How to Integrate Jira with Sally AI
Connect Sally AI with Jira to turn meeting insights into actionable tickets - directly in your Project → Issue type → Workflow. With the Sally Jira integration you can create new tickets, add comments, or even update the status of existing issues with one click, avoid double entry, and keep your team's backlog always up to date.
Quick Navigation
1. How do I connect Jira with Sally AI?
Follow these steps to enable the Sally Jira integration.
-
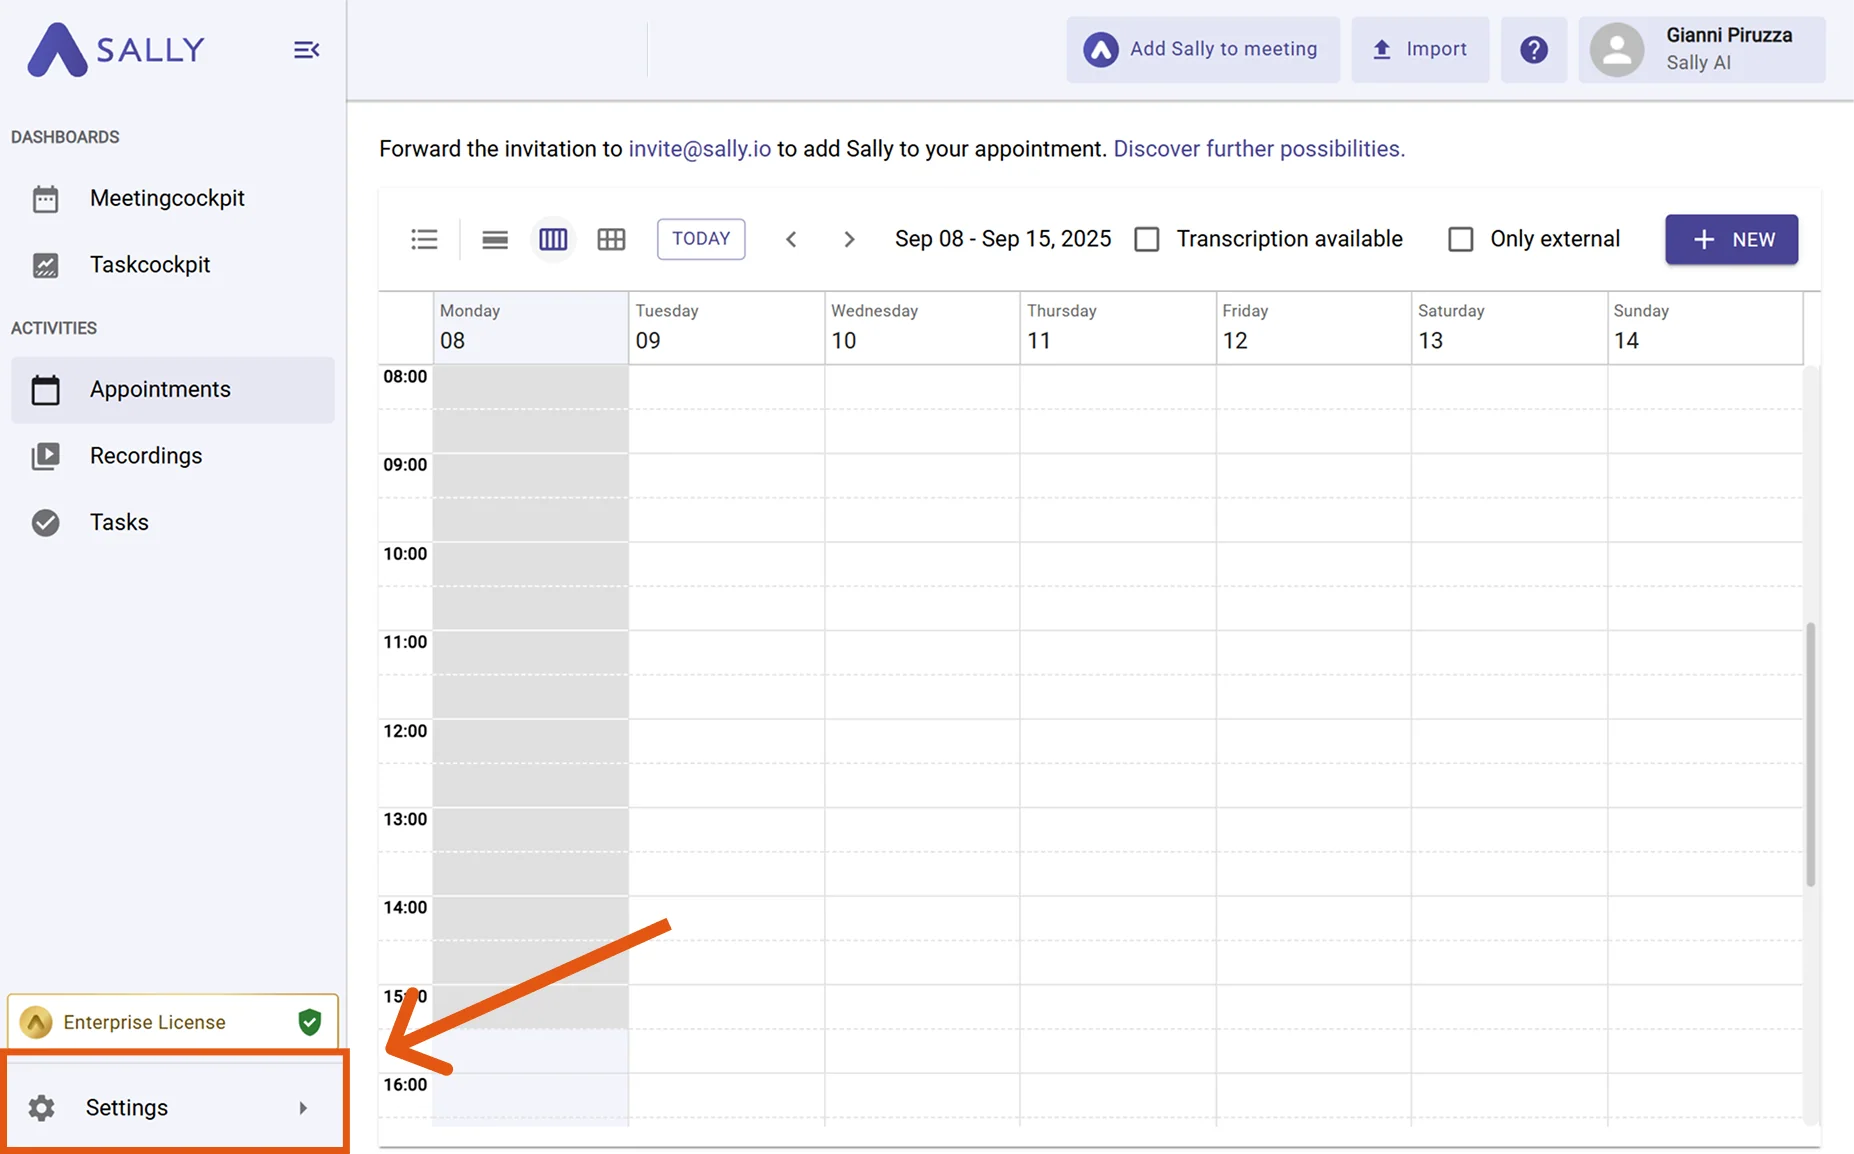
Open Settings in the left sidebar.
Figure 1: Go to Settings -
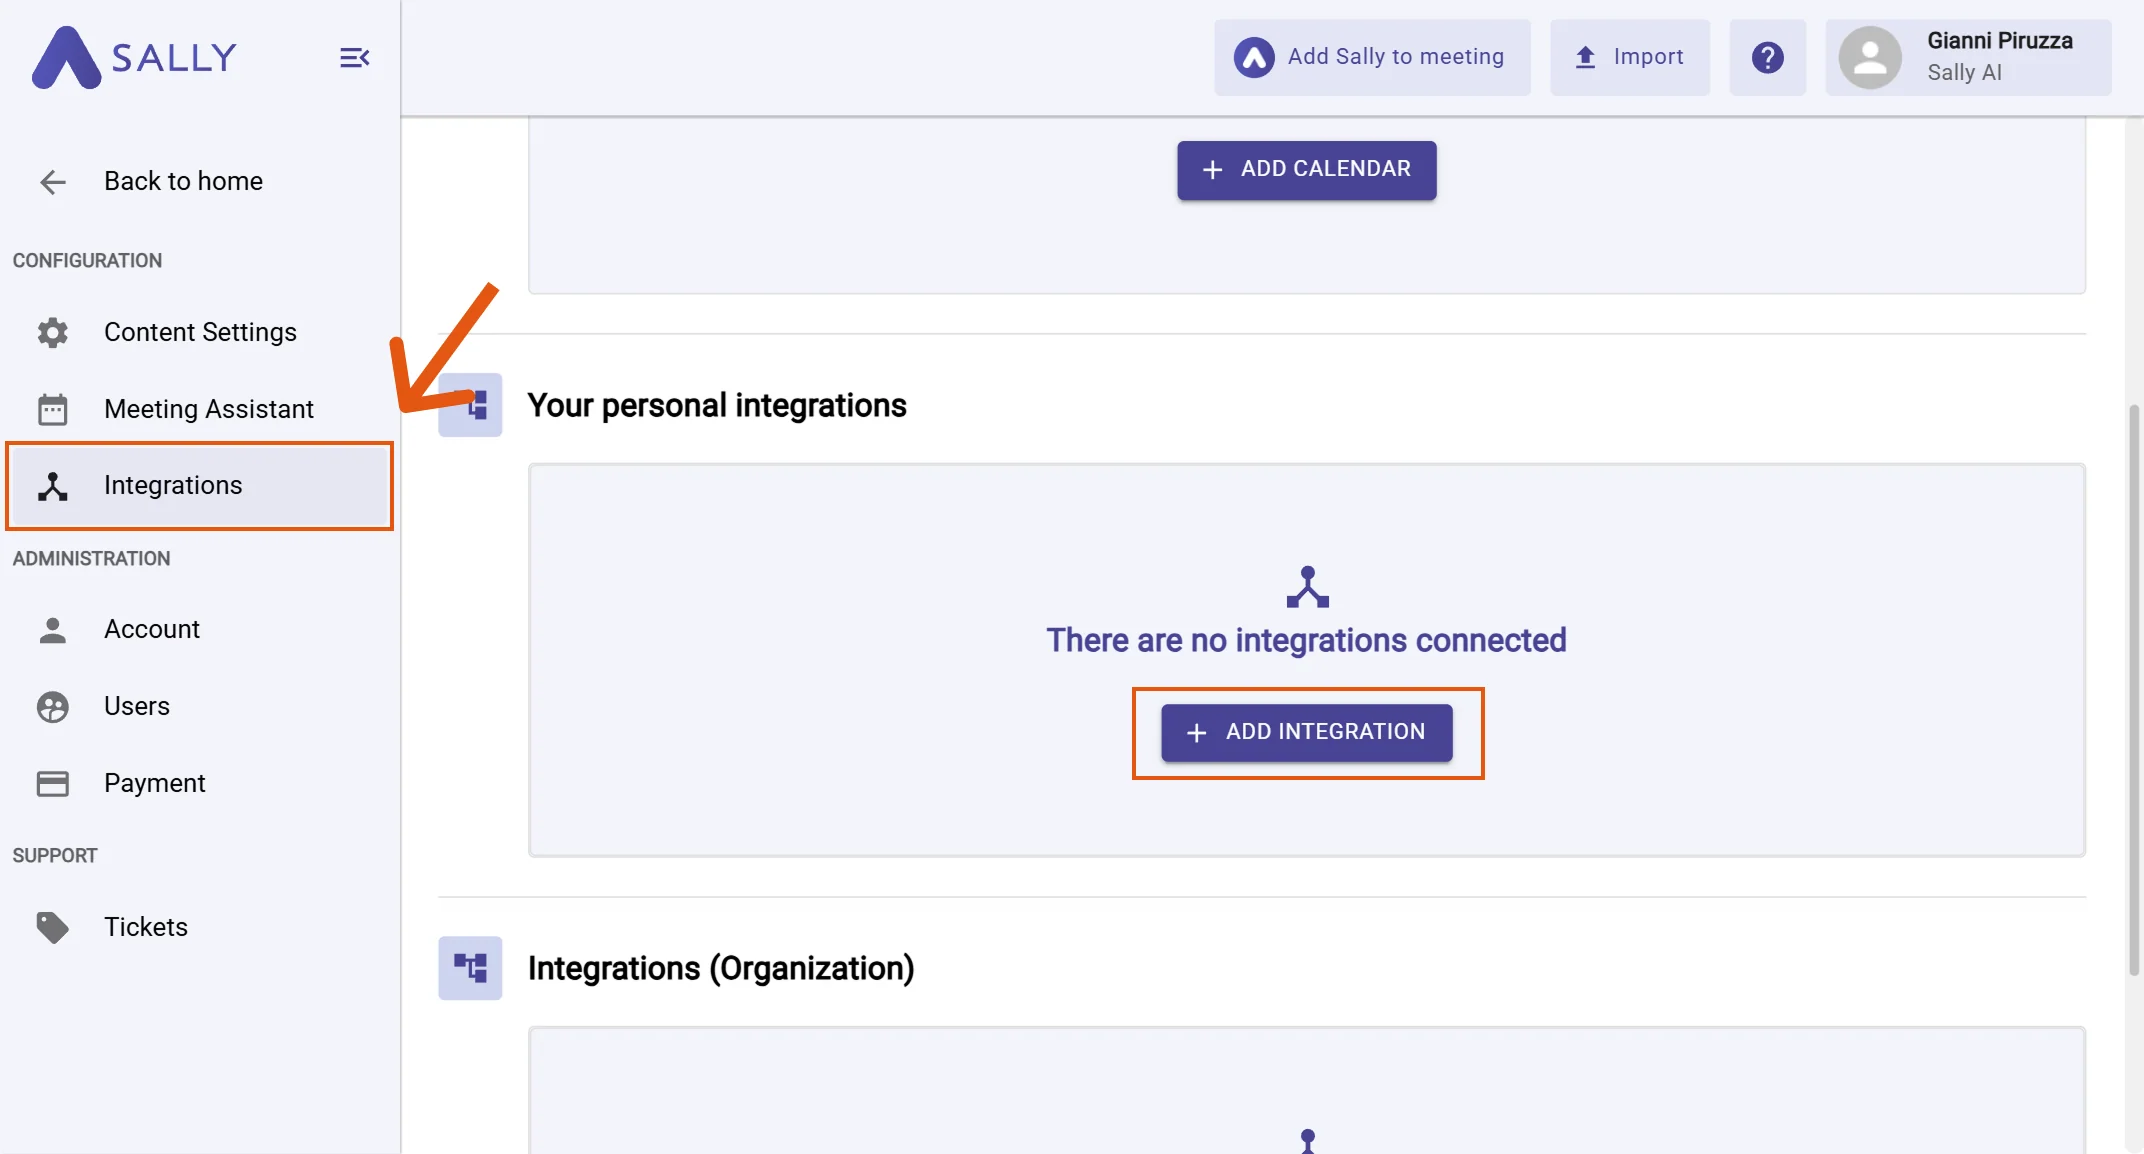
Go to Integrations.
-
Click "+ Add integration" under "Your personal integrations".
Figure 2: Add integration -
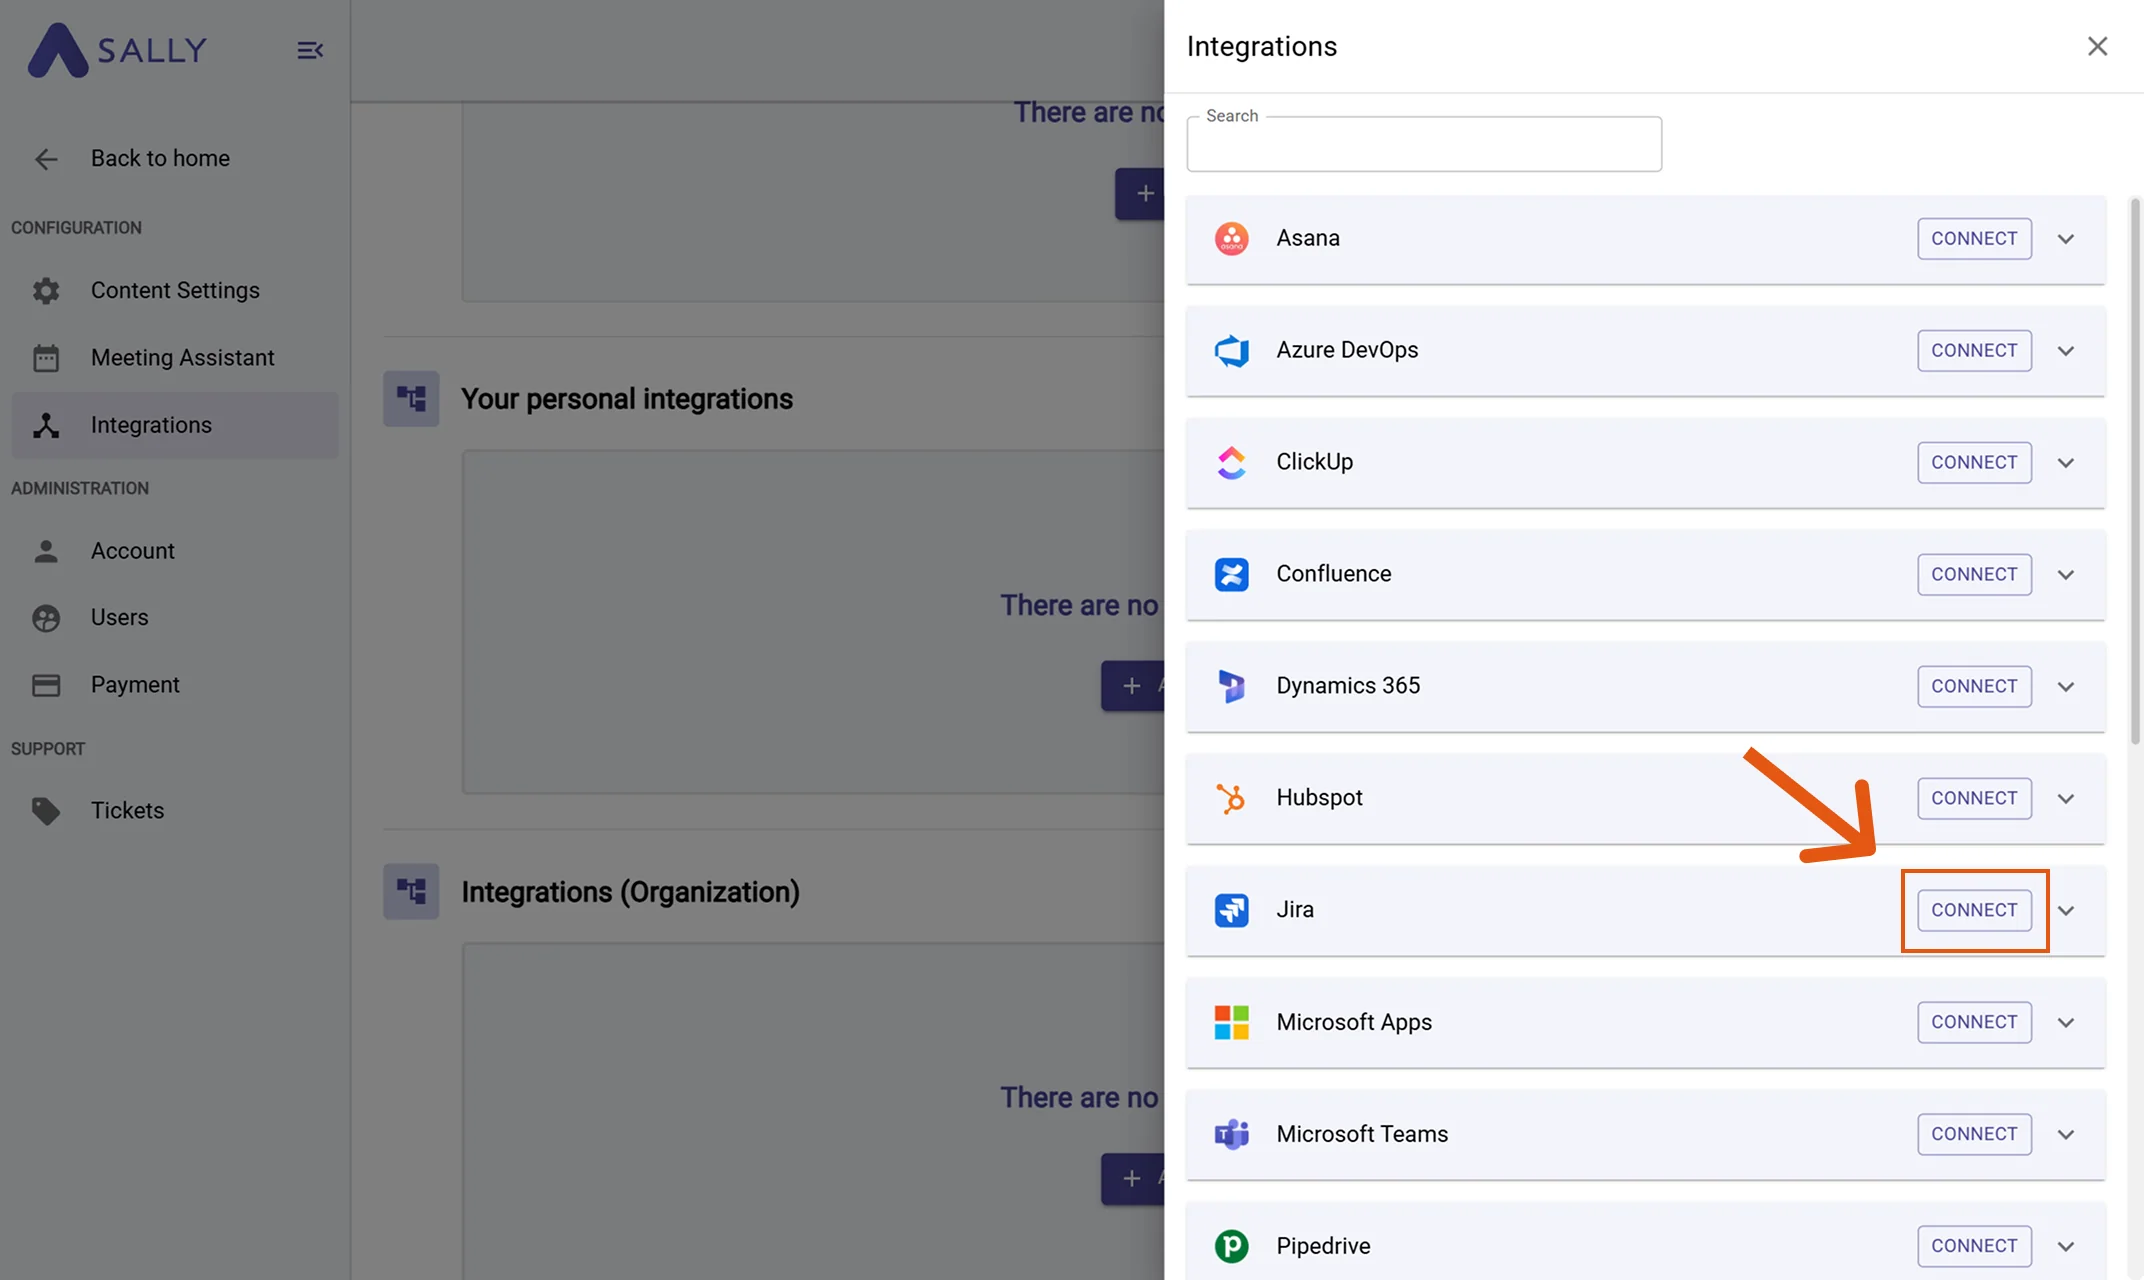
Select Jira and hit Connect. Complete the authorization flow in Atlassian.
Figure 3: Choose Jira → Connect -
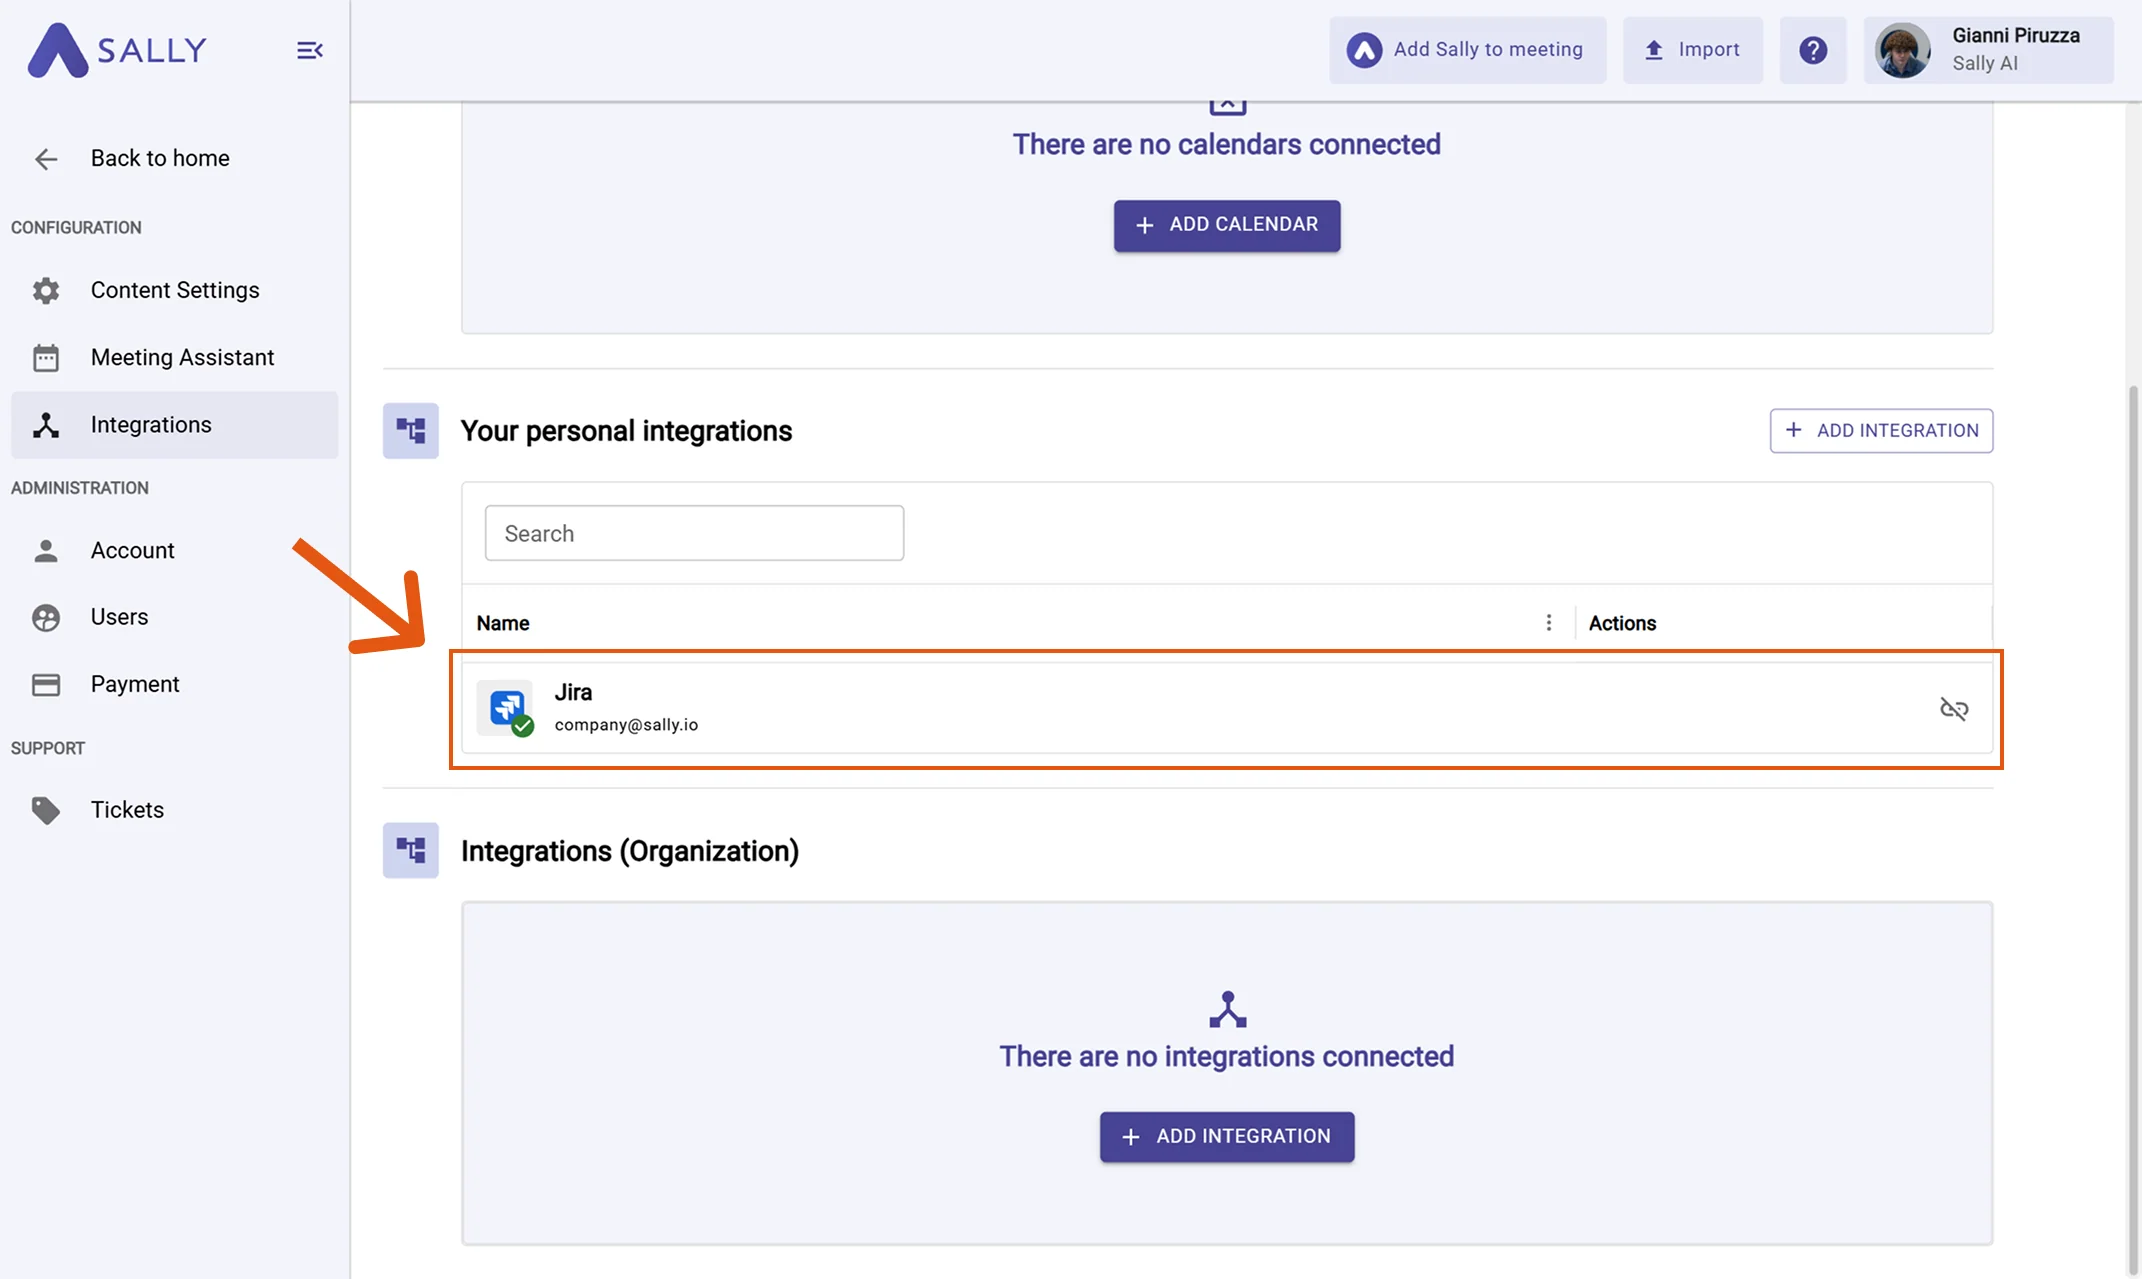
After a successful connection, Jira appears under "Your personal integrations".
Figure 4: Jira is connected
2. How do I send meeting insights to Jira?
Once Jira is connected, you can send meeting insights from Sally to Jira with a single click - so they land in the right Project, Issue type, and Workflow.
You can:
- Create a ticket in Jira → New backlog item or bug report.
- Add comment to a Jira ticket → Share context or decisions on an existing issue.
- Change ticket status with comment → Move work forward in the workflow while leaving context.
2.1. Create a ticket in Jira
Turn a Sally insight into a brand-new Jira ticket.
-
Open the desired meeting in Sally.
-
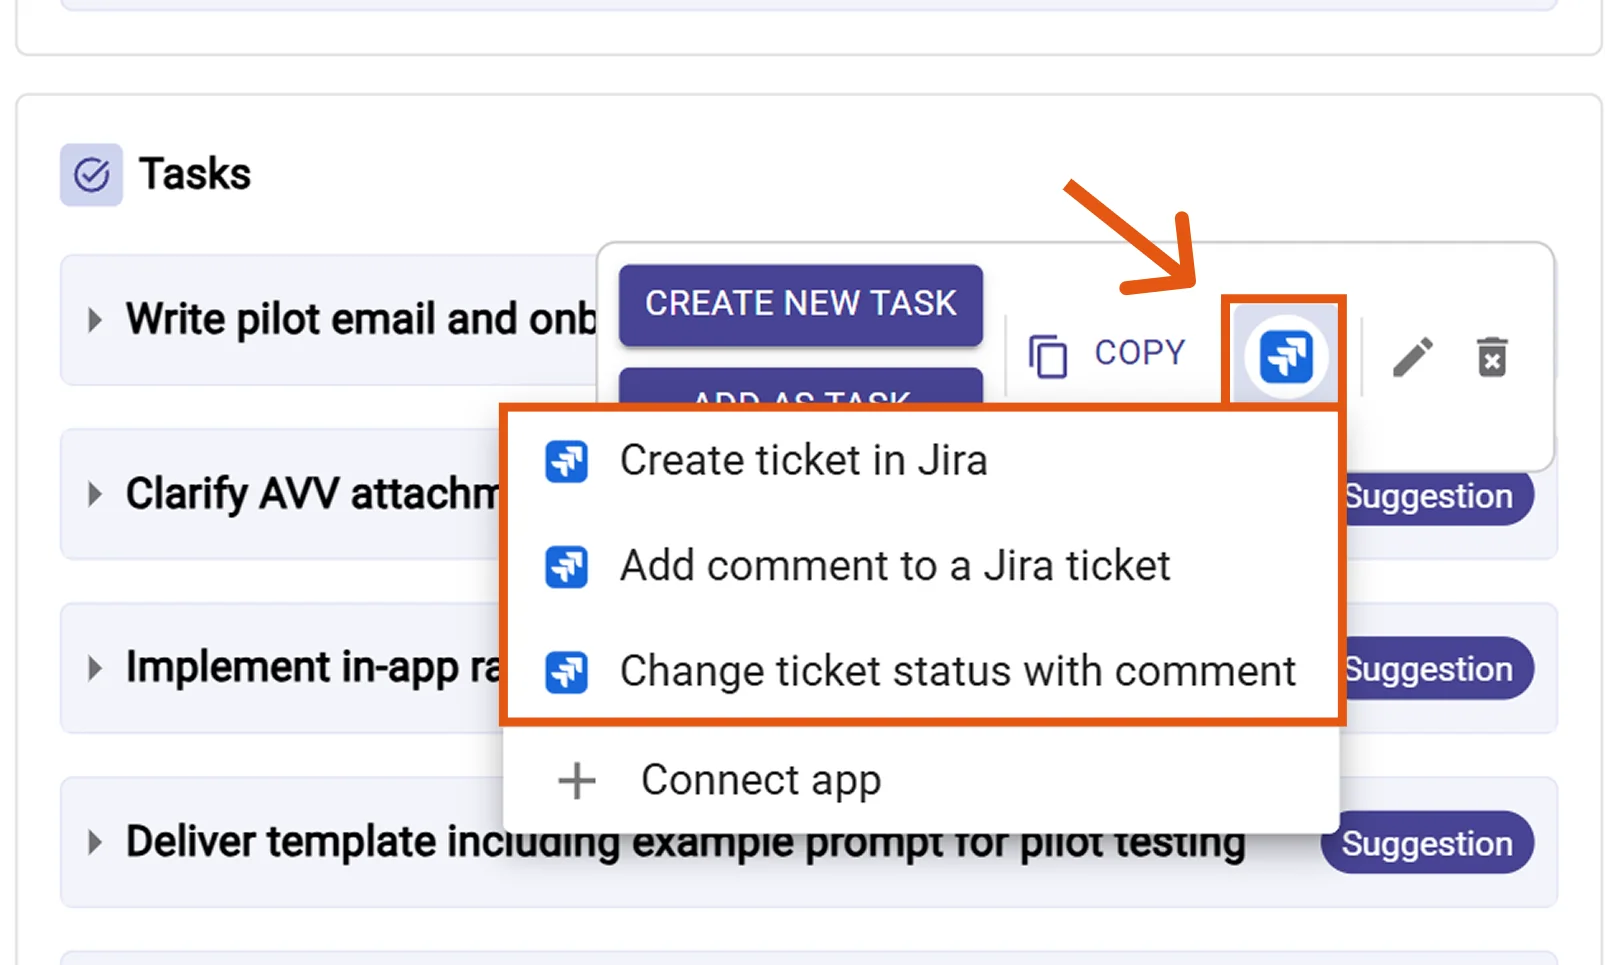
Hover any insight, decision, next step, or task in the summary. Click the Jira icon, then choose "Create ticket in Jira".
Figure 5: Choose Create ticket in Jira -
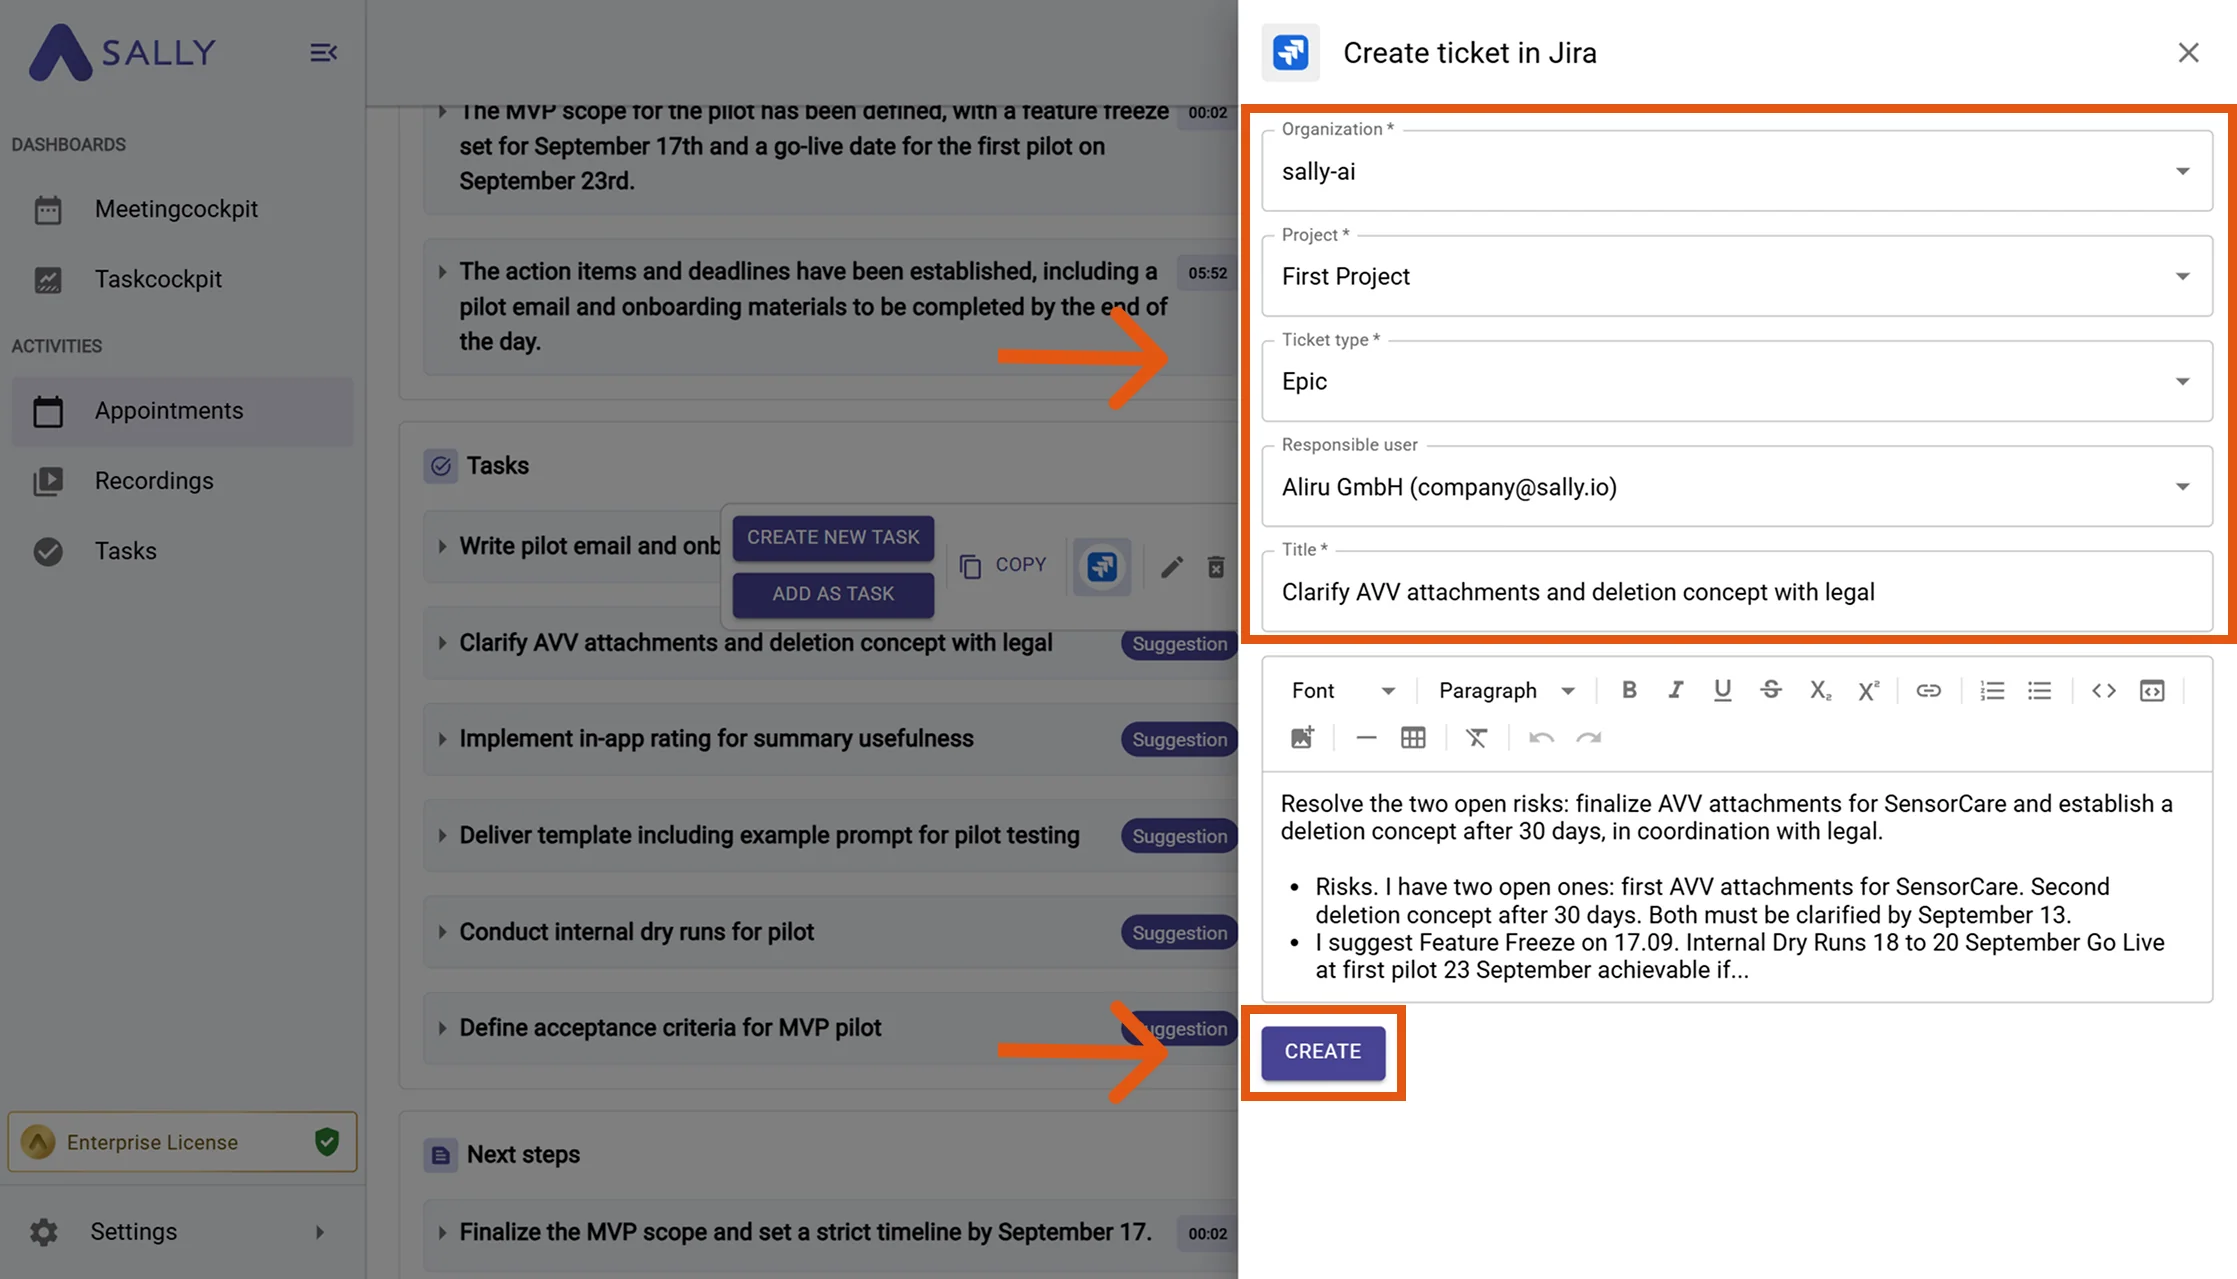
Fill in the creation form (required fields are marked with
*). For Jira this typically includes:- Organization*
- Project*
- Ticket type* (e.g., Task, Bug, Epic)
- Responsible user / Assignee (recommended)
- Title*
The description is prefilled from Sally and can be edited.
-
Click Create to send it to Jira.
Figure 6: Fill the Jira ticket fields and Create
2.2. Add a comment to a Jira ticket
Attach meeting context to an existing Jira ticket - perfect for updates, decisions, or additional notes.
-
Open the desired meeting in Sally.
-
Hover the relevant item, click the Jira icon, and choose "Add comment to a Jira ticket".
Figure 7: Choose Add comment to a Jira ticket -
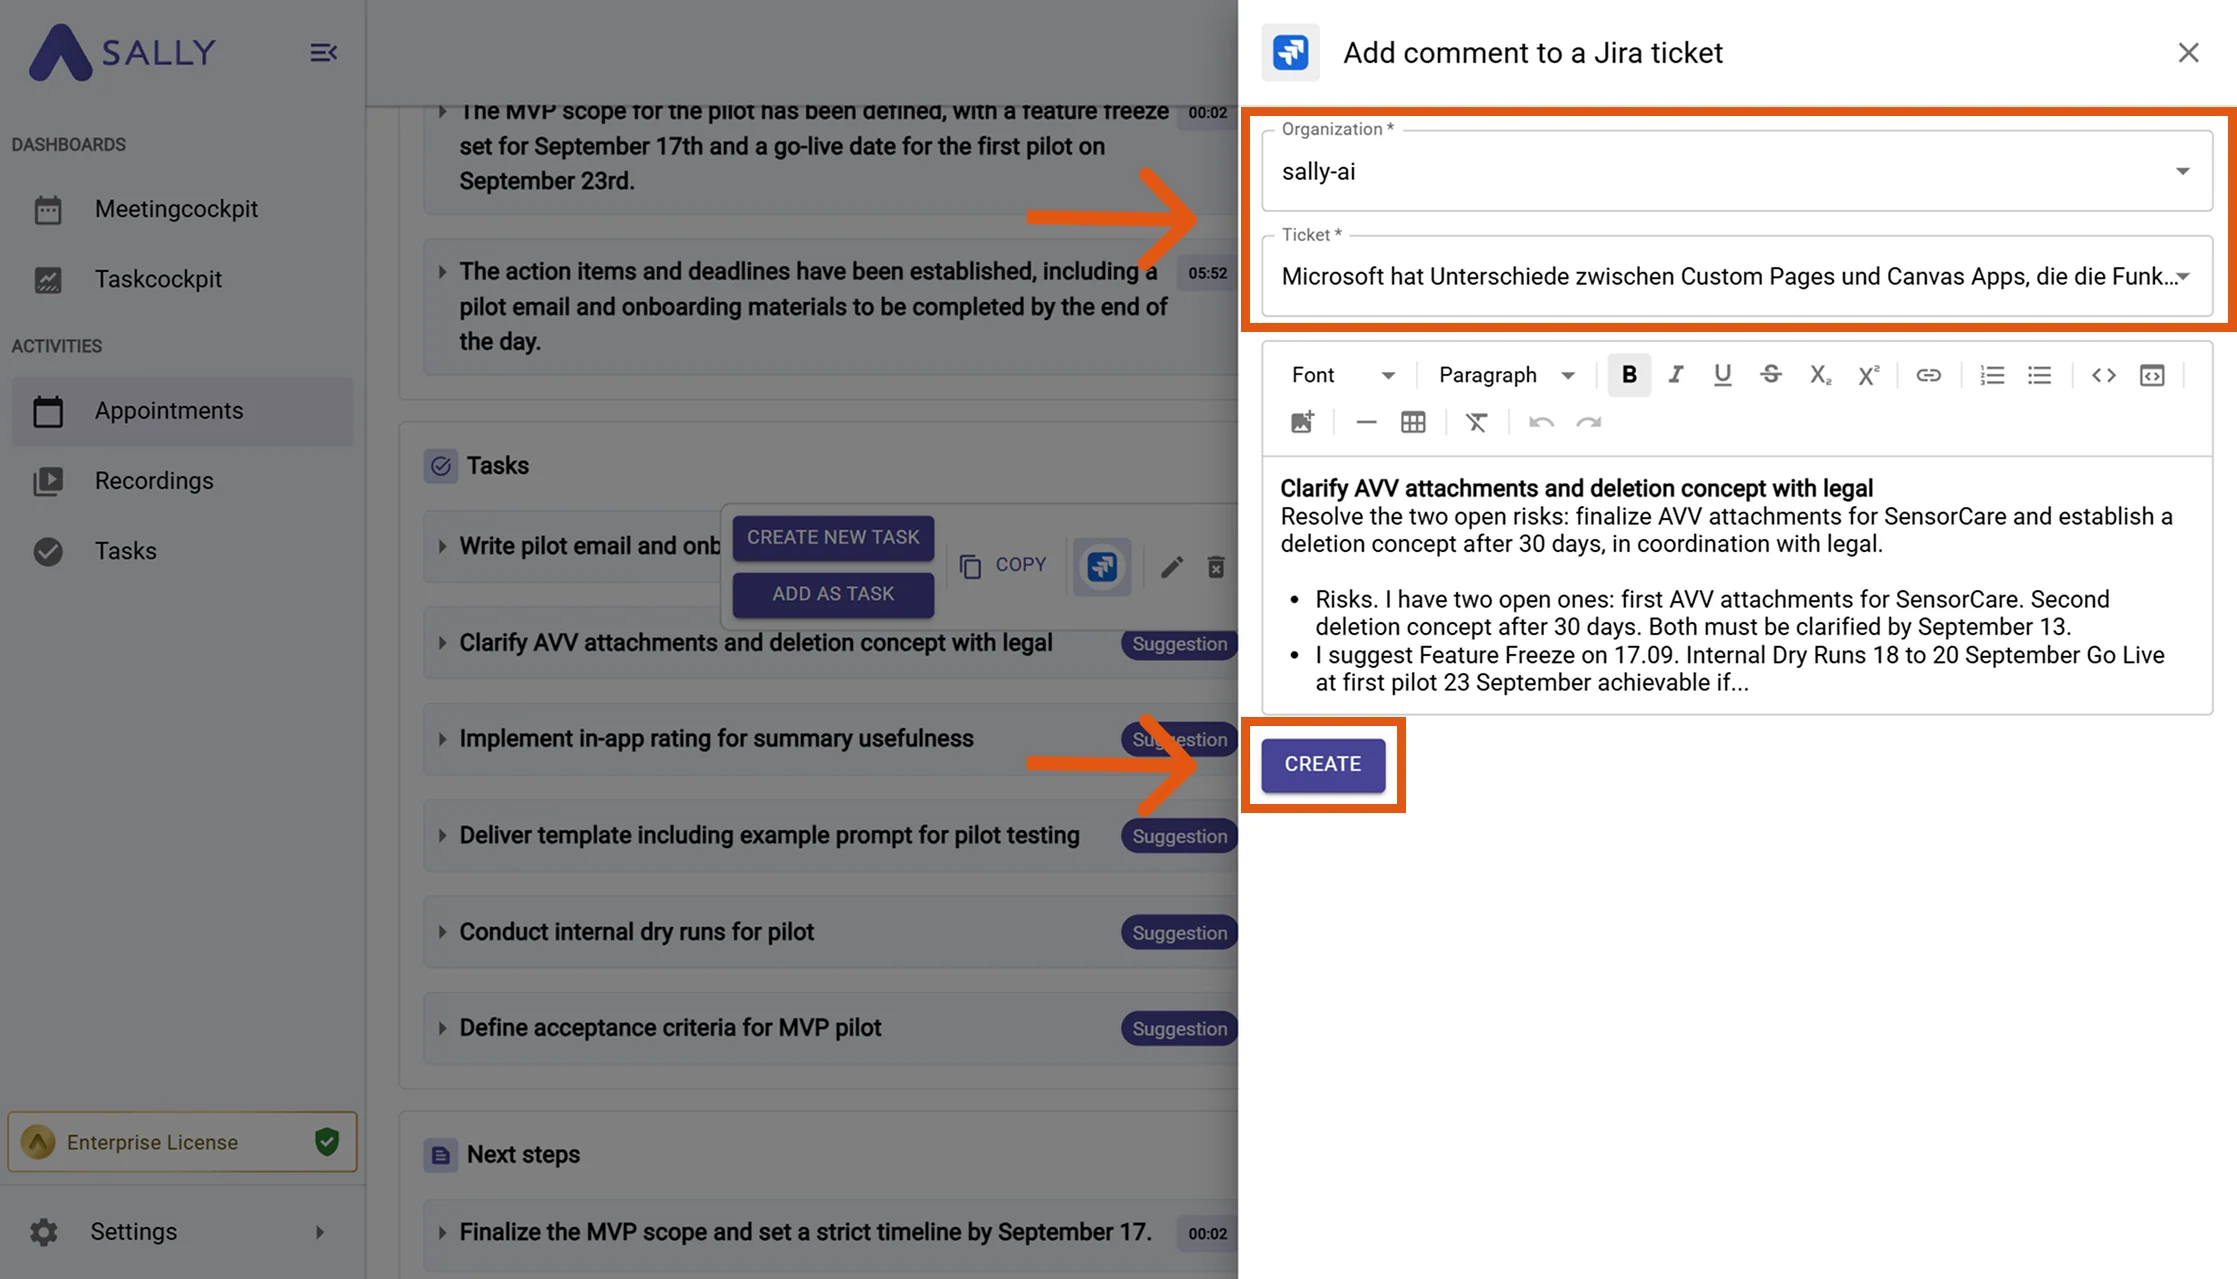
Fill in the creation form (required fields are marked with
*). For Jira this typically includes:- Organization*
- Ticket*
The description is prefilled from Sally and can be edited.
-
Click Create to send it to Jira.
Figure 8: Fill the Jira comment fields and Create
2.3. Change ticket status with comment
Move an existing Jira issue forward in the workflow and leave additional context from the meeting.
-
Open the desired meeting in Sally.
-
Hover the relevant item, click the Jira icon, and choose "Change ticket status with comment".
Figure 9: Choose Change ticket status with comment -
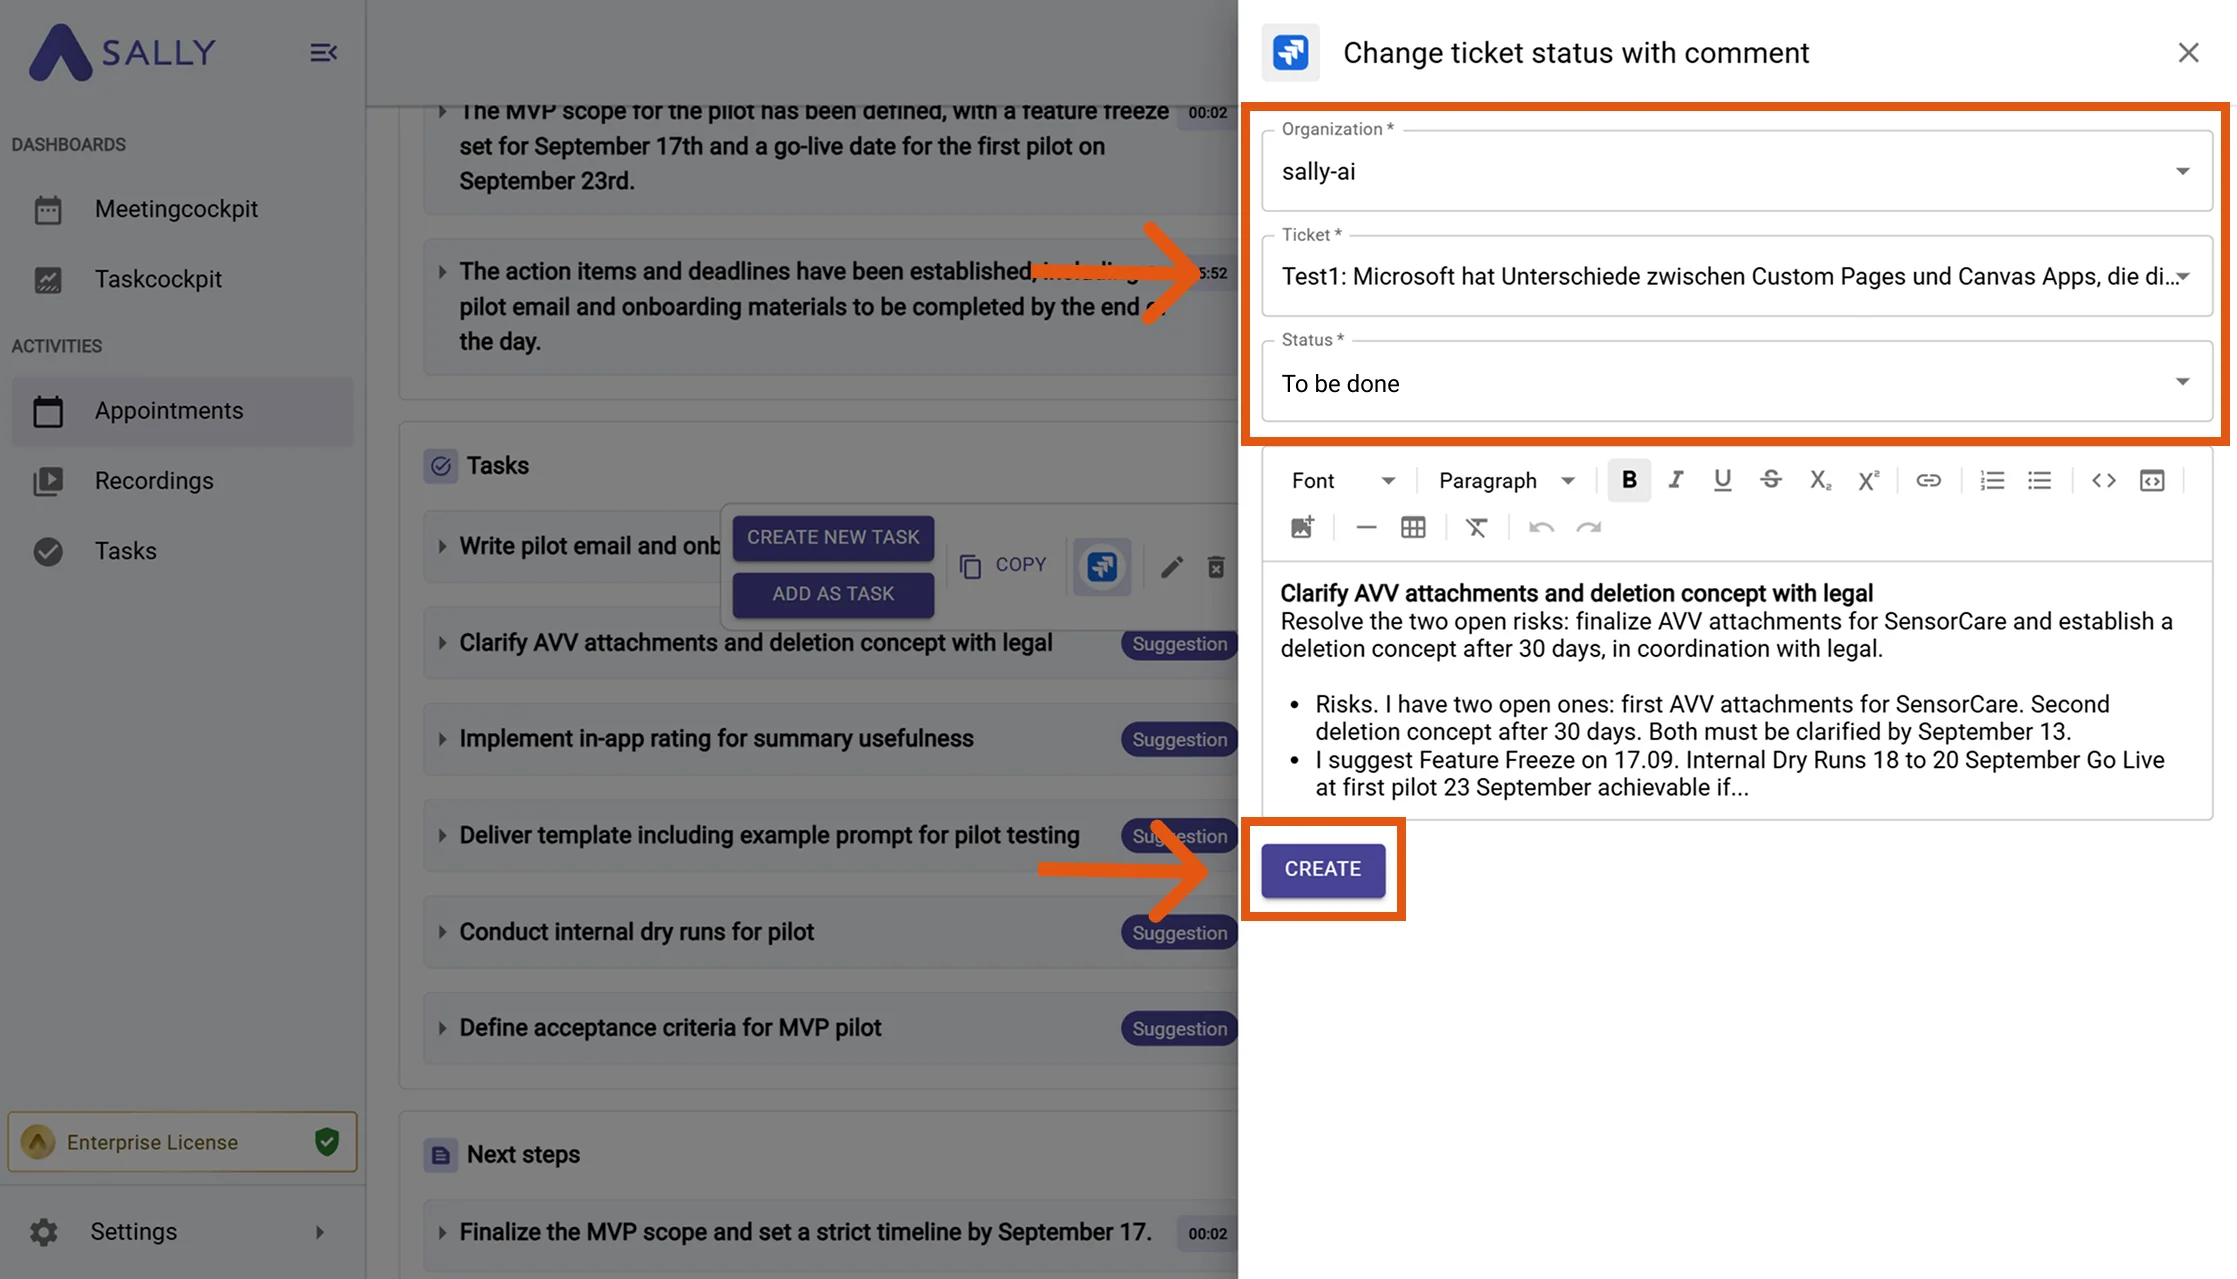
Fill in the creation form (required fields are marked with
*). For Jira this typically includes:- Organization*
- Ticket*
- Status*
The description is prefilled from Sally and can be edited.
-
Click Create to update the Jira issue.
Figure 10: Update Jira ticket status with comment
3. What OAuth scopes does the Jira integration require?
For the integration with Jira, Sally uses OAuth 2.0 for authorization. The following scopes define which areas Sally can access on behalf of the authenticated user.
-
Sally accesses this information solely to technically establish and maintain the connection to the user account.
-
Sally does not make any autonomous changes. Actions are performed exclusively upon the explicit initiative of the user.
-
API endpoints are only called within the scope of an active action initiated by the user within the platform.
Technical Overview of Required Scopes
| Scope | What Atlassian technically allows with this scope | How Sally uses this scope |
|---|---|---|
offline_access | Issuance of long-lived access tokens | Enables a stable connection without repeated login. No Jira data is modified. |
read:me | Read access to the authenticated user's profile | Sally reads basic account information for authentication purposes. |
read:jira-work | Read access to issues | Sally reads issue information where required within the integration context. No issues are modified. |
read:jira-user | Read access to user information | Sally reads user information for display within the integration. No user accounts are changed. |
write:jira-work | API permission for issue objects | Part of Atlassian's OAuth model. Sally does not independently create or modify tickets outside explicitly user-initiated actions. |