How to Integrate ClickUp with Sally AI
Connect Sally AI with ClickUp to turn meeting insights into real work - directly in the right Workspace → Space → List. With the Sally ClickUp integration you can send action items, decisions, and follow-ups to ClickUp with one click, avoid double entry, and keep your team's system of record up to date.
Quick Navigation
1. How do I connect ClickUp with Sally AI?
Follow these steps to enable the Sally ClickUp integration.
-
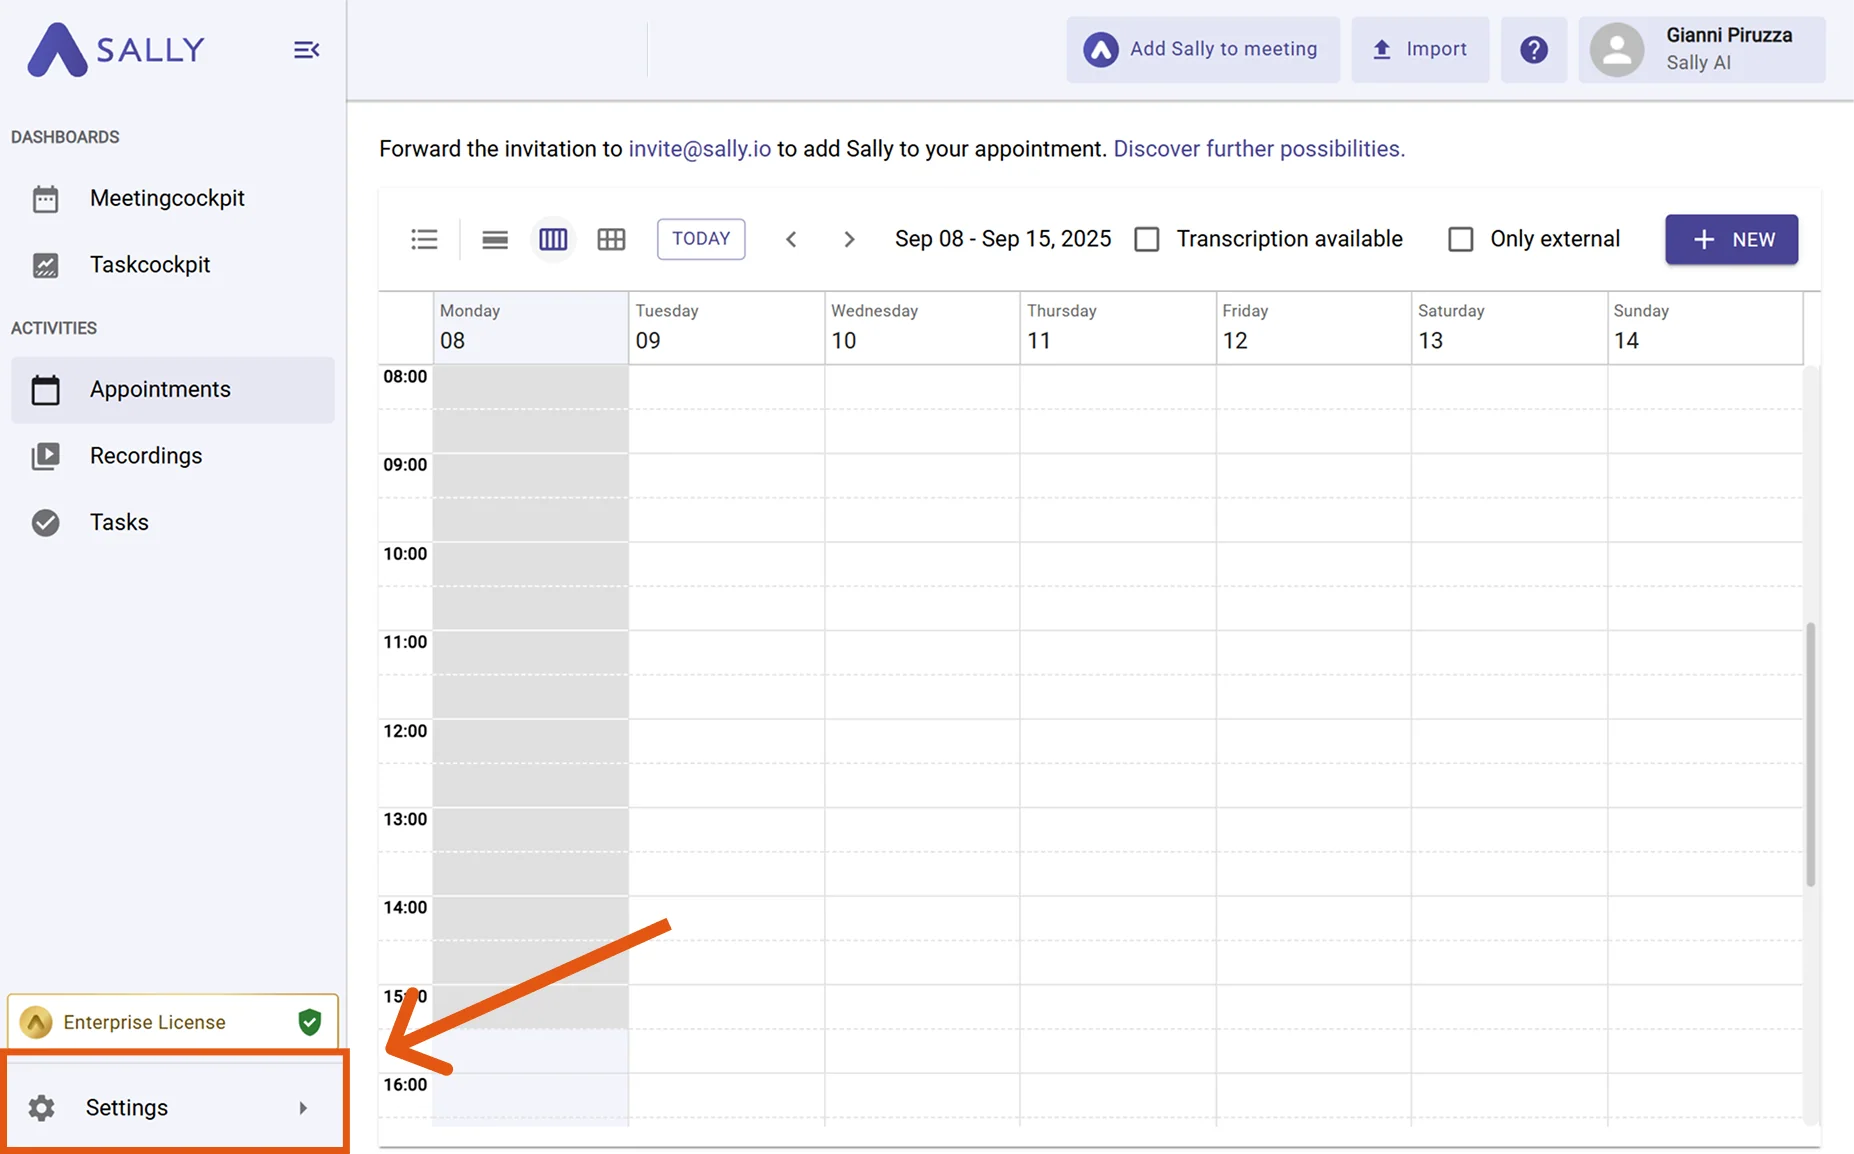
Open Settings in the left sidebar.
Figure 1: Go to Settings -
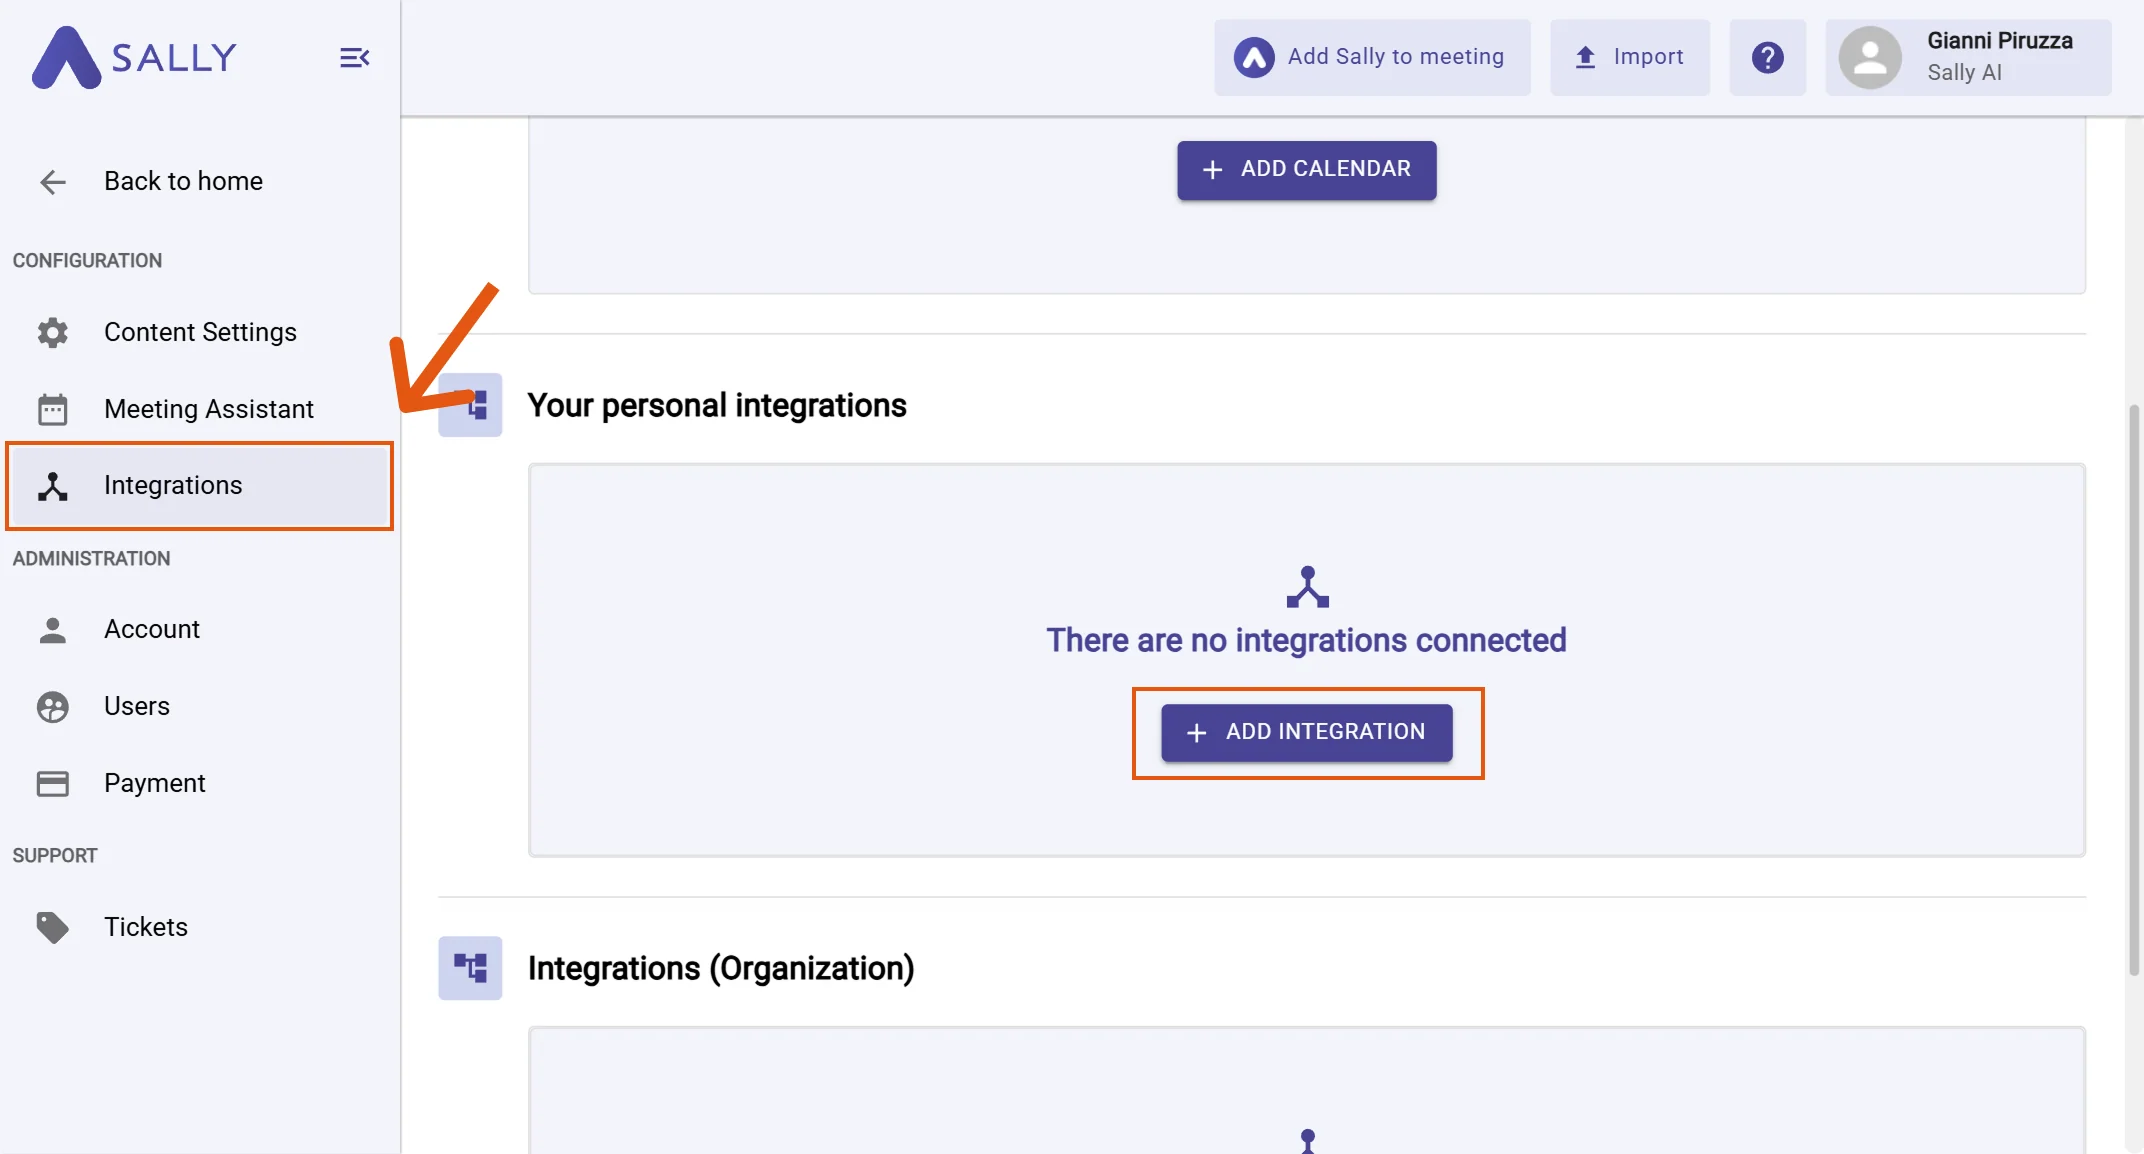
Go to Integrations.
-
Click "+ Add integration" under "Your personal integrations".
Figure 2: Add integration -
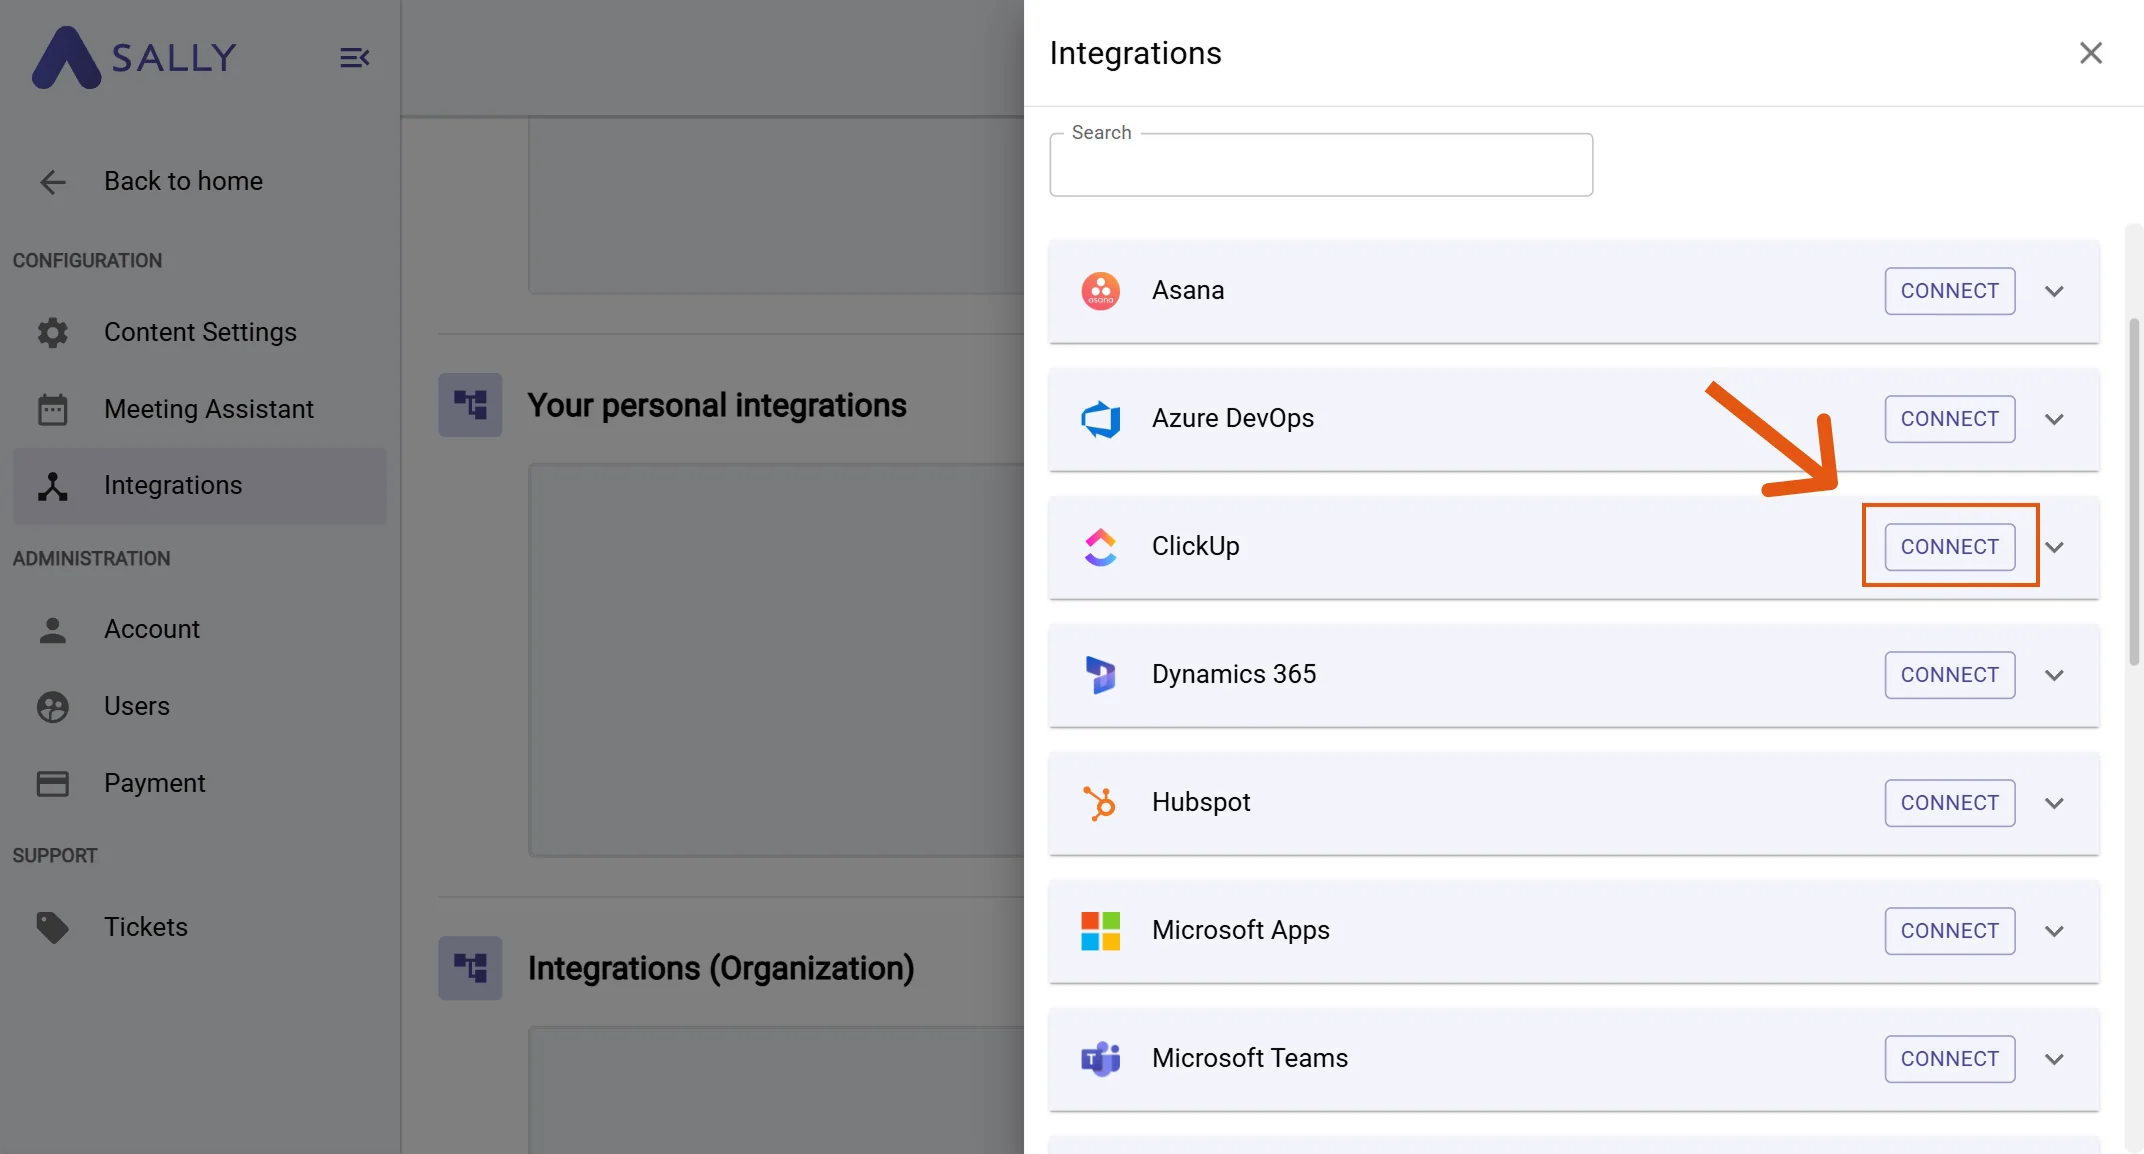
Select ClickUp and hit Connect. Complete the authorization flow in ClickUp.
Figure 3: Choose ClickUp → Connect -
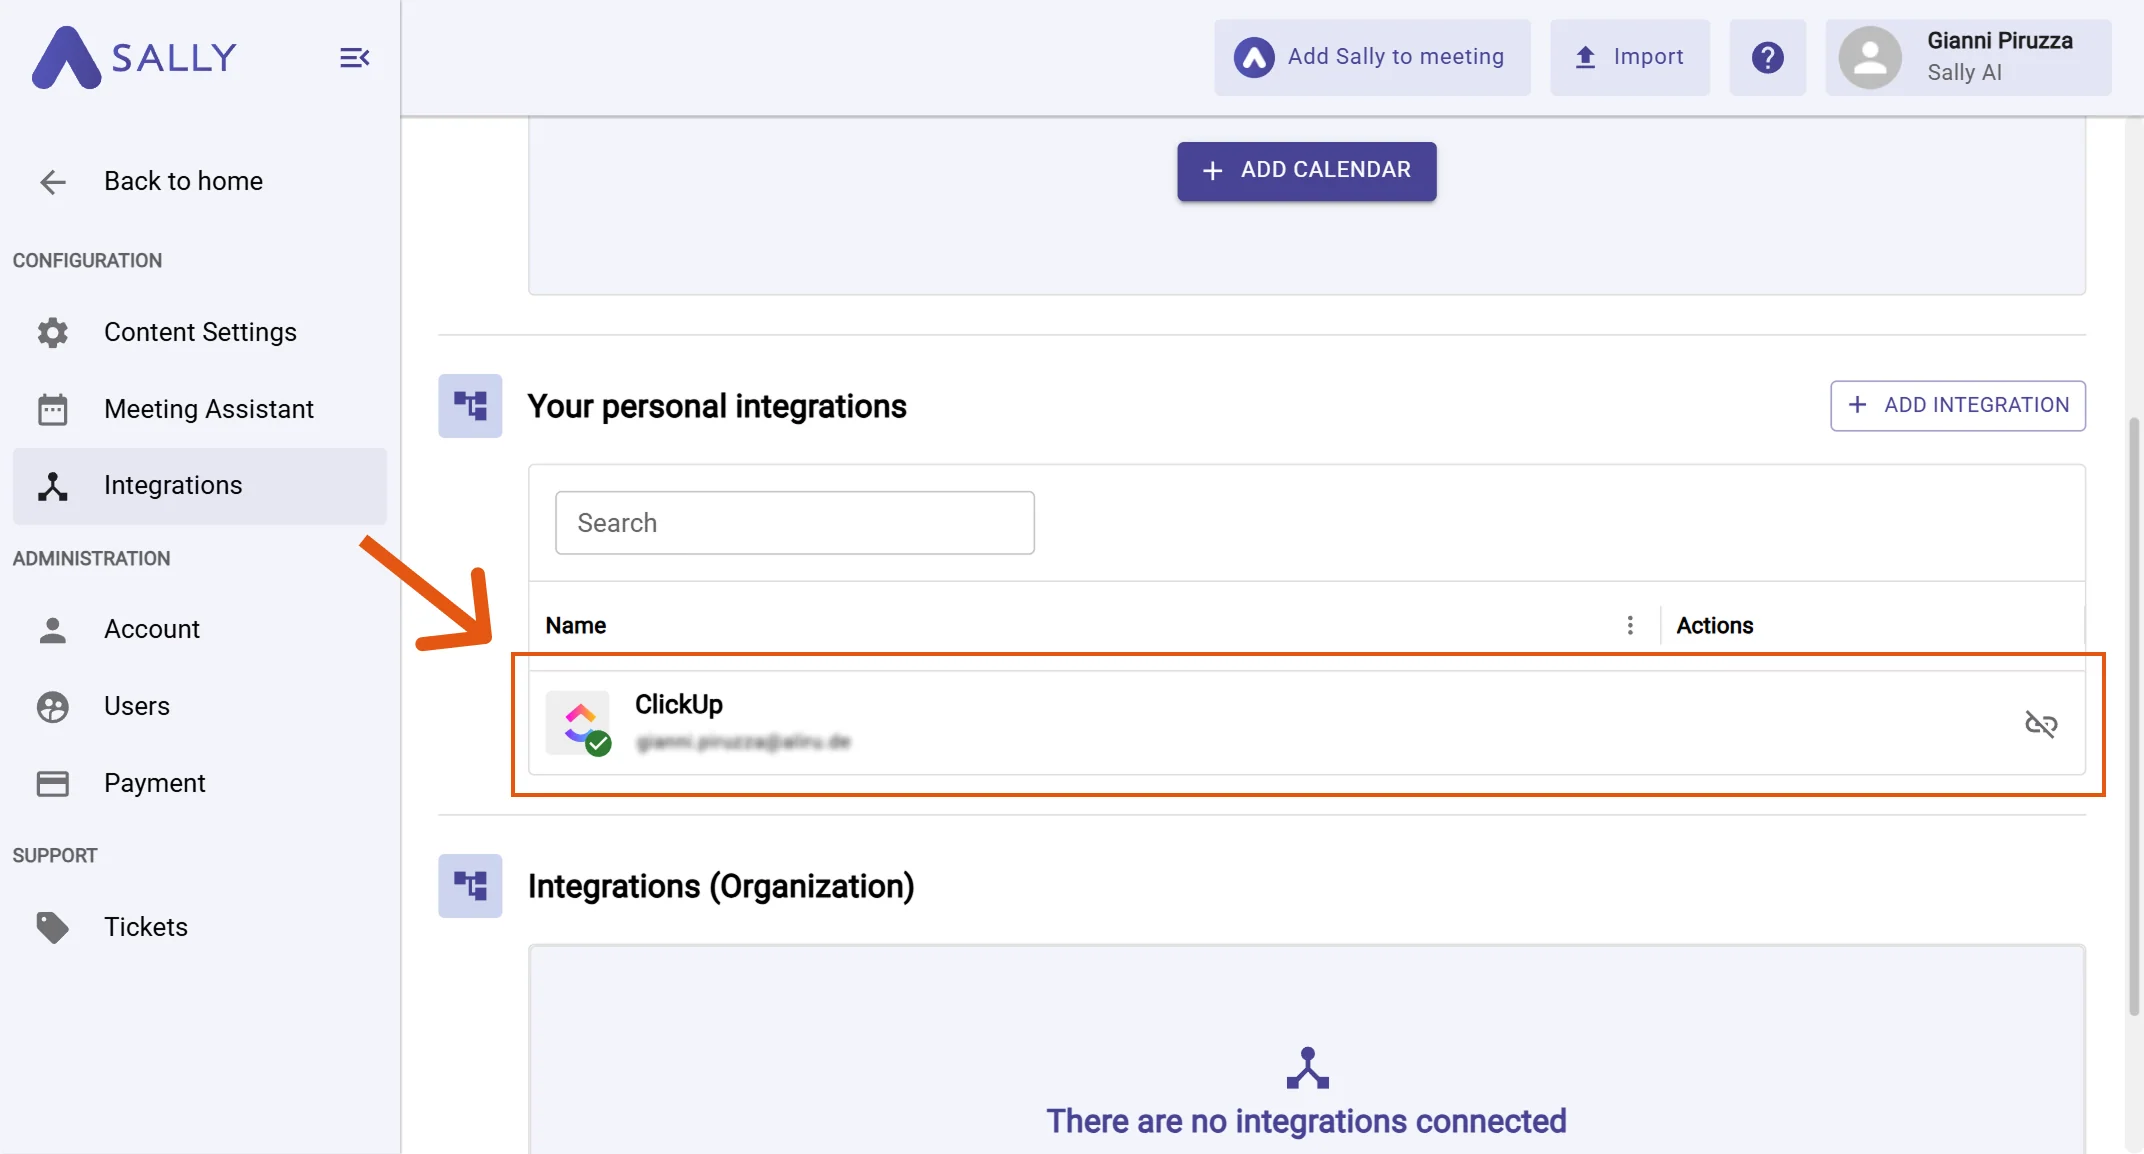
After a successful connection, ClickUp appears under "Your personal integrations".
Figure 4: ClickUp is connected
2. How do I send meeting insights to ClickUp?
Once ClickUp is connected, you can send meeting insights from Sally to ClickUp with a single click — so they land in the right Workspace, Space, and List.
You can:
- Create task in ClickUp → New, owned work item with status and due date.
- Add comment to ClickUp task → Additional context on an existing task, without changing ownership or dates.
2.1. Create a task in ClickUp
Turn a Sally insight into a brand-new task in ClickUp.
-
Open the desired meeting in Sally.
-
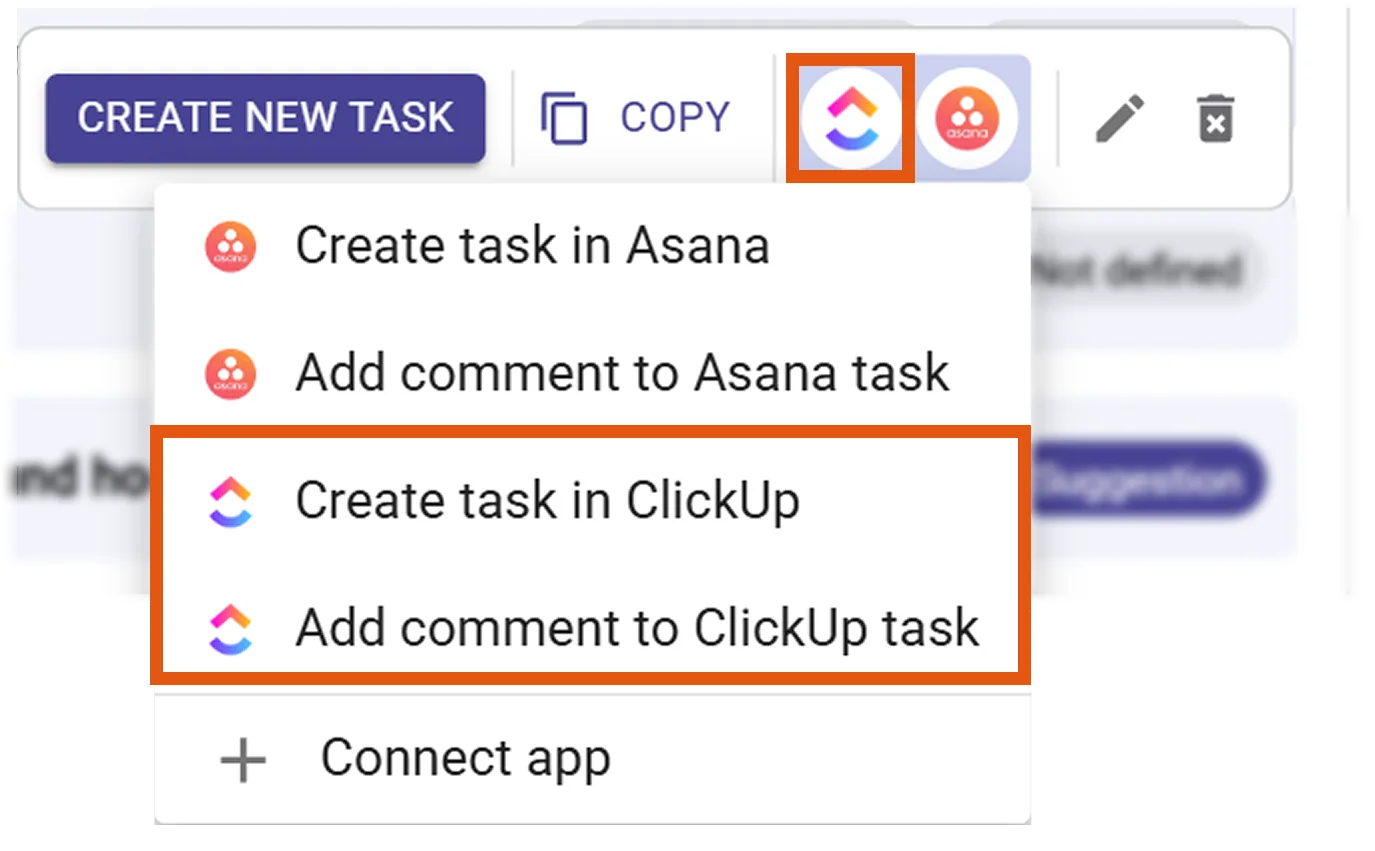
Hover any insight, decision, next step, or task in the summary. Click the ClickUp icon, then choose "Create task in ClickUp".
Figure 5: Choose Create task in ClickUp -
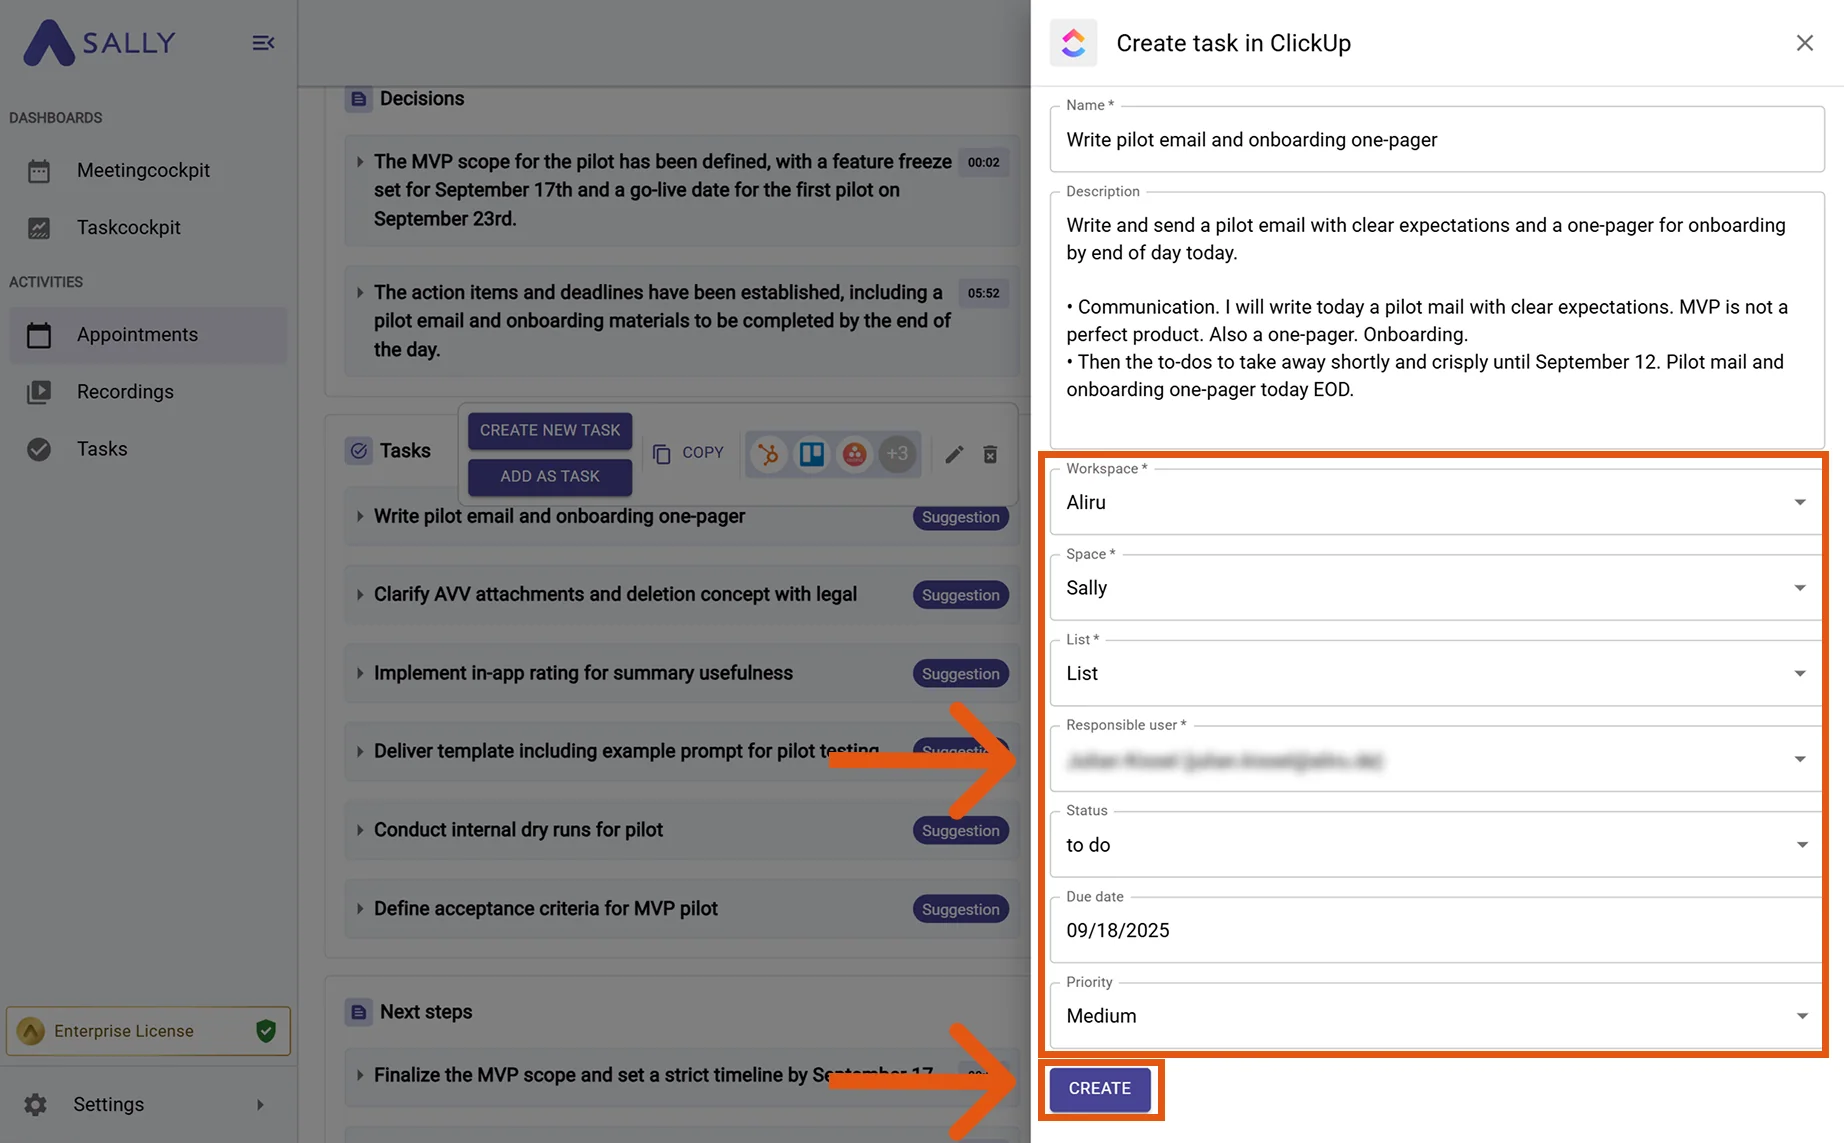
Fill in the creation form (required fields are marked with
*). For ClickUp this typically includes:- Workspace*
- Space*
- List*
- Responsible user / Assignee (recommended)
- Status (optional)
- Due date (optional)
- Priority (optional)
The description is prefilled from Sally and can be edited.
-
Click Create to send it to ClickUp.
Figure 6: Fill the ClickUp task fields and Create
Add as much context as possible (List, Assignee, Status, Due date, Priority, Tags). Richer tasks reduce follow-ups and improve reporting quality in ClickUp.
2.2. Add a comment to ClickUp task
Attach meeting context to an existing ClickUp task - perfect for updates, decisions, or notes.
-
Open the desired meeting in Sally.
-
Hover the relevant item, click the ClickUp icon, and choose Add comment to ClickUp task.
Figure 7: Choose Add comment to ClickUp task -
Fill in the creation form (required fields are marked with
*). For ClickUp this typically includes:- Workspace*
- Space*
- List*
- Responsible user / Assignee (recommended)
- Status (optional)
- Due date (optional)
- Priority (optional)
The description is prefilled from Sally and can be edited.
-
Click Create to send it to ClickUp.
Figure 6: Fill the ClickUp task fields and Create