Dynamics 365 integration
Connect Sally AI with Dynamics 365 to turn meeting insights into real work – directly in your organization’s environment. With the Sally Dynamics 365 integration you can send action items, notes, and appointments to Dynamics 365 with one click, avoid double entry, and keep your CRM up to date.
Quick Navigation
1. How to connect Dynamics 365 with Sally AI
Follow these steps to enable the Sally Dynamics 365 integration.
-
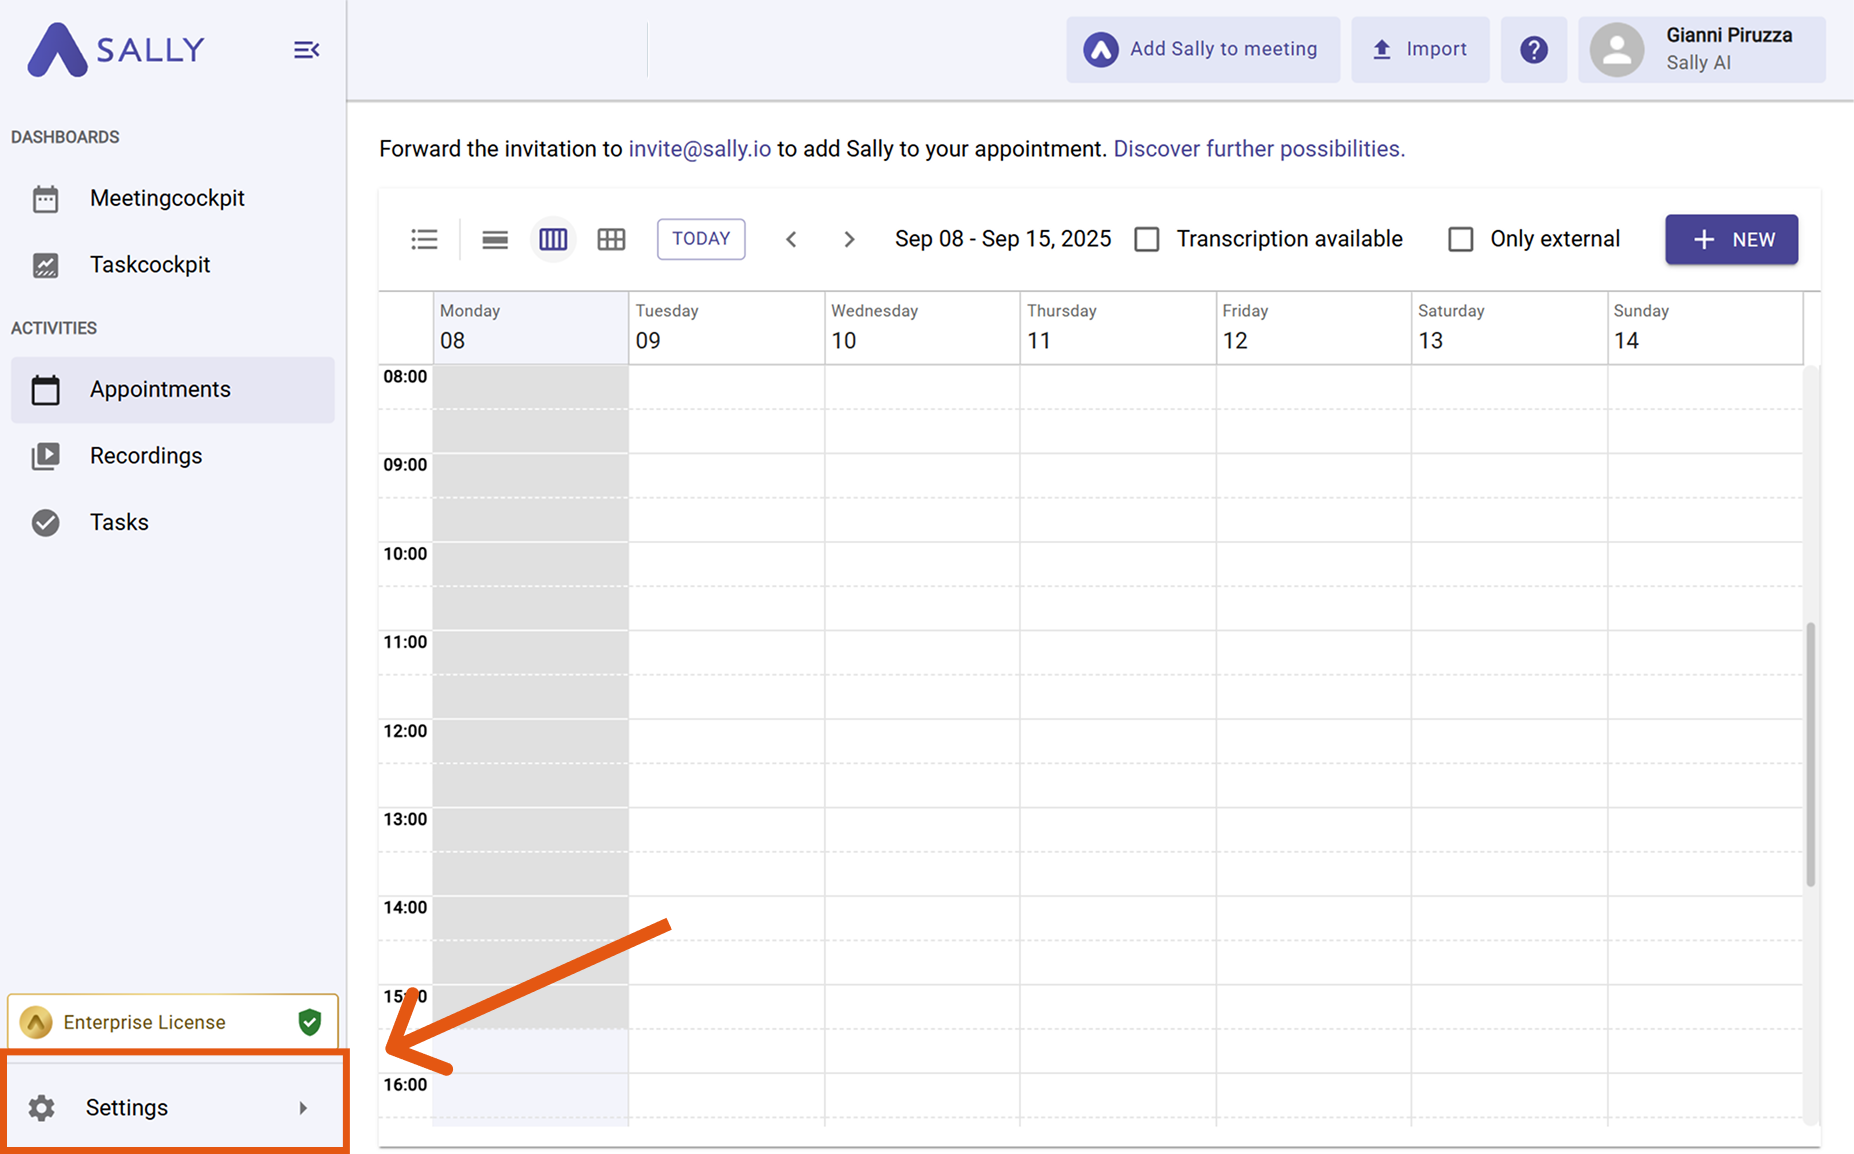
Open Settings in the left sidebar.
Figure 1: Go to Settings
-
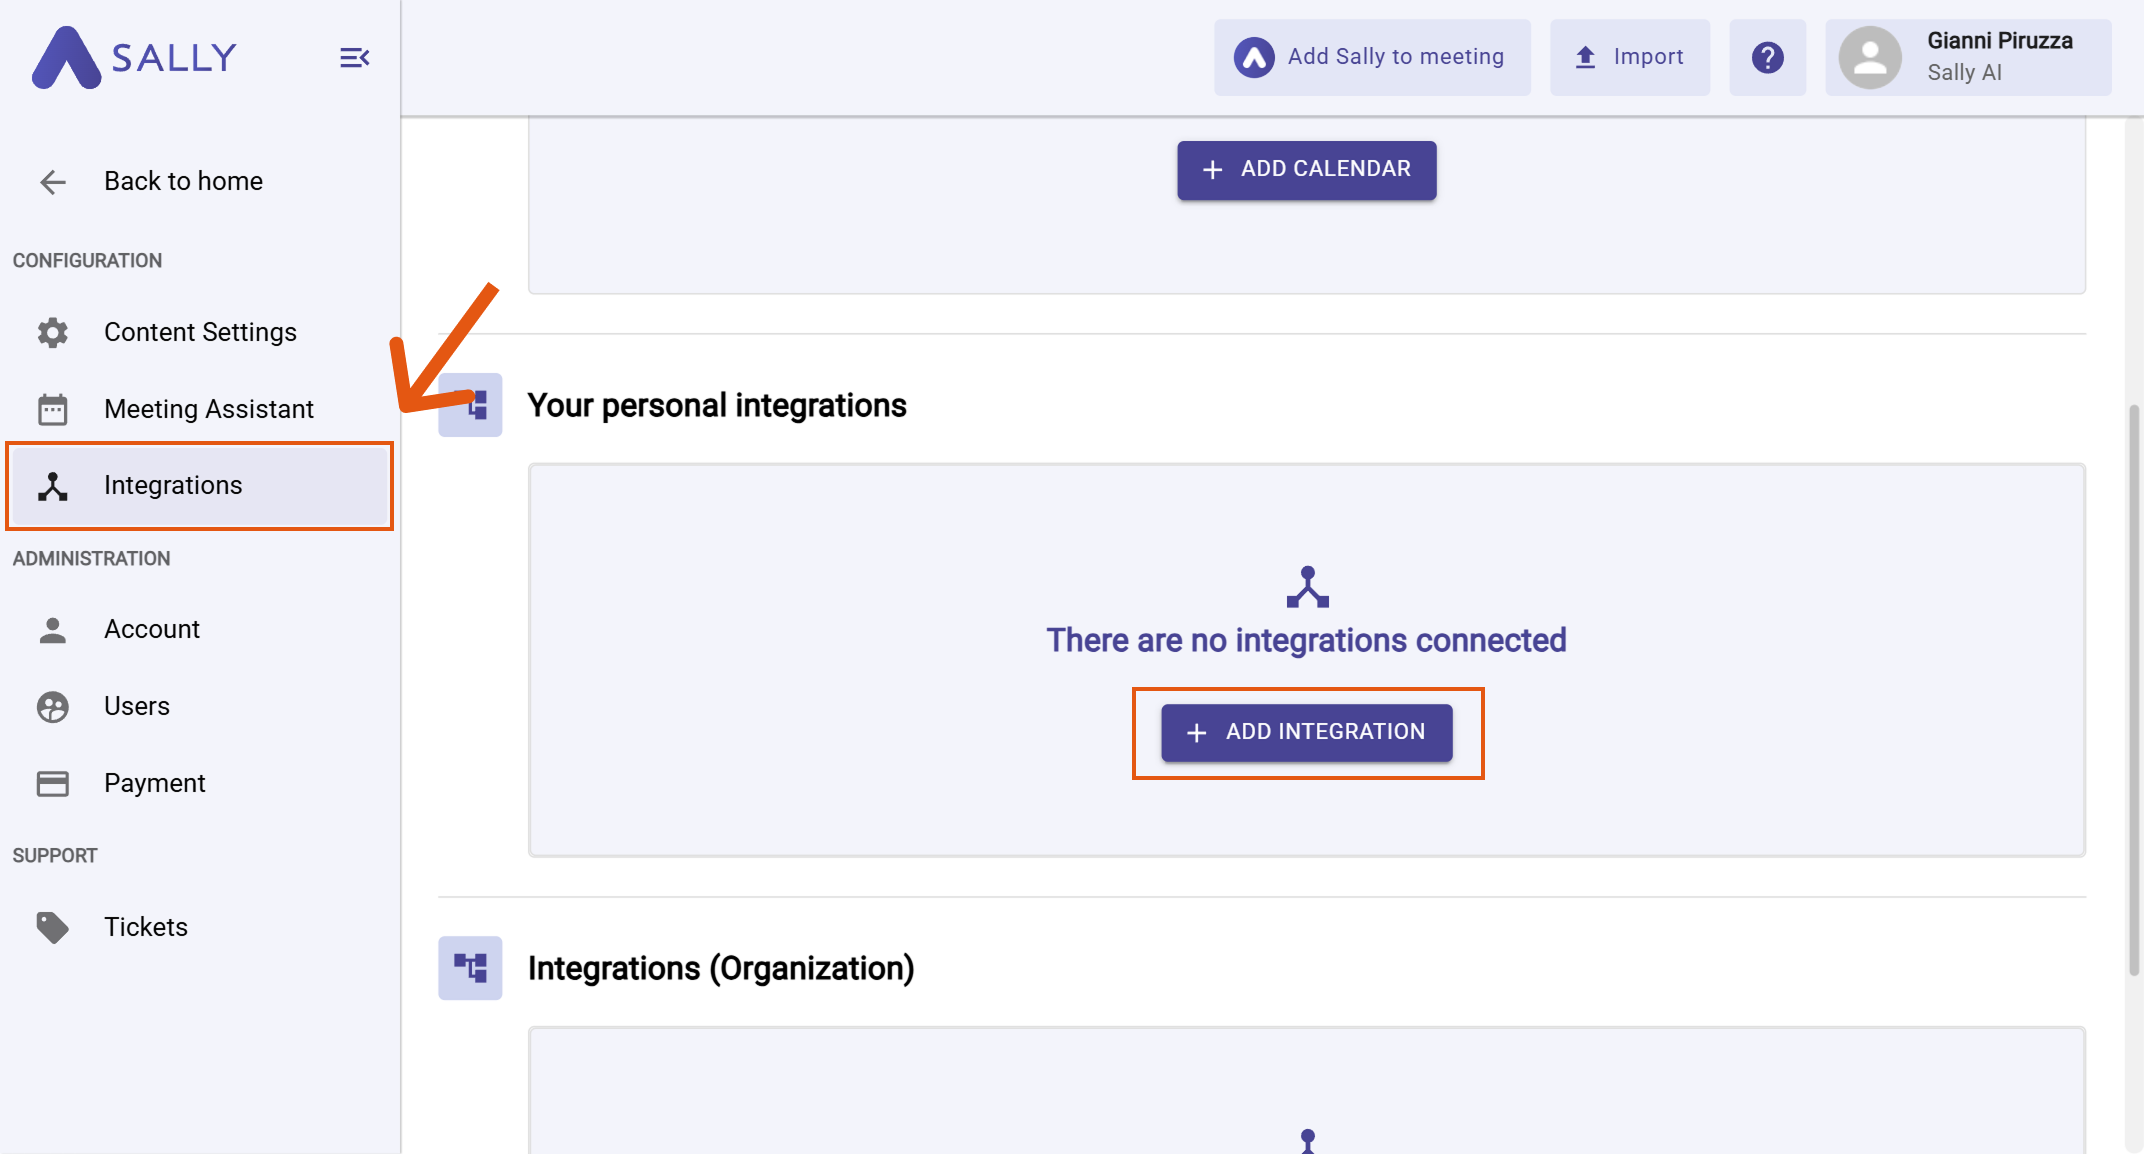
Go to Integrations and click "+ Add integration" under "Your personal integrations".
Figure 2: Add integration
-
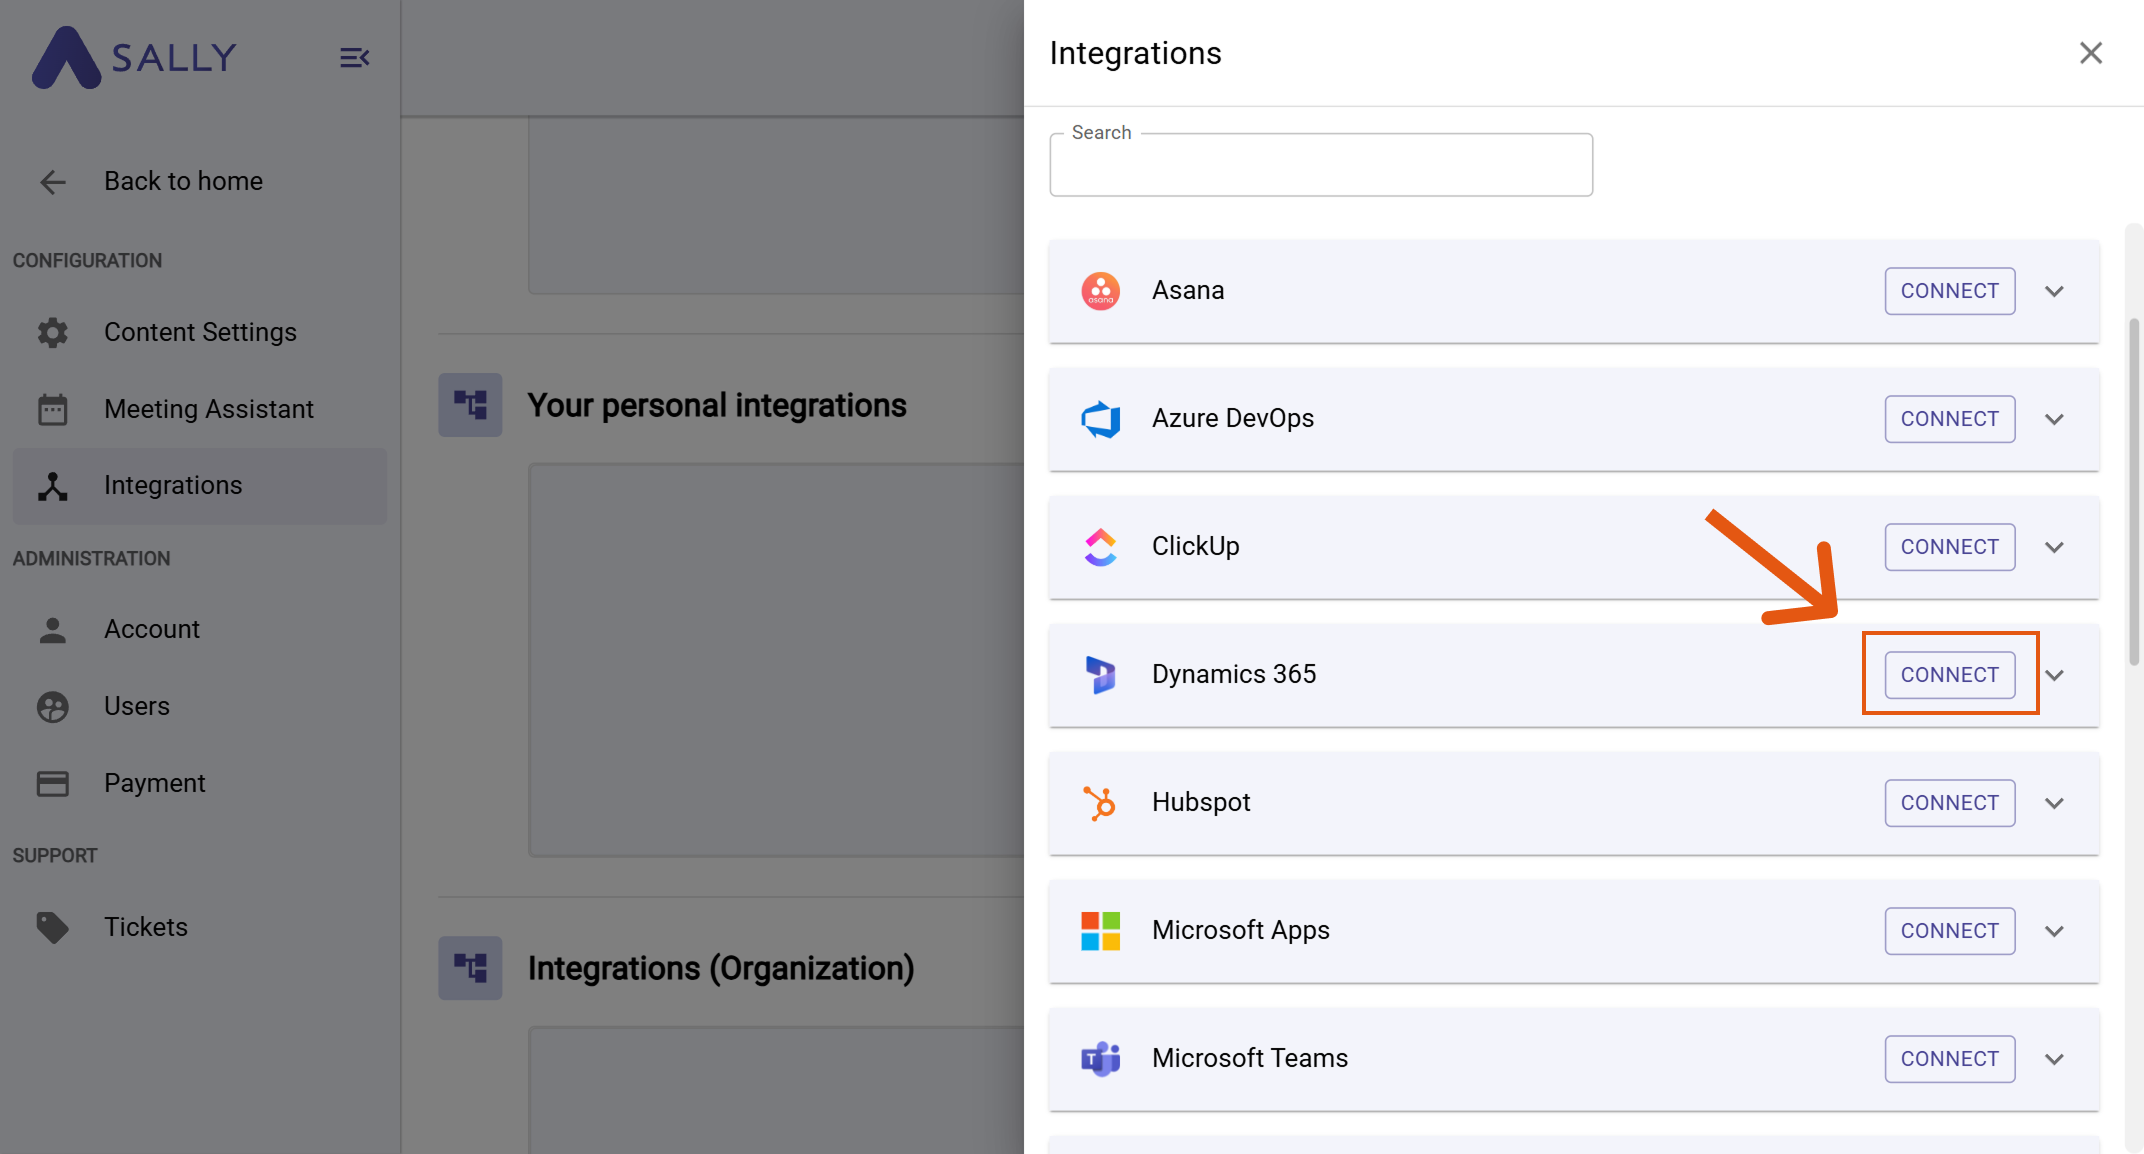
Select Dynamics 365 and hit Connect.
Figure 3: Choose Dynamics 365 → Connect
-
Enter your Dynamics 365 Environment URL (e.g.,
https://yourorg.crm4.dynamics.com) and complete the authorization flow.
The Environment URL is the base web address of your Dynamics 365 organization (sometimes called instance URL). You can copy it from your browser when Dynamics 365 is open. Region suffixes like crm, crm4, etc. are fine.
-
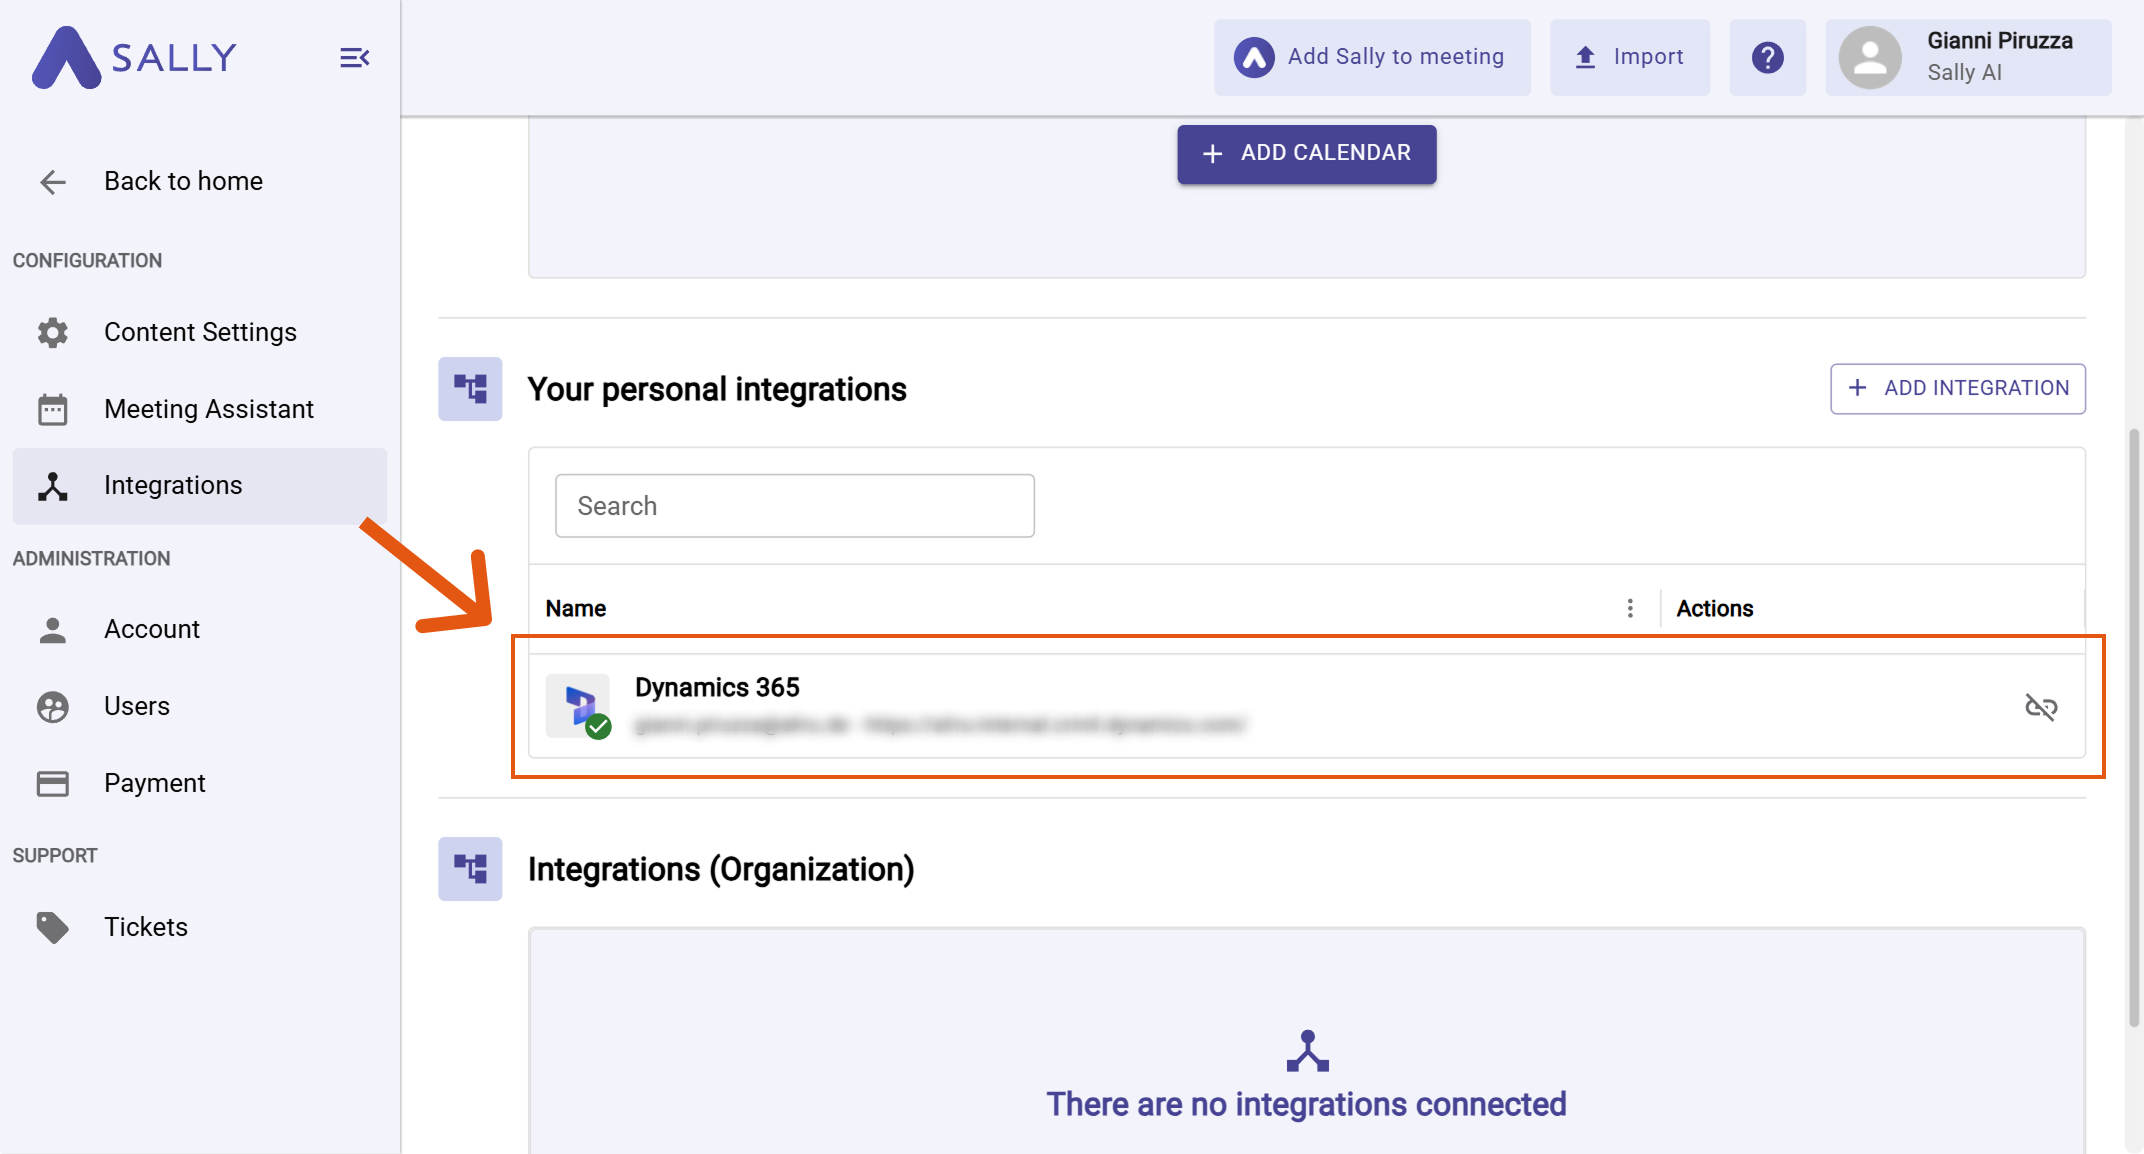
After a successful connection, Dynamics 365 appears under "Your personal integrations".
Figure 4: Dynamics 365 is connected
Personal integrations apply to your user account. Admins can also set up org-wide integrations under "Integrations (Organization)" if needed.
2. How to send insights to Dynamics 365
Once Dynamics 365 is connected, you can send meeting insights from Sally to Dynamics 365 with a single click - so they land in the right place.
You can:
2.1. Create task in Dynamics 365
Turn a Sally insight into a Dynamics 365 task.
-
Open the desired meeting in Sally.
-
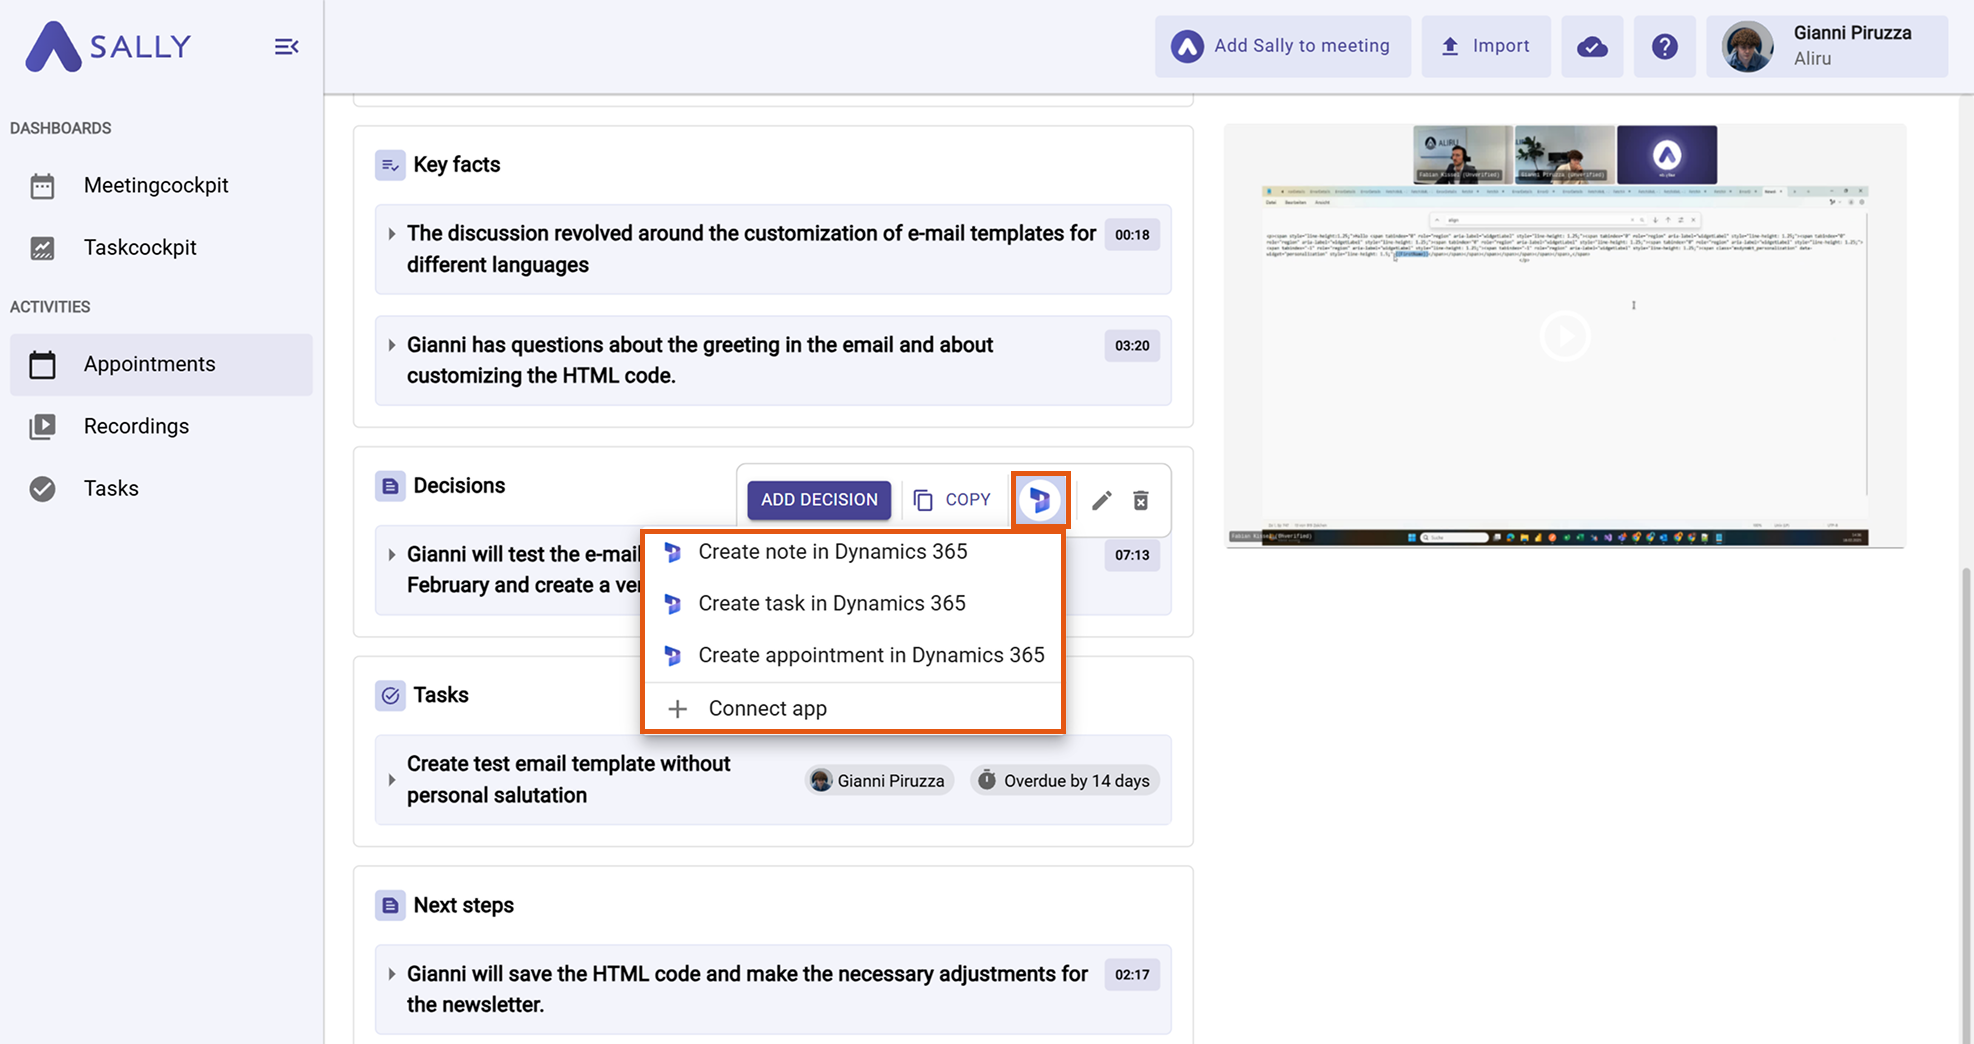
Hover an insight/decision/next step and click the Dynamics 365 icon, then choose "Create task in Dynamics 365".
Figure 5: Choose the Dynamics 365 action
-
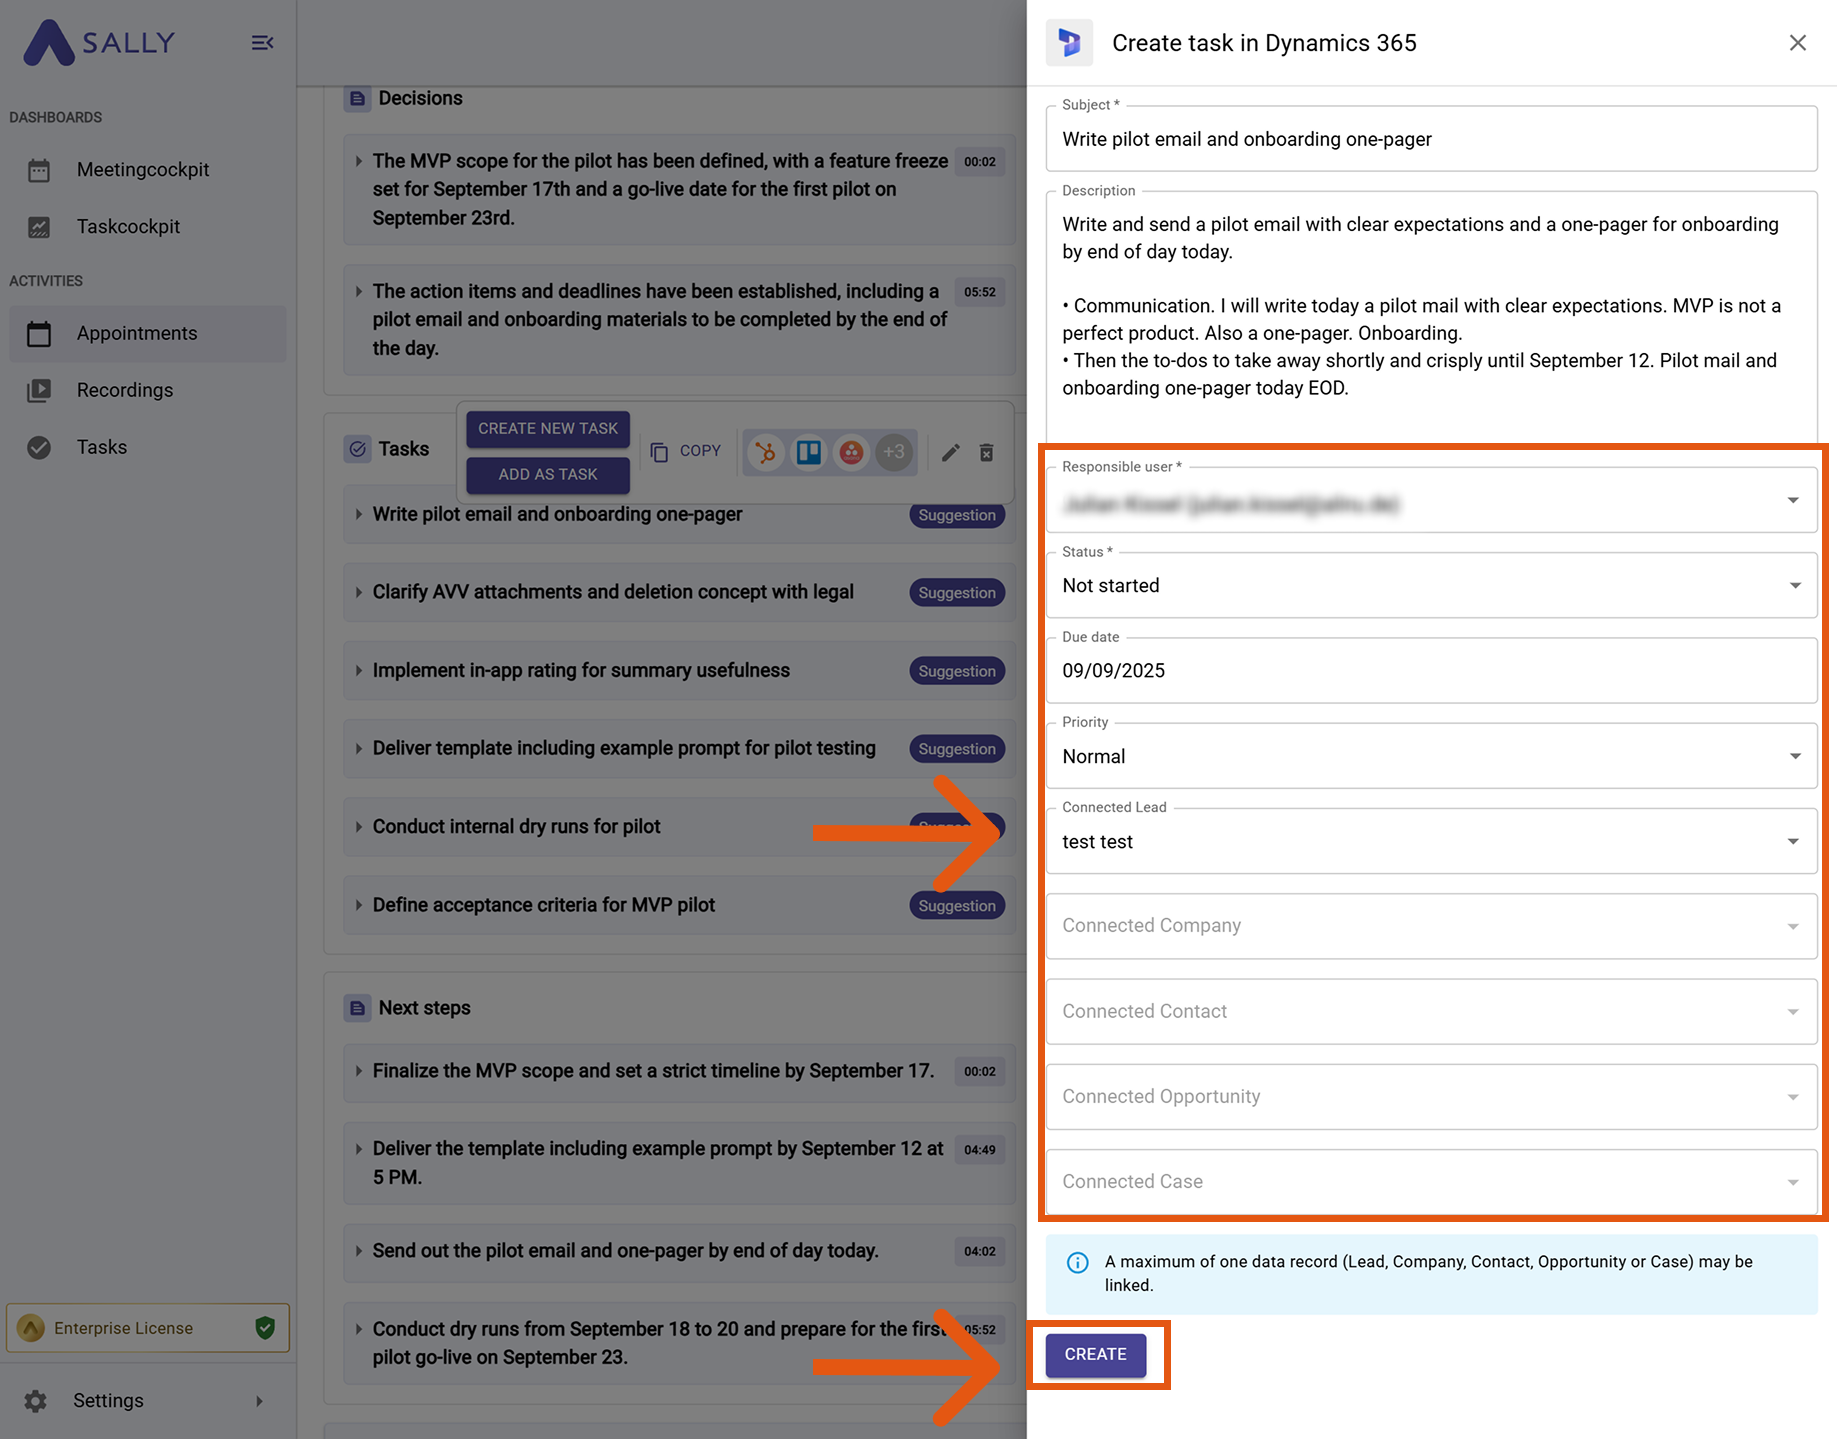
Fill in the creation form (required fields are marked with
*). Typically:- Responsible user / Owner*
- Status*
- Due date
- Priority
- Regarding (link exactly one record such as Lead, Account/Company, Contact, Opportunity, or Case)
The subject and description are prefilled from Sally and can be edited.
-
Click Create to send it to Dynamics 365.
Figure 6: Fill the Dynamics 365 task fields and Create
Always set Owner, Due date, and a Regarding record. This keeps tasks actionable and easy to find in Dynamics 365.
2.2. Create note in Dynamics 365
Attach meeting context as a note on a Dynamics 365 record.
-
Open the desired meeting in Sally.
-
Hover the relevant item, click the Dynamics 365 icon, and choose "Create note in Dynamics 365".
Figure 5: Choose the Dynamics 365 action
-
Fill in the creation form (required fields are marked with
*). Typically:- Responsible user / Owner*
- Status*
- Due date
- Priority
- Regarding (link exactly one record such as Lead, Account/Company, Contact, Opportunity, or Case)
The subject and description are prefilled from Sally and can be edited.
-
Click Create to send it to Dynamics 365.
Figure 6: Fill the Dynamics 365 task fields and Create
2.3. Create appointment in Dynamics 365
Schedule a Dynamics 365 appointment right from the summary.
-
Open the desired meeting in Sally.
-
Hover the relevant item, click the Dynamics 365 icon, and choose "Create appointment in Dynamics 365".
Figure 5: Choose the Dynamics 365 action
-
Fill in the creation form (required fields are marked with
*). Typically:- Responsible user / Owner*
- Status*
- Due date
- Priority
- Regarding (link exactly one record such as Lead, Account/Company, Contact, Opportunity, or Case)
The subject and description are prefilled from Sally and can be edited.
-
Click Create to send it to Dynamics 365.
Figure 6: Fill the Dynamics 365 task fields and Create
