Microsoft Apps Integration
Connect Sally AI with your Microsoft Apps - including Planner, Microsoft To Do, and OneNote - to create tasks and meeting notes directly from your Sally insights.
Generate follow-ups in your Microsoft workspace with just one click and keep all your tools perfectly synchronized.
Quick Navigation
1. How to connect Microsoft Apps with Sally AI
Follow these steps to enable the Sally–Microsoft Apps integration.
-
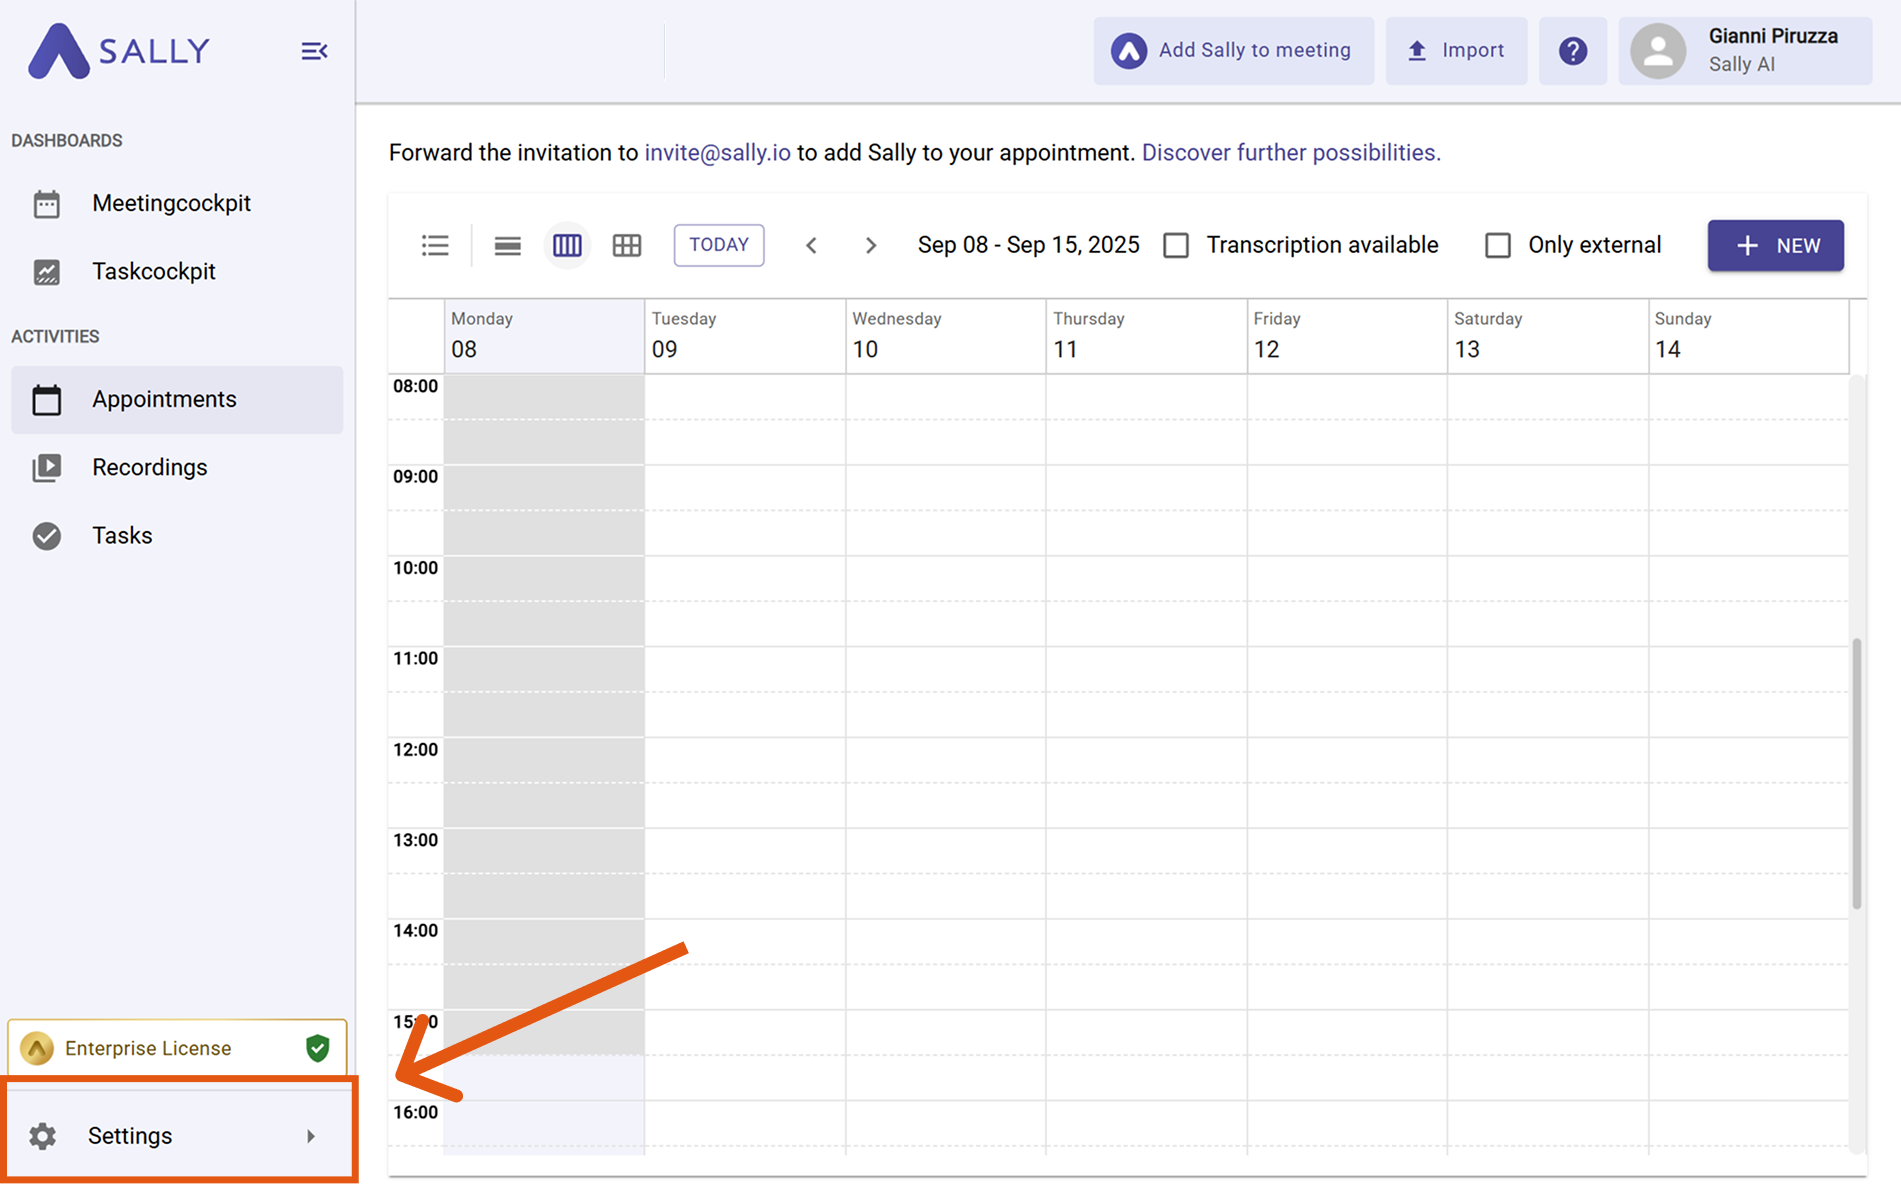
Open Settings in the left sidebar.
Figure 1: Go to Settings
-
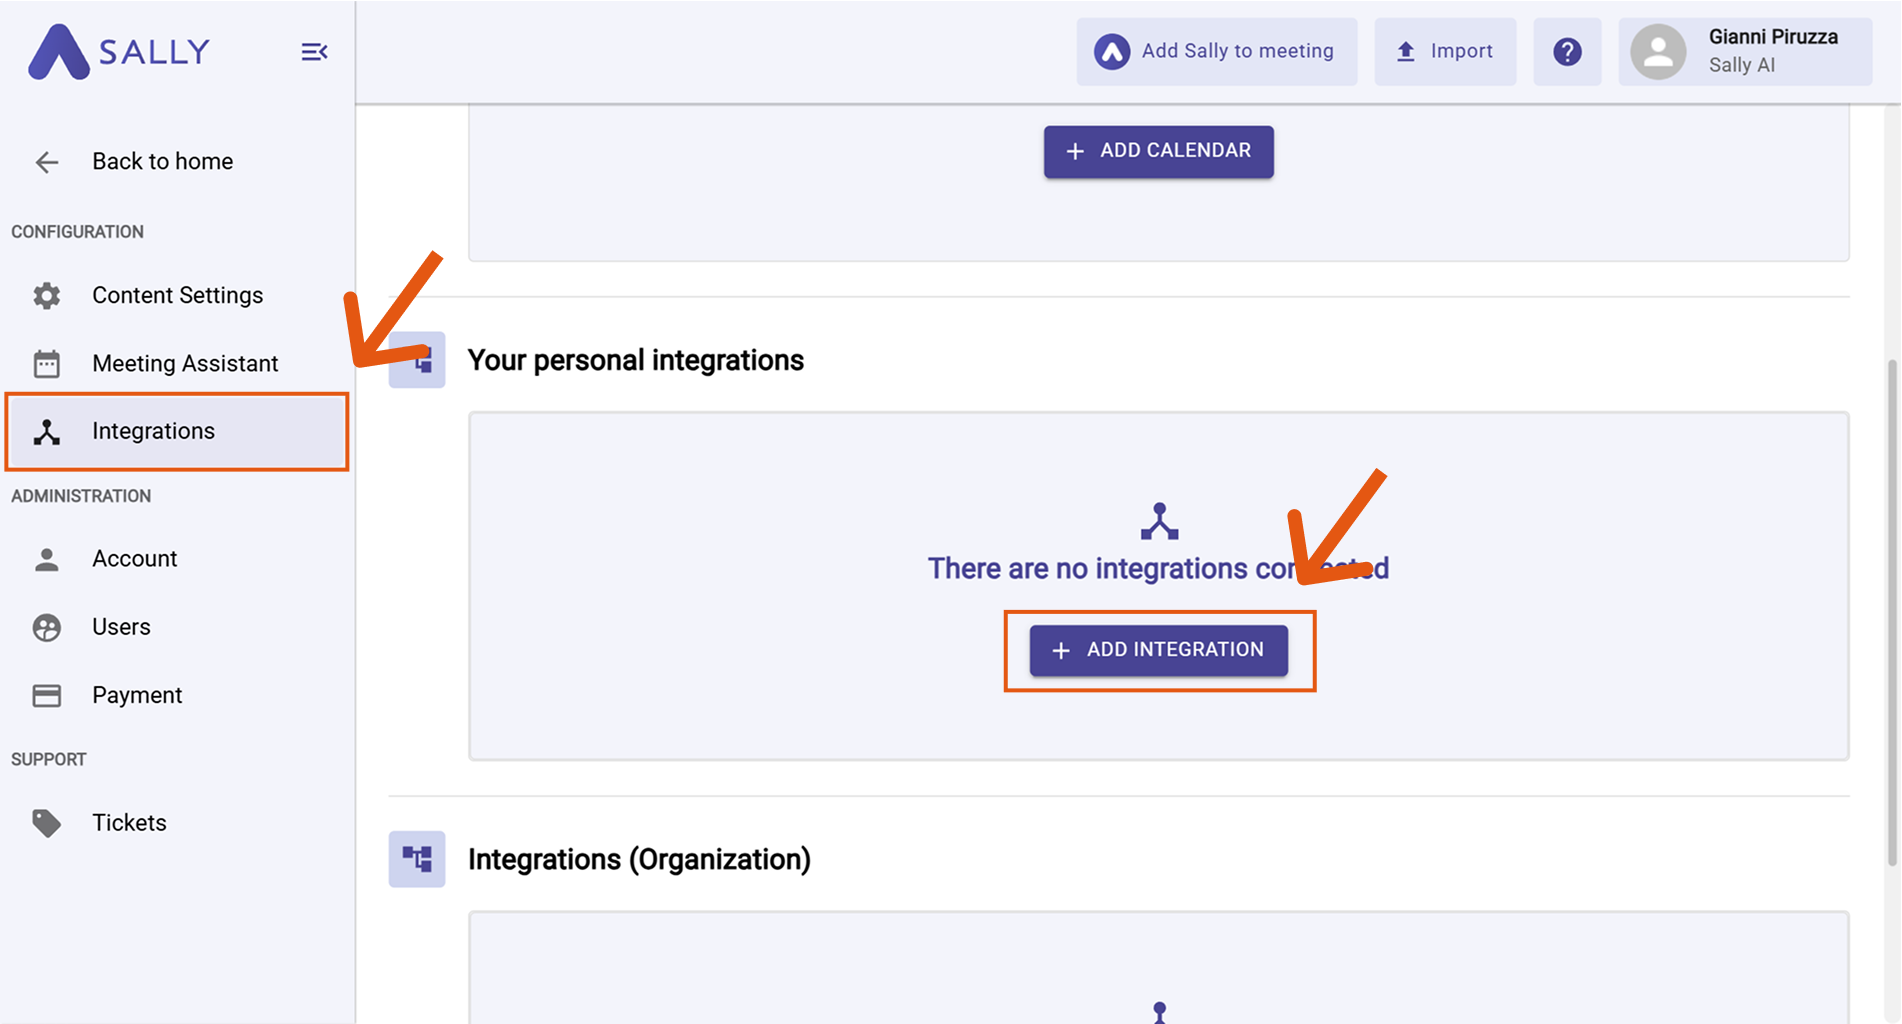
Go to Integrations and click “+ Add integration” under “Your personal integrations.”
Figure 2: Add integration
-
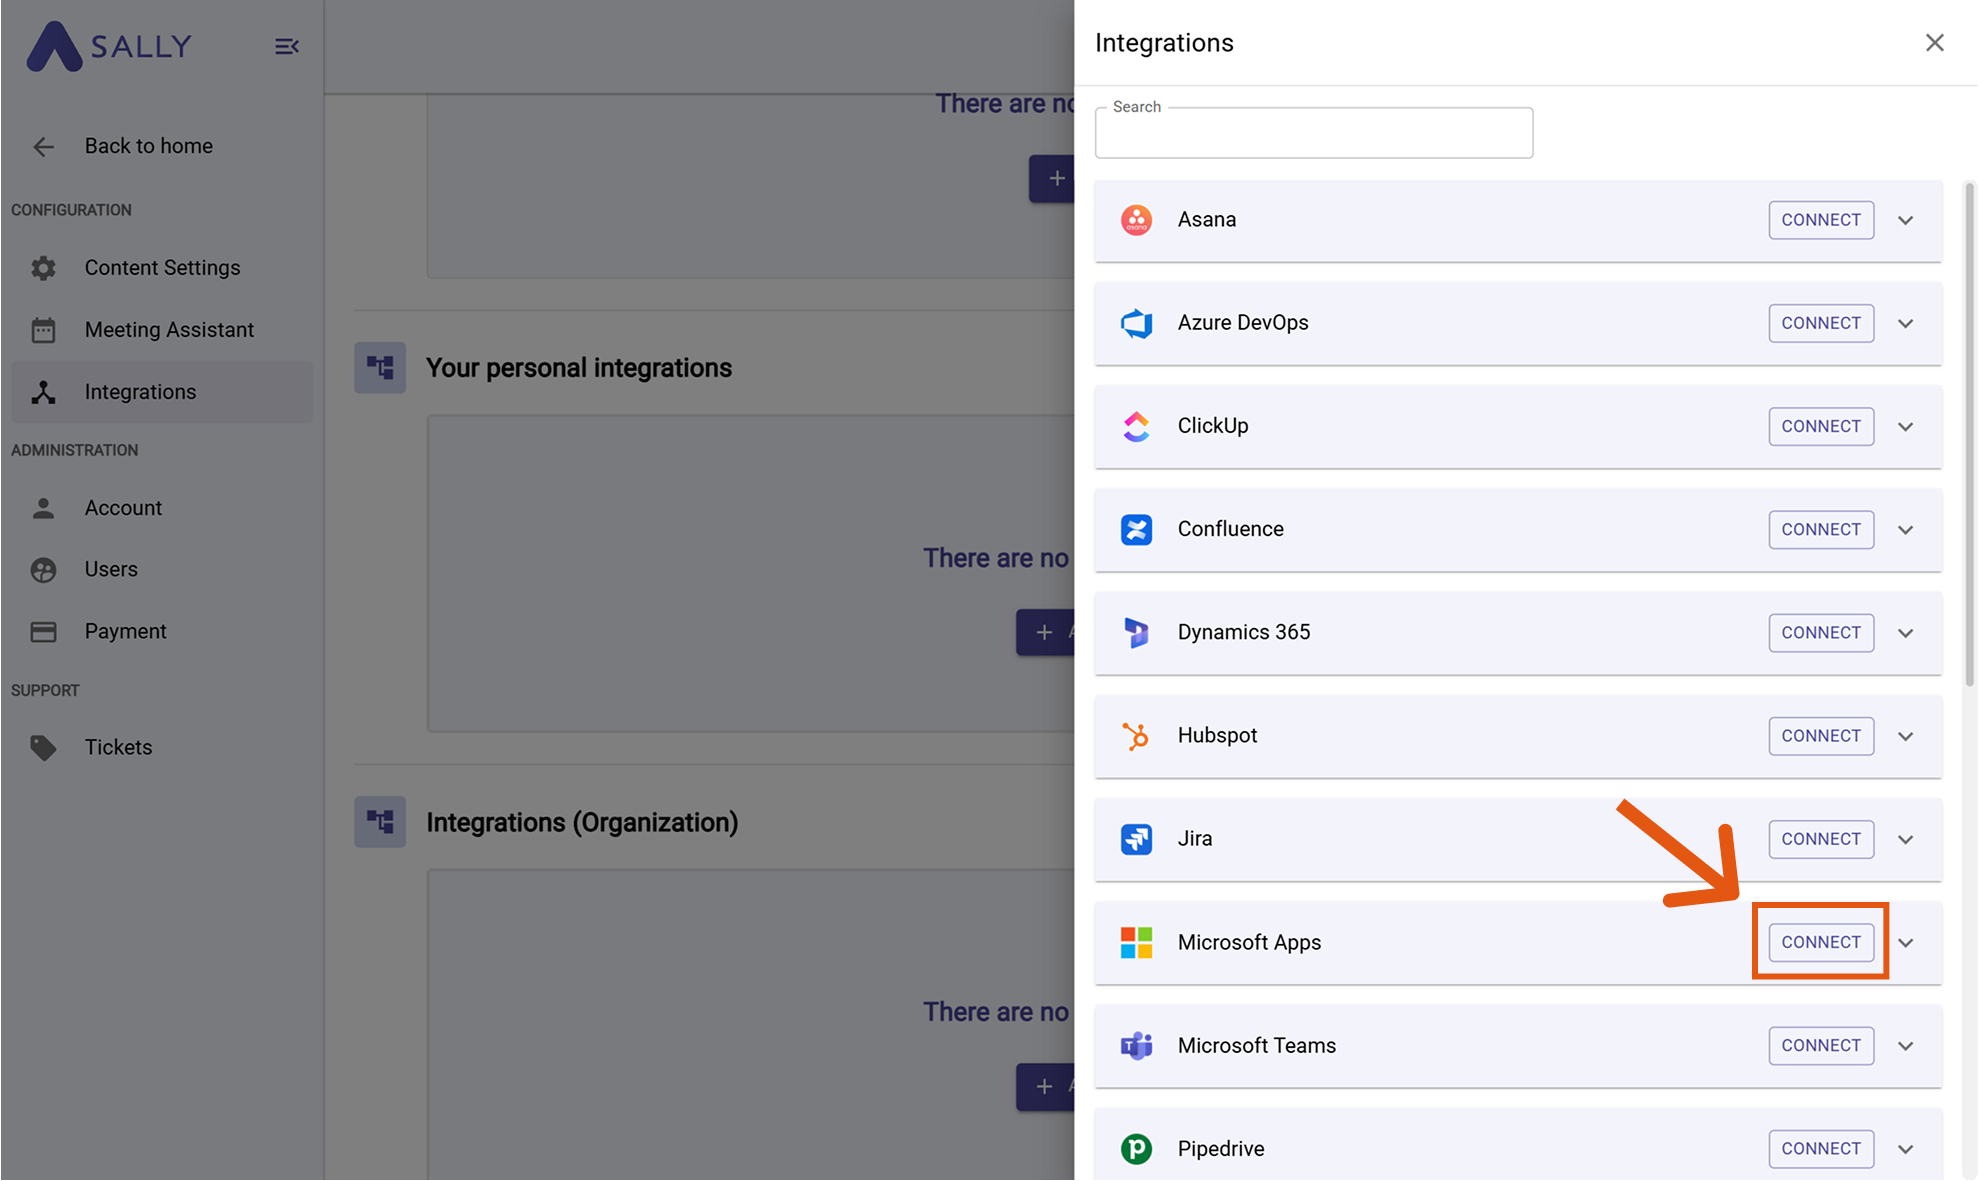
Select Microsoft Apps and click "Connect". Complete the OAuth flow in Microsoft.
Figure 3: Select Microsoft Apps → Connect
-
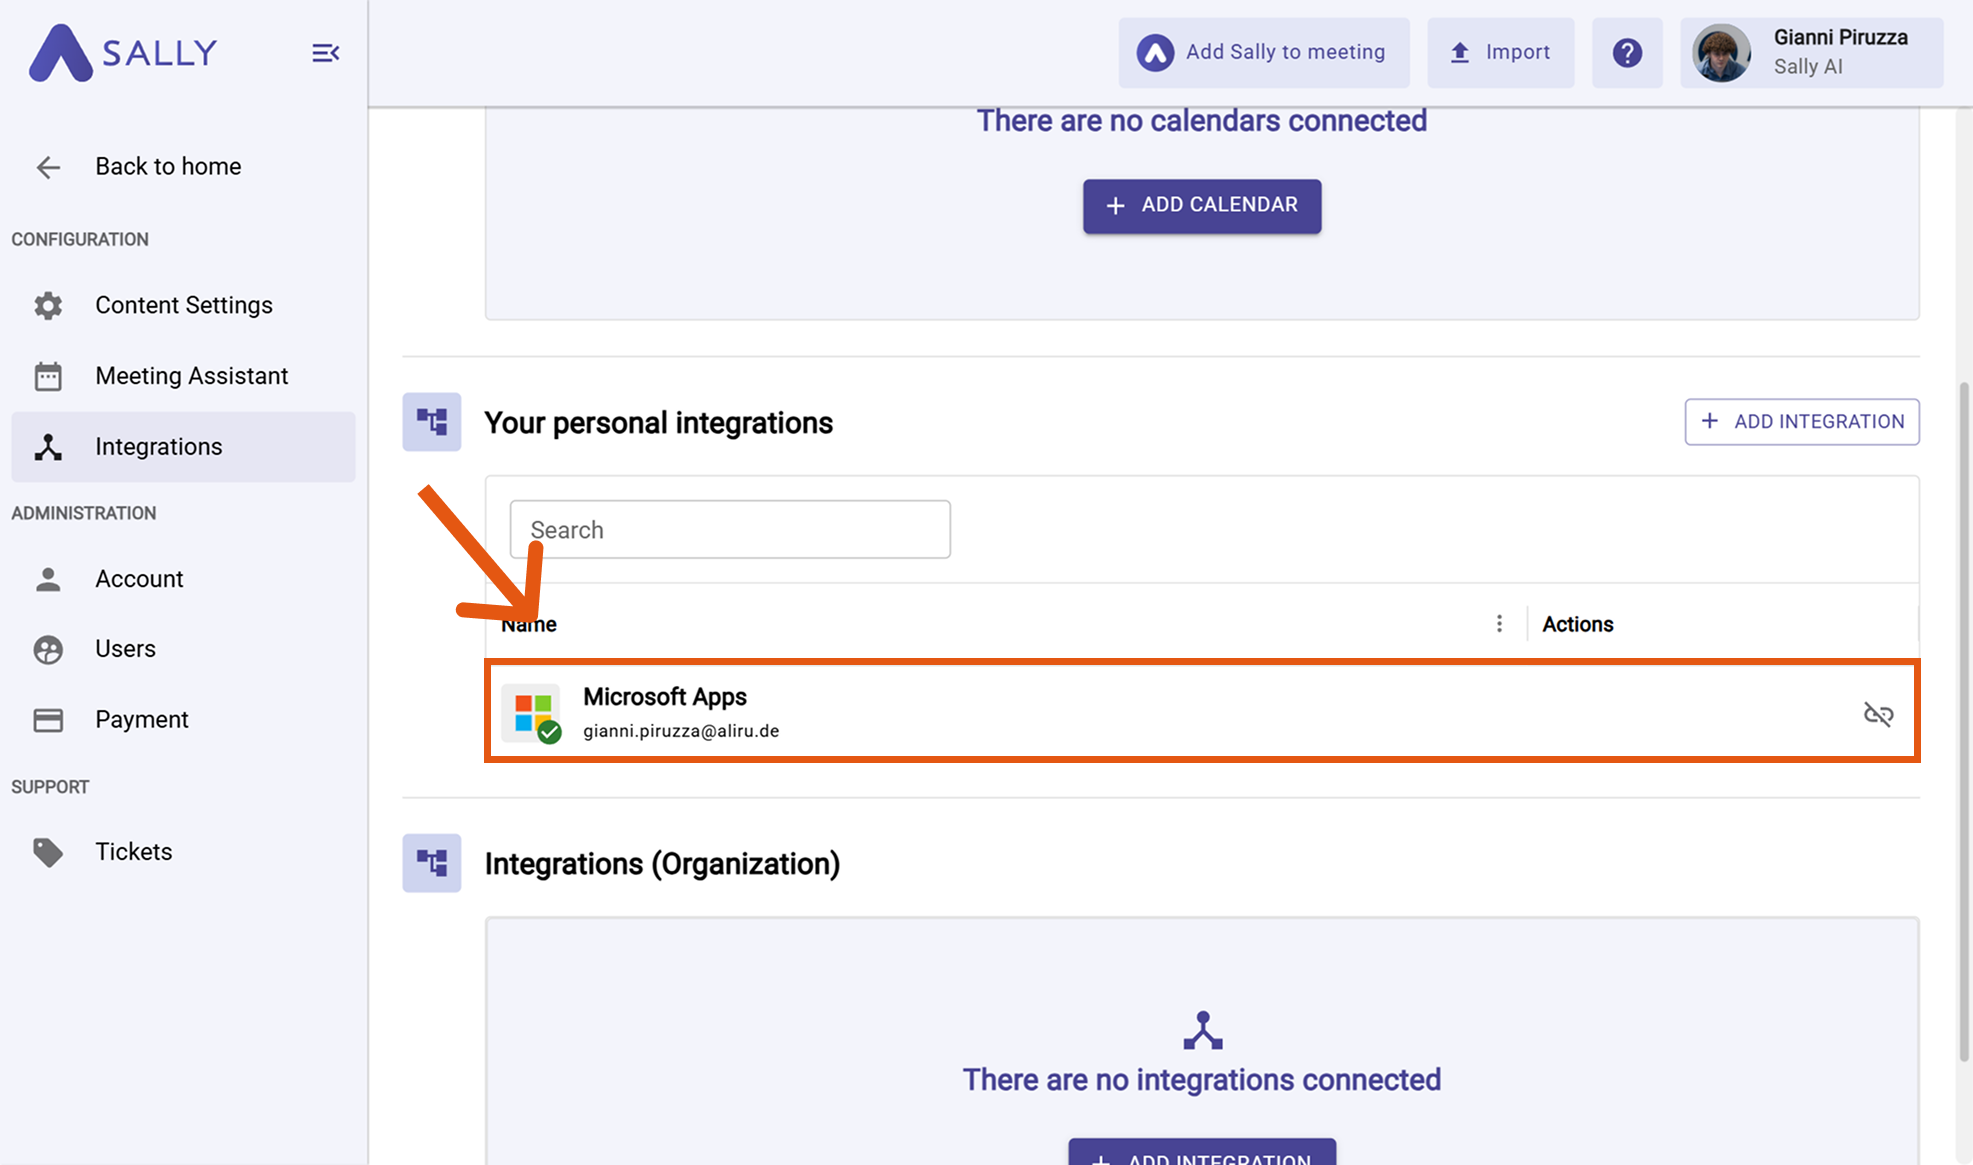
After a successful connection, your Microsoft Apps integration will appear under “Your personal integrations.”
Figure 4: Microsoft Apps are now connected
If your connected Microsoft account is a personal account, only the option to create a task in To Do
is available.
Other actions - such as creating tasks or comments in Planner or saving meeting notes in OneNote - require a work, school, or university account.
When a personal account is used, these buttons will appear grayed out or unavailable.
Microsoft distinguishes between two main account types:
-
Microsoft account (personal):
A personal account you use to access consumer services like Outlook.com, Xbox Live, Skype, or Microsoft Store.
These accounts are usually linked to an email ending with @outlook.com, @hotmail.com, or similar. -
Work, school, or university account:
An account provided by your organization (e.g. a company or educational institution) that gives access to Microsoft 365, Planner, To Do (work), Teams, OneNote, and other enterprise tools.
2. How to create tasks and notes in Microsoft Apps
Once your Microsoft Apps are connected, you can create or update tasks and notes directly from Sally with a single click.
2.1. Create a task in Planner
-
Open the desired meeting in Sally.
-
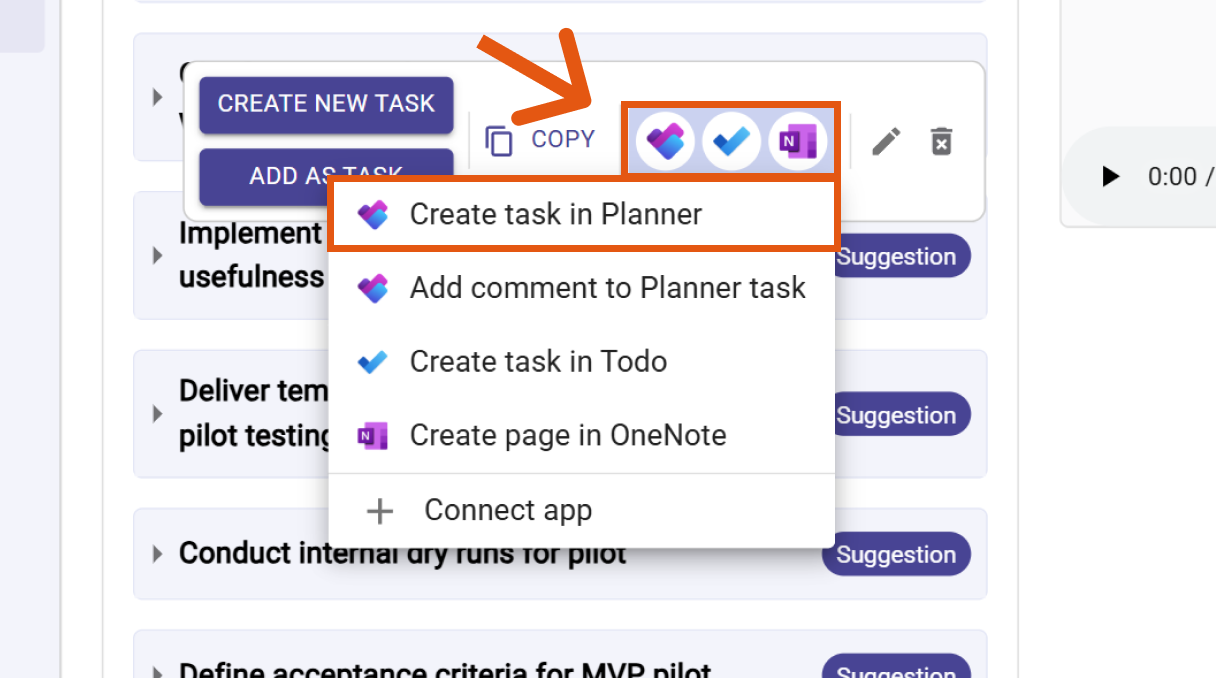
Hover over any insight, decision, or task in your summary and click the Planner icon → "Create task in Planner".
Figure 5: Choose Create task in Planner
-
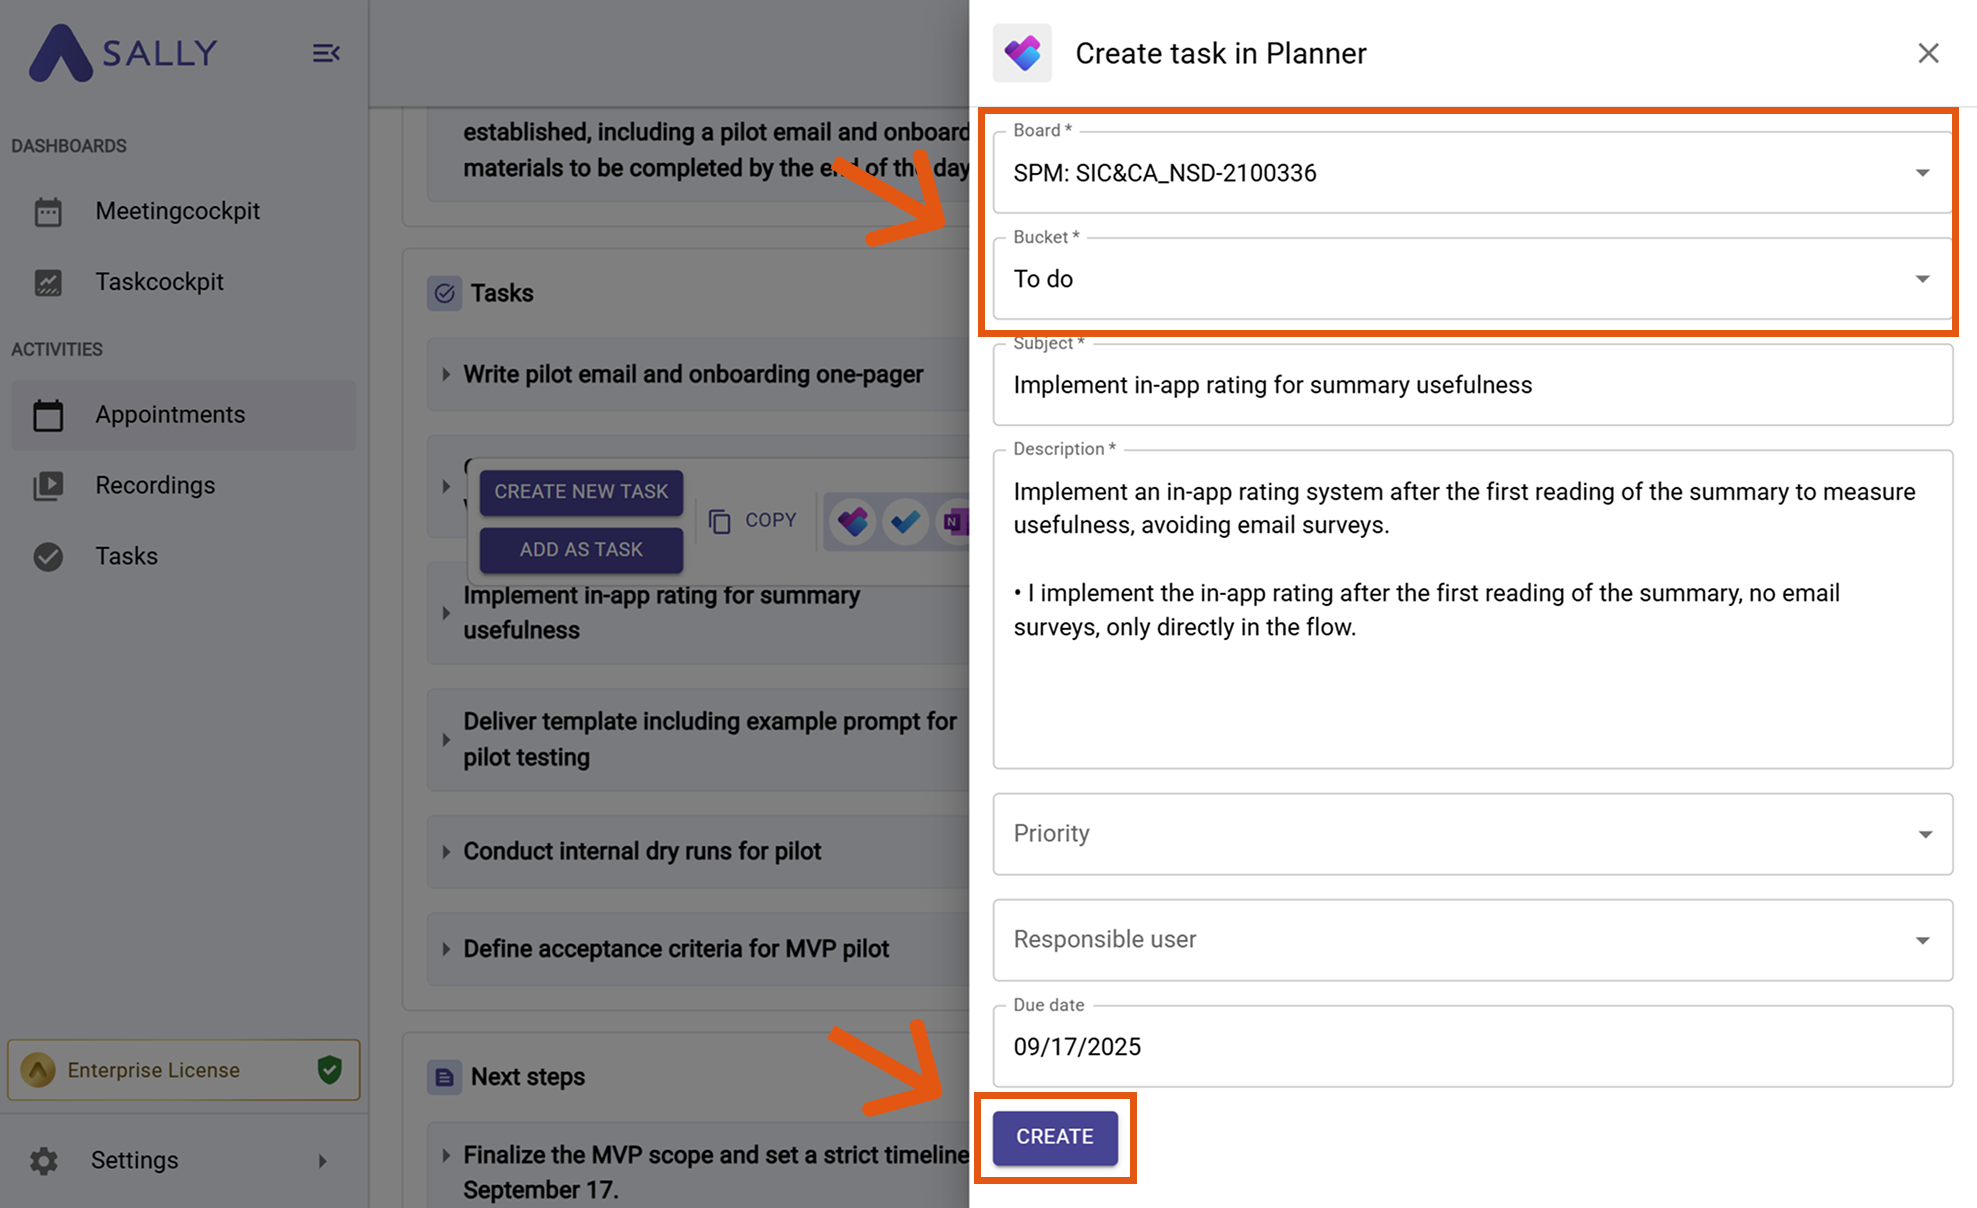
Fill out the form fields such as Board, Bucket, and Task name (required fields are marked with
*).Figure 6: Fill out Planner task fields and click Create
-
Click Create to send the task to Microsoft Planner.
2.2. Add a comment to an existing Planner task
-
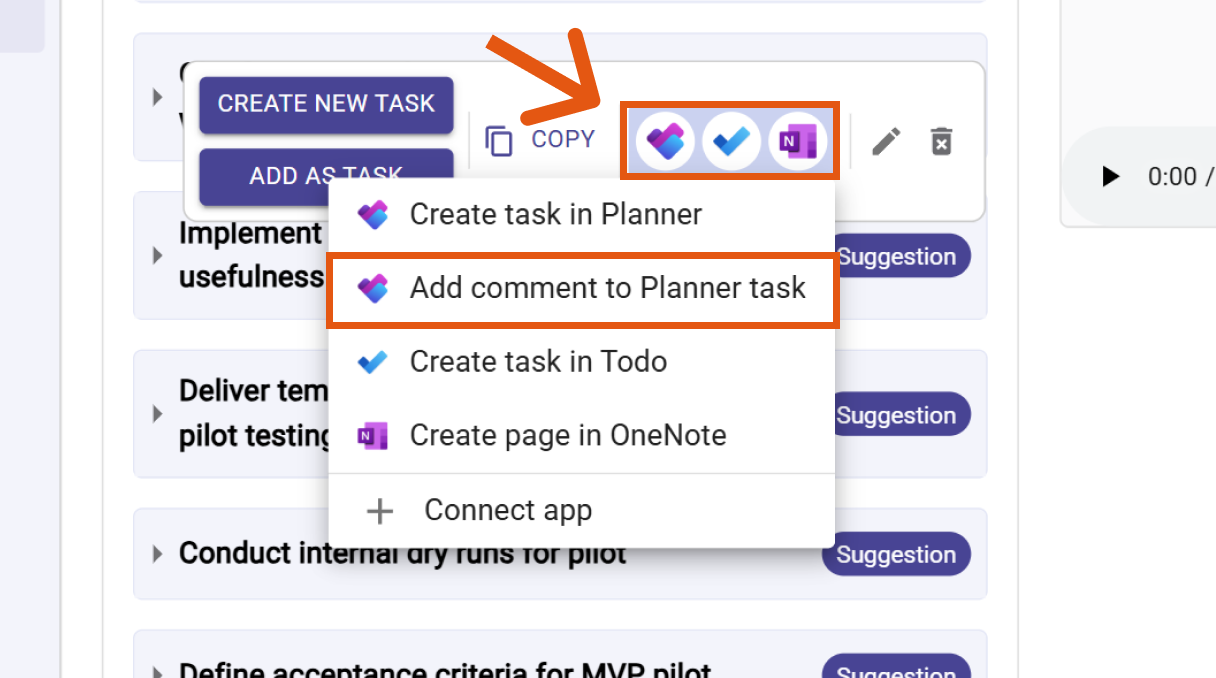
Hover over a Sally insight and click the Planner icon → Add comment to Planner task.
Figure 7: Add comment to existing Planner task
-
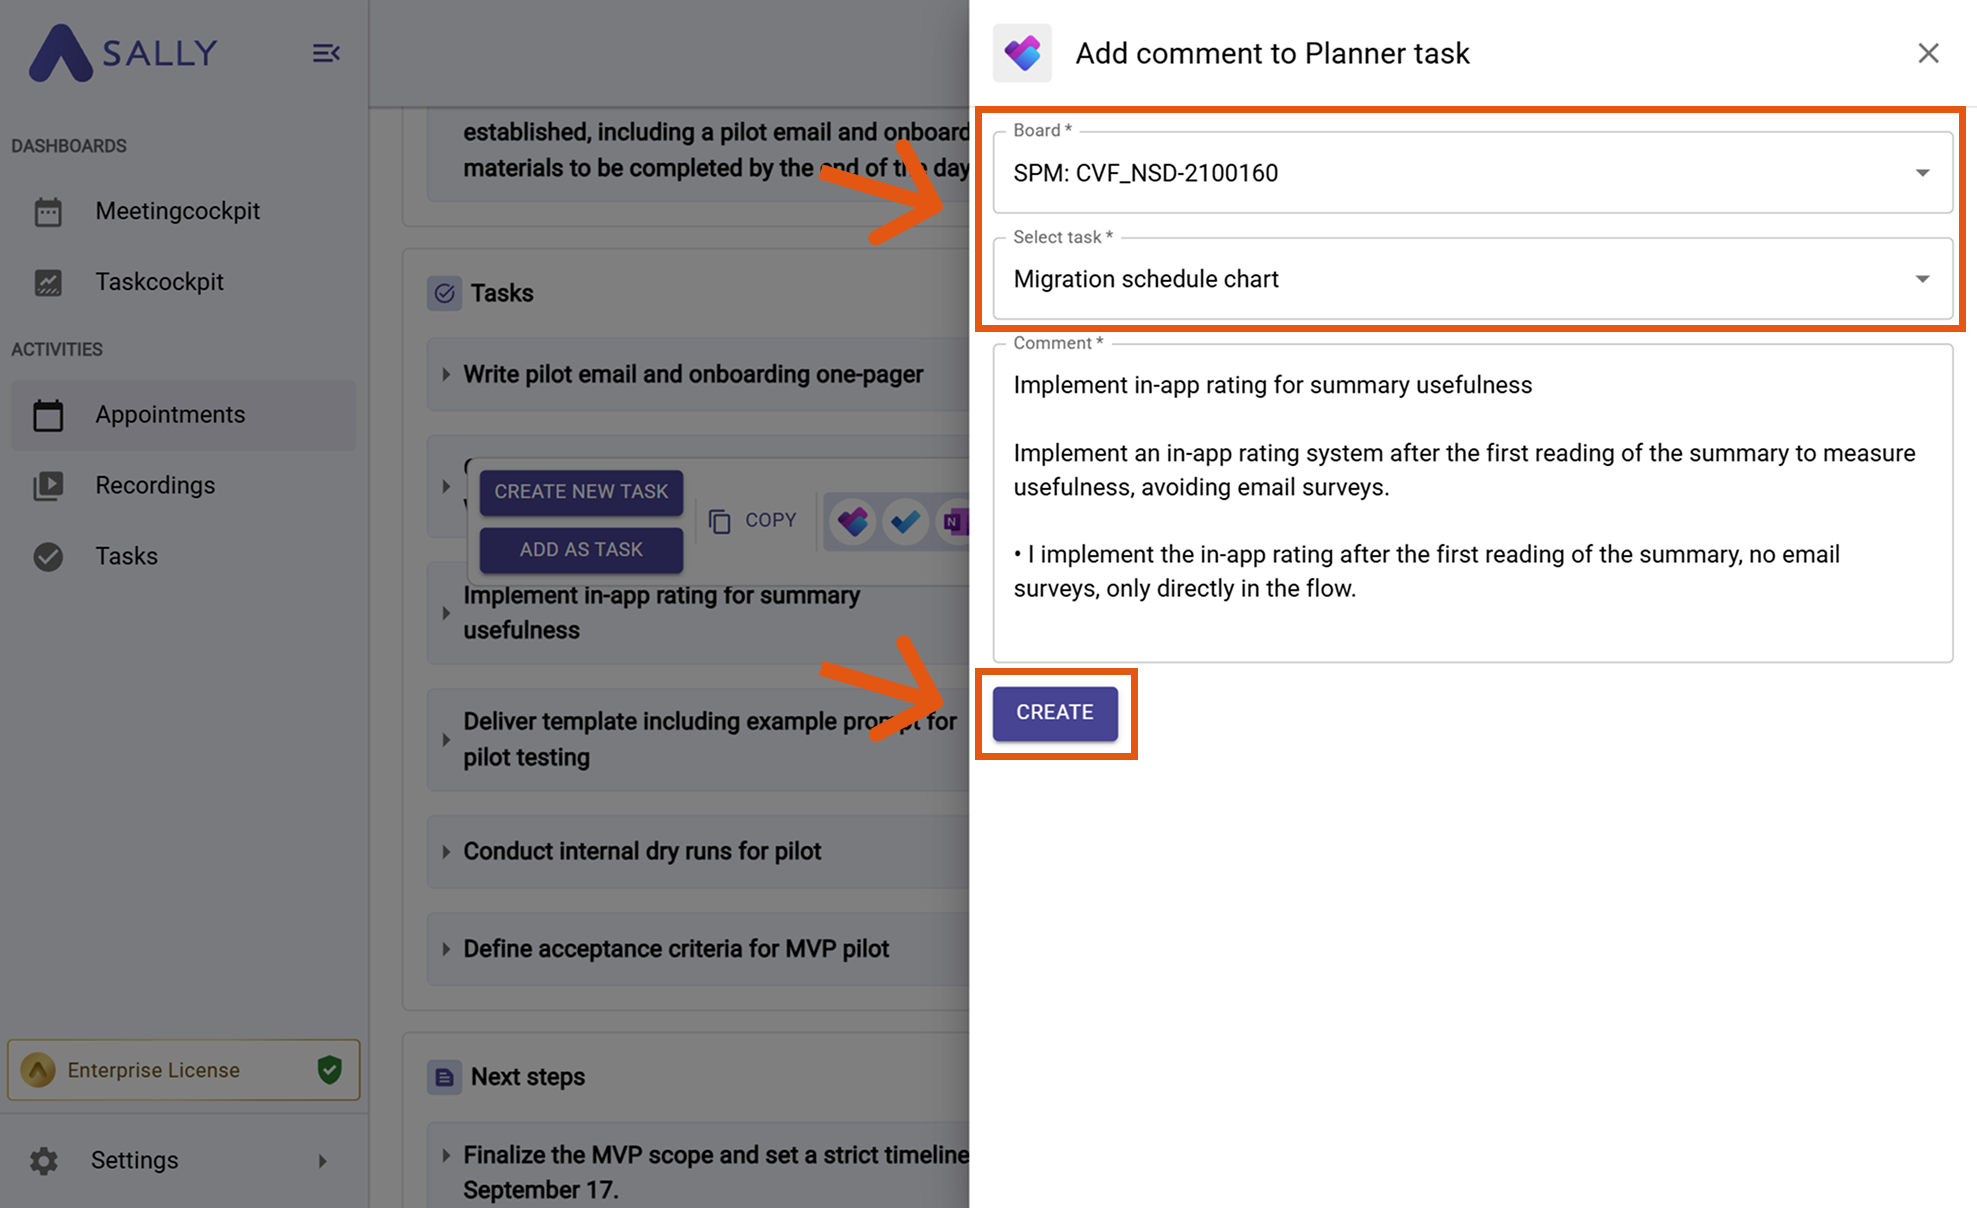
Select the corresponding Board and Task, then edit or confirm the comment text.
Figure 8: Fill in comment details and click Create
2.3. Create a task in Microsoft To Do
-
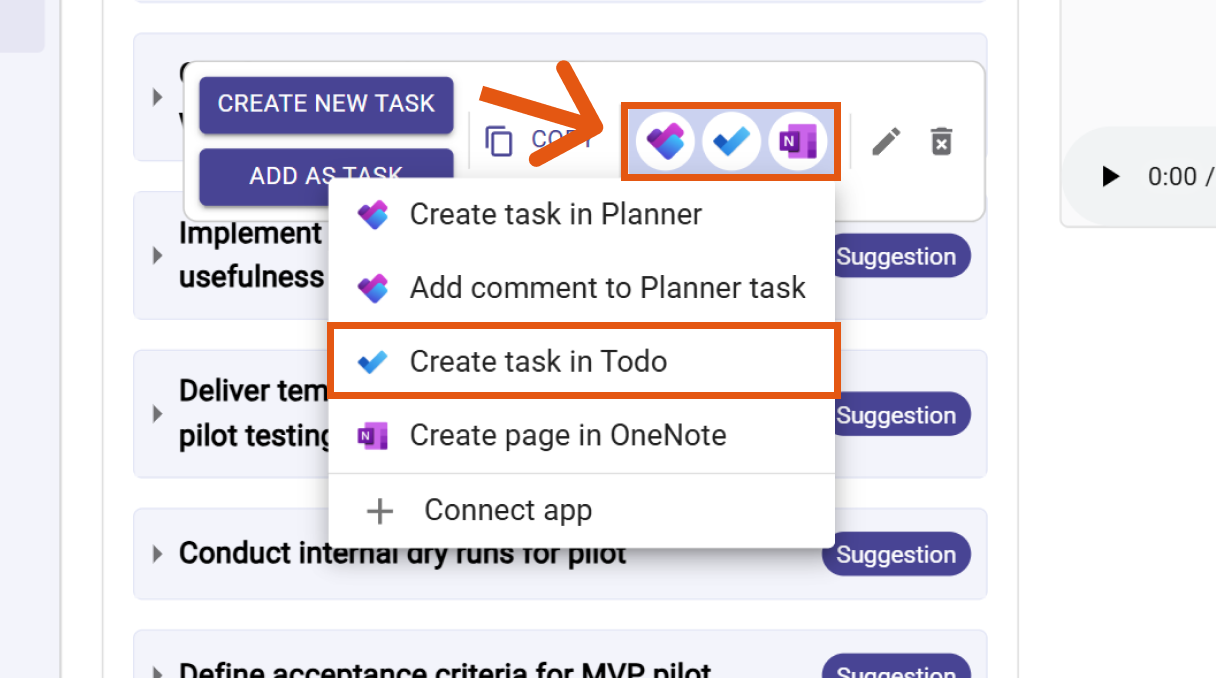
Hover over a Sally task or next step, click the To Do icon, and choose Create task in To Do.
Figure 9: Choose Create task in Microsoft To Do
-
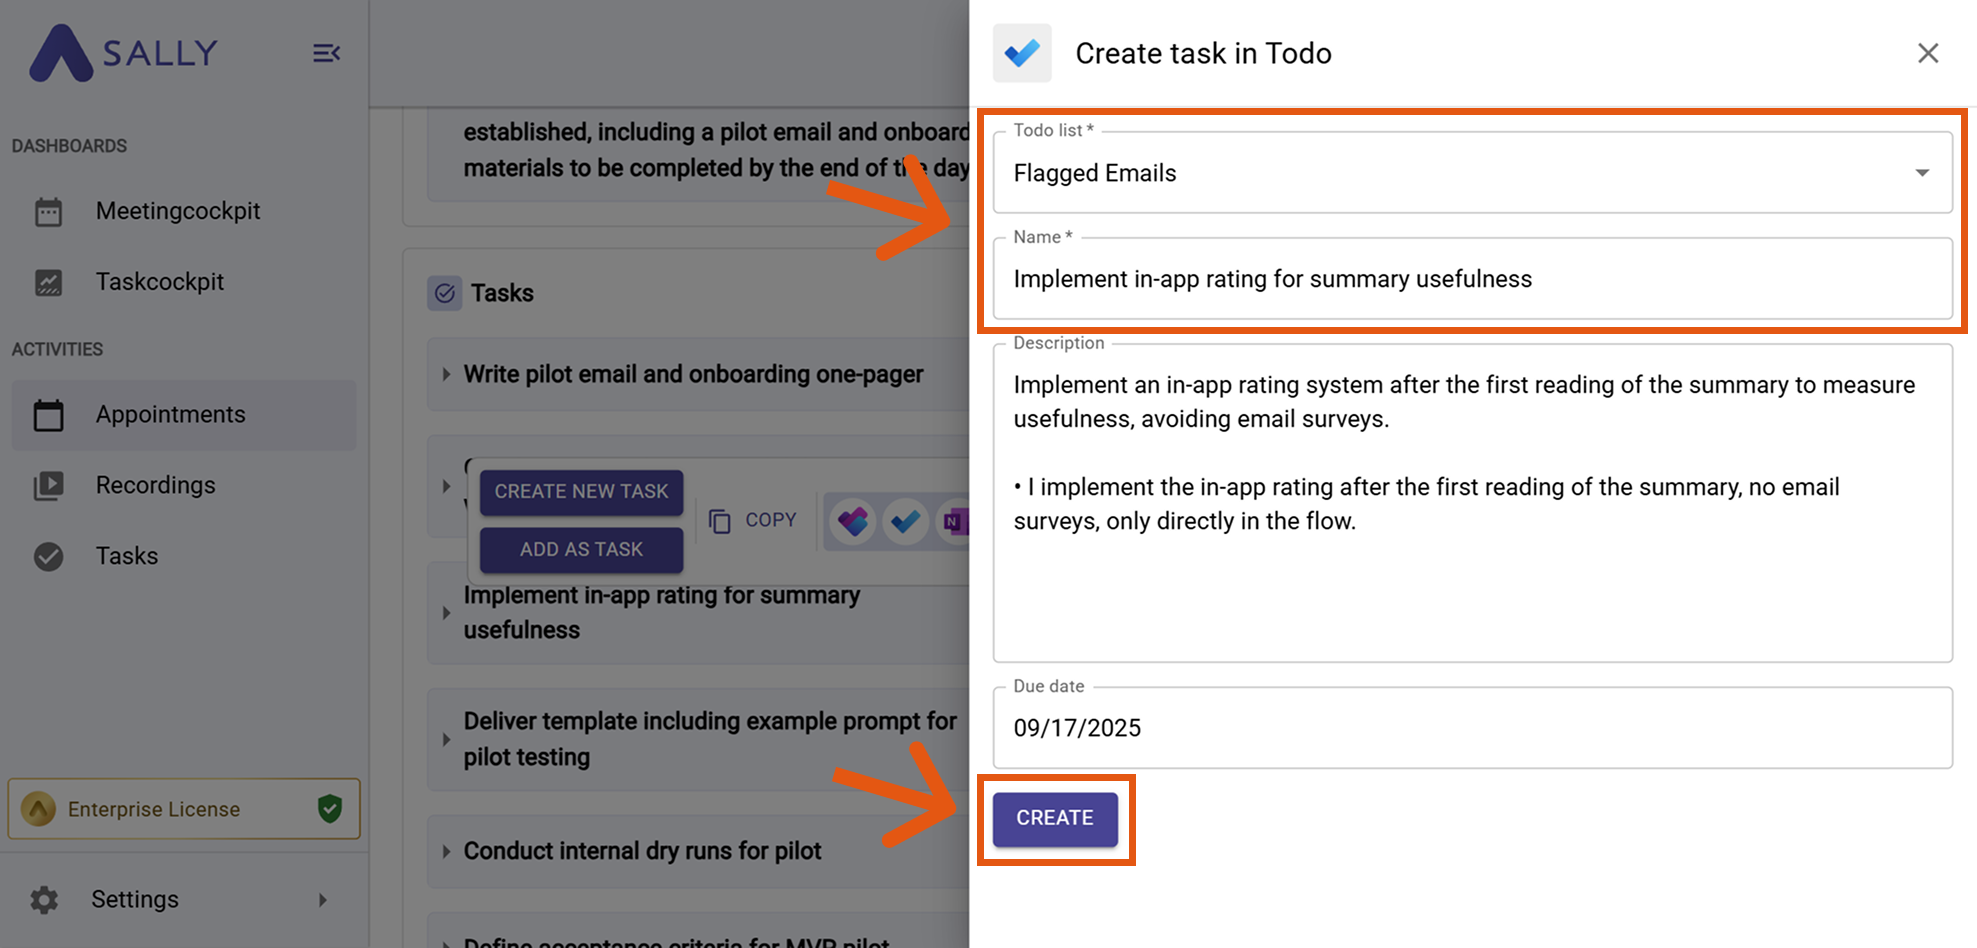
Fill out the task name, list, description, and due date.
Figure 10: Fill out To Do fields and click Create
-
Click Create to add it to your Microsoft To Do list.
2.4. Create a page in OneNote
You can also send meeting summaries or notes to Microsoft OneNote for easy archiving.
-
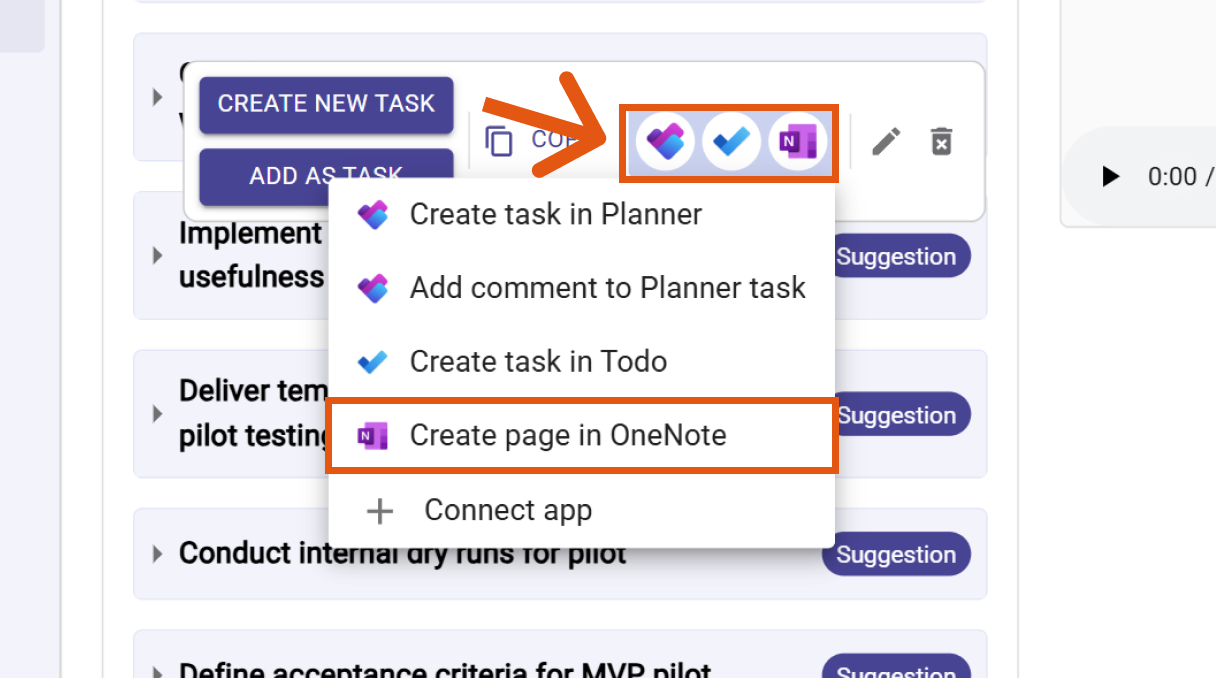
Hover over the summary section and click the OneNote icon → Create page in OneNote.
Figure 11: Choose Create page in OneNote
-
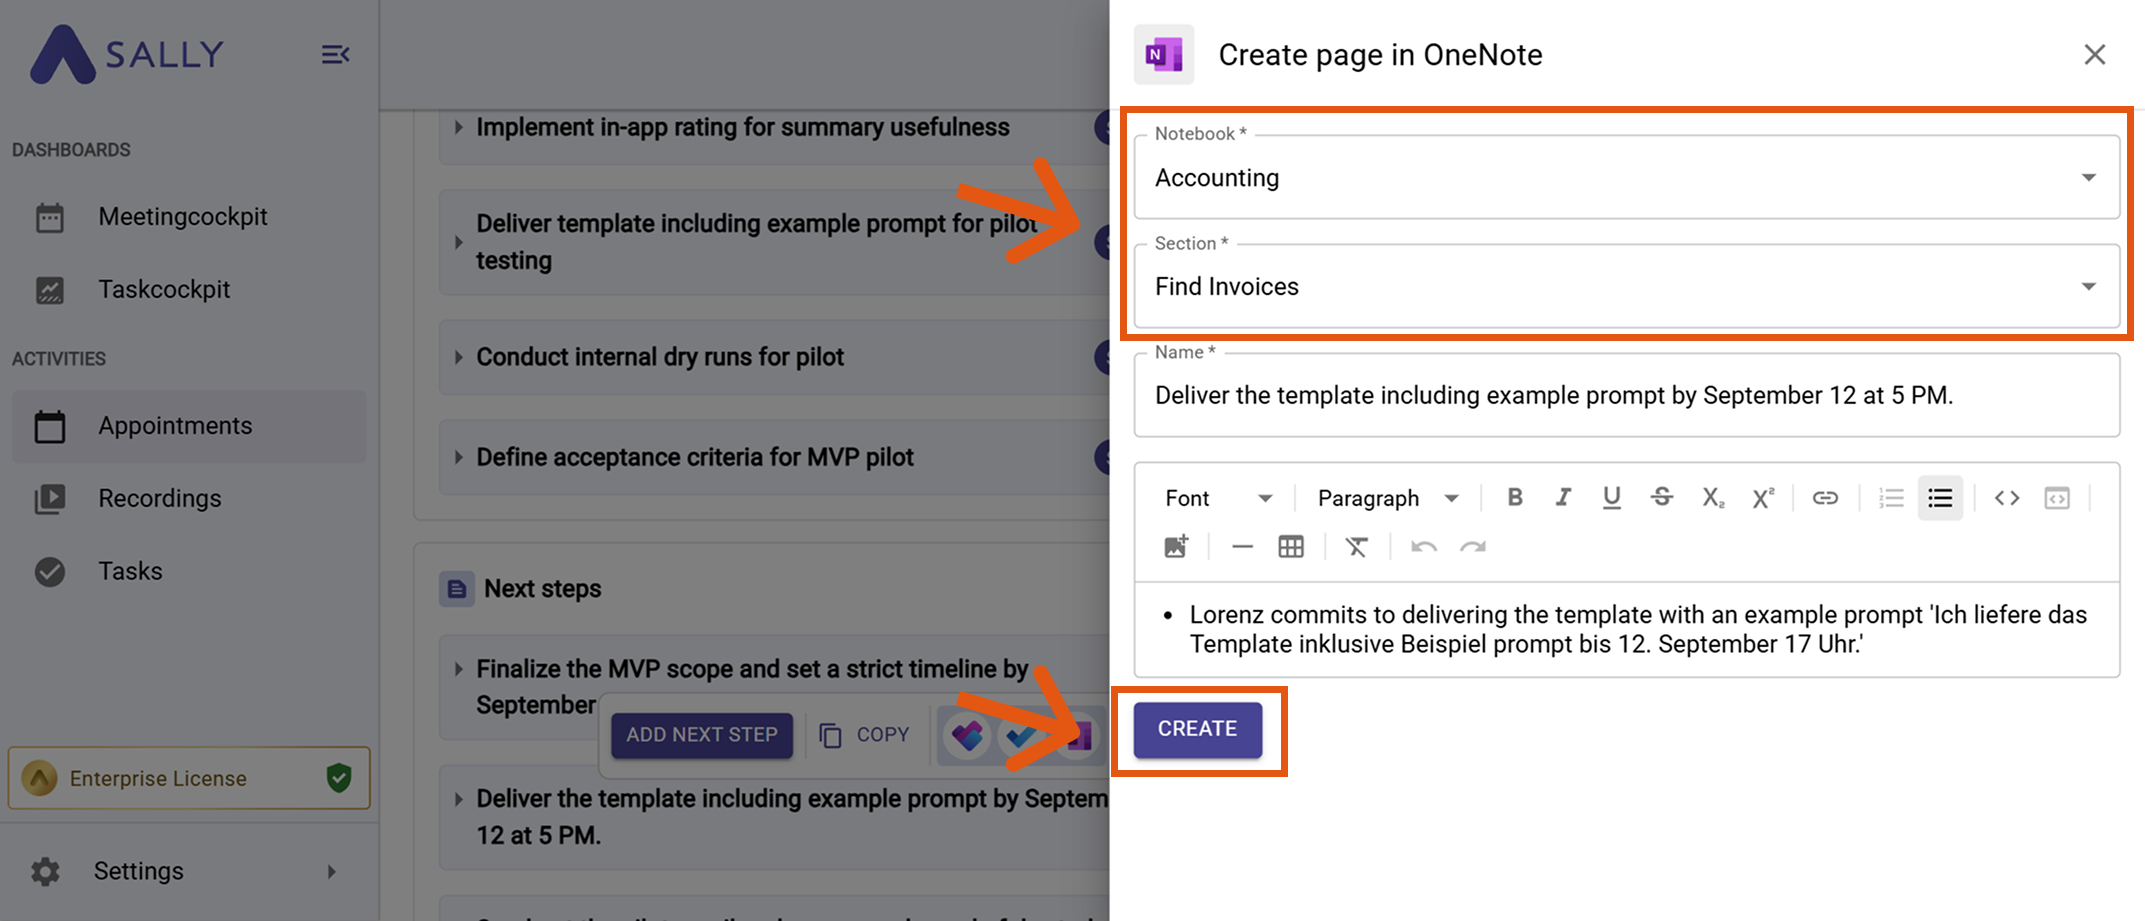
Choose the desired Notebook and Section, then confirm the content to be added.
-
Click Create to save the notes in your OneNote workspace.
Figure 12: Fill out To Do fields and click Create
Use OneNote for structured meeting documentation and reference material, while Planner and To Do handle actionable items.