
Automated summary email

After each meeting, you automatically receive an email with the most important details. This way, you don’t have to log in to the platform to get the key information right away.

Quick Navigation

  1. What’s included in the email
  2. How to adjust automation settings

1. What’s included in the email

After a meeting, simply check your regular email inbox - the summary is delivered automatically, no extra steps needed.

Example email Sally AI

Figure 1: Example email

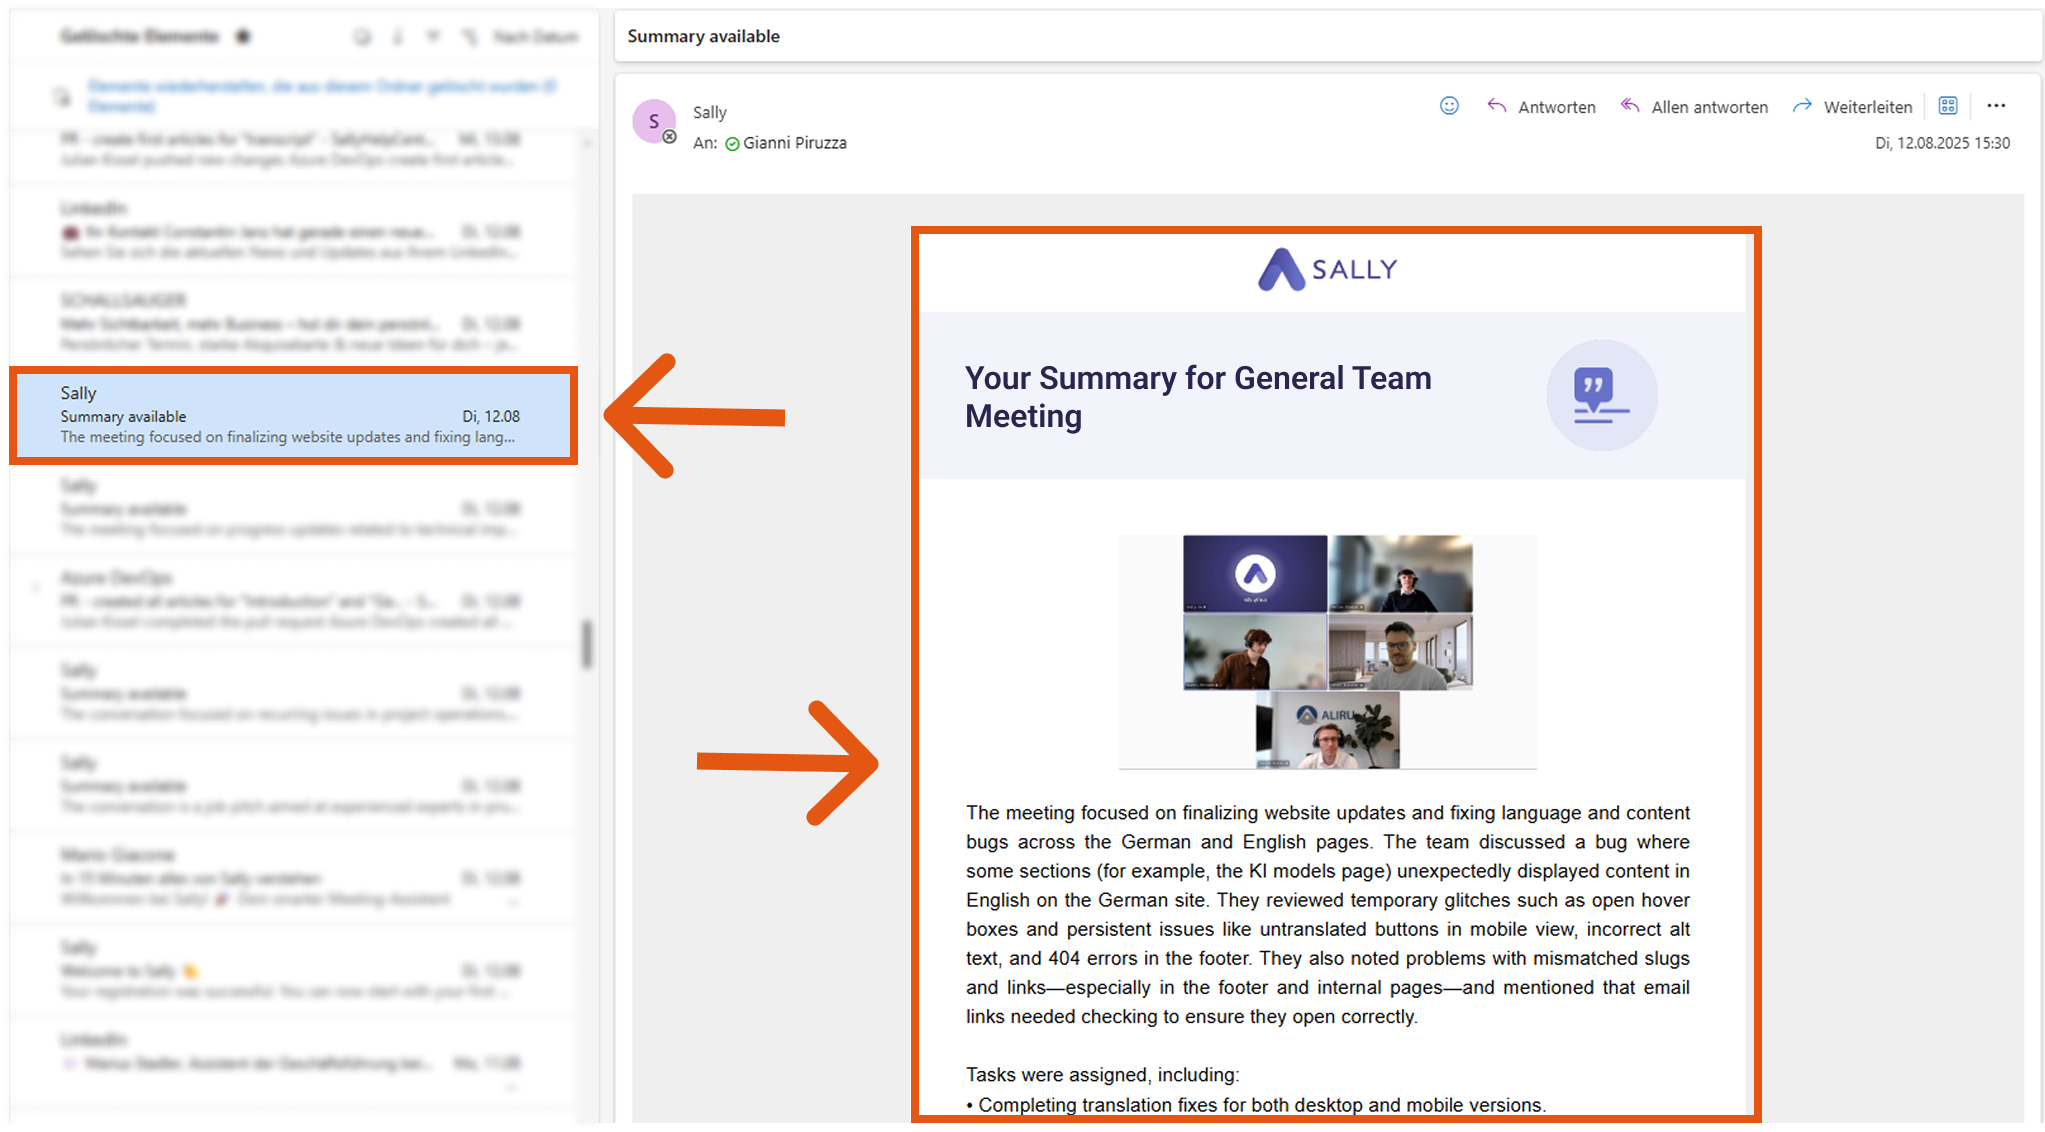
The summary email contains the following sections:

  • General meeting summary
  • Key points
  • Tasks
  • Next steps
  • Decisions

The automated email makes it easy for you to:

  • quickly forward the summary to colleagues or clients.
  • keep a written record of important discussions without extra effort.
  • follow up on tasks and next steps right from your inbox.
  • stay organized, even if you don’t have time to log in to the platform.

With just one email in your inbox, you always have the key meeting outcomes at hand.


2. How to adjust automation settings

You can decide how automated summary emails should be sent and in which language. These settings can be customized individually or locked as default for the entire organization.

2.1. How to find the automation setting

  1. Go to Settings in the left sidebar.
Sally interface with Settings highlighted

Figure 2: Go to Settings

  1. Under Configuration, select Meeting Assistant and scroll down to the Automations section.
Meeting Assistant Automations view

Figure 3: Open Automations

Here you will find all the settings for the automated summarization, which we will present to you here step by step.

2.2. Configure the automation options

You have three areas of control: Automatic email summary, Language settings for Summary, and Standard meeting type for new records. Each option below includes when to use it and recommended practices.

2.2.1. Automatic email summary

Decide who receives the summary email after a meeting:

Automatic email summary options

Figure 4: Automatic email summary settings

  • Send only to me
    Useful for private notes (e.g., 1:1s, interviews, early-stage sales calls) or when you want to review before sharing.
    Best practice: Use this for sensitive meetings, then forward the email selectively if needed.

  • Send to all participants
    Maximizes transparency and speed. Everyone leaves with the same facts and action items. Ideal for project stand-ups, cross-functional reviews, customer onboarding.
    Best practice: Add a line to your meeting invites like “Sally will share a short summary after the call” to set expectations.

  • Send only to users from this organization
    Keeps internal context (decisions, next steps) inside your company while excluding guests. Good for partner calls, agency/client meetings, or NDAs.
    Best practice: Pair this with a sanitized summary you share manually with externals.

    info

    To determine who belongs to your organization, you must create a whitelist.

  • Do not send
    No emails are sent. The summary remains available inside Sally for anyone with access.
    Best practice: Use this where email is restricted (e.g., regulated teams) or when you want to reduce inbox noise.

Privacy tip

Before enabling "Send to all participants", make sure attendees are informed that an AI-generated summary will be shared. For confidential topics, prefer Send only to me or Only to users from this organization.

2.2.2. Language settings for Summary

Choose the language of the email summary:

Language settings for summaries

Figure 5: Language settings

  • In my language (personal UI language)
    The summary is generated in your personal language preference. Great when you regularly meet in other languages but want to read in your own.
    Best practice: Recommended default for most users who consume summaries individually.

  • In the language of the meeting
    The summary follows the meeting’s spoken language. Perfect for international calls where participants expect one shared language (e.g., the call was in German → summary in German for everyone).
    Best practice: Use for cross-border teams to avoid mixed-language threads.

  • In another language
    Explicitly select a language (e.g., generate English even if the meeting was in French). Helpful for reporting to stakeholders who need a specific language. When this feature is enabled, a dropdown menu opens for selecting the language.
    Best practice: Create a consistent “reporting language” for executives or customers.

Helpful to know

My language” refers to the user’s personal language in their account settings. If an admin locks a language choice, that rule applies to all users in the org.

2.2.3. Standard meeting type for new records

Pick the default meeting type for newly created records:

Standard meeting type options

Figure 6: Default meeting type

  • Unset
    No default is enforced. Ideal when your meetings vary (sales, support, 1:1s) and you prefer to set the type per meeting.

  • Individual
    Optimizes for 1:1 conversations (e.g., manager–employee, coaching, interviews).
    Best practice: Teams with many 1:1s (People Ops, Managers, Coaches) should set Individual as default to keep records consistent.

Important

For each block above you can toggle Set this setting as the default and lock it. Use this for compliance or to standardize behavior across teams. Avoid locking when different departments need flexibility.