How Do You Connect Sally AI with Power Automate?
By connecting Sally with Power Automate, you can automatically trigger flows whenever Sally events occur - for example, when a meeting summary is created. This allows you to continue automation in Microsoft 365 without manual steps.
If you're new to webhooks, we recommend reading our full Webhook Guide, which explains in detail what they are and how they work.
Quick Navigation
1. How Do You Create a Webhook in Sally?
To send events from Sally to Power Automate, you first need to create a webhook in Sally.
Follow these steps:
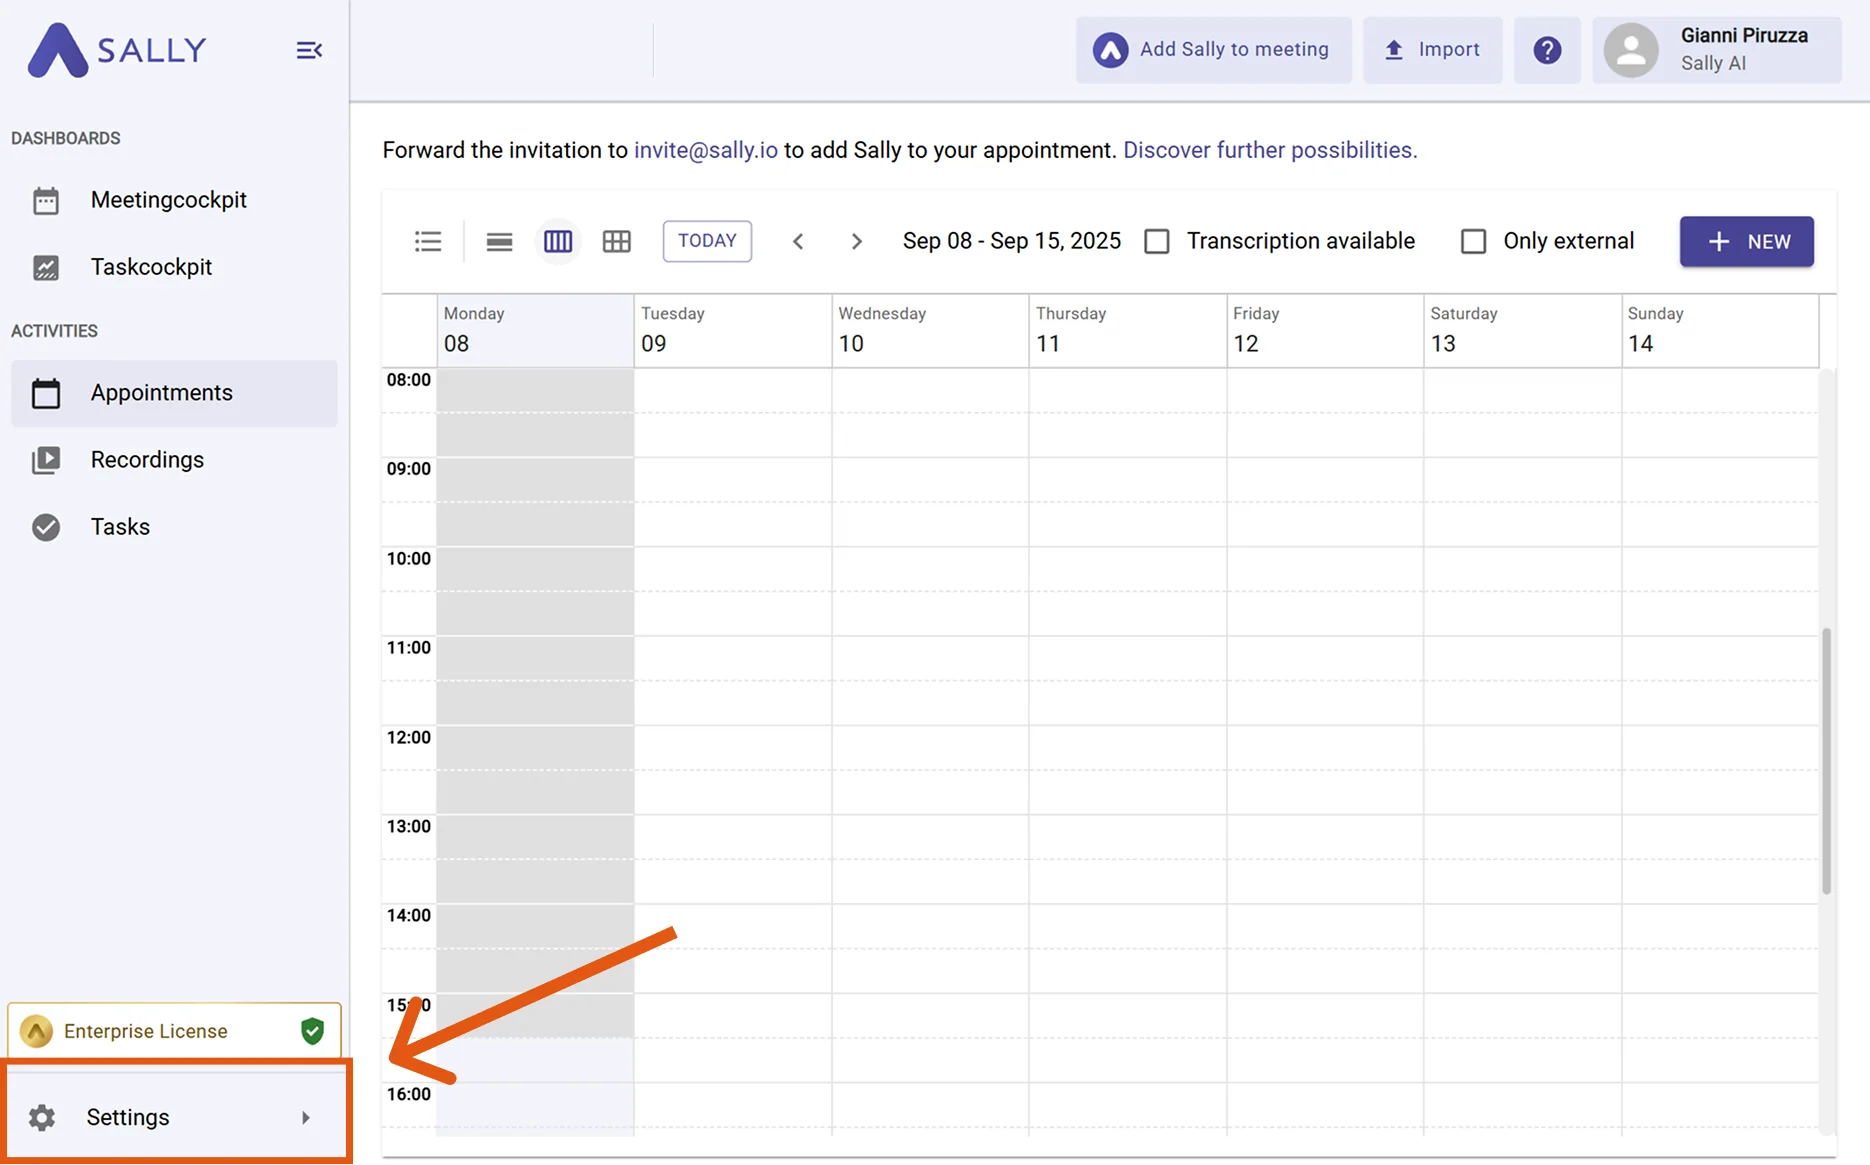
- In Sally, open Settings in the left sidebar.
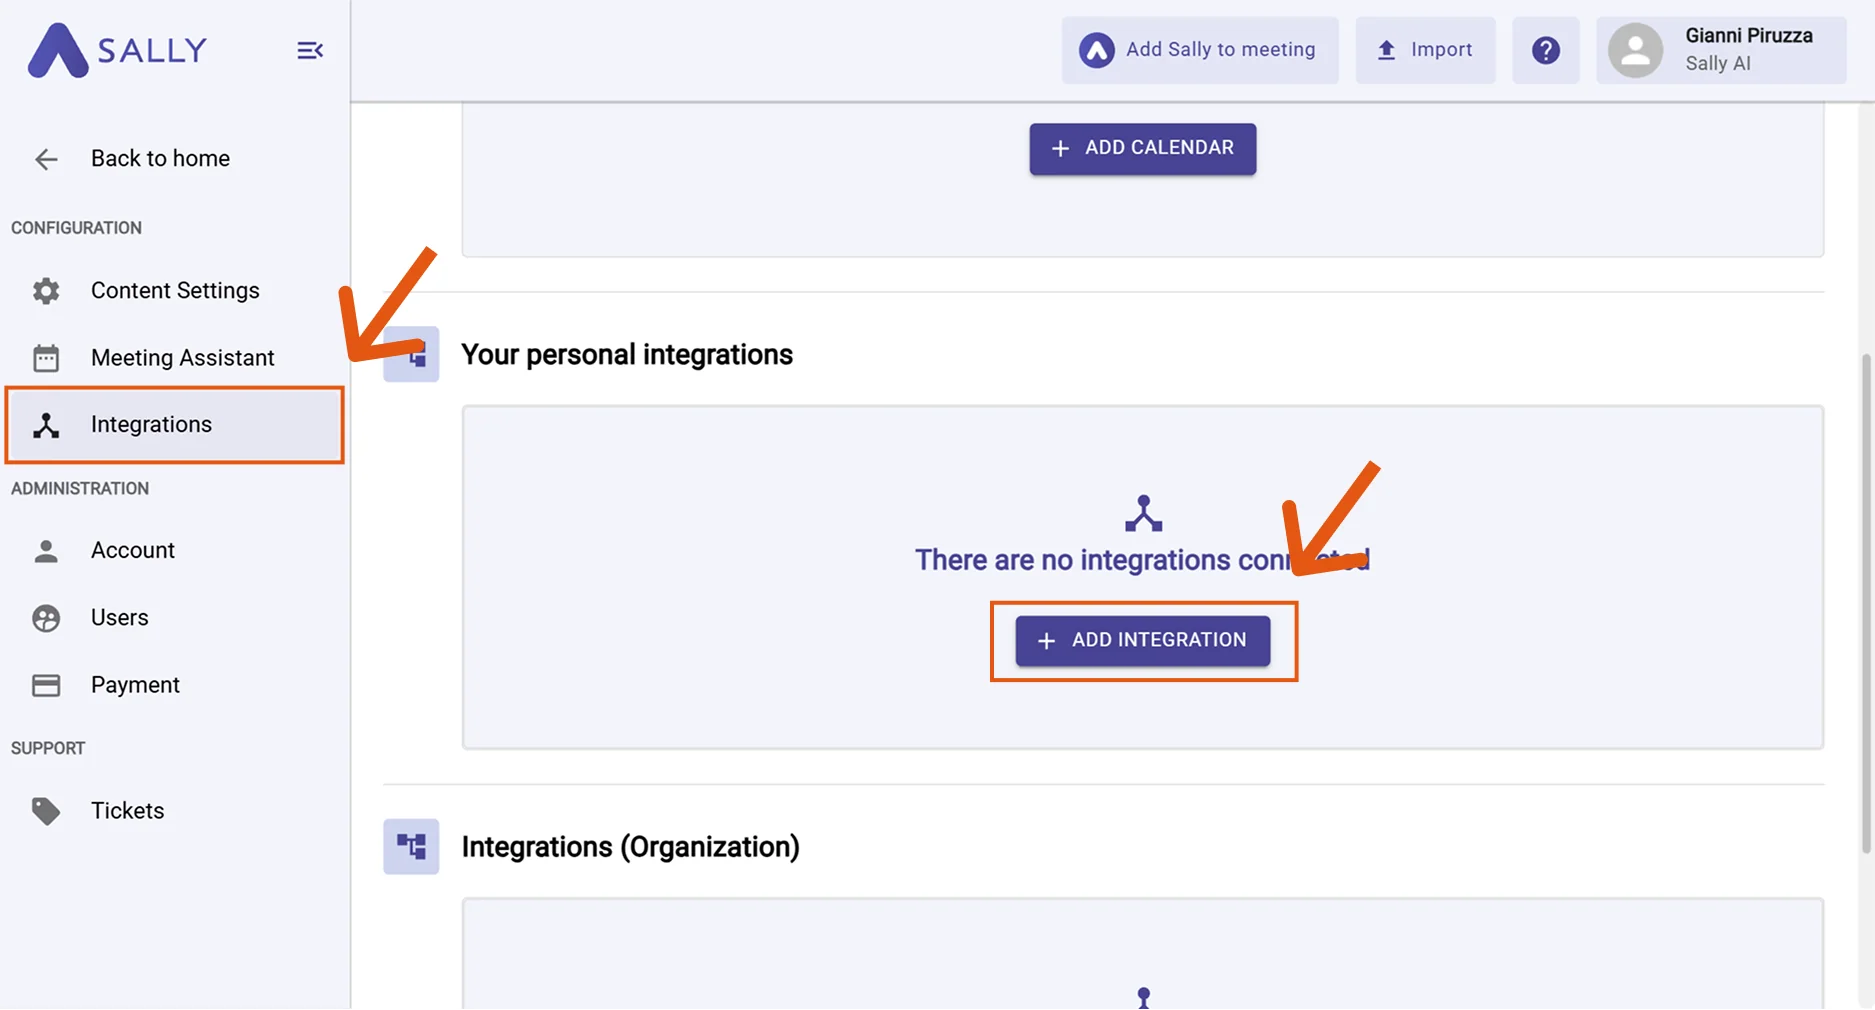
- Navigate to Integrations and click “+ Add integration”.
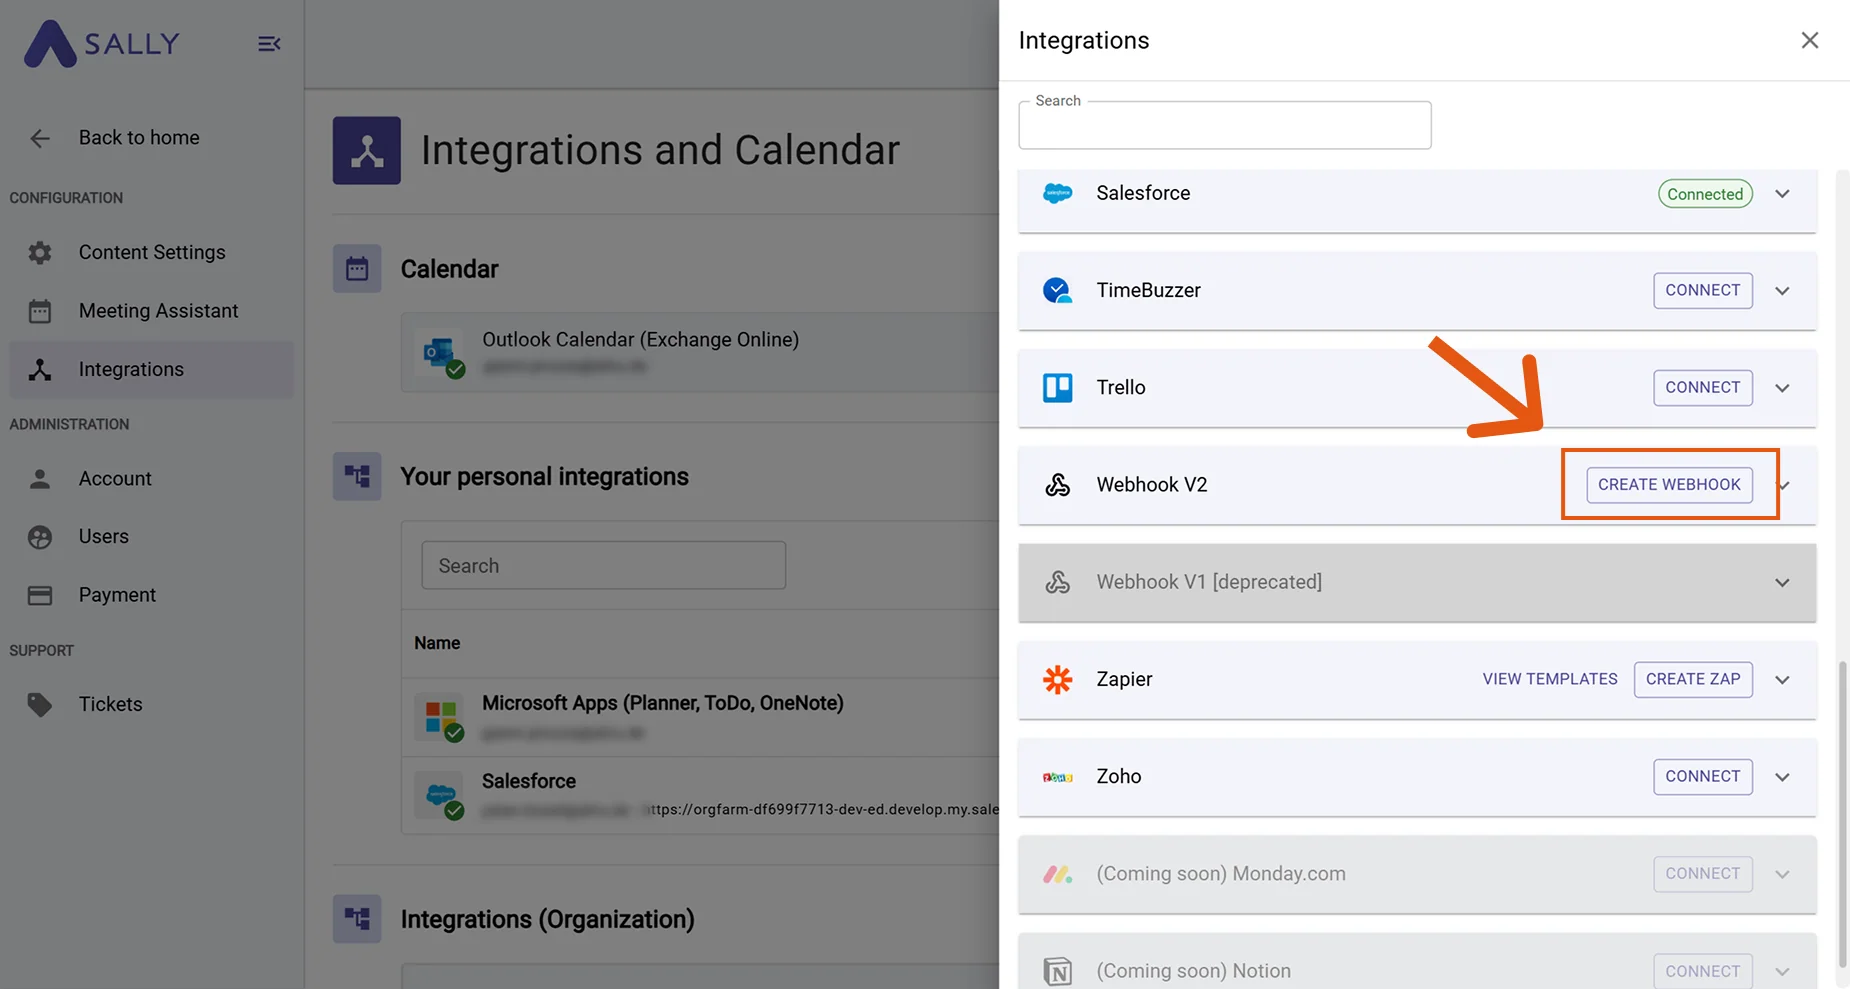
- In the list of integrations, select Webhook and click “Create webhook”.
- Fill out the webhook form.
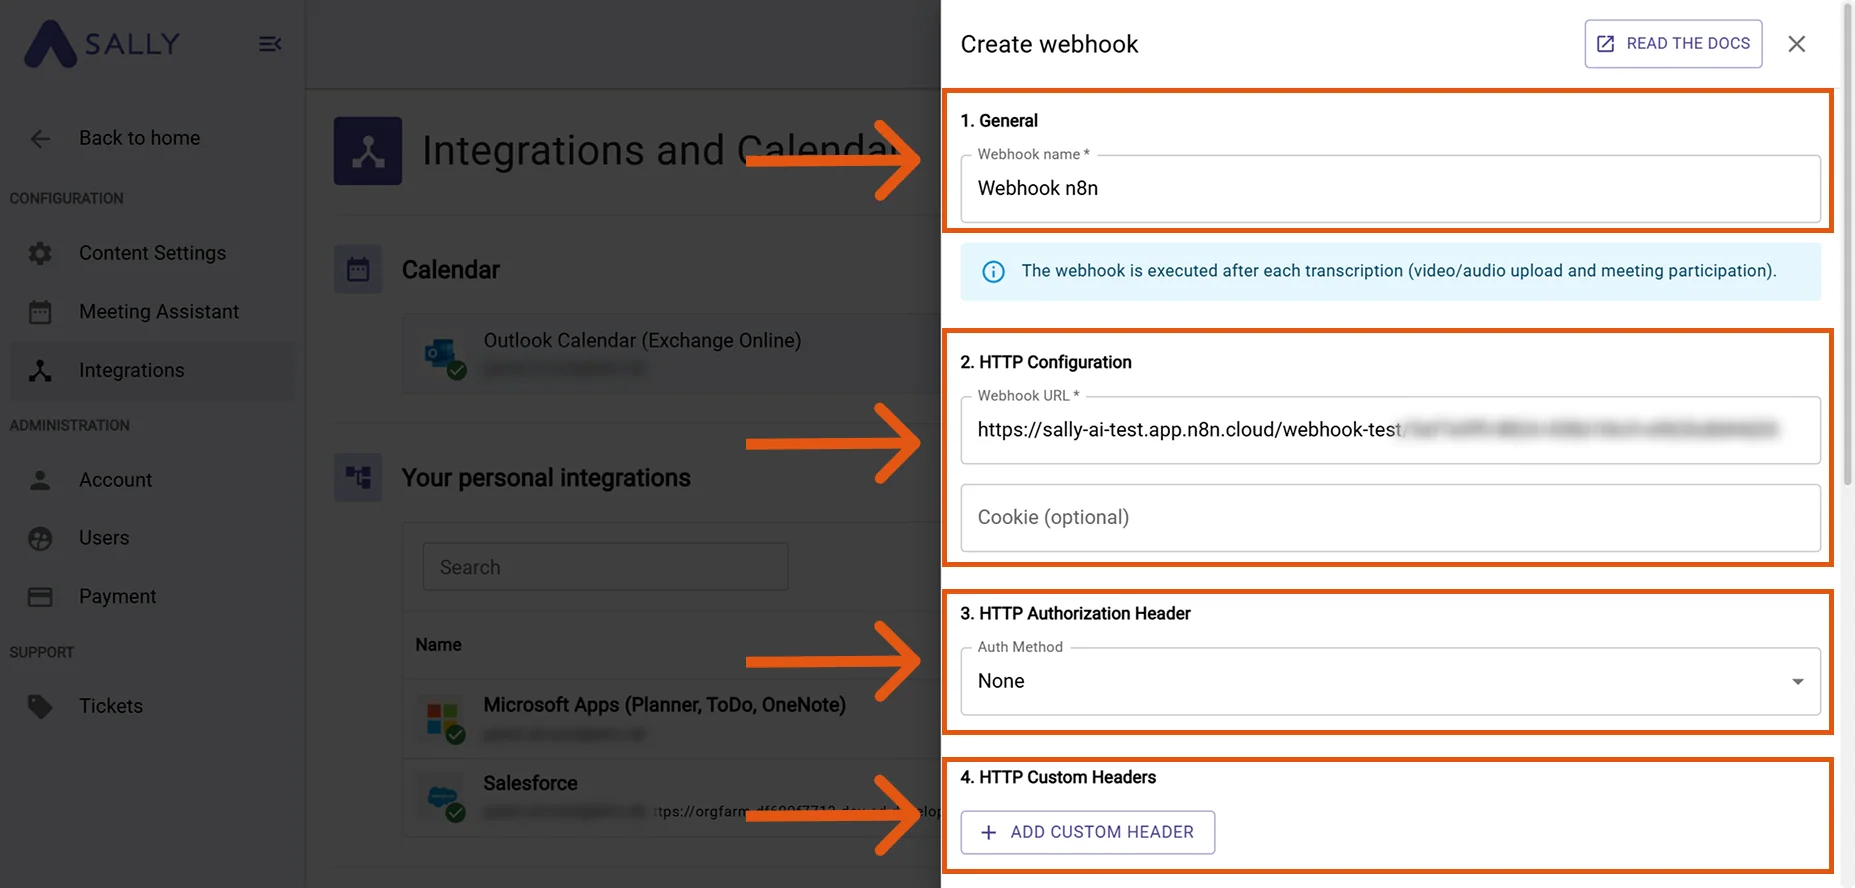
The table below shows all available settings in the webhook form — including an explanation of what each field is for and when you need it.
| Field | Description |
|---|---|
| Webhook name | A freely selectable display name for the integration. Helps you quickly identify the webhook later (e.g., “Webhook n8n – Leads”, “Zapier – Tasks”). |
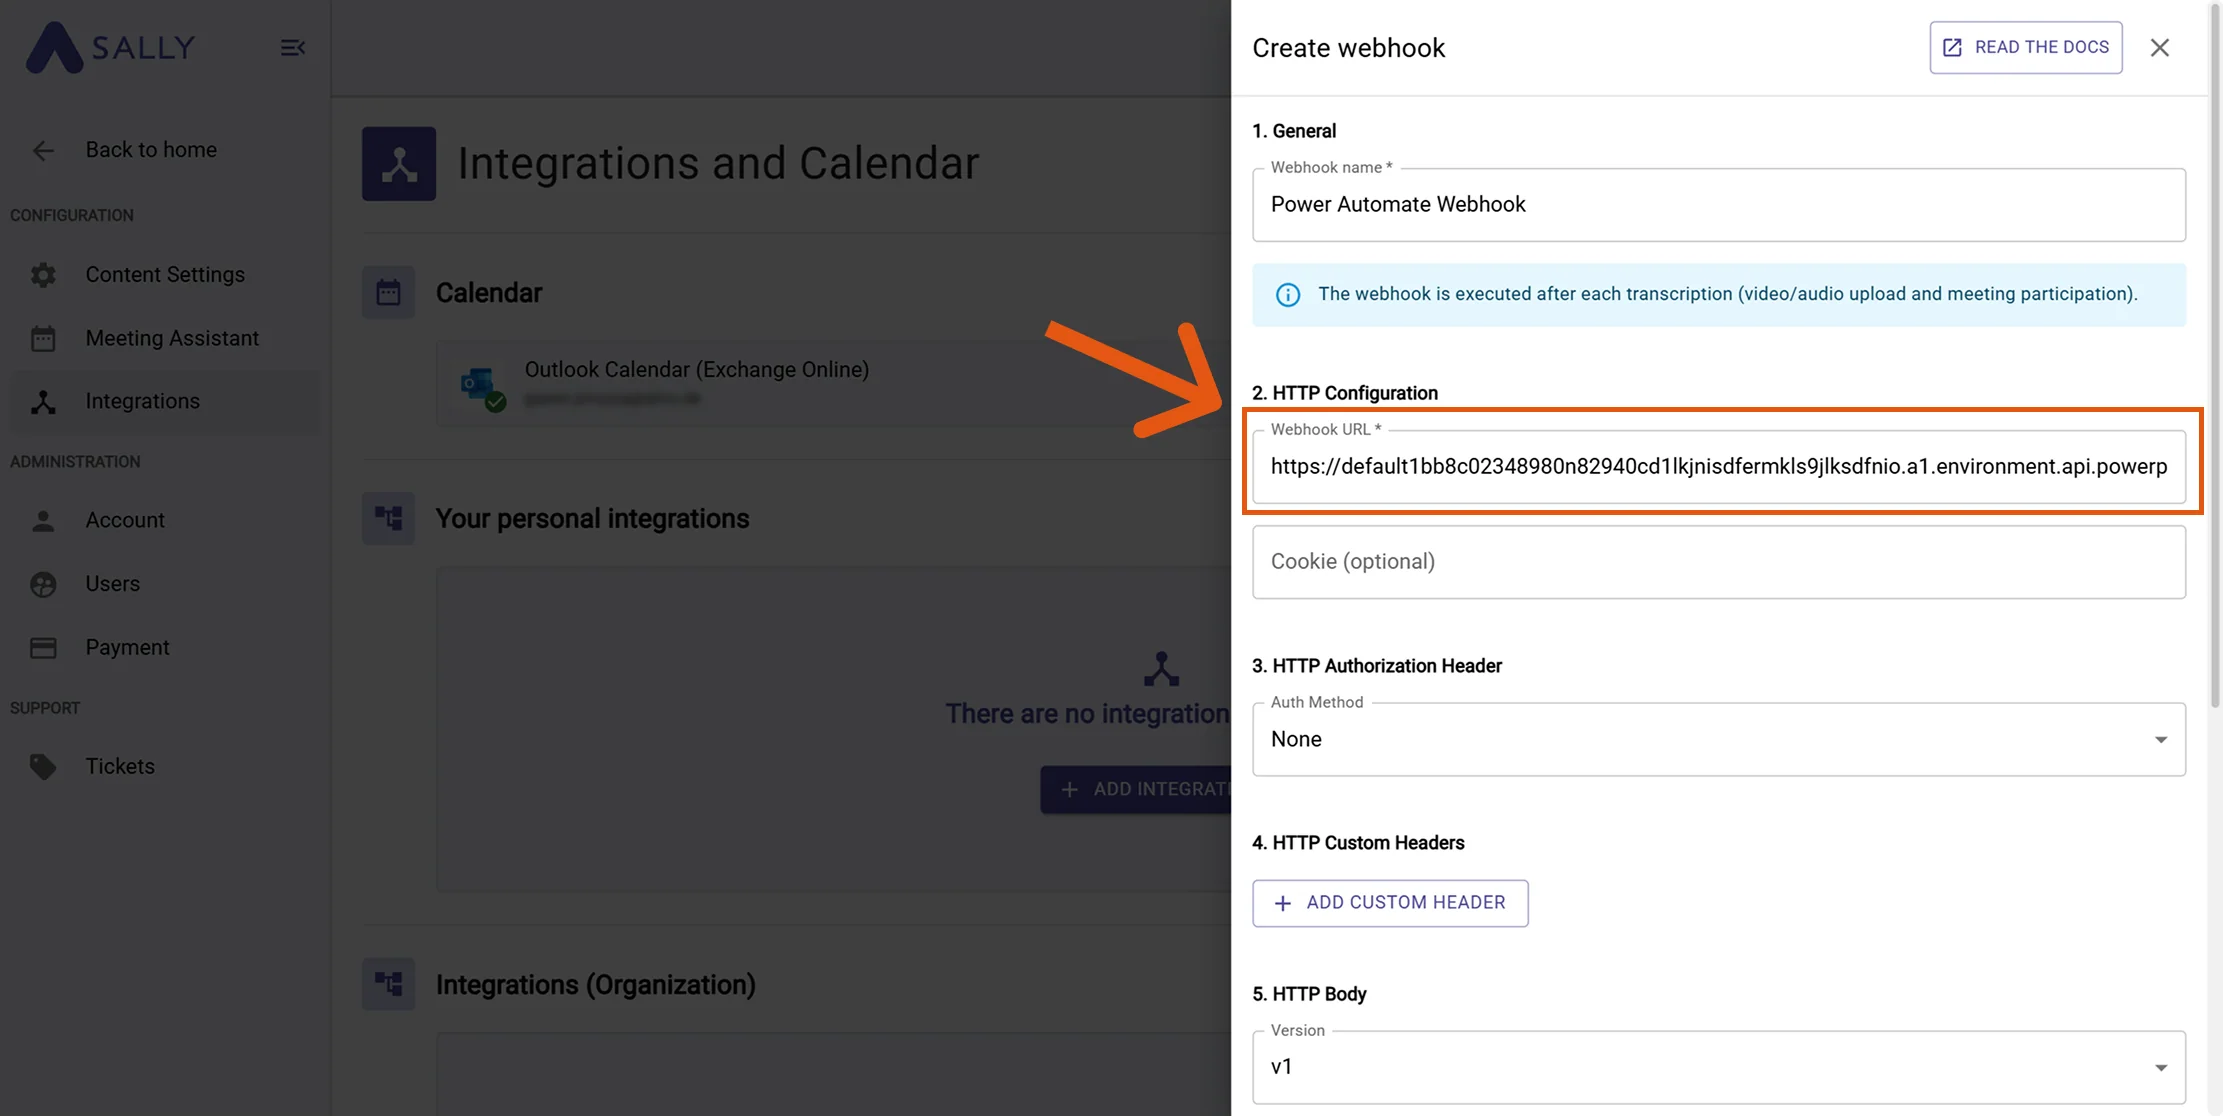
| Webhook URL | The endpoint URL provided by the target system where Sally sends the webhook data. Without this URL, the webhook cannot be triggered. |
| Cookie (optional) | Optional field for systems that use session cookies instead of API tokens. Modern tools like Zapier, Make, or n8n do not require a cookie. Only used for certain internal or legacy systems. |
| Authentication method | Defines how Sally authenticates with the target system. Possible options: • None – No Authorization header is sent; ideal for open listeners or test endpoints. • Basic Auth – Sally sends username + password via Basic Auth; common for internal APIs. • Raw – You manually enter the full Authorization header (e.g., Bearer xyz123, ApiKey abc123). • Client certificate (PFX + password) – Enables mTLS authentication; only needed if the target system explicitly requires a client certificate. |
| Custom headers | Allows adding any additional headers, such as x-api-key, x-tenant-id, or signature keys. Used to secure requests or steer workflows. |
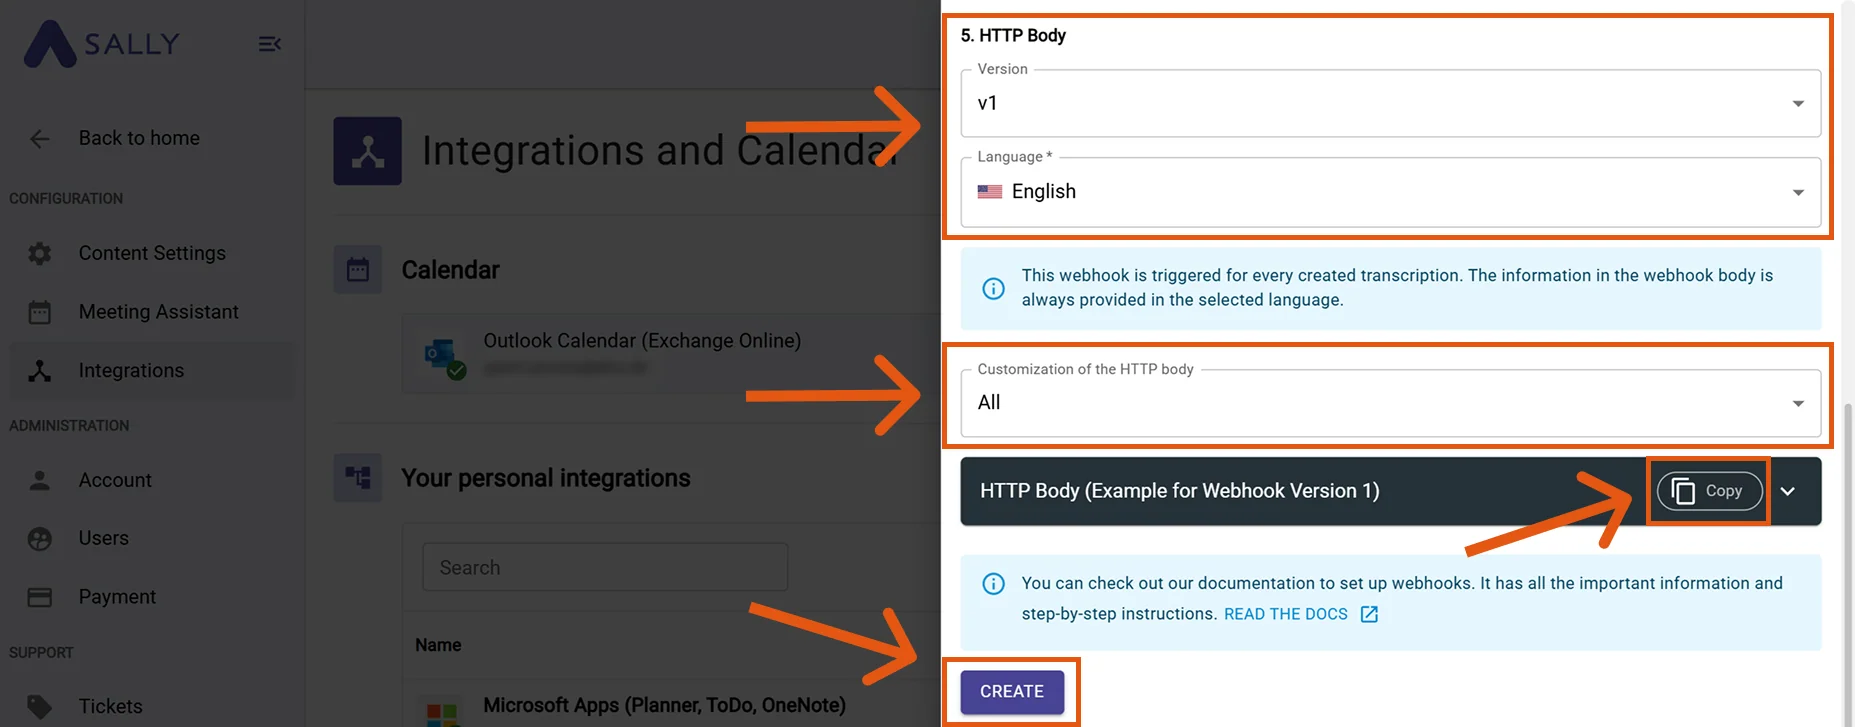
| HTTP body version | Defines the structure of the JSON body. Recommendation: always select the latest version to receive the most complete and up-to-date data. |
| Language | Defines the language in which the content is generated. Sally uses BCP-47 based on ISO 639-1. For example, de-DE or en-US will be sent. |
| Customize HTTP body | Controls which content Sally includes in the webhook body. Each category can be individually enabled or disabled. Available elements: • Tasks – All detected tasks, including assignees and due dates. • Custom insights – Results of your custom insights (e.g., checklists or custom fields). • Objections – Identified objections from the conversation. • Decisions – All decisions made during the meeting. • Key points – Important key themes or main statements from the meeting. • Meeting-type-specific elements – Content generated based on the selected meeting type (e.g., question catalog). • Transcription – Full transcript sections including speakers, timestamps, and emphasis markers. • Summary – The generated main summary plus HTML variants. By enabling or disabling these elements, you can precisely control how detailed the webhook body should be. |
At the end of the form, Sally provides an example of the HTTP body (JSON). Copy this JSON directly — you will need it later when setting up the schema in Power Automate.

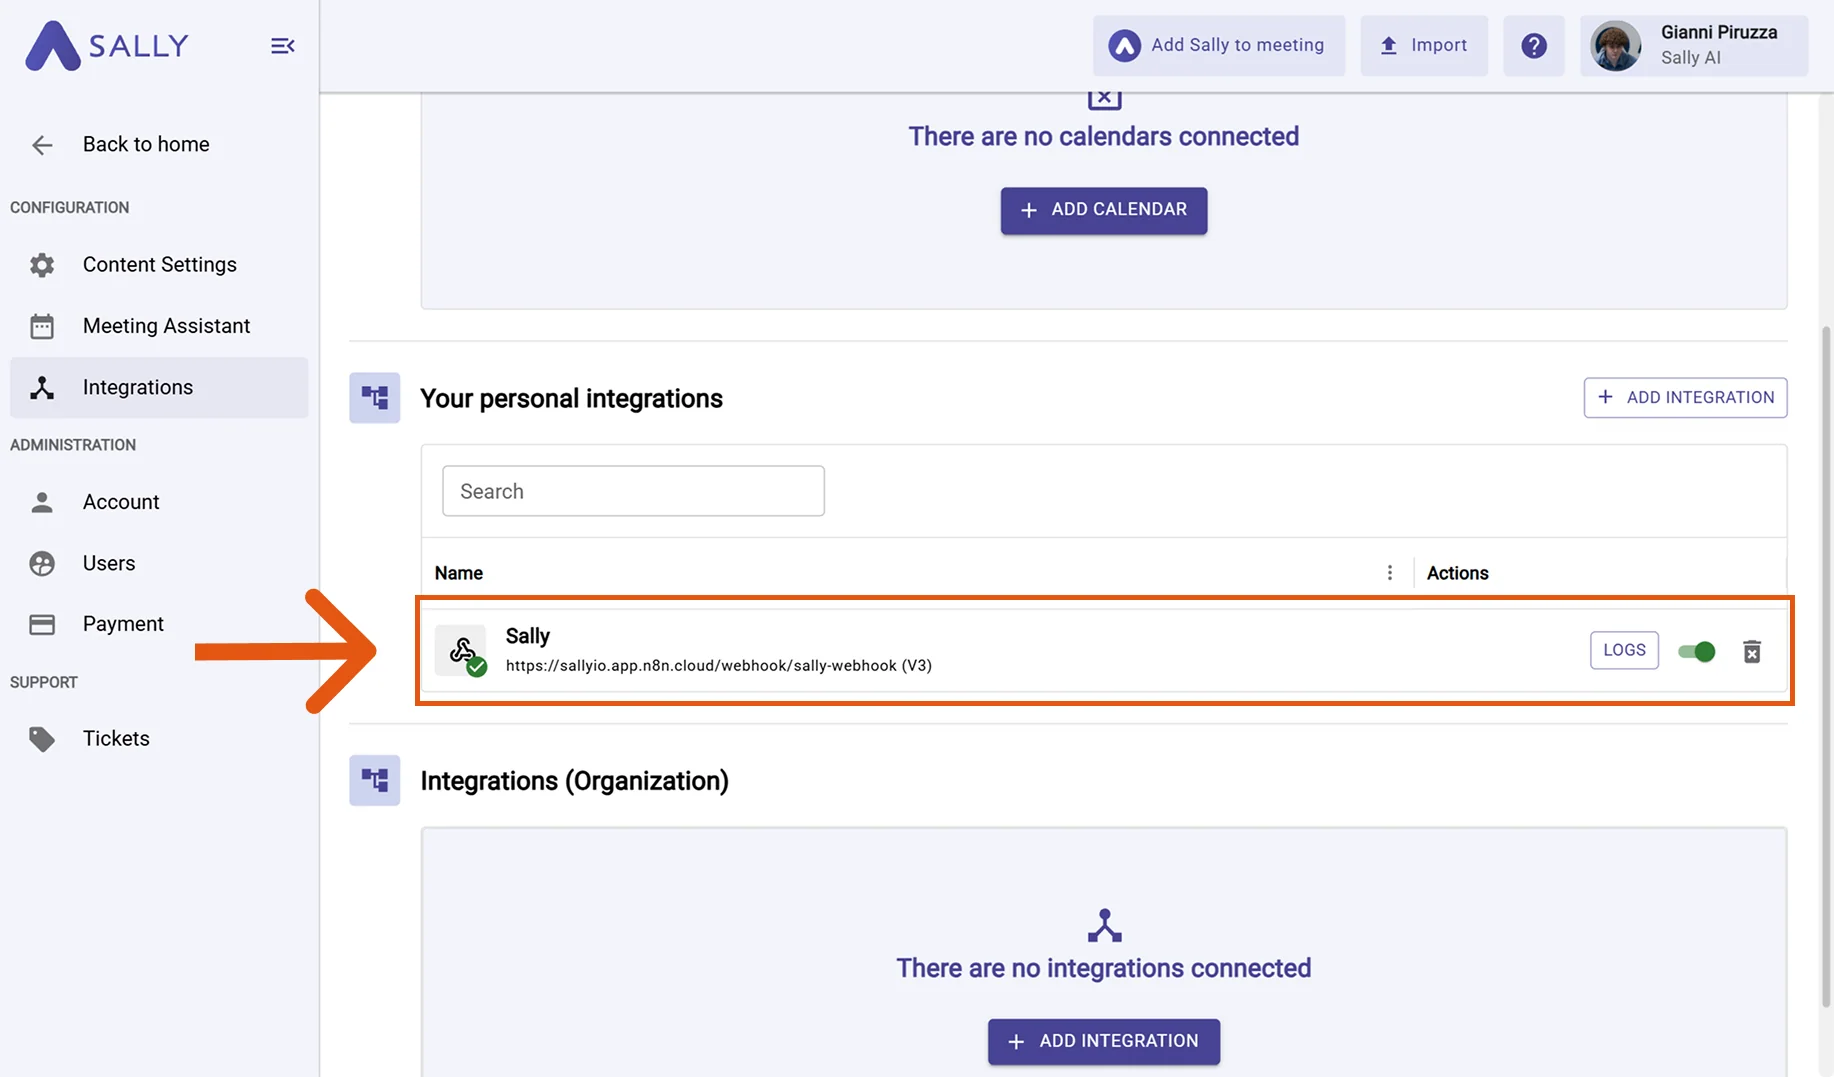
- Click Create. Your webhook will now appear under “Your personal integrations”.
✅ Sally is now ready to send events.
Next, we'll set up a flow in Power Automate to receive these webhook calls.
2. How Do You Set Up a Flow in Power Automate?
Now that Sally is ready to send data, let's create a flow in Power Automate that will listen to incoming webhooks and act on them.
Steps:
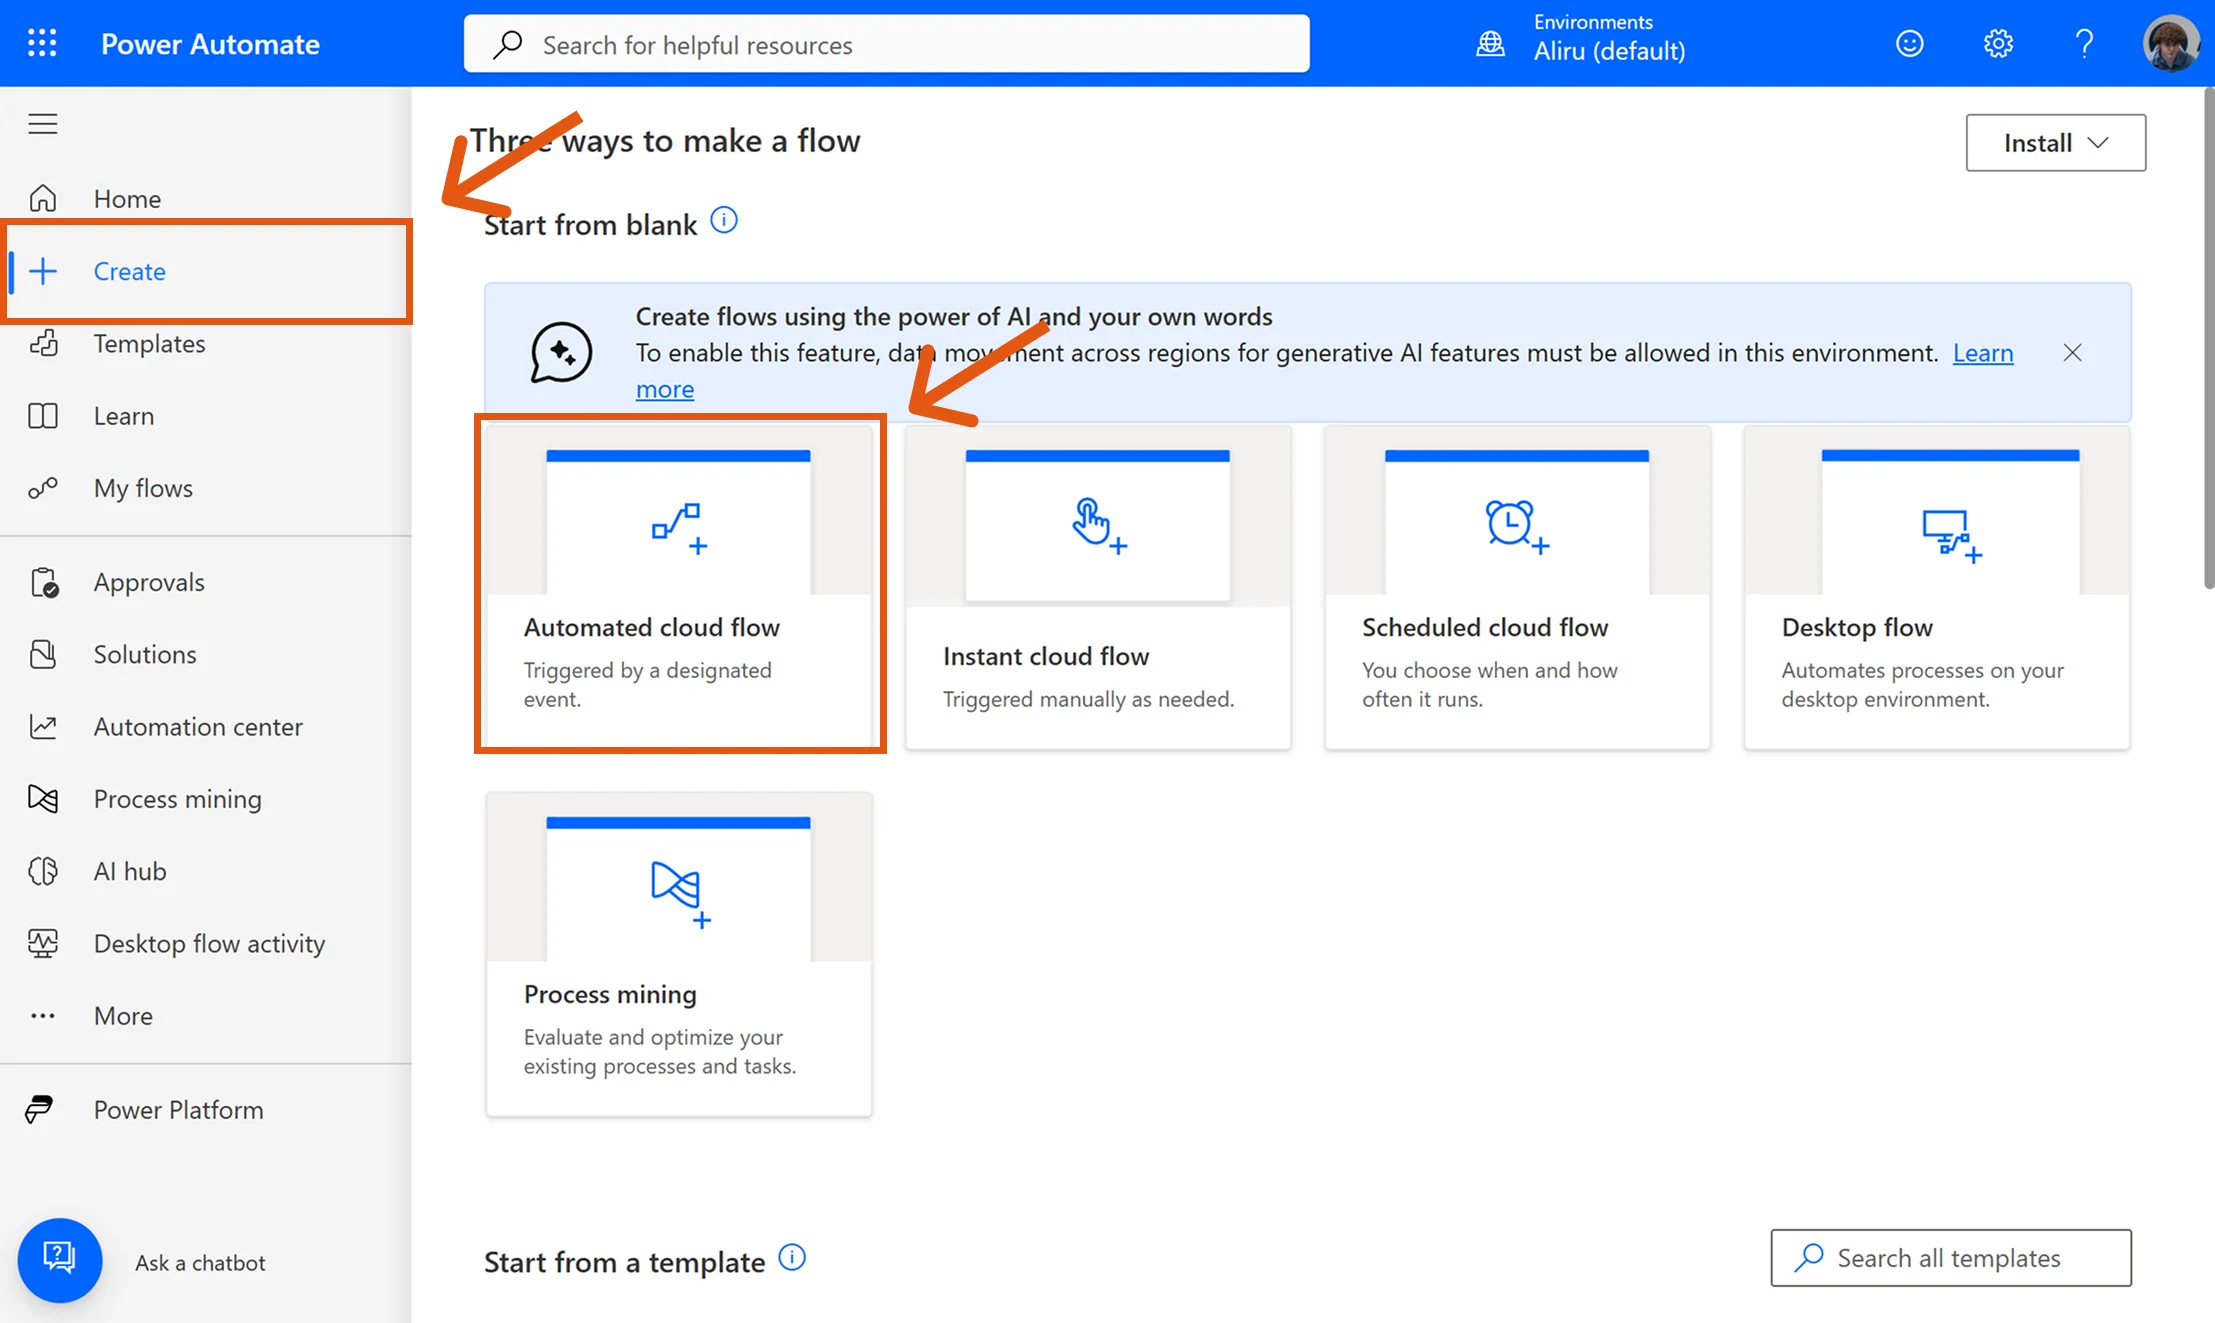
- In Power Automate, click Create and choose "Automated cloud flow".
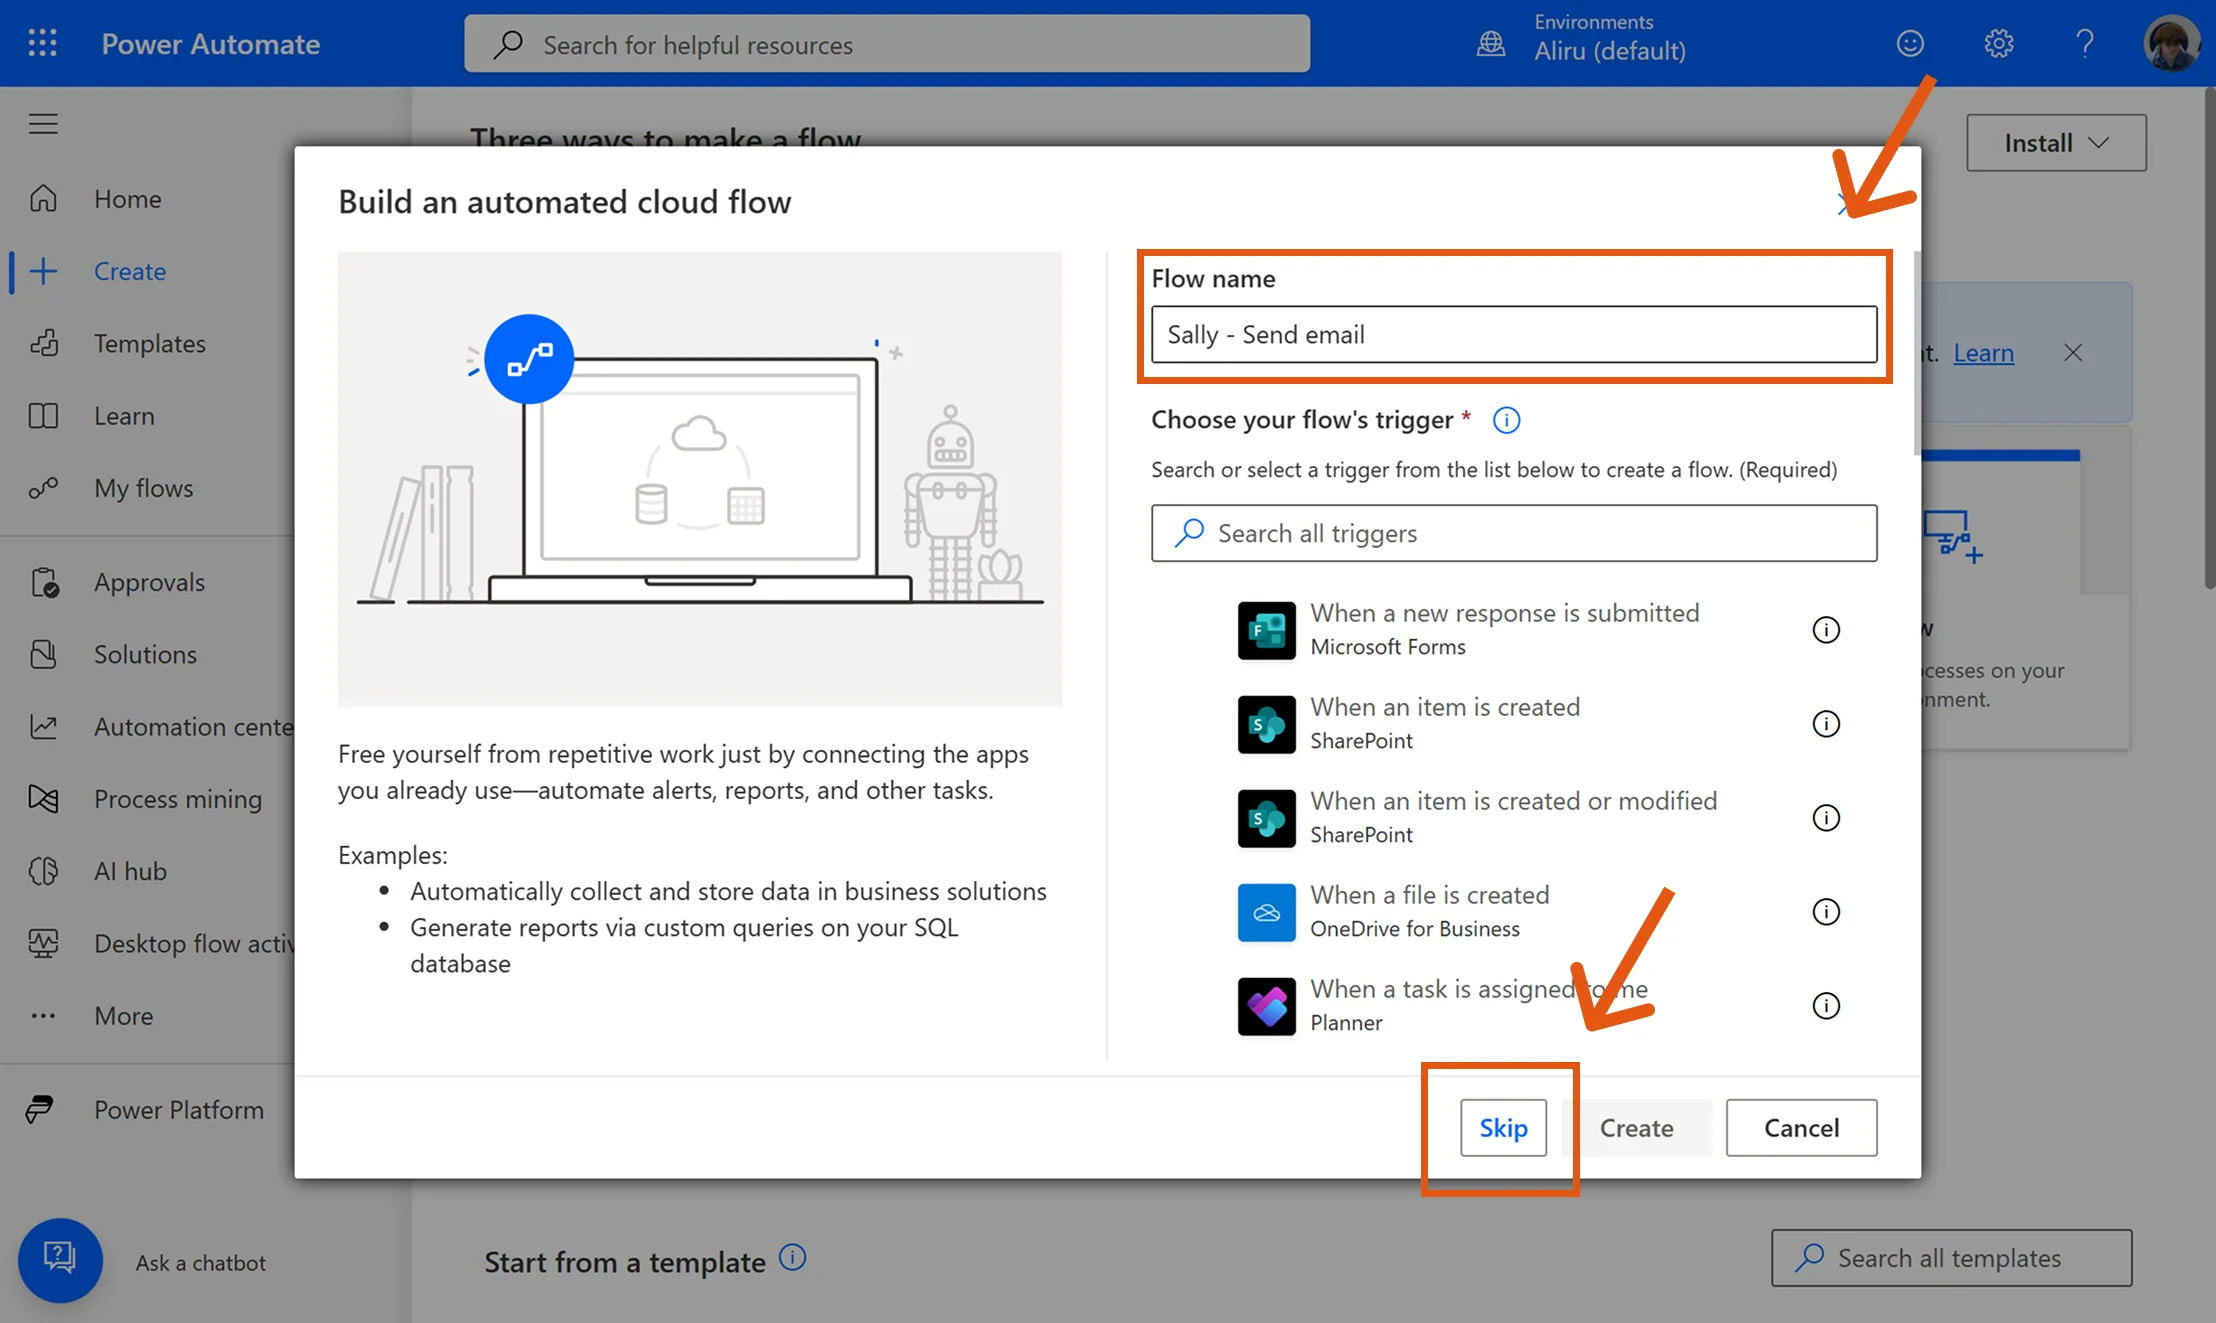
- Enter a descriptive Flow name (e.g., Sally – Send email). Then click Skip to manually select a trigger.
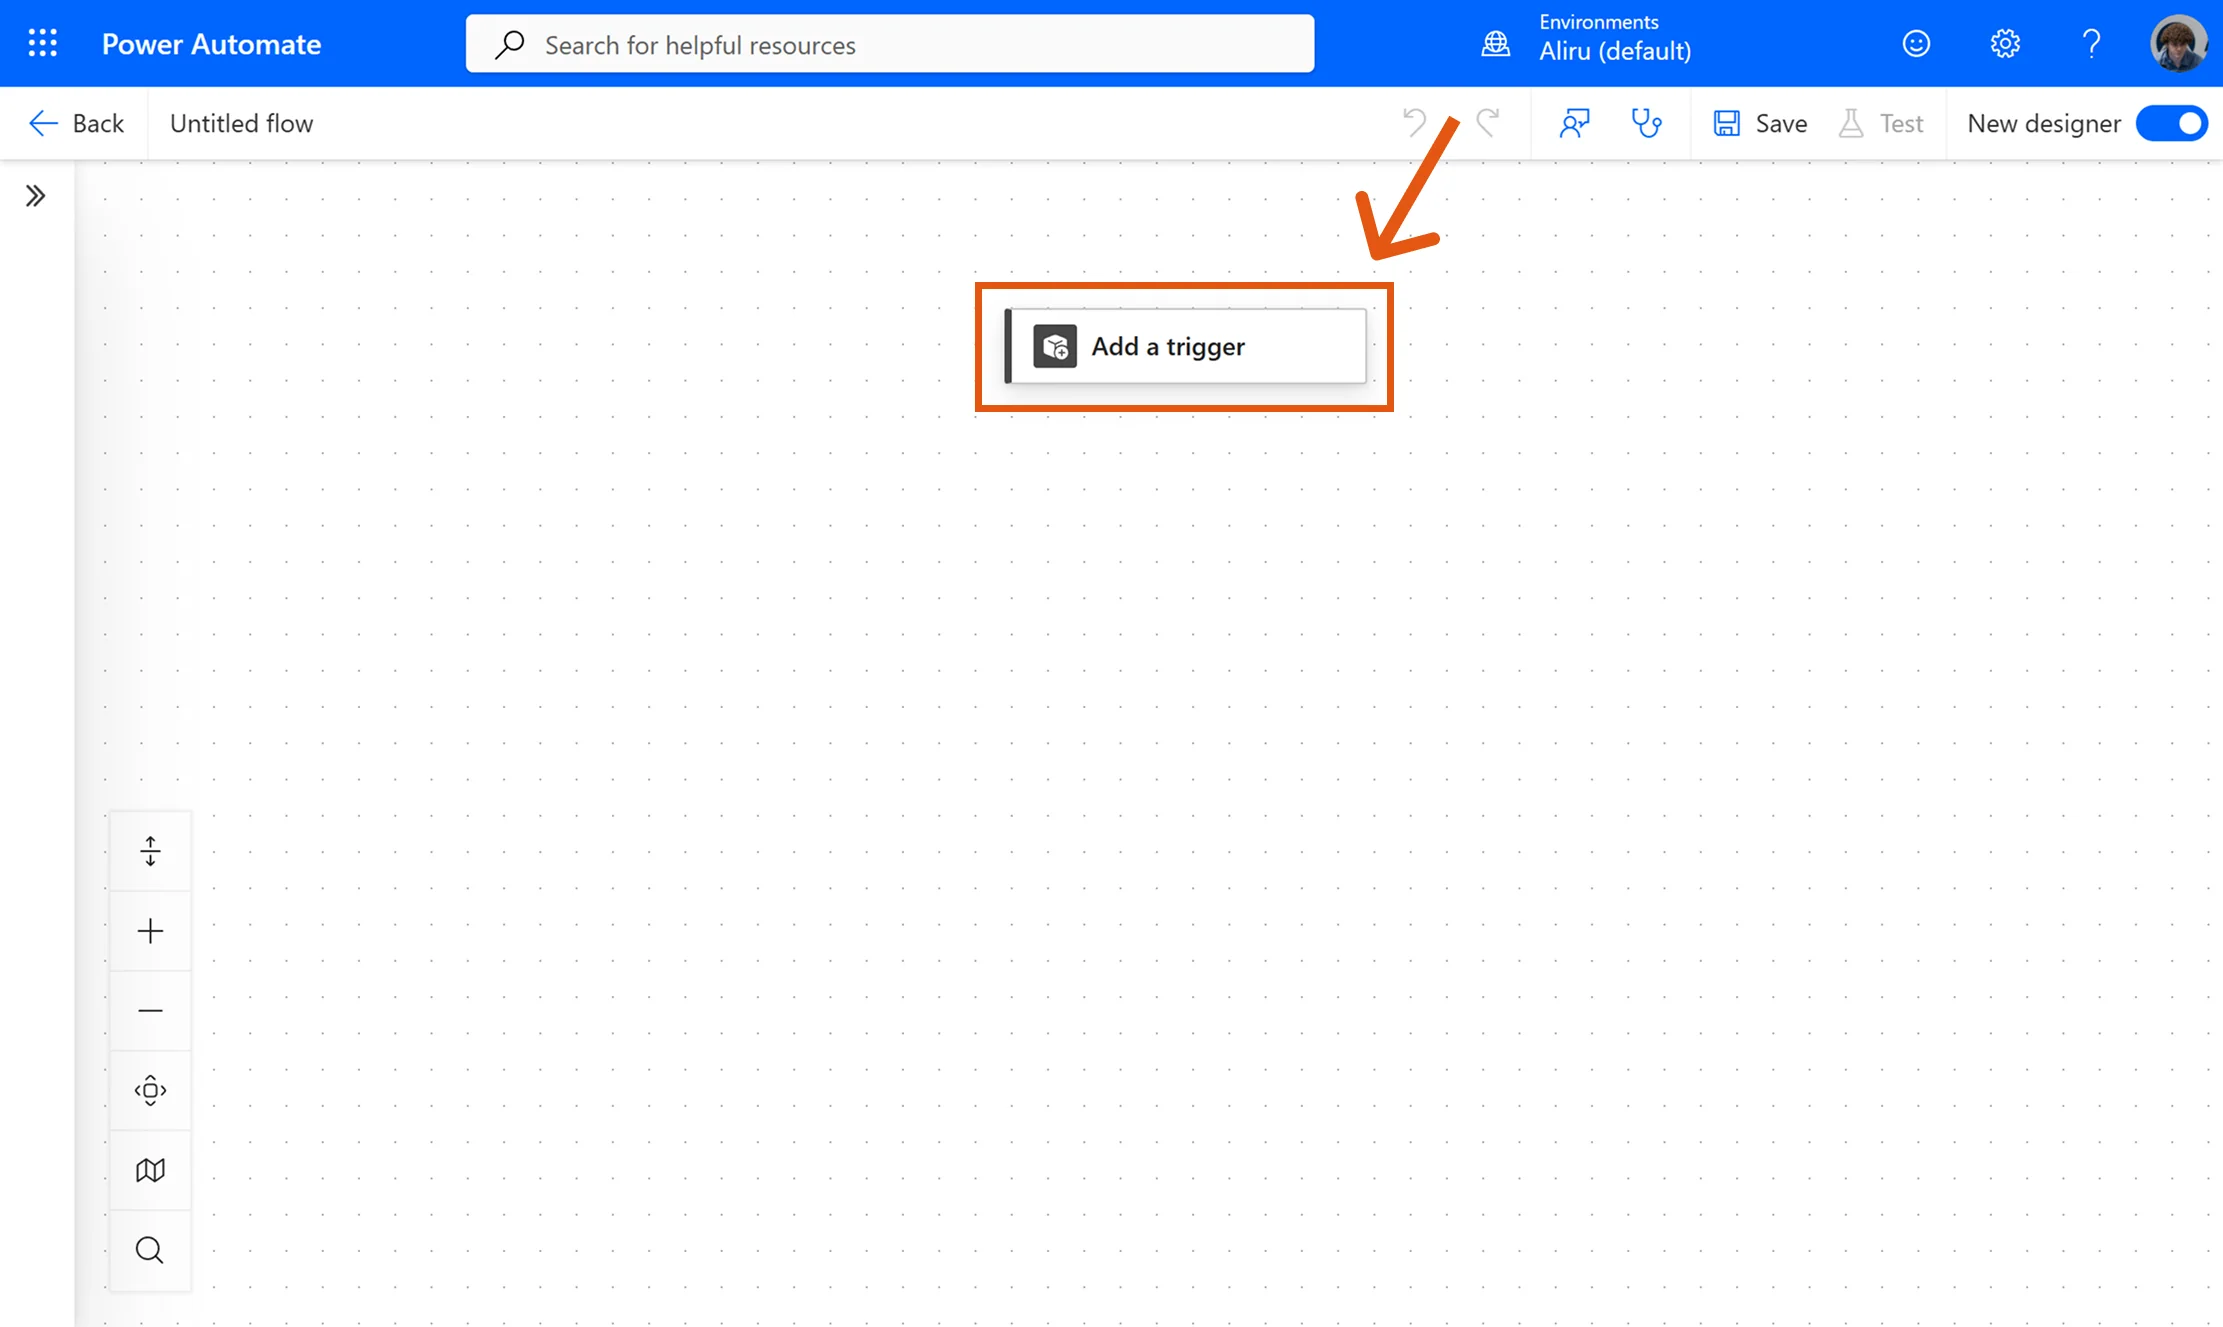
- In the new flow, click "Add a trigger".
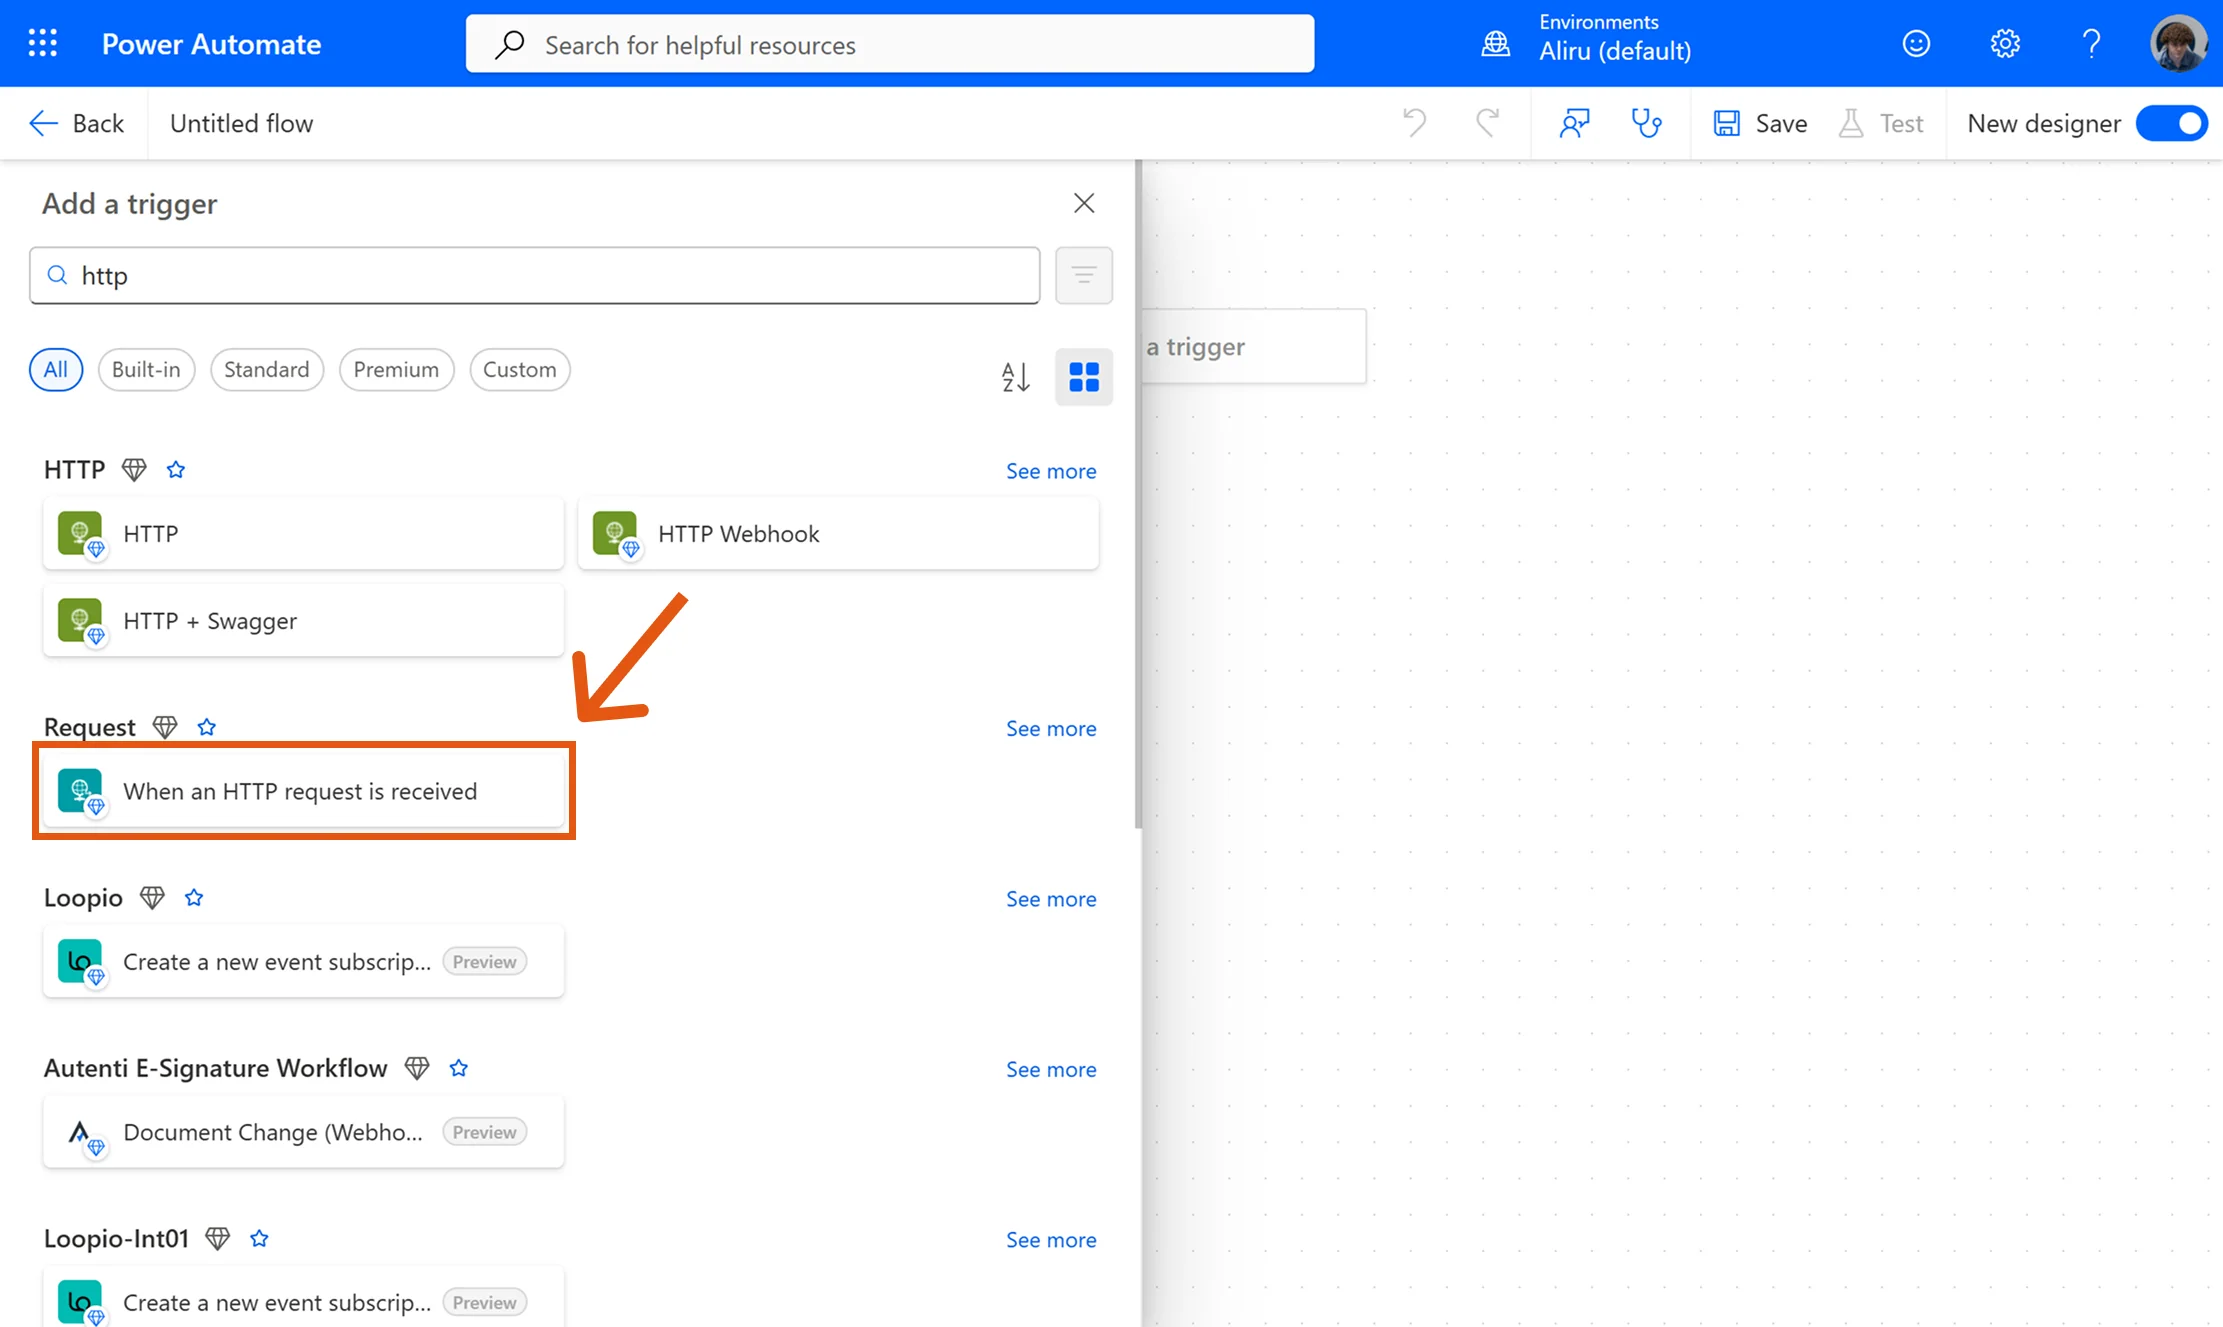
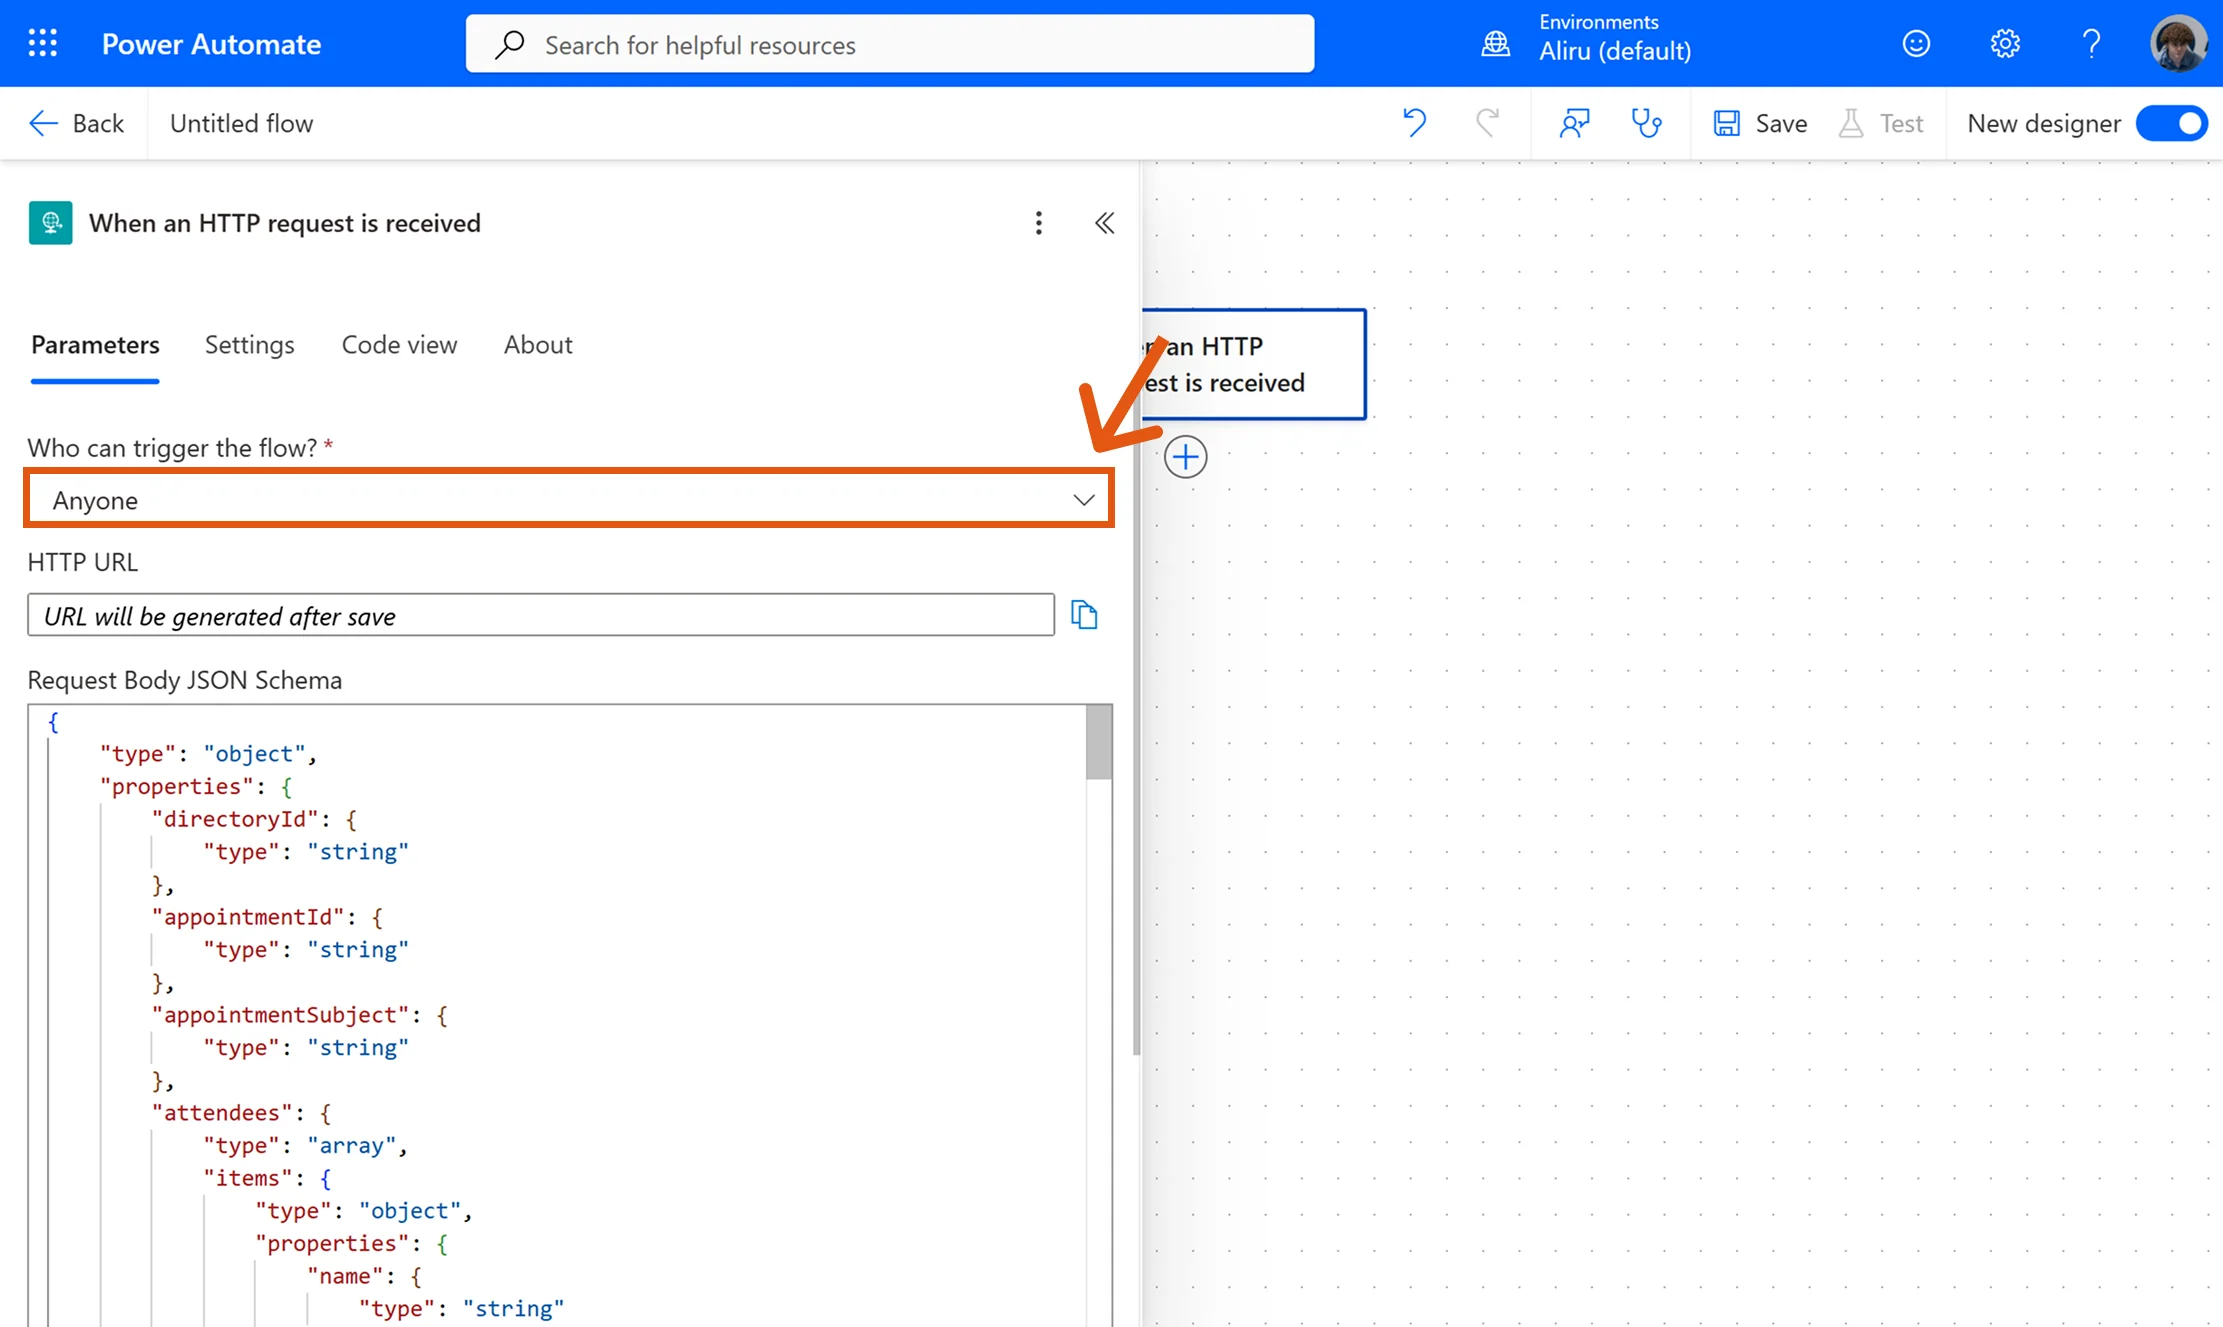
- Search for HTTP and select "When an HTTP request is received".
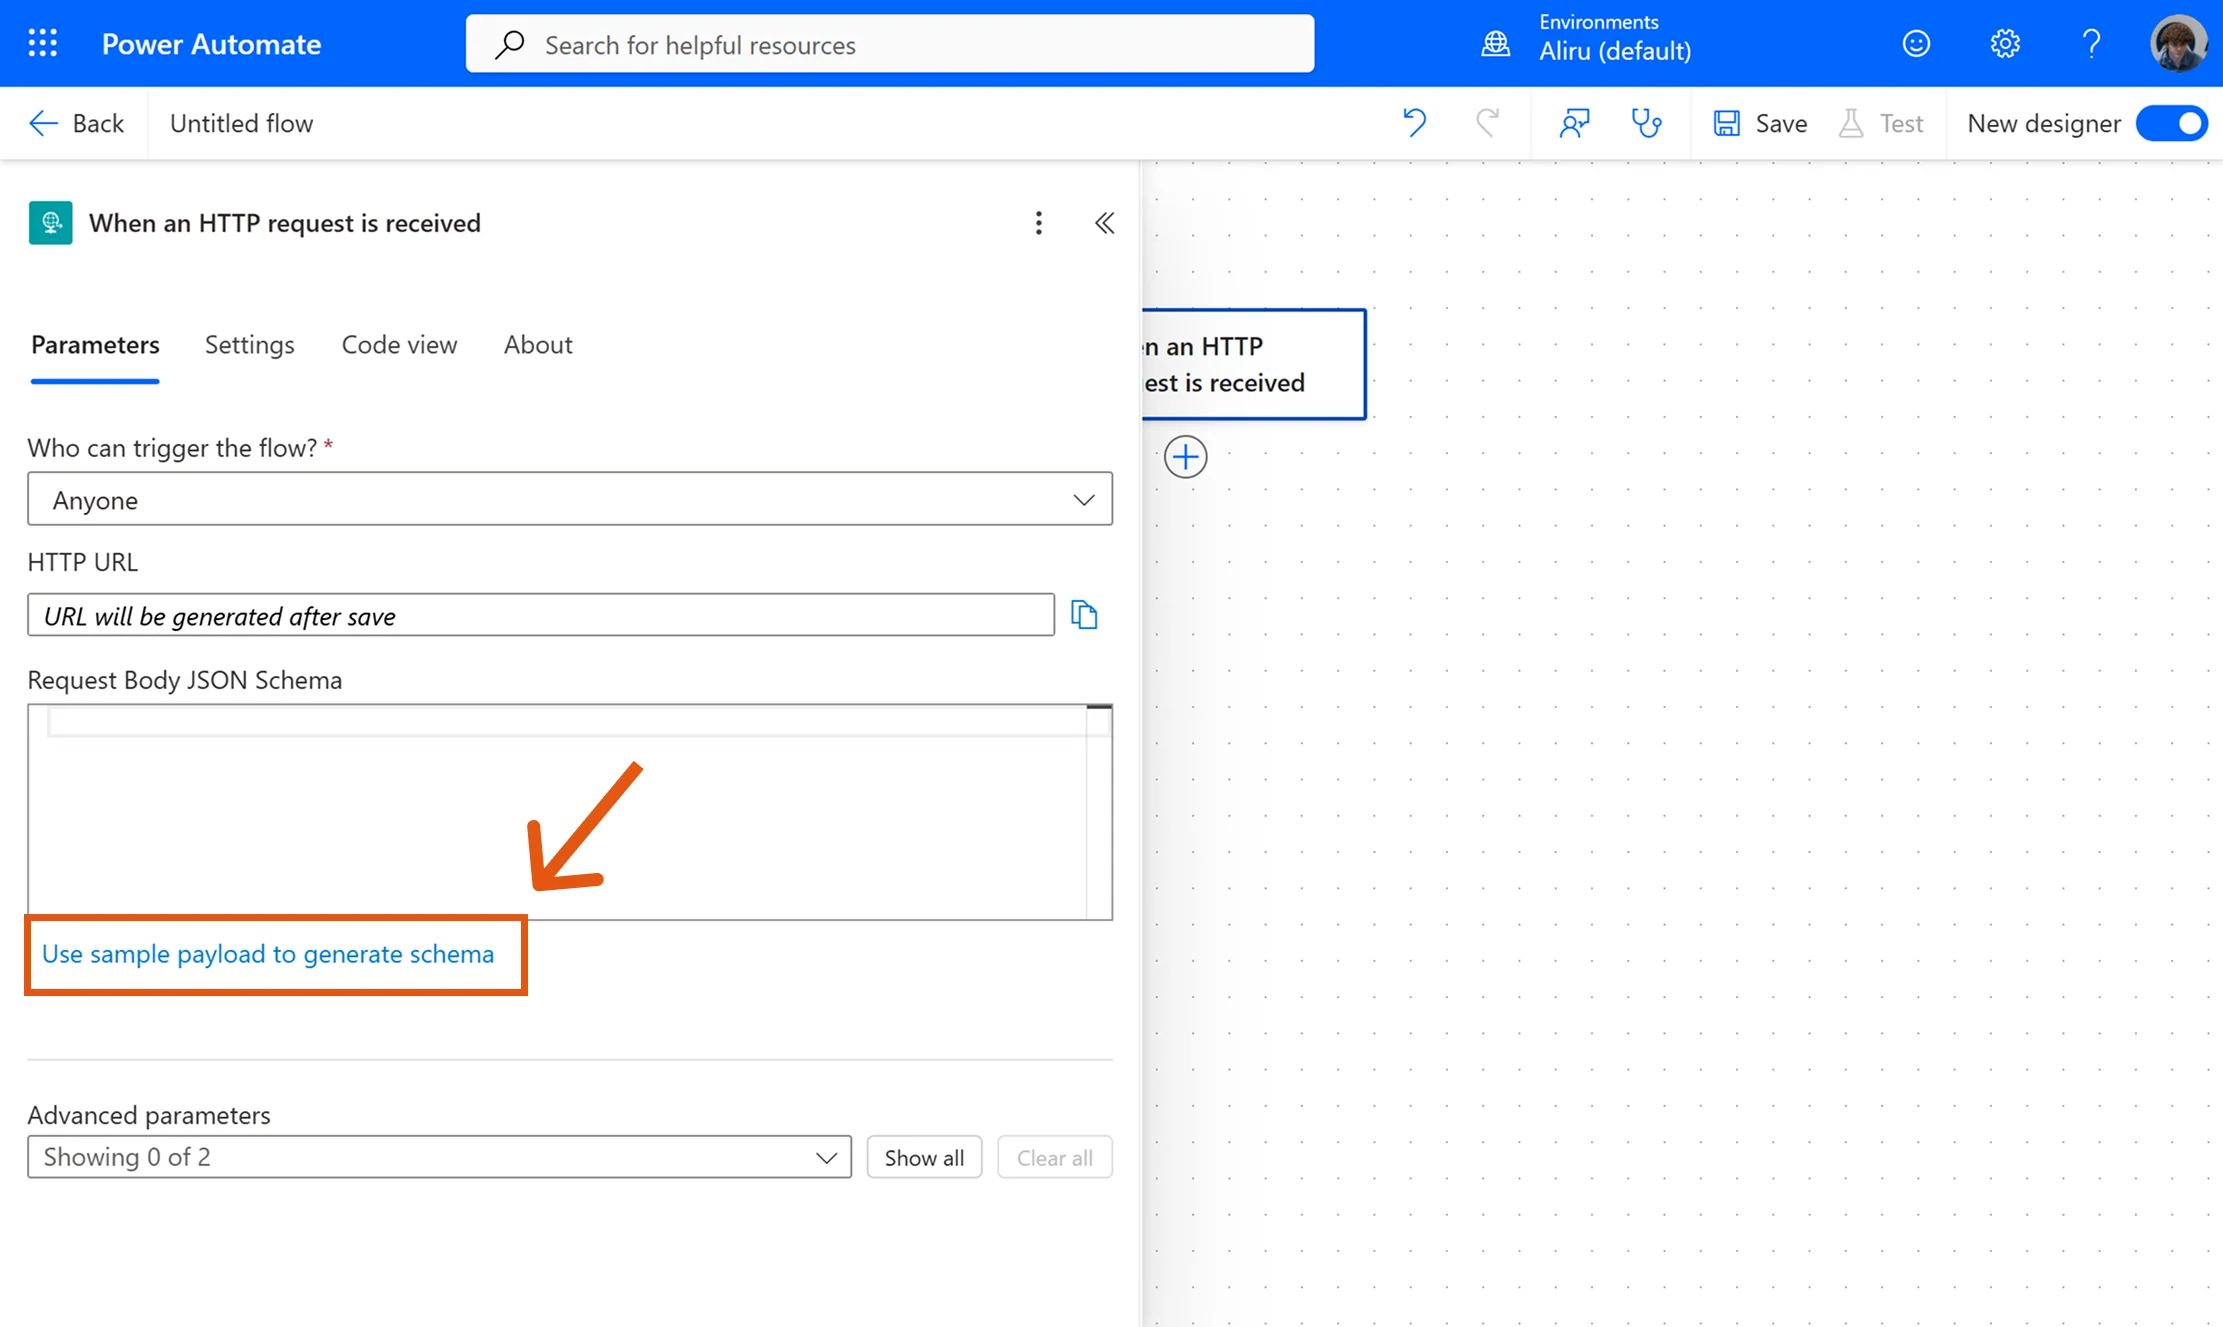
- Under "Request Body JSON Schema", click "Use sample payload to generate schema".
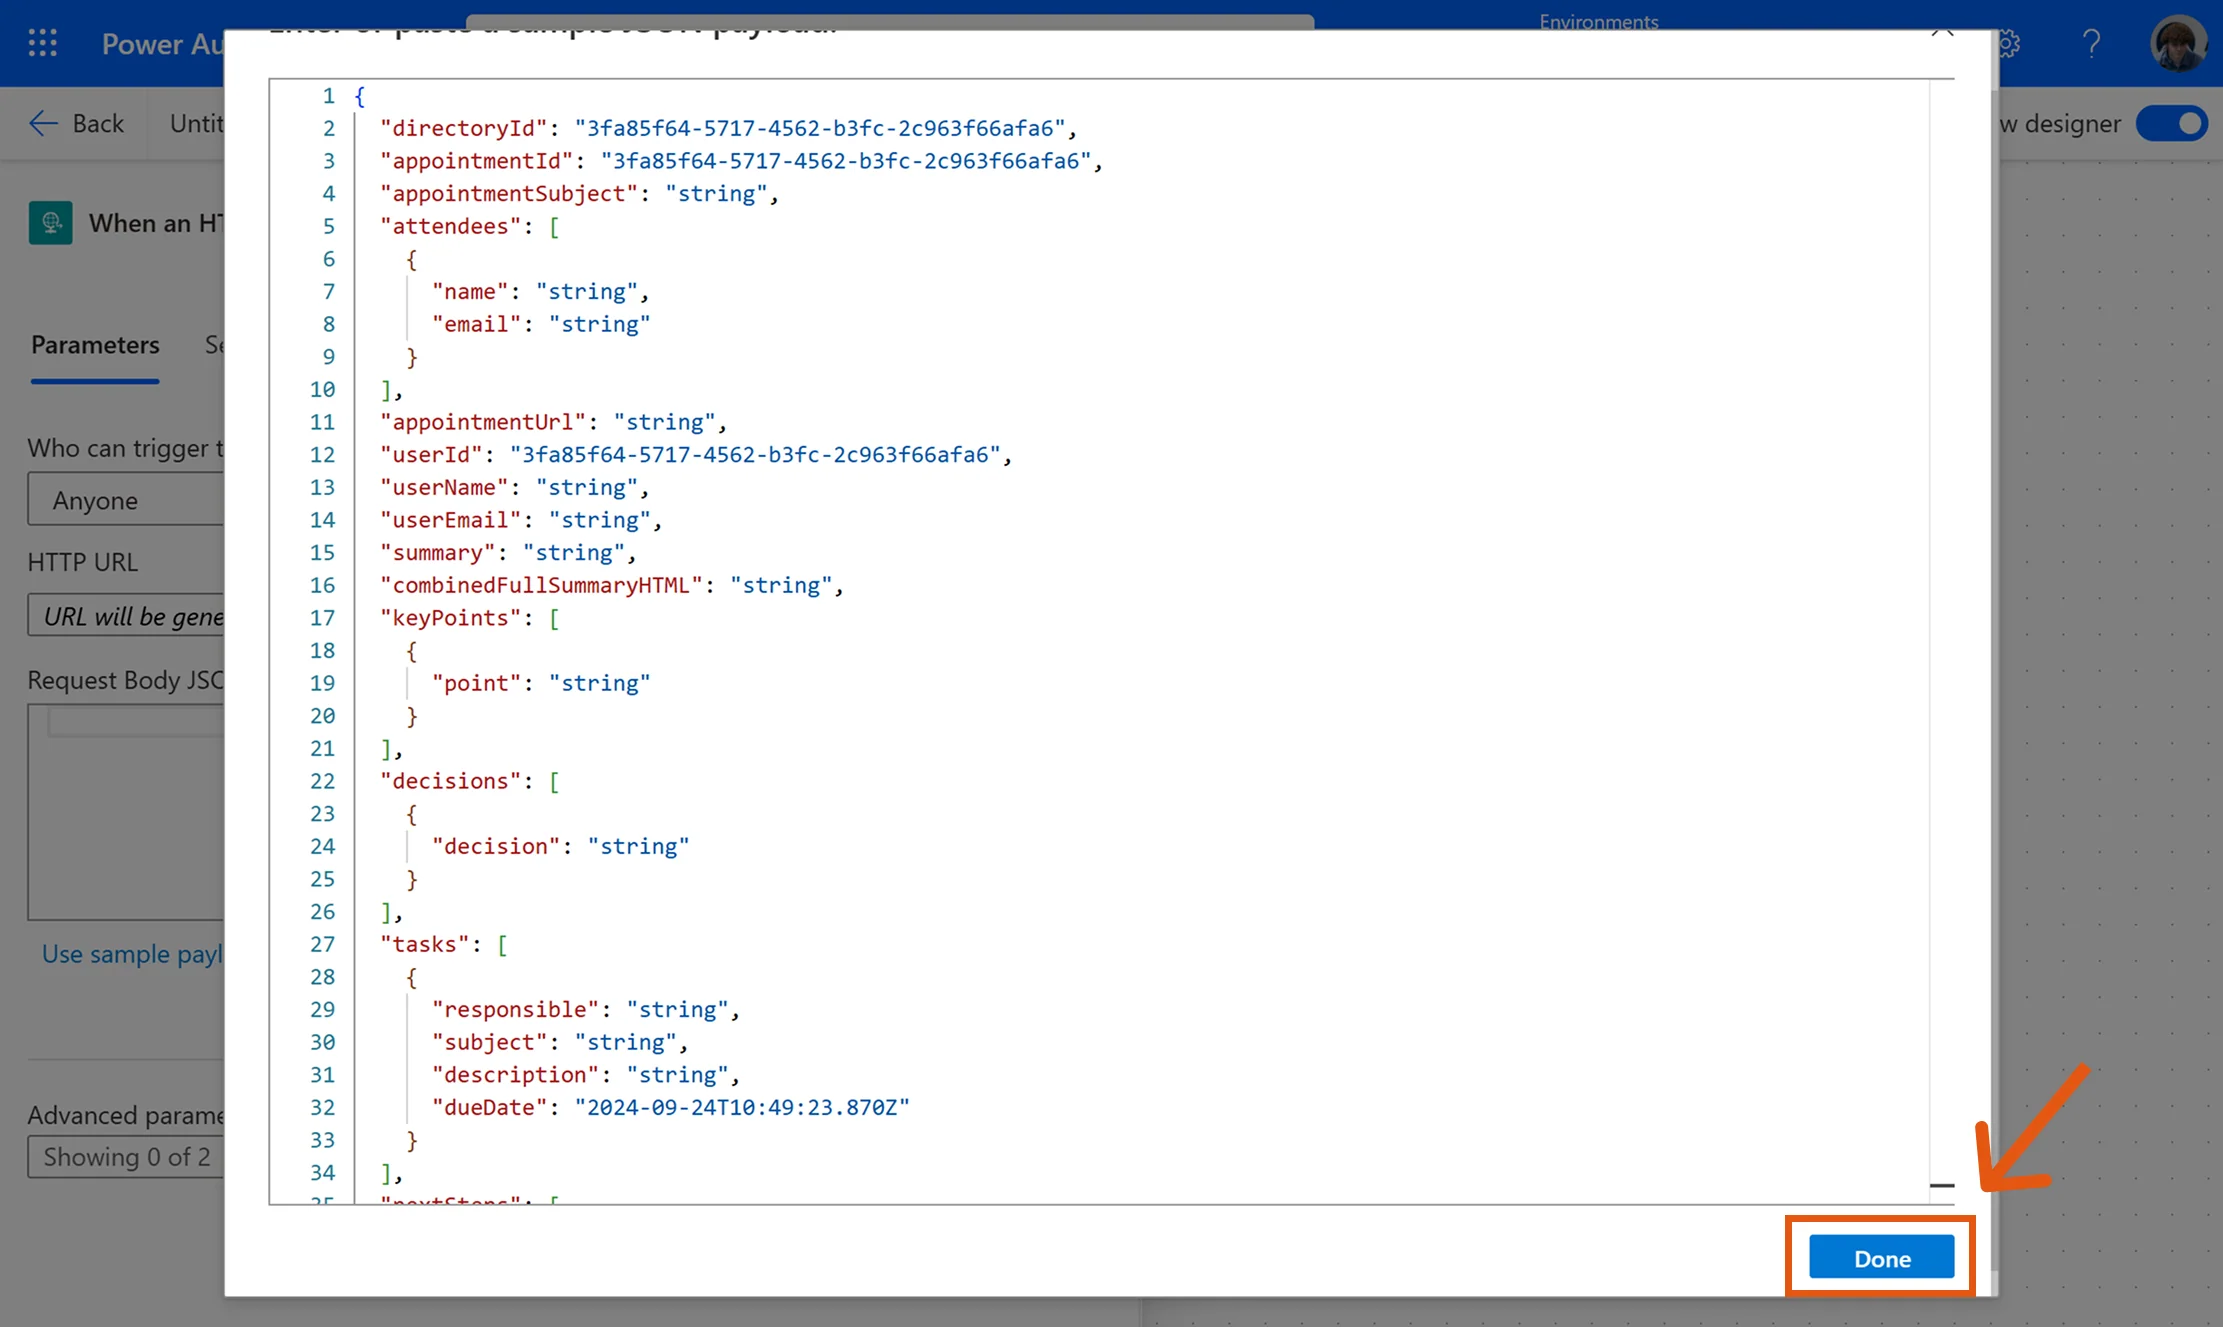
- Paste the HTTP Body JSON you copied from Sally and click Done. This automatically generates the schema Power Automate will use to parse incoming Sally events.
- Now you can adjust permissions (e.g., Who can trigger the flow) if needed.
By pasting the JSON from Sally, you tell Power Automate the structure of incoming data. This makes it possible to use dynamic fields like summary, tasks, or decisions in later flow steps.
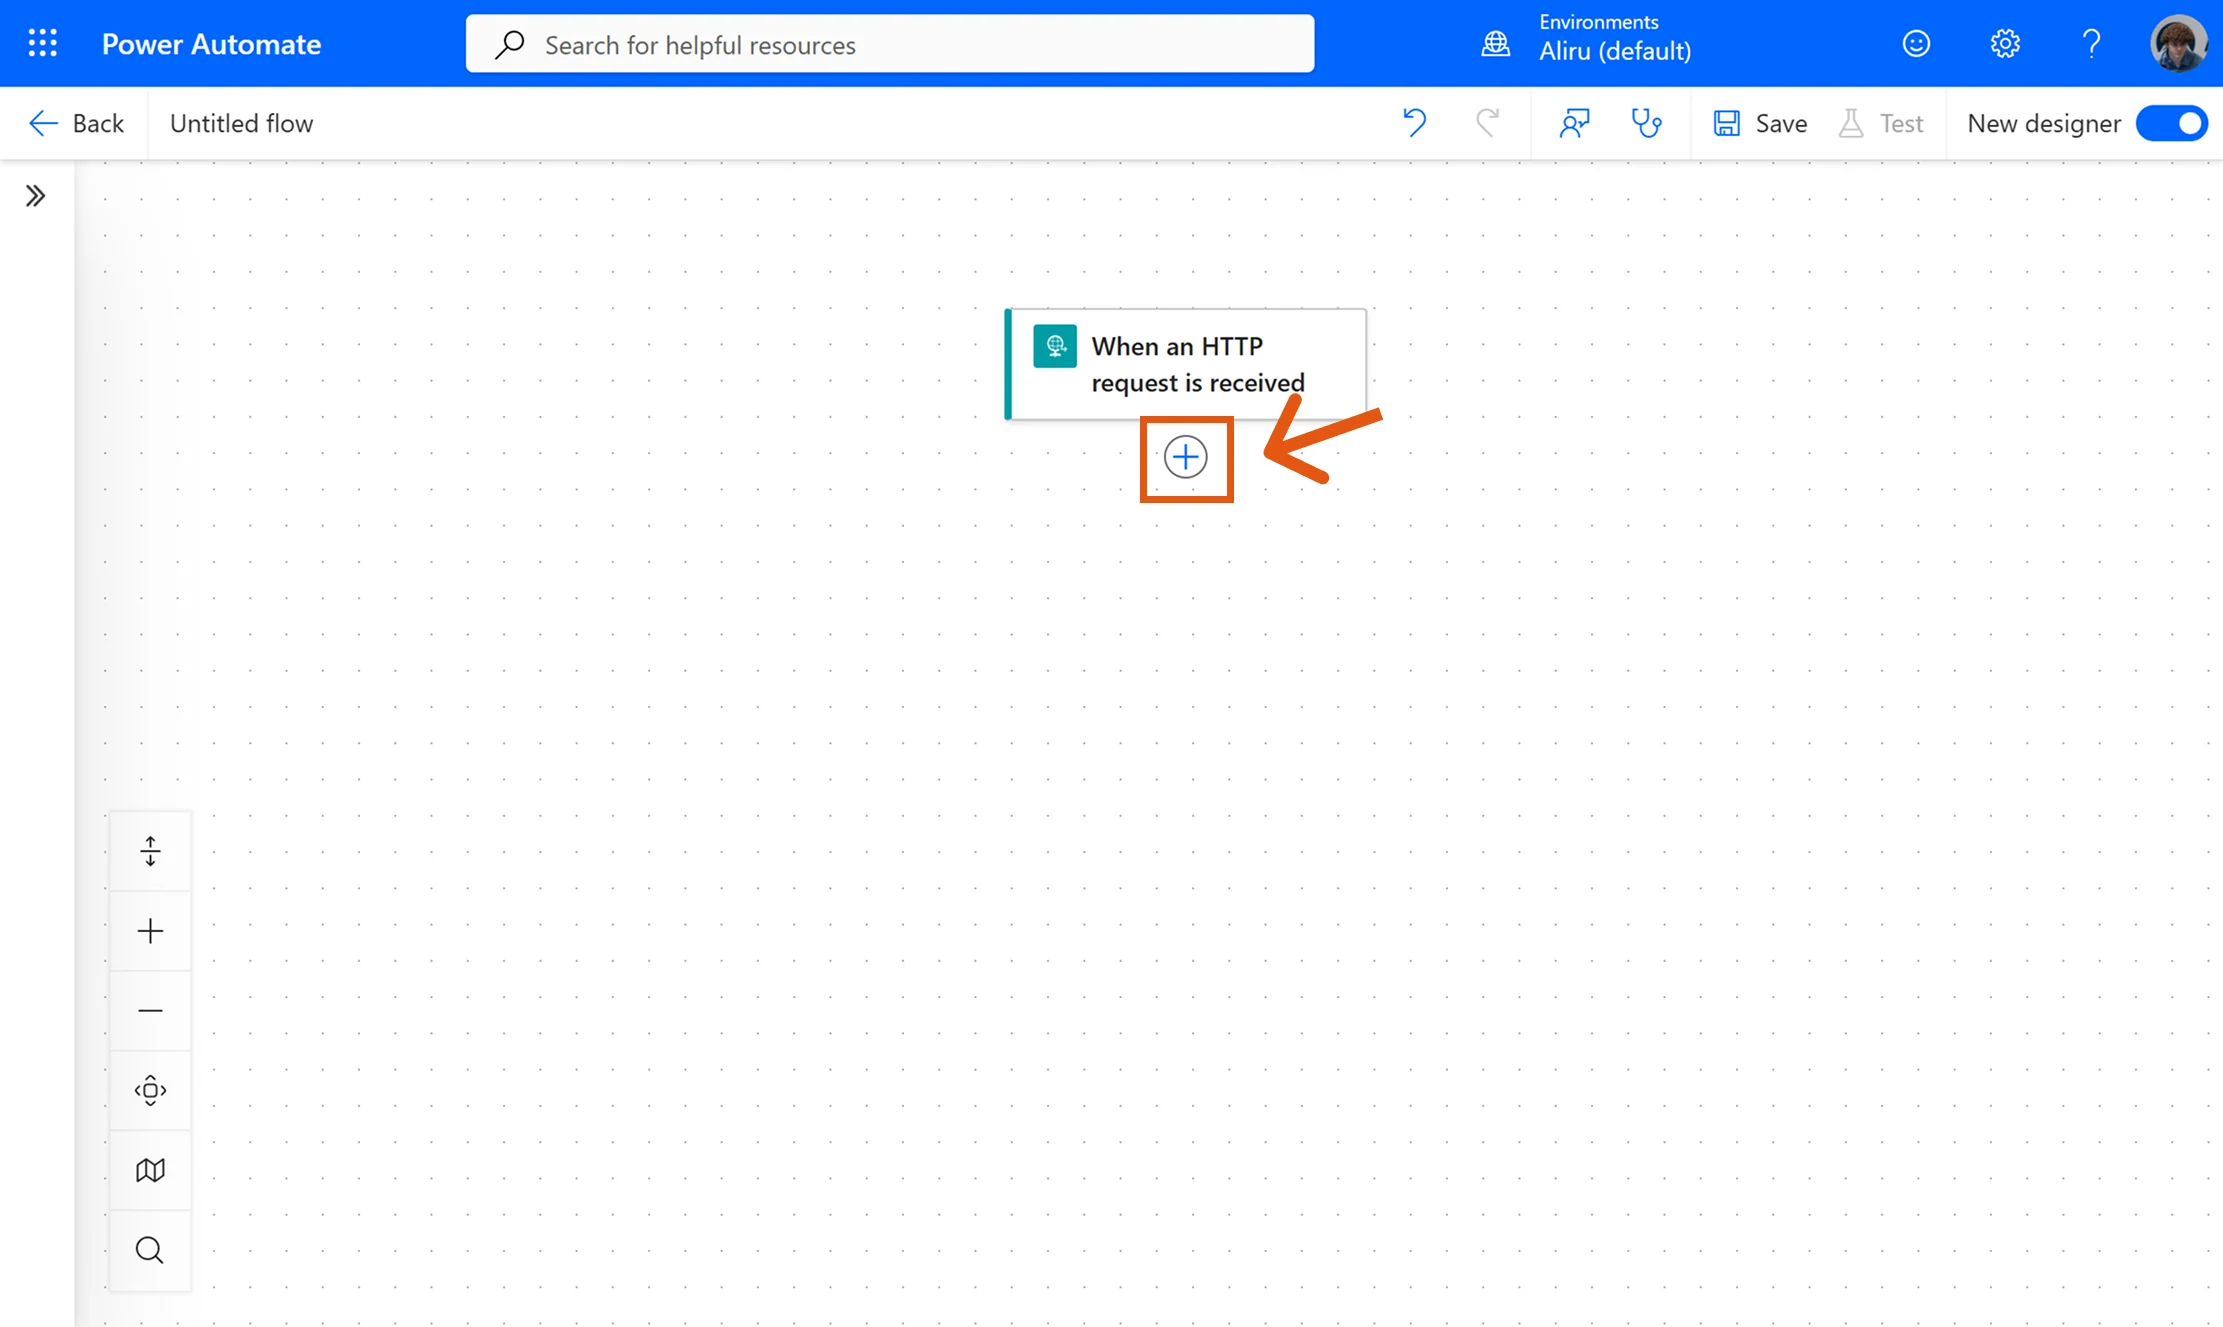
- Next, add a new Action to the flow.
ChatGPT:
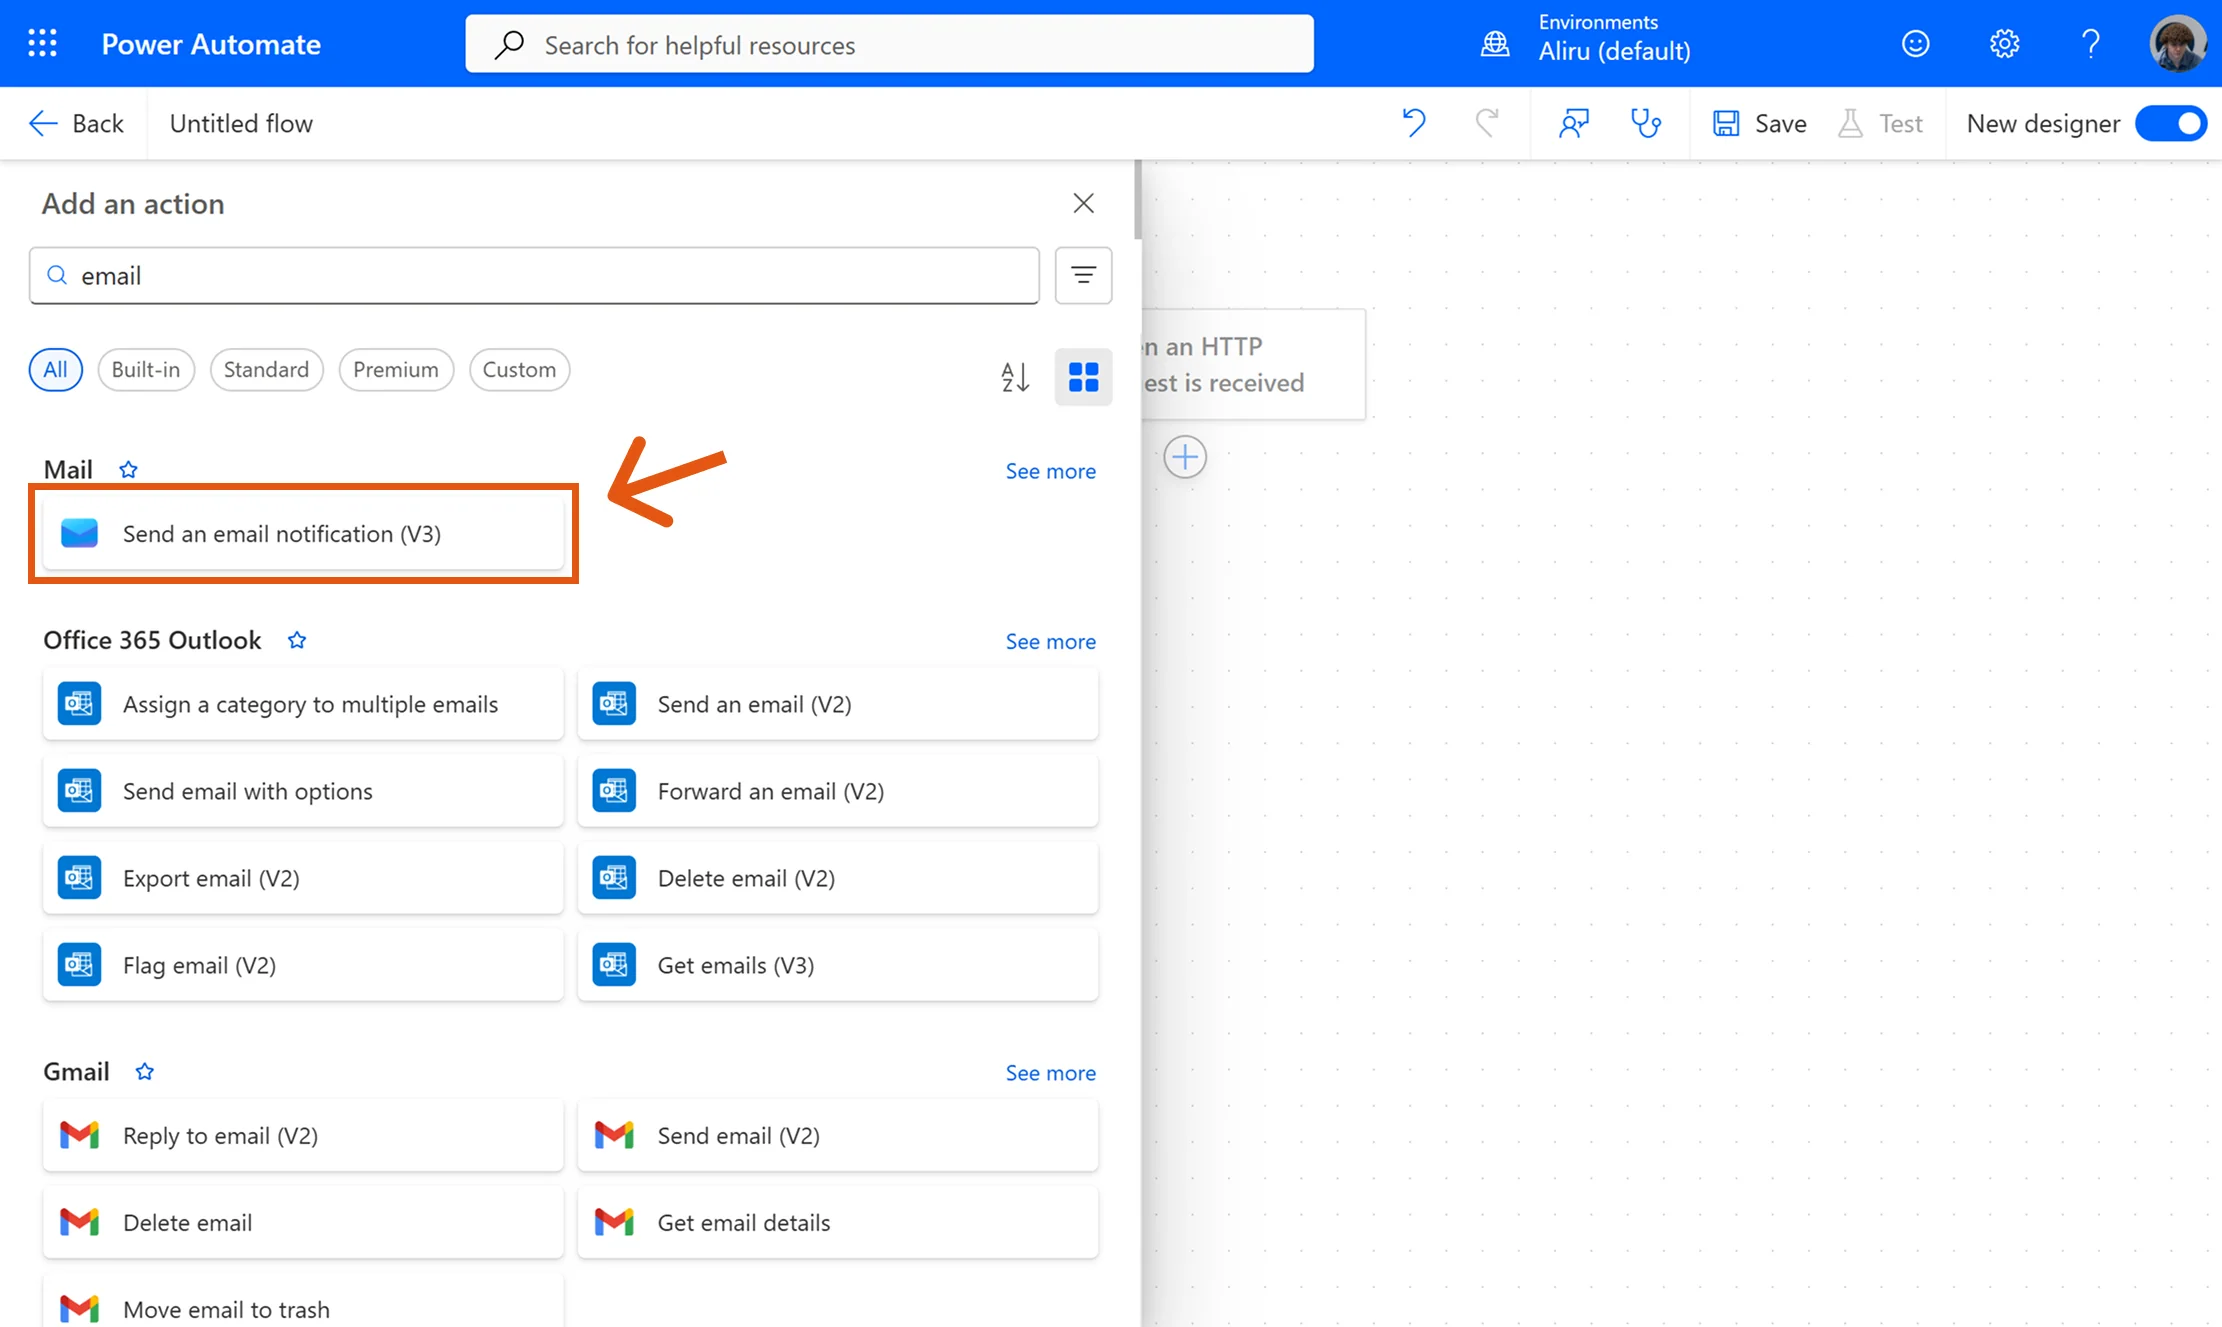
- For this example, we used Send an email notification (V3) to send the meeting information by email — but of course, you can use any other action as well, e.g. creating a Planner task, posting a message in Teams, or adding a new row to an Excel file.
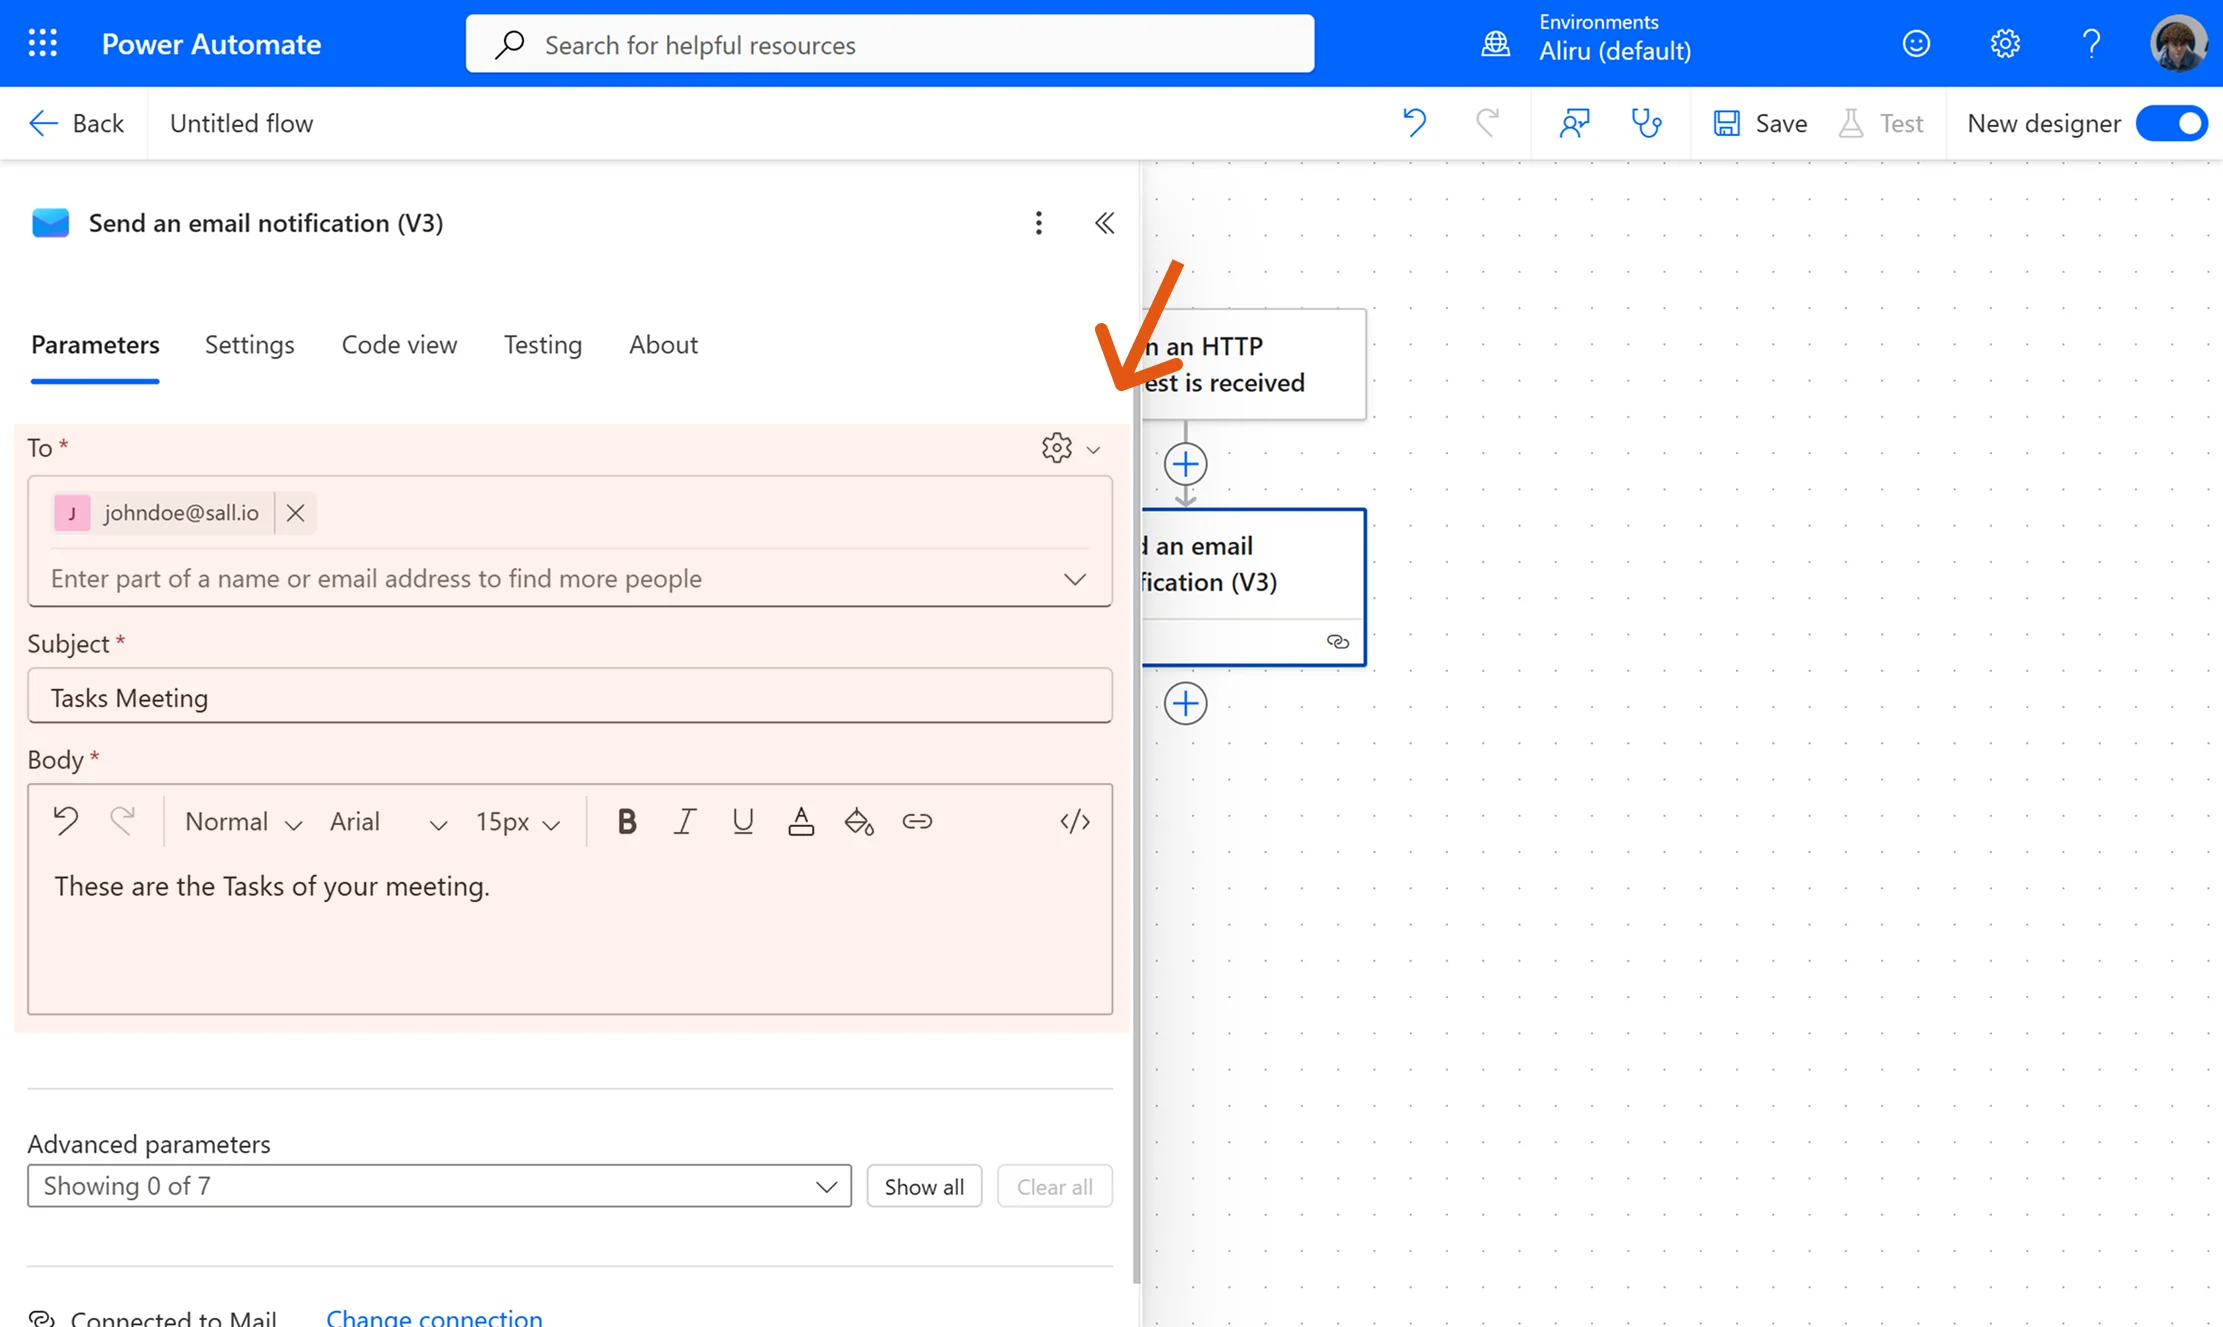
Configure the action details:
- To / Recipient: Define where the output should go (e.g., an email address, Teams channel, Planner, or another service).
- Subject / Title: Add a descriptive label like Tasks Meeting.
- Body / Content: Provide a short message or content (later you can insert dynamic fields coming from Sally).
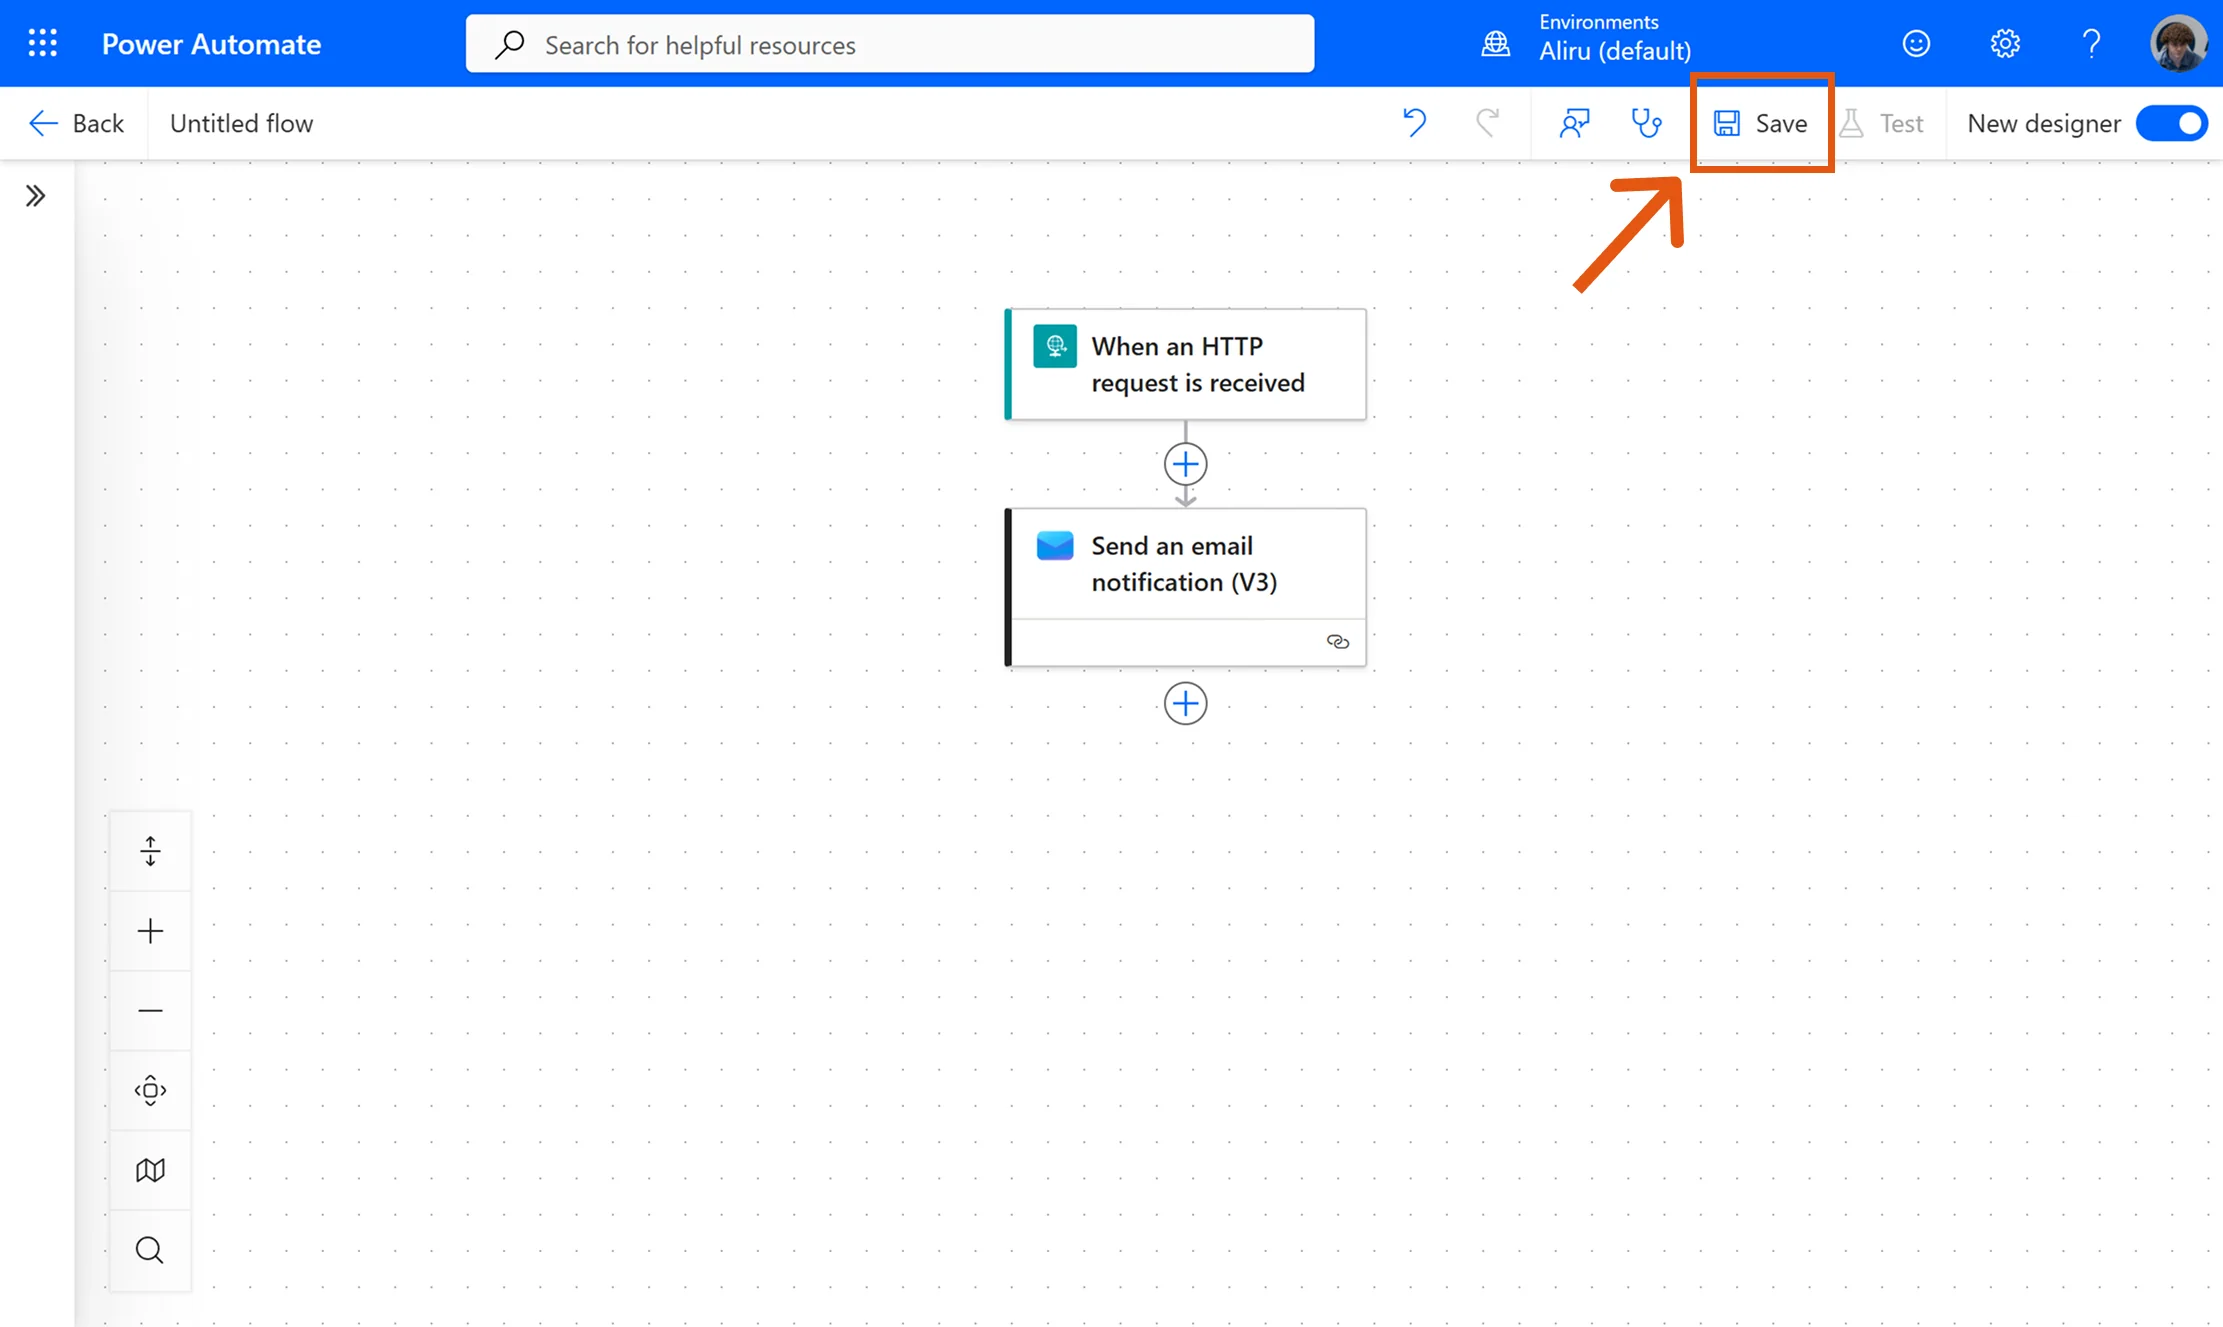
- Finally, click Save to store your flow.
- After saving, Power Automate will display the generated Webhook URL in the trigger “When an HTTP request is received”. Copy this URL.
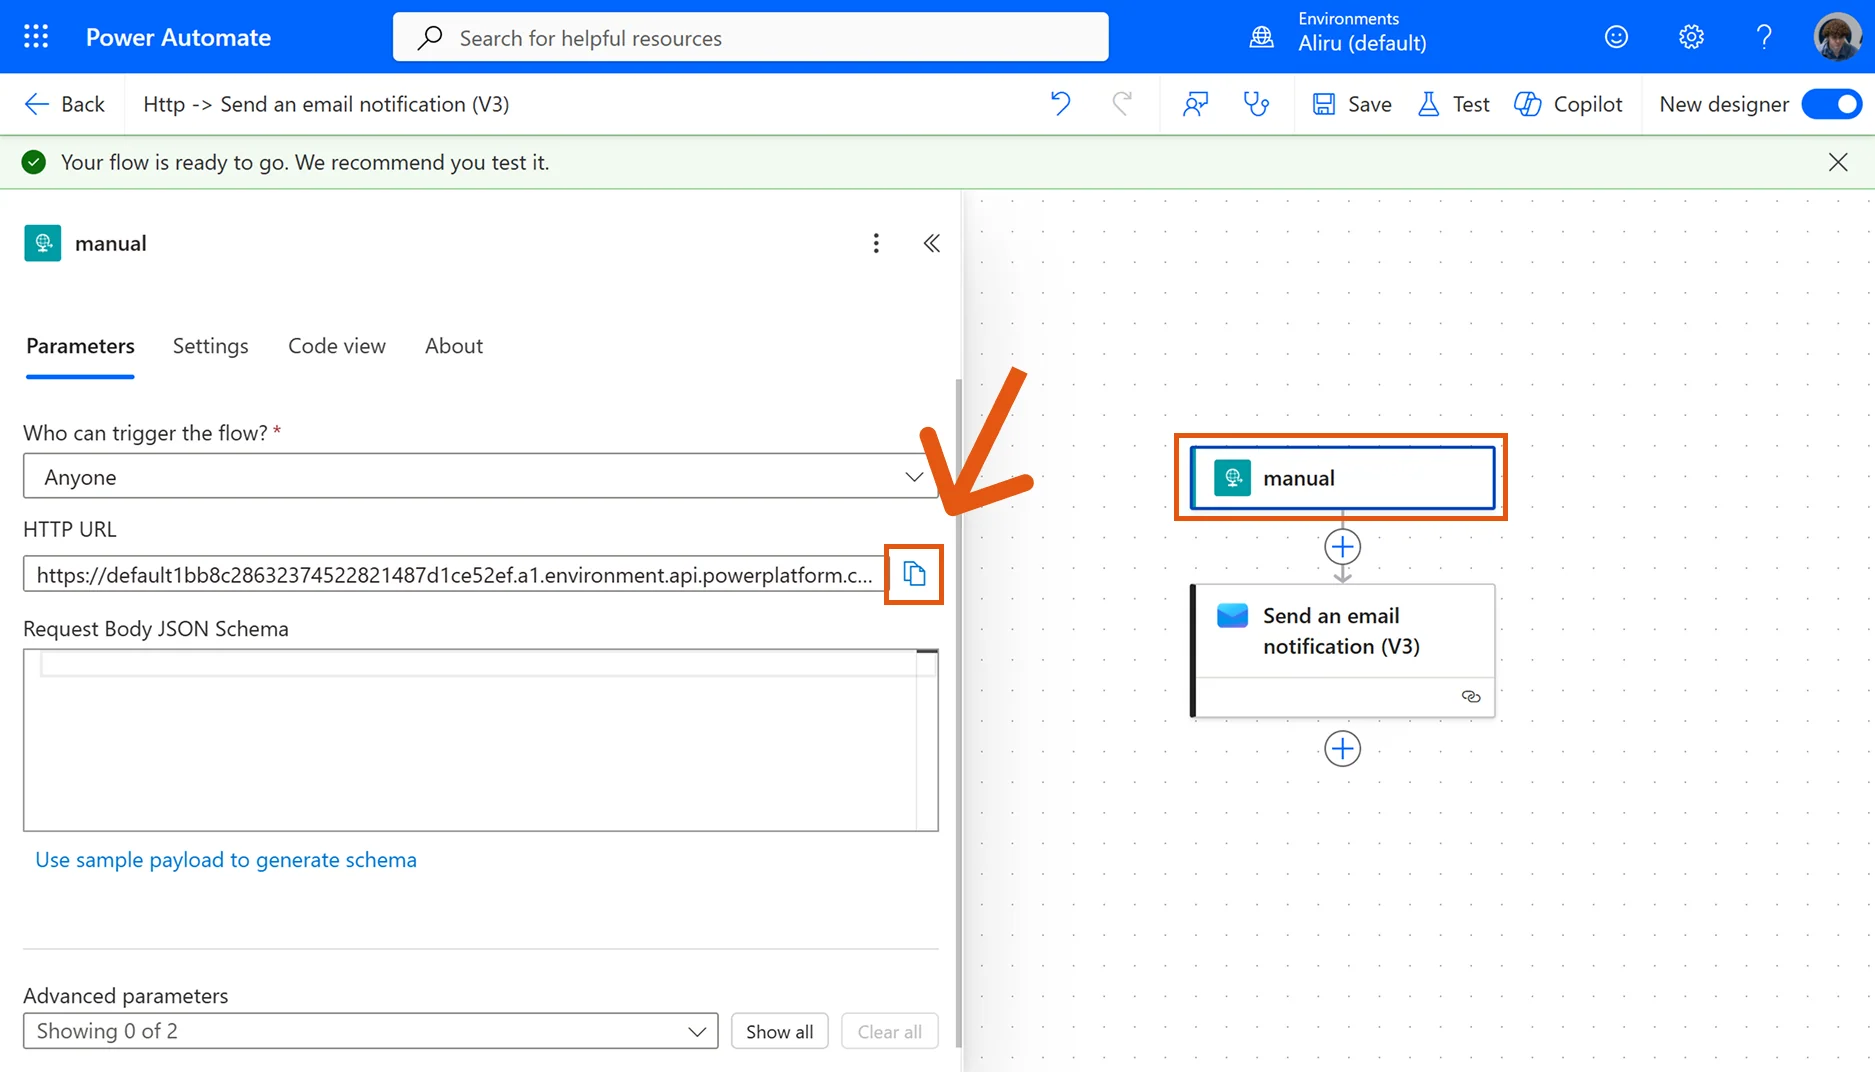
- Switch back to Sally and paste the copied URL into the Webhook URL field of the webhook you created earlier.
✅ Your flow is now set up with a webhook trigger and a first action. In the next step, we'll test the integration and confirm that data from Sally arrives correctly in Power Automate.
2.1. How Do You Test and Debug the Integration?
Use Sally Logs to confirm that events reach Power Automate and to debug issues.
Steps:
- In Sally, open Settings → Integrations.
- Under "Your personal integrations", find your webhook (e.g., Power Automate Connector) and click Logs.
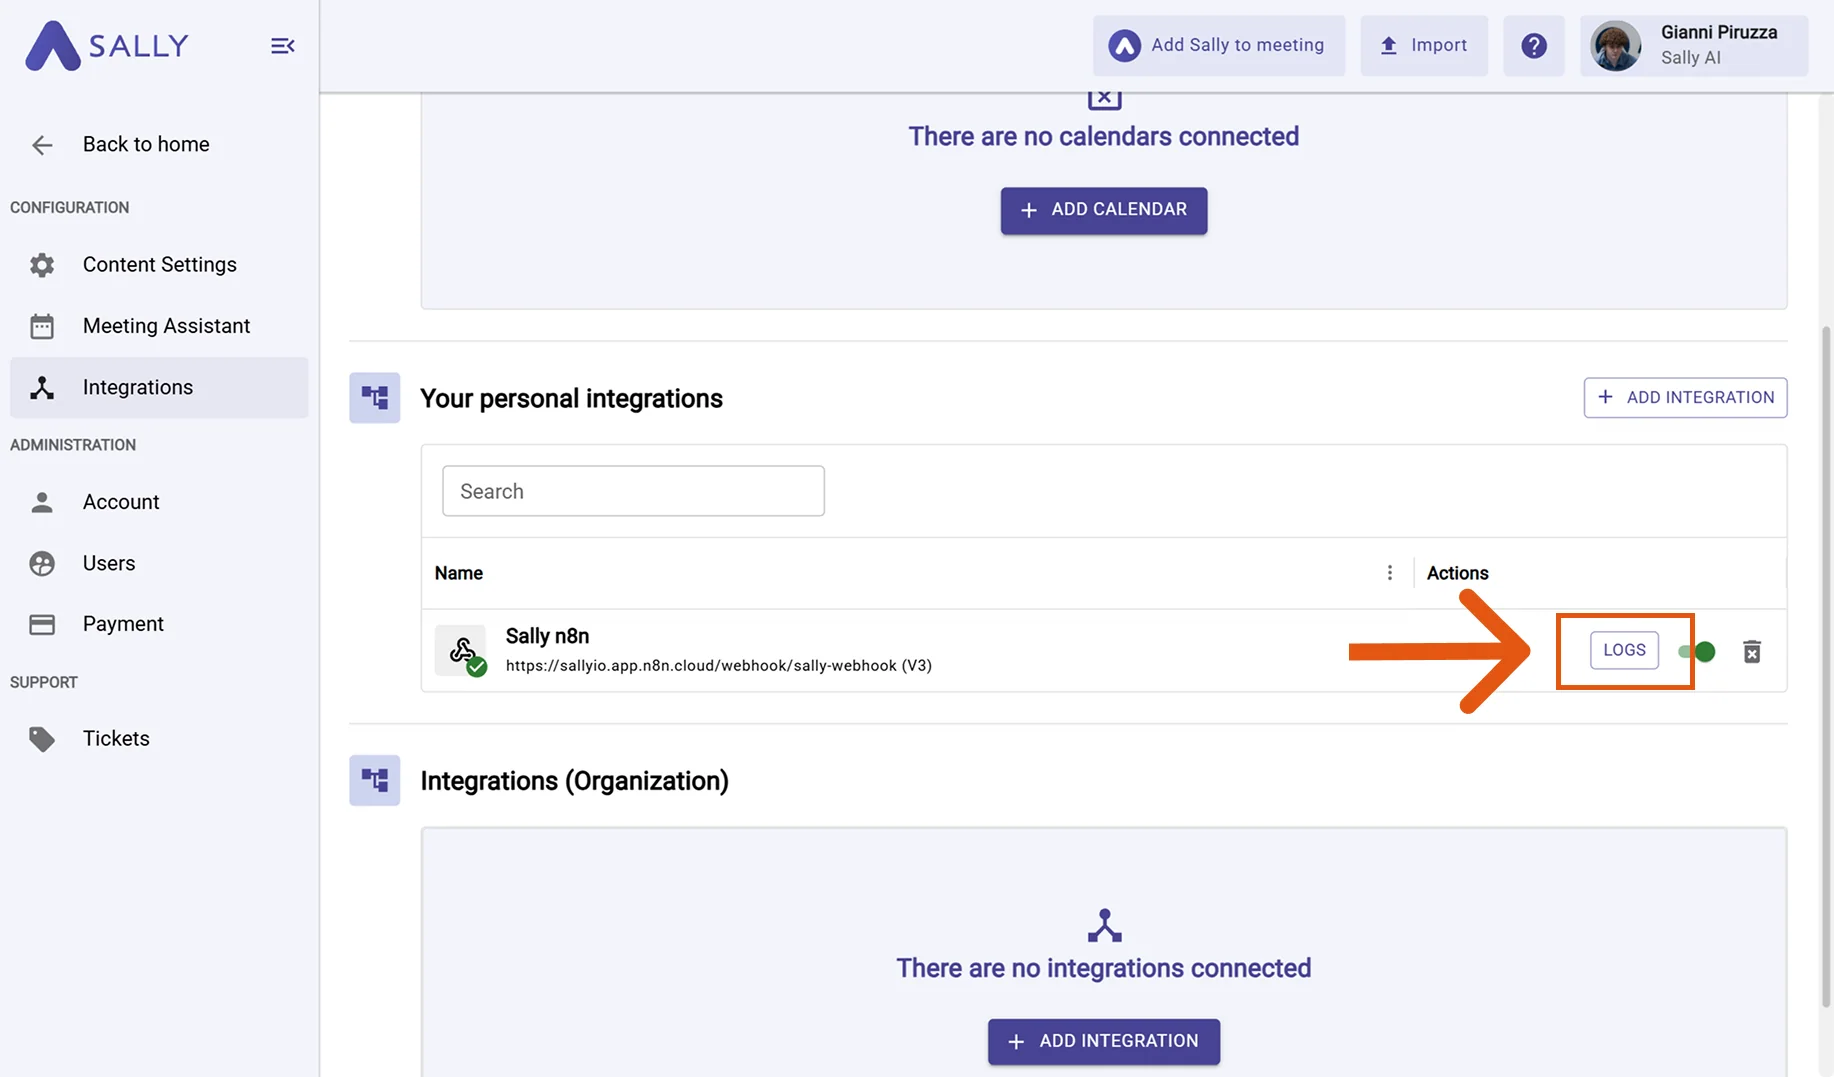
- Once your selected trigger fires, the executions appear here. Click Details on any row to inspect the payload and response.
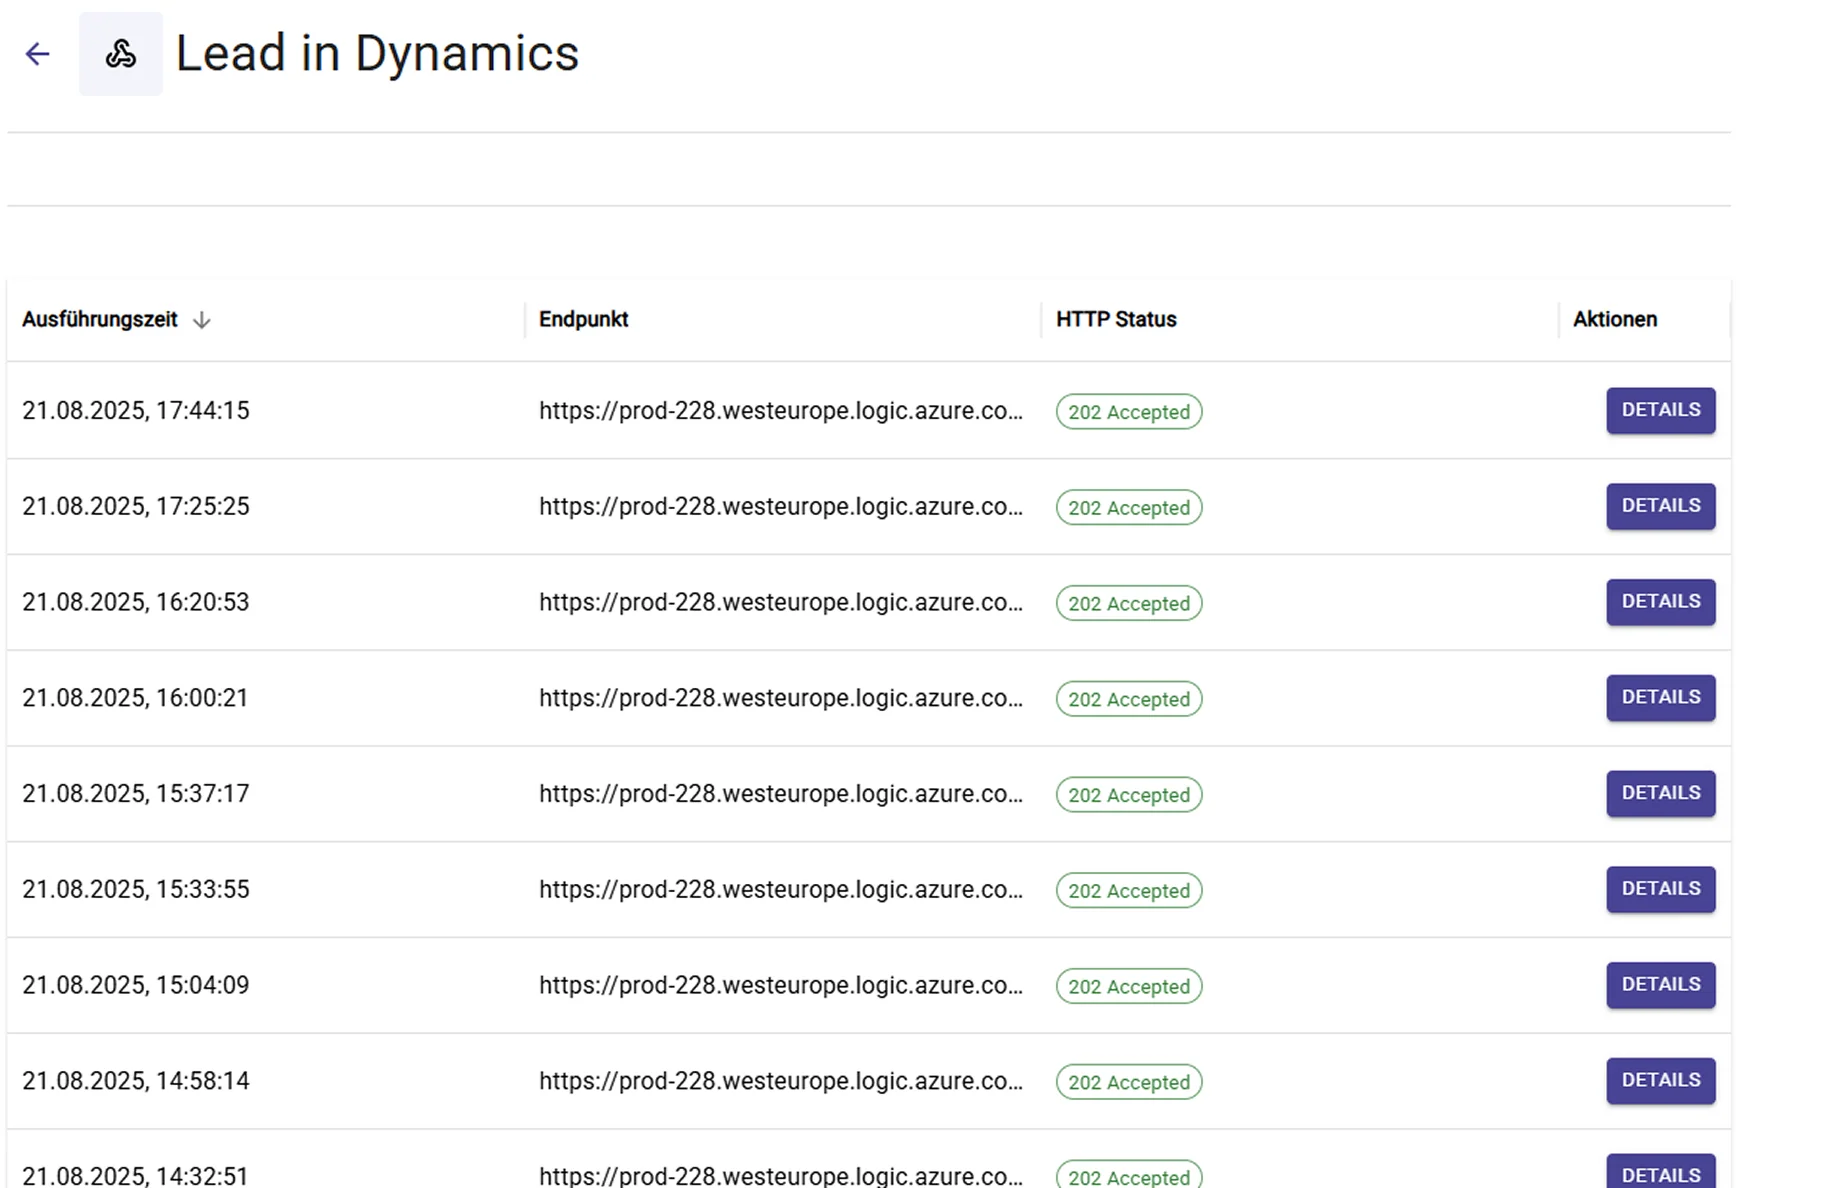
Each log entry shows:
- Execution time – when Sally sent the event
- Target endpoint – the Power Automate webhook URL
- HTTP status – response from Power Automate (e.g.,
202 Accepted)
Use logs to confirm delivery, inspect payloads, and debug errors.
If something doesn't work in Power Automate, check the Sally logs first to ensure the event was sent correctly.
3. How Do You Use Ready-Made Templates?
Instead of building a flow from scratch, you can also use ready-made Power Automate templates provided by Sally.
These templates are available as ZIP files you can download in Sally and import directly into Power Automate.
This way, you save time and get started faster — just adapt the imported flow to your needs.
Steps:
- In Sally, go to Settings.

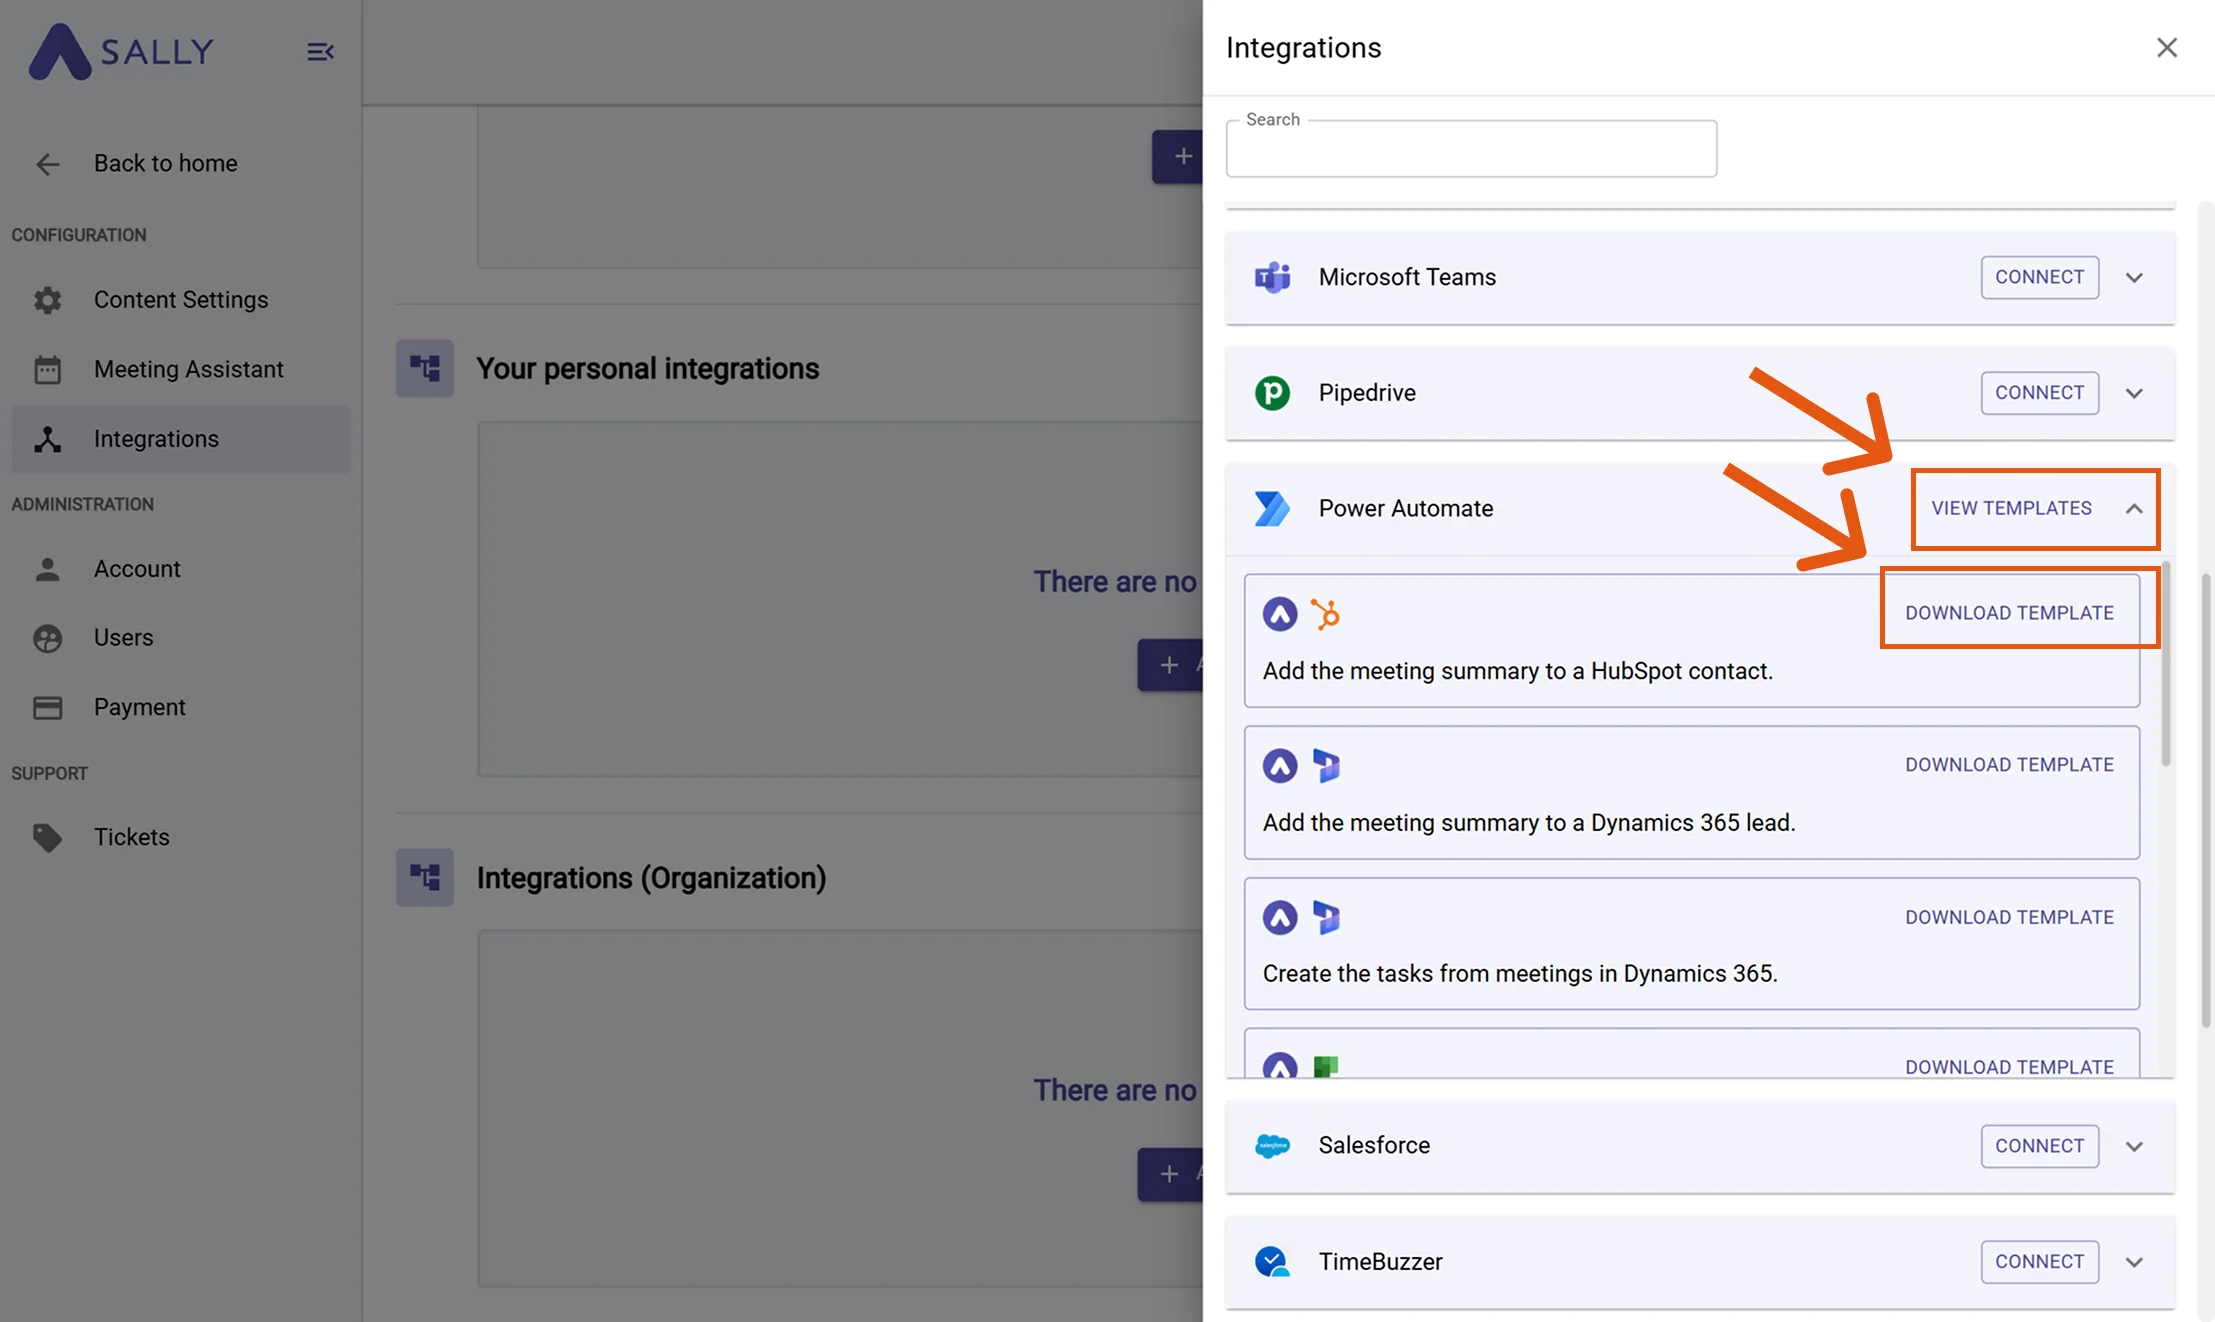
- Go to Integrations. Under “Your personal integrations”, click on “+ Add Integration.”

-
Select the template you want (e.g., Add the meeting summary to a HubSpot contact) and click Download Template.
This will download a ZIP file containing all necessary configuration files (including the JSON definitions).
You'll import this ZIP into Power Automate in the next step.
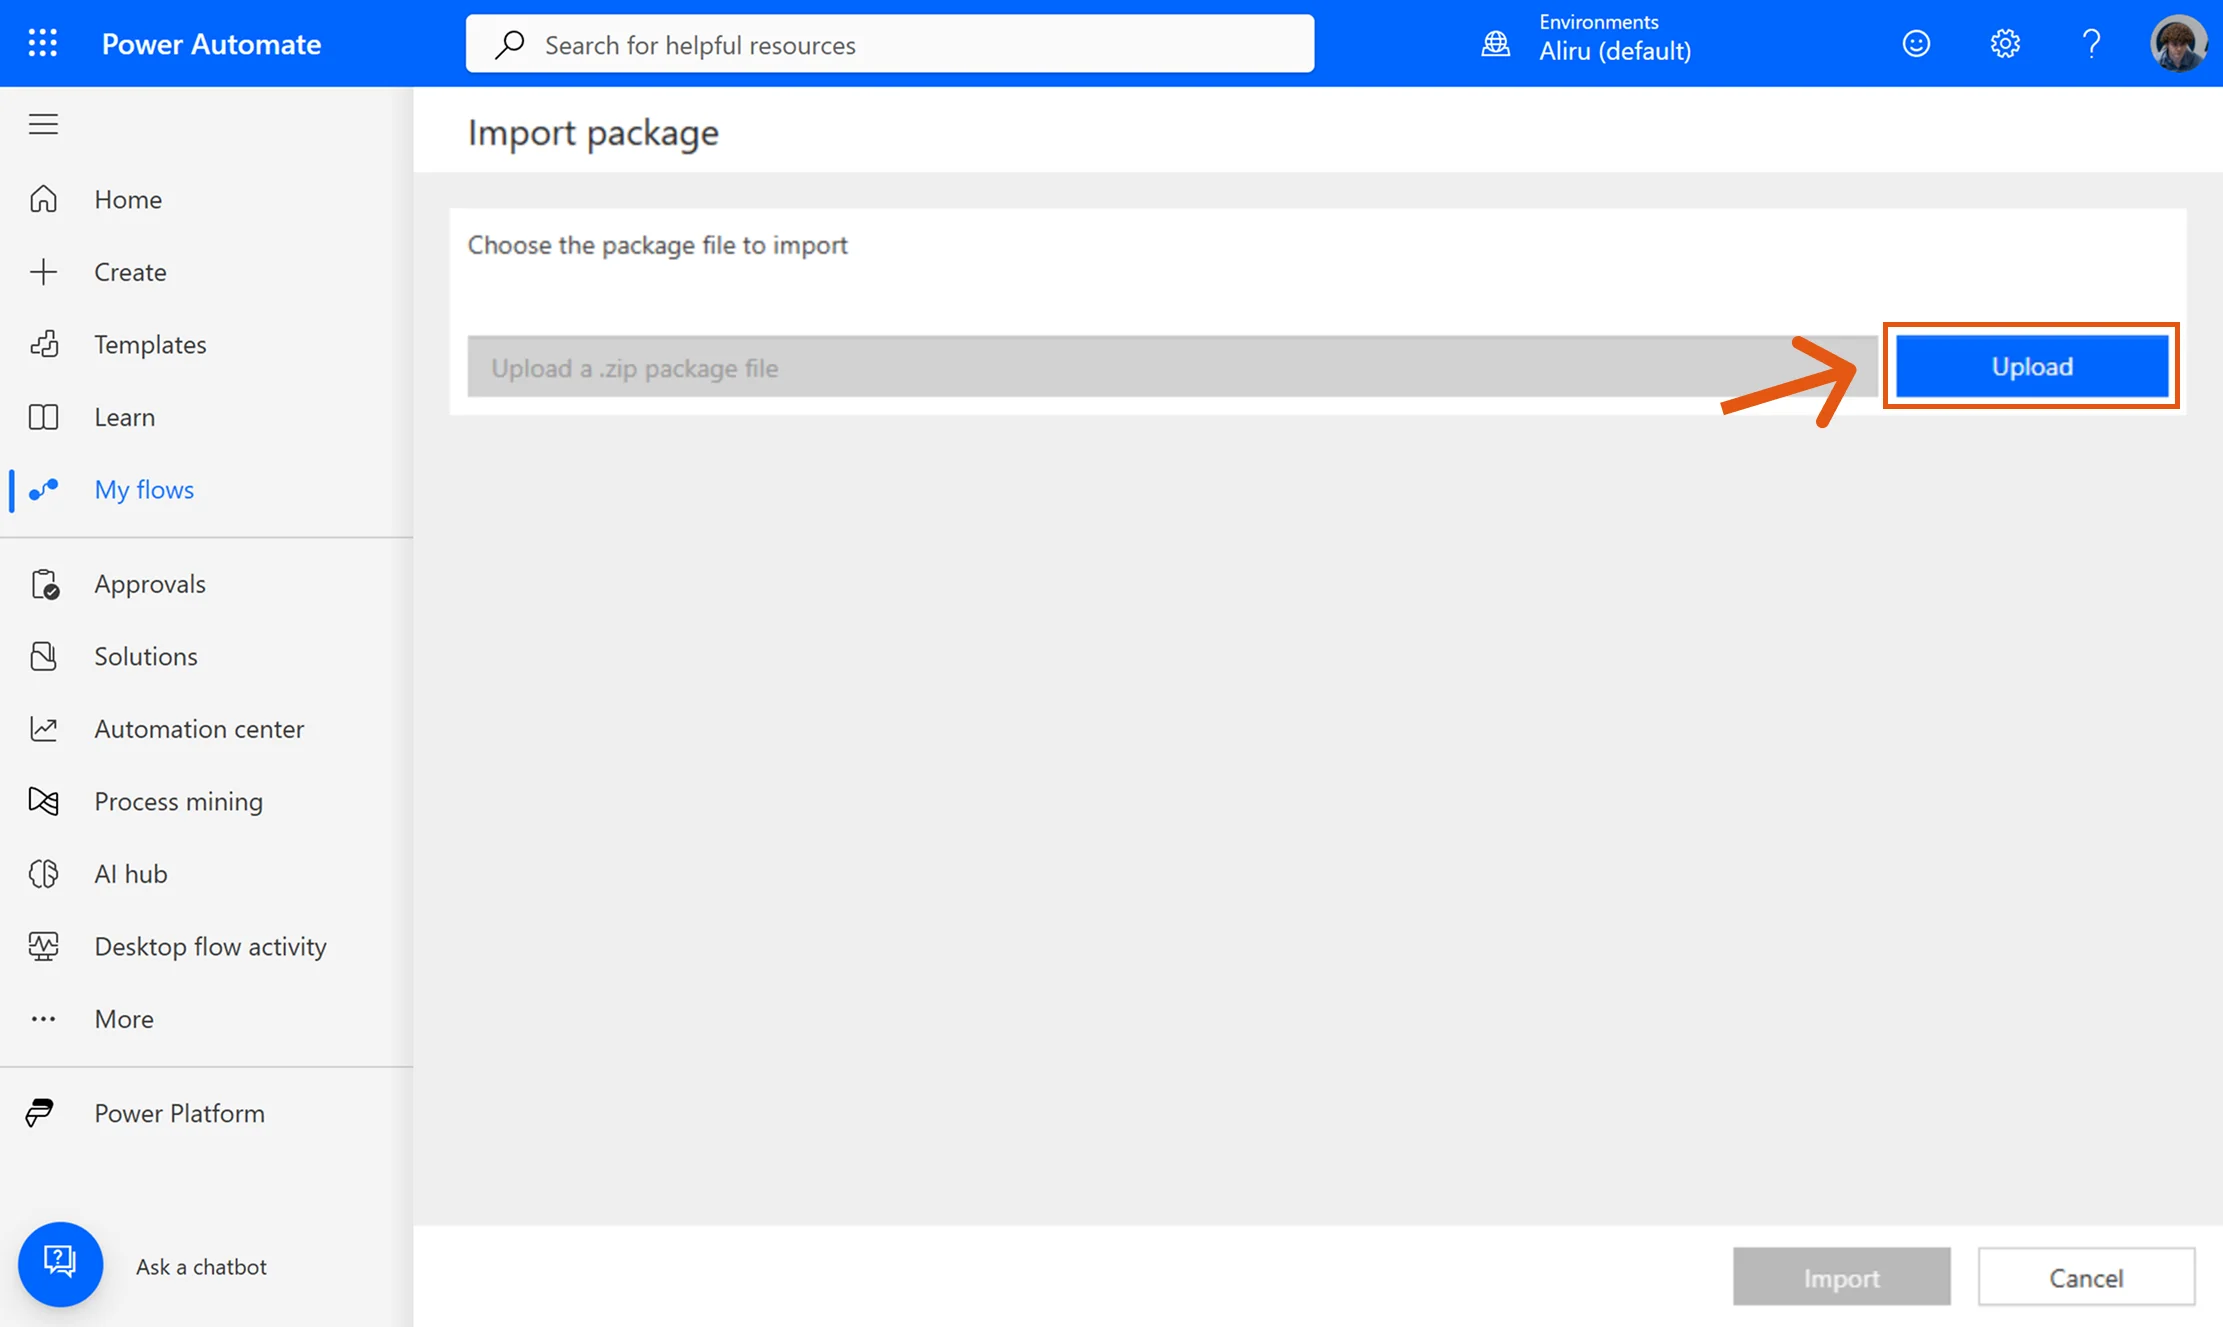
- In Power Automate, go to My flows → Import → Import Package (Legacy).

- Click Upload to upload the ZIP file you downloaded from Sally.
- Review the package details and click Import.
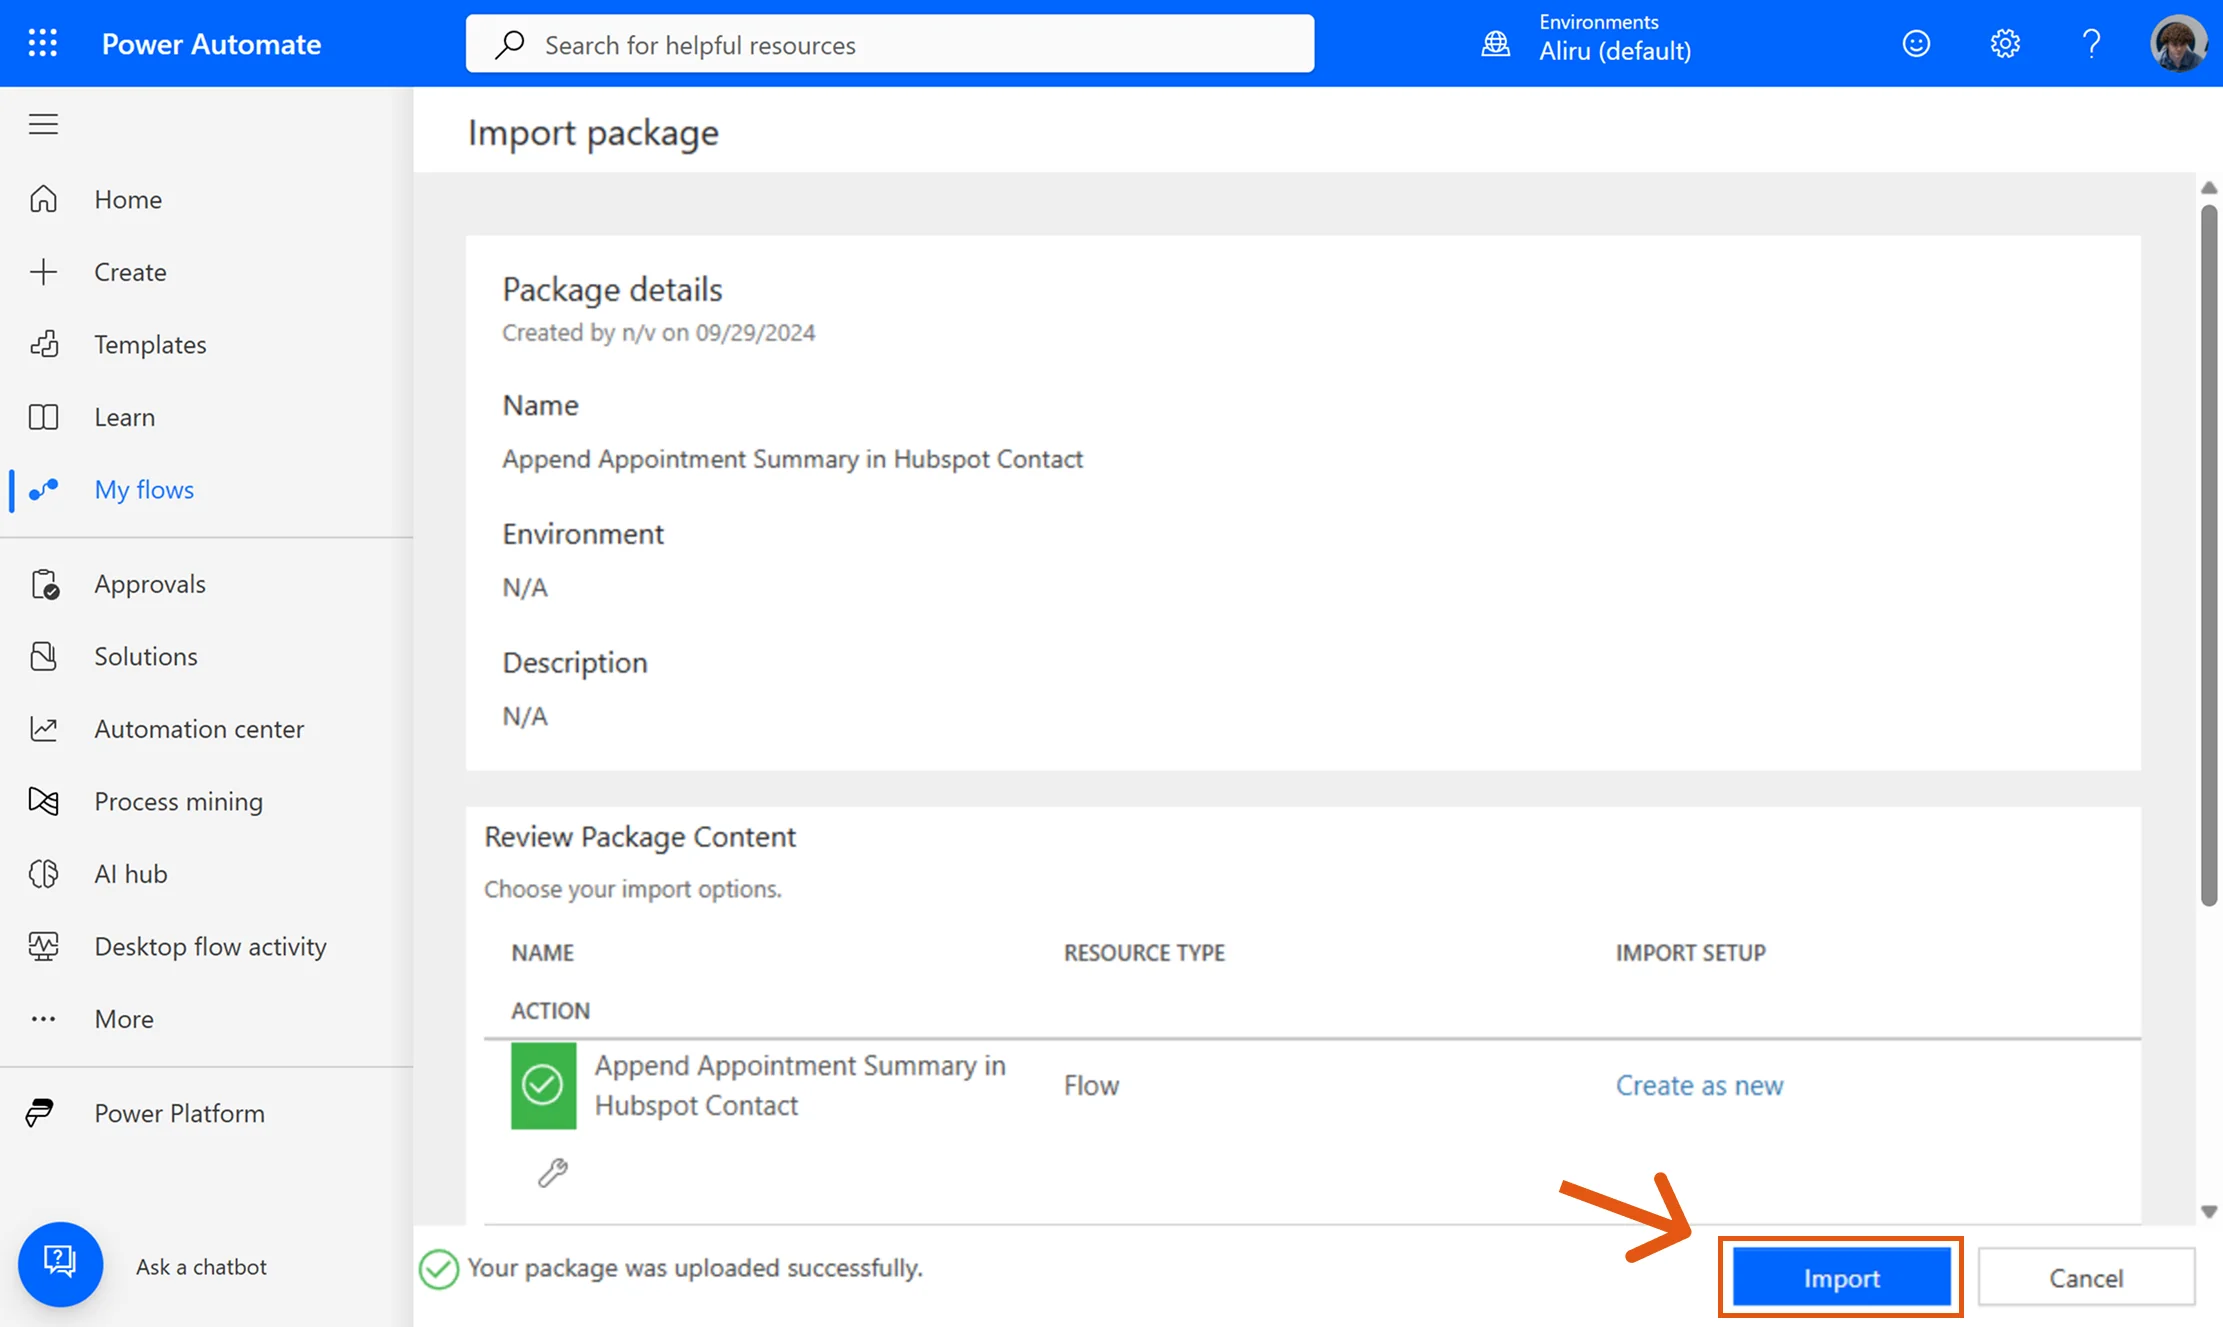
- Your new flow will now appear under My flows.
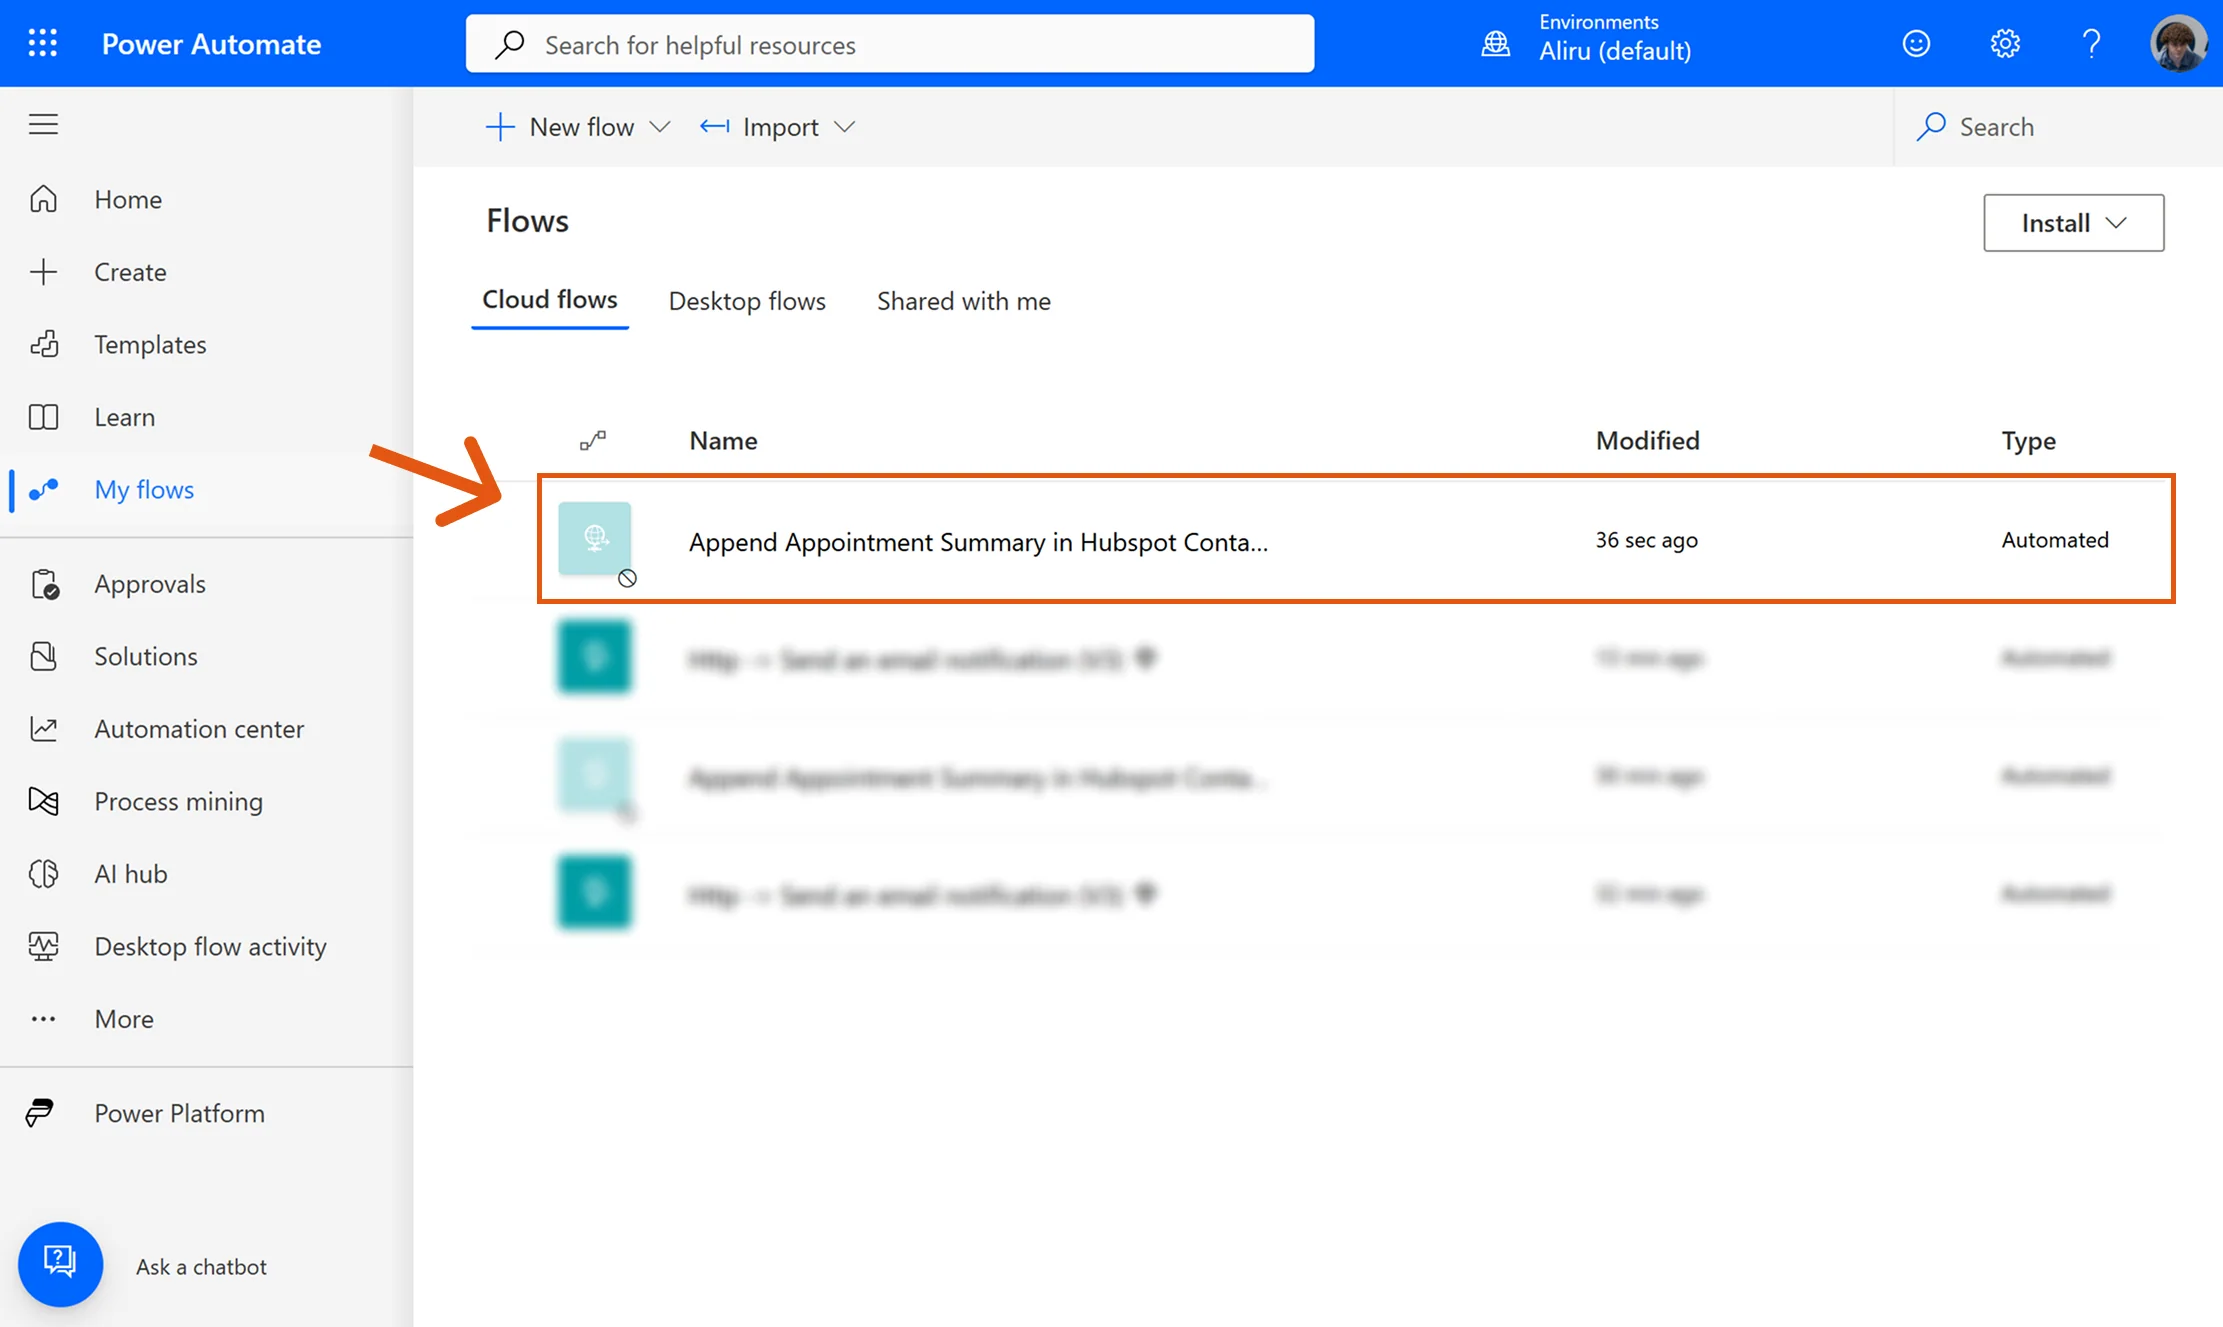
✅ With templates, you can skip manual setup and get a working integration instantly. Just adjust the details (e.g., target system, fields) to fit your specific use case.