What meeting templates are and what they are made of
Every summary Sally writes follows a meeting template. The template decides which sections the summary has, in which order they appear and what Sally looks for in each of them. A daily needs blockers, a sales call needs the customer's needs, and an interview needs the candidate's answers.
The template is where you tailor your summaries to your own work. You decide what goes in and what Sally leaves out.
You do not have to build anything to get started. Every account already has the General Meeting template, and this article shows you what it contains, where to find it and which parts of a template you can change later.
Quick navigation
- Finding your templates
- What a section is made of
- Versions and the live template
- Preview and test
- Managing templates and categories
1. Finding your templates
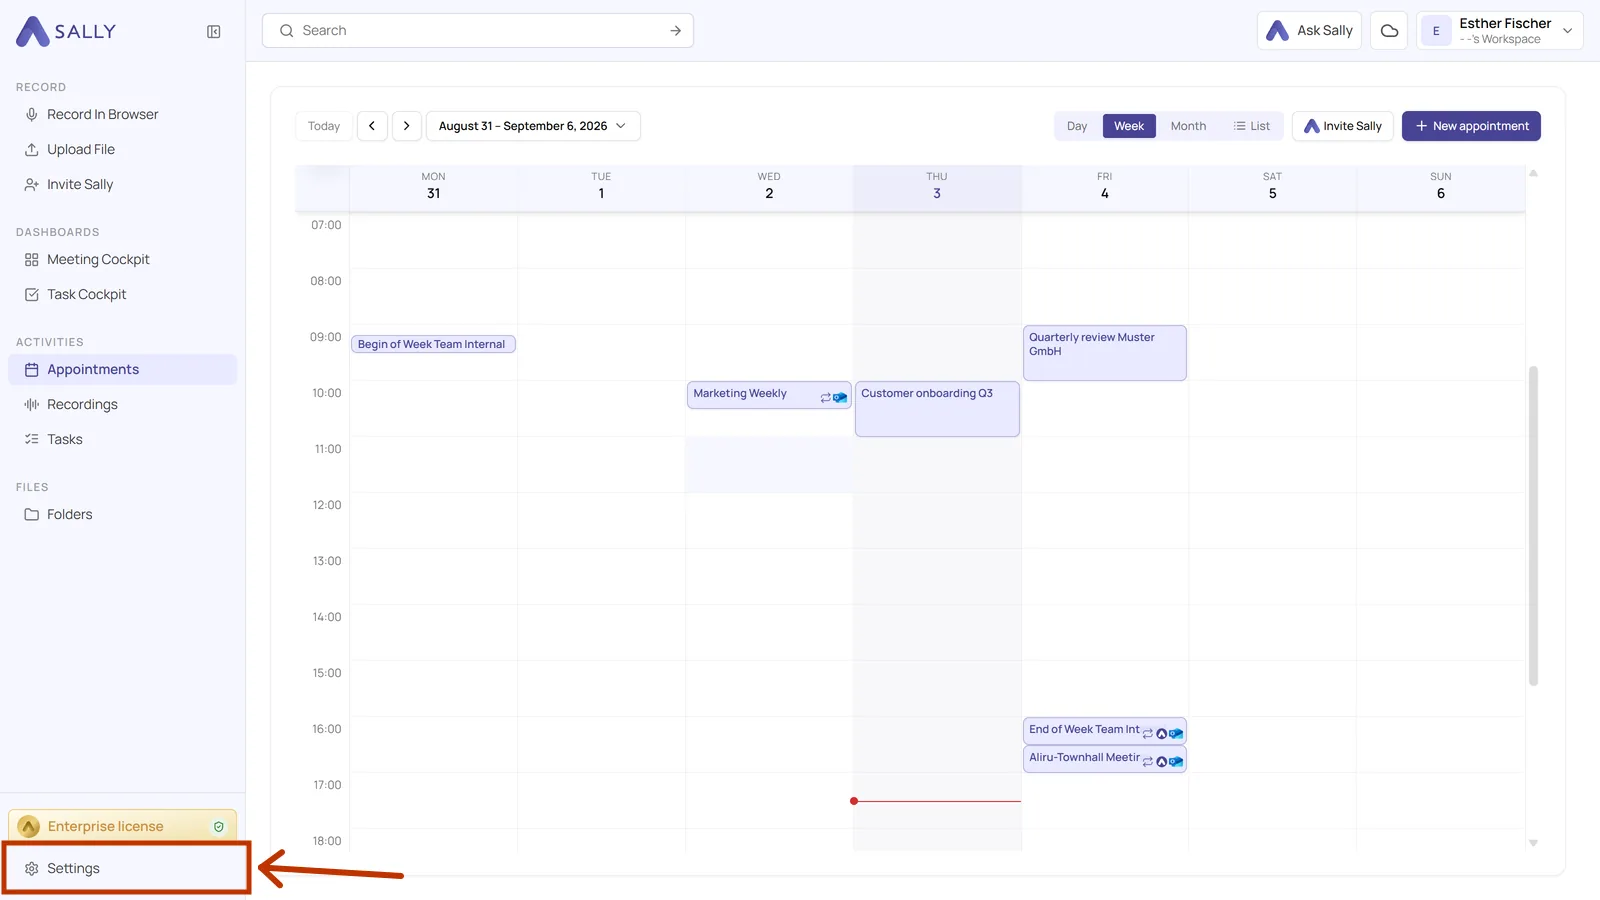
- Open Settings at the bottom of the left sidebar.
- In the sidebar on the left, under Configuration, pick Meeting templates.
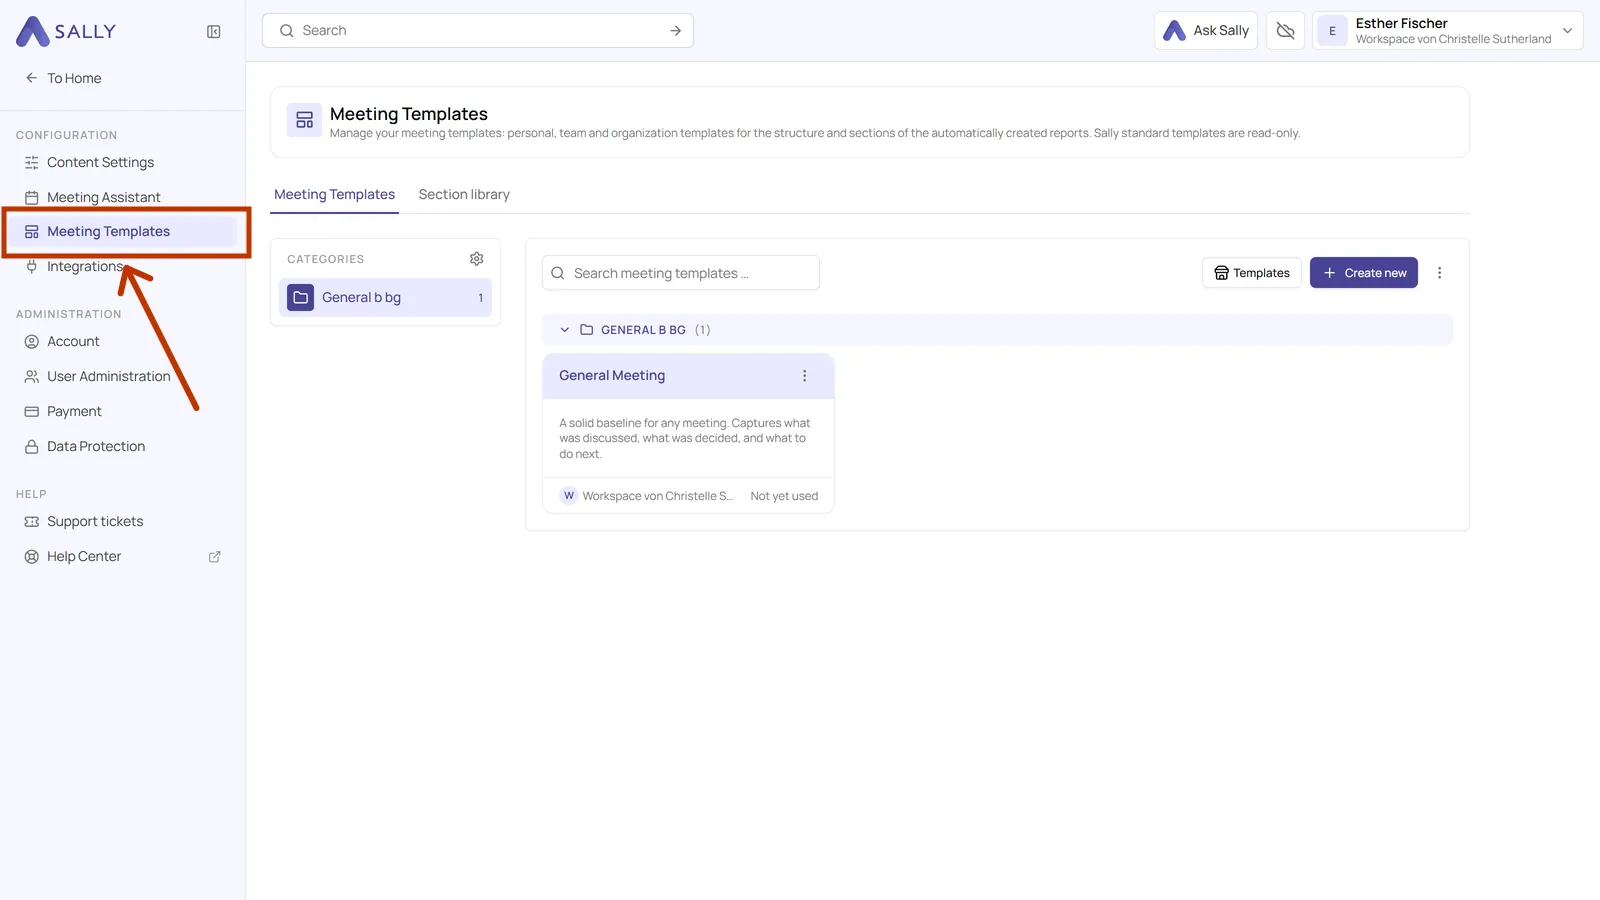
- The overview lists every template you can use. In a new account that is exactly one, General Meeting. Your categories are on the left, the templates themselves on the right. The two tabs at the top switch between Meeting templates and the Section library.
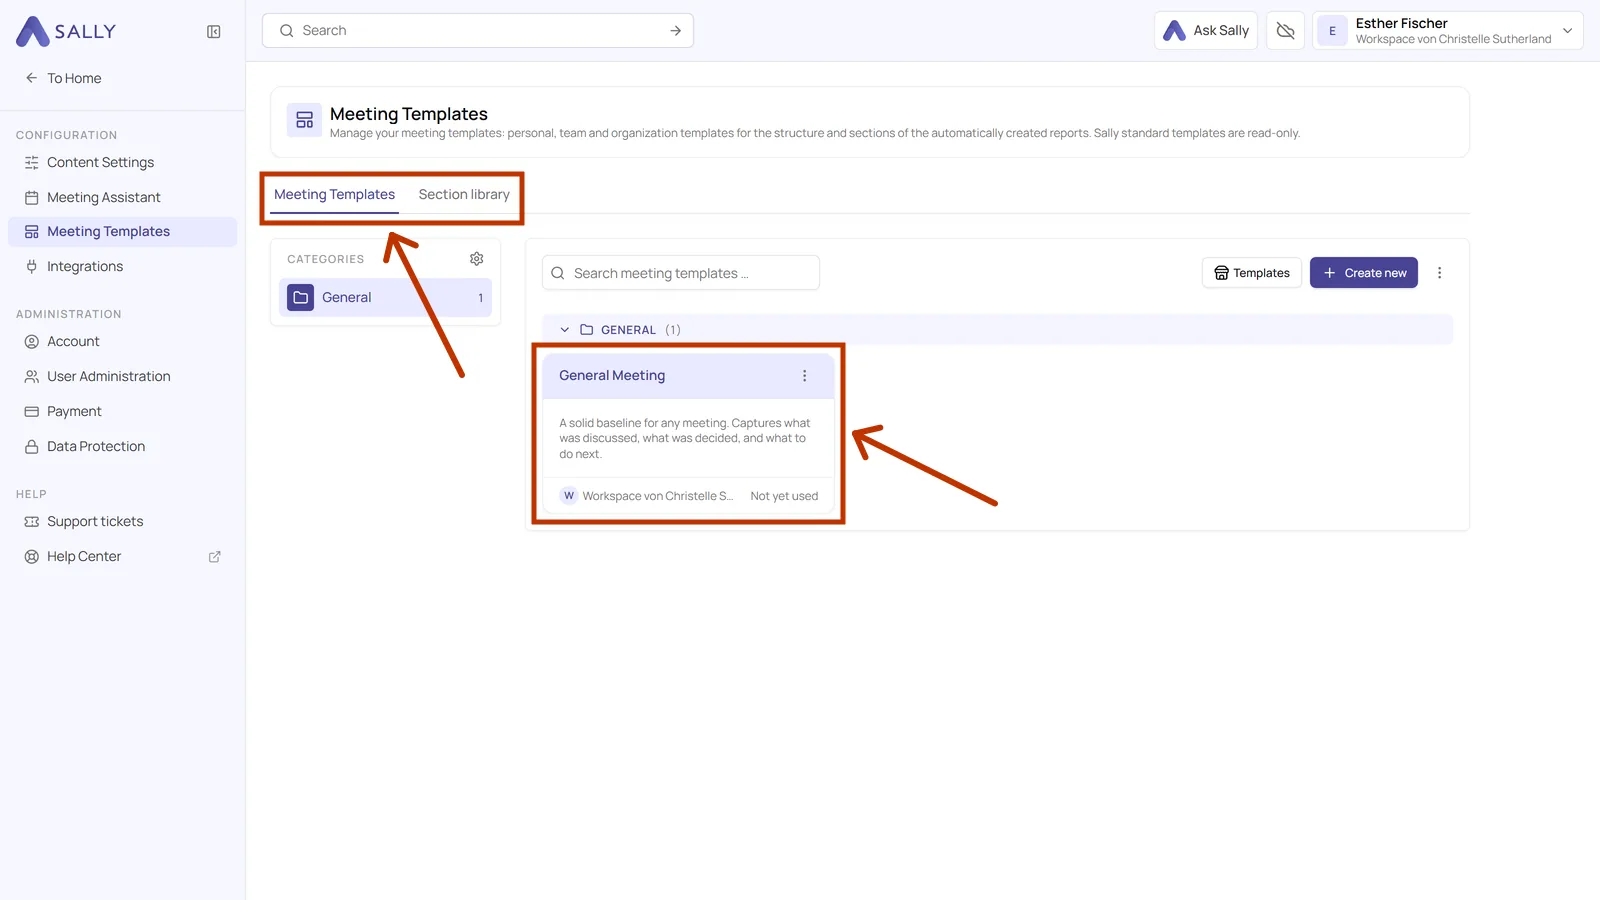
General Meeting is Sally's default template and it is in every account. The footer of the card shows who owns it and how often it has been used. Sally's own templates are read-only, so you cannot change them directly. What you can do is duplicate one and edit the copy.
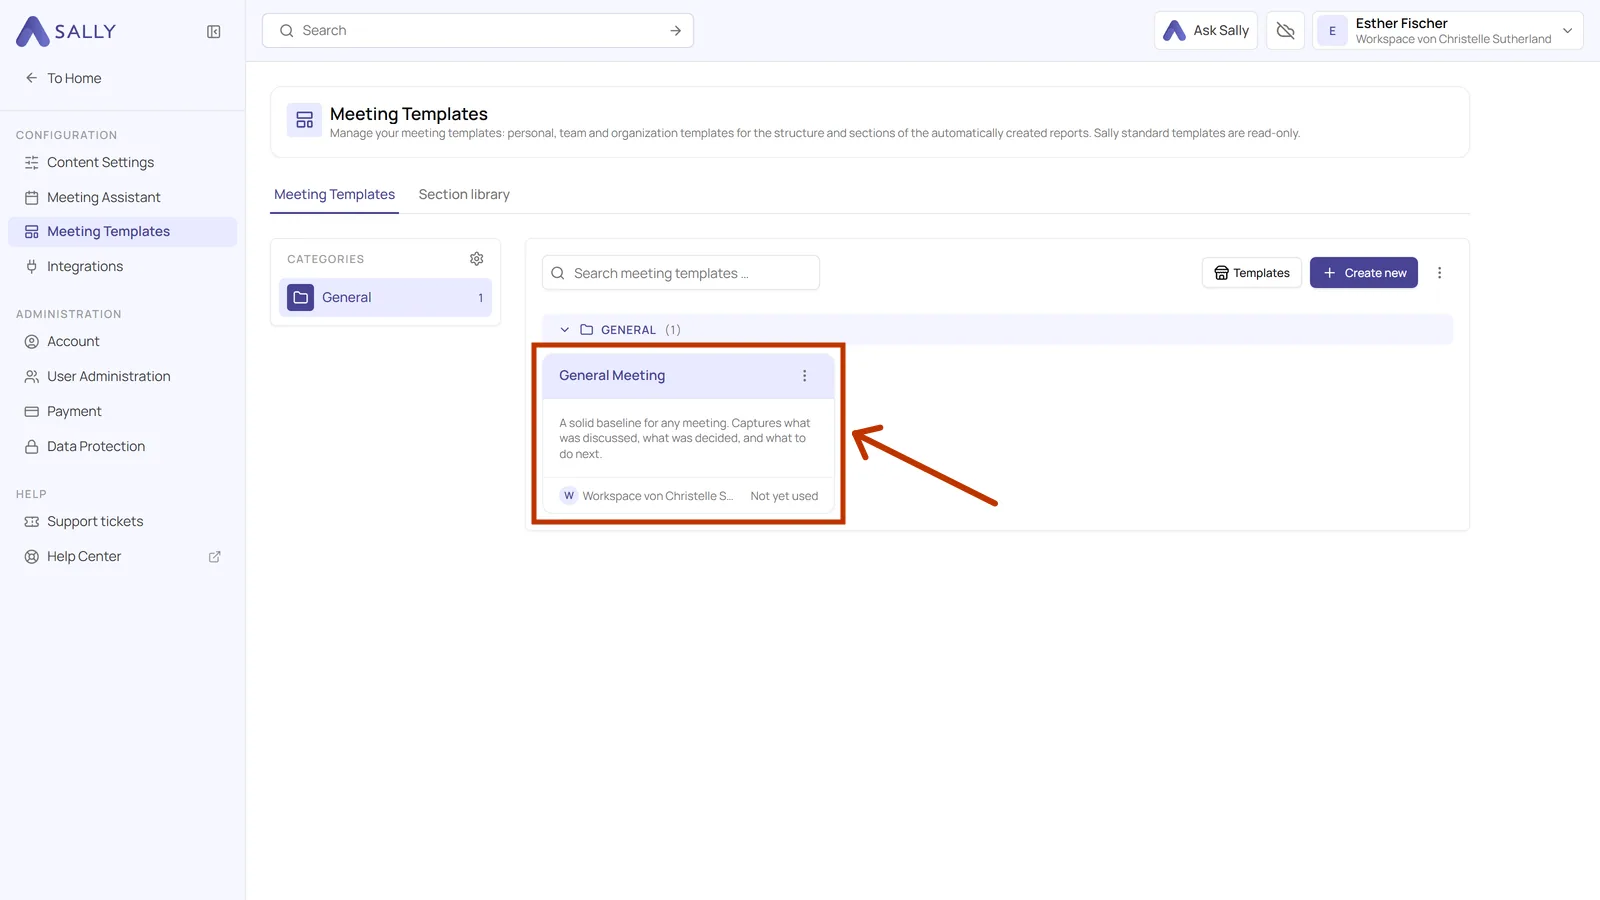
Templates that belong to you carry the label You. Templates that were shared with you show the team or the organization account instead, and whether you may edit them depends on your role there. How you decide who gets to see a template at all, only you, one team or the whole organization, is covered in Sharing a template.
2. What a section is made of
A section is one block in the finished summary, for example Summary, Topics, Decisions or Tasks. Here is how to look inside one.
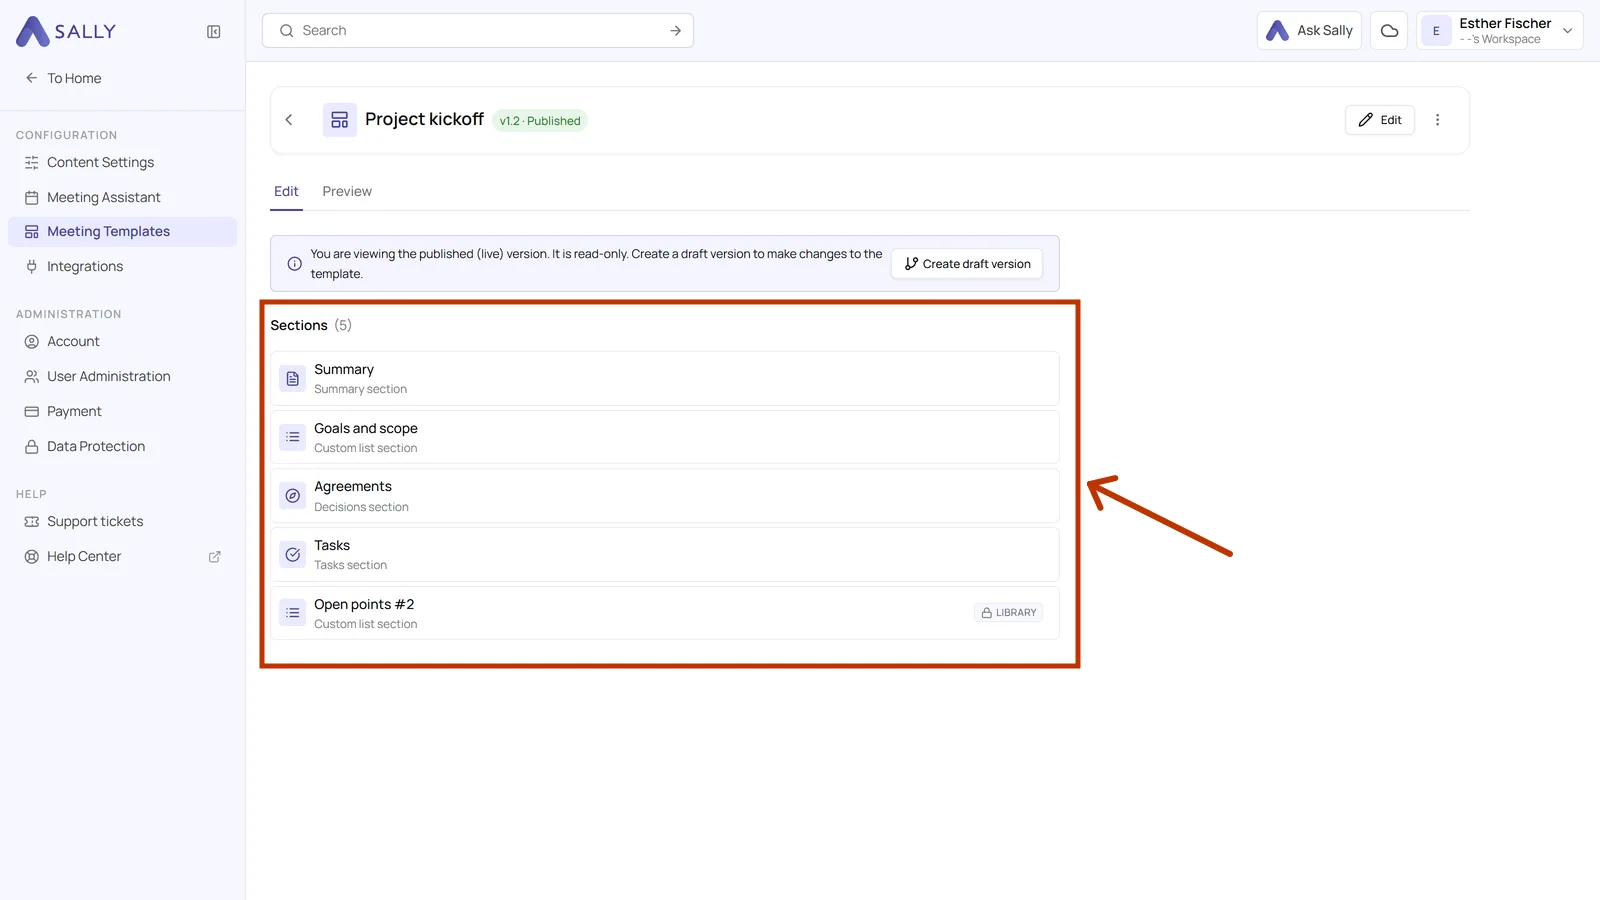
- Click the card of a template. Under Sections you see every section in the order it will appear in the summary.
- Click one of the sections in that list. A panel with its settings opens on the right. Each section has a title, which becomes the heading in your summary, and a prompt, which is the instruction Sally follows. Under Output you decide how much detail Sally writes, whether it adds timestamps and which format the result is in, HTML or Markdown.
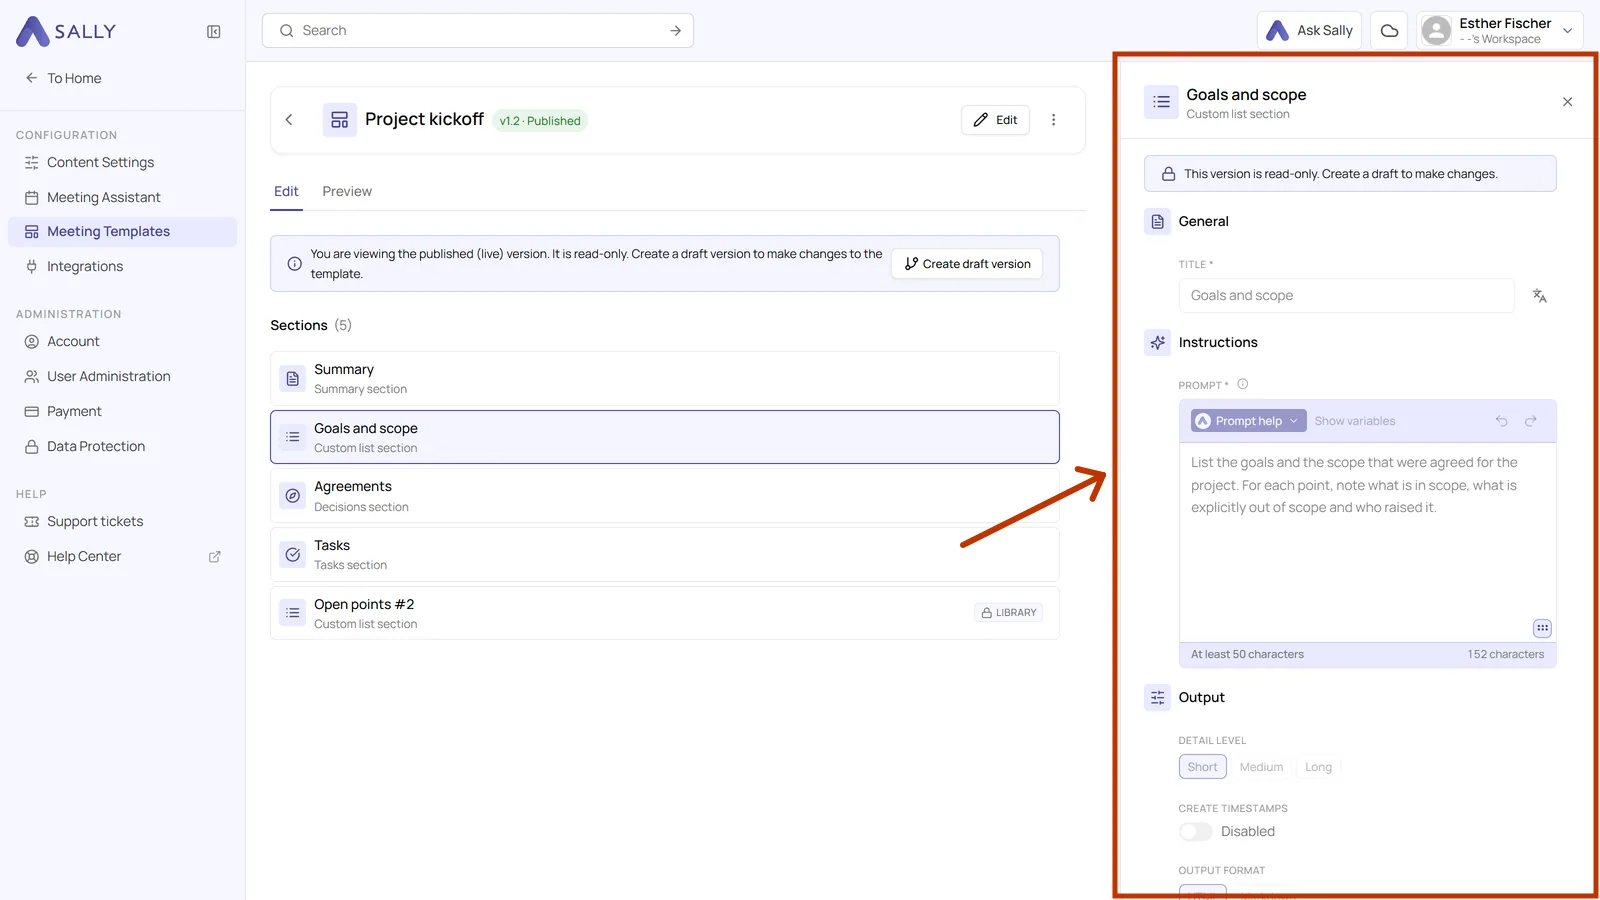
Four sections come with their prompt already written: Summary, Topics, Decisions and Tasks. You can take those as they are. For Custom list and Free text you write the prompt yourself. Sections and the section library covers that in detail.
3. Versions and the live template
The badge next to the template name always shows the version and its state, for example v1.1 · Published. The published version is the live one: it is the version your meetings actually use, and it is read-only.
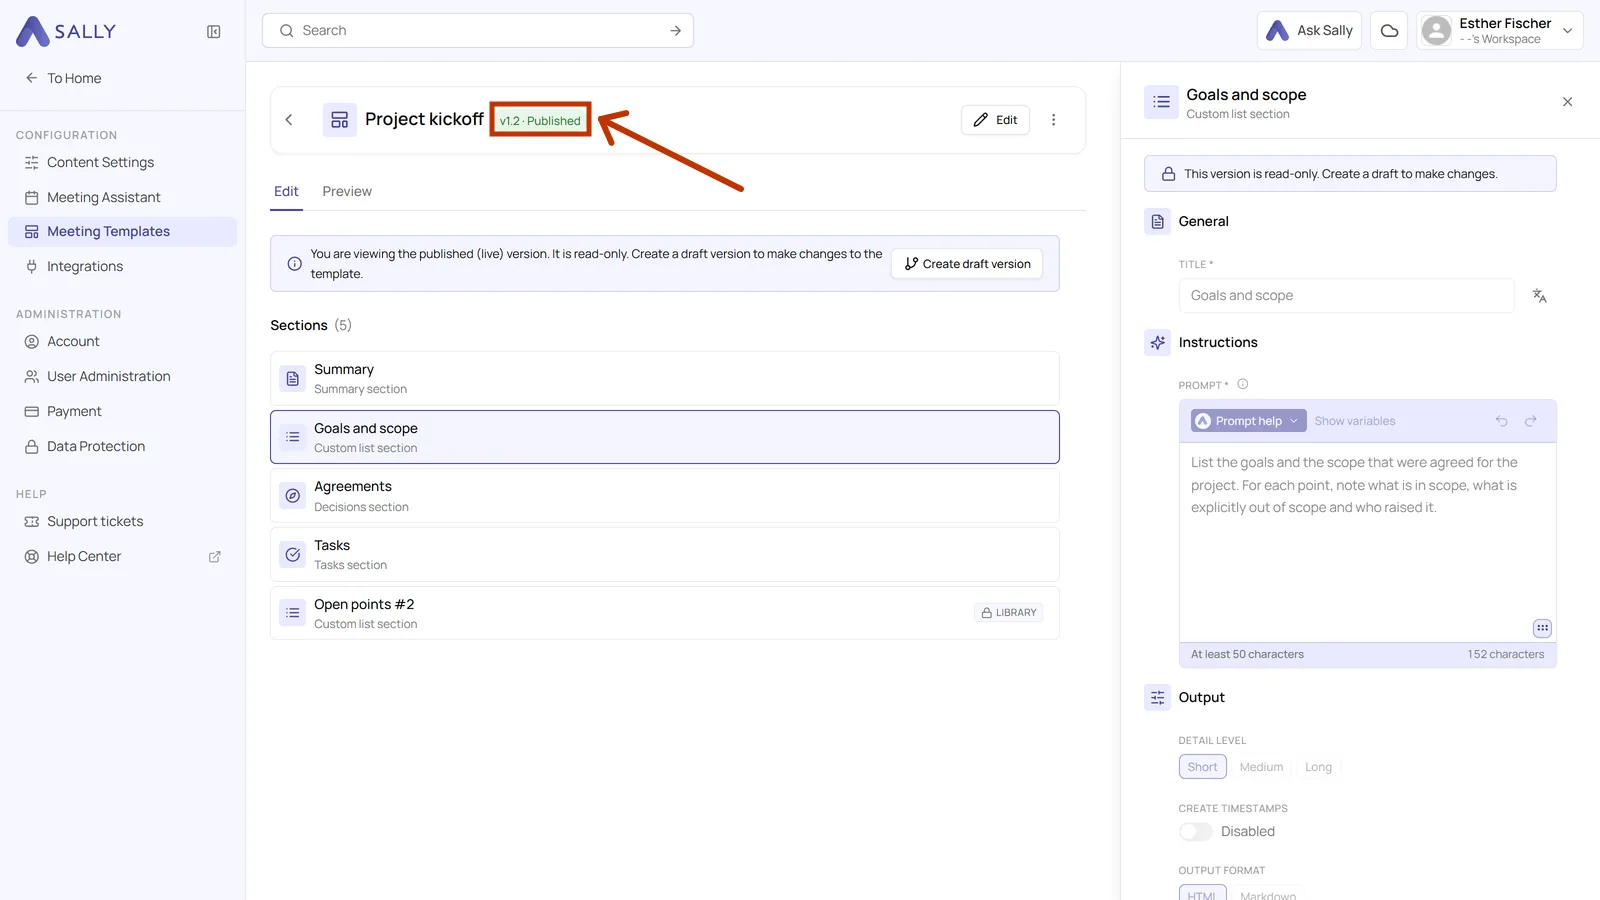
That is on purpose. The moment you want to change something, Sally creates a draft version for you. You can work in that draft as long as you like without touching the summaries that are being written in the meantime. Only when you publish the draft does it become the new live version. Creating a new version walks through it step by step.
4. Preview and test
Before a real meeting relies on your template, you can test it against a recording you already have. That way you see the result up front.
- In the overview, click the card of the template and switch to the Preview tab at the top.
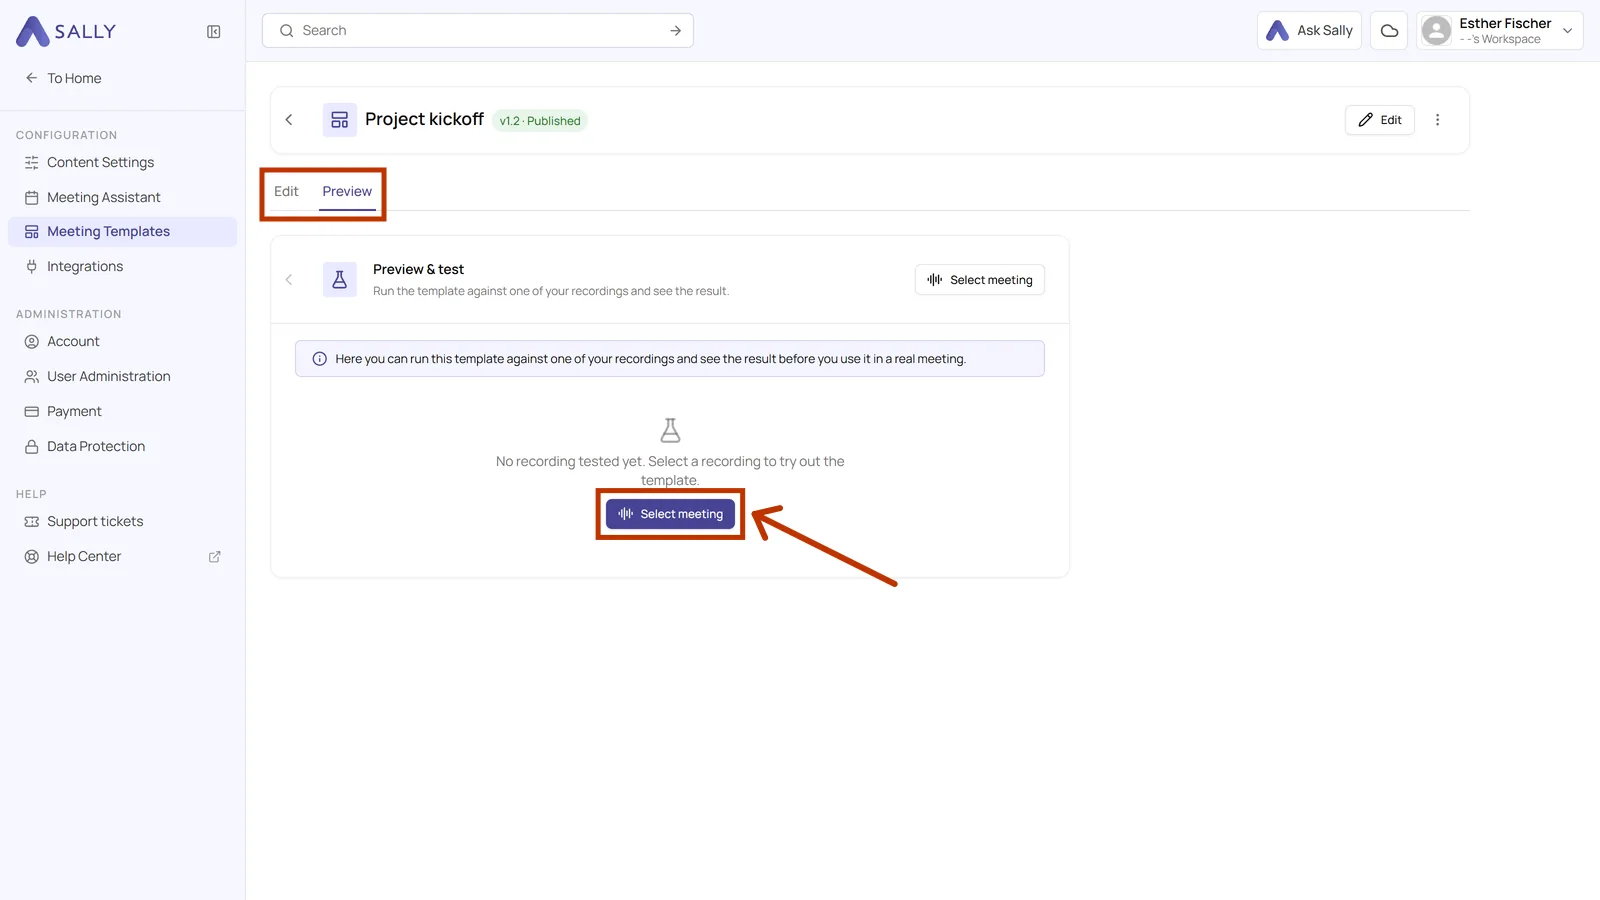
- Click Select meeting. Sally lists your recordings with their dates. Generate next to a recording starts the test.
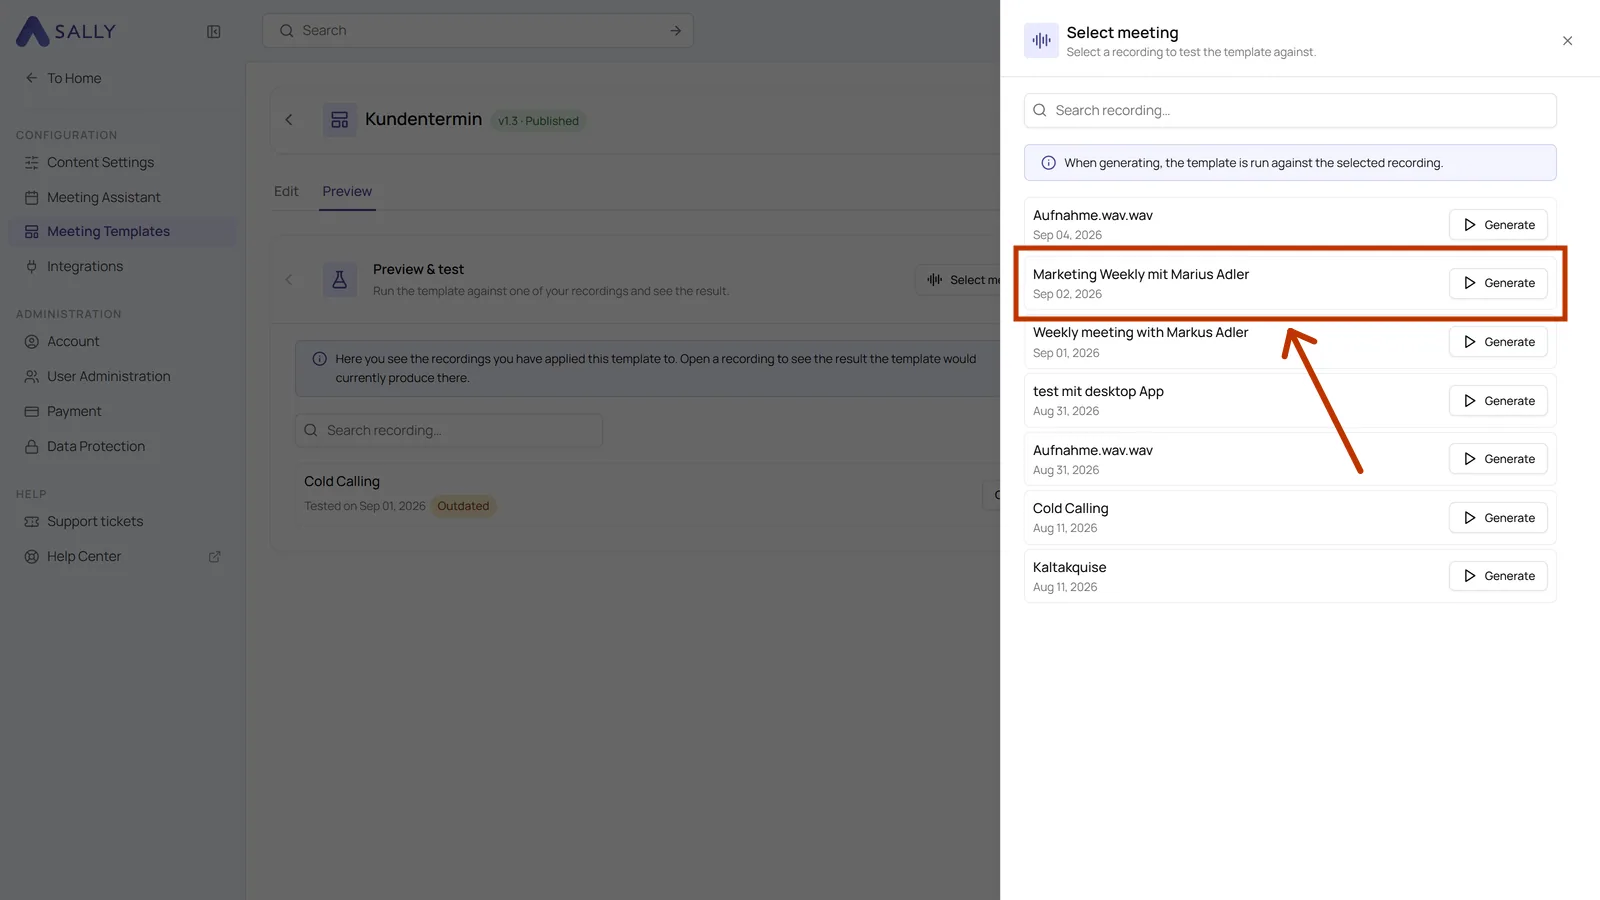
- Generating takes a moment. After that the sections of the template appear one below the other, each with the text Sally worked out from that recording. A click on an entry expands it.
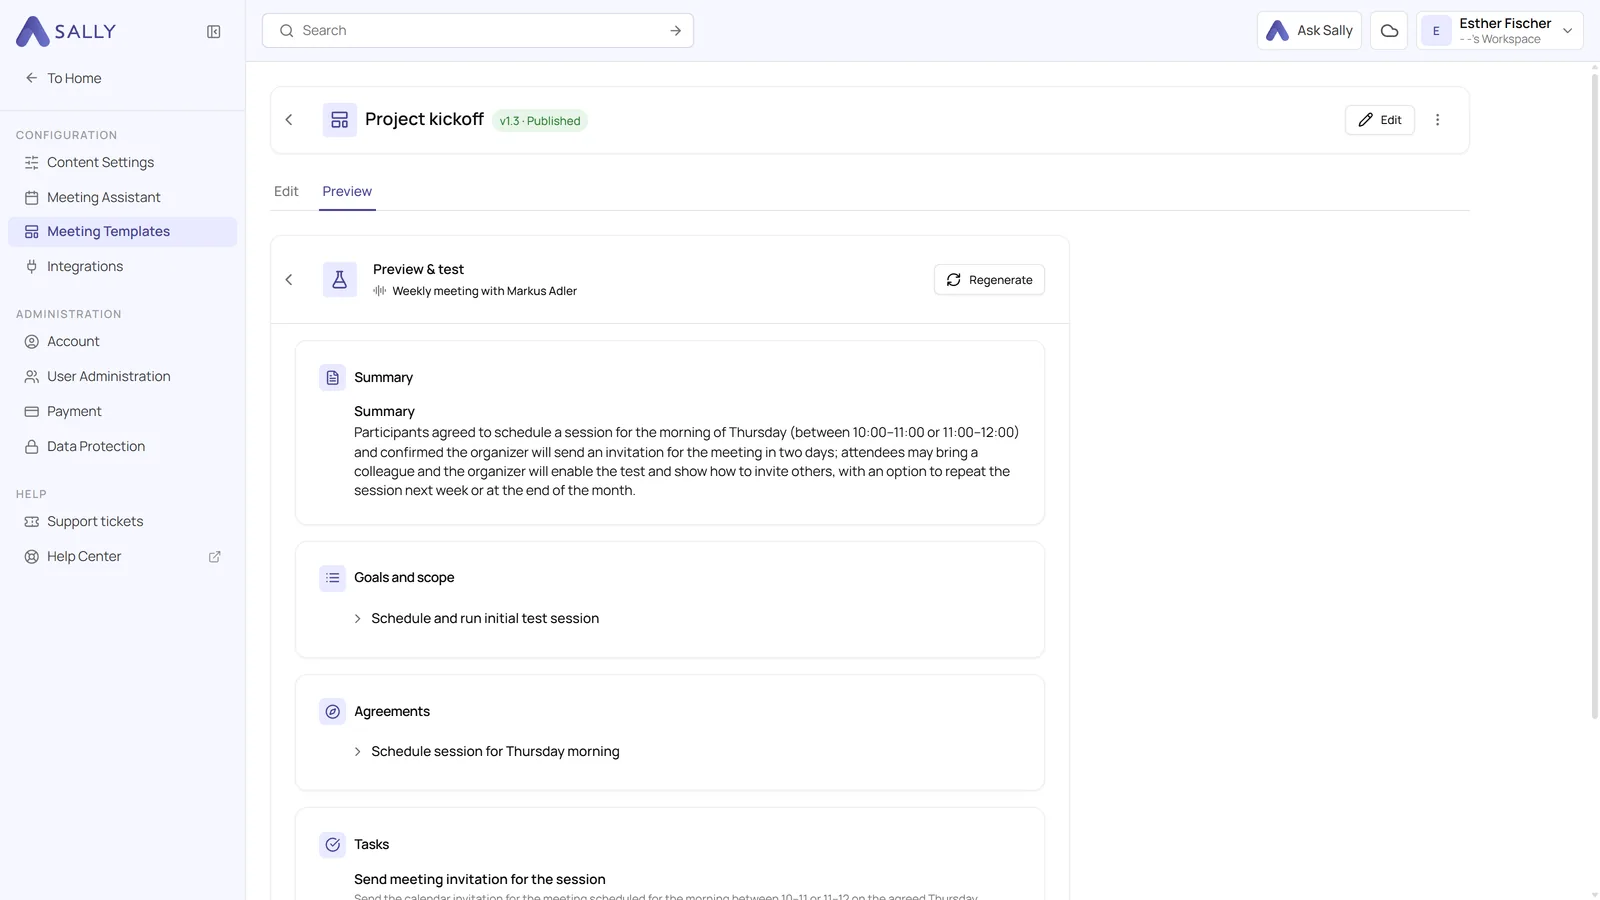
Recordings you have tested stay in the Preview tab, each with the date of its test, and Open brings its result back up. If you change the template later, Sally marks an older result as Outdated so you know it no longer matches the current state.
The recording itself stays untouched, so this is a safe way to check whether your prompts really deliver what you had in mind.
5. Managing templates and categories
The overview is where you manage individual templates and organize your categories. There are two places for that.
- Click the three dots in the top right of a template card. The menu shows every action for that template.
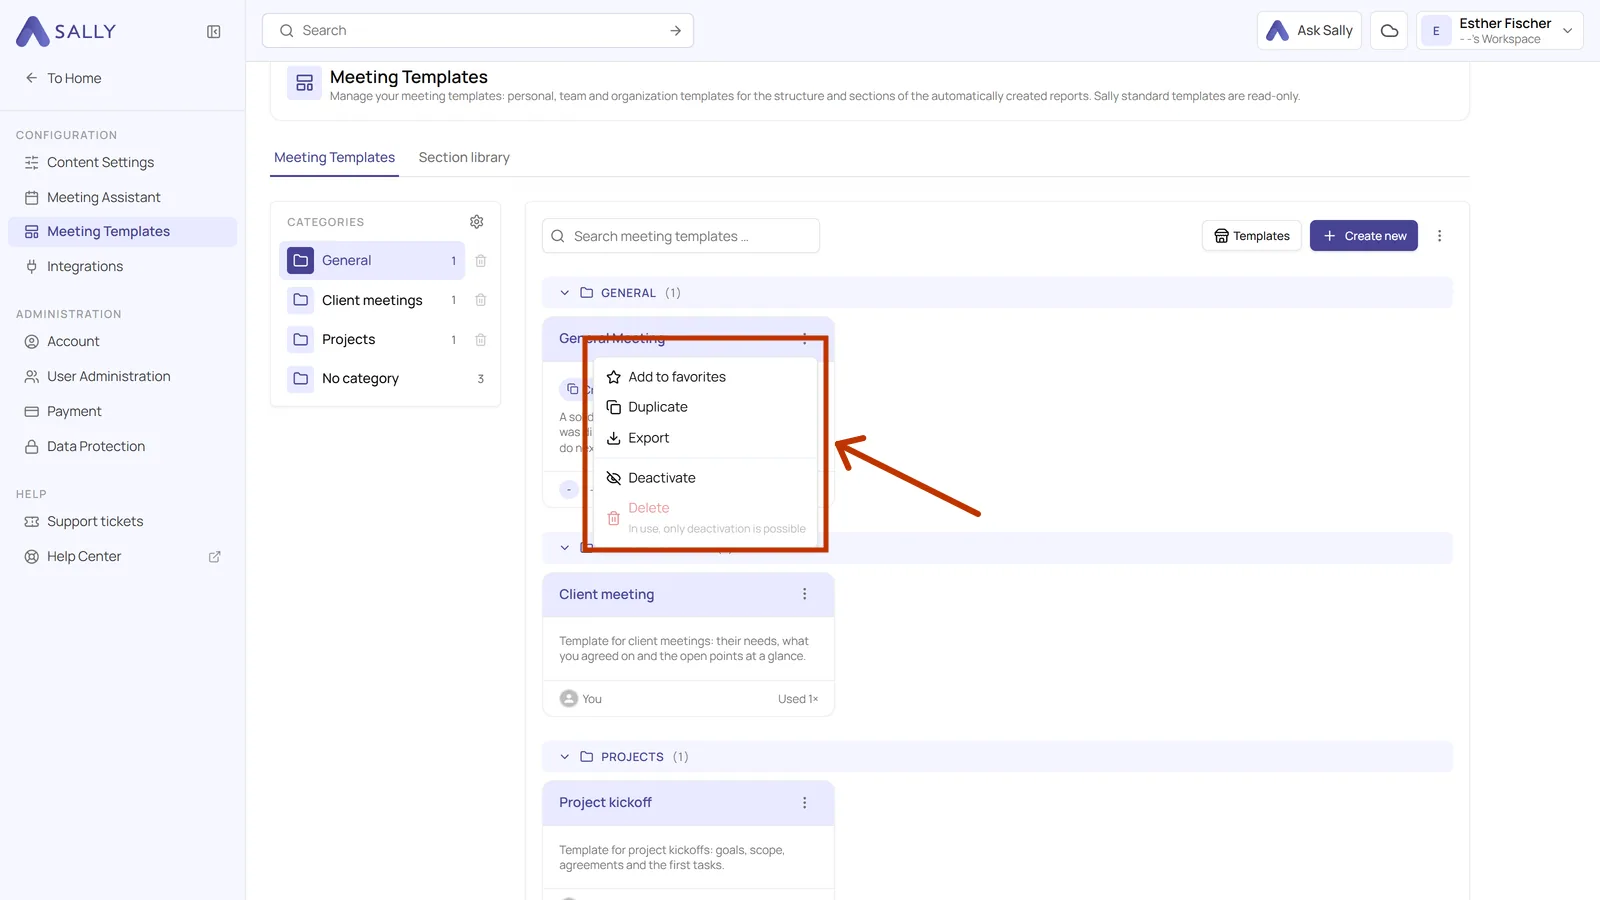
- Edit opens the details of the template: title, description, category and visibility.
- Add to favorites puts the template at the top of your overview so you find it faster.
- Duplicate creates an editable copy. This is the way to start from one of Sally's templates.
- Export saves the template as a file. Export and import explains what you can do with it.
- Deactivate takes a template out of use without deleting it.
- Delete removes it permanently. A template that is already in use cannot be deleted, only deactivated.
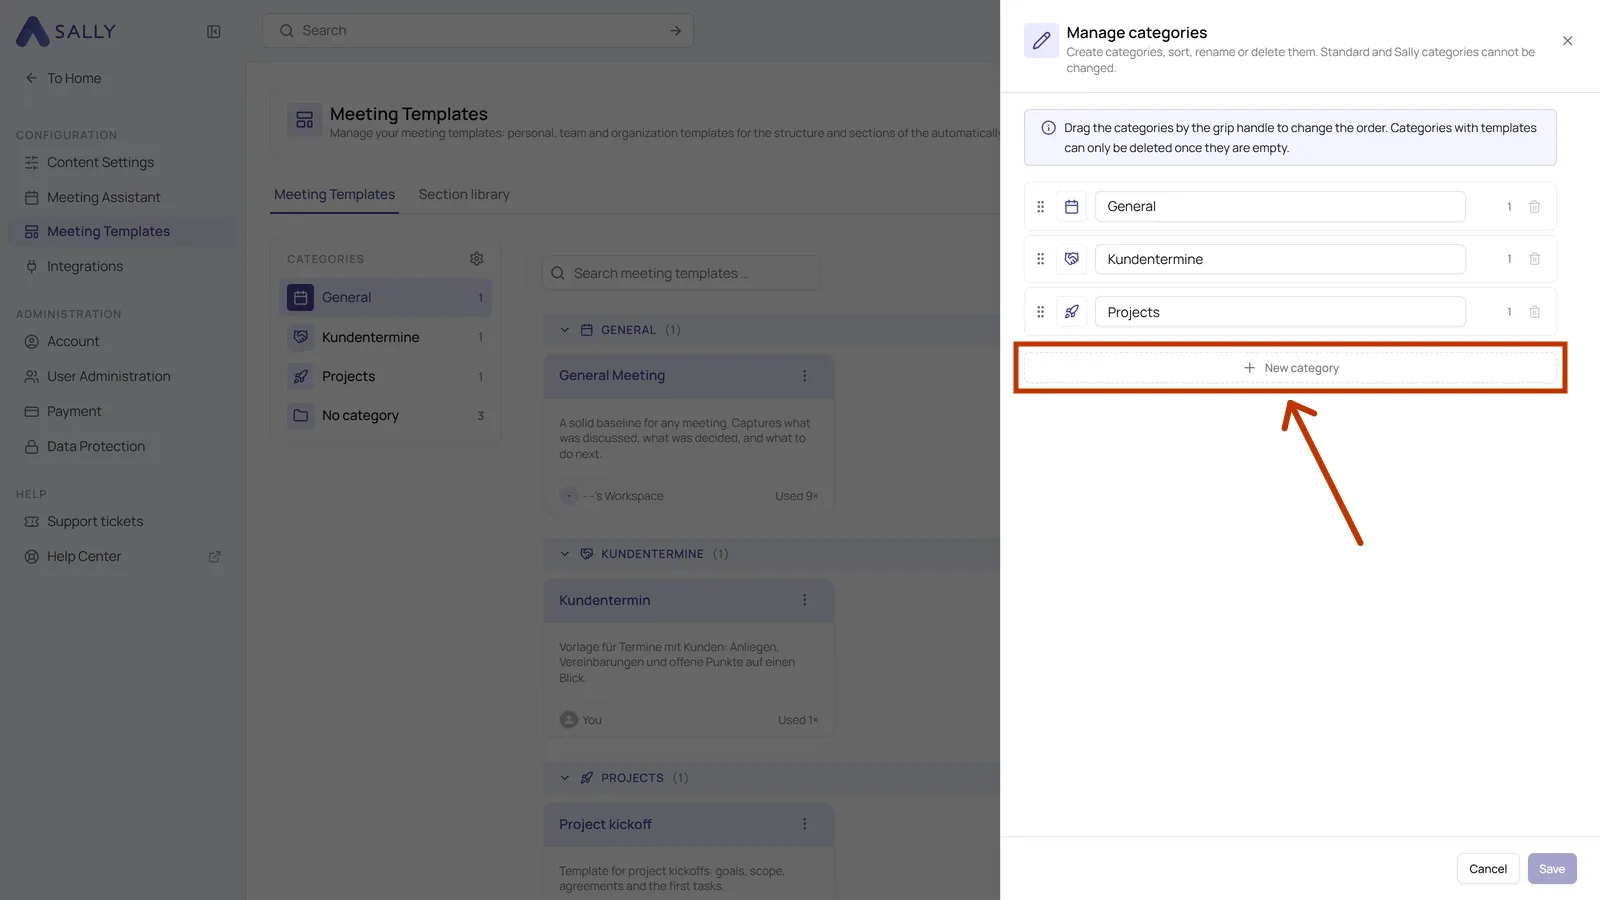
- Click the gear icon above the category list on the right. That opens Manage categories.
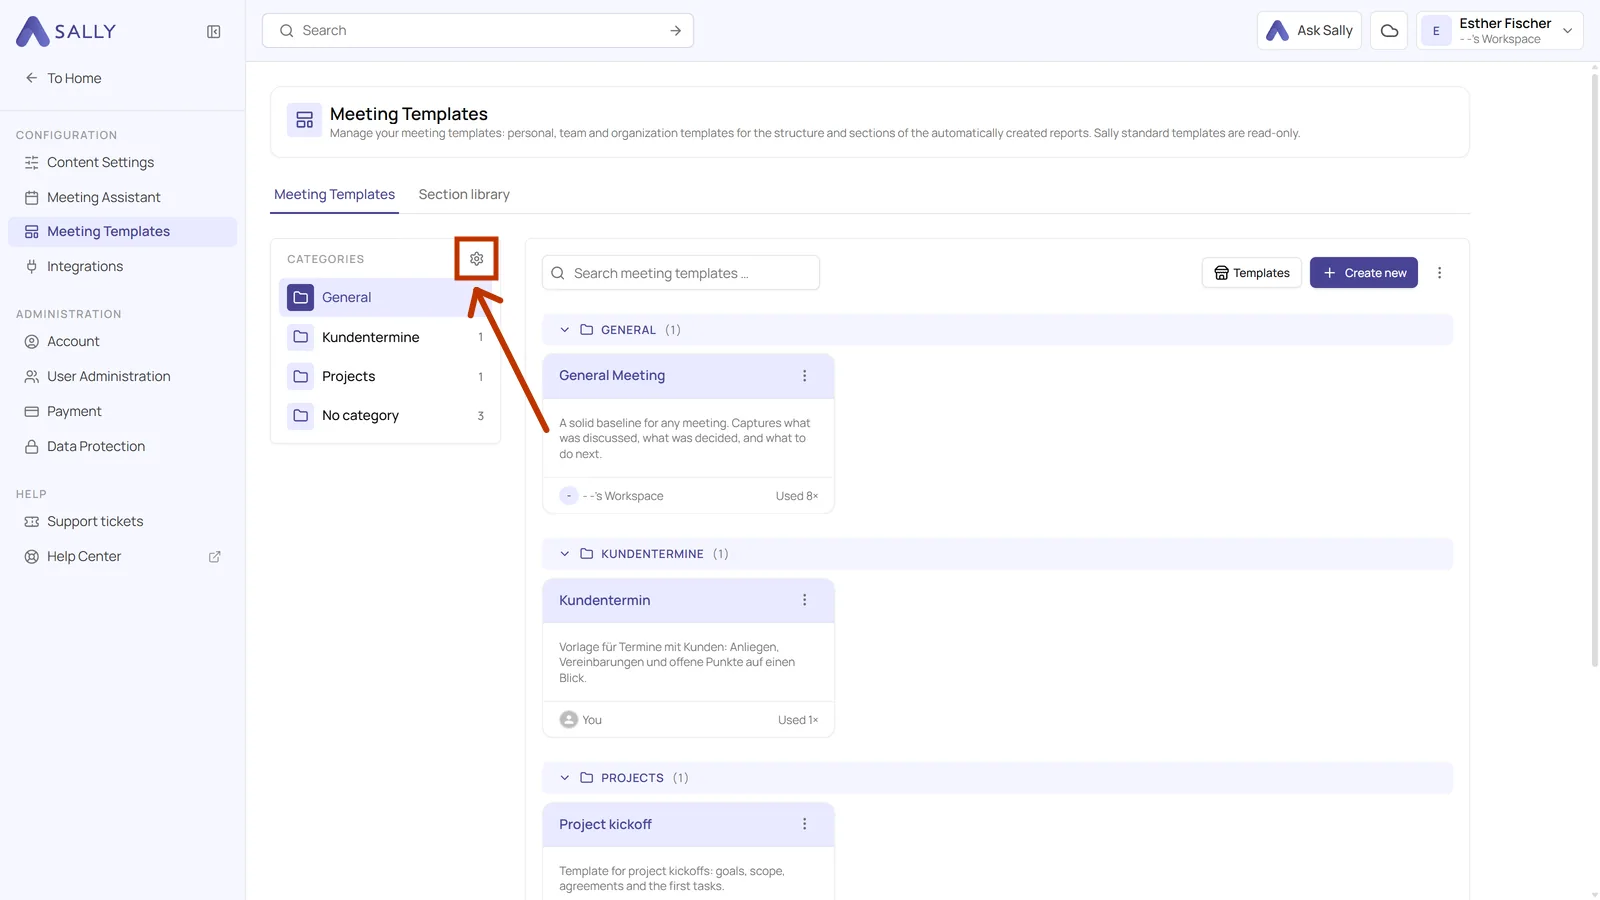
Categories are just for order in the overview: create them, rename them, drag them into the order you want. Click the folder icon in front of a category name and pick your own icon from the grid. That makes the categories easier to tell apart at a glance. A category has to be empty before you can delete it.
If you only want a better structure quickly, take a look at Sally's ready-made templates first. There are 30 of them, and copying one into your own account takes two clicks.