How to build sections and use the section library
Sections are the parts a template is made of. Each one becomes a heading in your summary, and its prompt is the instruction Sally follows while writing it. That is where you decide whether a section stays a short overview or digs into every detail.
This article goes through everything a section can do: the types you can choose from, how to write a good prompt, how to translate the title into other languages, what the output settings change, and how the section library lets you reuse a section across all your templates instead of writing it again every time.
Quick navigation
1. Section types
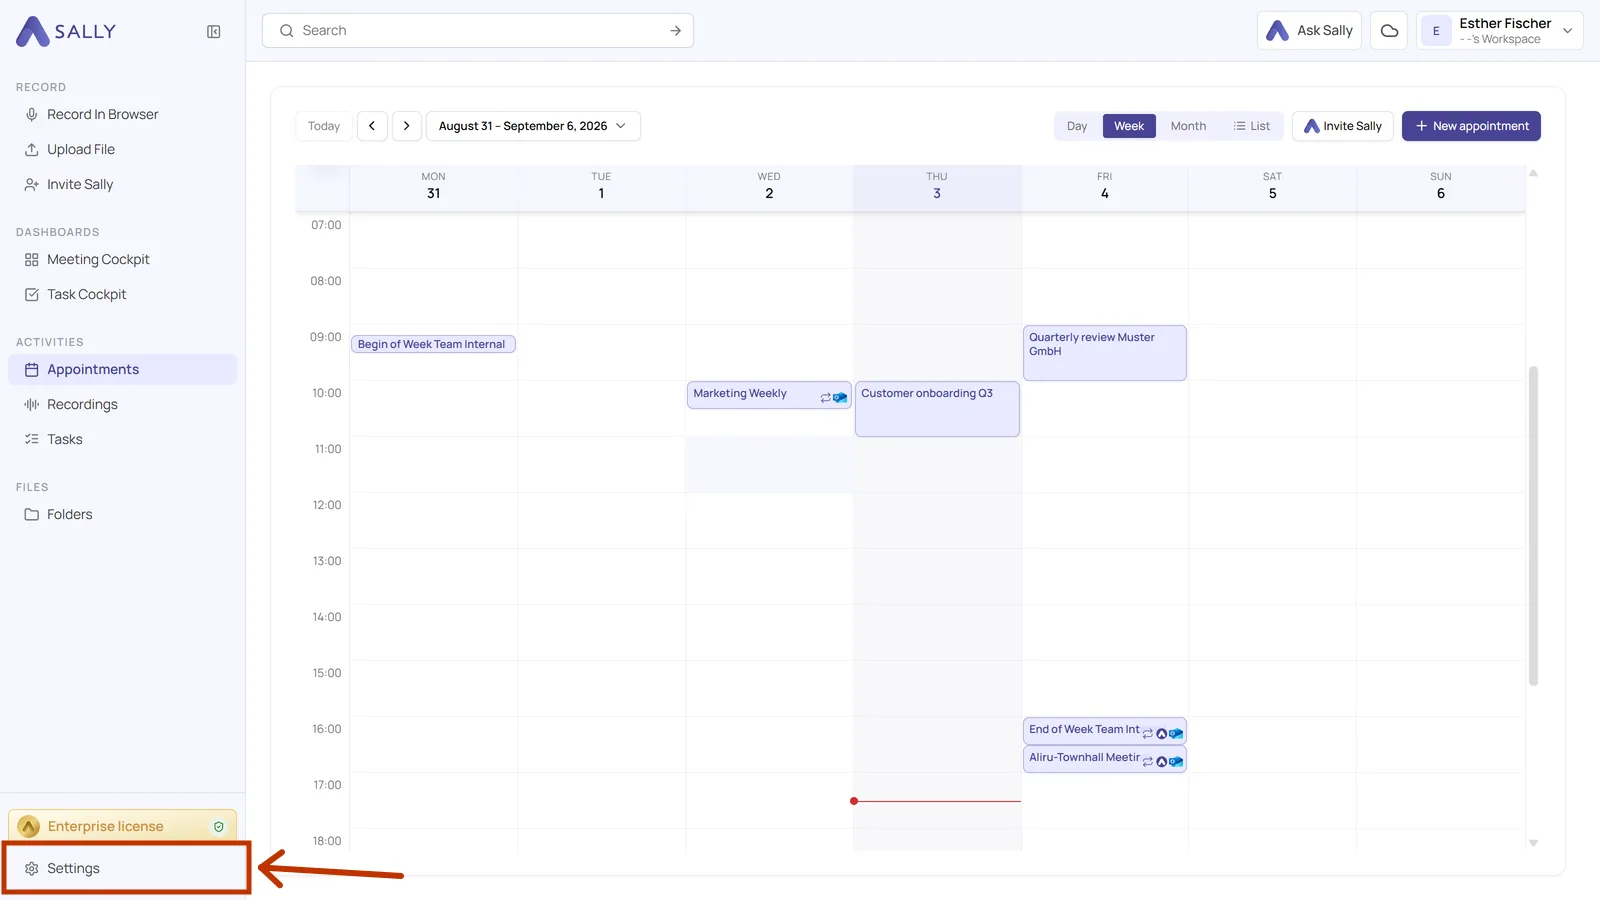
Sections are always edited in a draft. Here is the way there, from the calendar to the list of section types:
- Open Settings at the bottom of the left sidebar.
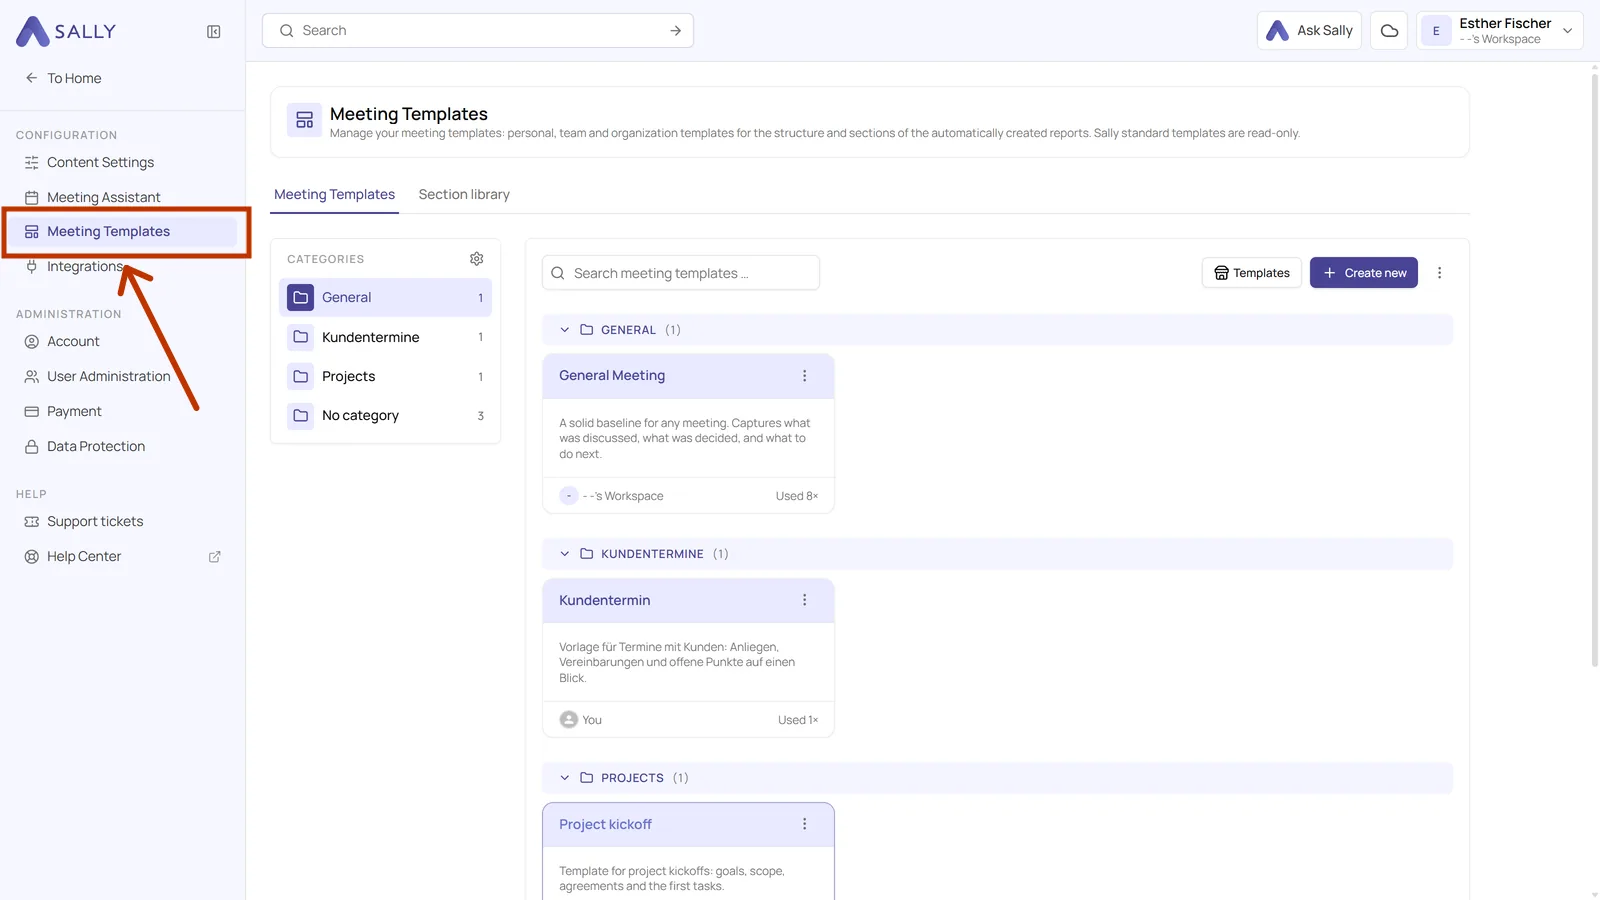
- In the settings sidebar on the left, under Configuration, click Meeting templates.
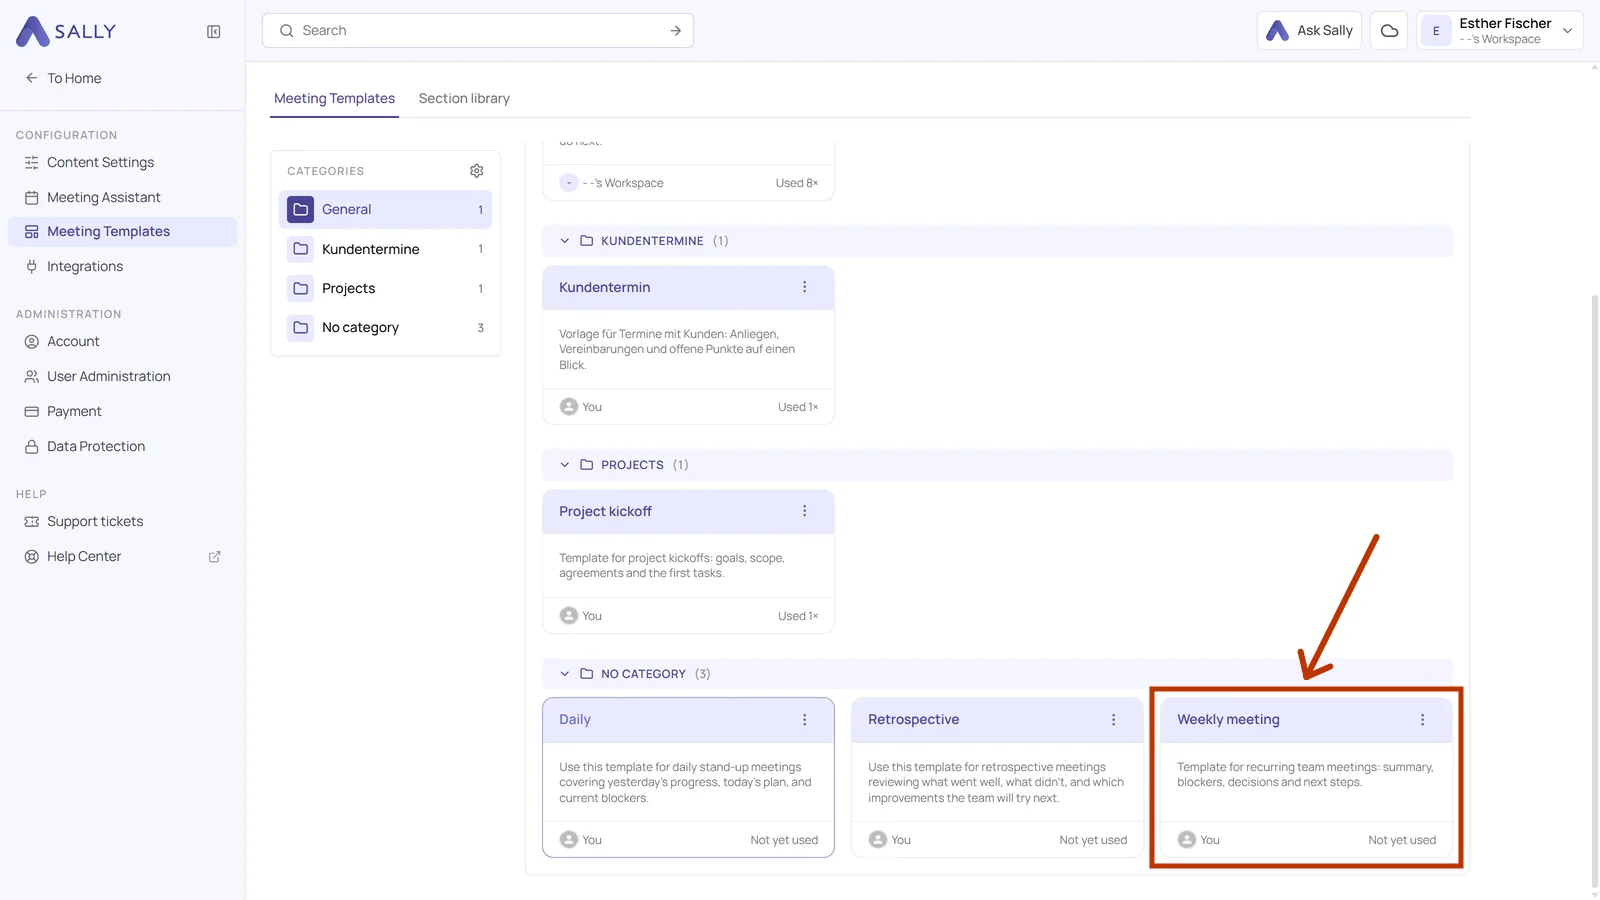
- Click the card of the template you want to work on.
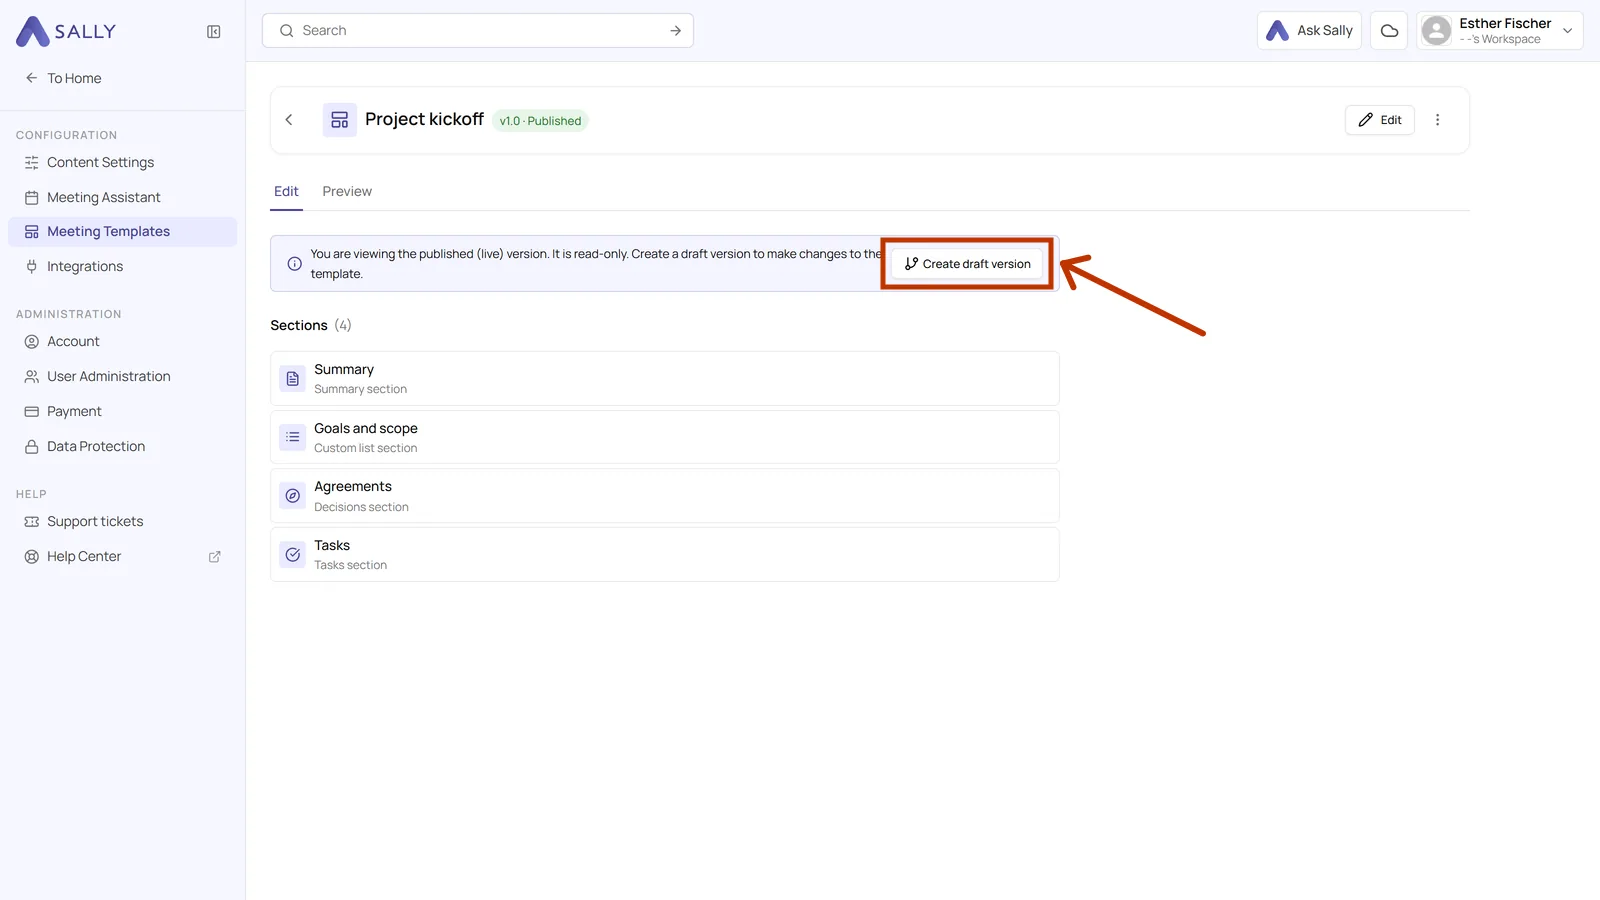
- In the note at the top, click Create draft version and confirm the version number. Creating a new version walks through that in detail. If you are in the middle of creating your own template, you are already in a draft and can skip this step.
- Click Add section below the section list. The panel with the choices opens on the right, and its Standard tab splits them into two groups.
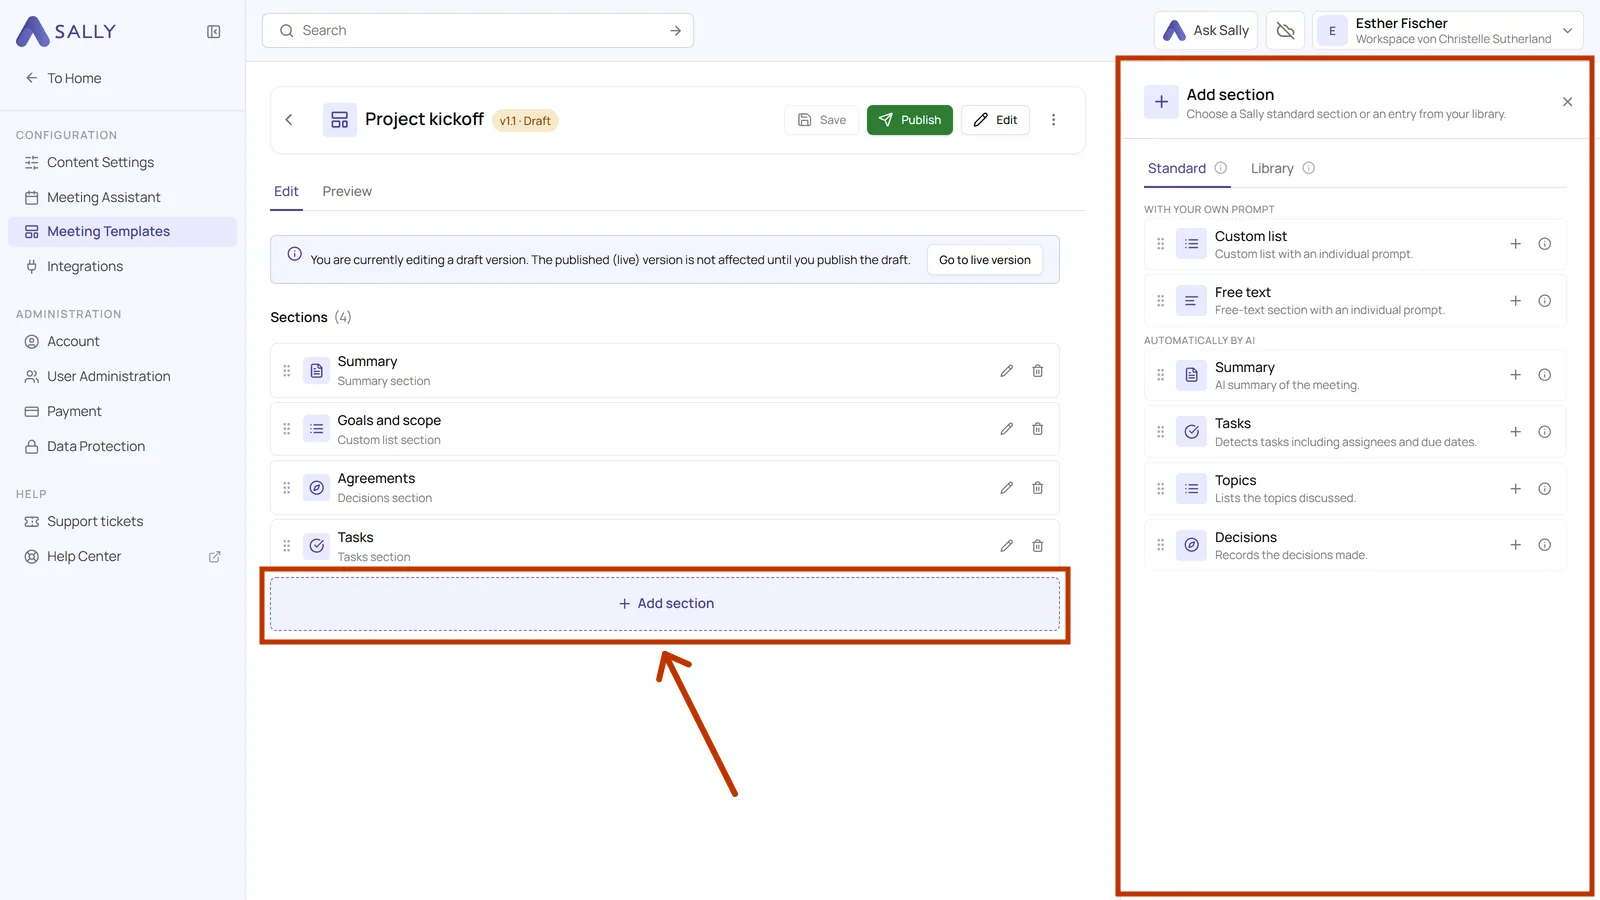
With your own prompt
- Custom list produces a list, one entry per point, each with a short label and an explanation.
- Free text produces running text.
Automatically by AI
- Summary writes a short overview of the whole meeting.
- Tasks pulls out the action items, with owners and due dates where they were mentioned.
- Topics lists what was discussed, in the order it came up.
- Decisions records what was actually agreed.
The four automatic ones already come with a prompt that you can adjust.
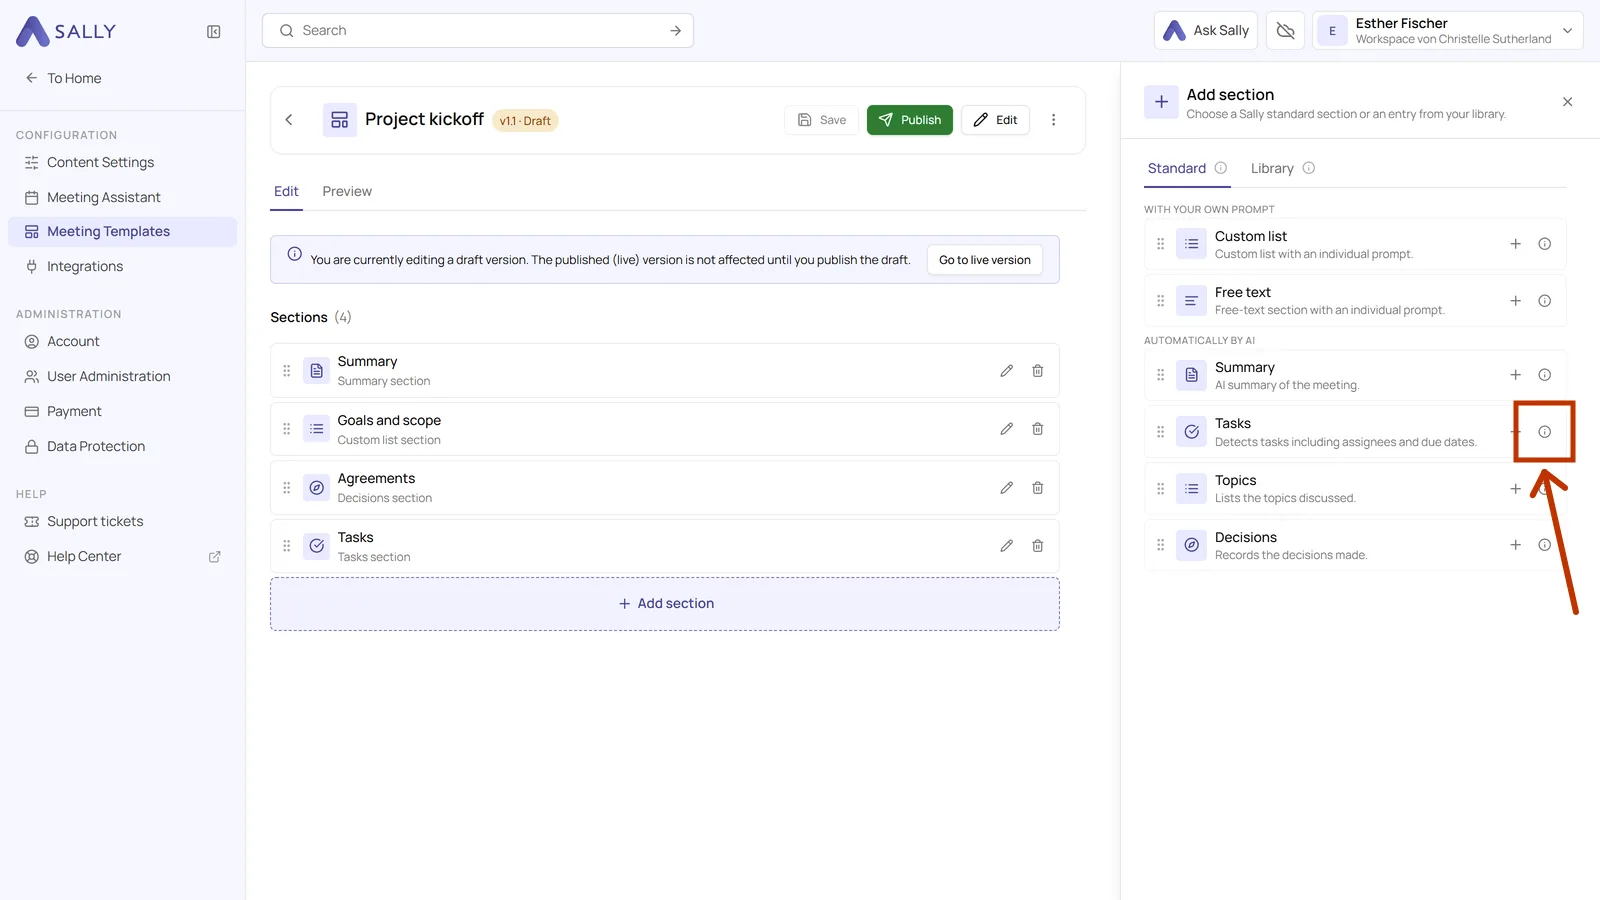
- Click the small info icon to the right of an entry when you want to know exactly what that section does.
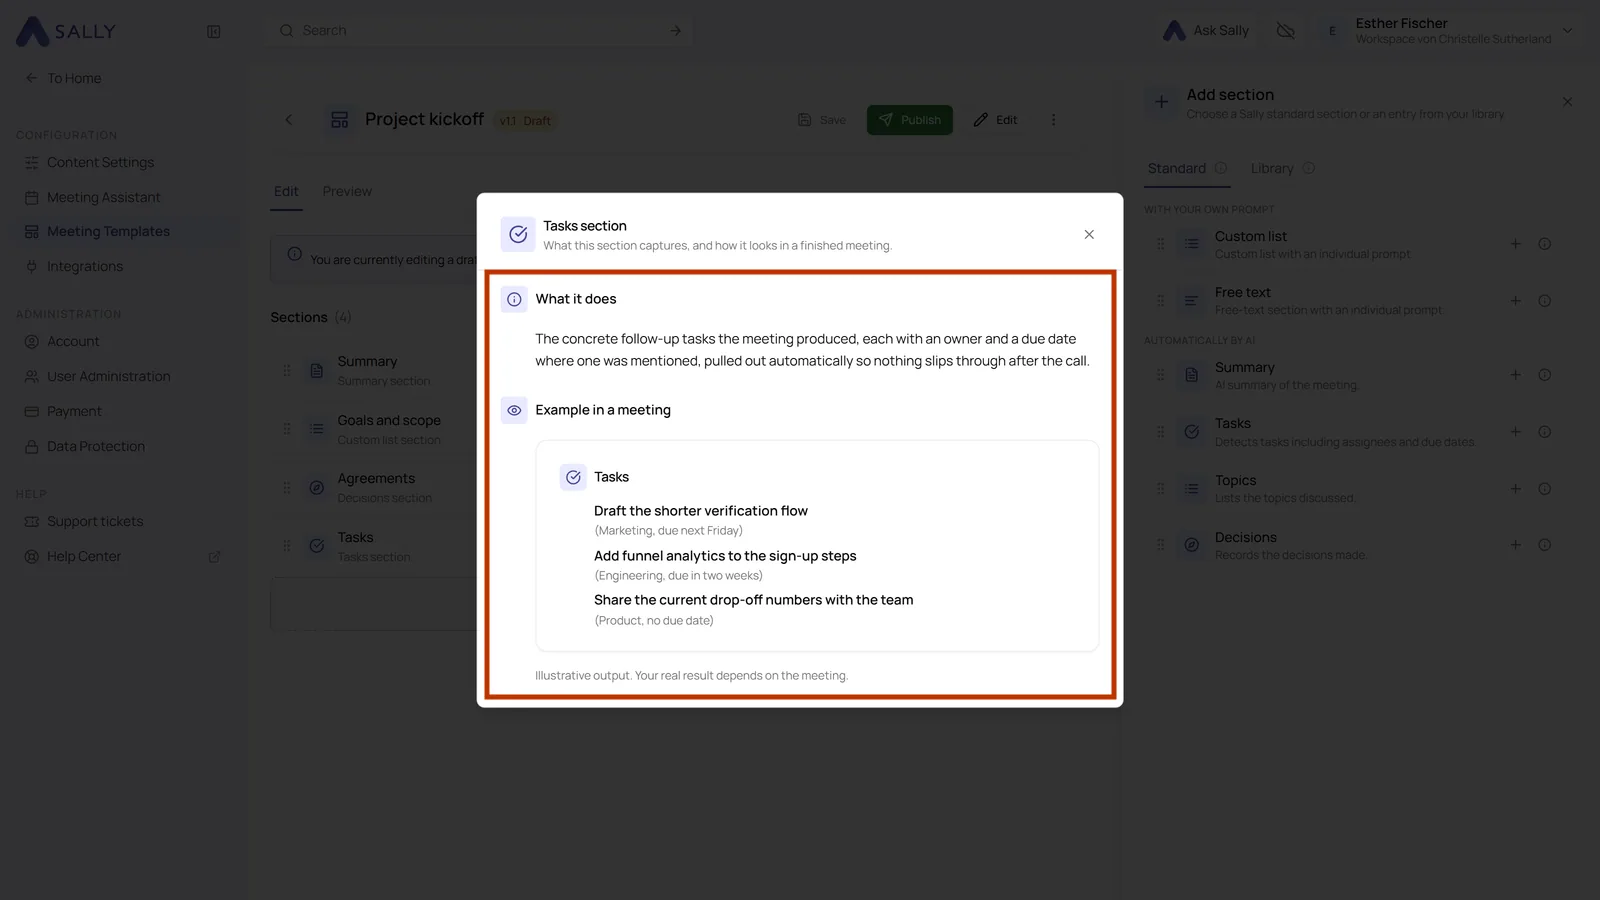
- An explanation opens with What it does and a small Example in a meeting, so you can see the result before you commit. Close it with the cross in the top right.
2. Title and prompt
The title and the prompt are the two things that make up a section. You set both in the panel that opens on the right when you open a section.
-
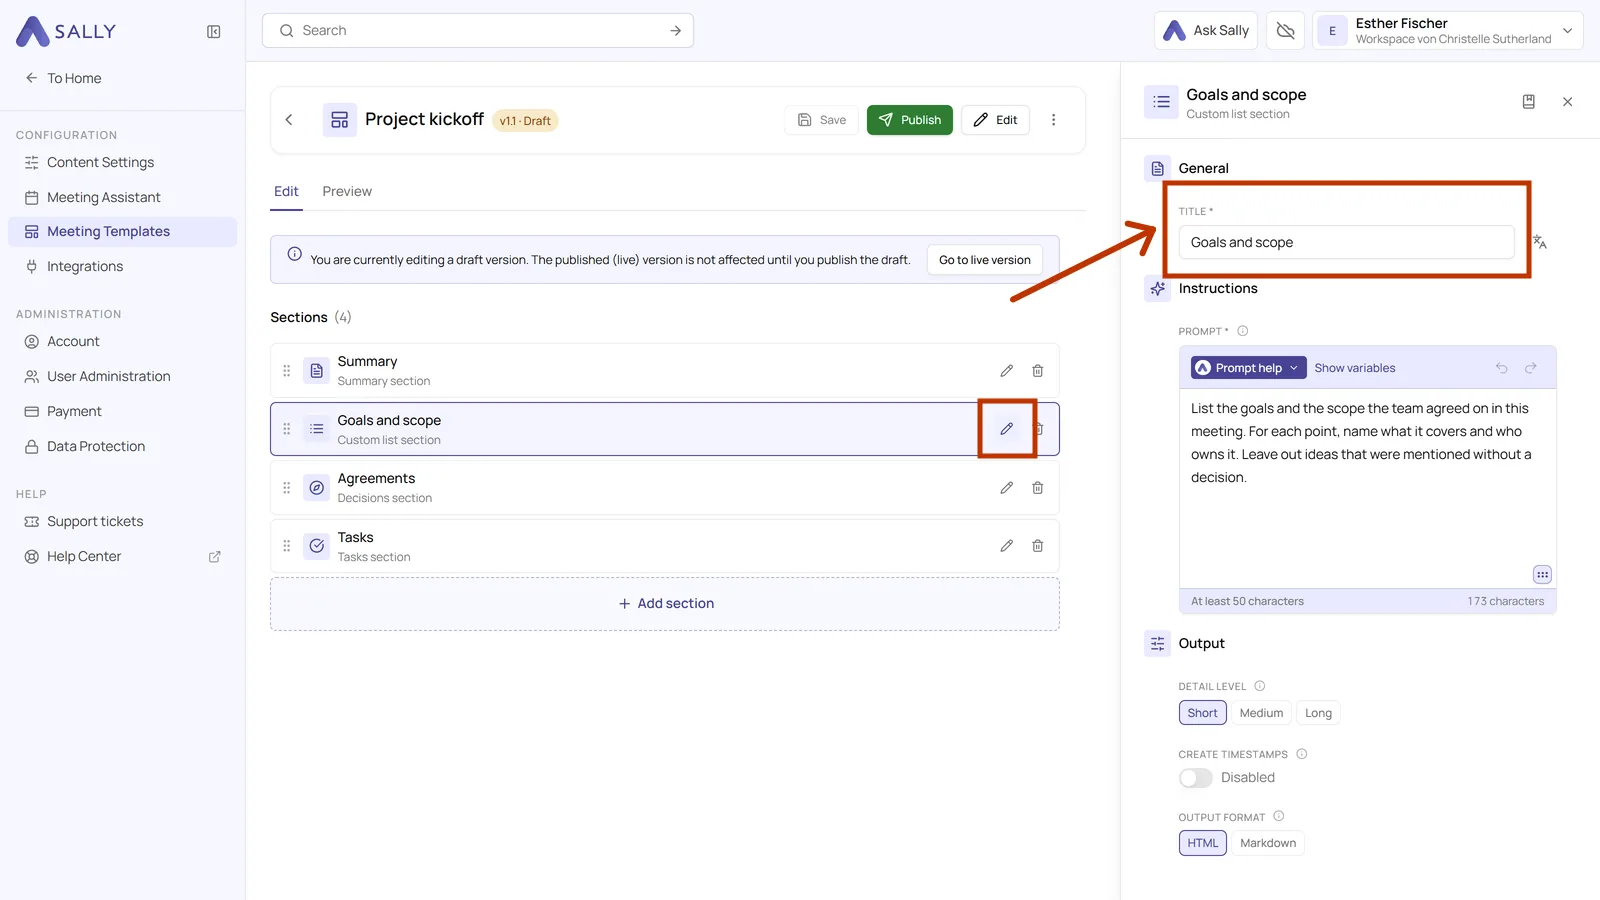
In the section list, click the pencil icon of the section. Its panel opens on the right.
-
Enter the title at the top. It becomes the heading in your summary, so keep it short and recognizable, for example Blockers rather than Things that are currently blocking us.
- Click the translation icon to the right of the title field when your meetings are held in more than one language.
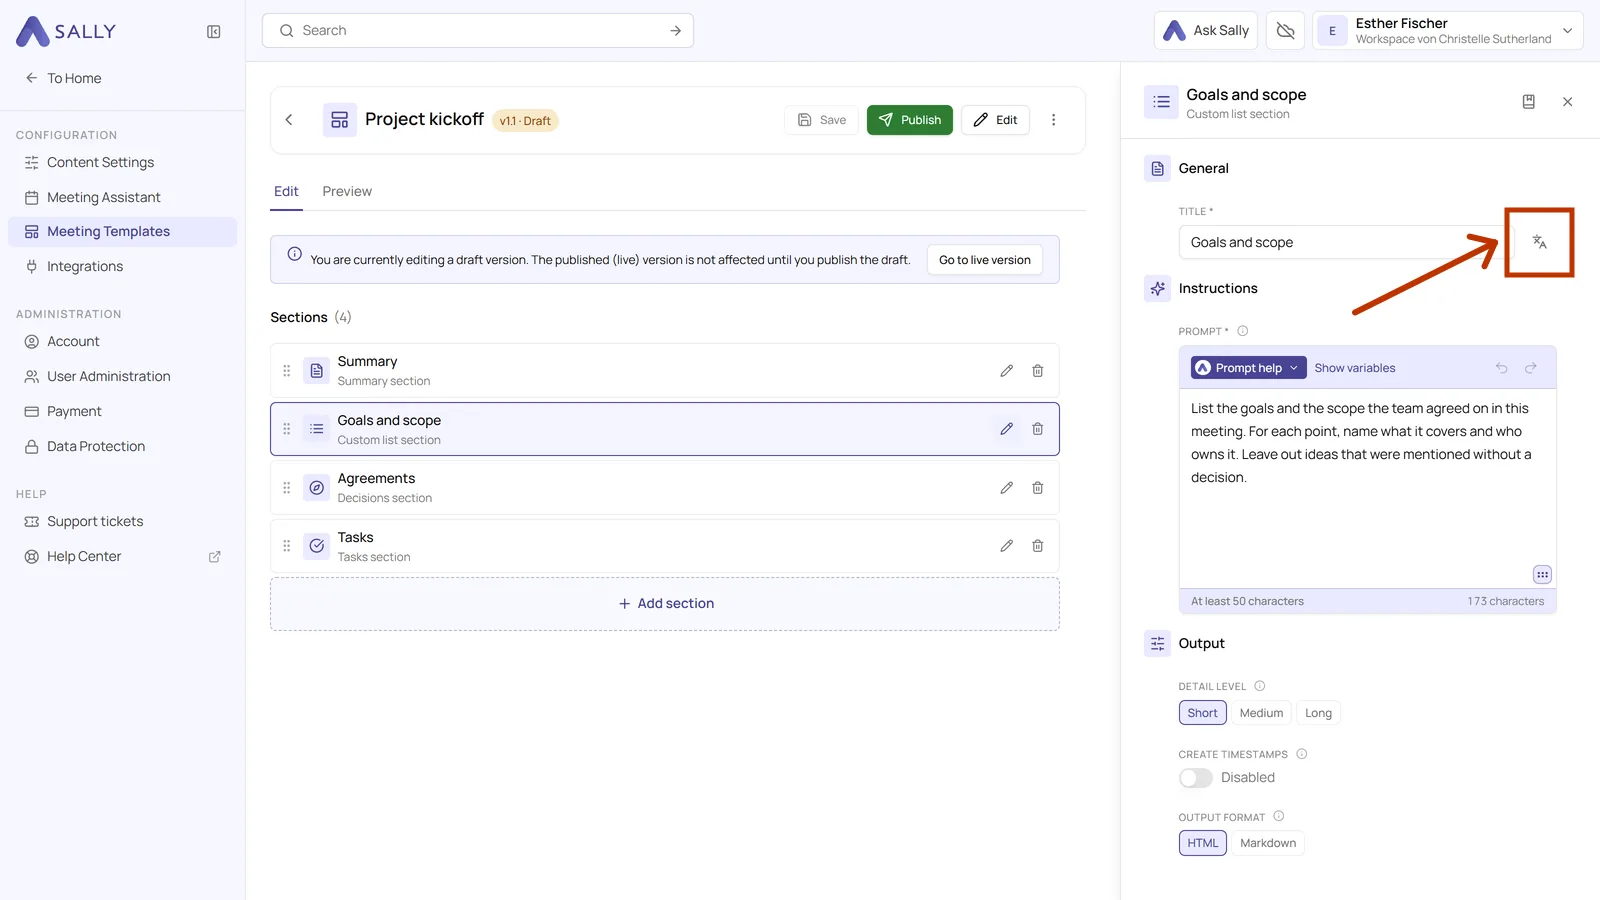
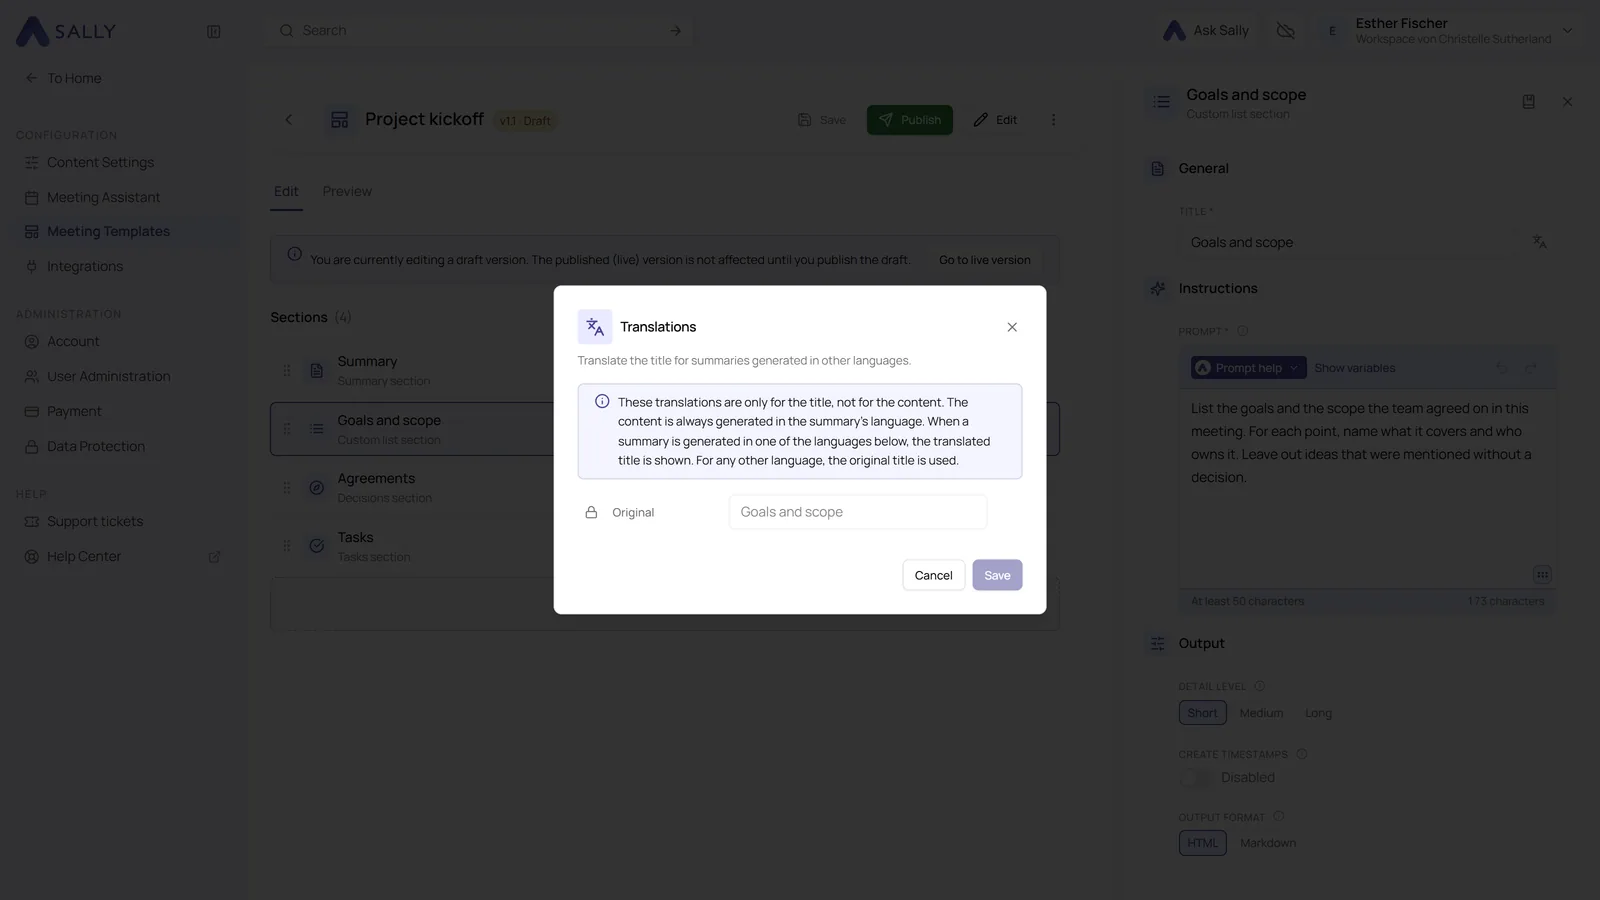
- The Translations window shows your original title at the top. Add language gives you a separate title for every further language. Only the title is translated, not the content: when a summary is written in one of the languages you set up, Sally uses the matching title, and for every other language the original one stays. Click Save afterwards.
- Under Prompt, describe what the section should contain. Write it the way you would explain it to a new colleague: what belongs in there, what should be left out, and how detailed it should be. The prompt needs at least 50 characters, and the counter below the field tells you where you are. The arrows above the field undo and redo your last edits.
Name the content, the structure and the boundary. For example: "List every blocker that was mentioned. For each one, say what it is about, who is affected and what is needed to resolve it. Leave out general complaints without a concrete blocker." The last sentence is the one that keeps the section clean.
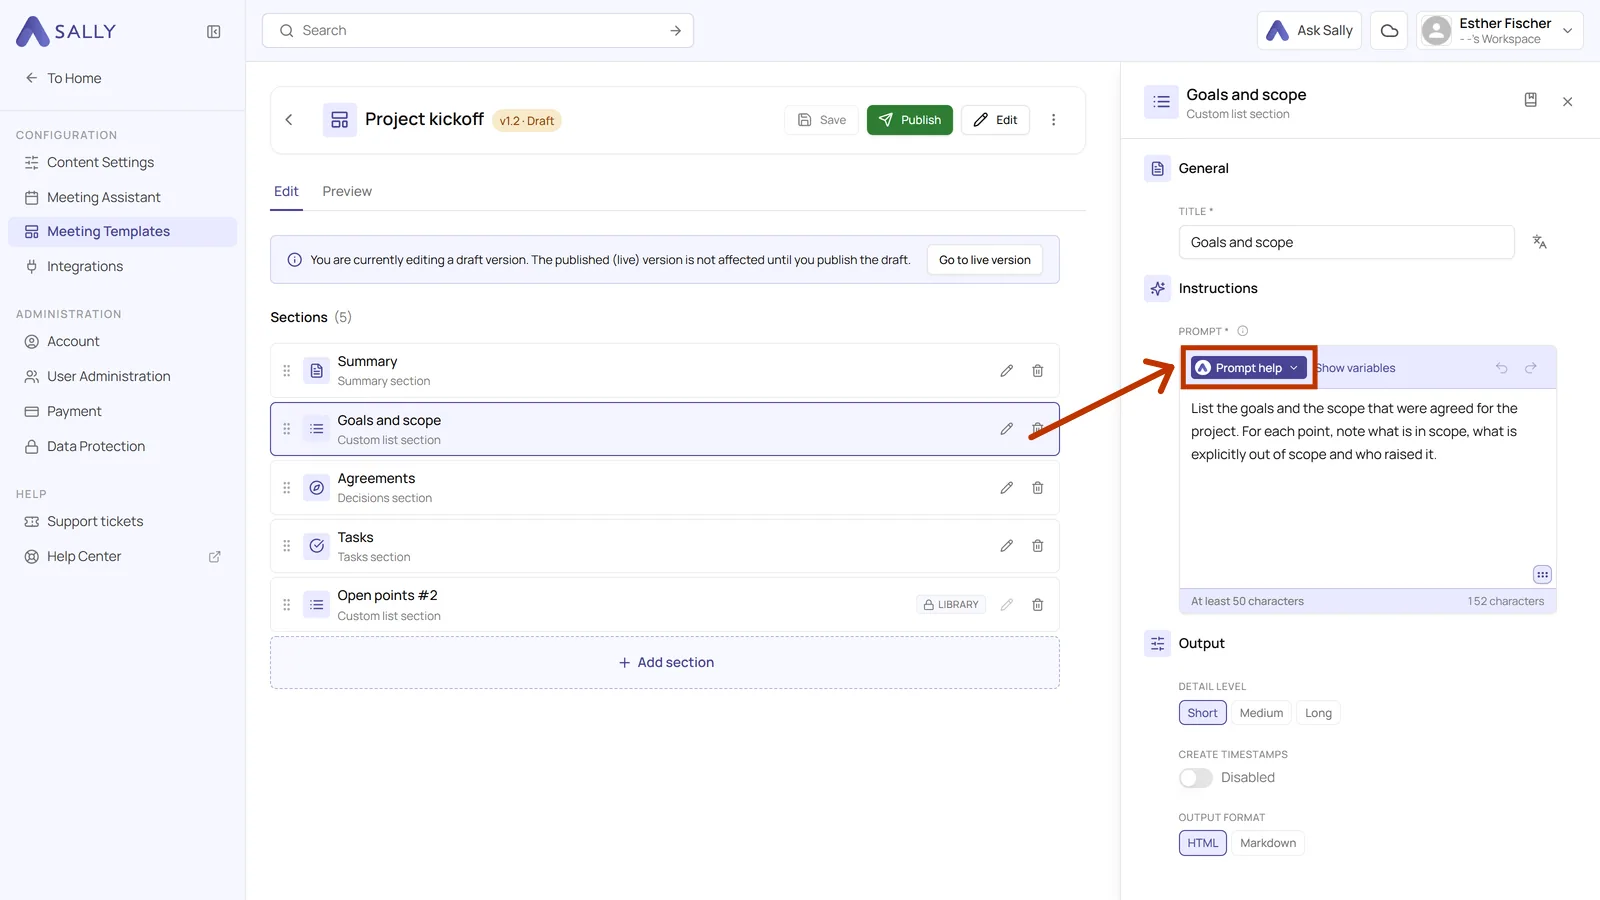
Prompt help covers two cases: you do not want to start from nothing, or your prompt is already there and you want Sally AI to rewrite it for you.
- Click Prompt help above the prompt field.
- The menu offers two routes, Use template and Optimize with Sally AI.
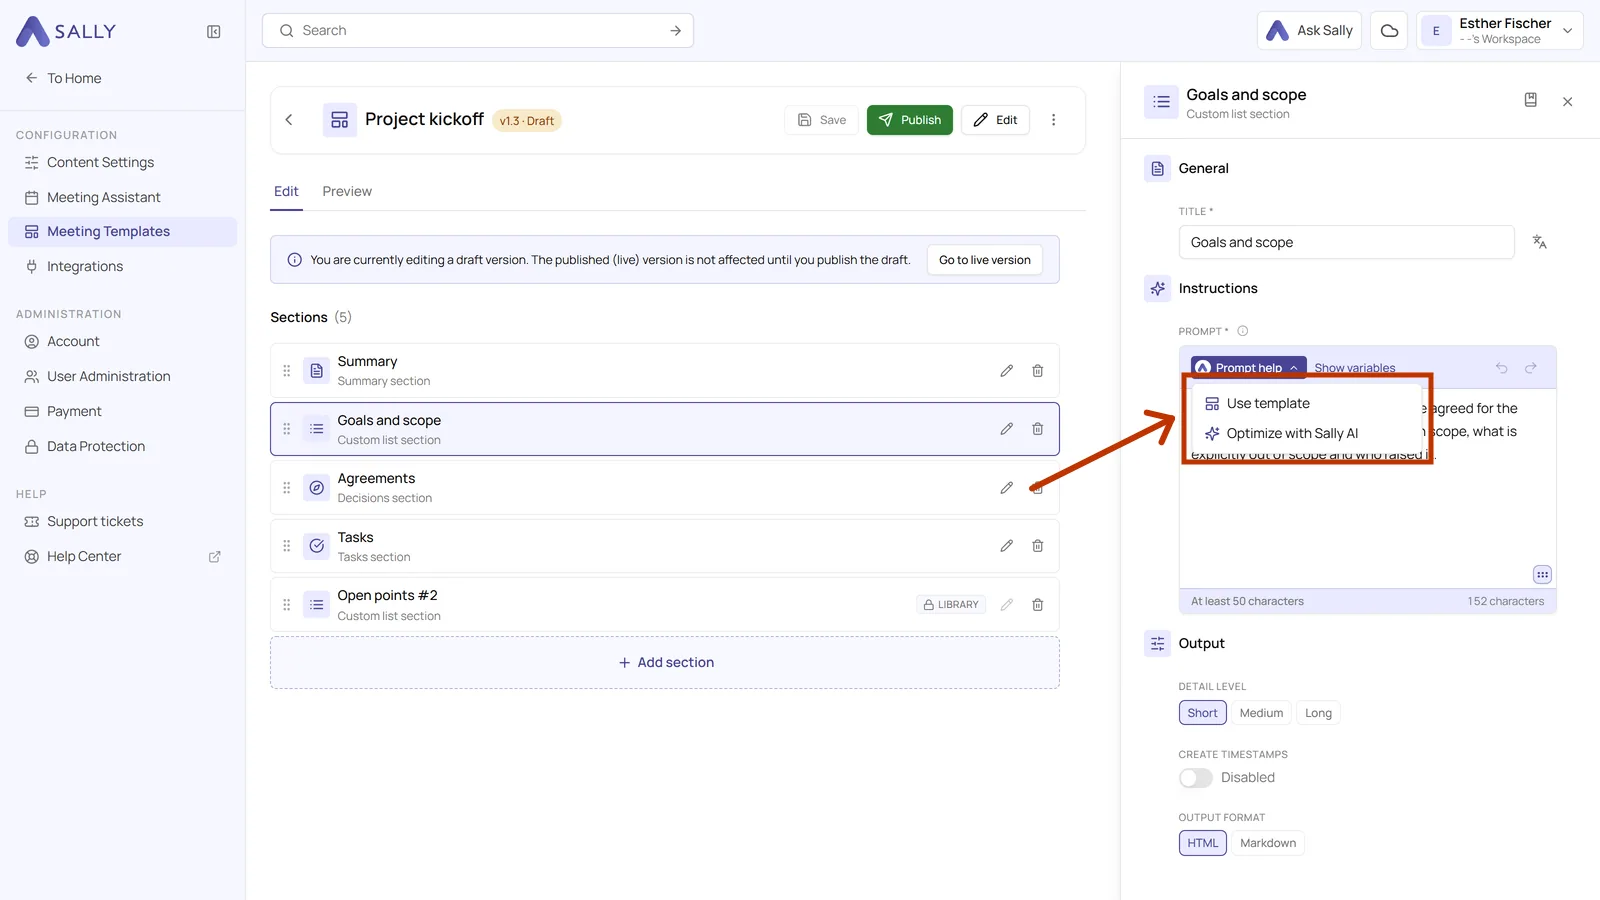
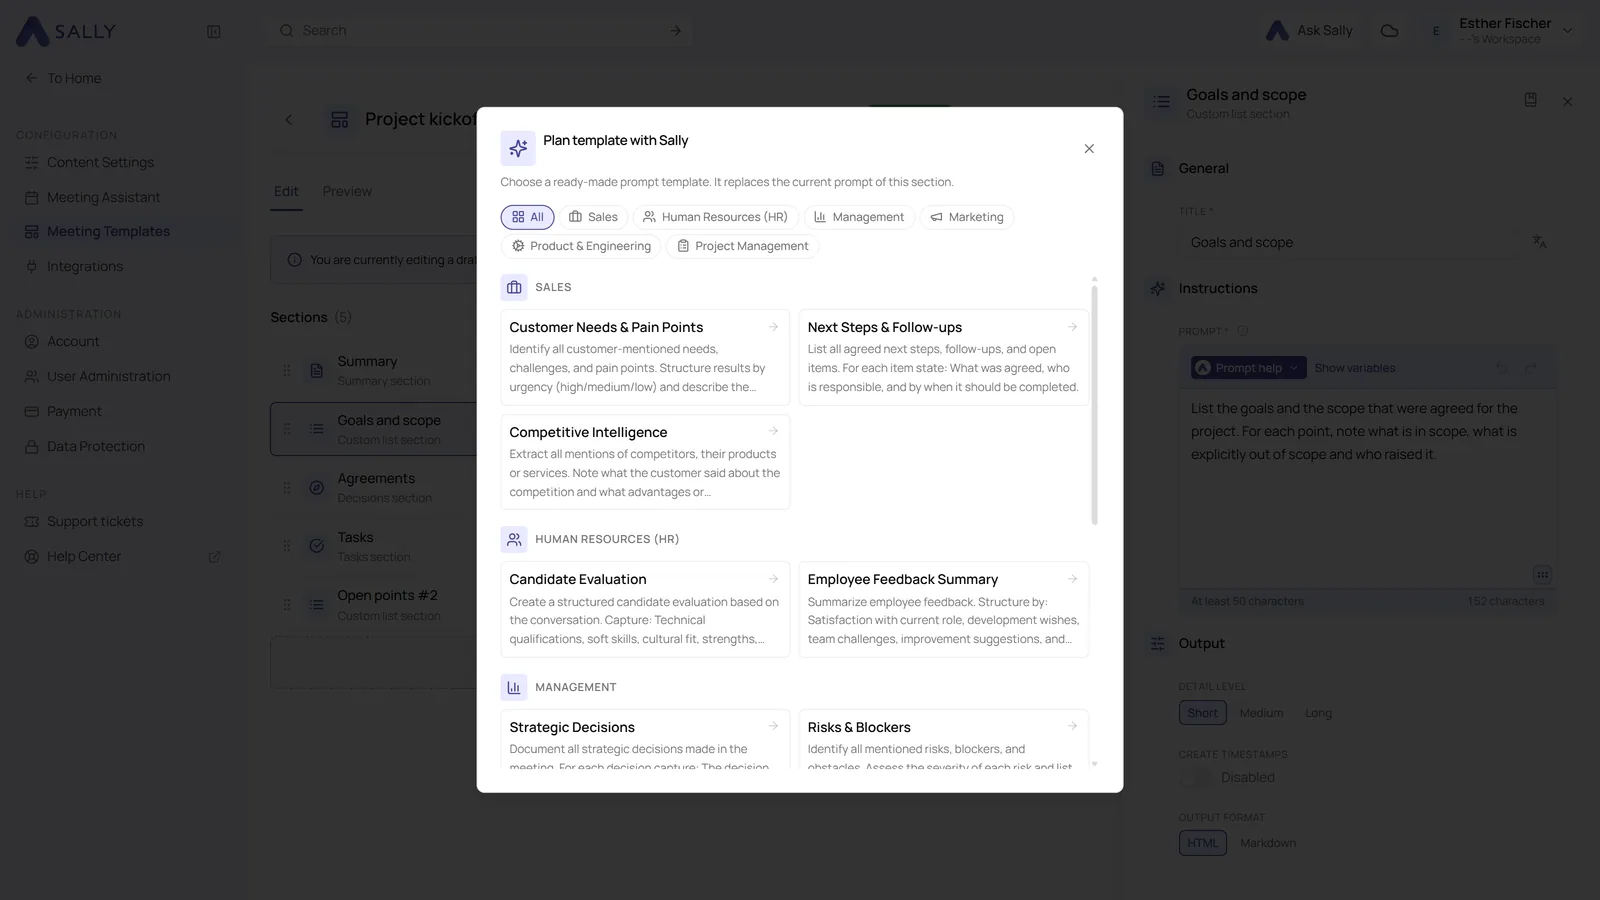
Use template opens a collection of ready-made prompts, sorted by area: sales, human resources, management, marketing, product and engineering, project management. Picking one replaces the current prompt of the section, so use it as a starting point rather than an addition.
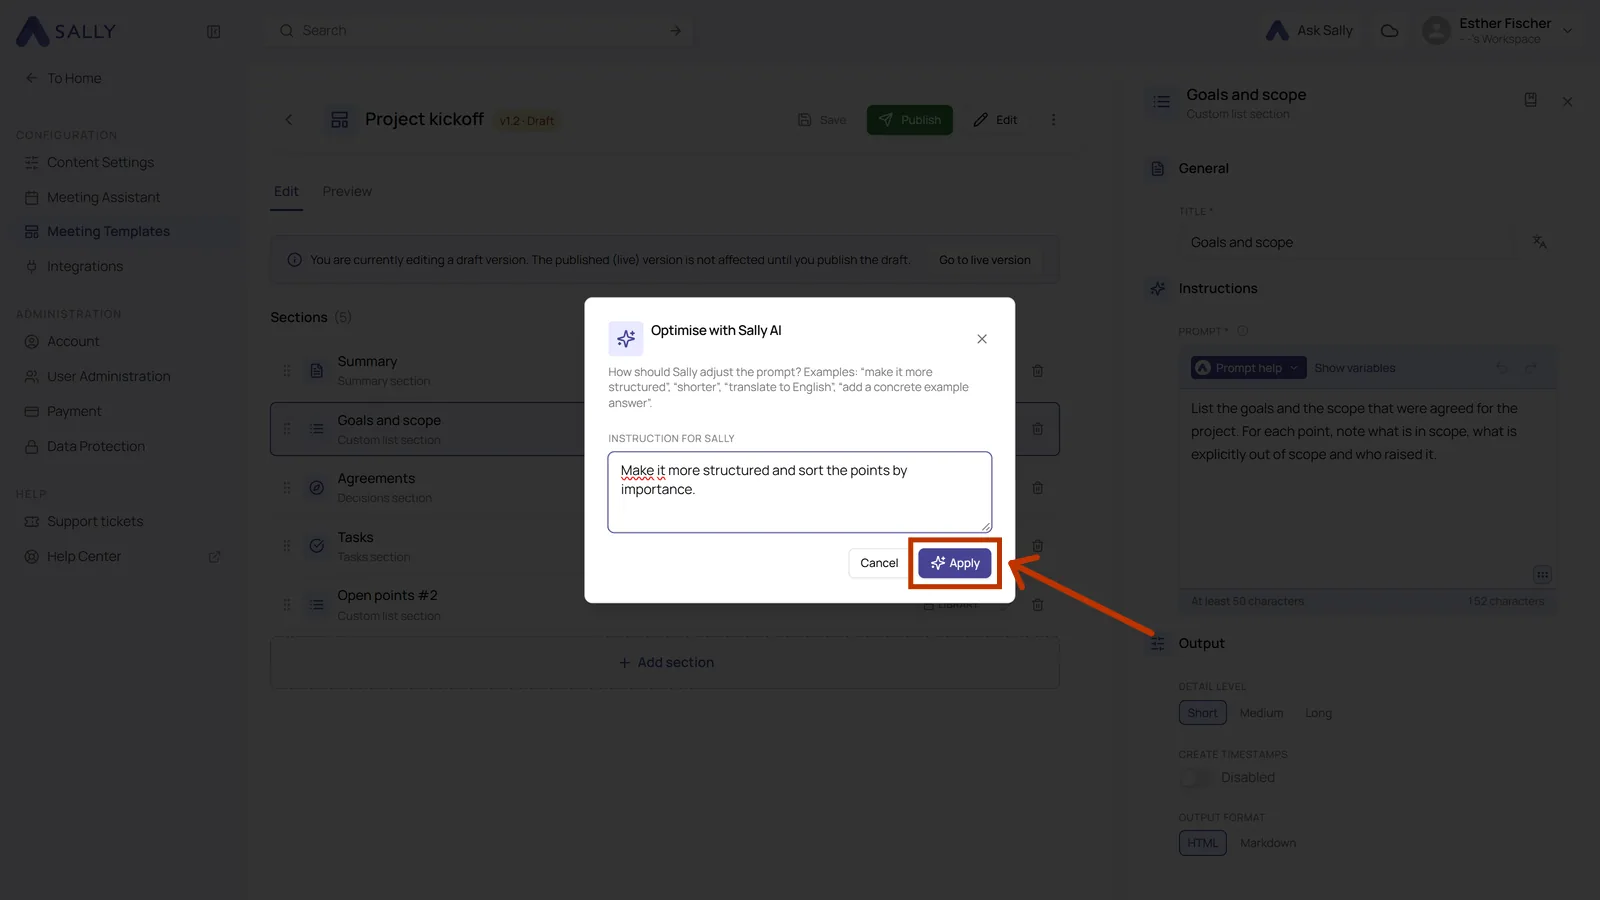
Optimize with Sally AI rewrites your existing prompt for you. You say what should change, for example make it more structured, shorter or add a concrete example answer, and Sally suggests a new version.
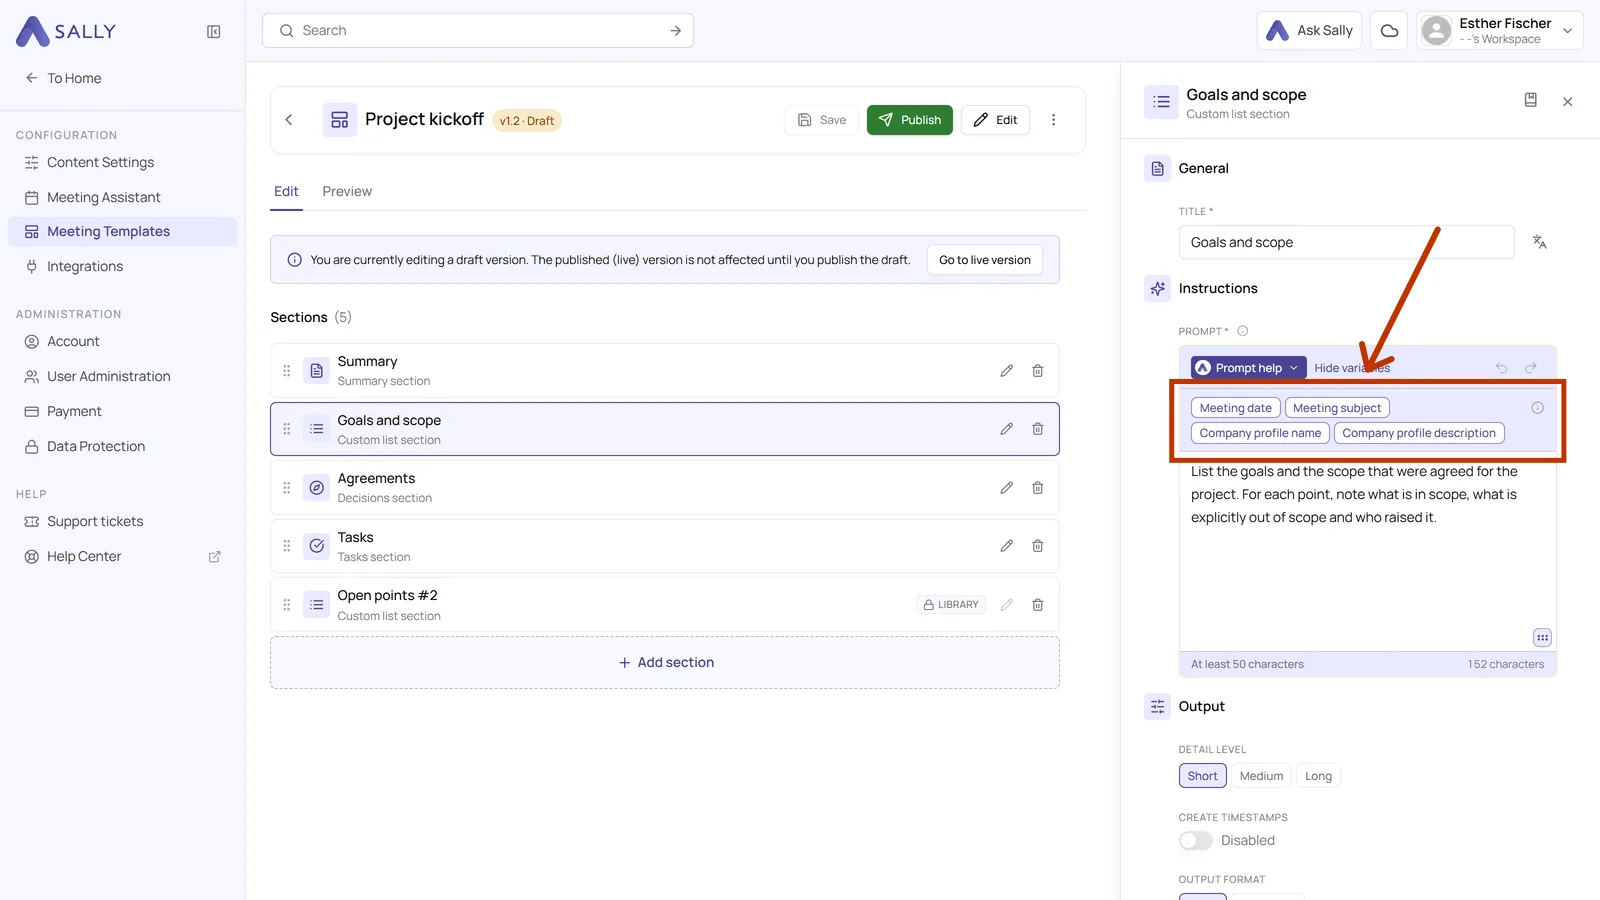
- Next to Prompt help, click Show variables. It lists the placeholders you can drop into the prompt: Meeting date, Meeting subject, Company profile name and Company profile description. Click one and it is inserted into the prompt as a small chip that Sally fills in for every meeting.
We recommend writing prompts in English, because the AI follows English instructions more precisely. It does not change the language of your summary: Sally still writes the content in the language of the meeting, and the section title stays exactly as you entered it.
3. Output settings
Scroll down in the section panel. There, Output decides how the result looks.
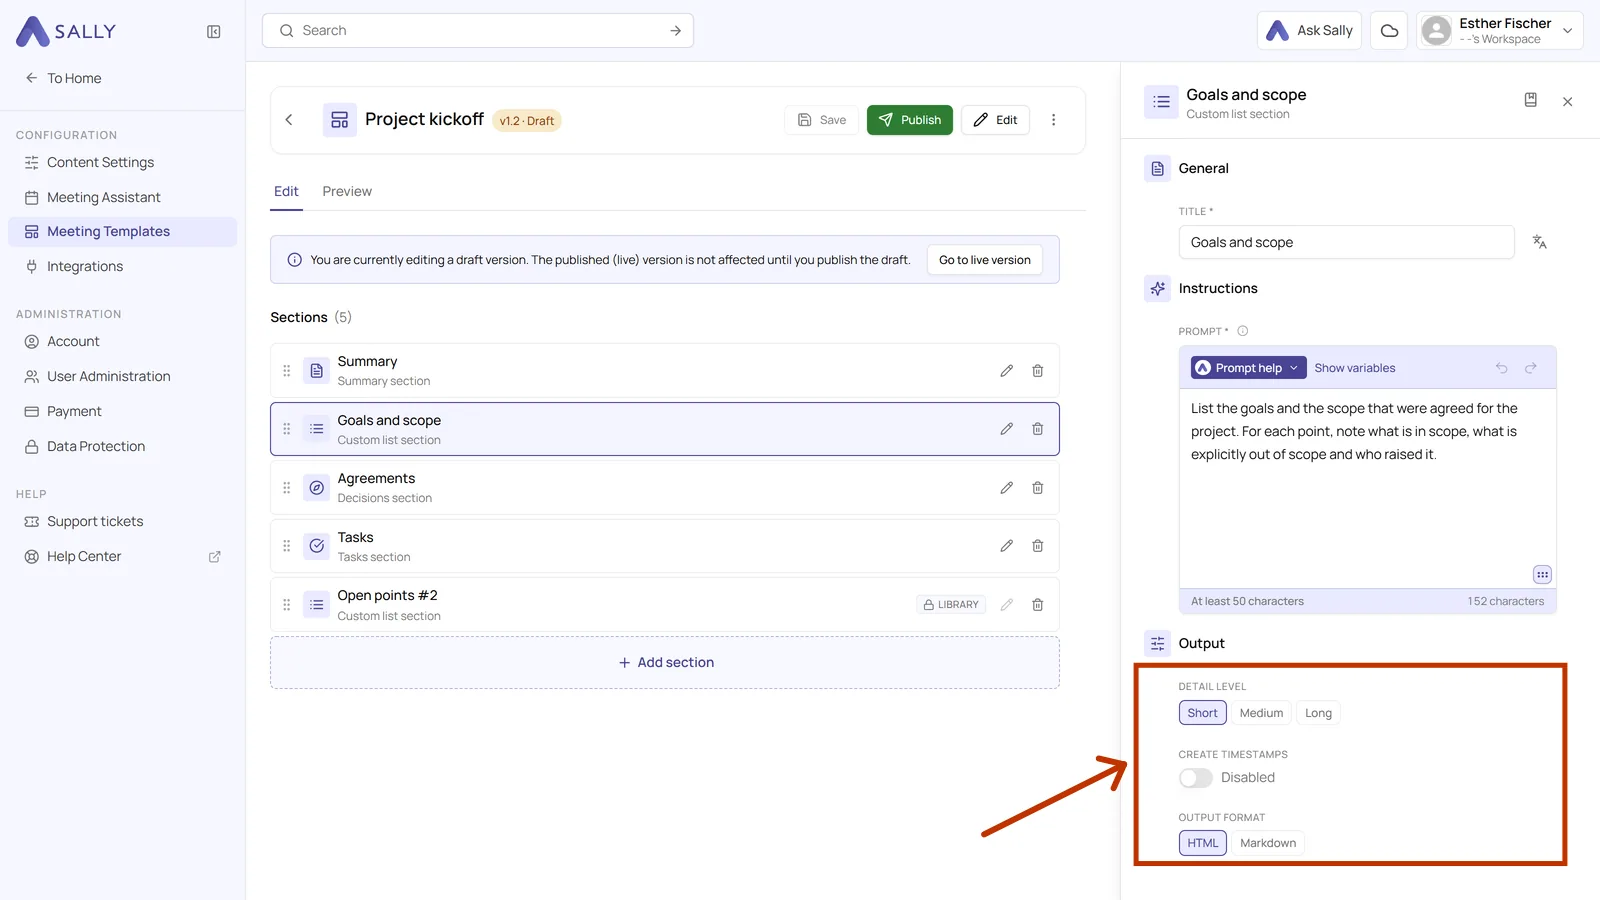
- Detail level switches between Short, Medium and Long. Short is right for an overview someone skims, long for a section that has to serve as the record.
- Create timestamps adds the point in the recording each statement came from, so you can jump straight to it.
- Output format produces either HTML or Markdown. HTML is the right choice for the summary in Sally, Markdown if you pass the text on to another tool.
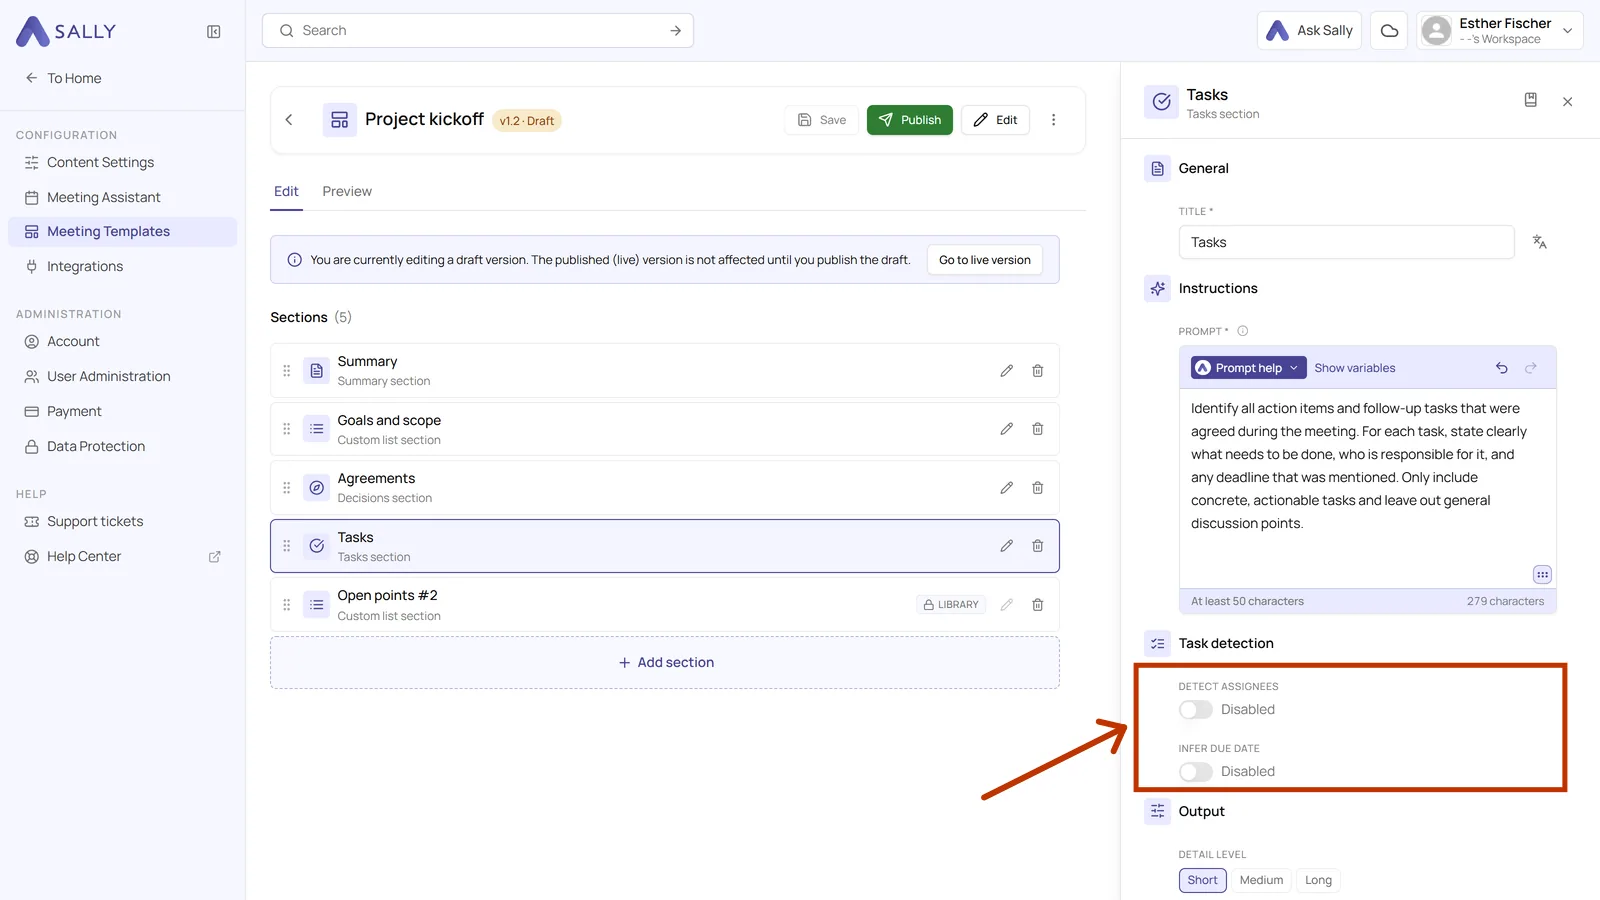
The Tasks section has one extra block. Detect assignees lets Sally assign each task to a participant, and Infer due date lets it turn phrases like by next Friday into an actual date.
4. The section library
If you want the same section in several templates, put it in the section library once. From then on you insert it instead of writing it again. An entry gets into the library in two ways.
From a section you already have
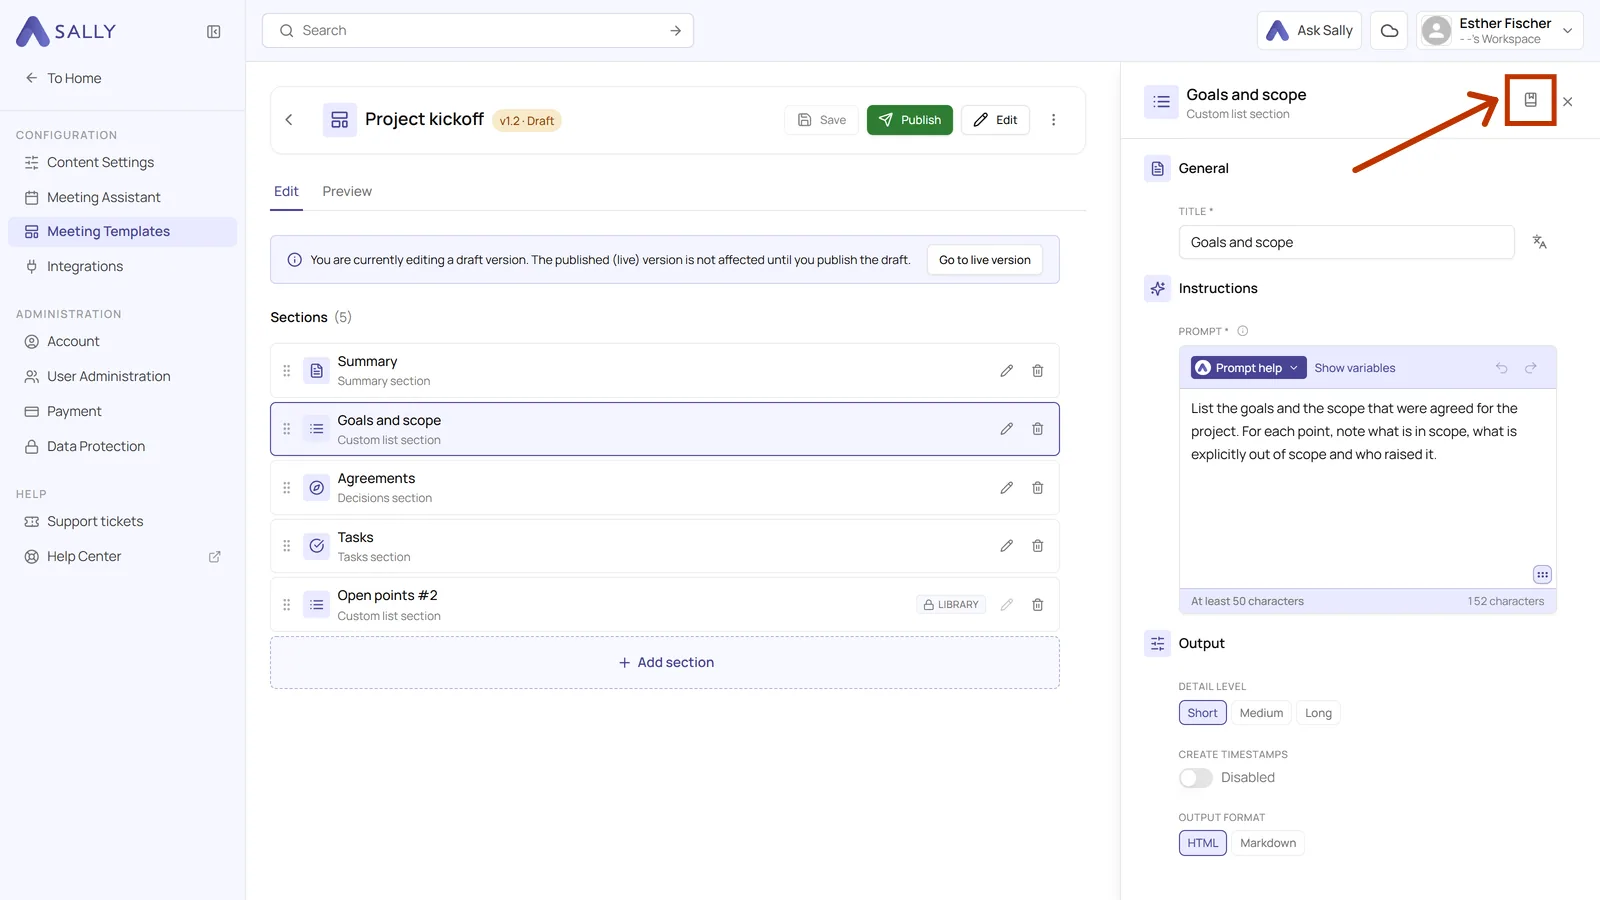
- Open the section in a draft through its pencil icon, the way Title and prompt describes, and click the icon Save to library at the top right of its panel.
From scratch
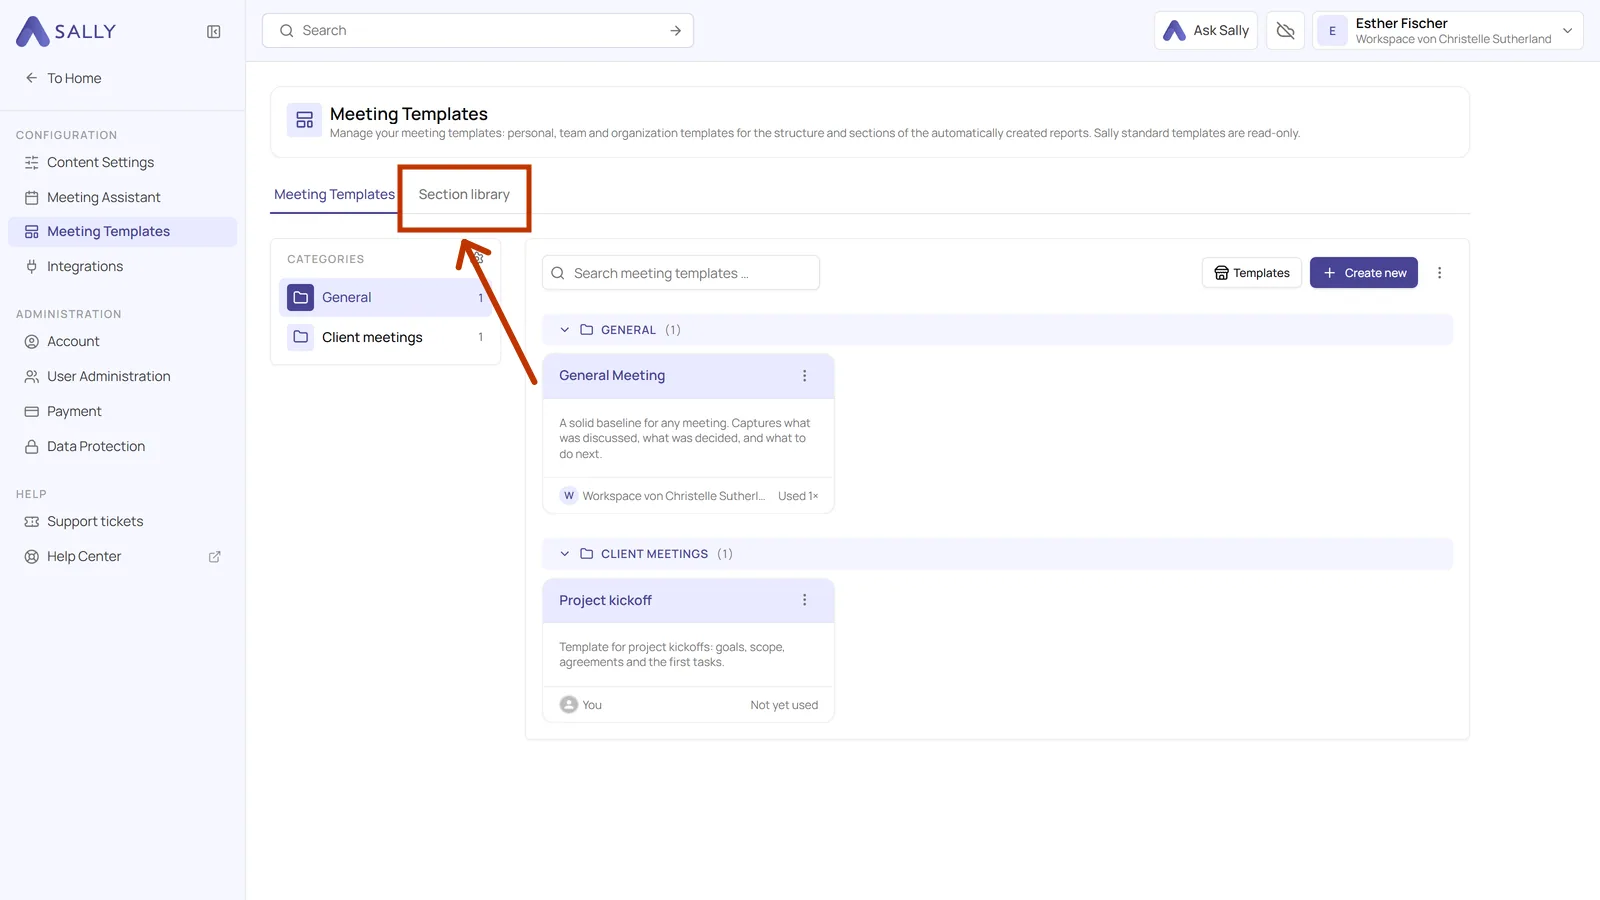
- Open Settings at the bottom left, click Meeting templates under Configuration and switch to the Section library tab at the top.
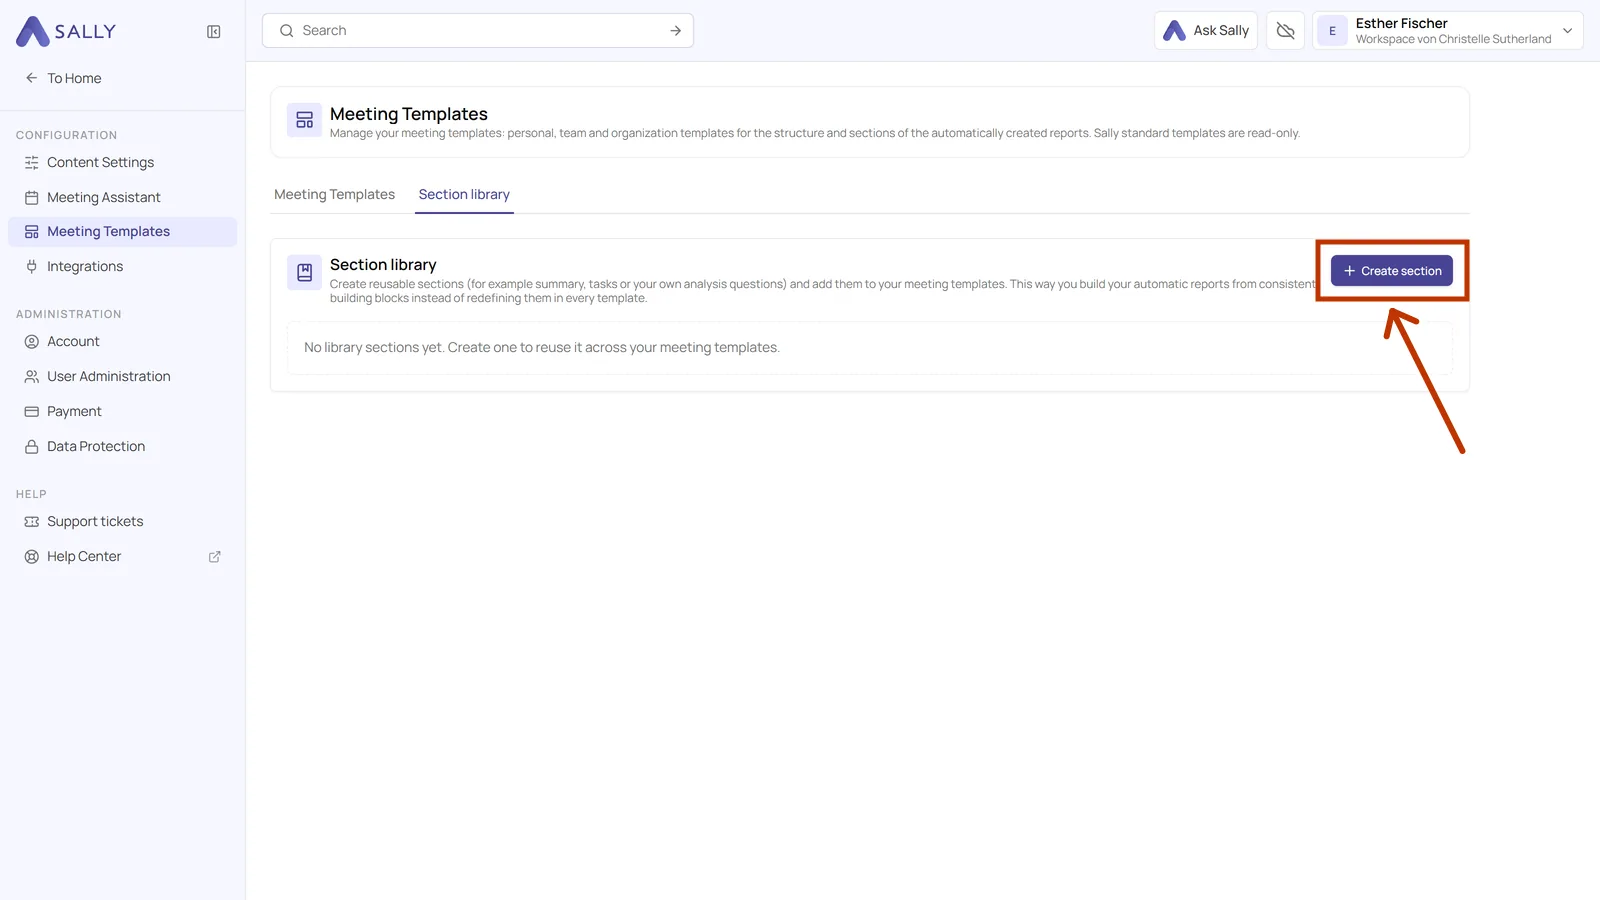
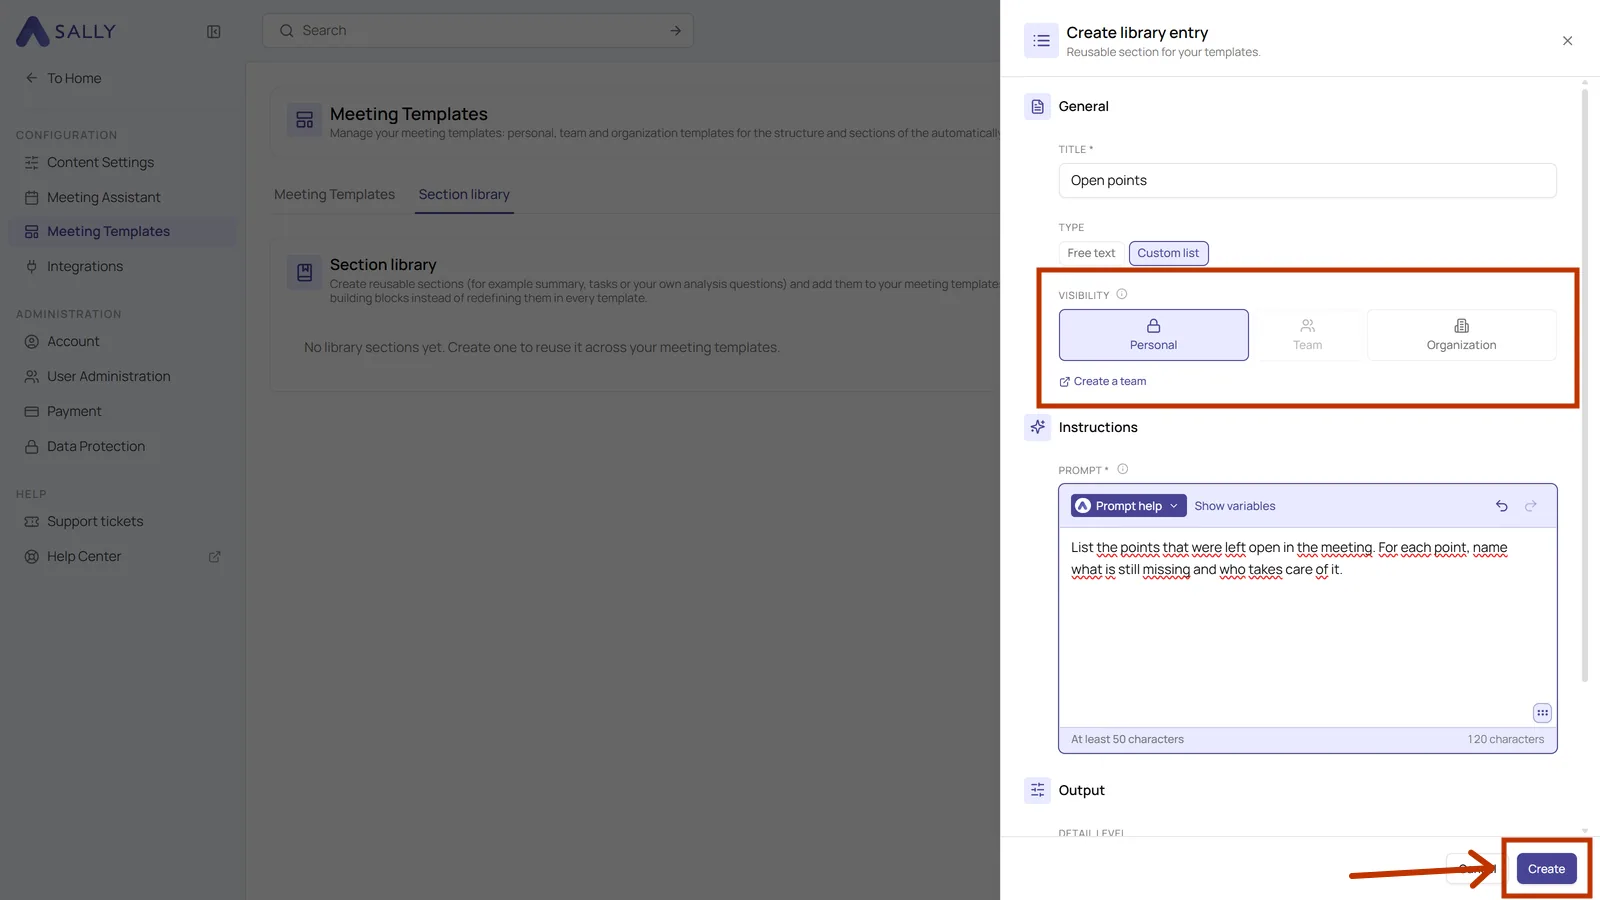
- Click Create section on the right.
- The dialog asks for the same things as a section in a template, so title, type, prompt and output, plus a visibility. A personal entry stays with you, a team or organization entry is available to your colleagues as well. Once everything is filled in, click Create in the bottom right.
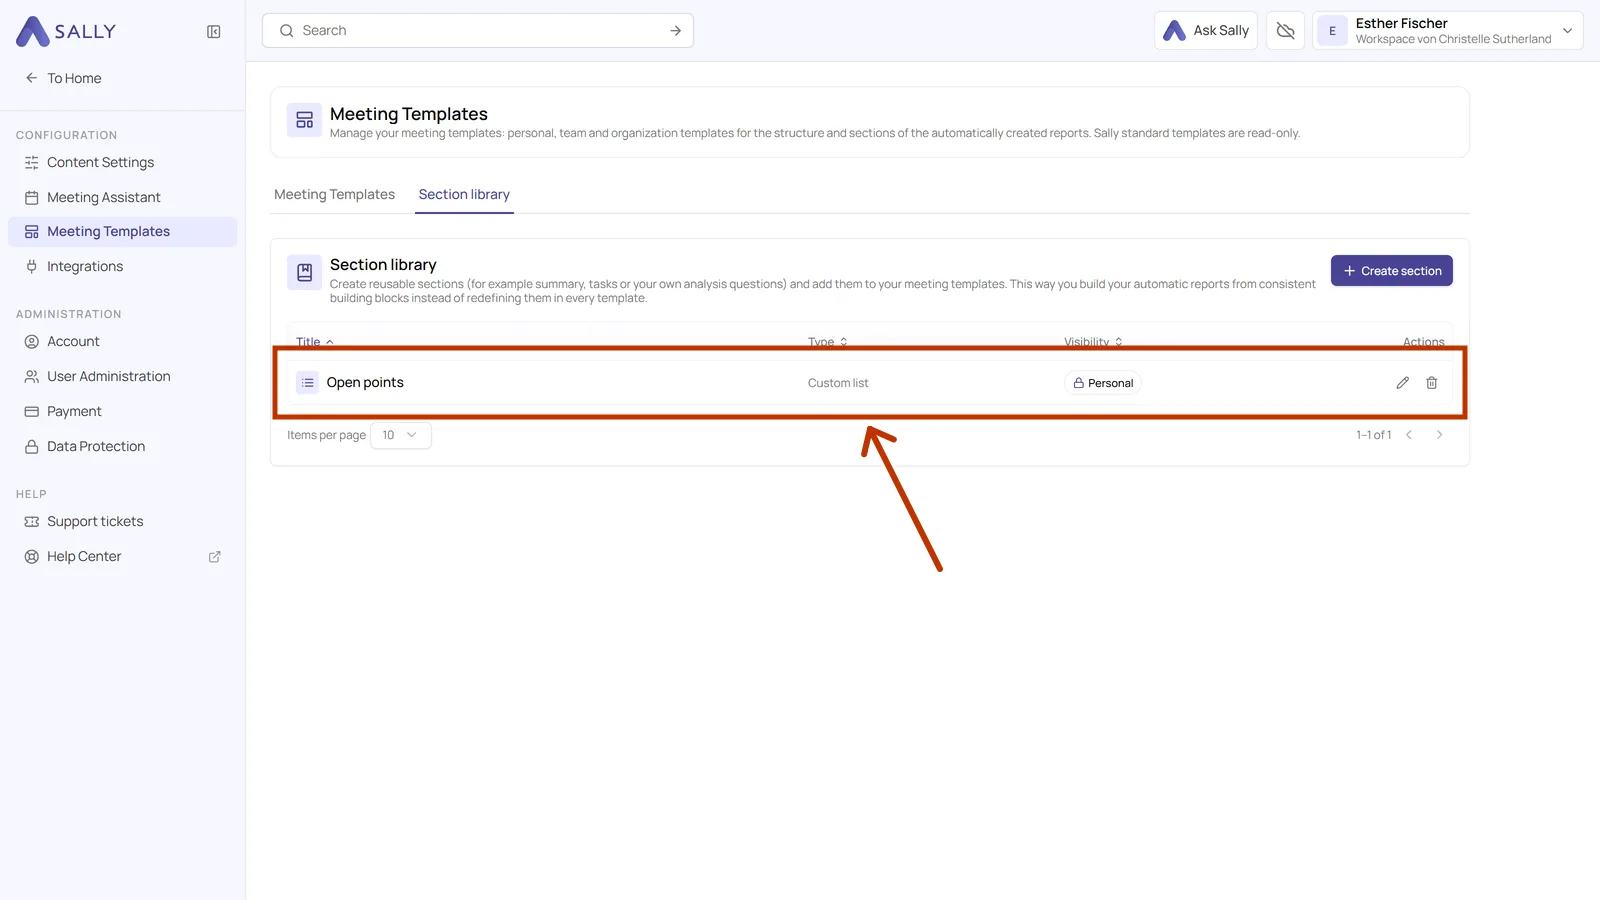
- The entry then appears in the table with its type and visibility. The icons on the right of the row edit or delete it.
Inserting an entry into a template
To put a library section to work, you add it to a template. That happens in a draft as well.
- Switch to the Meeting templates tab at the top and click the card of the template the section should go into.
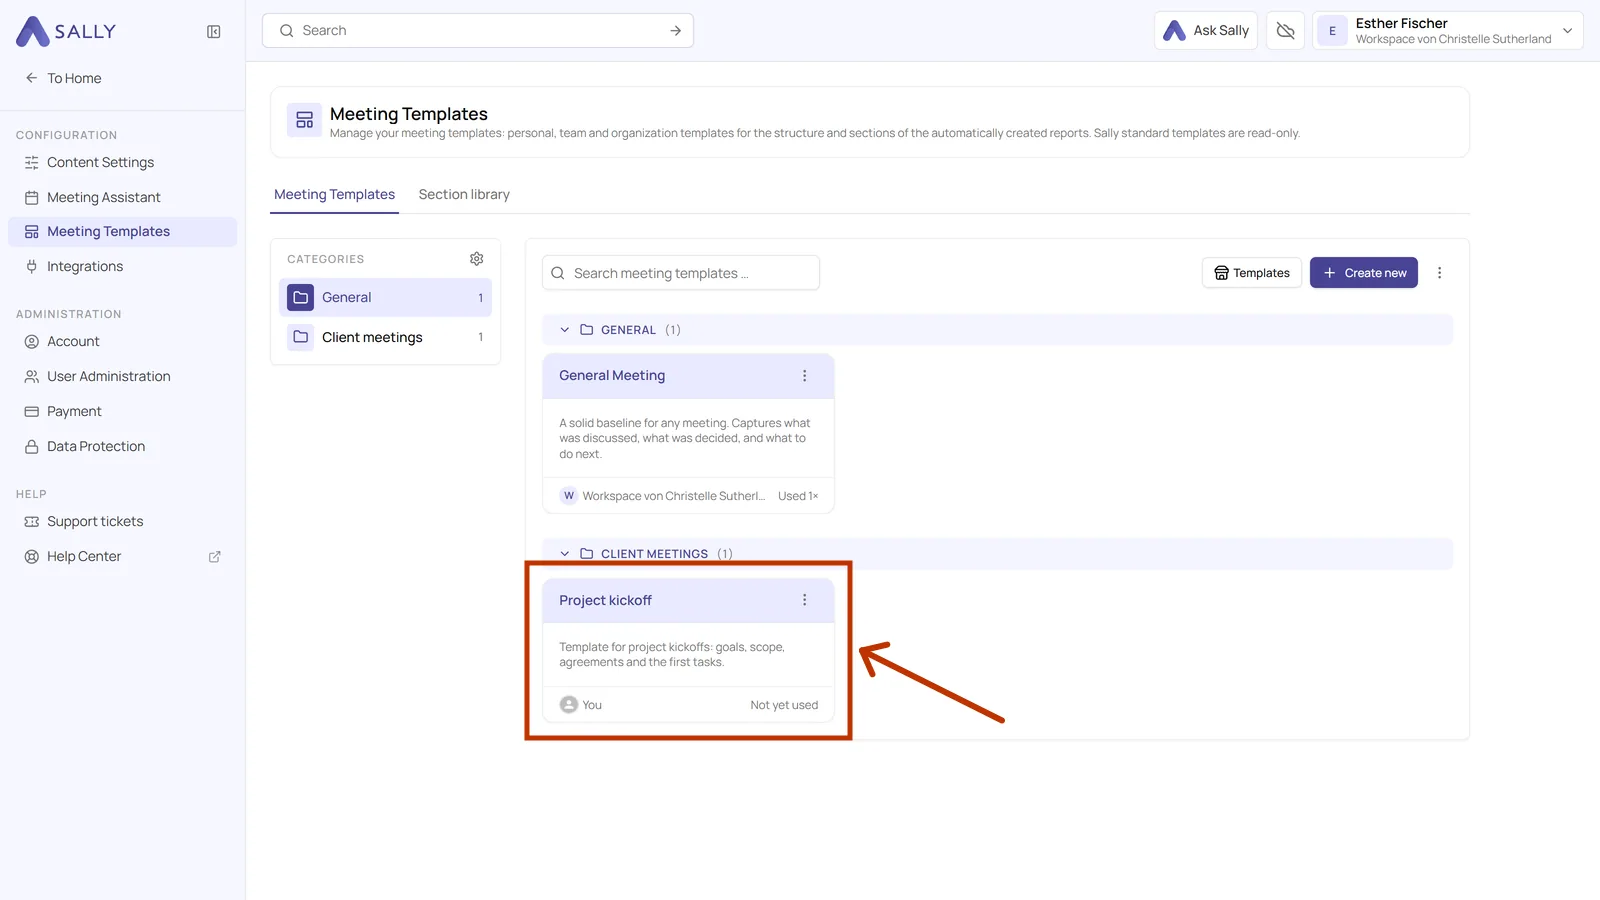
- If the template is published, click Create draft version in the note at the top, as shown in Section types. Then click Add section below the section list and switch to the Library tab at the top of the panel.
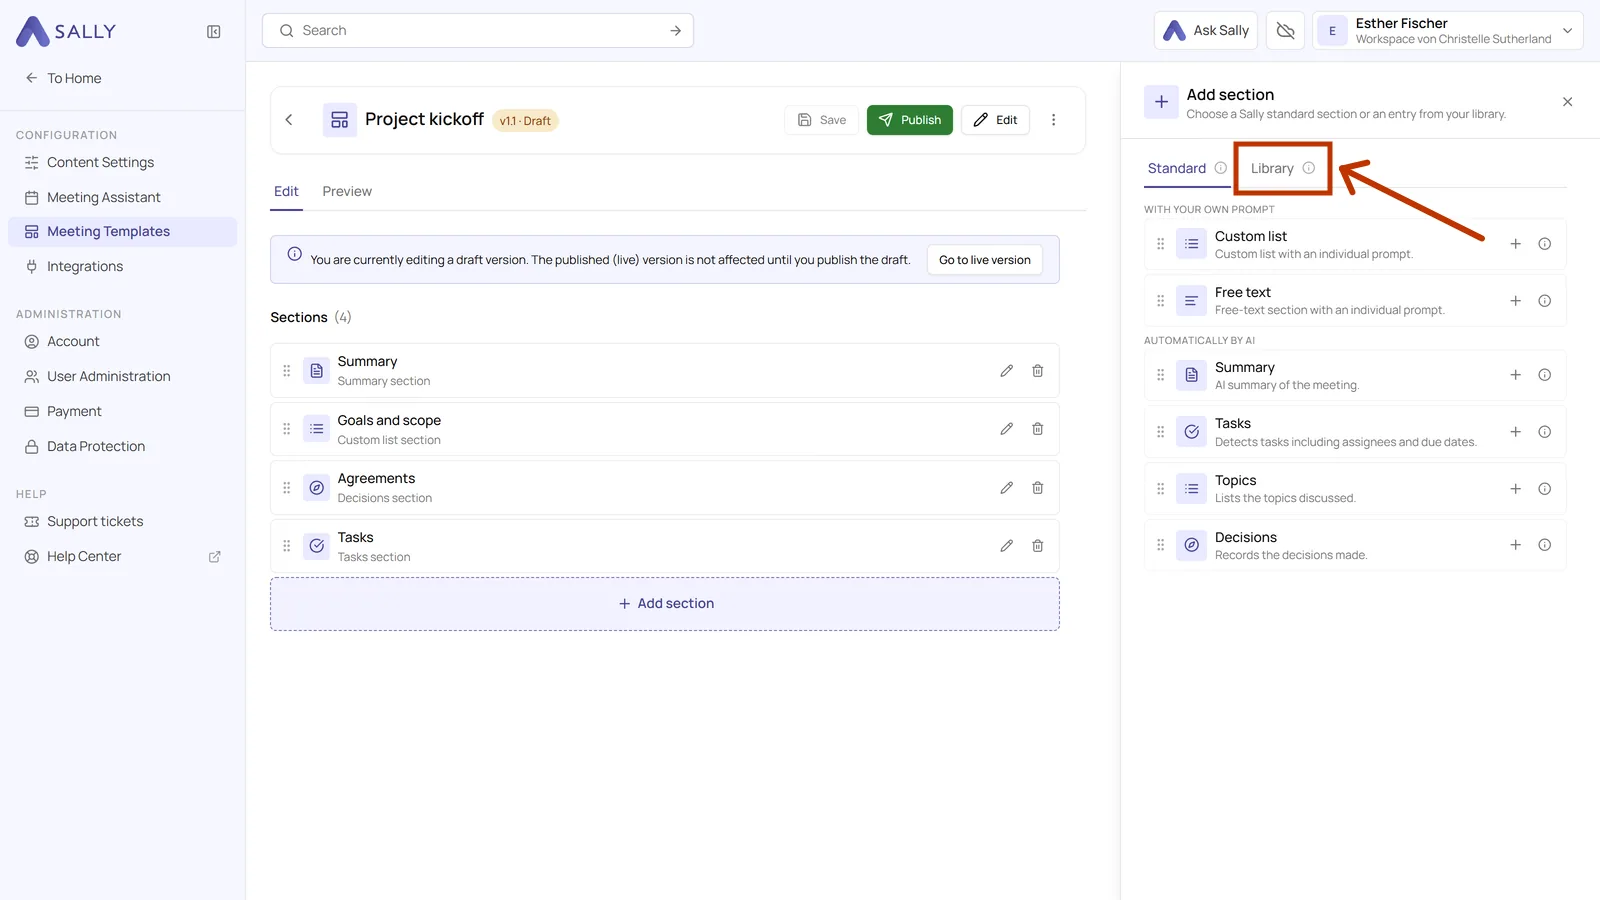
- Click the entry you want to insert.
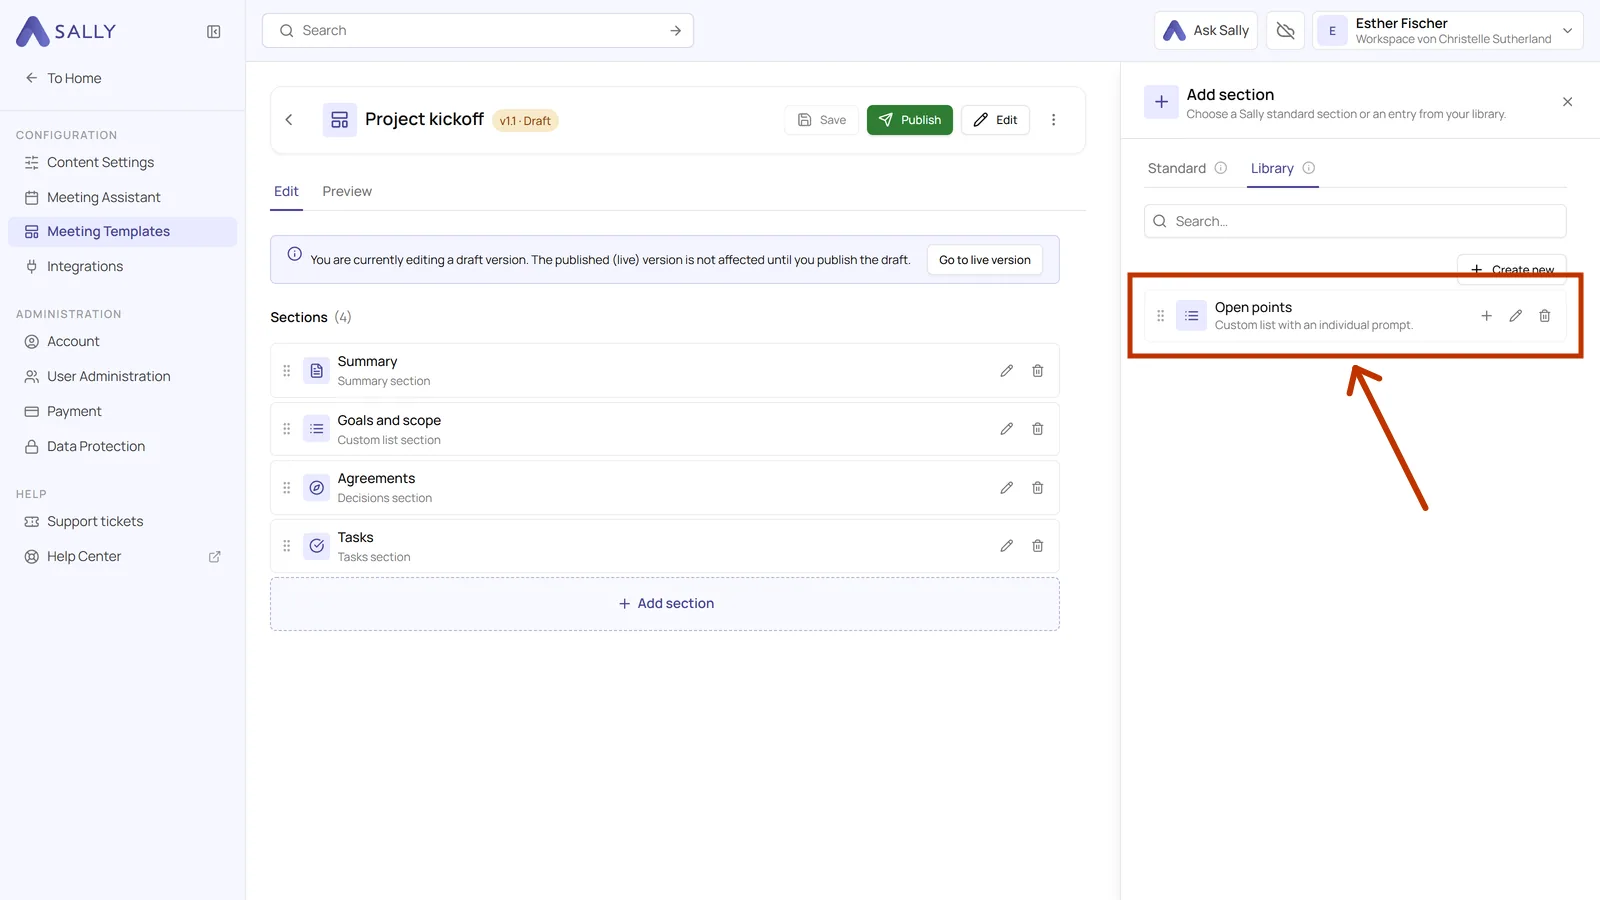
- The section is added at the bottom of the list with a Library badge. Sally adds a number to the title when the template already has a section of the same type. Click Save in the top right and publish the draft once the section should take effect in real meetings.
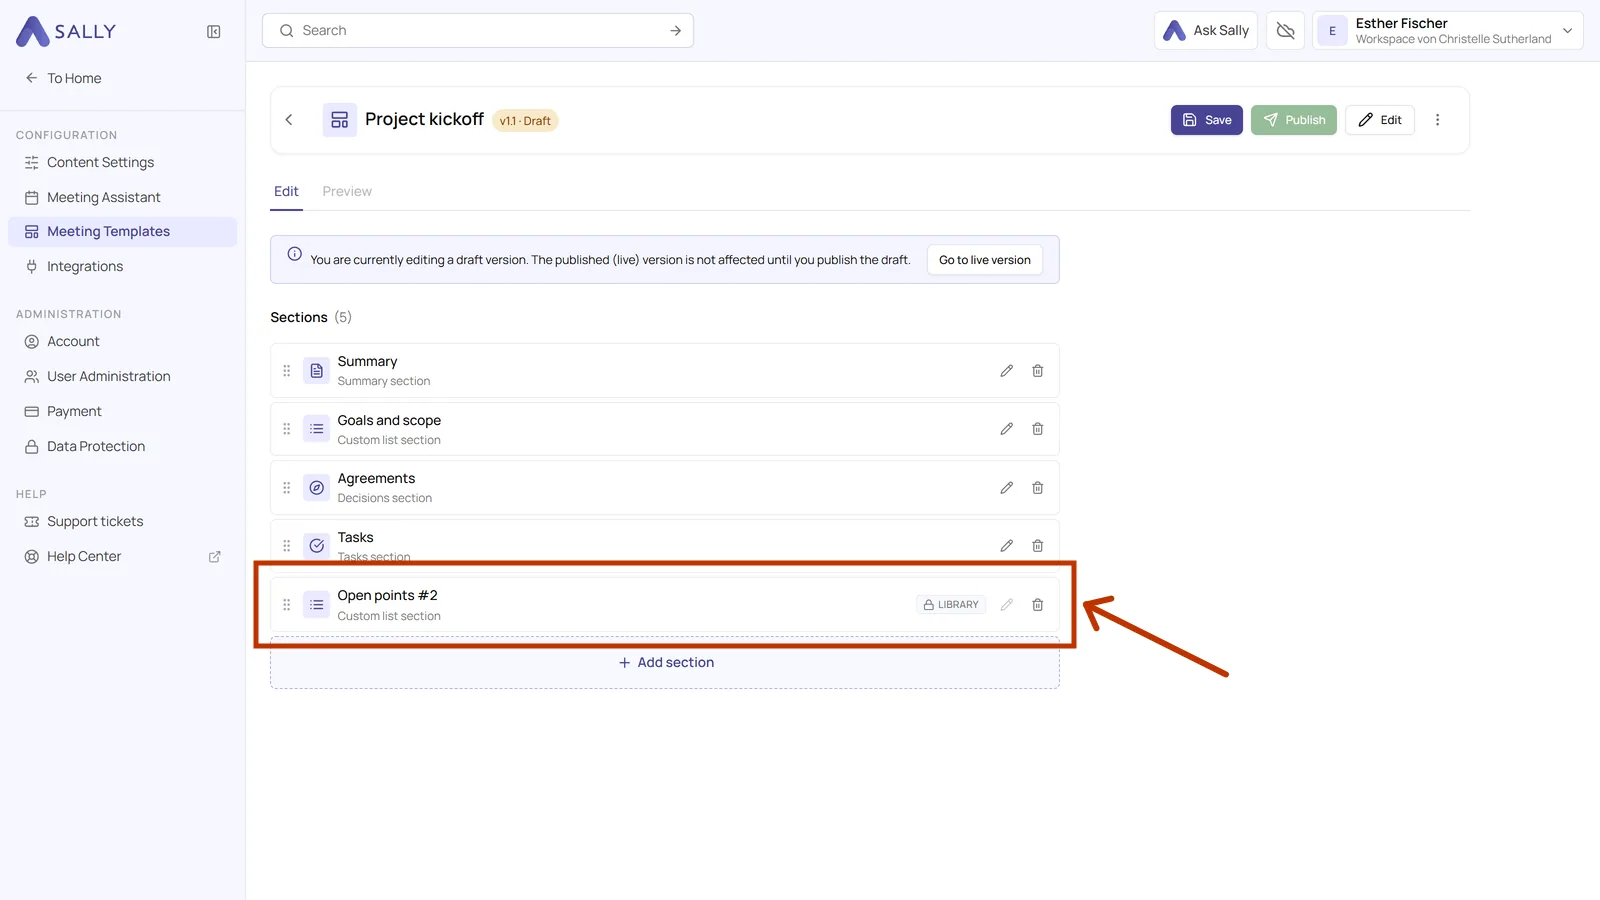
Inside the template that section is read-only. Its pencil icon is greyed out, and a note tells you it was adopted from the library. That is the point: you maintain the text in one place instead of in five templates. To change it, edit the entry on the Section library tab.
When you delete a library entry, it disappears from the library. Sections that have already been inserted stay unchanged in your templates and keep working.