How to create your own meeting template
If the ready-made templates do not fit the way your team works, build your own. That is where the value is: you decide which blocks appear in your summary, in which order they come and how much detail Sally writes. You put the template together yourself, and there is no upper limit on the number of sections.
This article walks the whole way, from the calendar to a published template. You create the template with a title and a visibility, add the sections, fill each one with a title and a prompt, test the result on a recording you already have and publish it at the end. The example is a template for project kickoffs with four sections: a summary, a list of goals, the agreements and the tasks.
Quick navigation
- Creating the template
- Adding sections
- Filling in the sections
- Testing the template
- Publishing the template
- Next steps
1. Creating the template
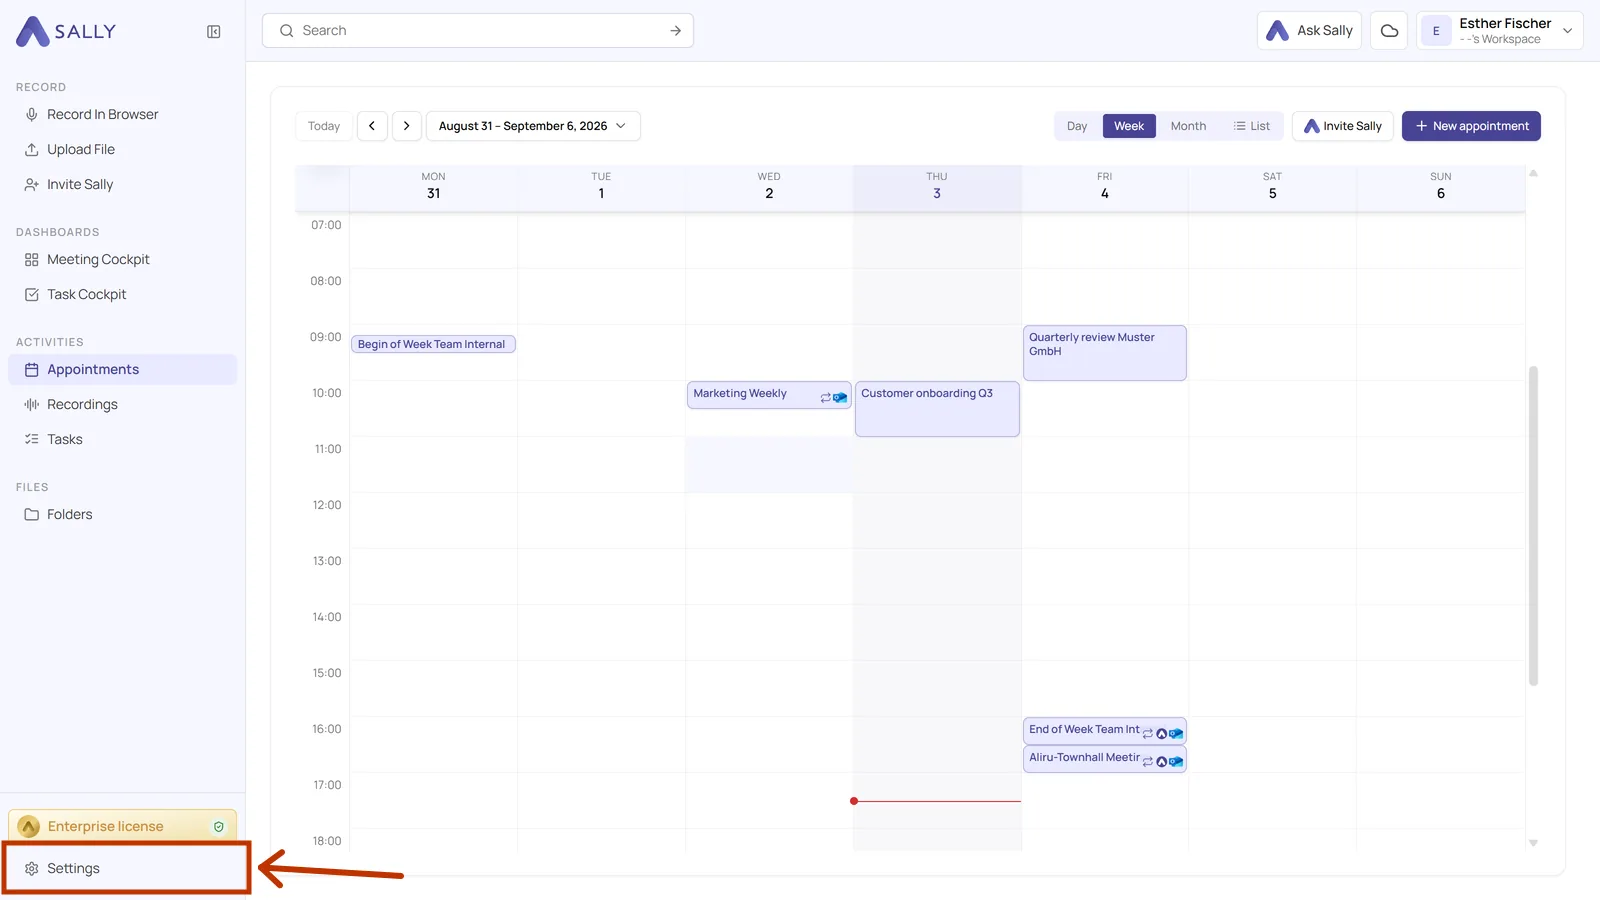
- Open Settings at the bottom of the left sidebar.
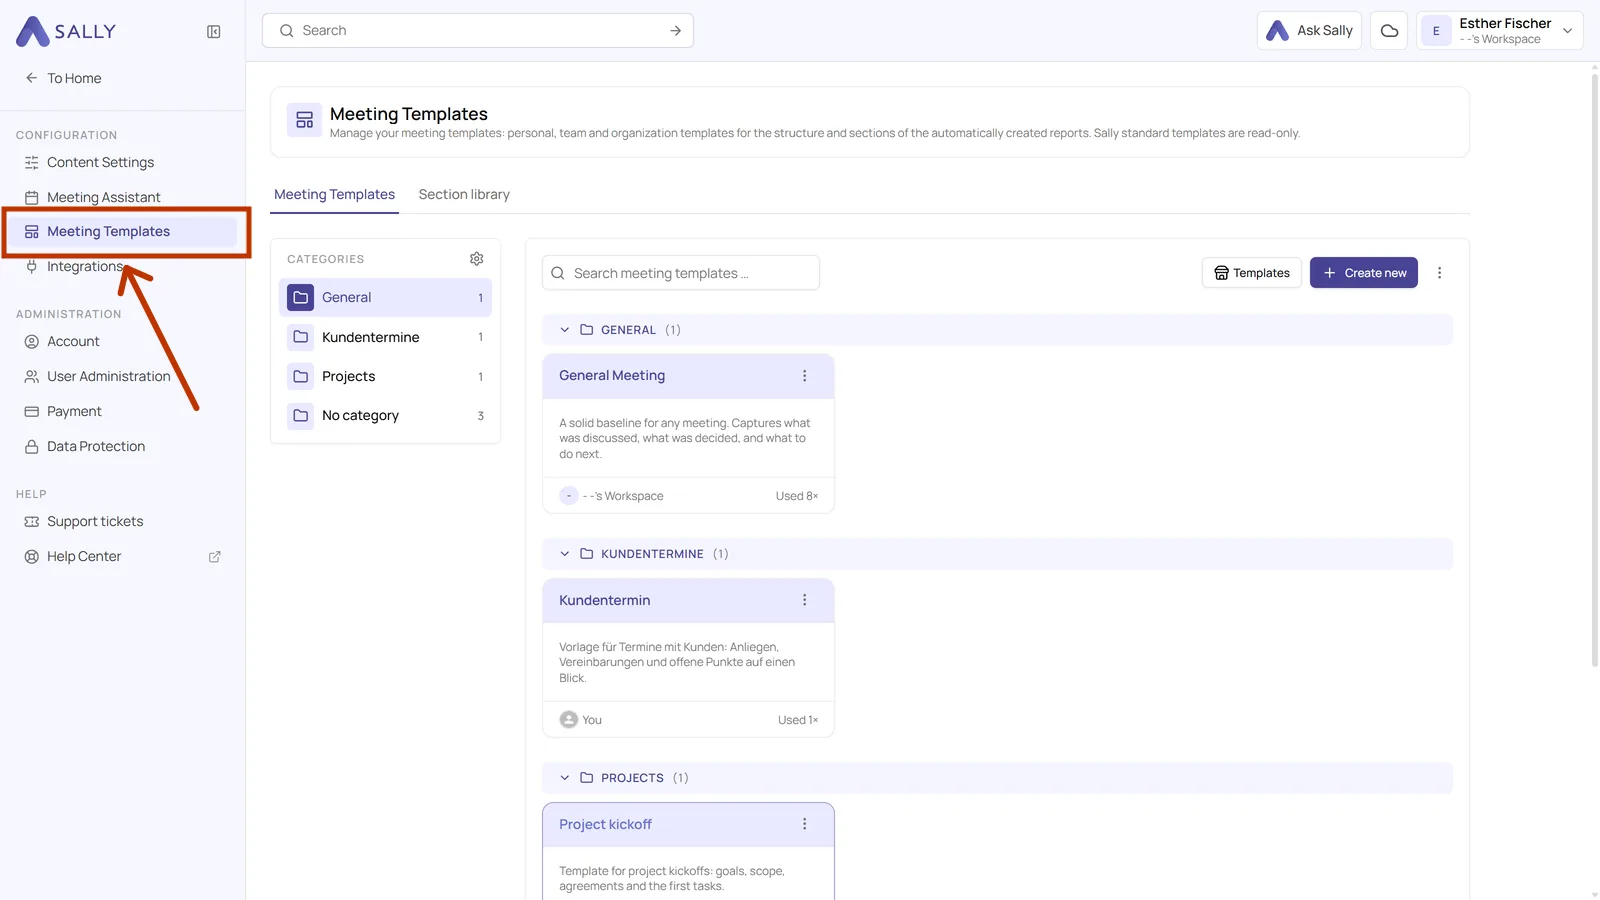
- In the settings sidebar on the left, under Configuration, click Meeting templates.
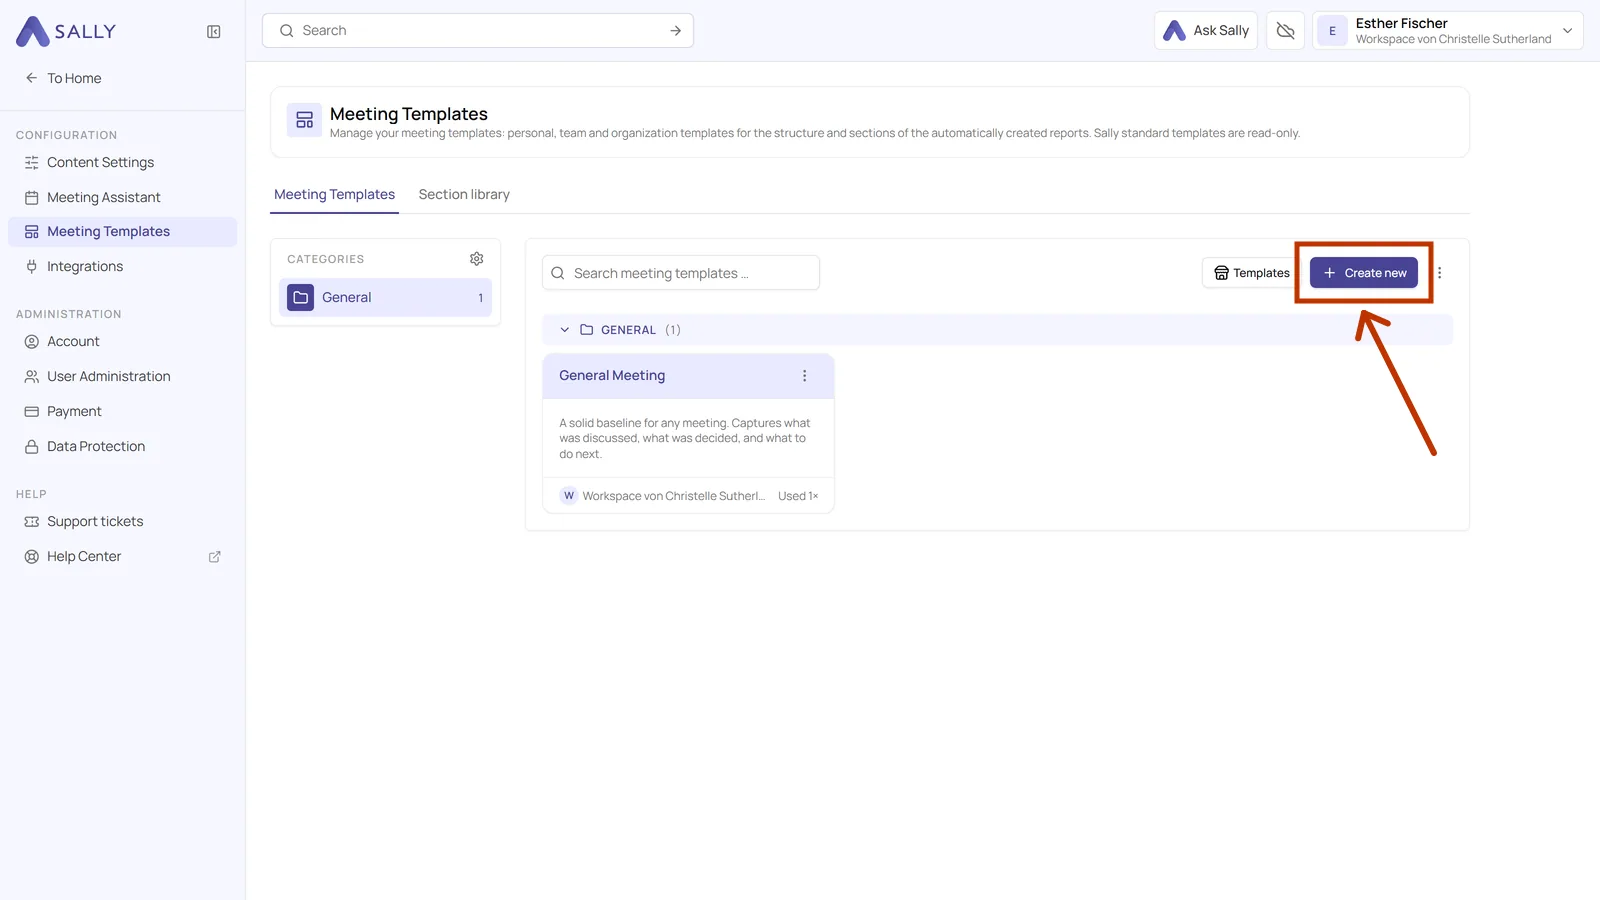
- Click Create new in the top right. The New meeting template dialog opens on the right.
-
Enter a title at the top and, ideally, a description. The description is what your colleagues see on the card, so write what the template is for rather than what it is called.
-
Under Category, pick where the template belongs in the overview. If the right category does not exist yet, click Create category, type the name and click Add. The folder icon in front of the name field gives the category its own icon.
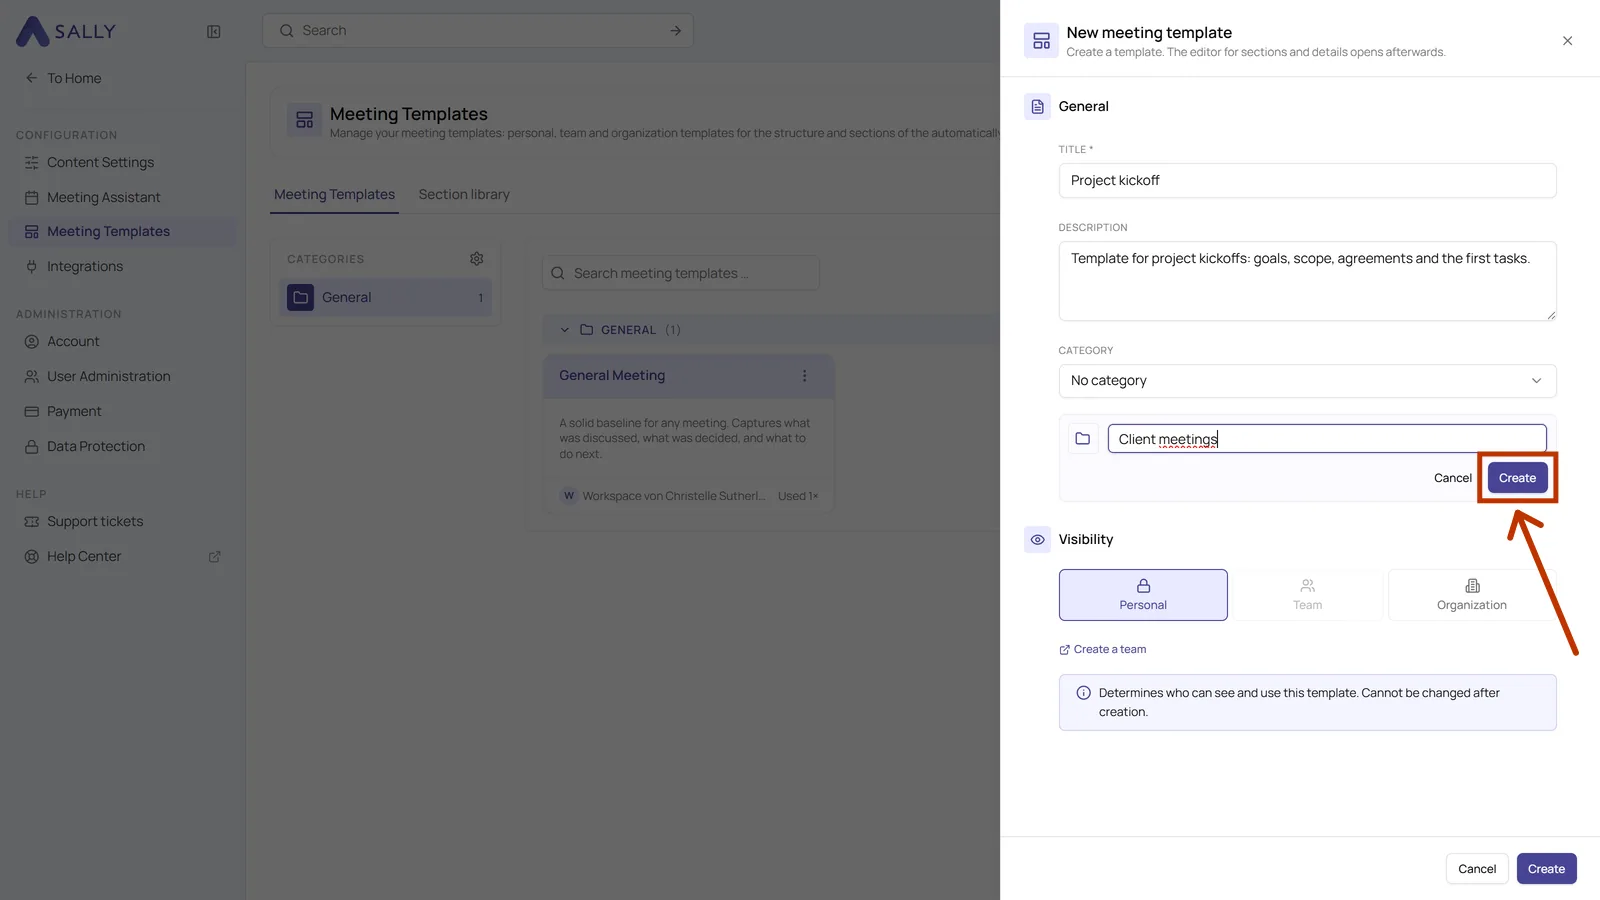
- Below that, Visibility decides who may see and use the template: Personal for you alone, Team for the members of one team, or Organization for everyone. Team only becomes available once a team exists, and the Create a team link takes you there. Then click Create in the bottom right.
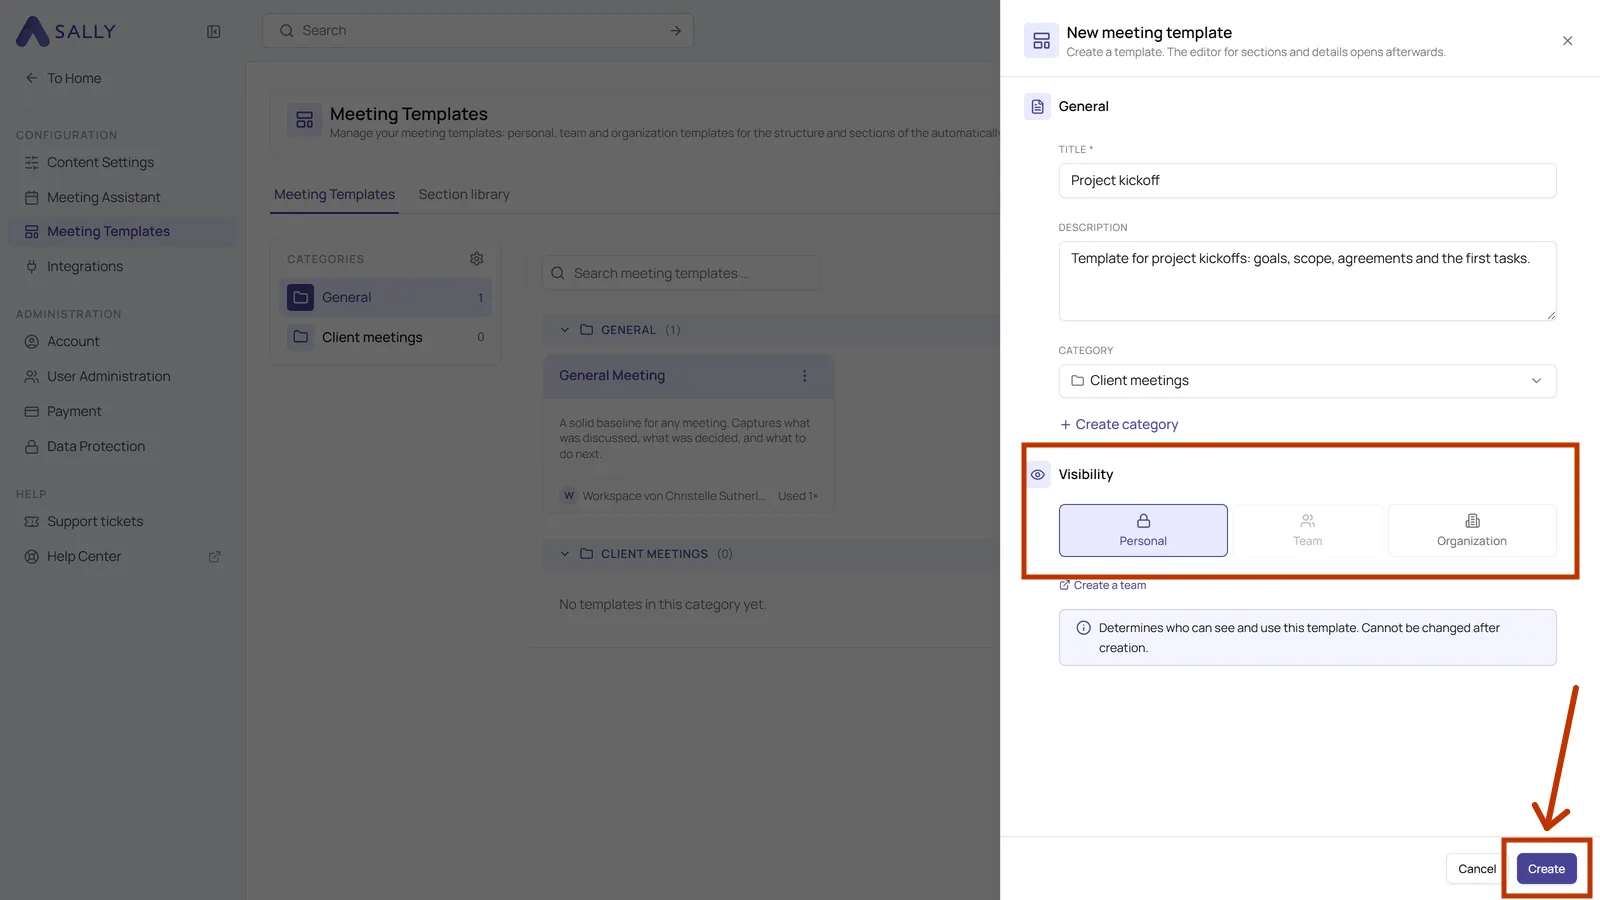
The visibility is not set in stone. The Edit button in the top right of the template takes you back to these details, and you can switch it there. Sharing a template explains what the three levels mean.
2. Adding sections
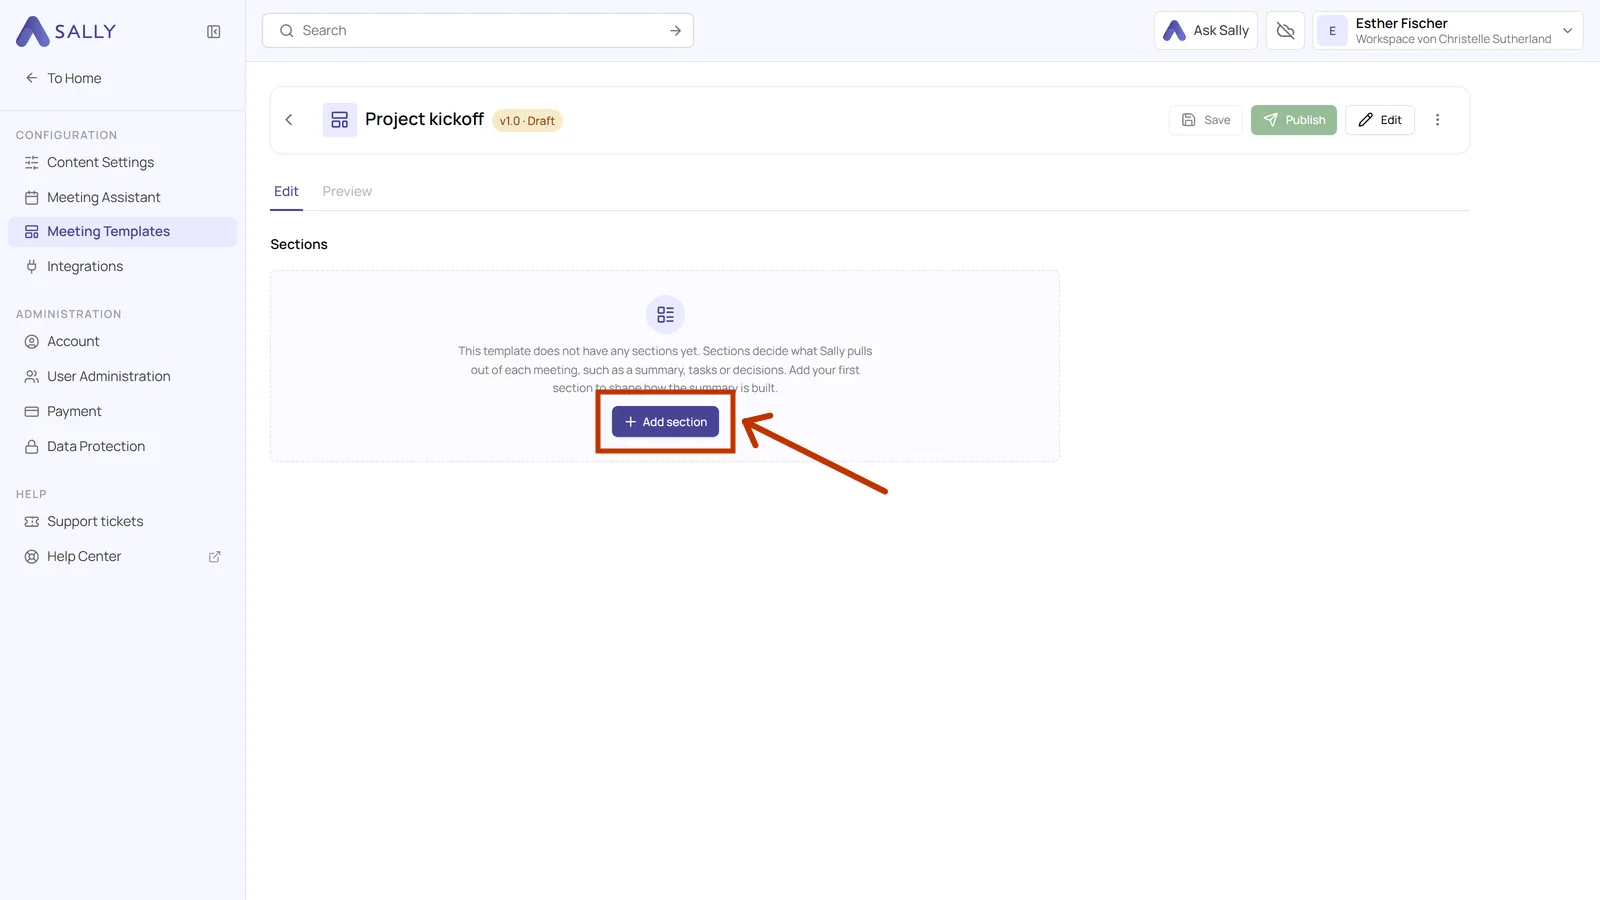
The editor opens as soon as the template exists, and it starts empty. Everything you do here happens in a draft, so nothing is live yet.
- Click Add section in the middle.
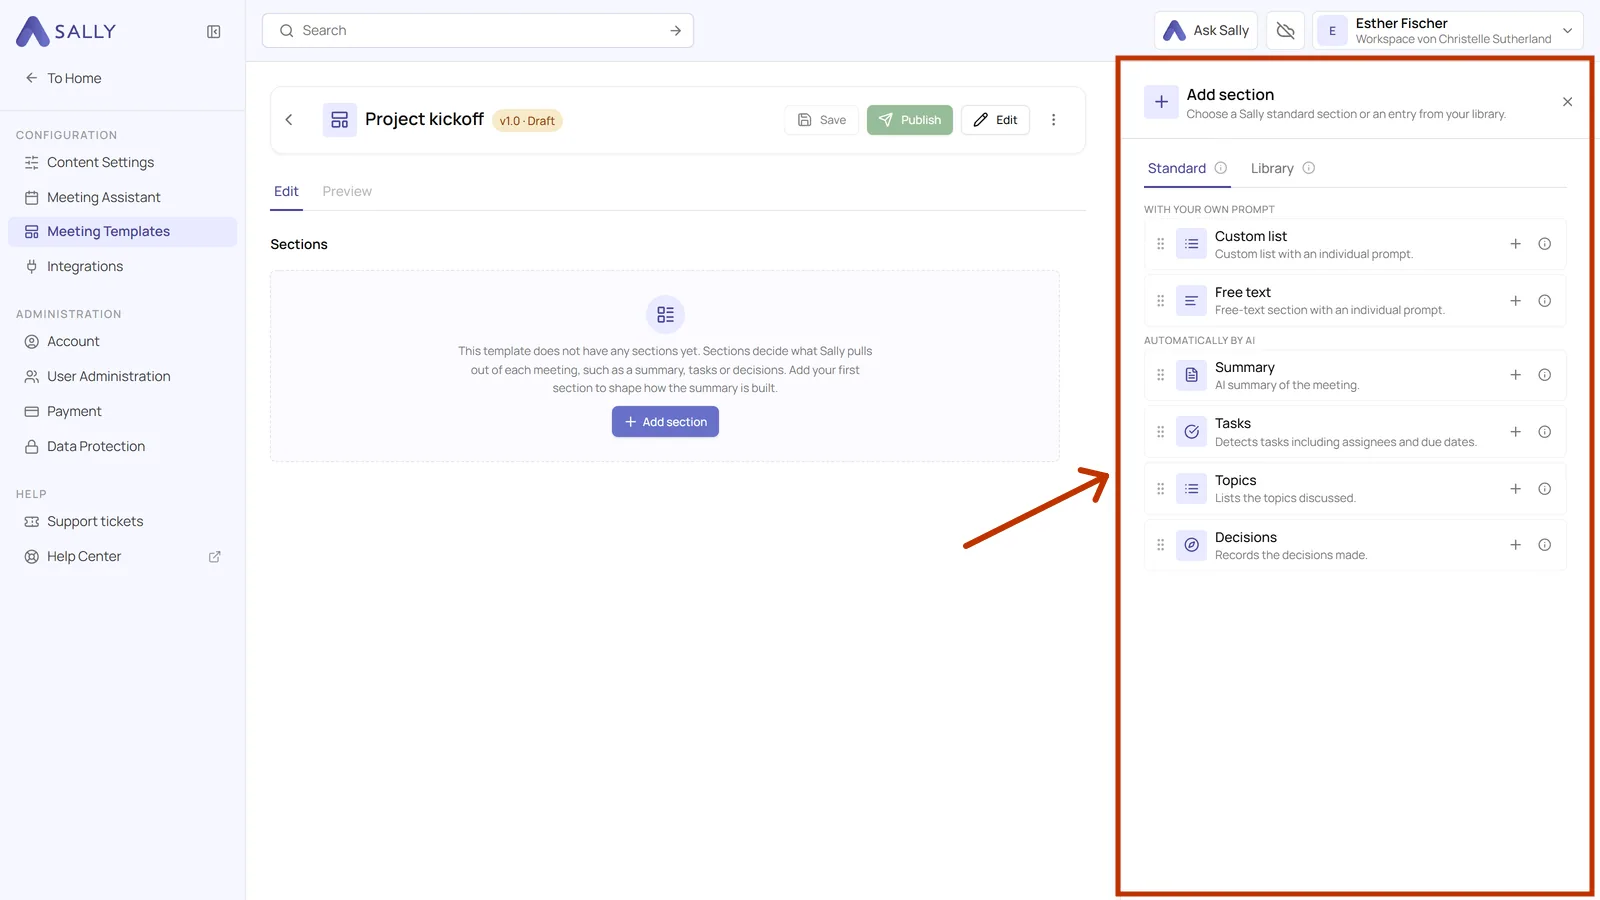
- A panel with the choices opens on the right. On the Standard tab, the top group holds the sections whose prompt you write yourself, Custom list and Free text. Below them are the four automatic ones: Summary, Tasks, Topics and Decisions, which already come with a prompt. The Library tab holds the sections you have saved in the section library.
-
Click the sections you need. In the example those are Summary, Custom list, Decisions and Tasks. The panel stays open, so you can add several in a row. They appear in the list in the order you add them, and that is the order they will have in the summary. Close the panel afterwards with the cross in the top right.
-
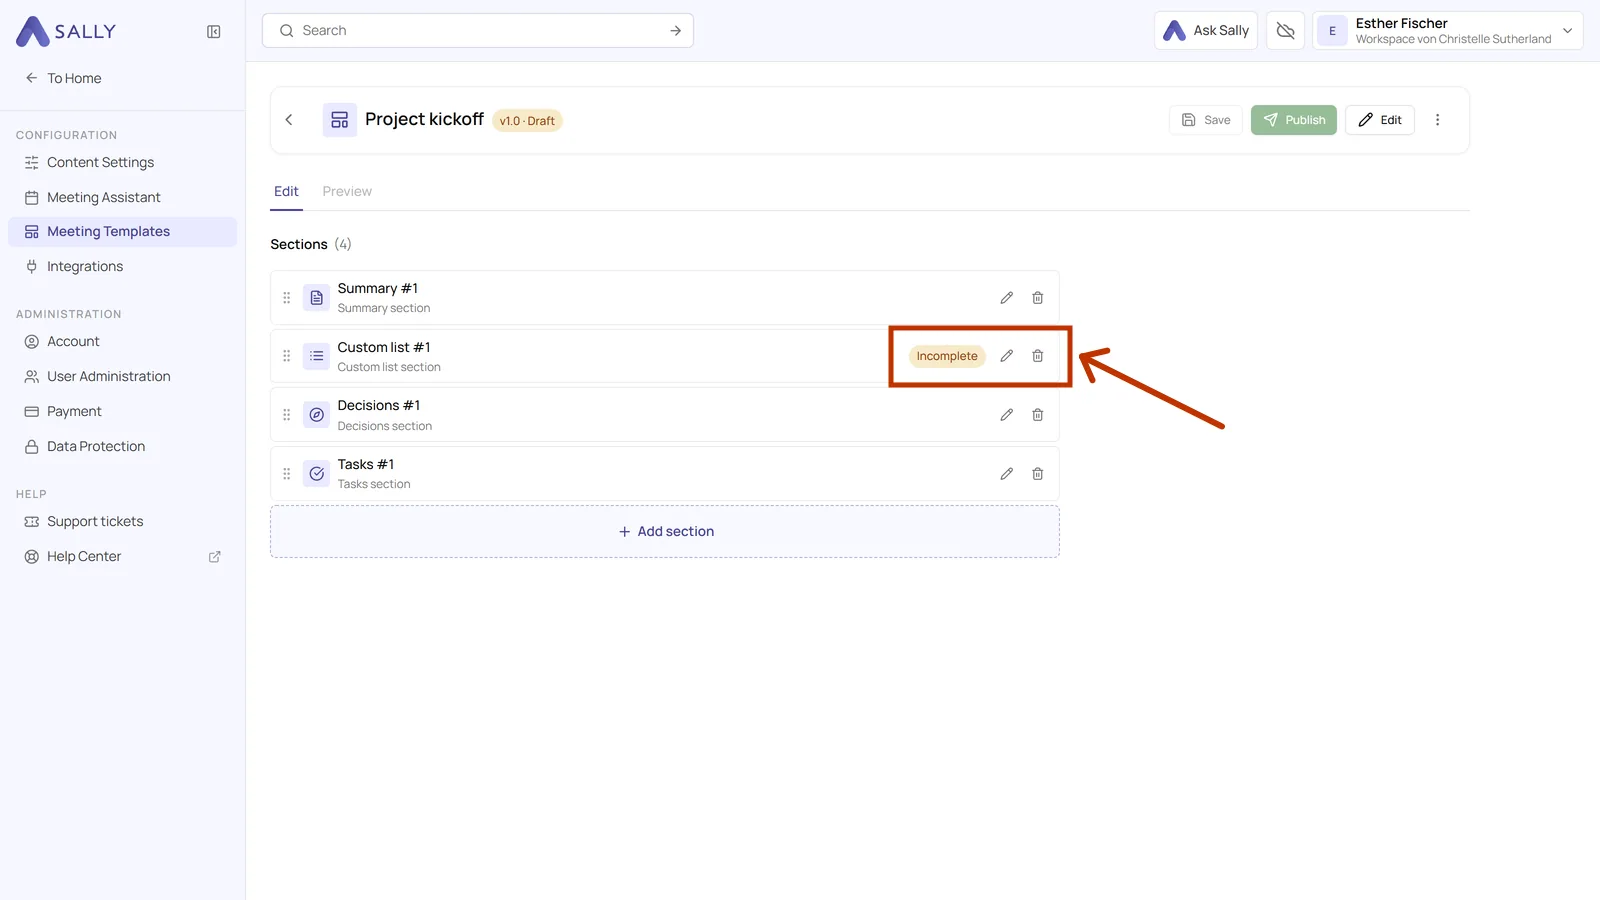
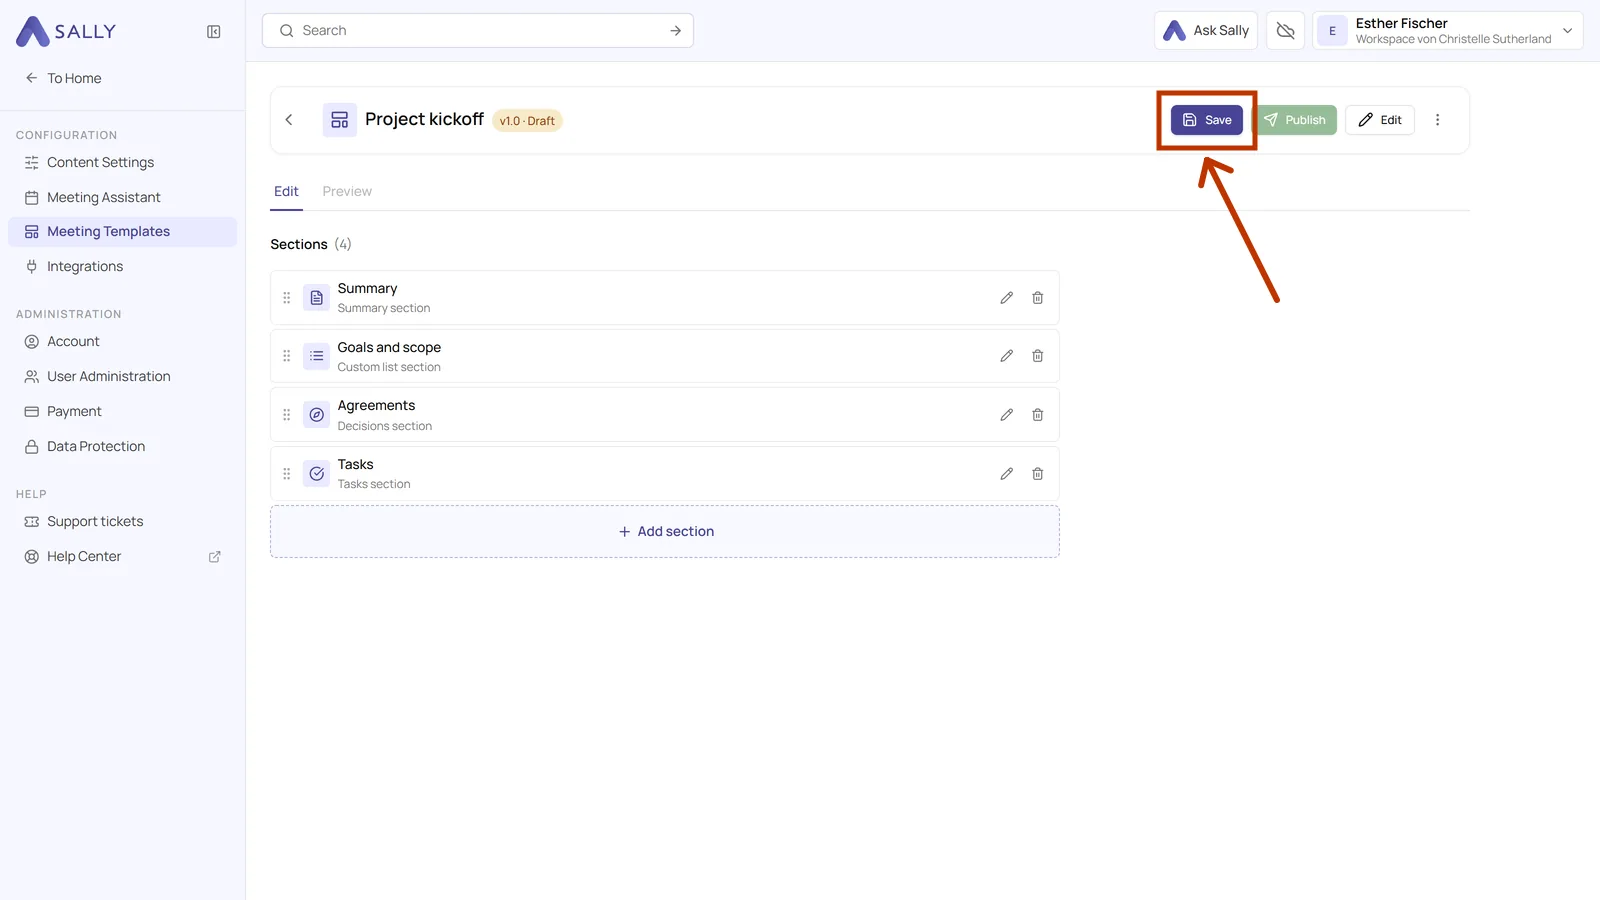
The sections now appear one below the other. Sally names them automatically and appends a number, for example Summary #1. On the right of each row you find a pencil icon for editing and a bin icon for removing the section. Custom list #1 also carries the note Incomplete, because this section has no prompt yet. The grip handle on the left of a row lets you drag a section to another position.
3. Filling in the sections
A section consists of a title and a prompt. The title becomes the heading in your summary, the prompt is the instruction Sally follows while writing. The four automatic sections arrive with a prompt you can adjust. Custom list and Free text are yours to write, which is why they start out marked Incomplete.
-
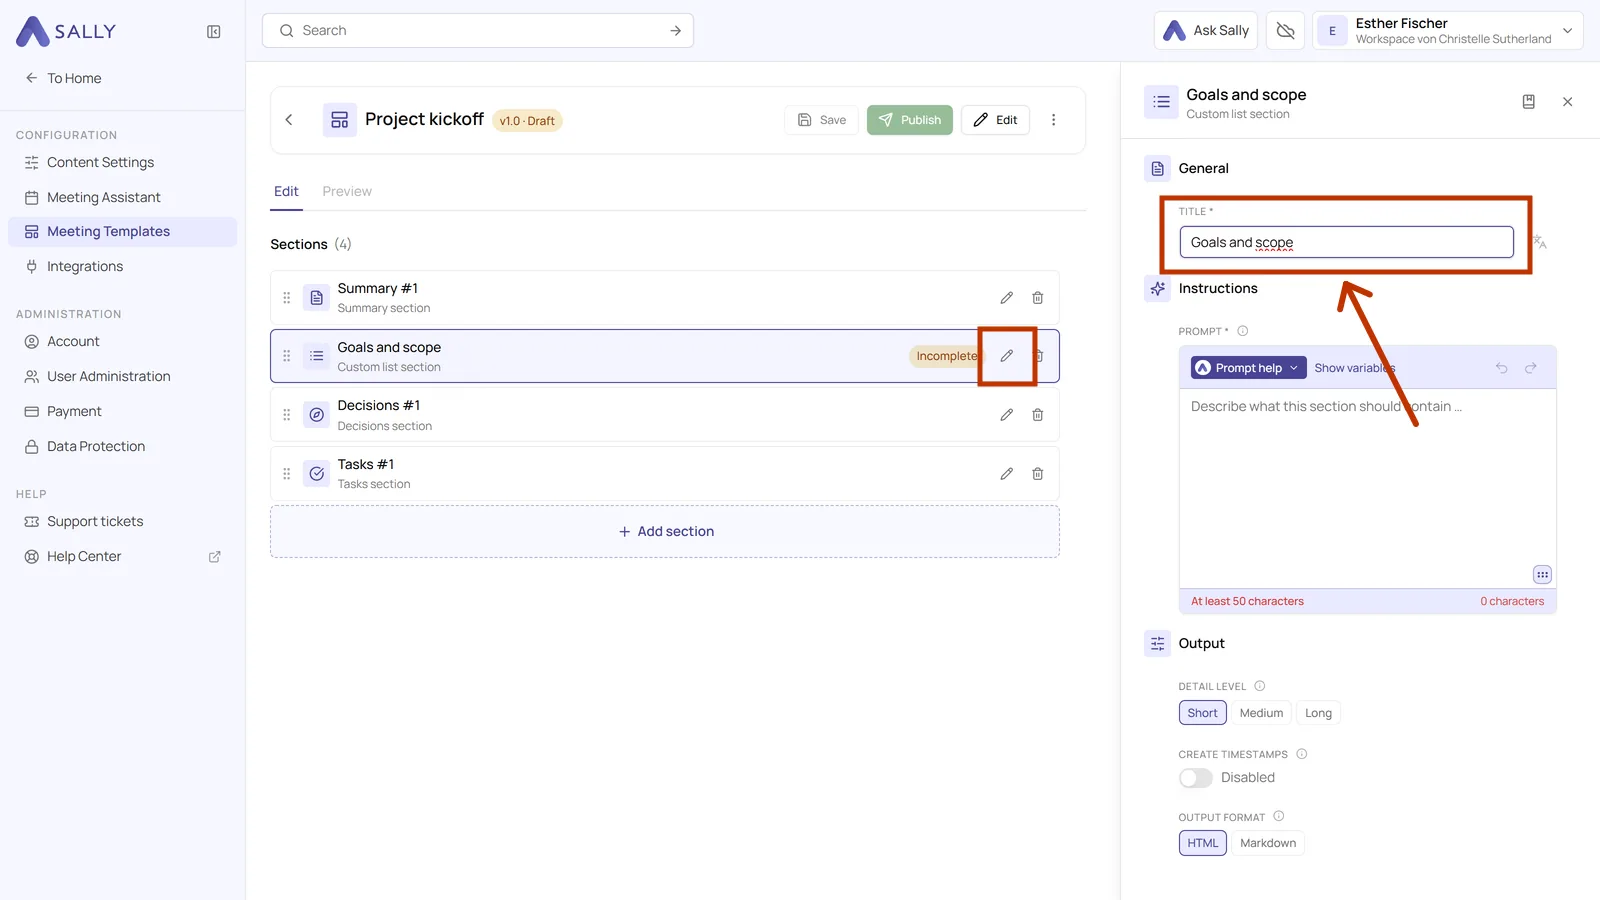
Click the pencil icon in the row of the section. Its settings open in a panel on the right.
-
Enter the heading you want under Title, in the example Goals and scope. Keep it short and recognizable, more like Blockers than Things that are currently blocking us. If your meetings run in more than one language, the translation icon next to the field gives you a separate title per language, see translating the title.
- Below that, use Prompt to describe what the section should contain: what belongs in it, what to leave out and how detailed it may be. We recommend writing the prompt in English, because the AI follows English instructions more precisely. The prompt needs at least 50 characters, and the counter under the field shows where you stand. Above the field, Prompt helper and Show variables give you a head start, both explained in Sections and the section library.
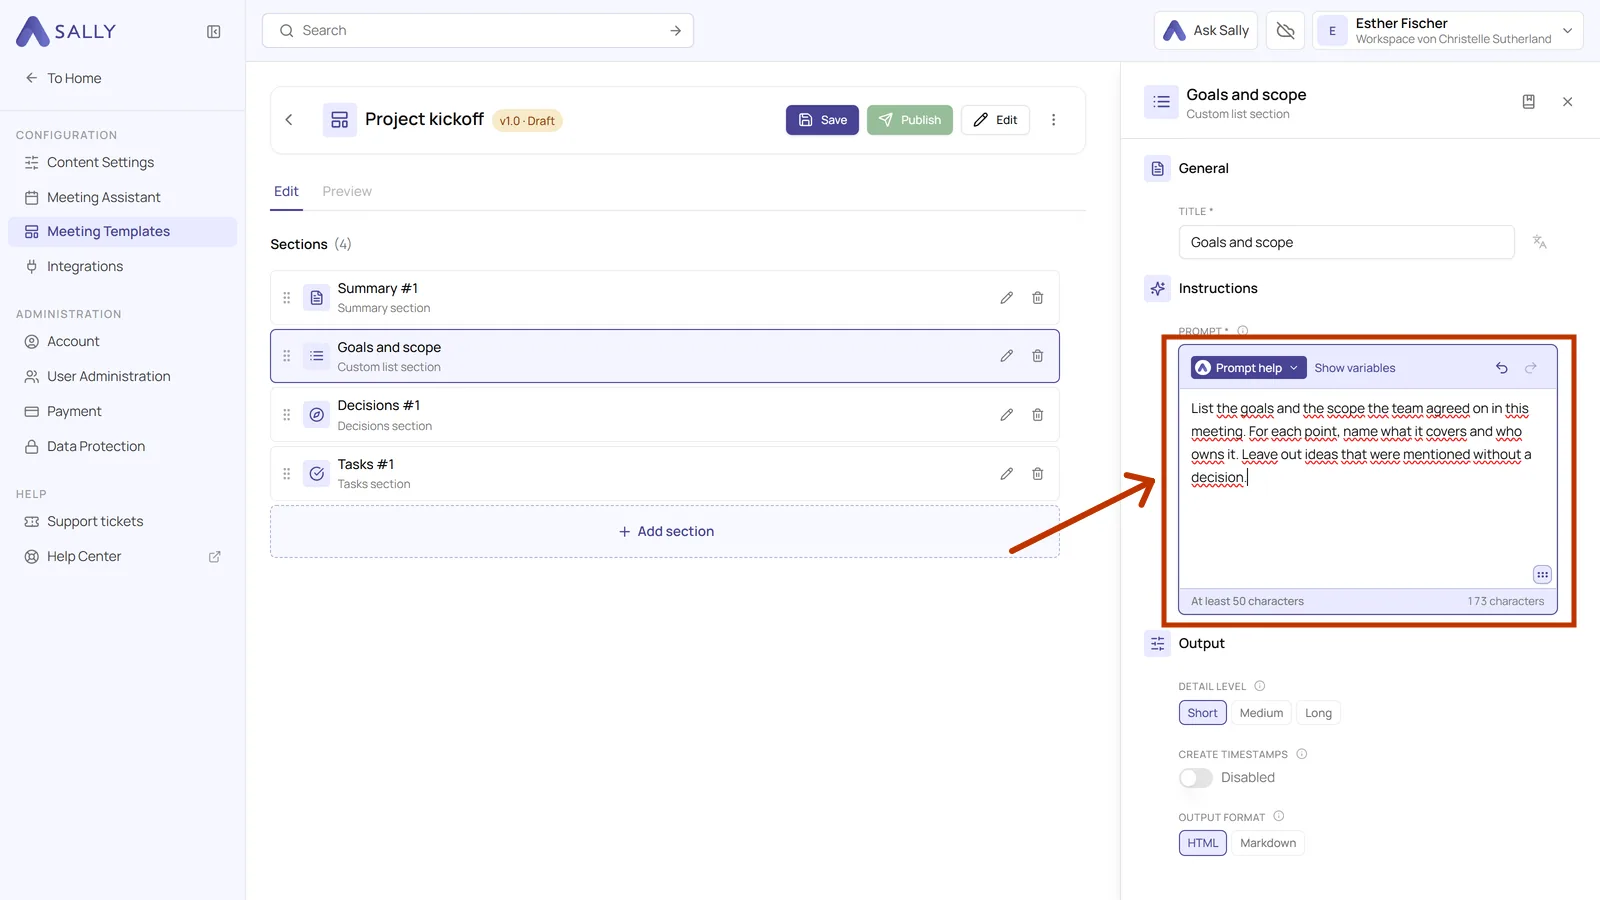
Name the content, the structure and the limit. For example: "List the goals and the scope the team agreed on. For each point, name what it covers and who owns it. Leave out ideas that were mentioned without a decision." That last sentence is what keeps the section clean.
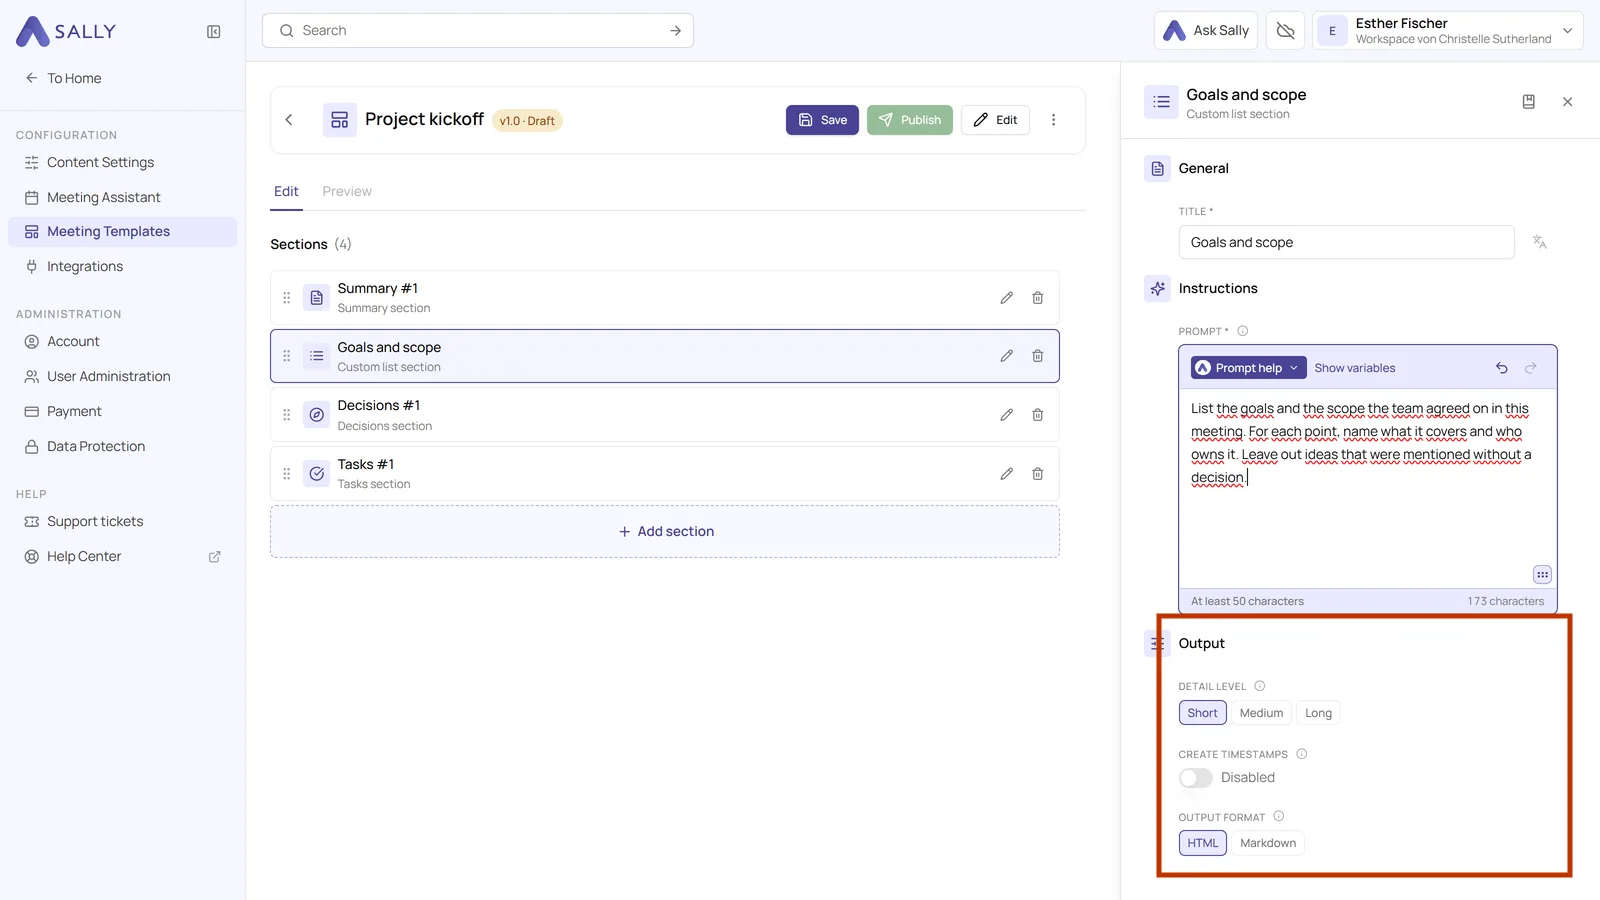
- Scroll down in the panel to Output. Level of detail switches between Short, Medium and Long. Create timestamps adds the point in the recording a statement came from. Output format decides whether the result is HTML or Markdown, and HTML is the right choice for the summary inside Sally.
- Close the panel with the cross in the top right. Your title now appears in the list, and the Incomplete note is gone. Repeat the steps for every section that still needs its own title or prompt.
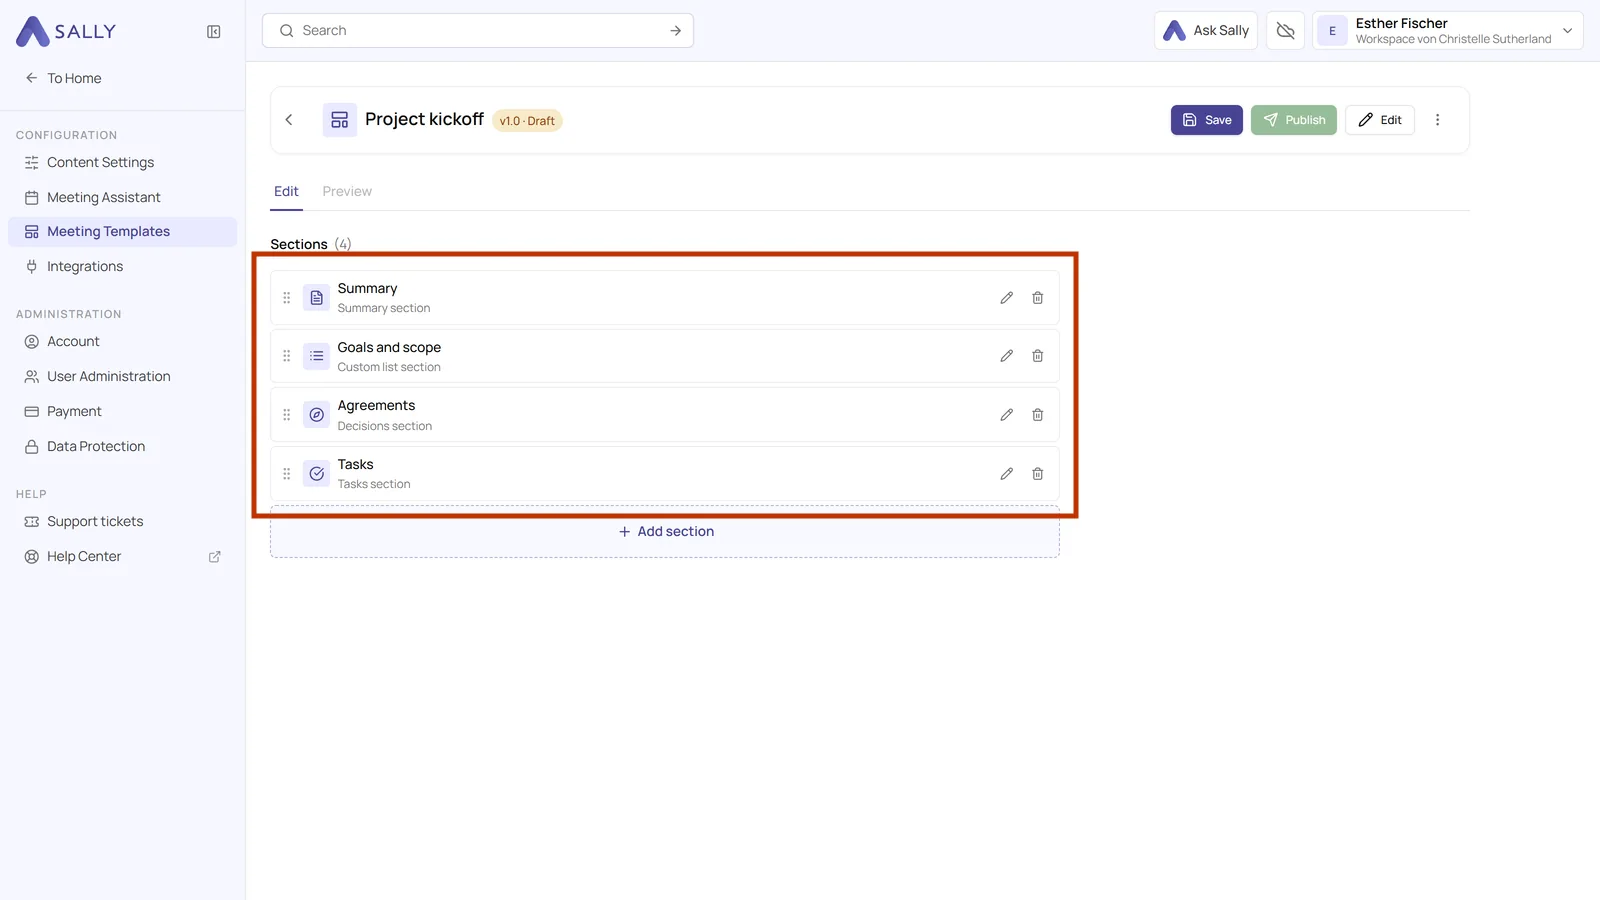
- Click Save in the top right. That secures the draft. It is not live yet.
4. Testing the template
Before a real meeting relies on your template, try it on a recording you already have. That way you see the result before you publish. The recording itself stays untouched.
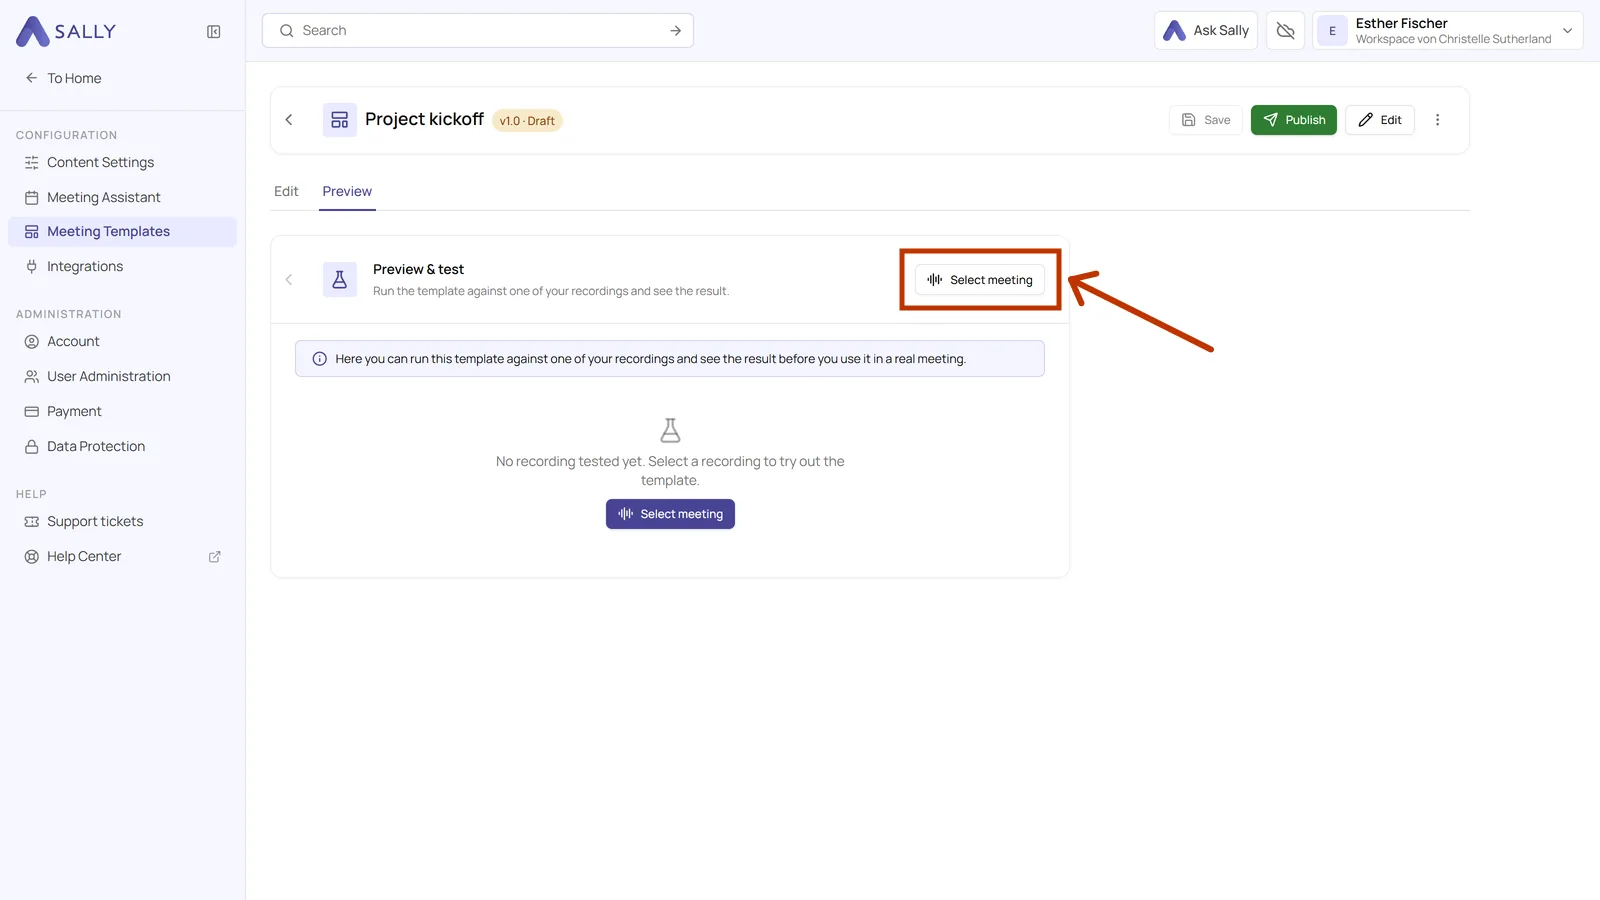
- Switch to the Preview tab above the section list and click Select meeting.
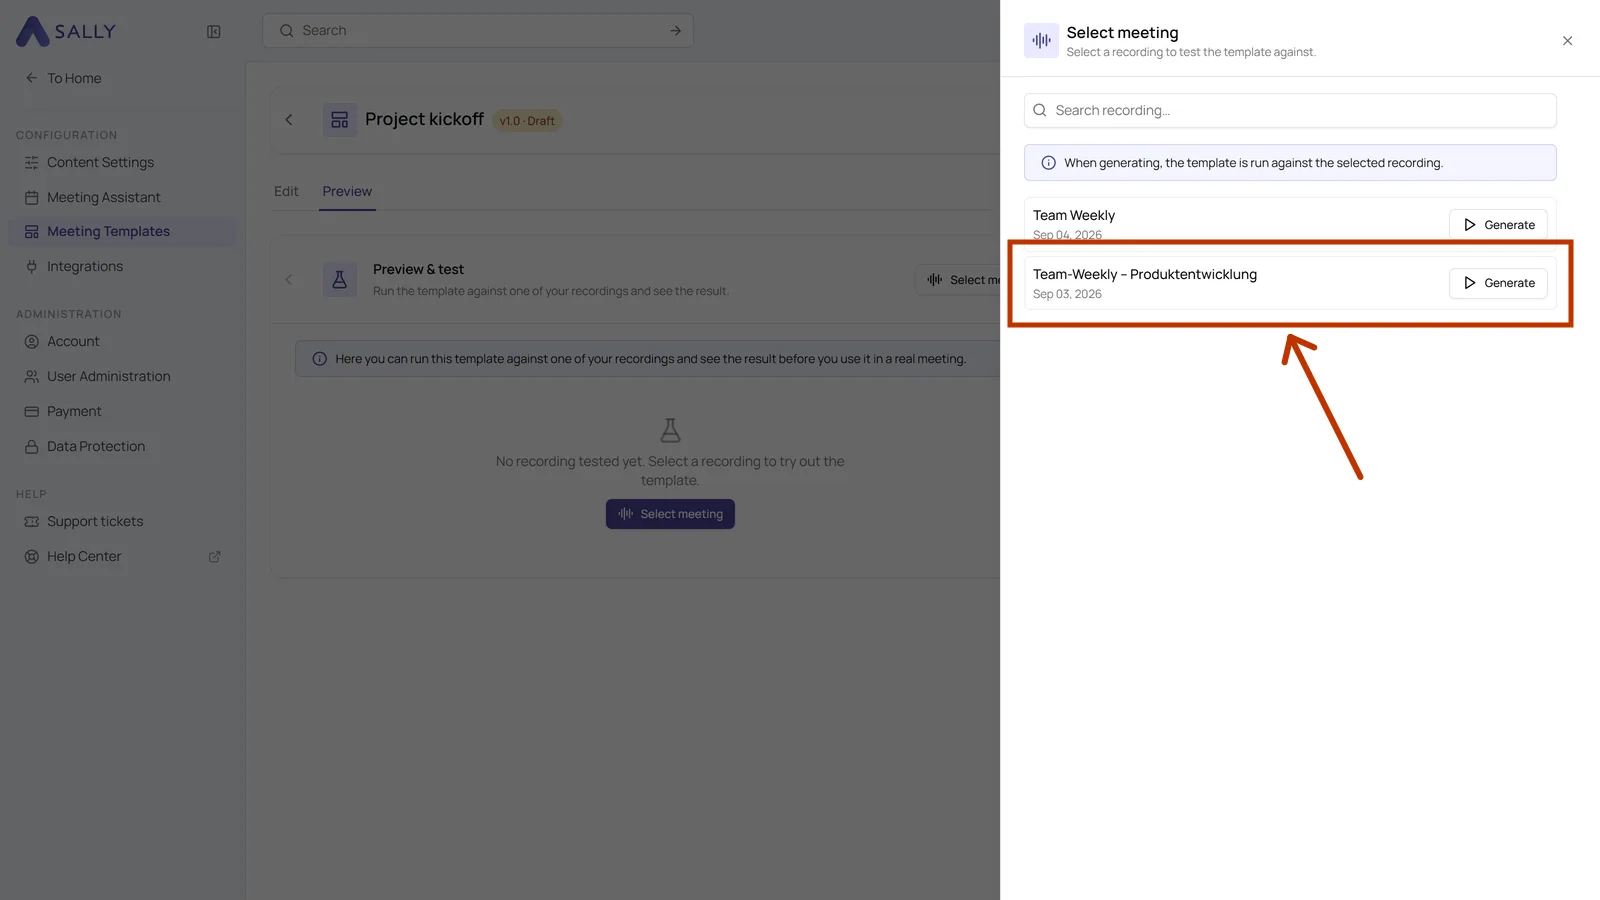
- The list of your recordings opens on the right, each with its date. Click Generate behind the recording you want to use.
- Generating takes a moment. After that your sections appear one below the other, each with the text Sally worked out from that recording. A click on an entry expands it. Sally always writes the content in the language of the meeting, while the headings stay the way you set them in the template.
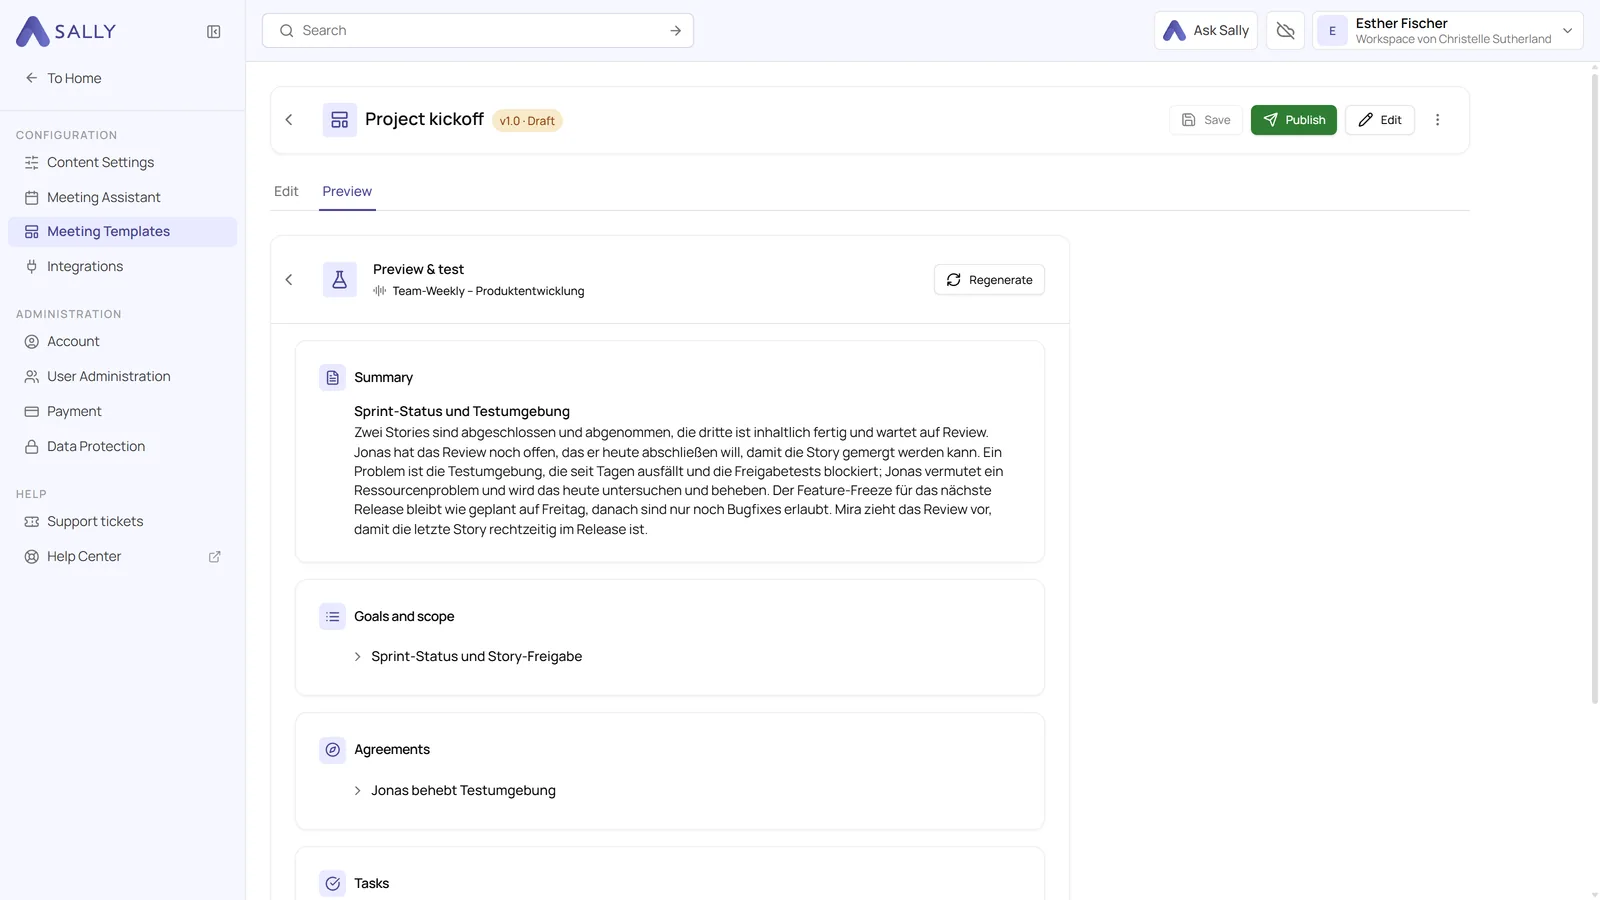
- If something is off, go back to the Edit tab, change the prompt of that section, save and run the test again with Regenerate.
5. Publishing the template
Once you are happy with your draft and want to use it on your meetings from now on, publish it.
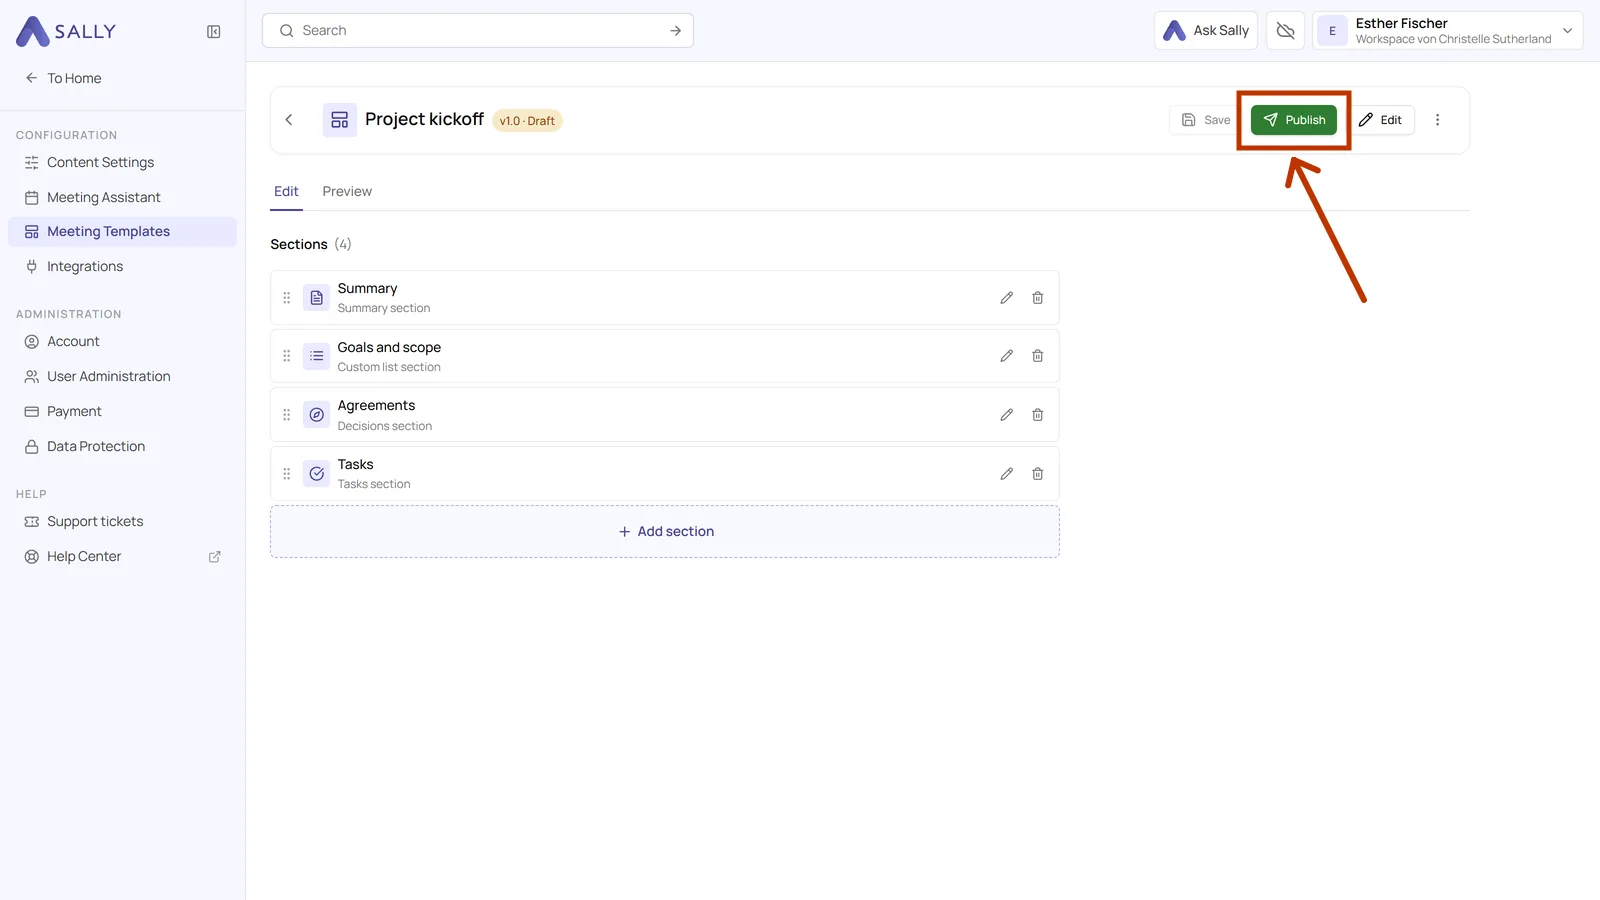
- Click Publish in the top right.
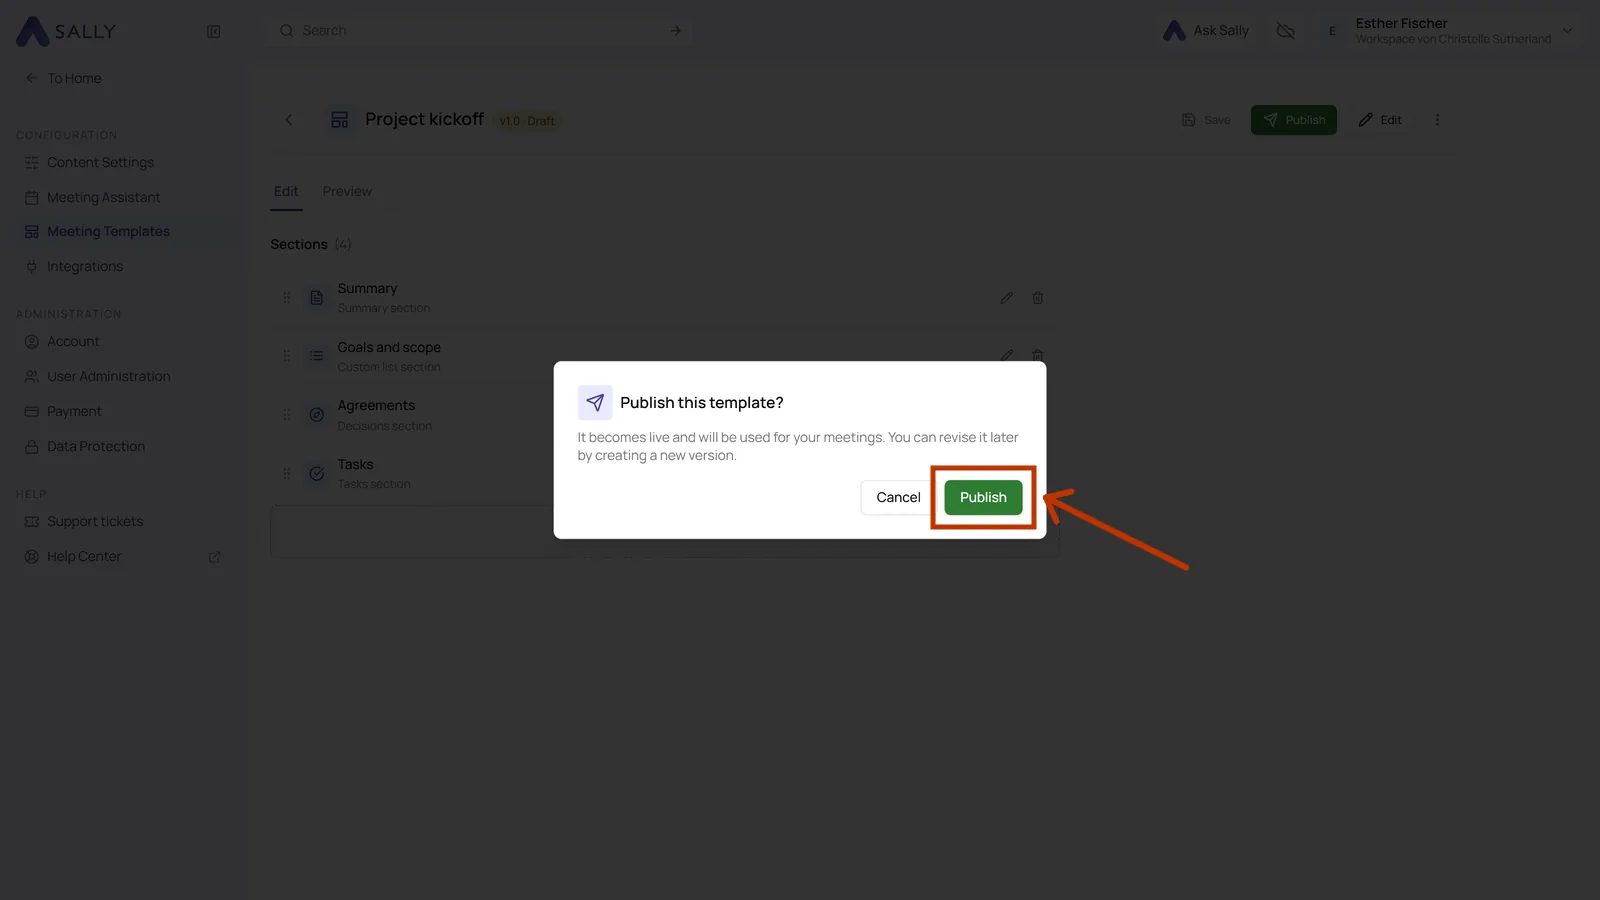
- Sally asks for a confirmation, because the template becomes live for your meetings. Confirm with Publish.
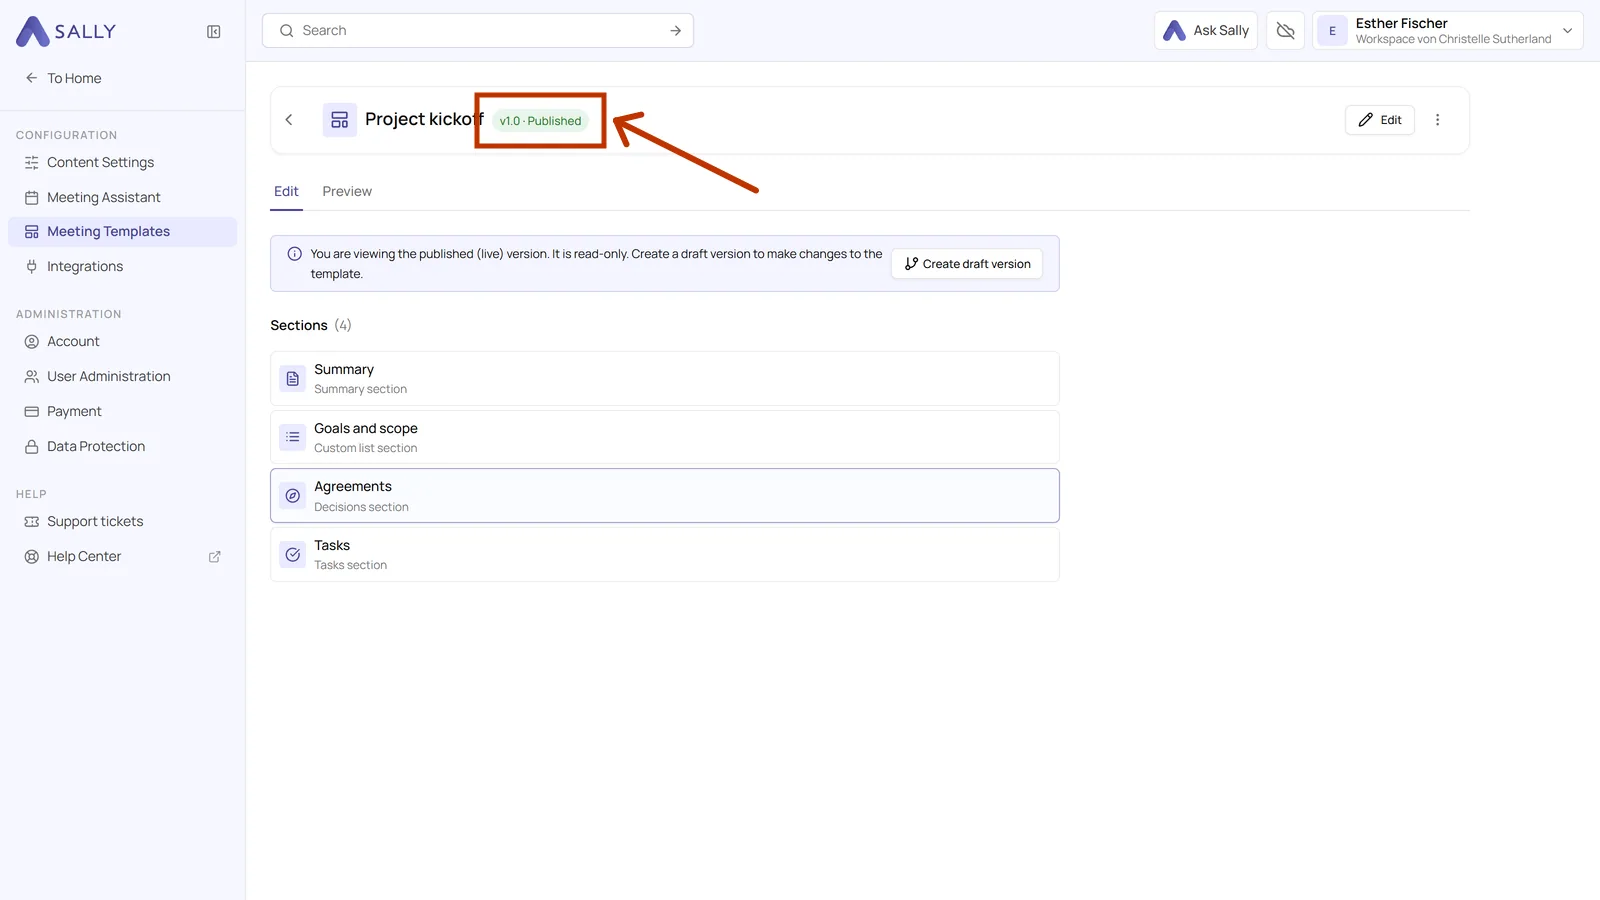
- The badge next to the name now reads v1.0 · Published. From here the template is read-only, and the next change starts with a new draft.
6. Next steps
- Set the template for a meeting or make it your default. Applying a template covers both.
- Pass it on to your team or the whole organization. Sharing a template explains the three visibility levels and how to set up a team.
- Change something later on. Every change runs through a draft that you publish, see Creating a new version.