How to Organize Meetings in Folders
Sally lets you organize your meetings in folders so you can group related recordings and summaries. Folders help you quickly find meetings by project, client, or topic, instead of scrolling through a long list. You can keep folders private or share them with individual colleagues and entire teams.
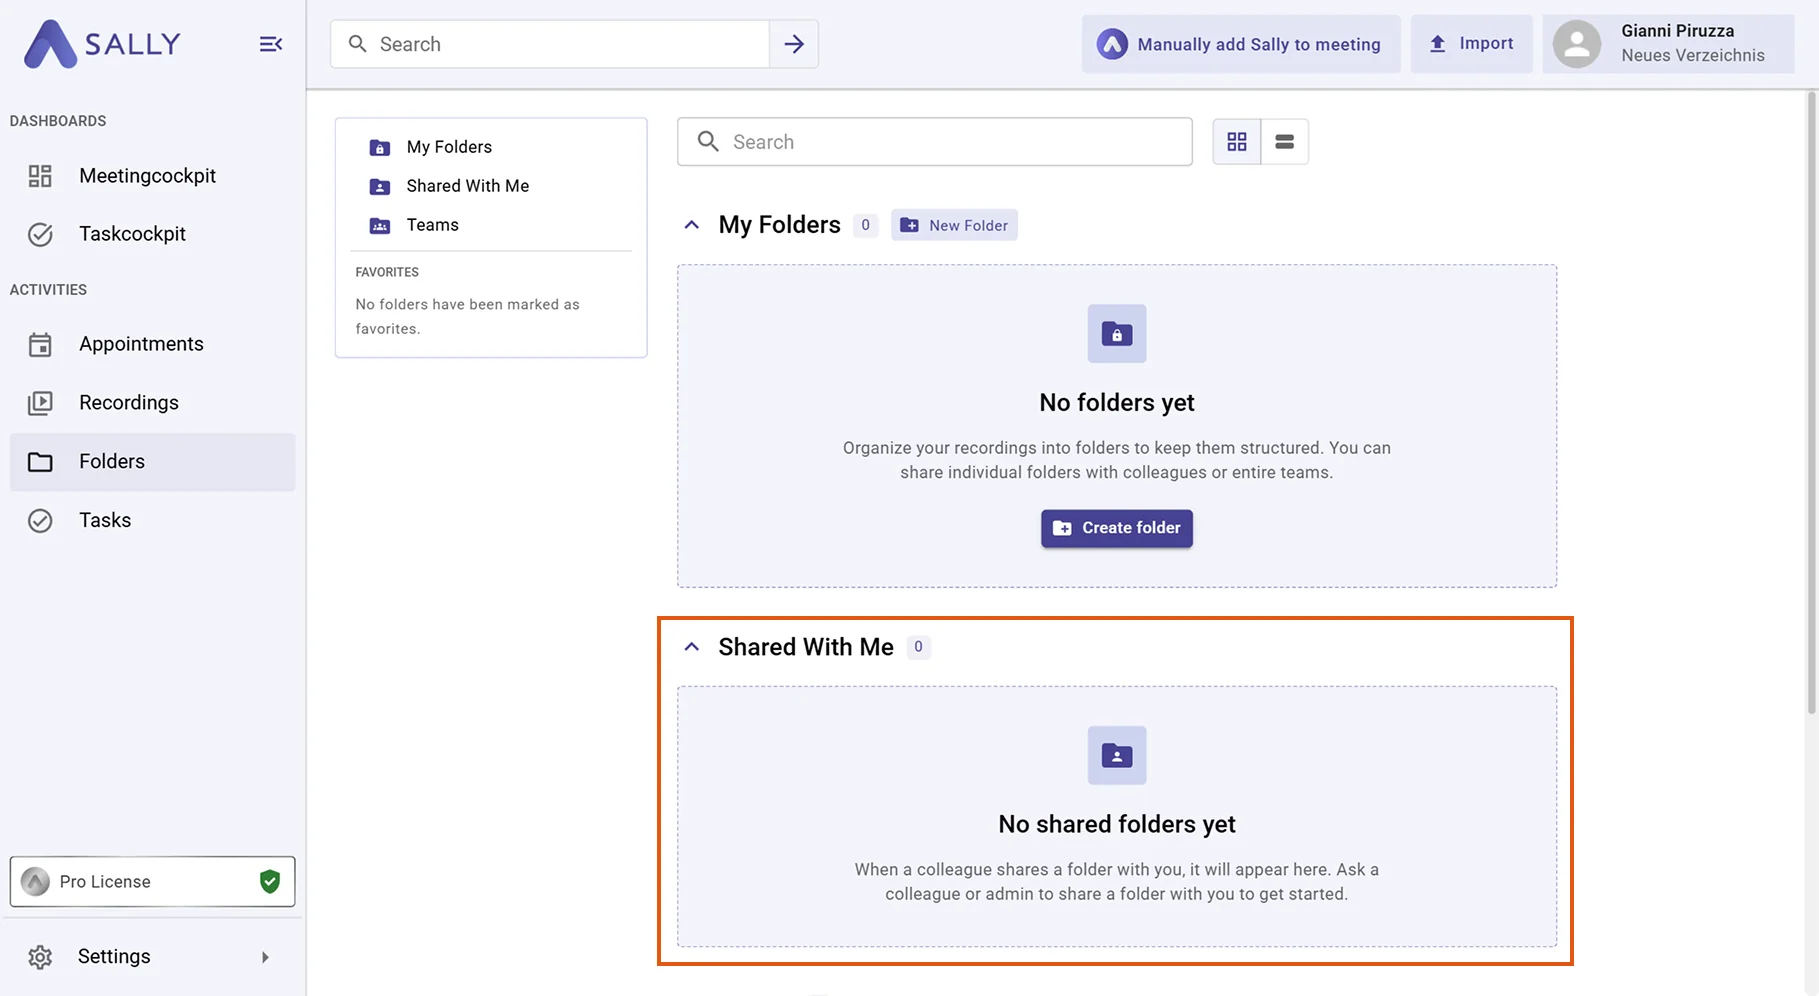
- "My folders": Folders you created yourself.
- "Shared with me": Folders other people have shared with you.
- "Teams": Folders shared with an entire team.
Quick navigation
1. Set up and manage a folder
Setting up your own folder happens in three steps: you create the folder, optionally build a structure with sub-folders, and then add your recordings. You can revisit and adjust any of these steps at any time.
1.1. Create and share a folder
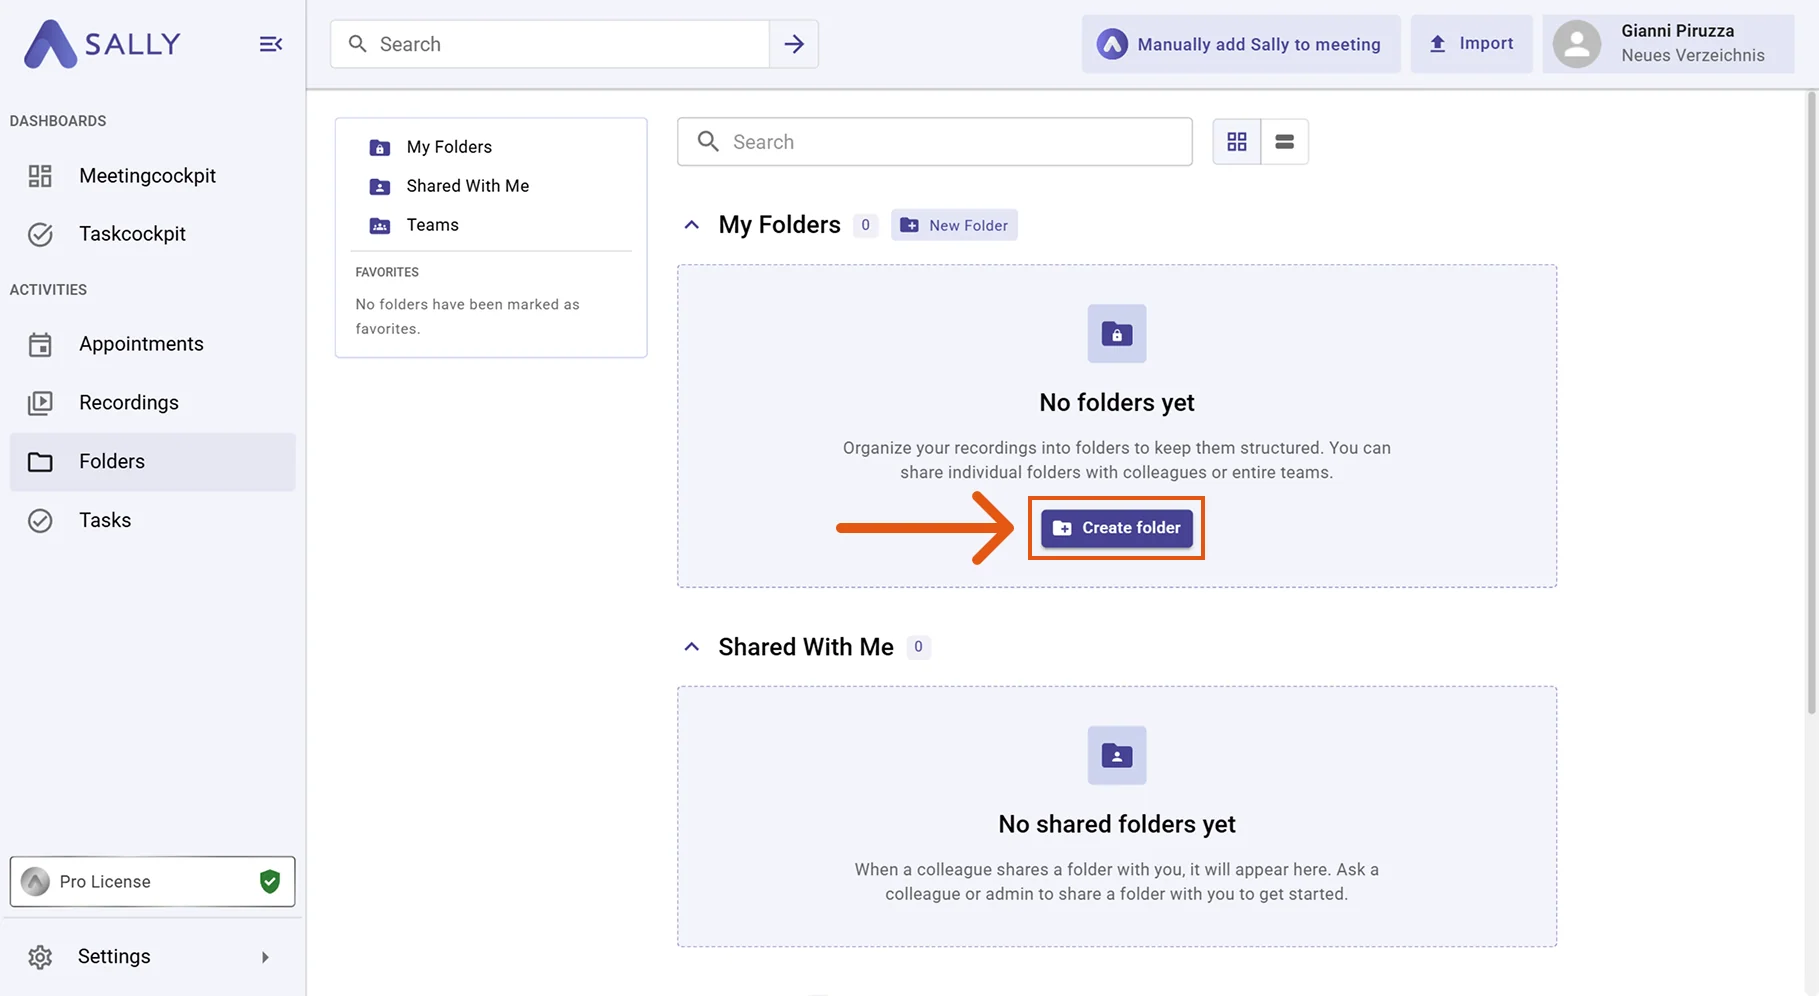
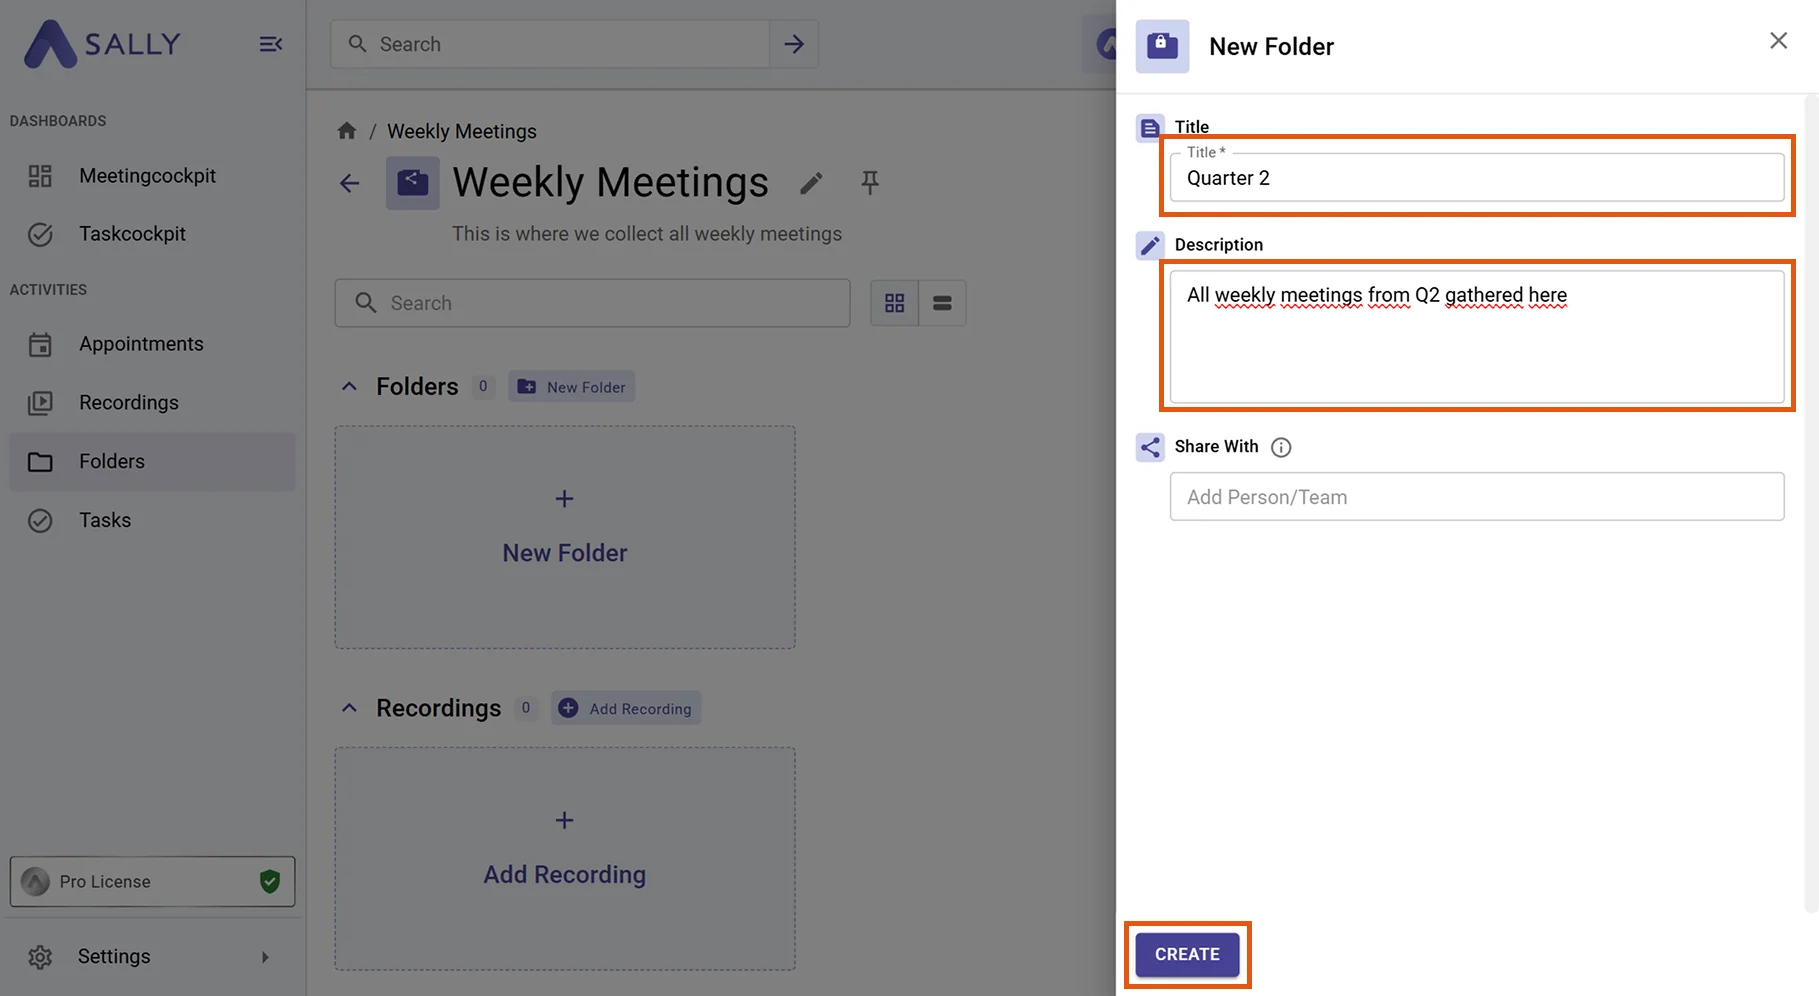
- In the left sidebar, click Folders and then click Create folder under "My folders".
-
In the Add folder dialog, enter a clear title and, optionally, a description. The description helps you and your team quickly understand the folder's purpose later on.
-
(Optional) Under Share with, share the folder directly with individual people or teams. For each person or team, choose a permission:
- Can view: the person can open the folder and all contained recordings.
- Can edit: the person can additionally add recordings, remove them, and create sub-folders.
- Remove: revokes access for that person.
You can adjust a folder's members and permissions at any time, even after the folder has been created. Add people, change their permissions, or revoke access later via the folder's settings.
- Click Create to save the folder.

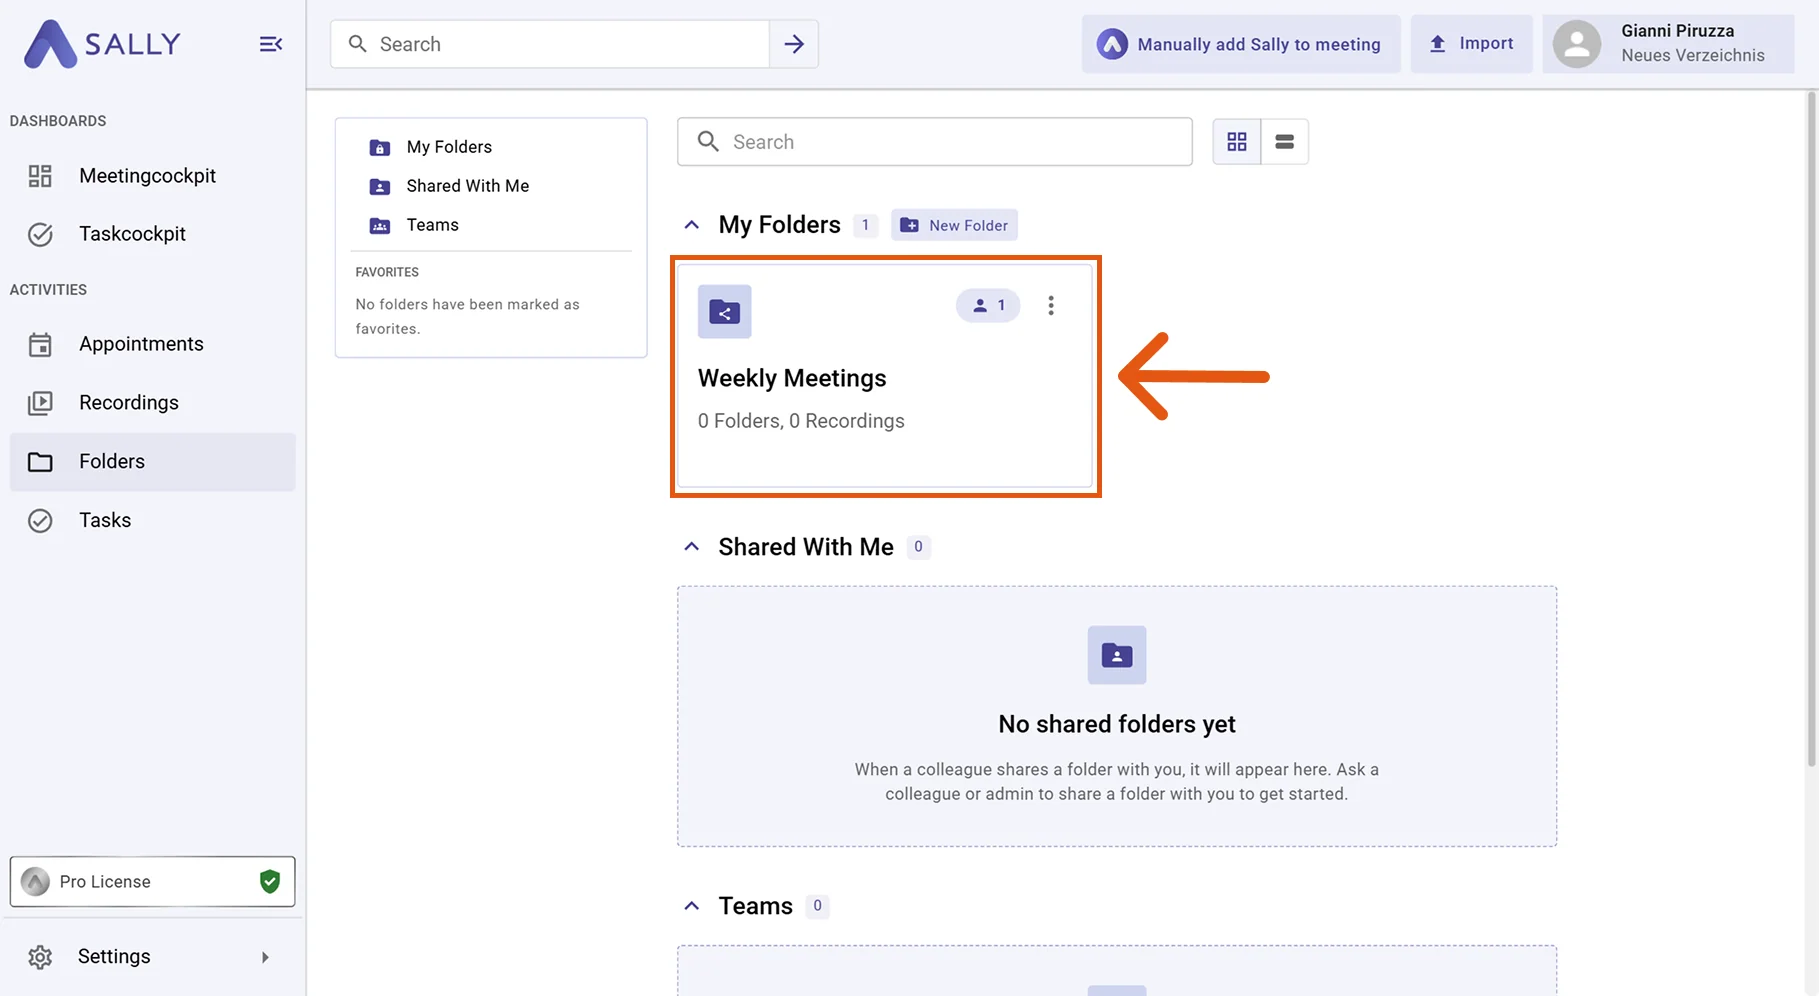
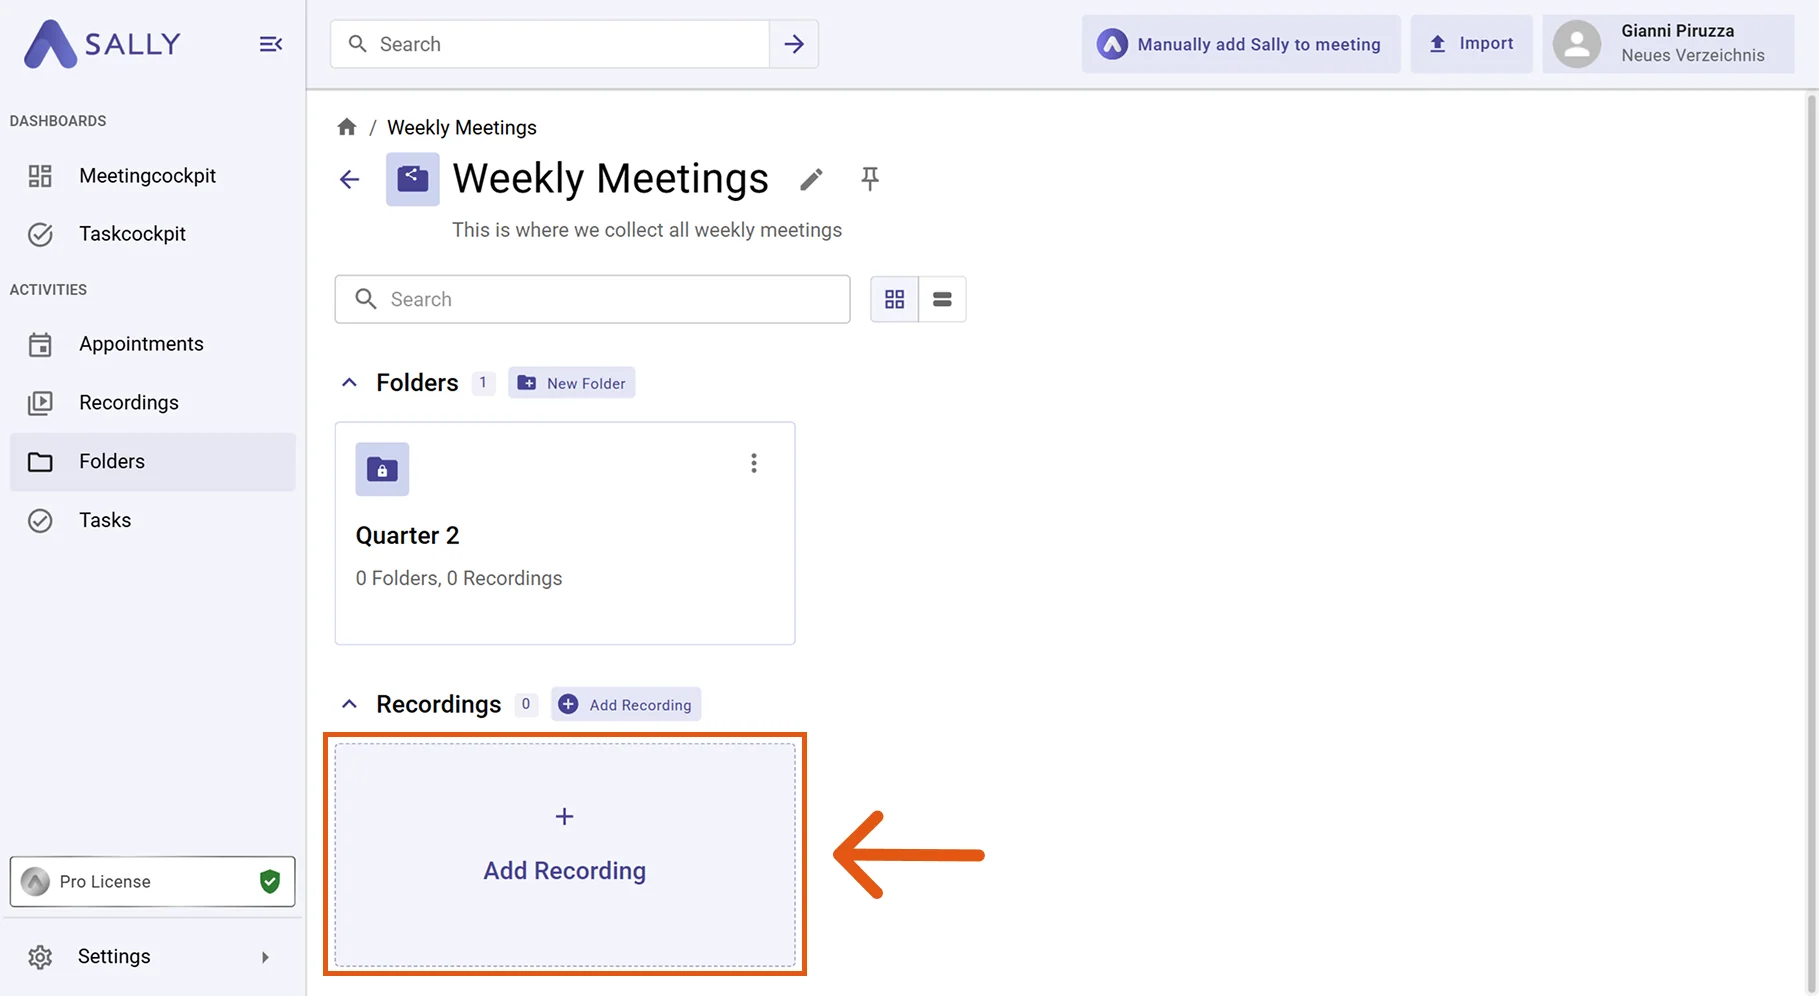
- The new folder appears under "My folders". From there, you can open, rename, or edit it anytime.
1.2. Add sub-folders
For finer structure, you can create sub-folders inside any folder, for example per quarter, project phase, or client.
- Under "My folders", click the folder you want to structure further to open it.
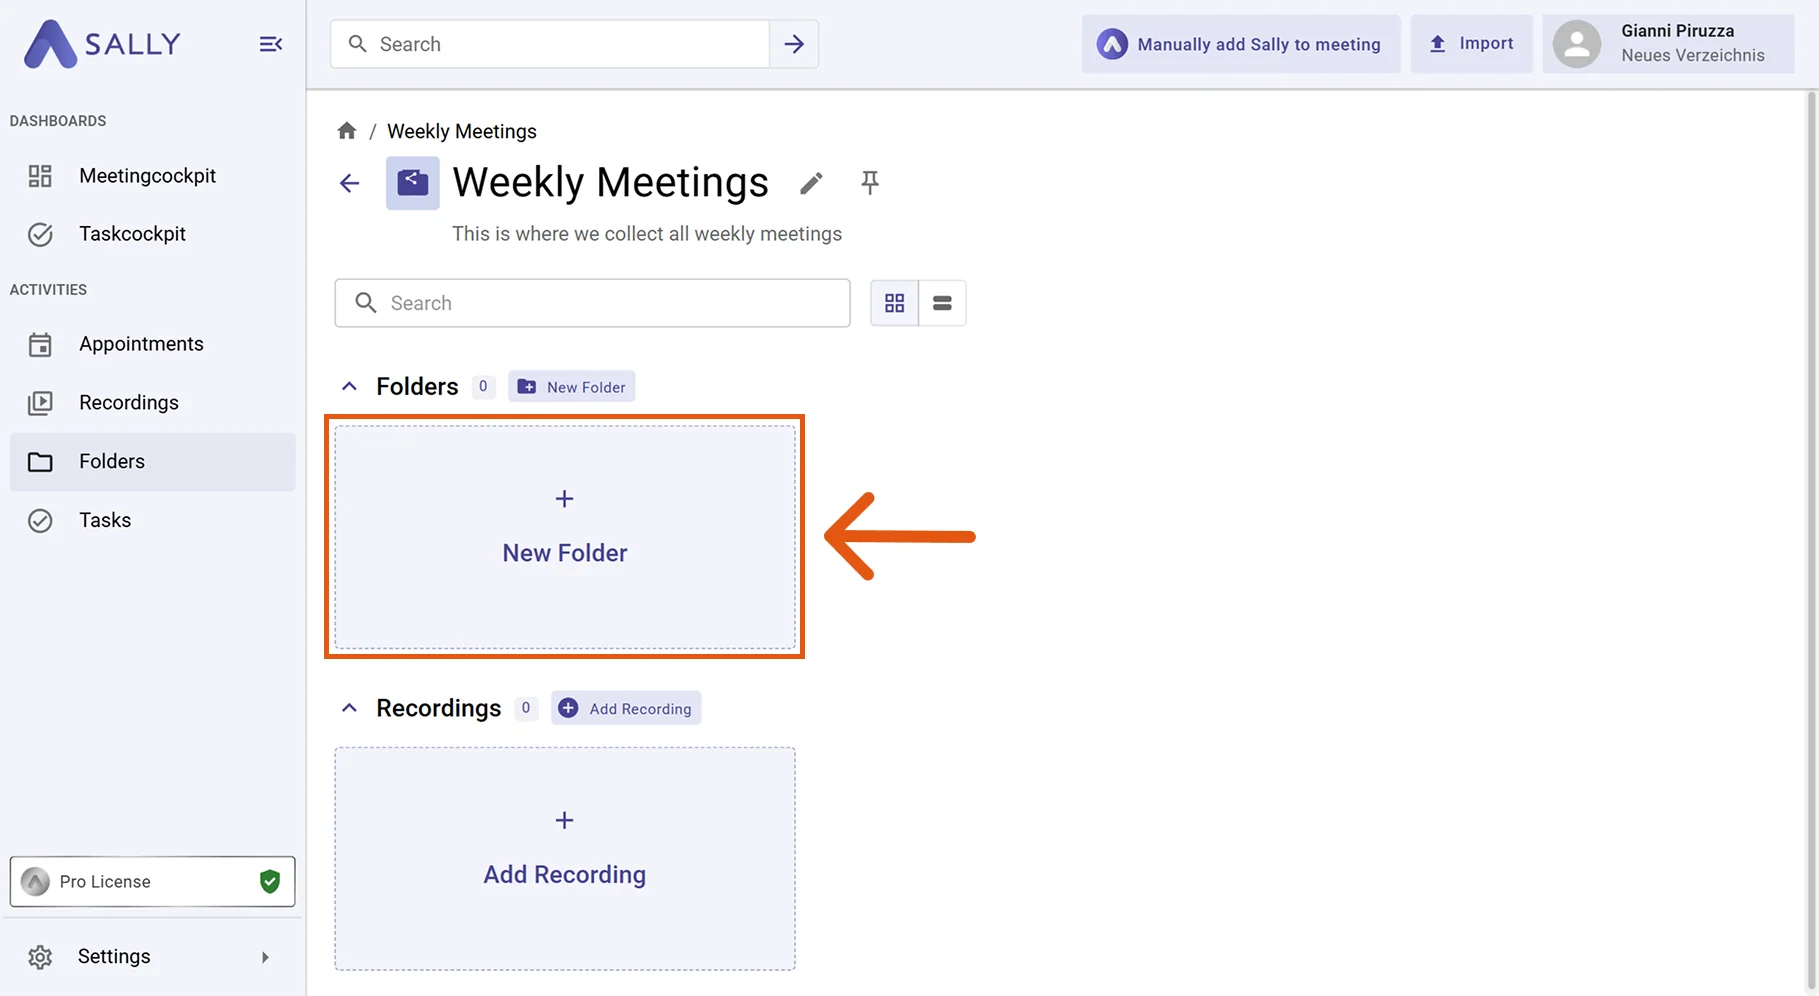
- Inside the opened folder, click Add folder in the "Folders" section.
-
Enter a title and, optionally, a description. You can also share sub-folders directly with people or teams via Share with.
-
Click Create.
The sub-folder appears inside the parent folder and is ready to use immediately.

1.3. Add recordings to a folder
- Open the folder where you want to place recordings and, in the "Recordings" section, click Add recording.
-
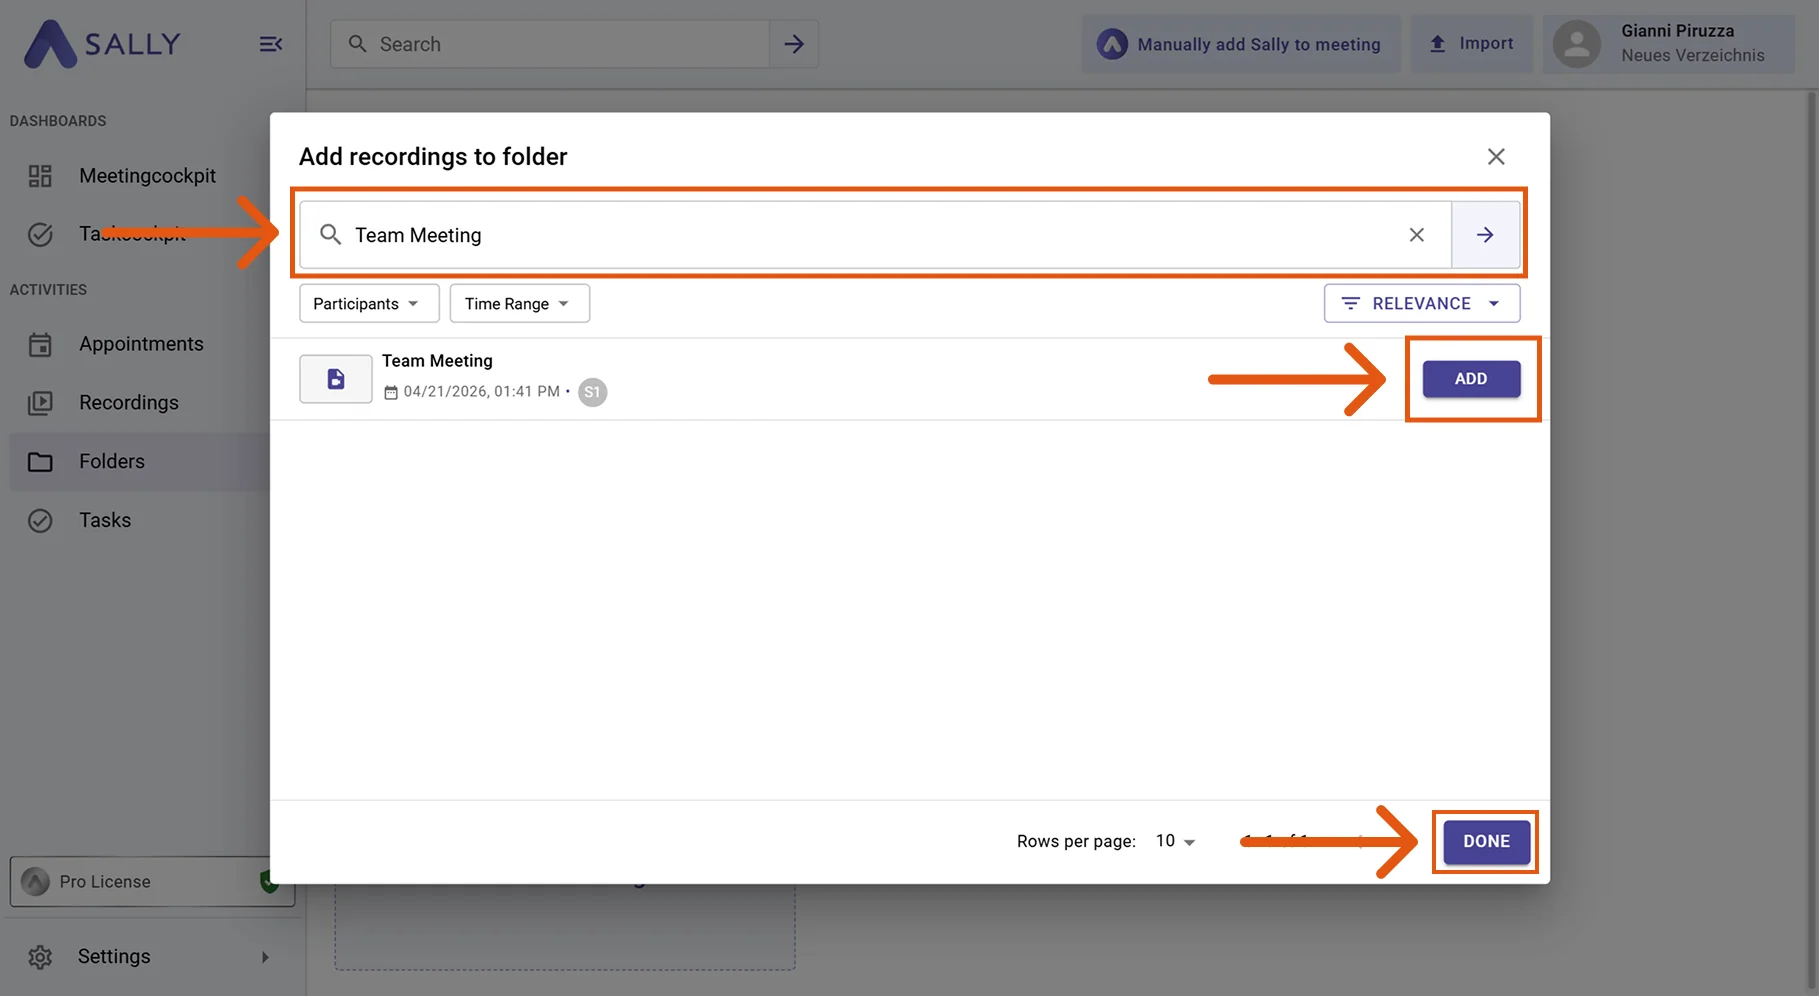
Enter a search term to find the right recording. You can also use the Participants and Time range filters or the Relevance sort order to narrow down the results.
-
Click Add next to each recording you want to include. You can add multiple recordings in one go.
-
Once all recordings are assigned, click Done.
A recording can live in several folders at once. This lets you place the same meeting into both a project and a client folder, for example, without duplicating it.
2. Create a team for shared folders
If you regularly share folders with a fixed group, it is worth creating a team. All team members then automatically gain access to folders shared with that team.
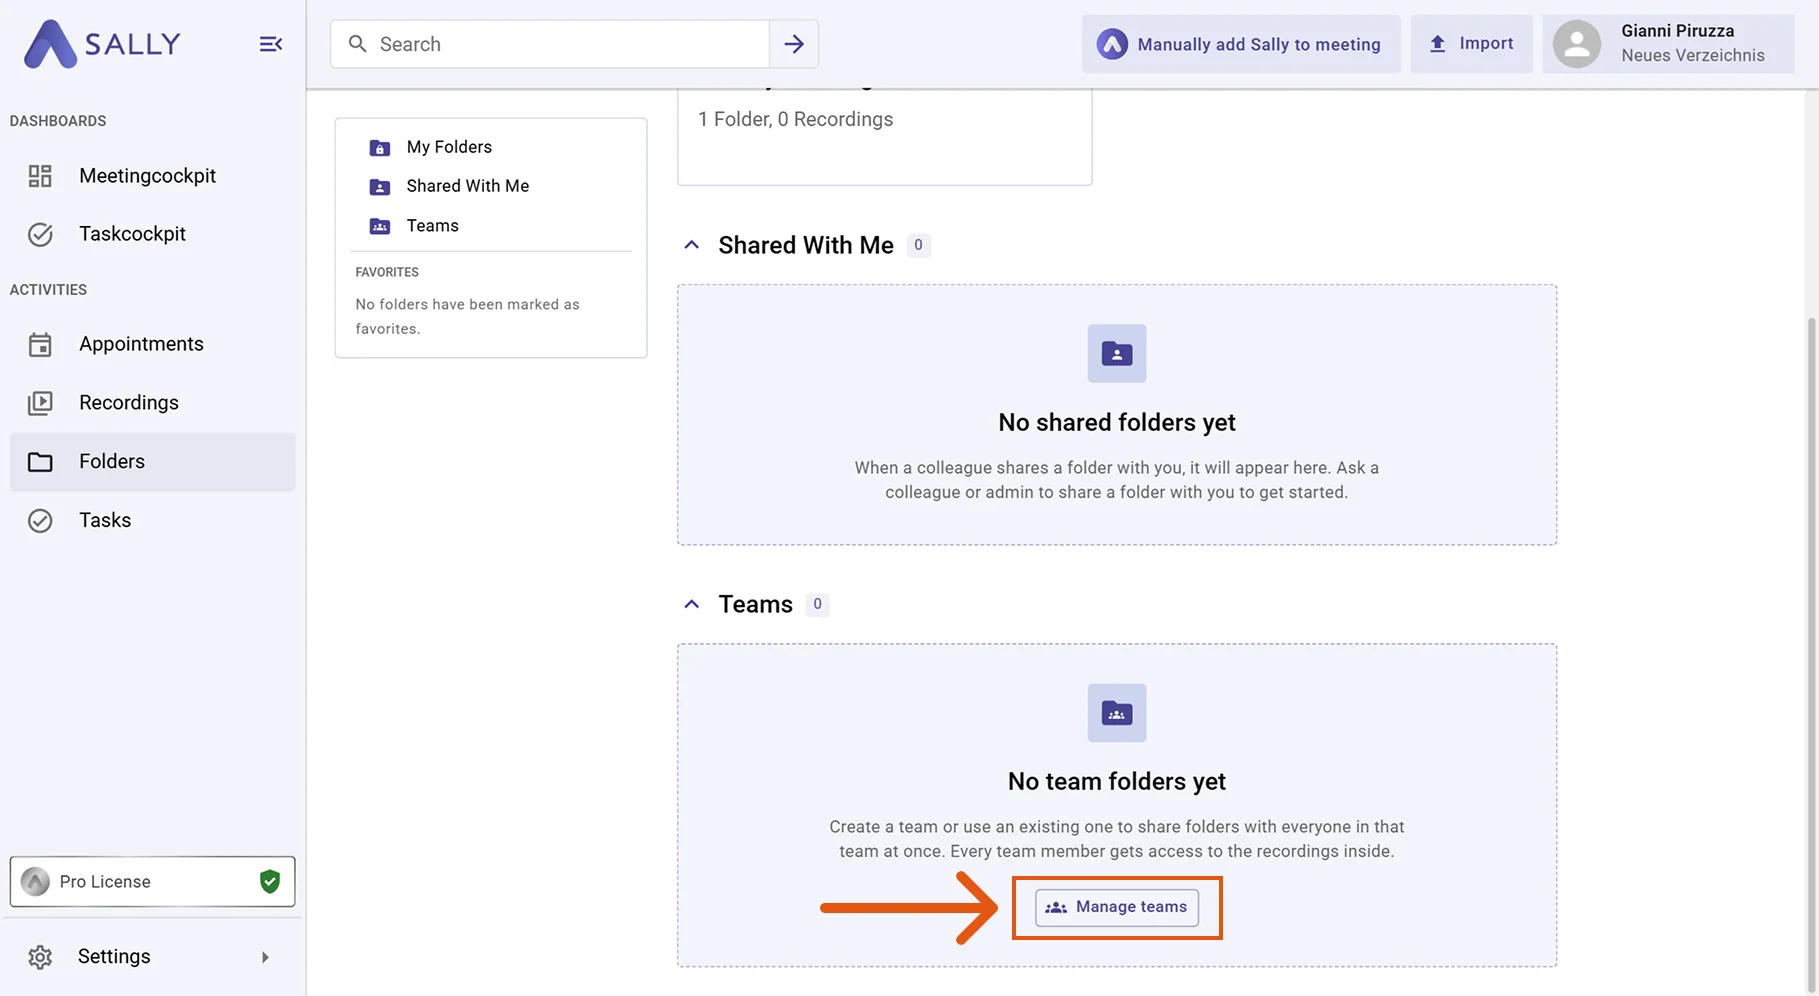
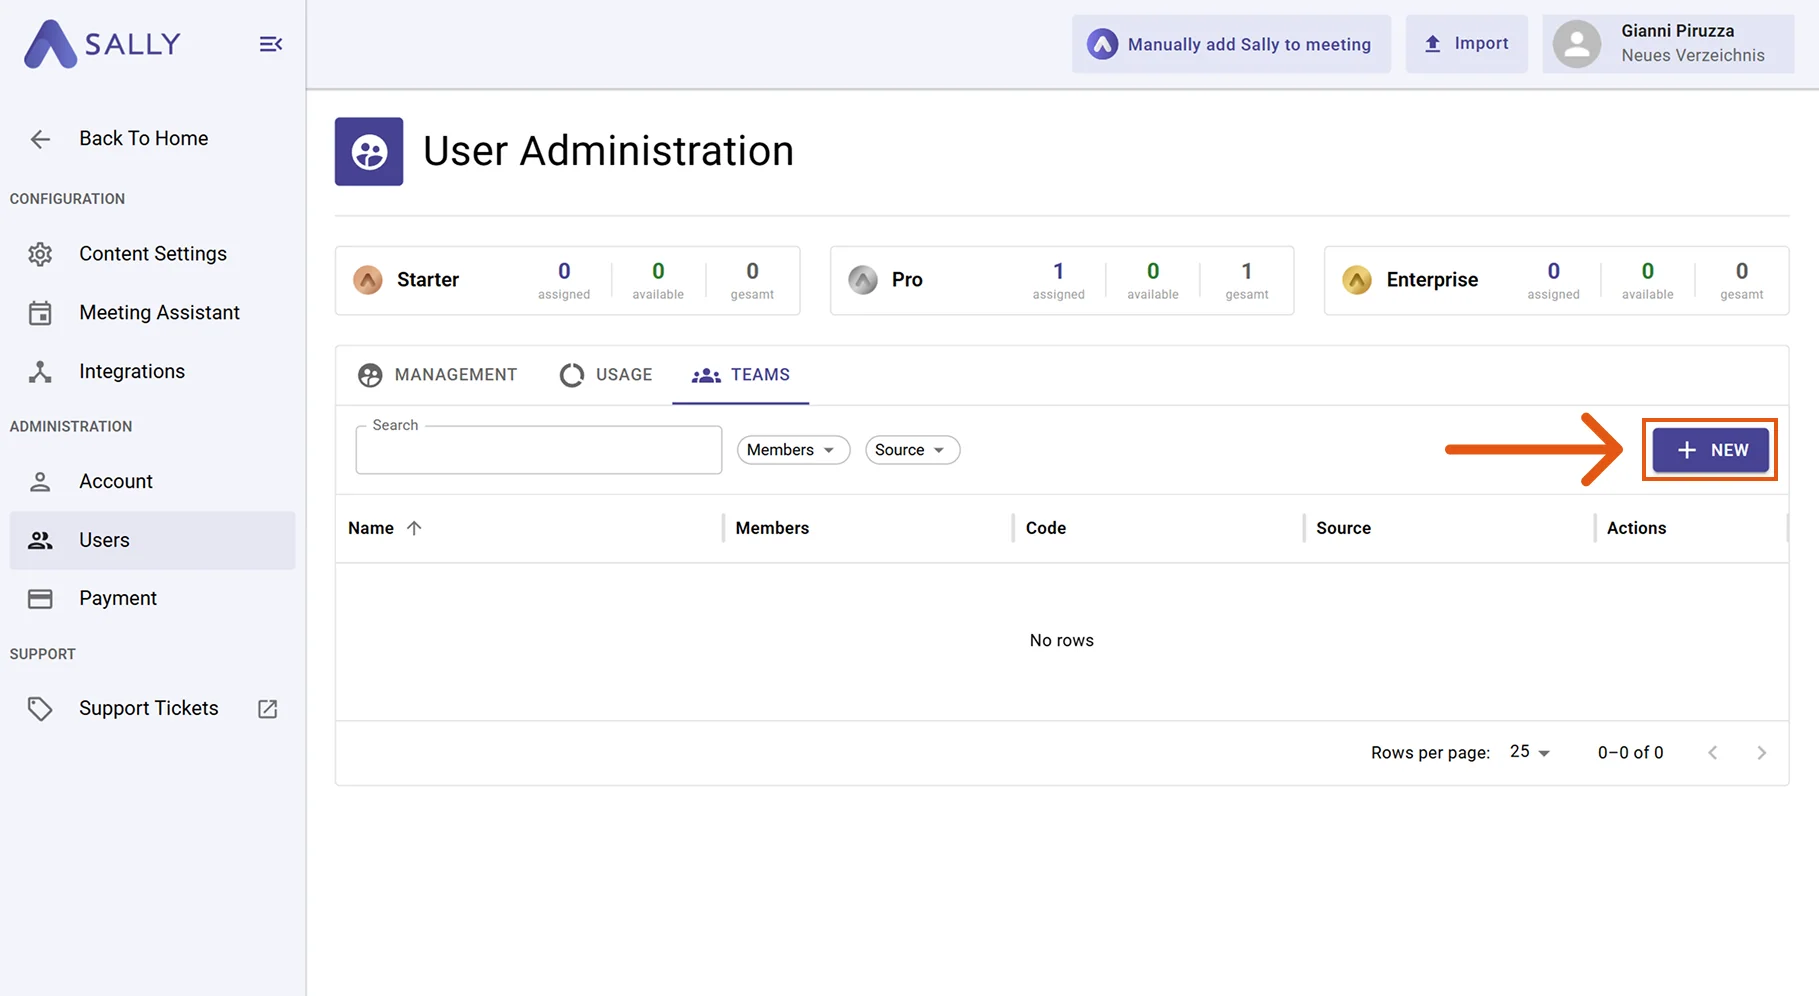
- In the left sidebar, open Folders and click Manage teams in the "Teams" section. Alternatively, you can reach the teams overview via Administration > User management > "Teams" tab.
- Click + New in the top right to create a new team.
-
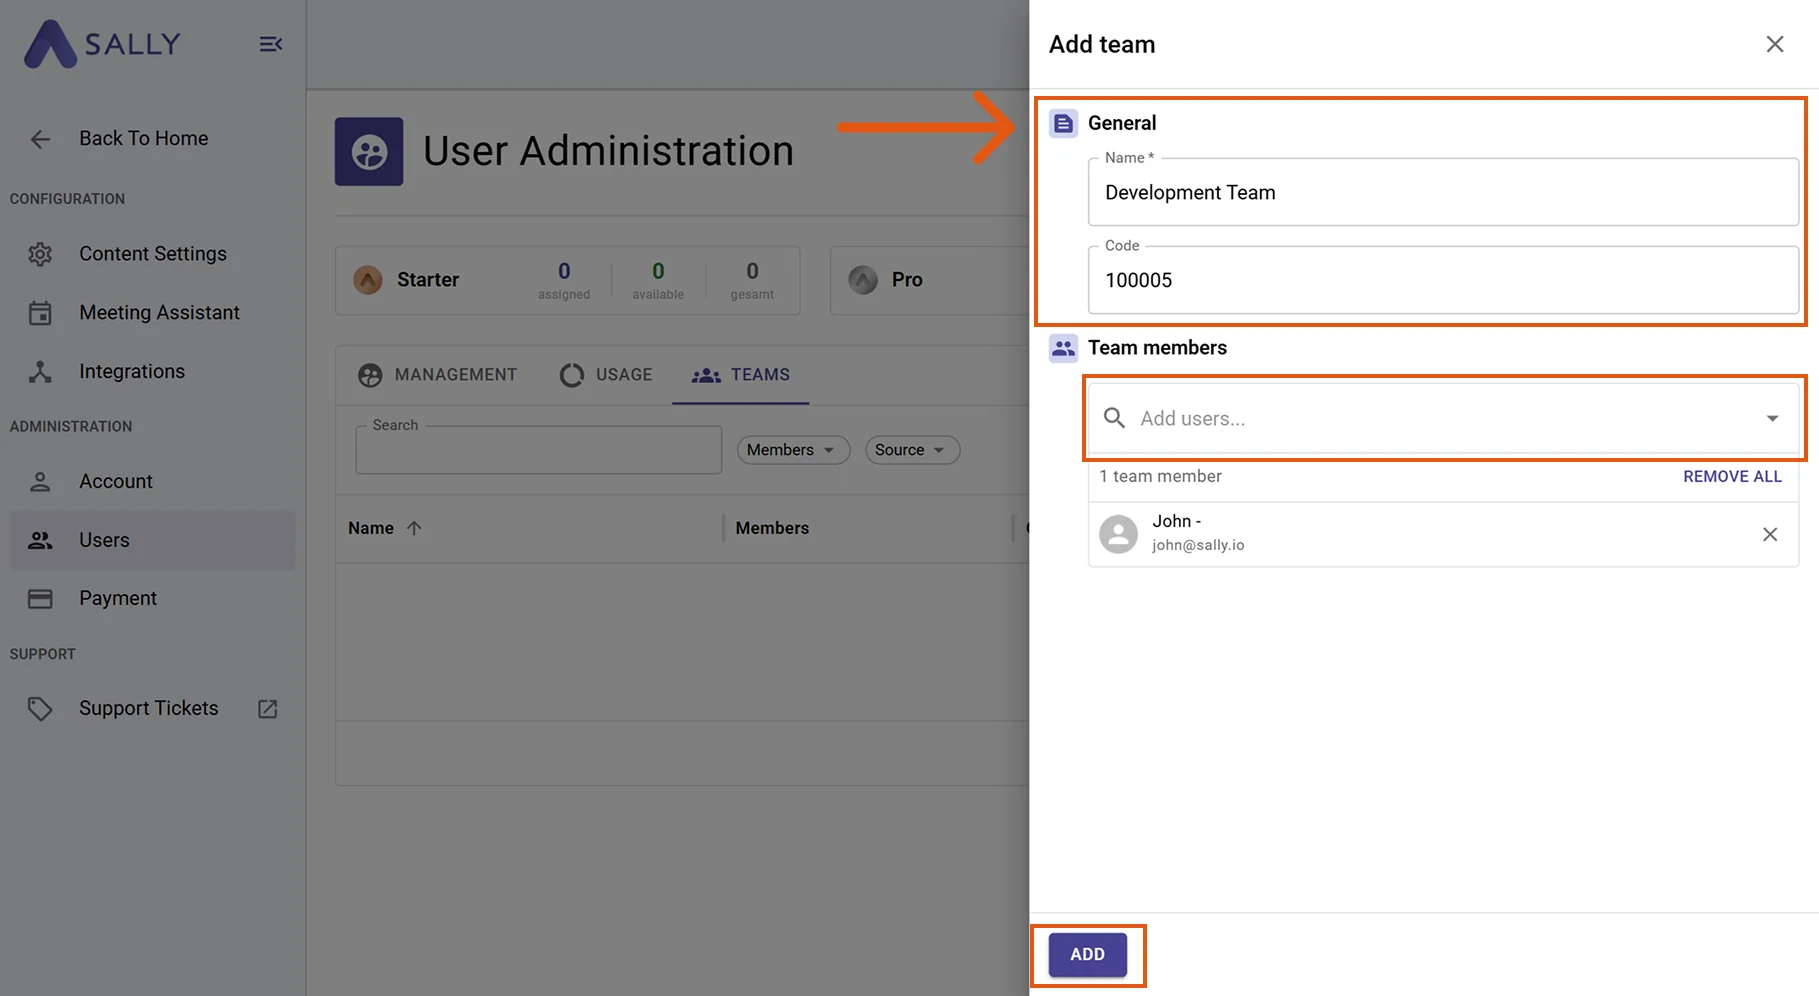
Enter a name for the team and, optionally, a code for internal identification (for example, a cost center or department number).
-
Use Add user to add the desired team members. You can add more people or remove members later at any time.
-
Click Add to save the team. The team then shows up in the Share with field when you create or edit folders.
Teams are created and maintained in User management, which is typically only accessible to admins. If you cannot create a team yourself, contact an admin on your account.
3. Find folders shared with you
Folders that other people have shared with you appear under "Shared with me". Team folders additionally appear under "Teams".
-
Open the "Folders" section in the left sidebar.
-
Scroll to "Shared with me" or "Teams" to see the folders you have access to. As soon as someone shares a folder with you, it appears here automatically.