How to share a template with your team or organization
You can keep a template to yourself. It pays off most when your team works from the same structure: if three people write the summary of the same weekly in three different structures, nobody can compare them. Sharing solves that. You build the template once and your colleagues pick it from their list.
Sharing works through the visibility of a template. You set it when you create the template and you can change it later. This article explains what the three levels mean, what you need for the team level, where you can see who a template belongs to, and how to switch the visibility afterwards.
Quick navigation
- The three levels of visibility
- Setting up a team
- Who a template belongs to
- Visibility of library sections
- Changing visibility afterwards
1. The three levels of visibility
You set the visibility while creating a template. Here is the way there:
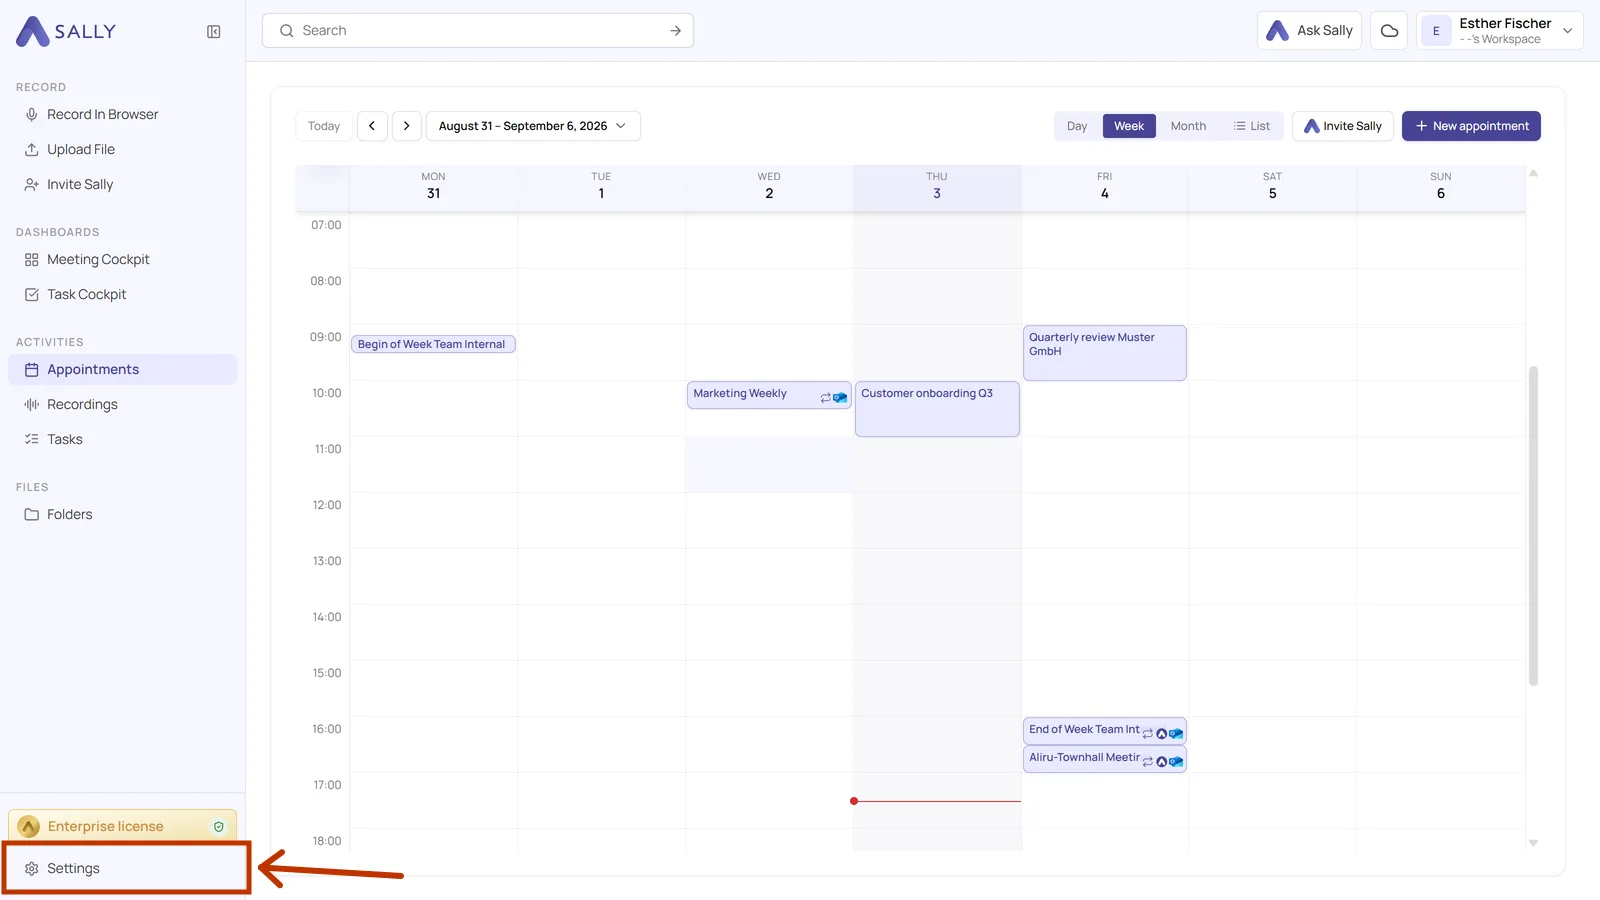
- Open Settings at the bottom of the left sidebar.
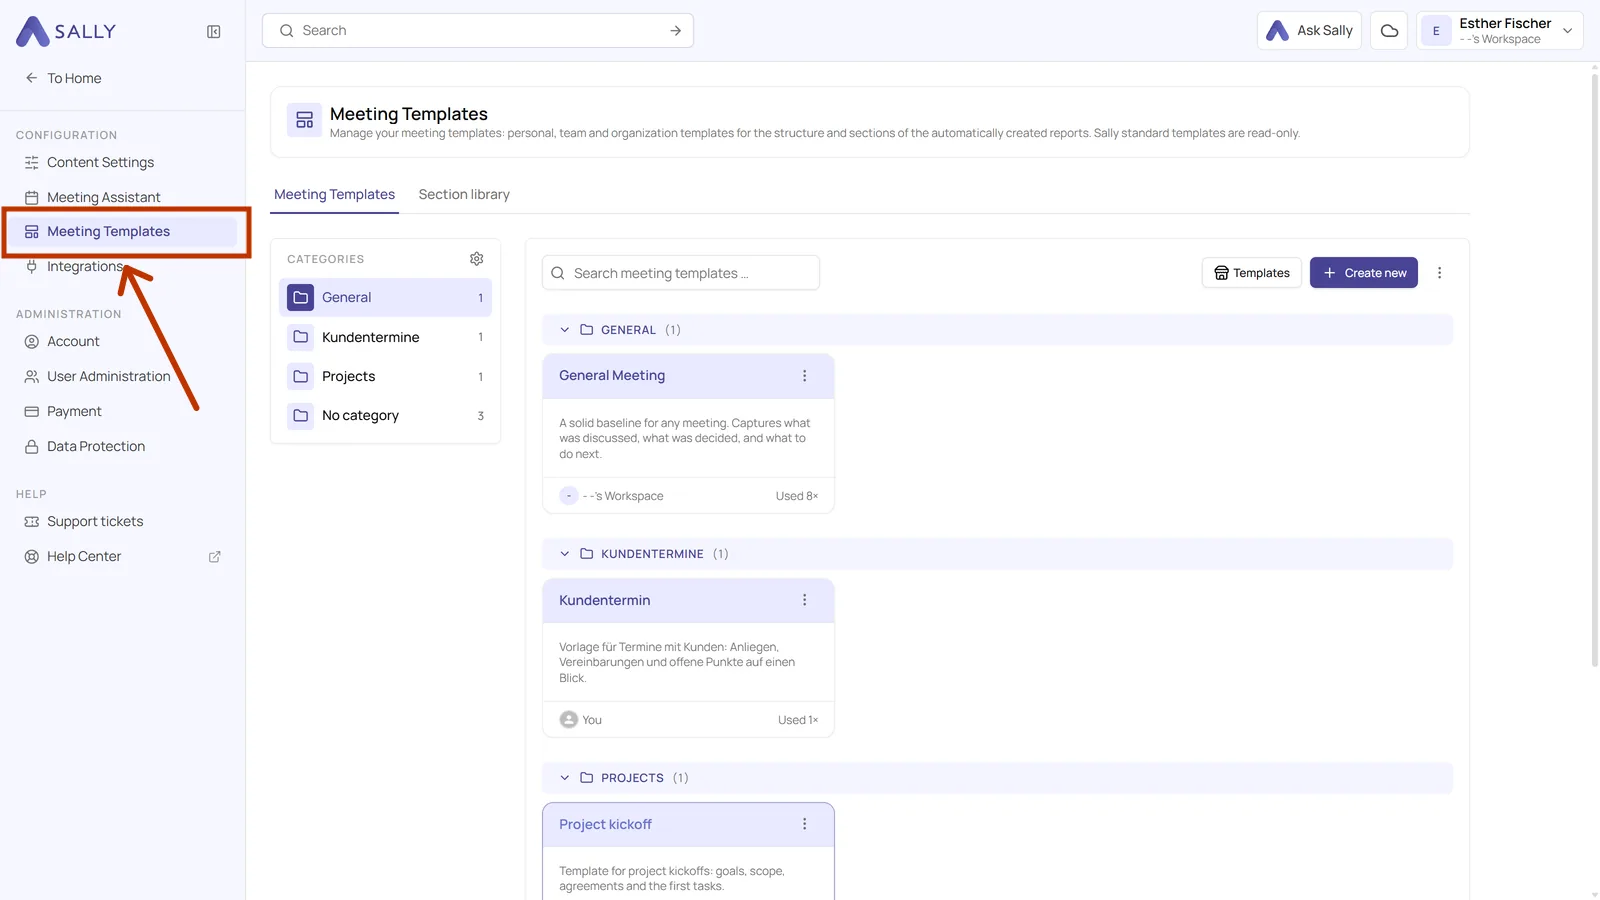
- In the settings sidebar on the left, under Configuration, click Meeting templates.
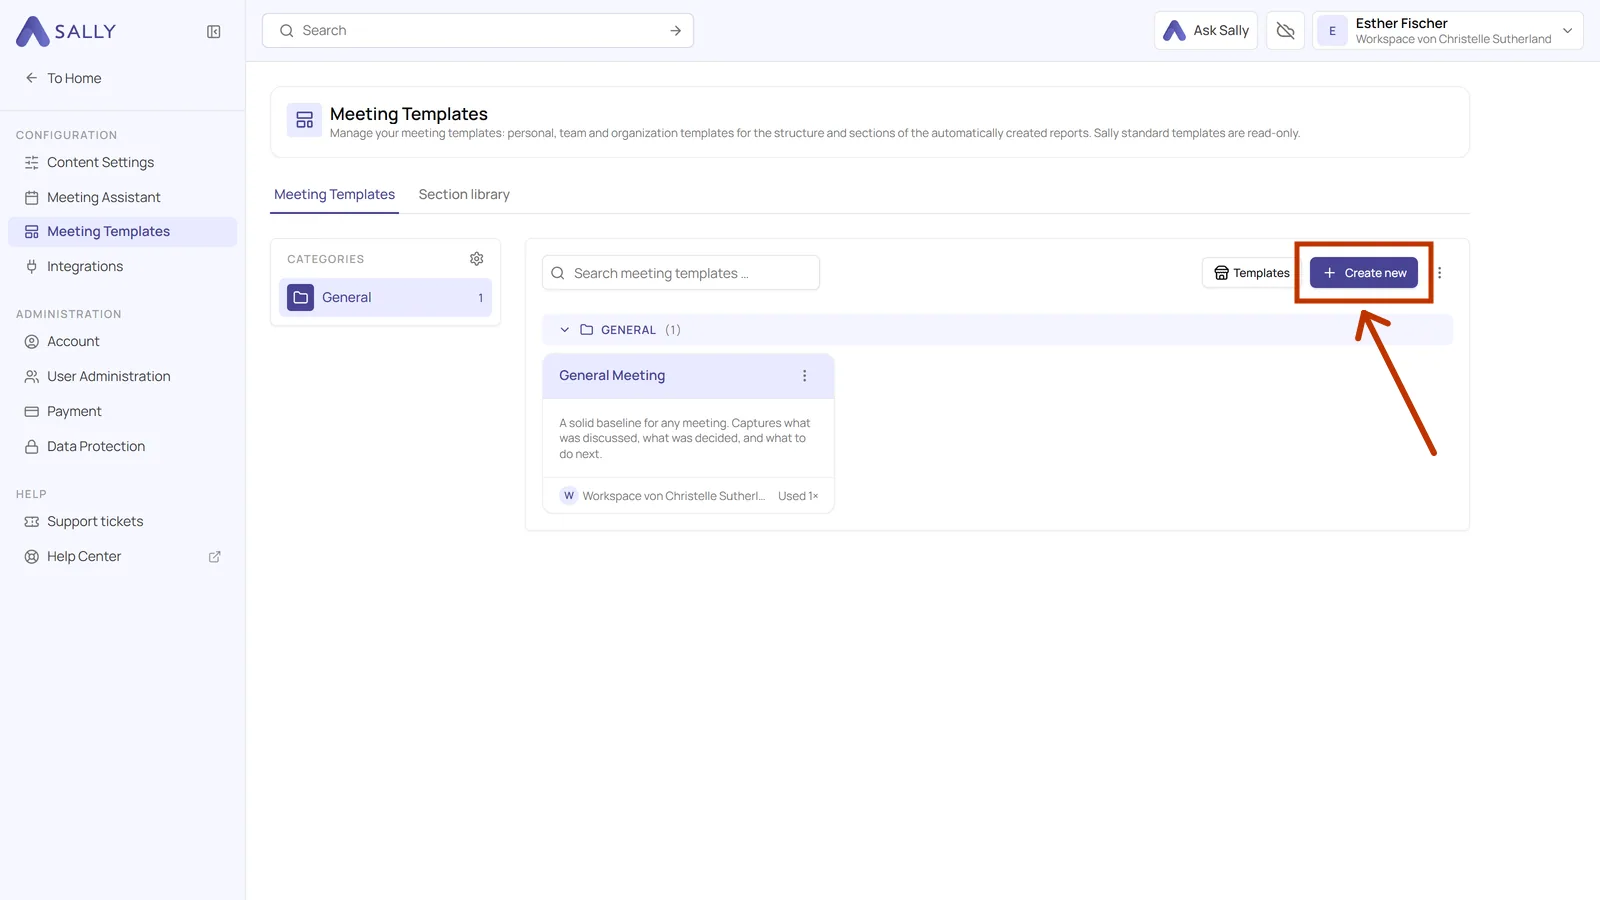
- Click Create new in the top right.
- In the dialog, Visibility offers three options.
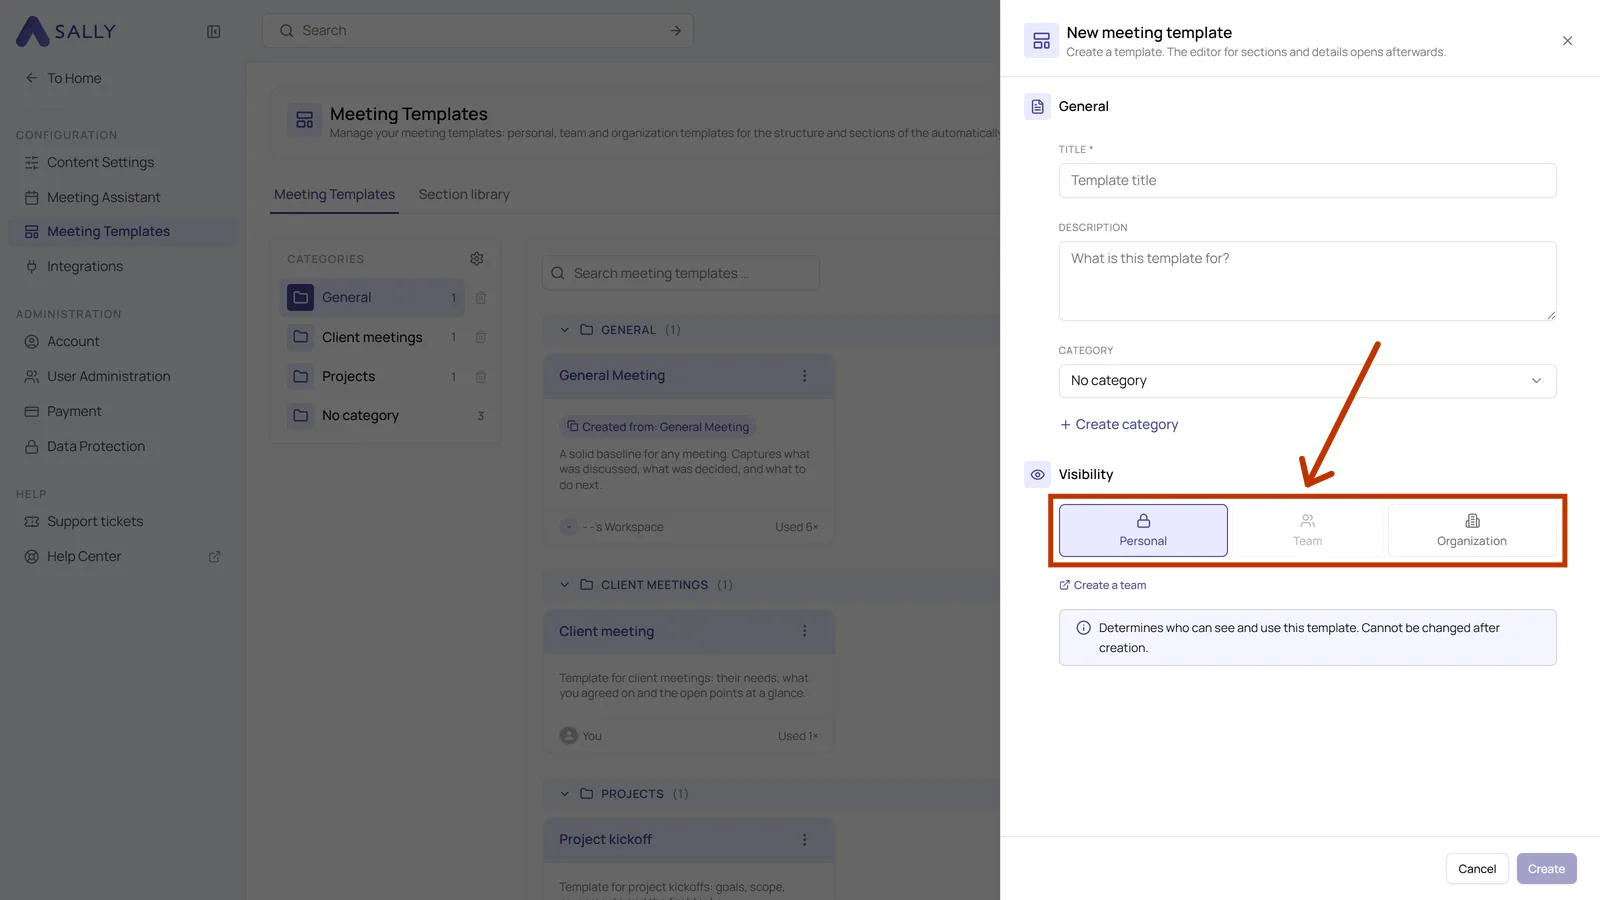
- Personal keeps the template with you. Nobody else sees it in their list.
- Team shares it with the members of a team. Good for a structure that only one department needs, for example a support handover.
- Organization makes it available to everyone in the account. This is the right level for the templates that should be the standard, for example your weekly or your customer meetings.
Whether you may create a template for the whole organization depends on your role in the account. If the option is not available to you, ask an administrator to create the template.
2. Setting up a team
Team can only be selected once a team is available to you. If the option is greyed out, set up a team first. Only owners and admins of the organization can create teams.
-
Open Settings at the bottom of the left sidebar. The Create a team link in the template dialog takes you straight there as well.
-
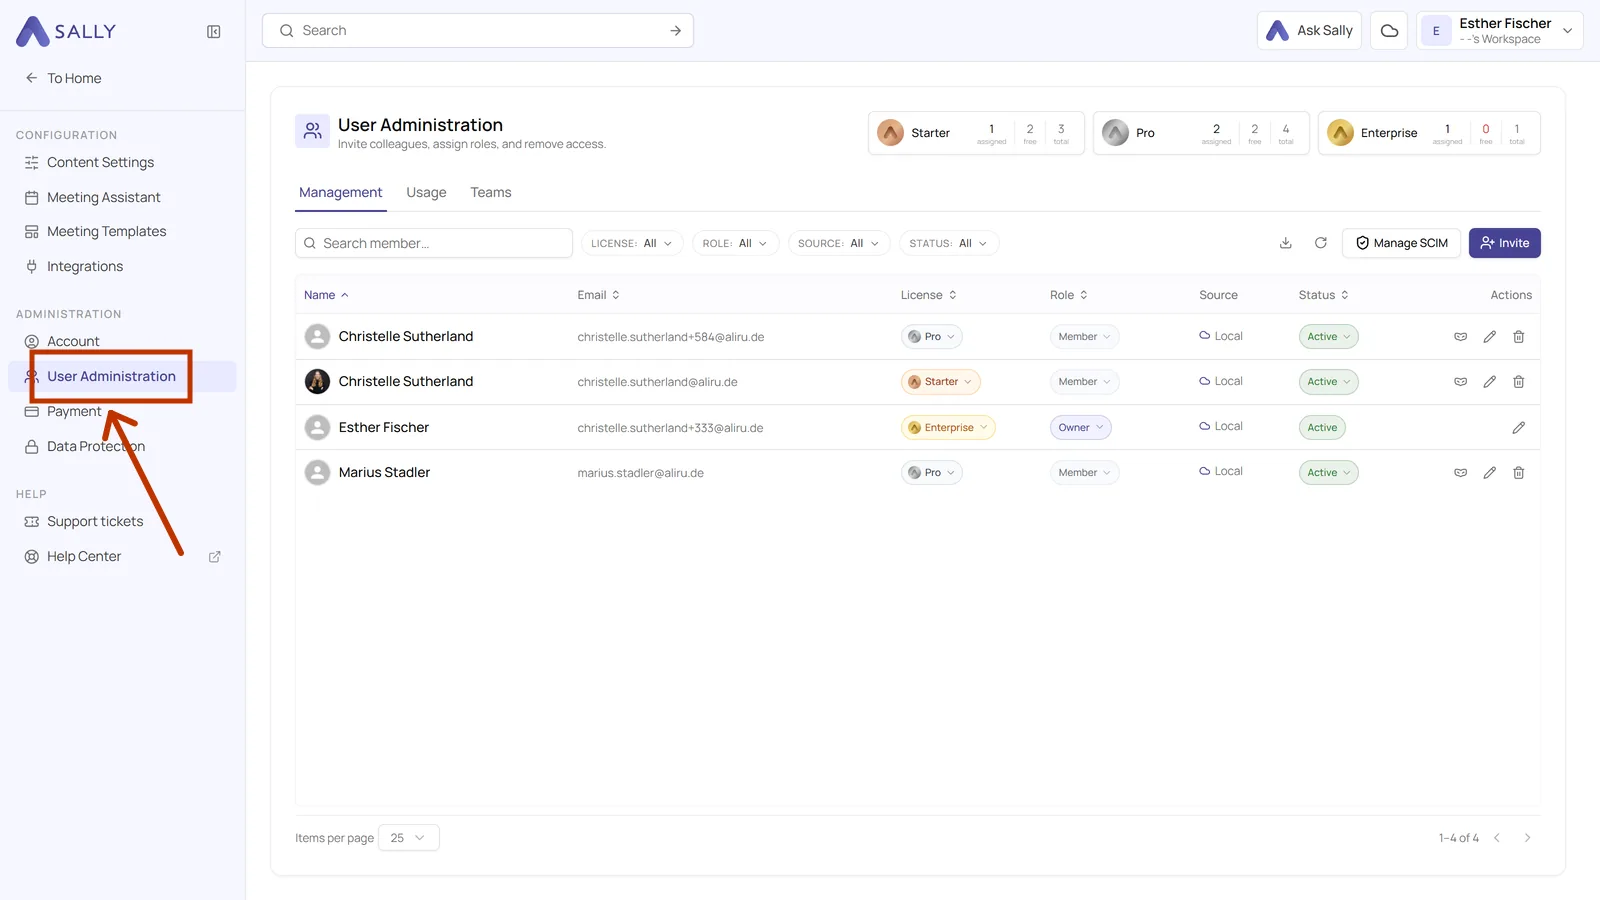
In the settings sidebar, under Administration, click User Administration.
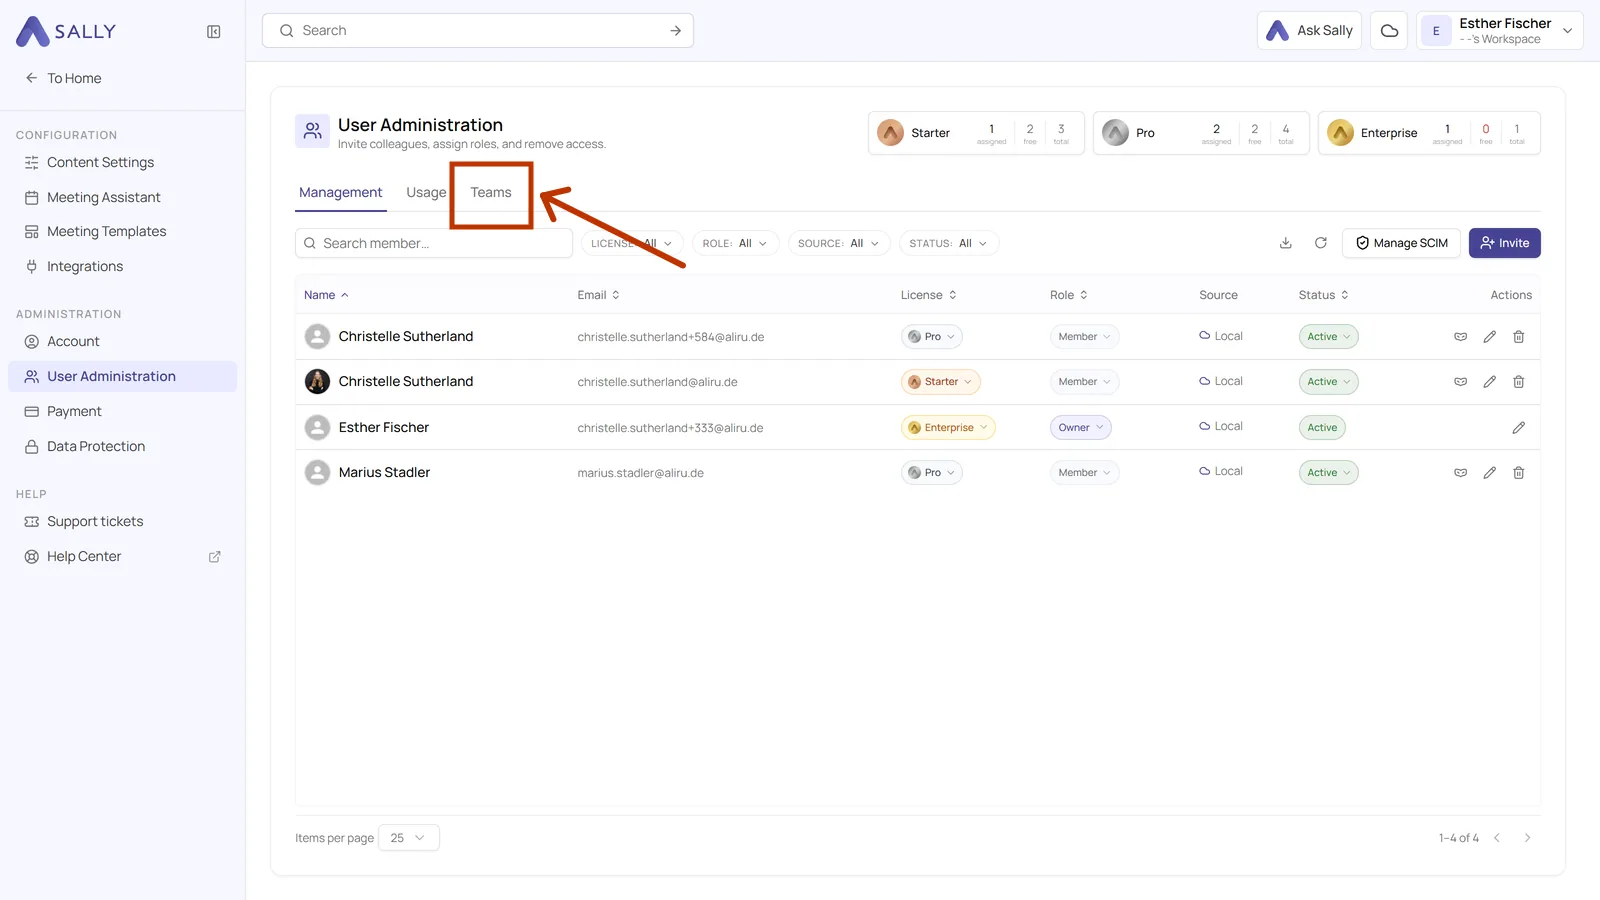
- Switch to the Teams tab at the top.
- Click New team in the top right, give it a name and add the colleagues who belong to it.
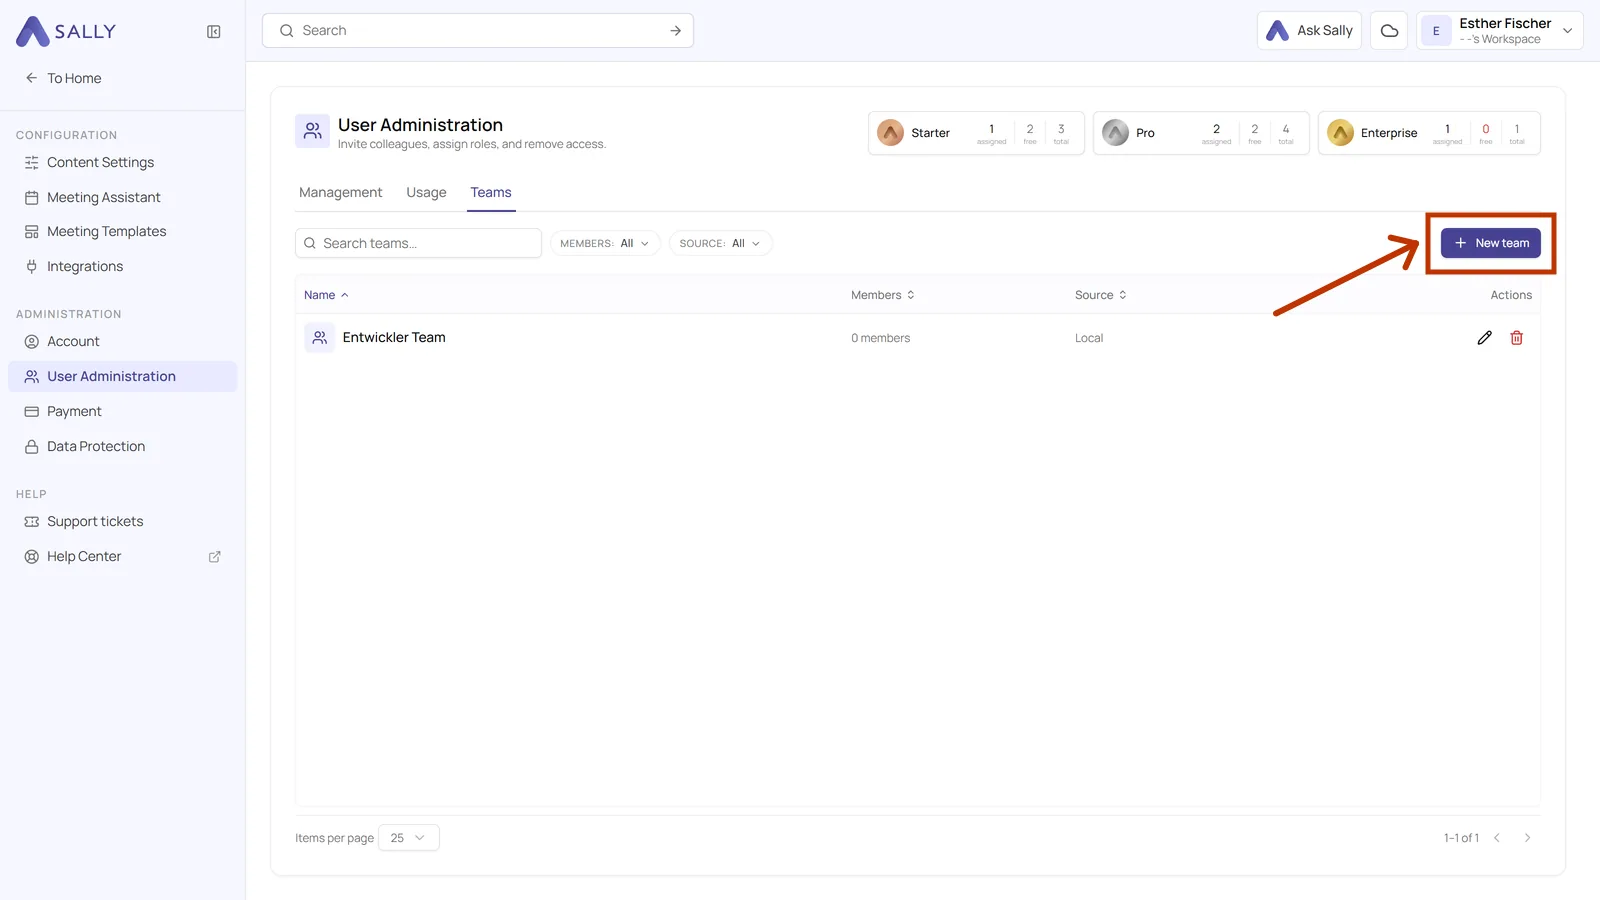
The list shows how many members a team has and where it comes from, which matters if your teams are synchronized from another system.
Without a team the Team level stays greyed out, so set the team up first and create the template afterwards. Switching later is possible too, see Changing visibility afterwards.
3. Who a template belongs to
The footer of every card in the overview says who owns the template. Your own ones say You, shared ones name the team or the organization account instead. Next to it you see how often the template has been used.
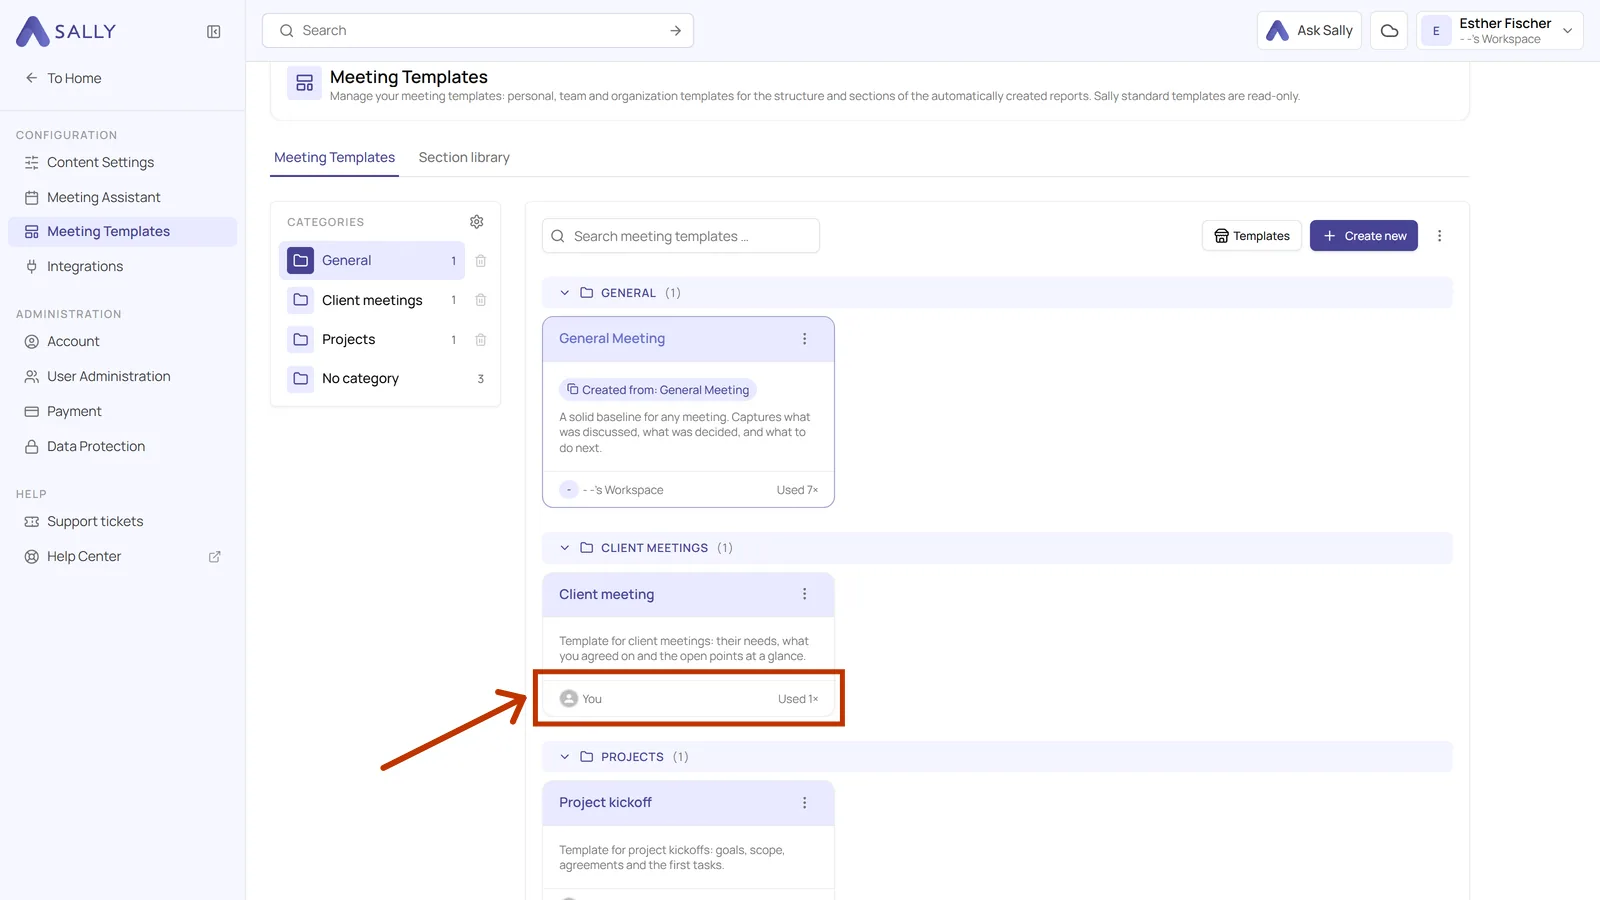
This is also where you can tell whether you may edit a template. Sally's own templates are read-only for everyone, and for a shared one it depends on your role in that team or organization. What always works is duplicating it and editing your copy.
4. Visibility of library sections
Library sections carry their own visibility, independently of the templates that use them. You set it when you create the entry. The table shows it in its own column.
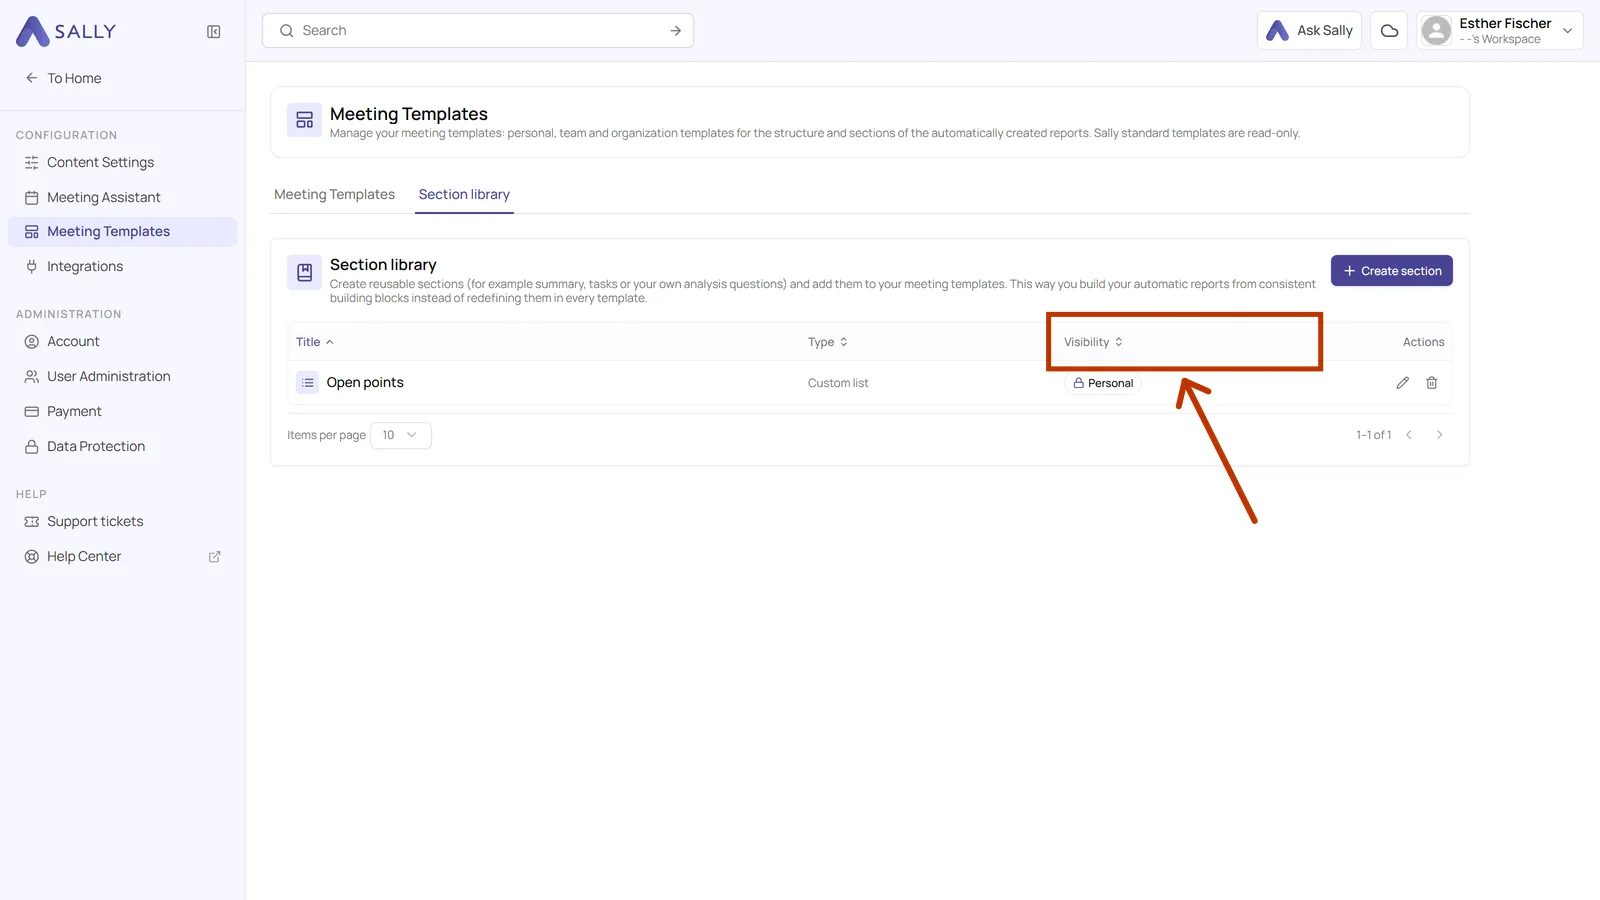
That combination is useful: a section that everybody should phrase the same way, for example your definition of a blocker, can be shared organization-wide while the template that uses it stays personal.
5. Changing visibility afterwards
You set the visibility when you create a template, but it is not final. Here is how to switch it:
- Open the template from its card in the overview.
- Click Edit in the top right. The Edit template dialog shows the same details as when you created it: title, description, category and visibility.
- Pick the new level. If you narrow the visibility while the template is already in use, a warning appears right below it: the template will no longer be selectable for others, and evaluations that have already been created stay intact. You can still save.
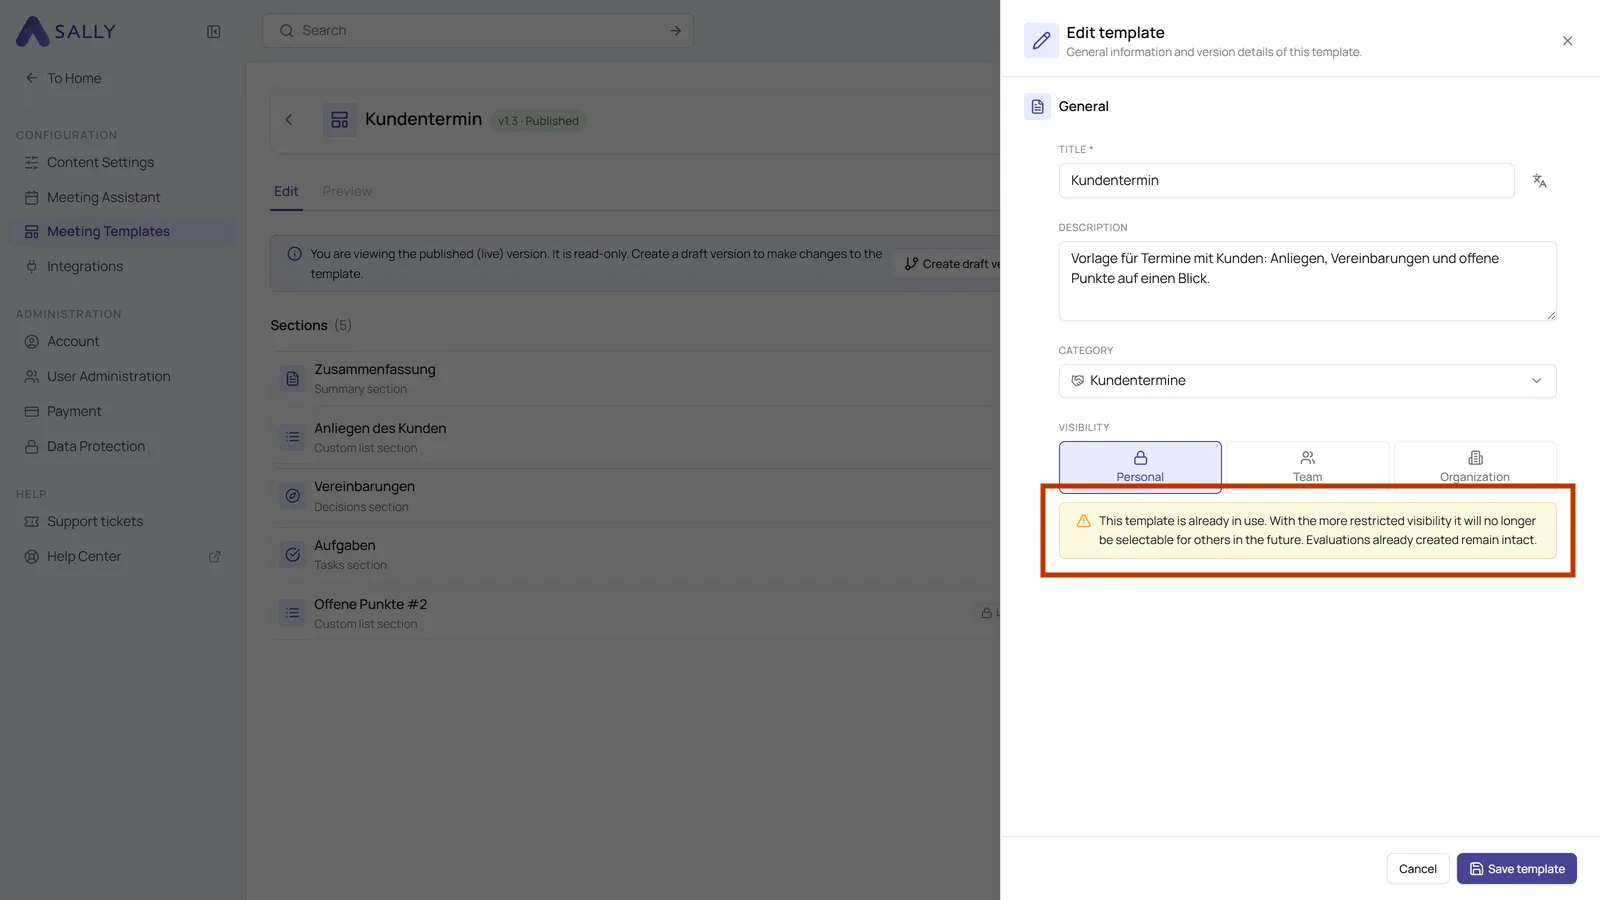
- Click Save template in the bottom right.
What that means for your colleagues: if you move a template your team already uses down to Personal, it disappears from their lists. The summaries that were written with it stay unchanged.
If both levels should exist side by side, Duplicate the template through the three dots on its card and give the copy the other visibility. The sections come along, so you only need to set the name and the visibility.