Sally MCP with Microsoft Copilot in VS Code
The Model Context Protocol (MCP) is an open standard that lets AI tools connect to external data sources. With the Microsoft 365 Agents Toolkit and GitHub Copilot Chat in Visual Studio Code, you can connect Sally's MCP endpoint and query meetings, summaries, and transcripts directly in the Copilot Chat Agent mode, for example to look up what was decided in a recent meeting, review action items, or pull a transcript while working on a related task.
The Microsoft 365 Agents Toolkit is currently only available as a Visual Studio Code extension. This is a Microsoft requirement, not a Sally limitation. If Microsoft releases the toolkit for other IDEs in the future, the setup steps will work there as well.
- Visual Studio Code installed.
- Node.js (version 18 or later). Check with
node -vin the terminal. - Microsoft 365 Agents Toolkit extension installed (search "Microsoft 365 Agents" in the Extensions Marketplace).
- GitHub Copilot Chat installed with an active GitHub Copilot license.
- An active Sally user with access to at least one company account.
- Sally MCP enabled for your company account (admin setting).
Quick Navigation
1. Create a Personal Access Token in Sally
A Personal Access Token (PAT) is the credential the Copilot agent uses to authenticate against the Sally MCP endpoint. You create it once.
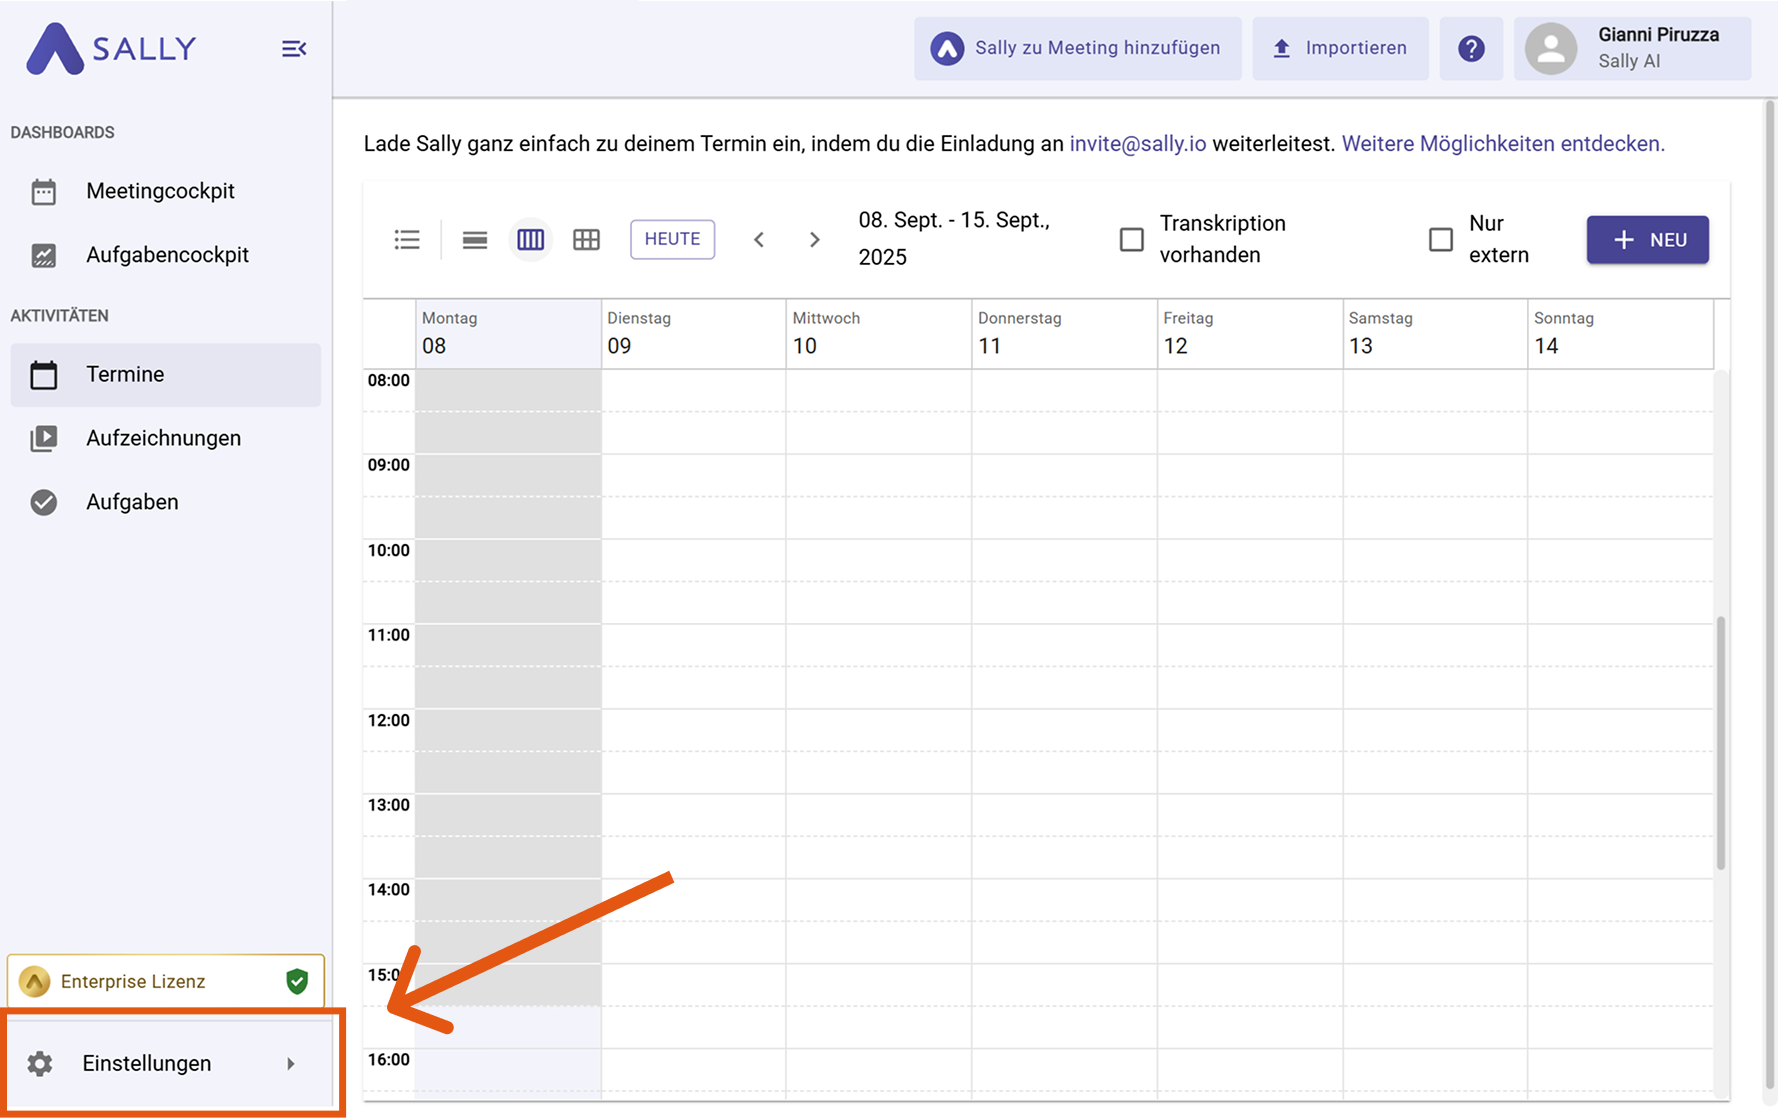
- Log in to Sally at app.sally.io.
- Open Settings in the bottom-left of the sidebar.
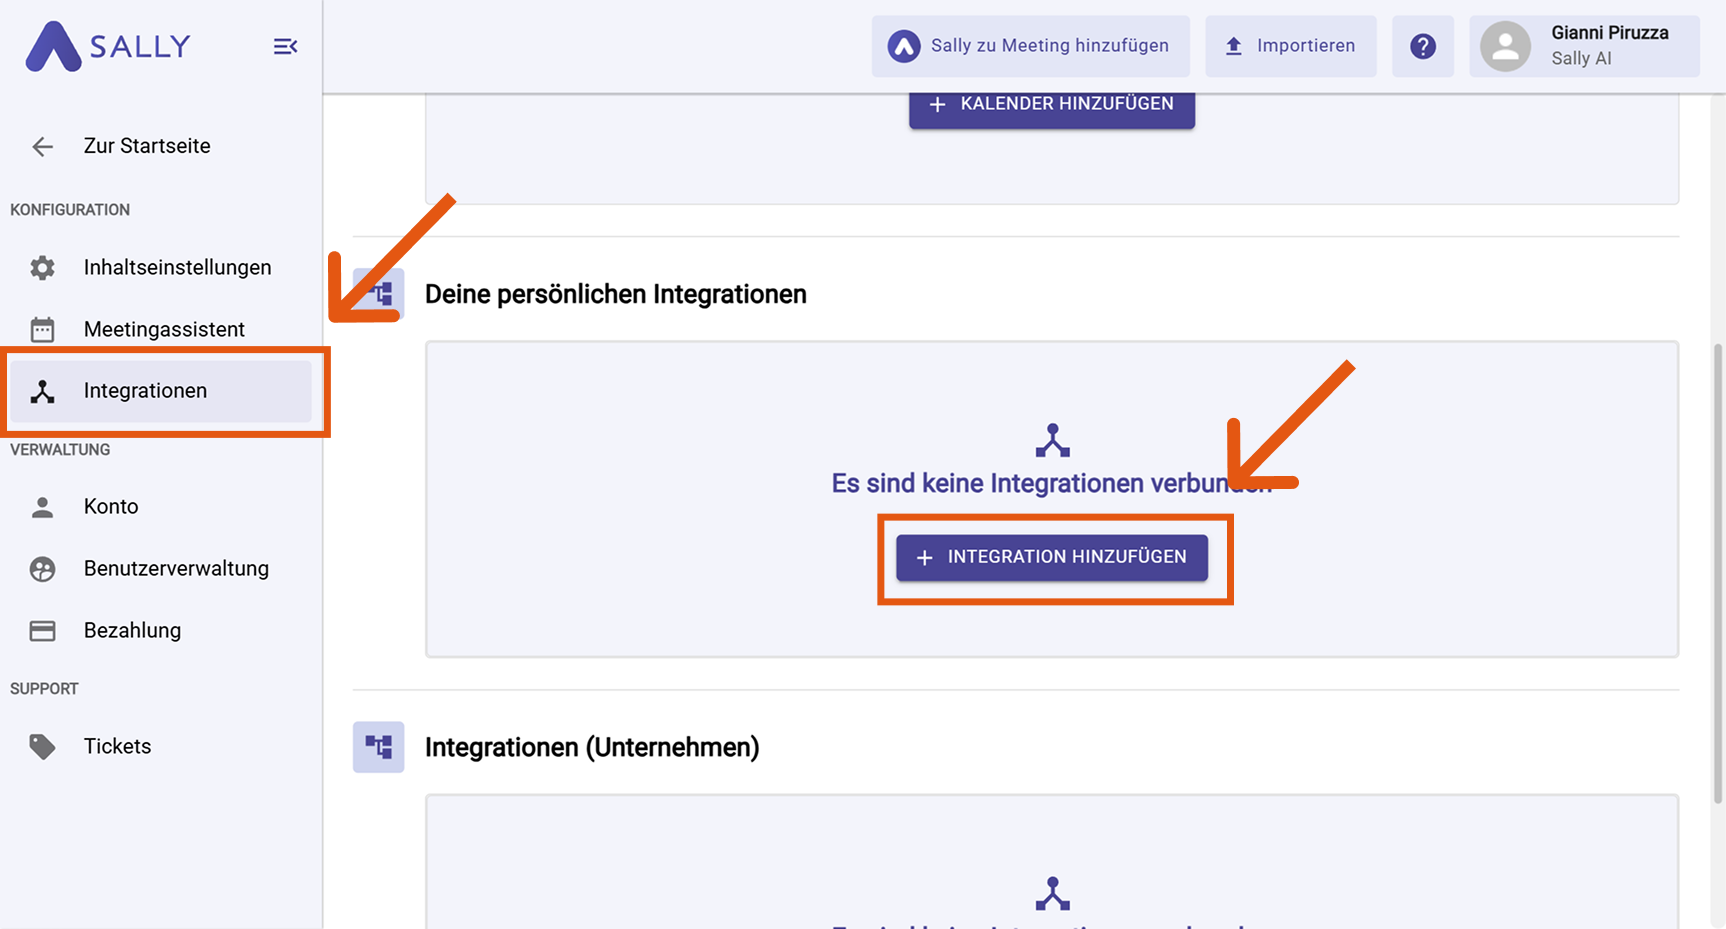
- In Settings, choose "Integrations". Under "Your personal integrations", click "+ Add integration".
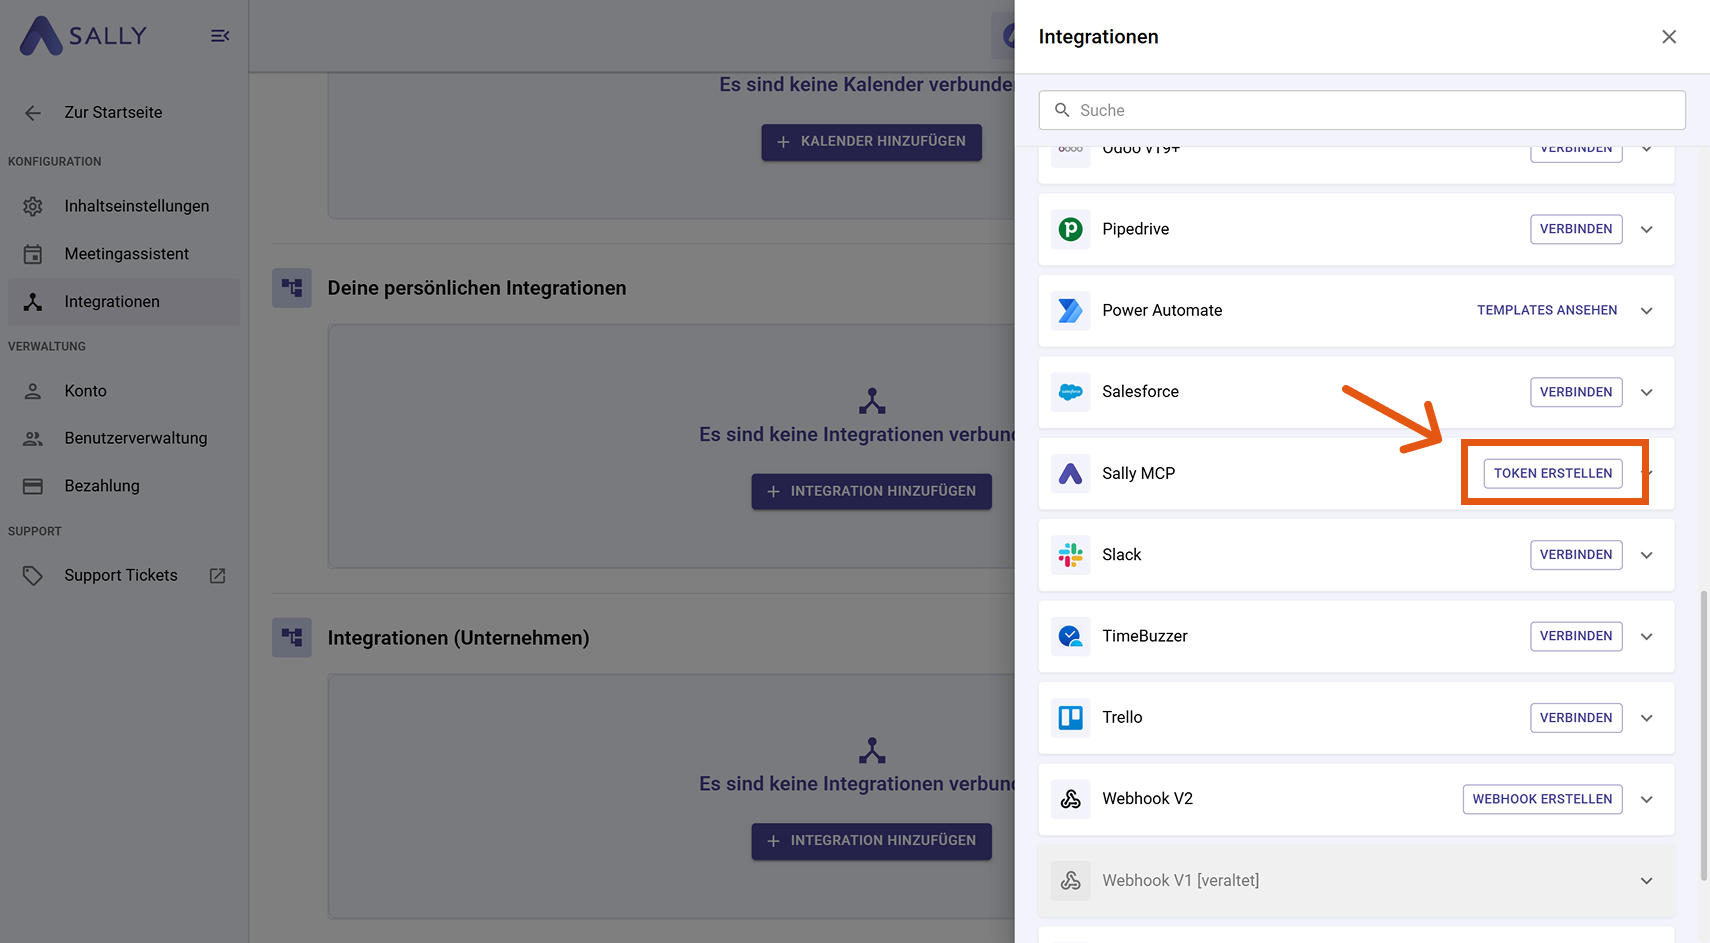
- In the integration drawer, find "Sally MCP" and click "Create Token".
-
Fill out the "Create new Sally MCP Token" dialog:
- Name: a label that helps you recognize the token later (e.g. "Microsoft Copilot").
- Expires: choose a lifetime: 30 days, 90 days, 1 year, 2 years, or Never.
Then click "Create Token".
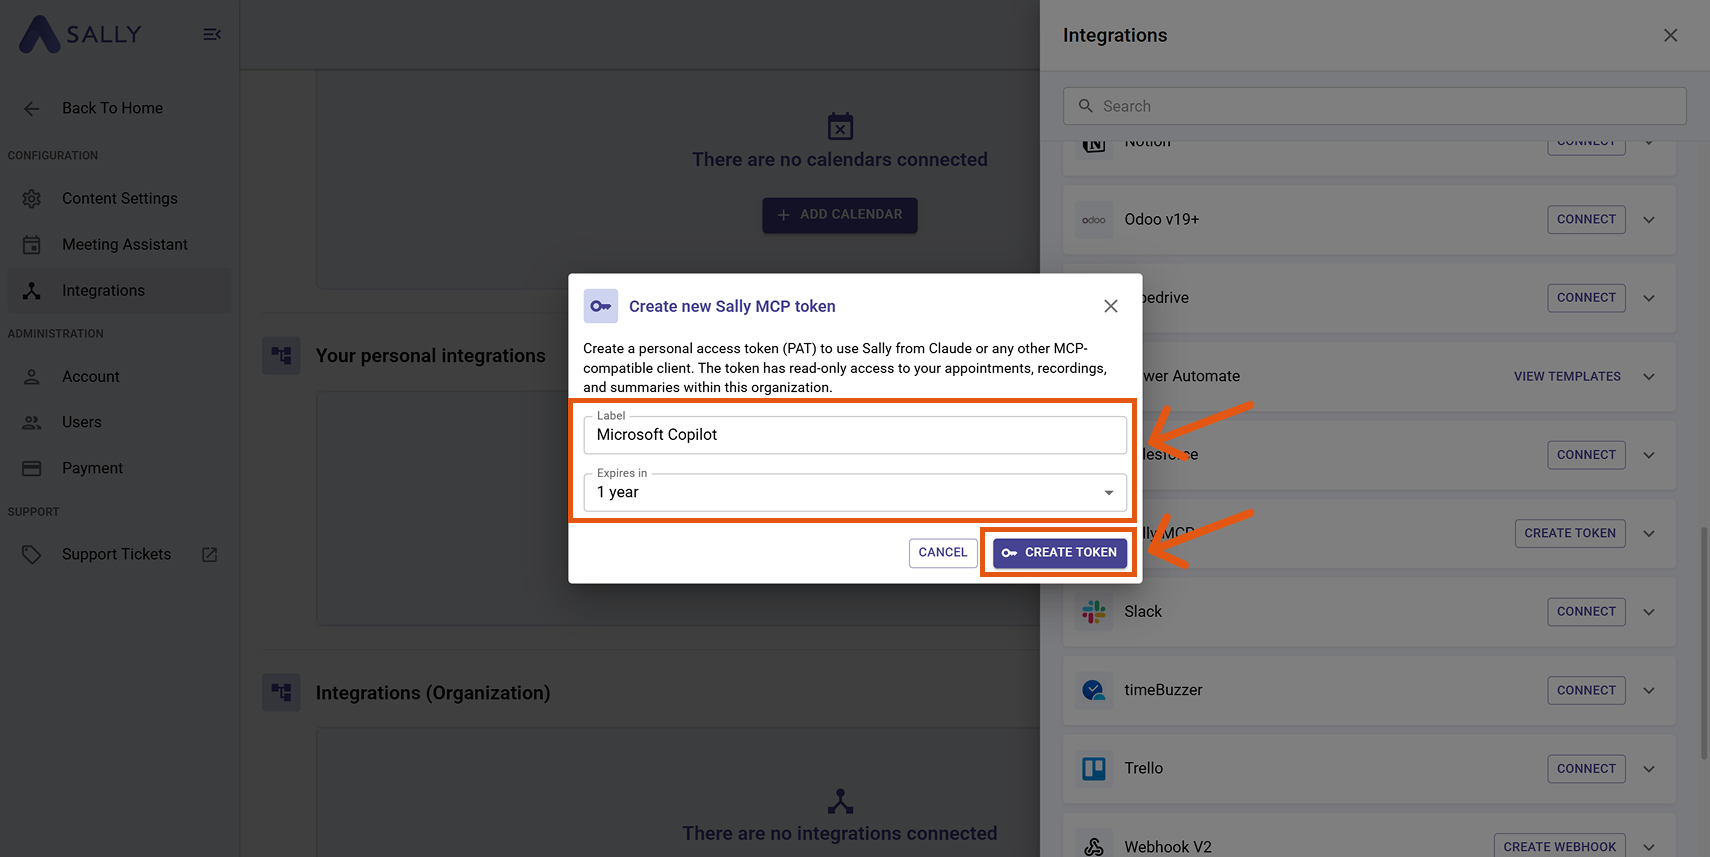
- Sally displays the full token exactly once. Copy it immediately and store it in a password manager or secure secret store. Once you close the dialog, the clear-text value is gone: you cannot view it again, only regenerate it.
The token grants read access to every appointment, recording, and summary your Sally user sees in this company account. Do not paste it into Slack, email, or tickets. Store it in a password manager.
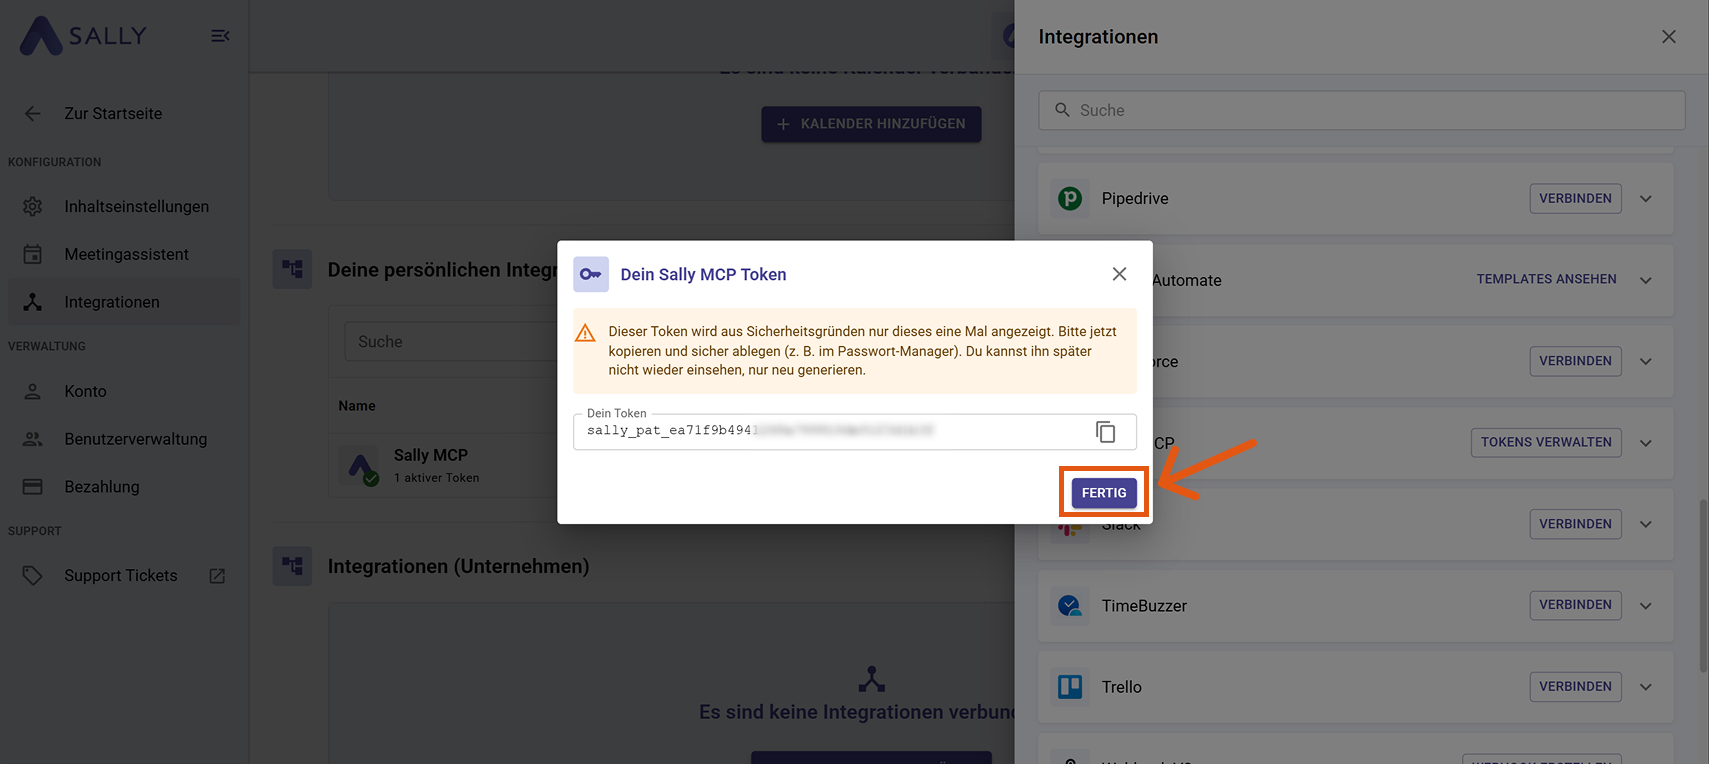
- Click "Done".
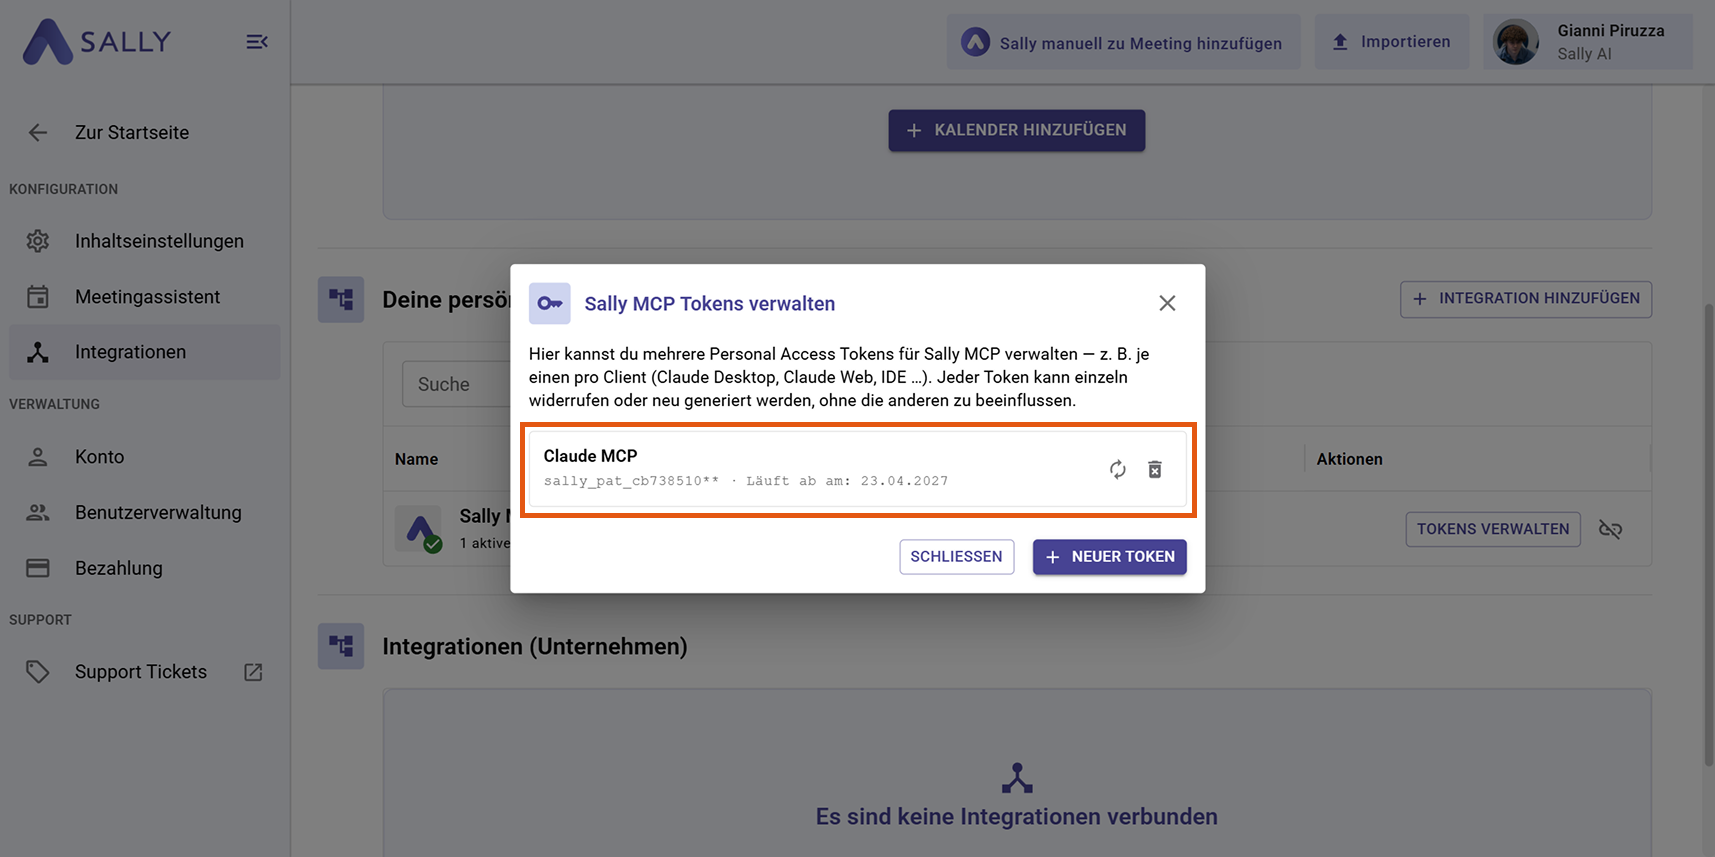
You can return to Settings → Integrations → Sally MCP → "Manage Tokens" at any time to regenerate, revoke, or create additional tokens. Regenerating invalidates the old token immediately, so update it in any client that still uses it.
2. Set up MCP in Microsoft Copilot
- Open Visual Studio Code.
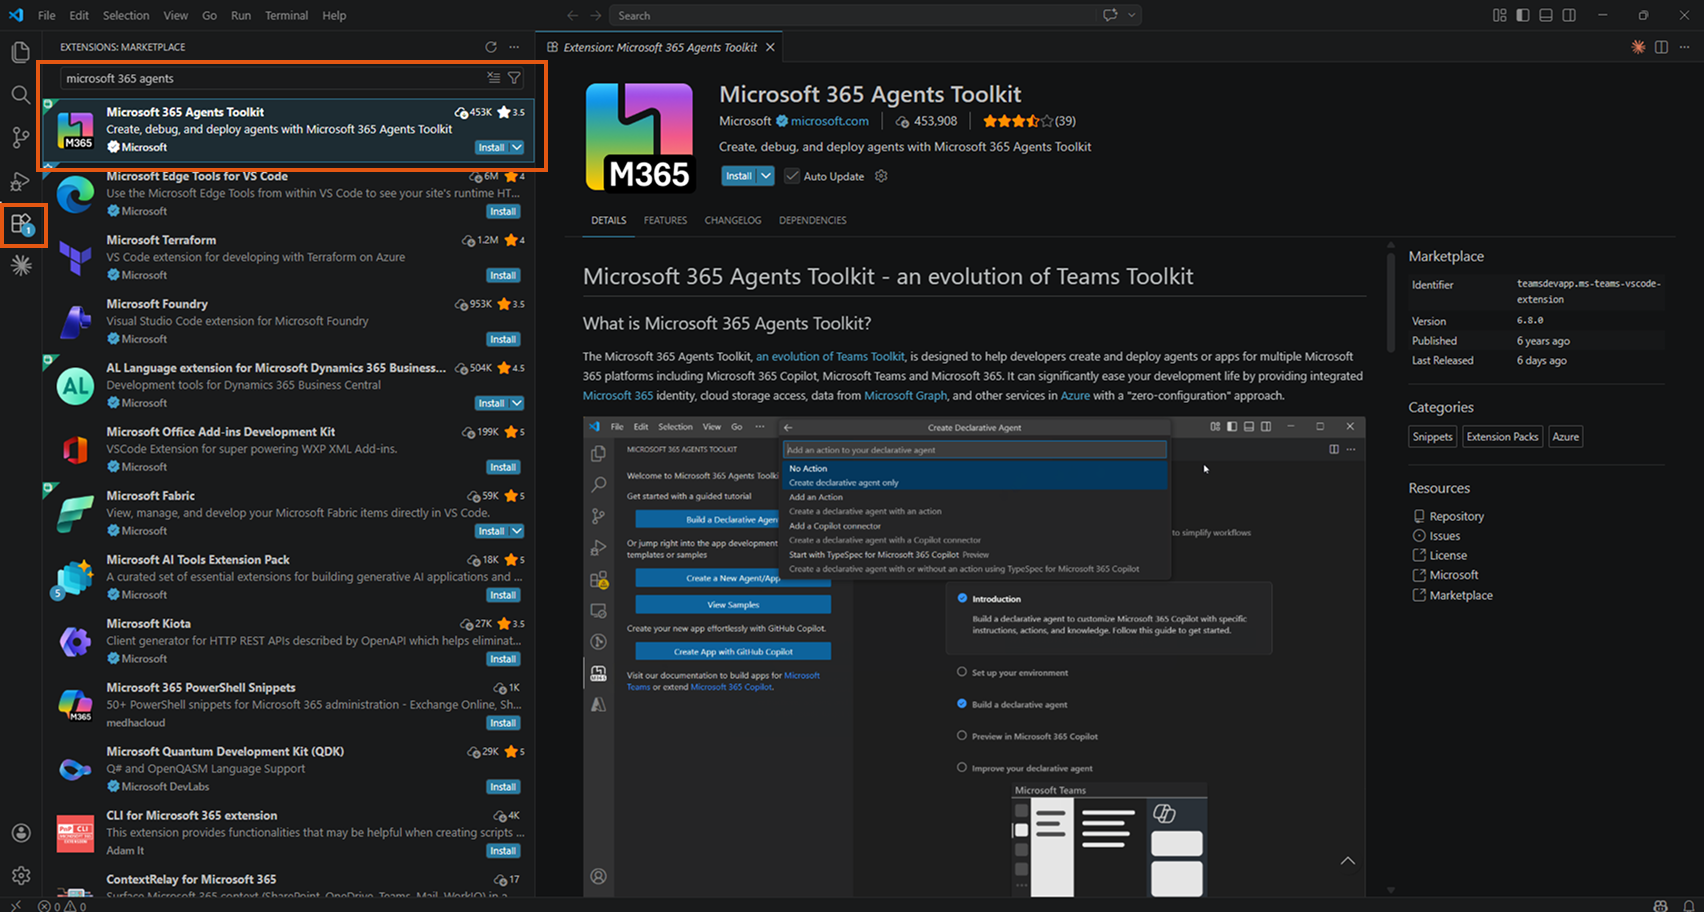
- Click the Extensions icon in the Activity Bar (or press Ctrl+Shift+X).
- Search for "Microsoft 365 Agents".
- Install the Microsoft 365 Agents Toolkit extension by Microsoft.
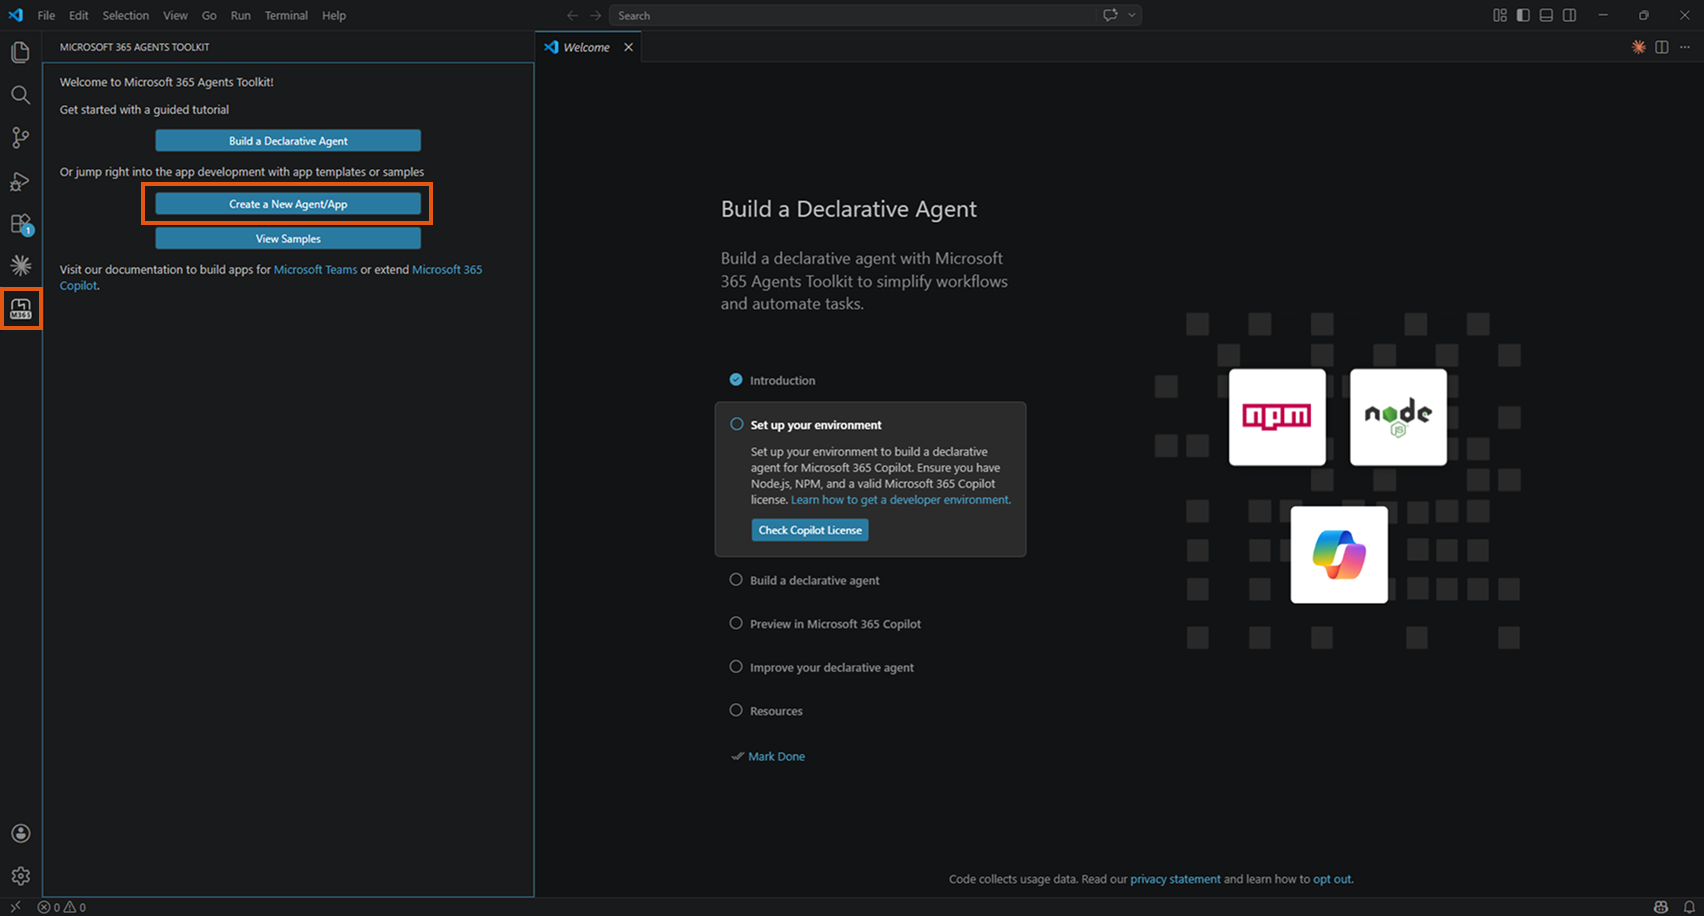
- In the left Activity Bar, click the Microsoft 365 Agents Toolkit icon (M365 logo).
- Click "Create a New Agent/App".
- Select "Declarative Agent".
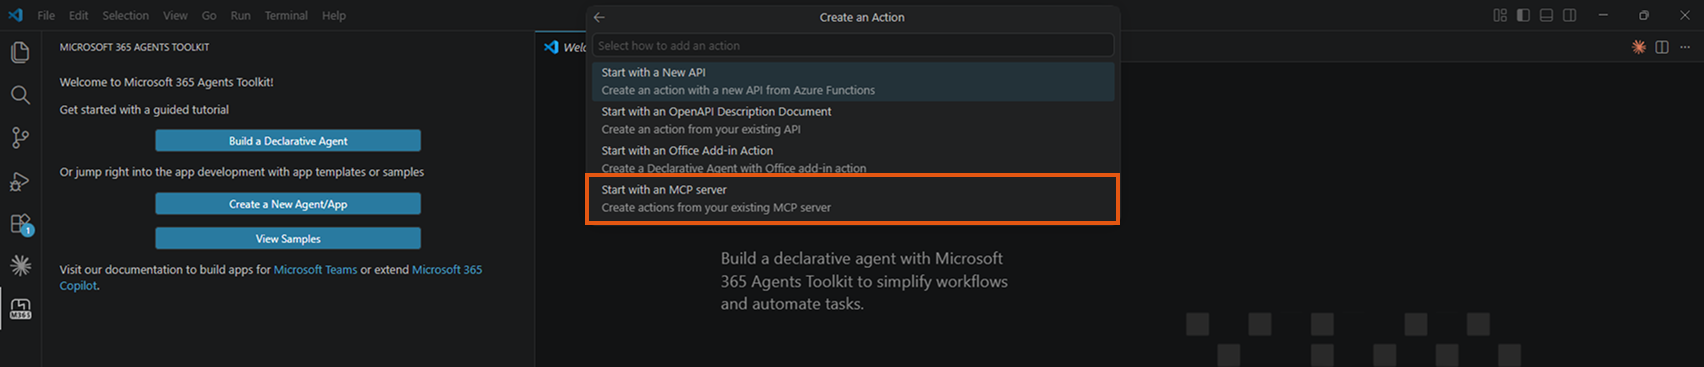
- Select "Add an Action".
- Select "Start with an MCP server".
- When asked for the MCP server type, select "Remote MCP server".
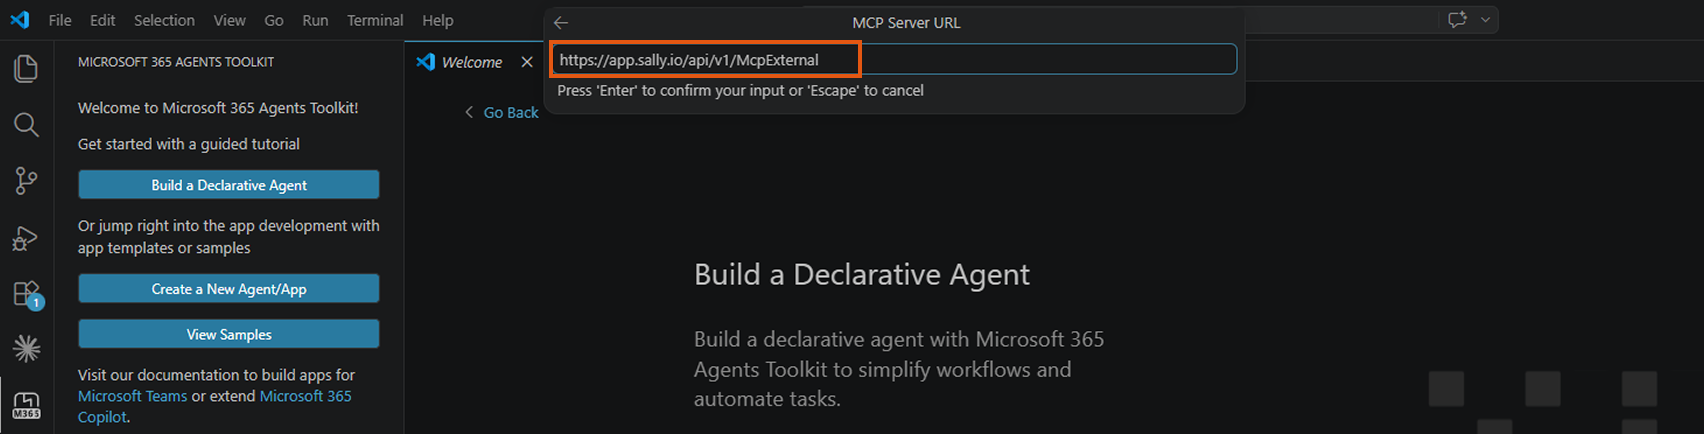
- Enter the Sally MCP endpoint URL:
https://app.sally.io/api/v1/McpExternal
- Choose a folder for the project.
- Give the agent a name (e.g. "Sally MCP").
- Confirm. VS Code opens a new window with the generated project.
The generated project opens with .vscode/mcp.json already visible. The default entry is missing authentication, so you need to replace it.
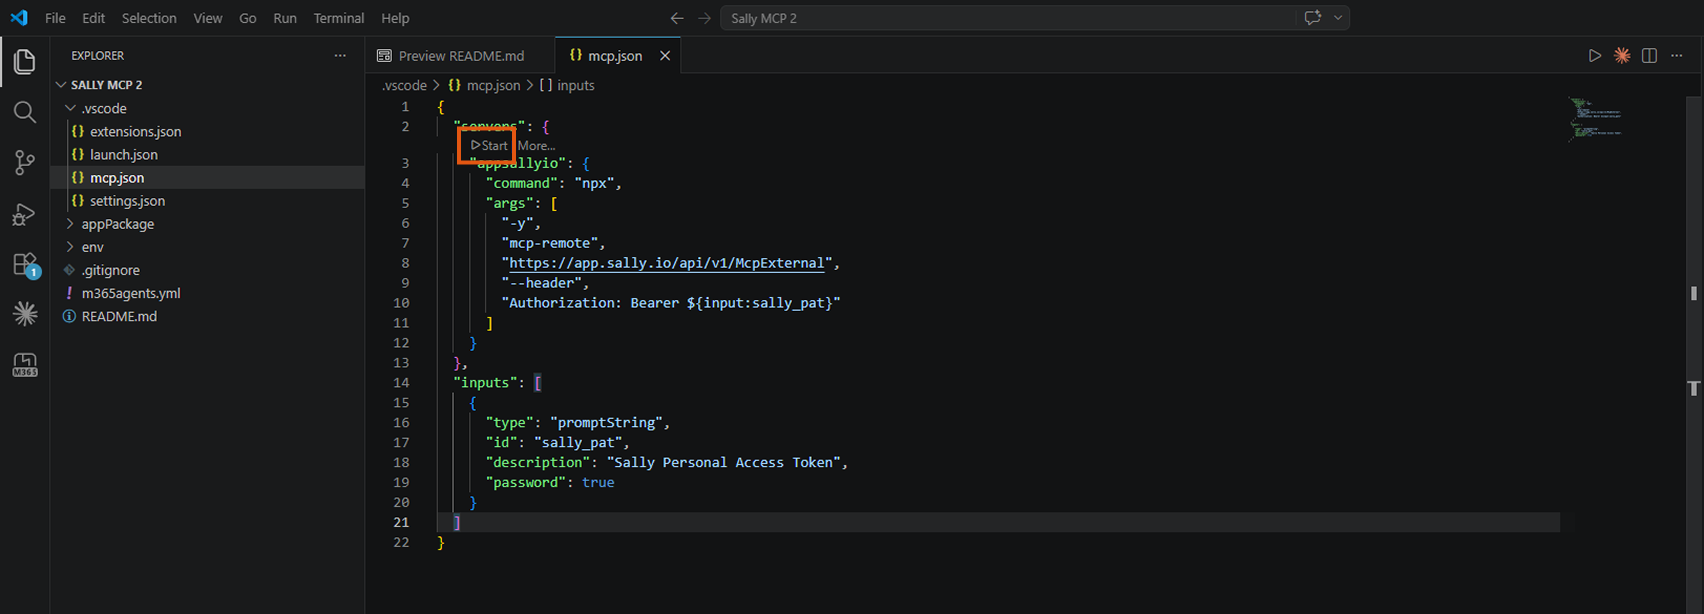
Replace the entire contents of .vscode/mcp.json with:
{
  "servers": {
    "appsallyio": {
      "command": "npx",
      "args": [
        "-y",
        "mcp-remote",
        "https://app.sally.io/api/v1/McpExternal",
        "--header",
        "Authorization: Bearer ${input:sally_pat}"
      ]
    }
  },
  "inputs": [
    {
      "type": "promptString",
      "id": "sally_pat",
      "description": "Sally Personal Access Token",
      "password": true
    }
  ]
}
Save the file (Ctrl+S).
This configuration uses the mcp-remote proxy instead of a direct HTTP connection. This is more stable in VS Code because VS Code otherwise attempts an OAuth discovery that Sally does not support.
- In the editor, a small Start link appears above the
"servers": {line (line 2). Click it.
- An input field labeled "Sally Personal Access Token" appears at the top of VS Code.
- Paste your full Sally token (including the
sally_pat_prefix).

- Press Enter.
The token is stored securely in VS Code's Secret Storage, not in plain text in the file.
After starting, the status line above "servers": { should show:
Running | Stop | Restart | 5 tools | More...
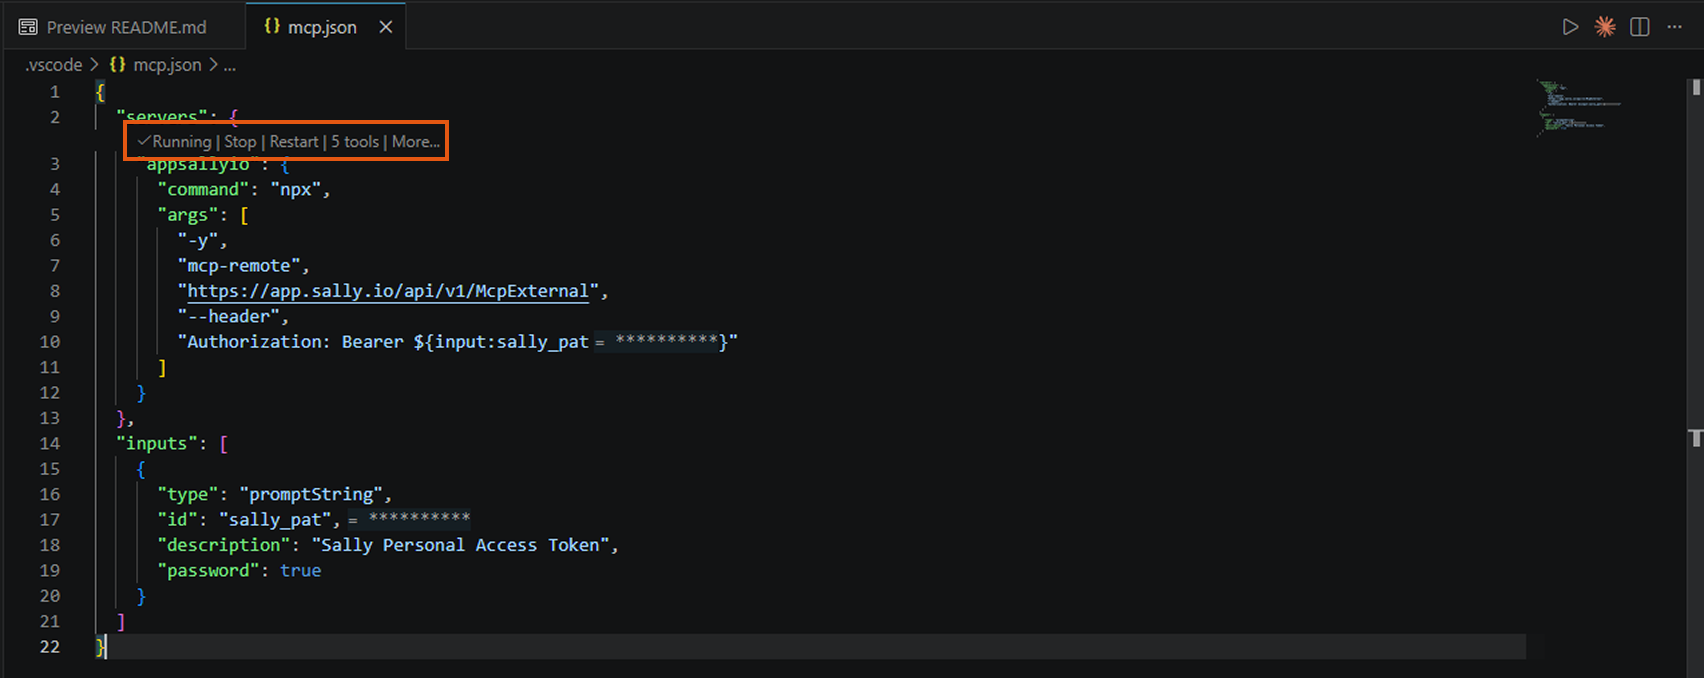
This means the connection is active and Sally has provided 5 tools.
If Error appears instead:
- Revoke the token in Sally and create a new one.
- Click Restart and enter the new token.
You need GitHub Copilot Chat installed and signed in with a GitHub account that has a Copilot license.
- Press Ctrl+Alt+I to open GitHub Copilot Chat.
- At the bottom of the input field, switch the mode to Agent.
- Click the tools icon (wrench). The Sally tools should appear in the list.
- Enable the Sally tools you want to use by checking them.
- Try a test query:
"Which Sally tools are available?"
3. Troubleshooting
| Issue | Fix |
|---|---|
| "Dynamic Client Registration not supported" dialog appears on start | Click Cancel. The Bearer token header is still applied correctly. |
| Server stays in "Waiting for server to respond..." | The token is being rejected. Revoke the token in Sally and create a new one at app.sally.io. |
| "401 Unauthorized" in the logs | The token is invalid or has been revoked. Create a new token and enter it when clicking Restart. |
| Agent mode not available in Copilot Chat | Press Ctrl+Shift+P, then run "Chat: Switch to Agent Mode". If not available, check your GitHub Copilot license. |
| Tools return empty results | Make sure the Sally user associated with the PAT has accessible meetings. Check access rules. |
For more troubleshooting tips, see the General Setup Guide → Troubleshooting.