How do you connect Sally AI with Make?
To connect Sally with Make you use a webhook. Sally sends the results of a meeting to an address of your choice, and your Make scenario picks up from there.
The setup has three parts. In Make you create the webhook and copy its address; in Sally you set up the webhook with that address; after that you let Make build the data structure from an example body. If you have not worked with webhooks before, read the webhook guide first, it explains in detail what a webhook is and which fields it carries.
Quick navigation
1. How do you create a scenario in Make?
1.1. Configure the trigger in Make
First you need a webhook in Make. It is the entry point for everything Sally sends later.
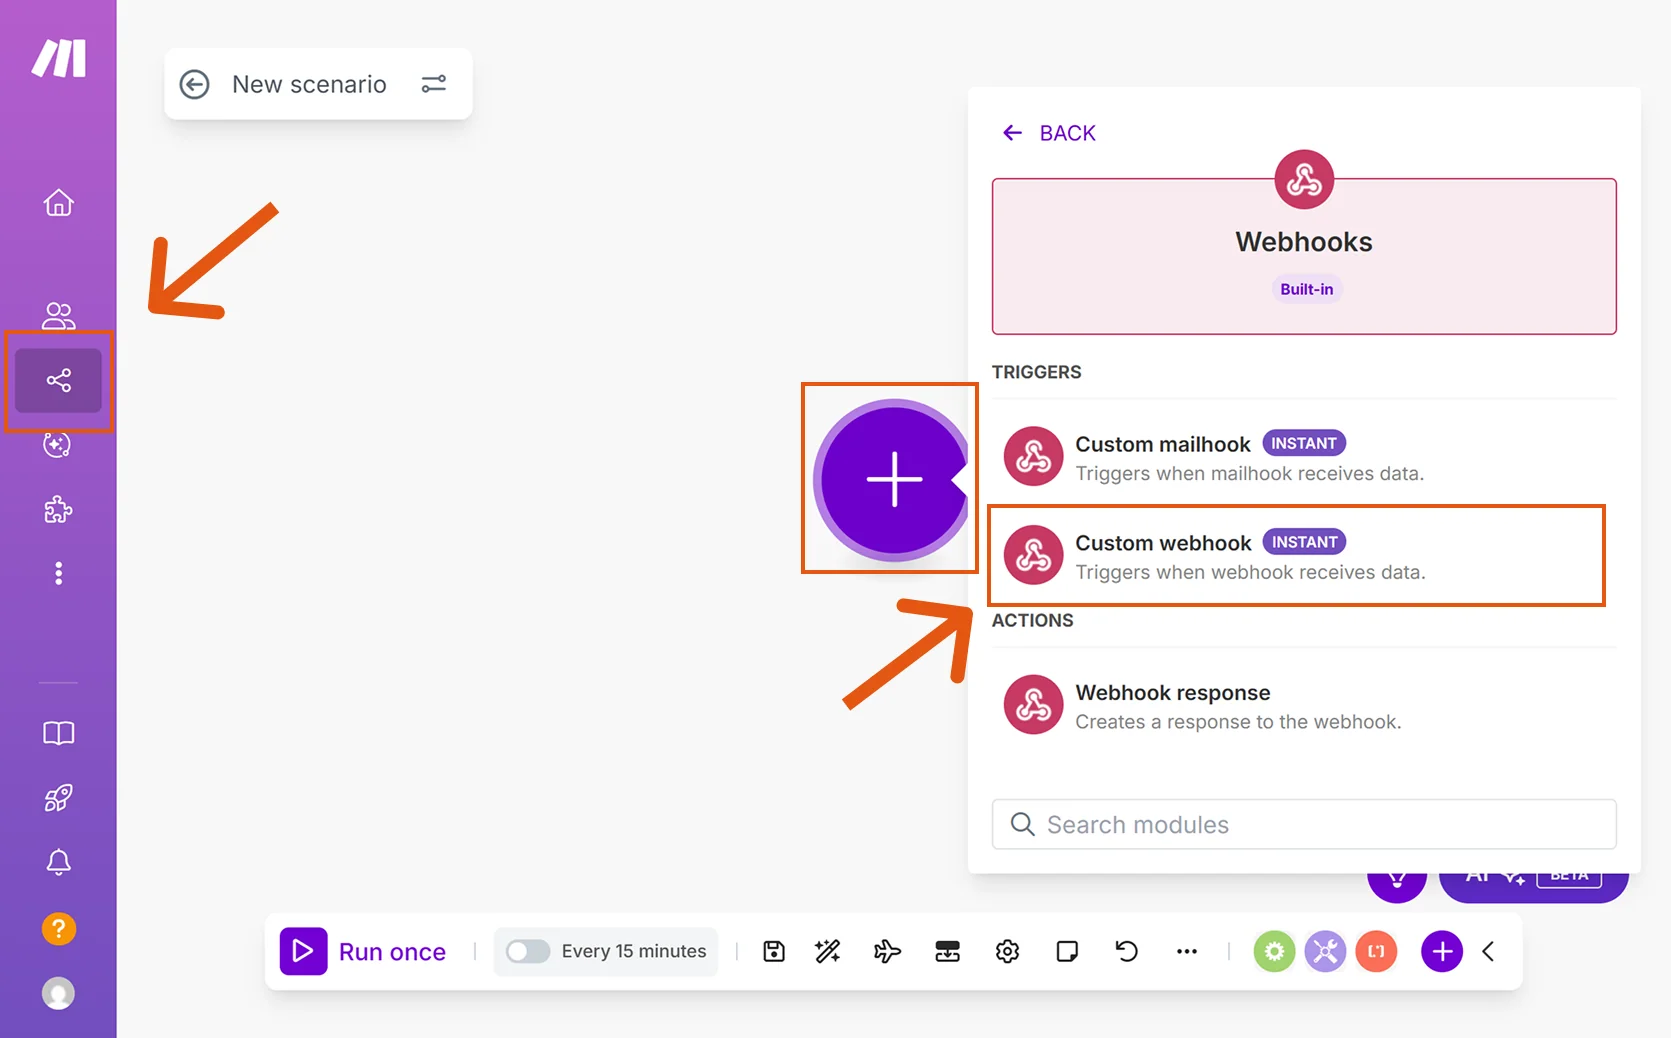
- In Make, go to Scenarios and click the +. Search for Webhooks and pick Custom webhook under Triggers.
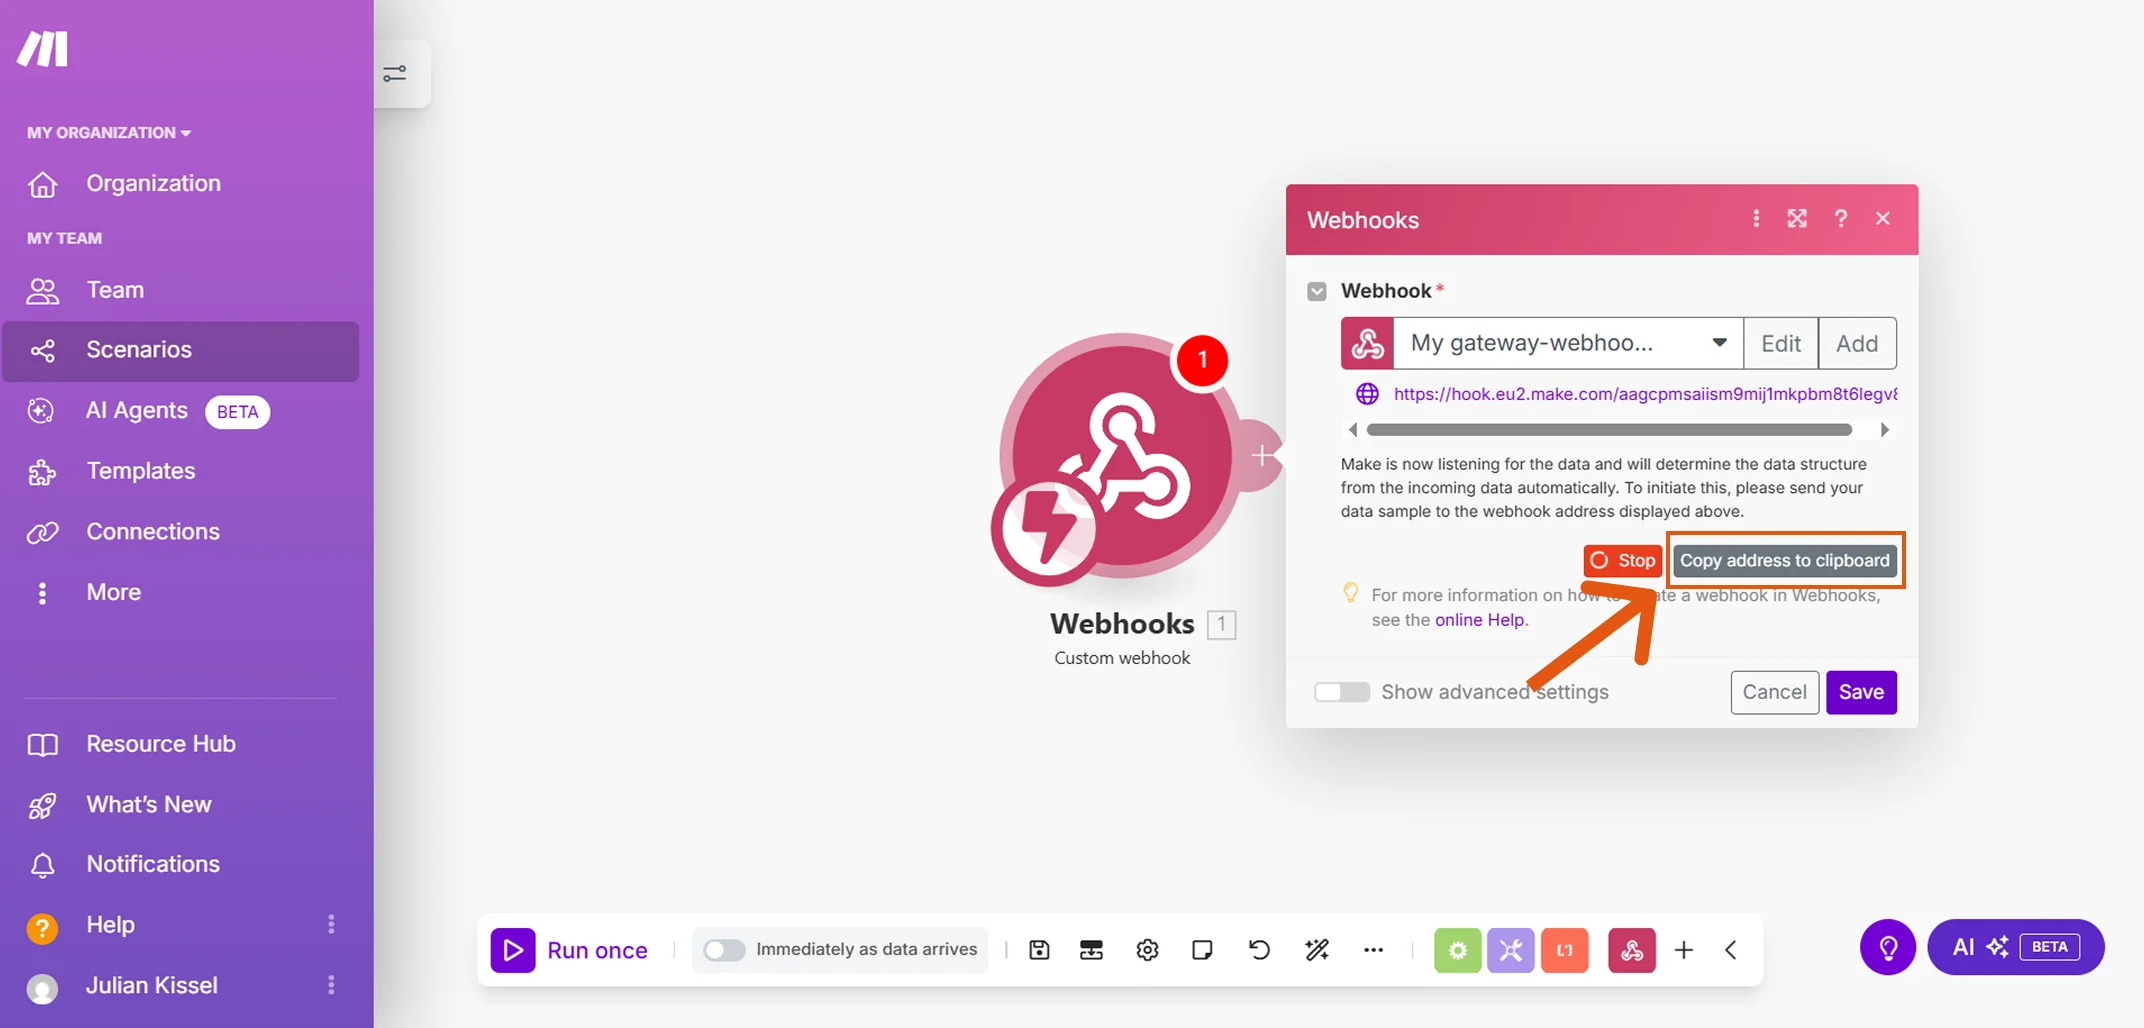
- Make shows the generated address and waits for data. Click Copy address to clipboard, this is where Sally will send the results.
1.2. Configure the webhook in Sally
Now you put the copied address into Sally.
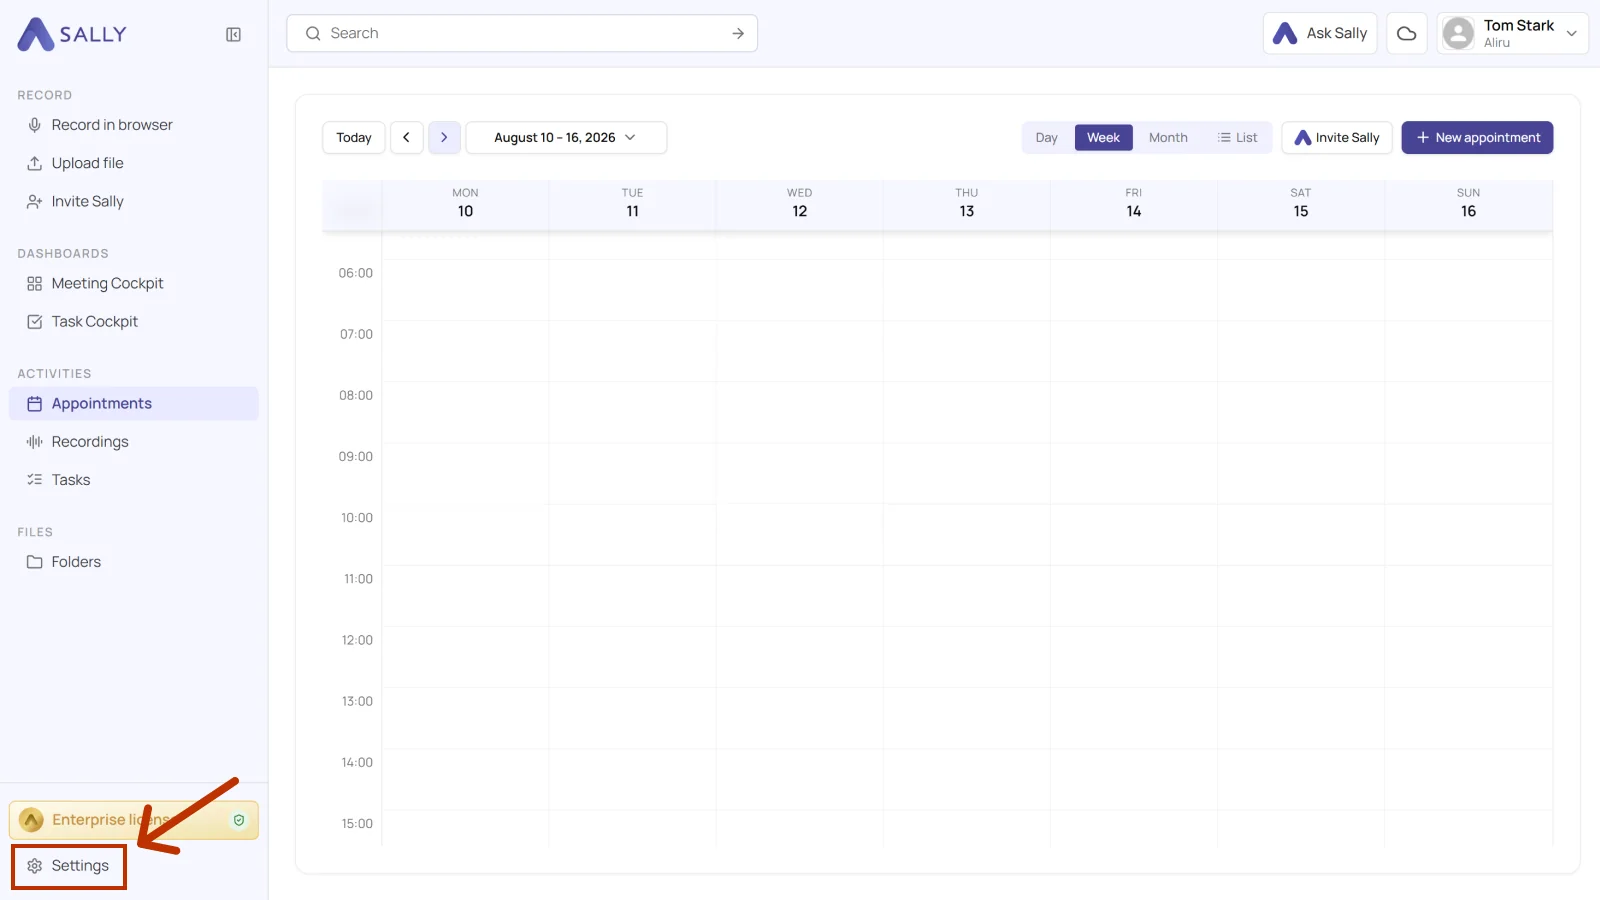
- In Sally, open Settings from the bottom-left corner of the sidebar.
- Under Configuration, select Integrations and open the Webhooks tab. Click Create webhook under Webhooks (Personal).
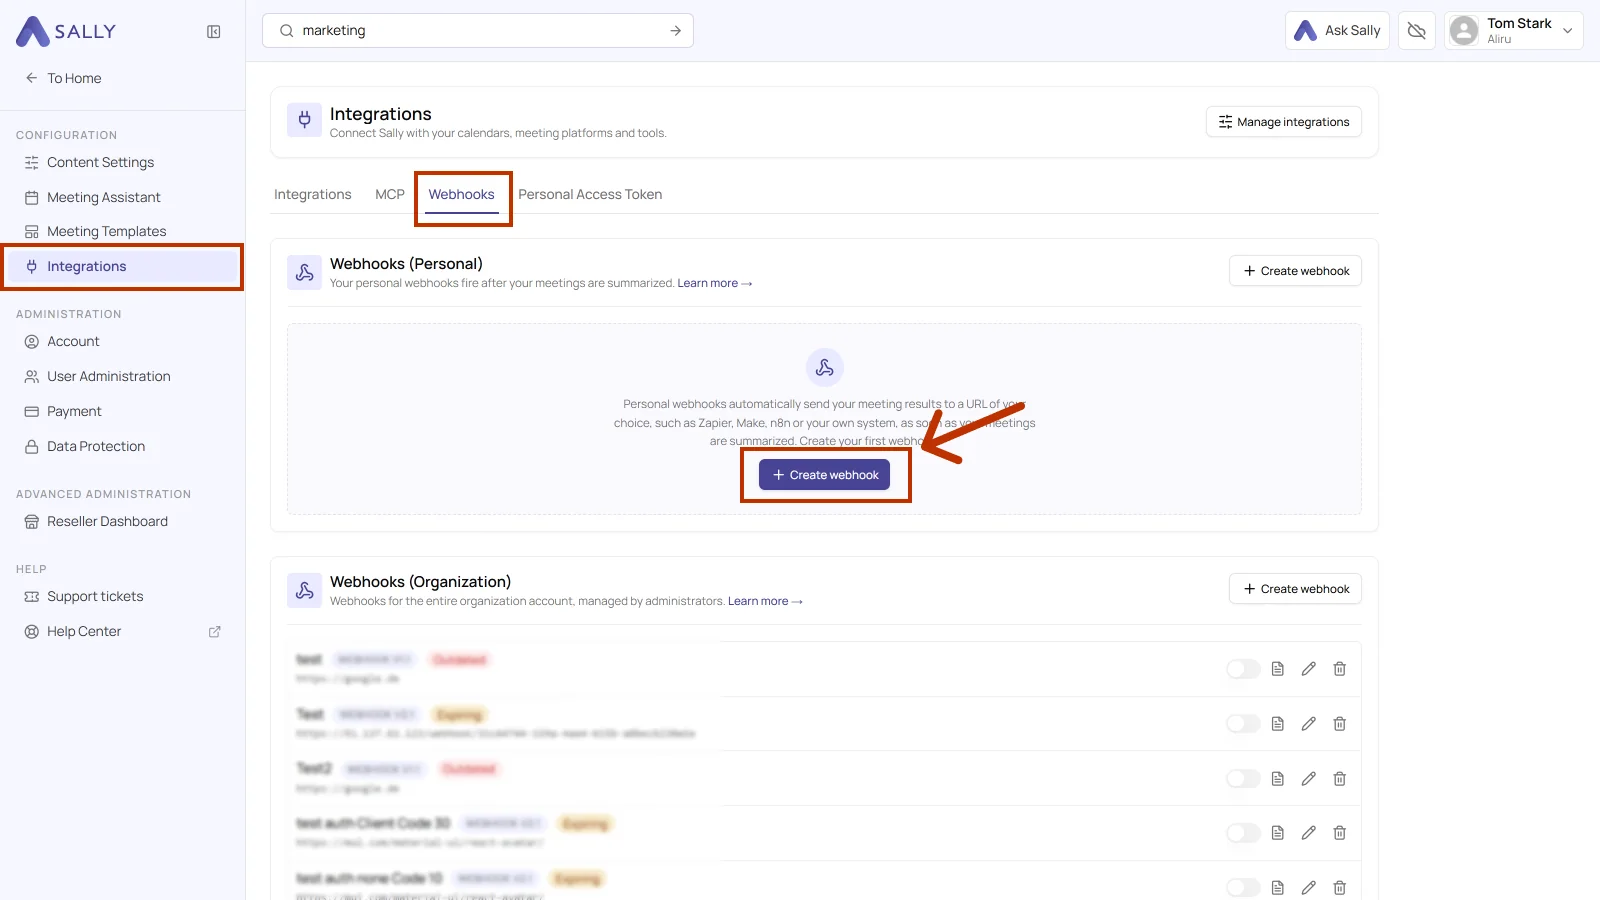
Webhooks (Personal) fire after your own meetings are summarized. Webhooks (Organization) apply to the entire organization account and are managed by administrators. For your own Make scenario, use the personal section.
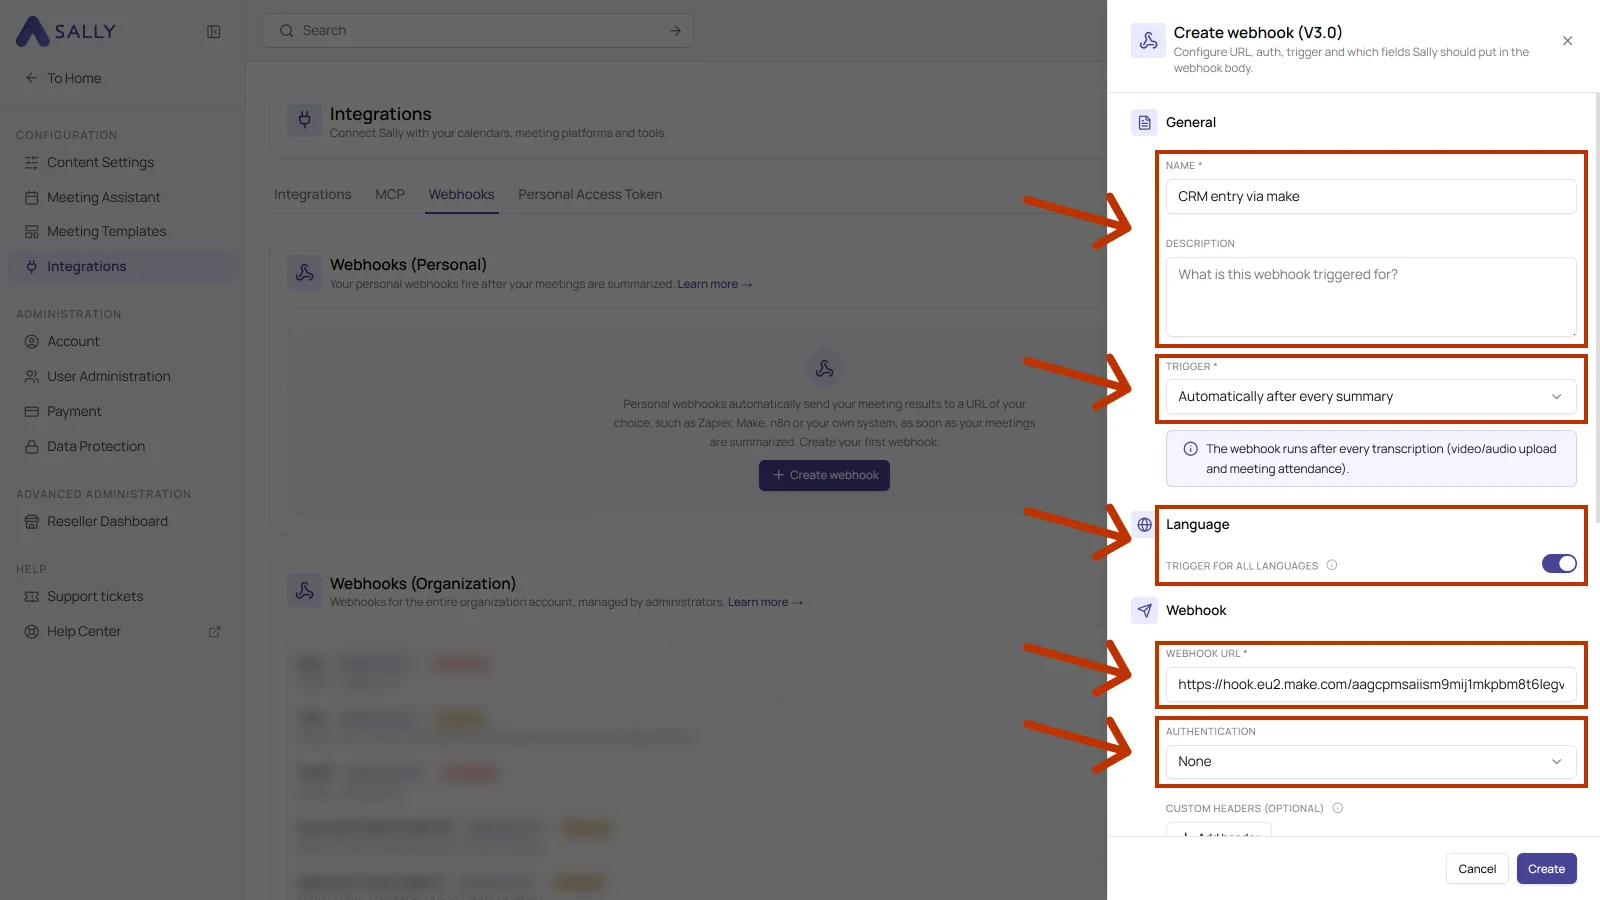
- Fill in the upper part of the Create webhook dialog: Name, an optional Description, the Trigger, the Language, the Webhook URL from Make, and the Authentication.
- Scroll down in the dialog. Body contents defines what Sally sends along, Options defines when the webhook fires. Then click Create.
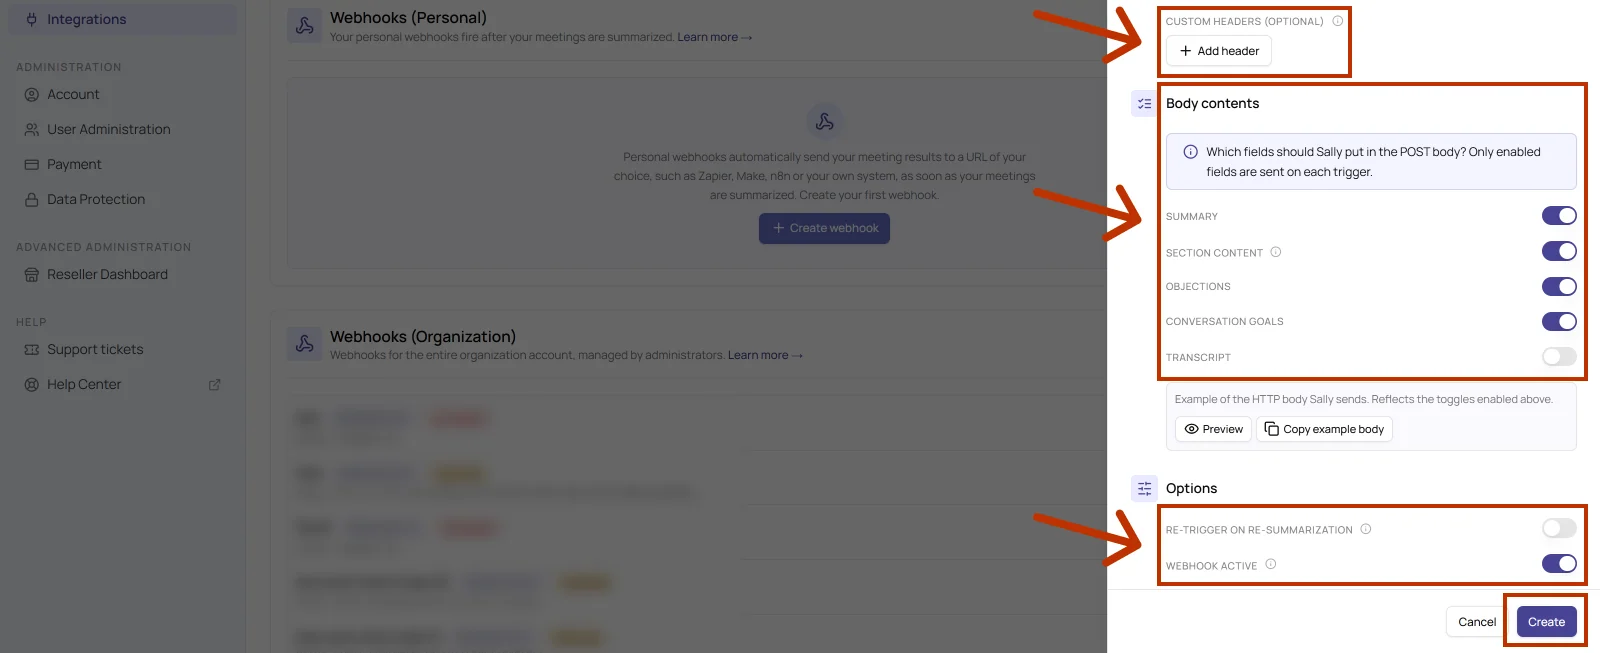
The table below explains every field of the dialog.
| Field | What it does |
|---|---|
| Name | Required. The display name of the webhook. Pick something you will recognize later, for example "CRM entry via make". |
| Description | Optional. A note on what the webhook is triggered for. Useful once several webhooks run side by side. |
| Trigger | Required. Defines when Sally sends. Automatically after every summary runs the webhook after every transcription, which means after a video or audio upload and after a meeting Sally attended. |
| Trigger for all languages | When enabled, the webhook fires no matter which language the summary was created in. |
| Webhook URL | Required. The address you copied in Make. |
| Authentication | Defines how Sally identifies itself to the target system. For Make, None is enough, because the webhook address itself is not public. The webhook guide covers the other methods and when you need them. |
| Custom headers (optional) | Add header lets you send extra headers, an API key for instance. A Make scenario normally does not need this. |
| Body contents | Defines which fields end up in the POST body: Summary, Section content, Objections, Conversation goals and Transcript. Only enabled fields are sent on each trigger, and the less you send, the smaller and faster the request. |
| Preview and Copy example body | Shows the body Sally would send with the toggles you set, and copies it. That body is exactly what you need for Make in step 1.3. |
| Re-trigger on re-summarization | When off, the webhook fires only the first time. When on, Sally sends again whenever a summary is regenerated. |
| Webhook active | Switches the webhook on. Turning it off leaves it in place without deleting it. |
From now on Sally sends the selected content to your Make scenario whenever the trigger fires.
Every webhook in the list carries its body version. Sally creates new webhooks on the current version, older ones are marked Outdated or Expiring. If an old webhook is still running, recreate it with the same settings so it runs on the current version. The version determines how the body is built, so a recreated webhook may deliver a different body. Rebuild the data structure in Make from the example body afterwards.
1.3. Extend the Make trigger with the data structure from Sally
This step is optional but worth doing. Given an example body, Make builds the fields itself. That saves you adding them by hand and rules out typos in the field names.
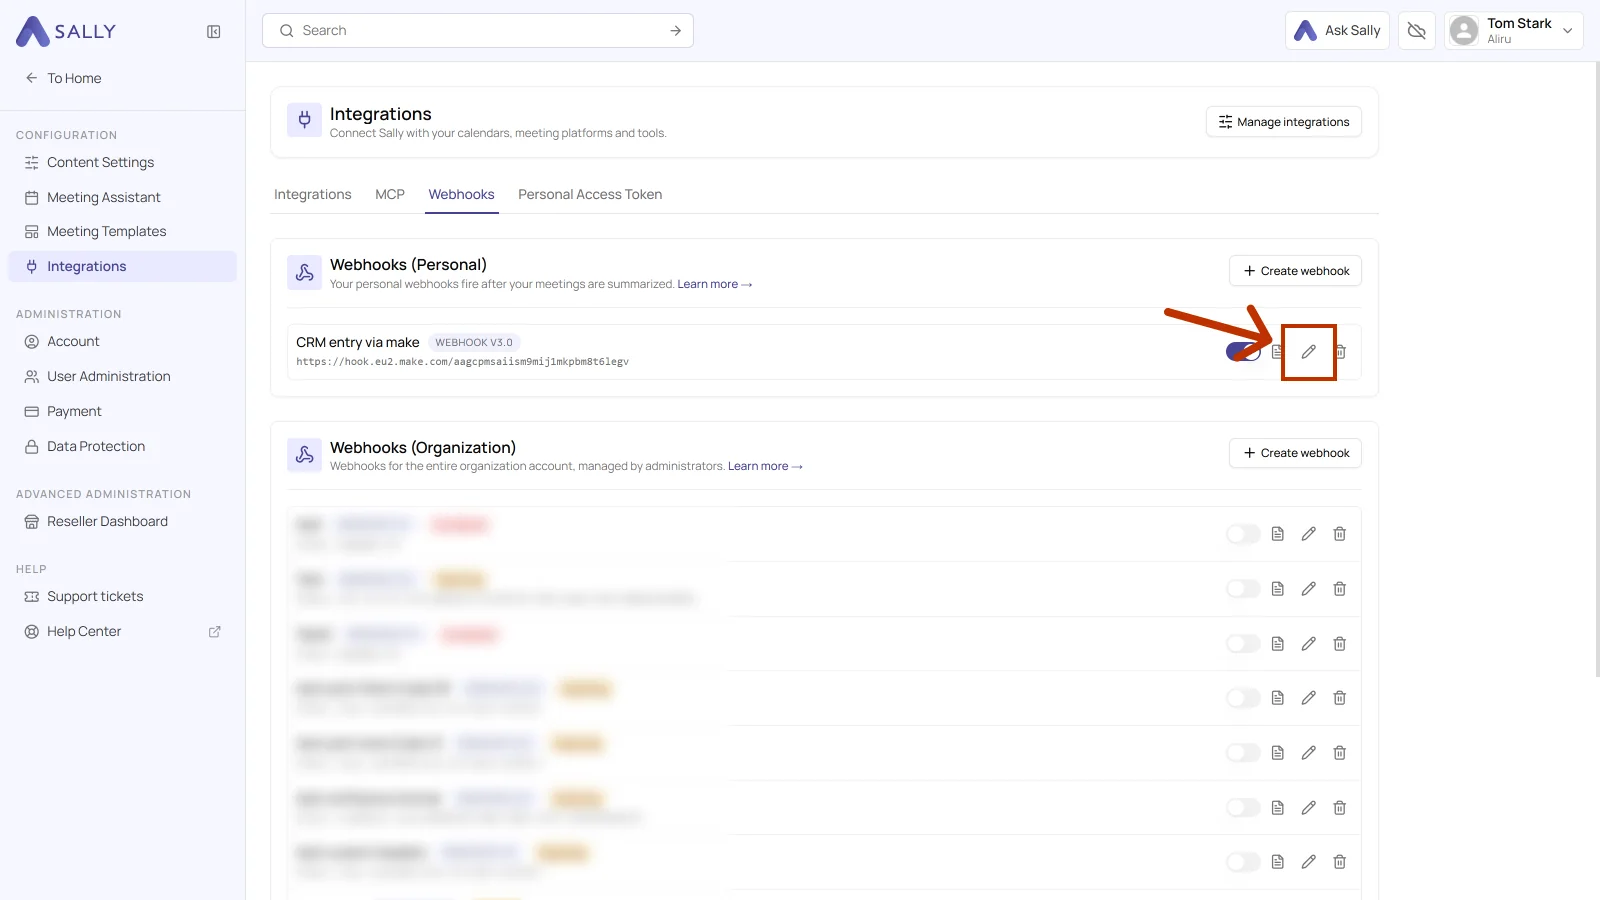
- Back in Sally, open the Webhooks tab and click the pencil icon on your webhook.
- Click Copy example body. Preview shows the body inside the panel first, and it mirrors the toggles you set under Body contents.
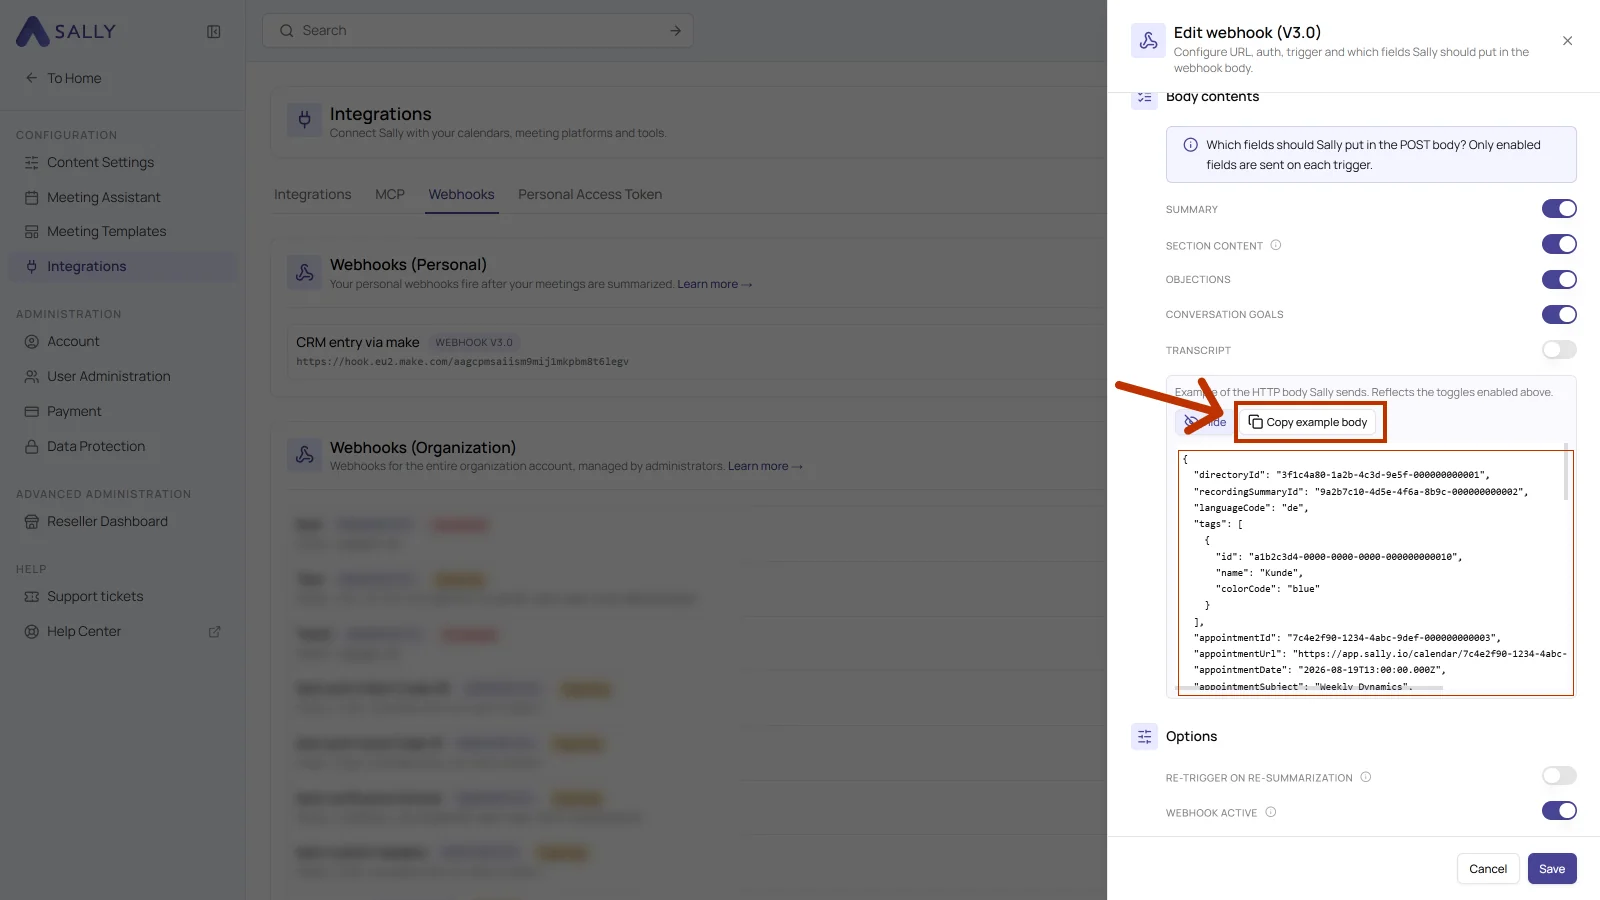
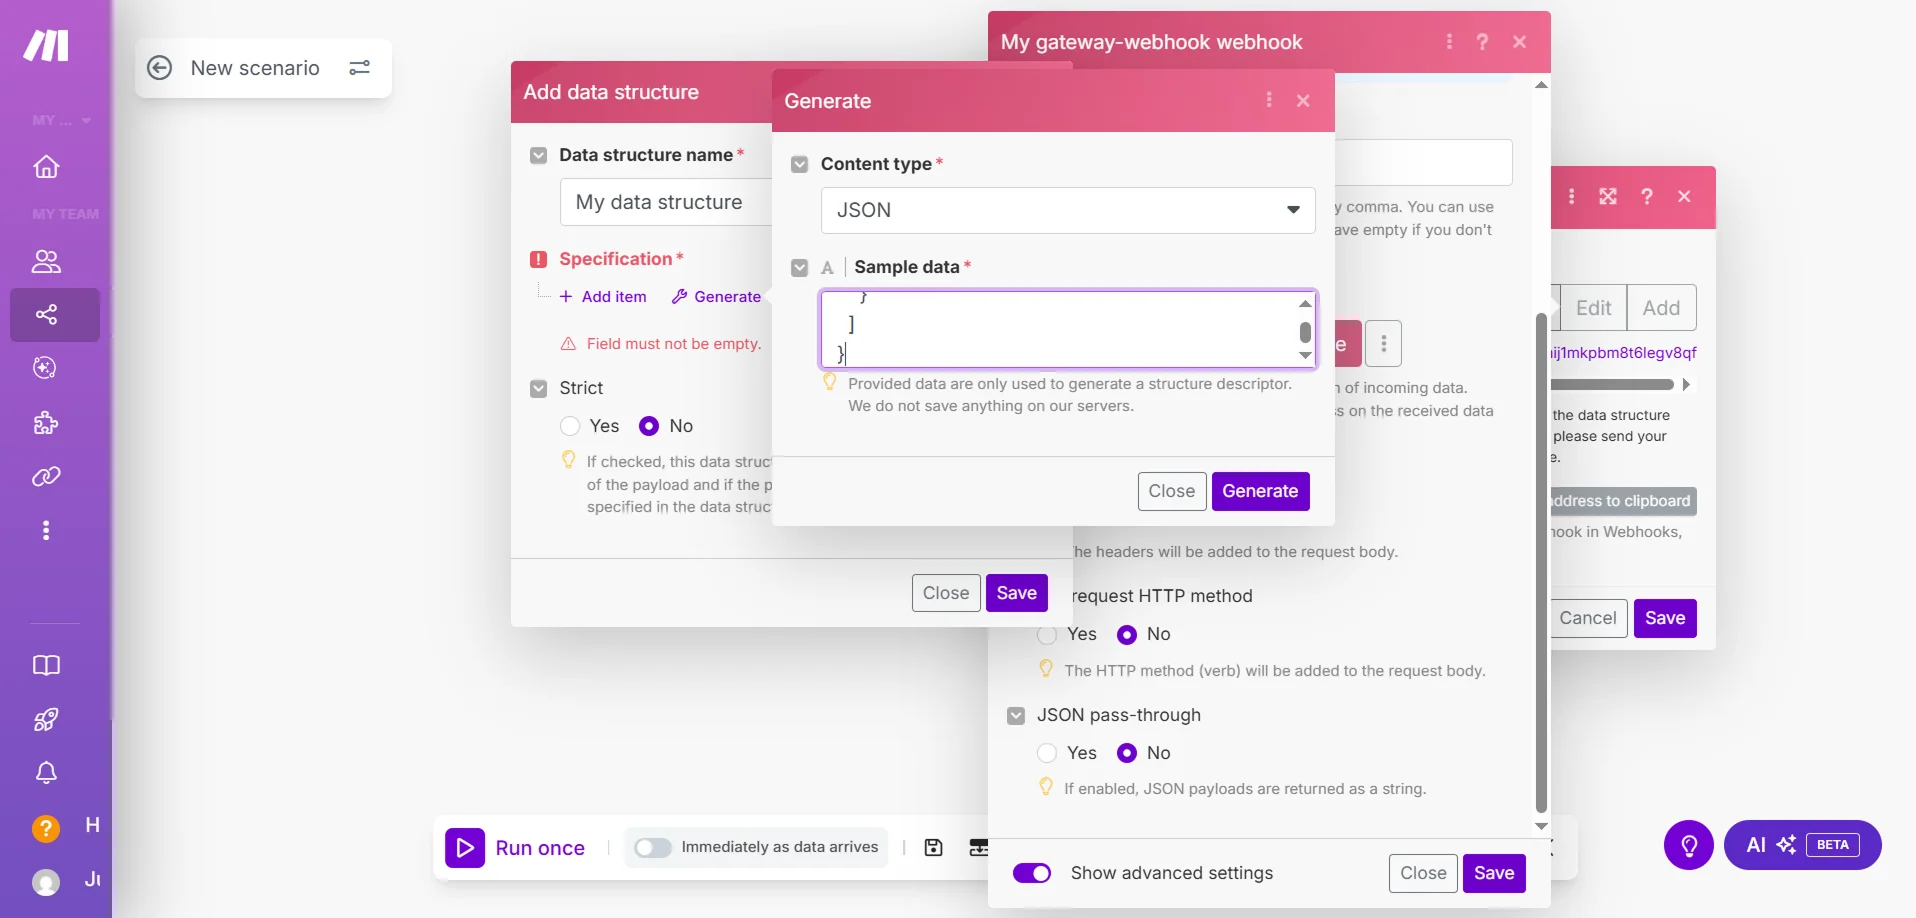
- In Make, open the webhook, click Add data structure and then Generate. Set Content type to JSON, paste the body into Sample data and click Generate.
2. How do you inspect and debug webhook logs?
Finally, check that Sally is actually sending. Sally logs every trigger, so you can see what went to Make and how Make answered.
- Open the Webhooks tab and click the document icon on your webhook.
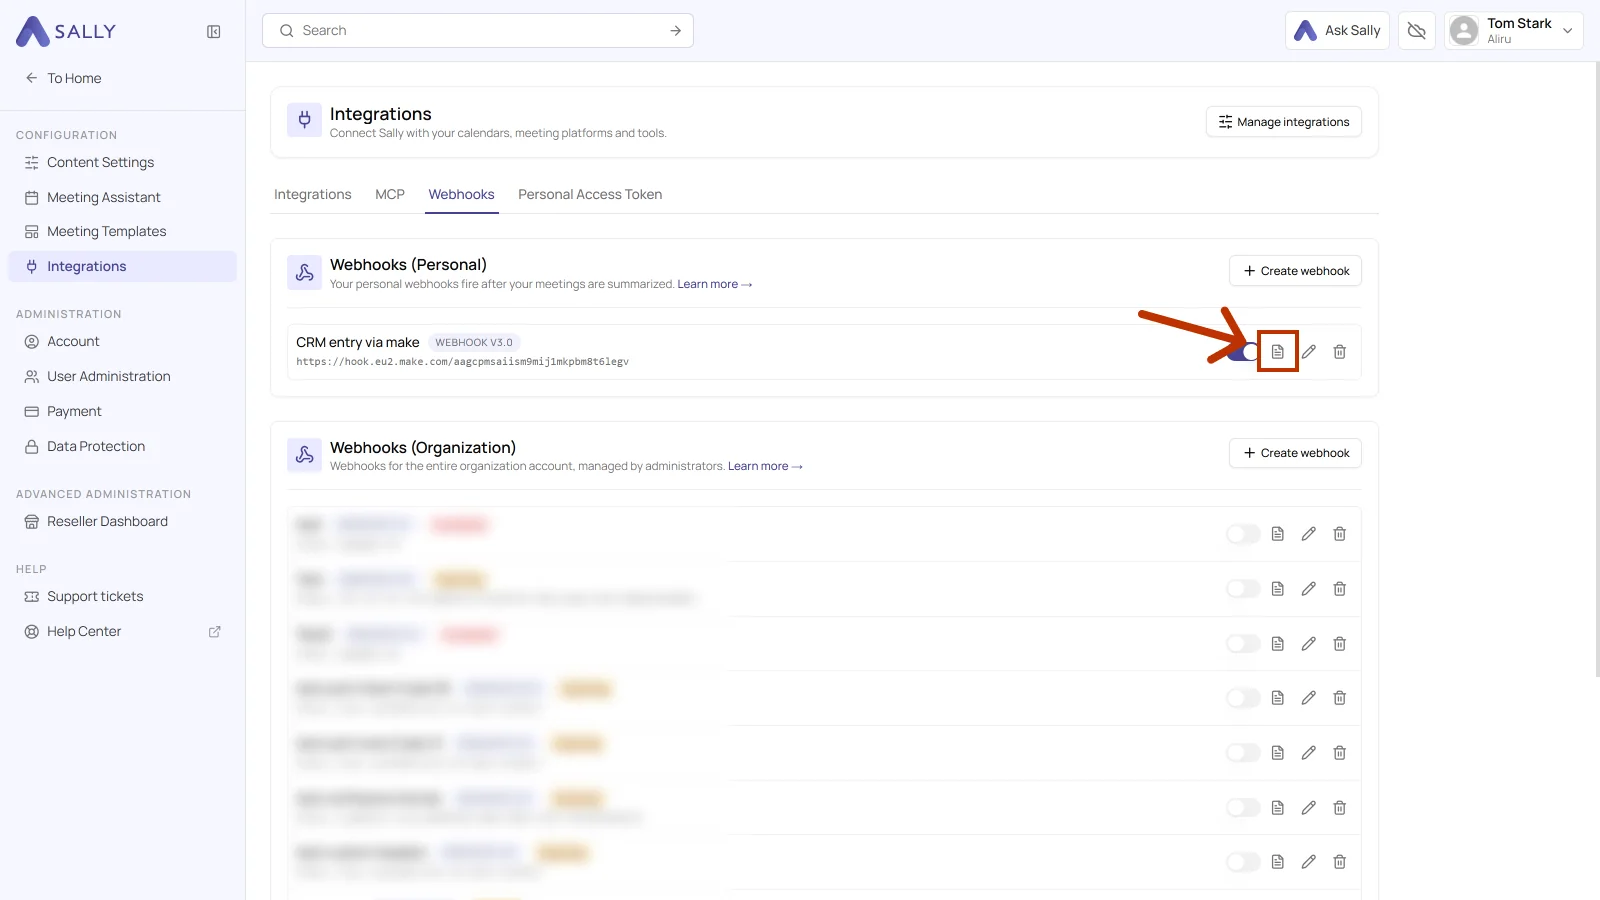
Once the trigger has fired, the entries show up in the log. Every entry shows:
- Execution time: when Sally sent the event.
- Endpoint: the webhook address from Make.
- HTTP status: the answer from Make, for example
202 Accepted.
Details opens the request that was sent, body included.
2.1. What do the HTTP status codes mean?
The status comes from Make, not from Sally. It tells you whether the request arrived and where to look when it did not.
| Status | What it means | What you can do |
|---|---|---|
| 200 OK, 204 No Content | Make accepted the request. | Nothing, the connection works. |
| 202 Accepted | Make accepted it and runs the scenario in the background. | If the scenario still does nothing, check the execution history in Make. |
| 400 Bad Request | Make cannot read the body, usually because the data structure does not match the fields being sent. | Rebuild the data structure in Make from the current example body. |
| 401 Unauthorized, 403 Forbidden | The target rejects the request. | Rare with Make, where None is enough. Check the authentication and the custom headers on the webhook. |
| 404 Not Found, 410 Gone | The address no longer answers, for instance because the webhook in Make was deleted or recreated. | Copy the address in Make again and put it into the webhook. |
| 429 Too Many Requests | Too many requests arrive in a short time. | Send less content or take load off the scenario in Make. |
| 500, 502, 503, 504 | Make was unreachable, or the scenario failed with an error. | Trigger again later and check in Make why the scenario failed. |
If nothing arrives in Make, check the log in Sally first. No entry means the trigger did not fire, which points back at Sally. An entry with an error status points at the target: the address, the authentication or the scenario in Make.