Sally MCP with Cursor
Cursor is an AI-powered code editor that supports MCP servers through its built-in settings UI and a project-level config file. The Model Context Protocol (MCP) is an open standard that lets AI tools connect to external data sources. By adding the Sally MCP endpoint, you can query your meetings, summaries, and transcripts directly while coding, for example to look up a decision from a sprint review, check action items, or pull a transcript without switching to another app.
For background on the Sally MCP Connector, available tools, and security best practices, see the General Setup Guide.
- Cursor installed (download from cursor.com).
- An active Sally user with access to at least one company account.
- Sally MCP enabled for your company account (admin setting).
Quick Navigation
- Create a Personal Access Token in Sally
- Set up the MCP connection in Cursor
- Access scope
- Troubleshooting
1. Create a Personal Access Token in Sally
A Personal Access Token (PAT) is the credential Cursor uses to authenticate against the Sally MCP endpoint. You create it once.
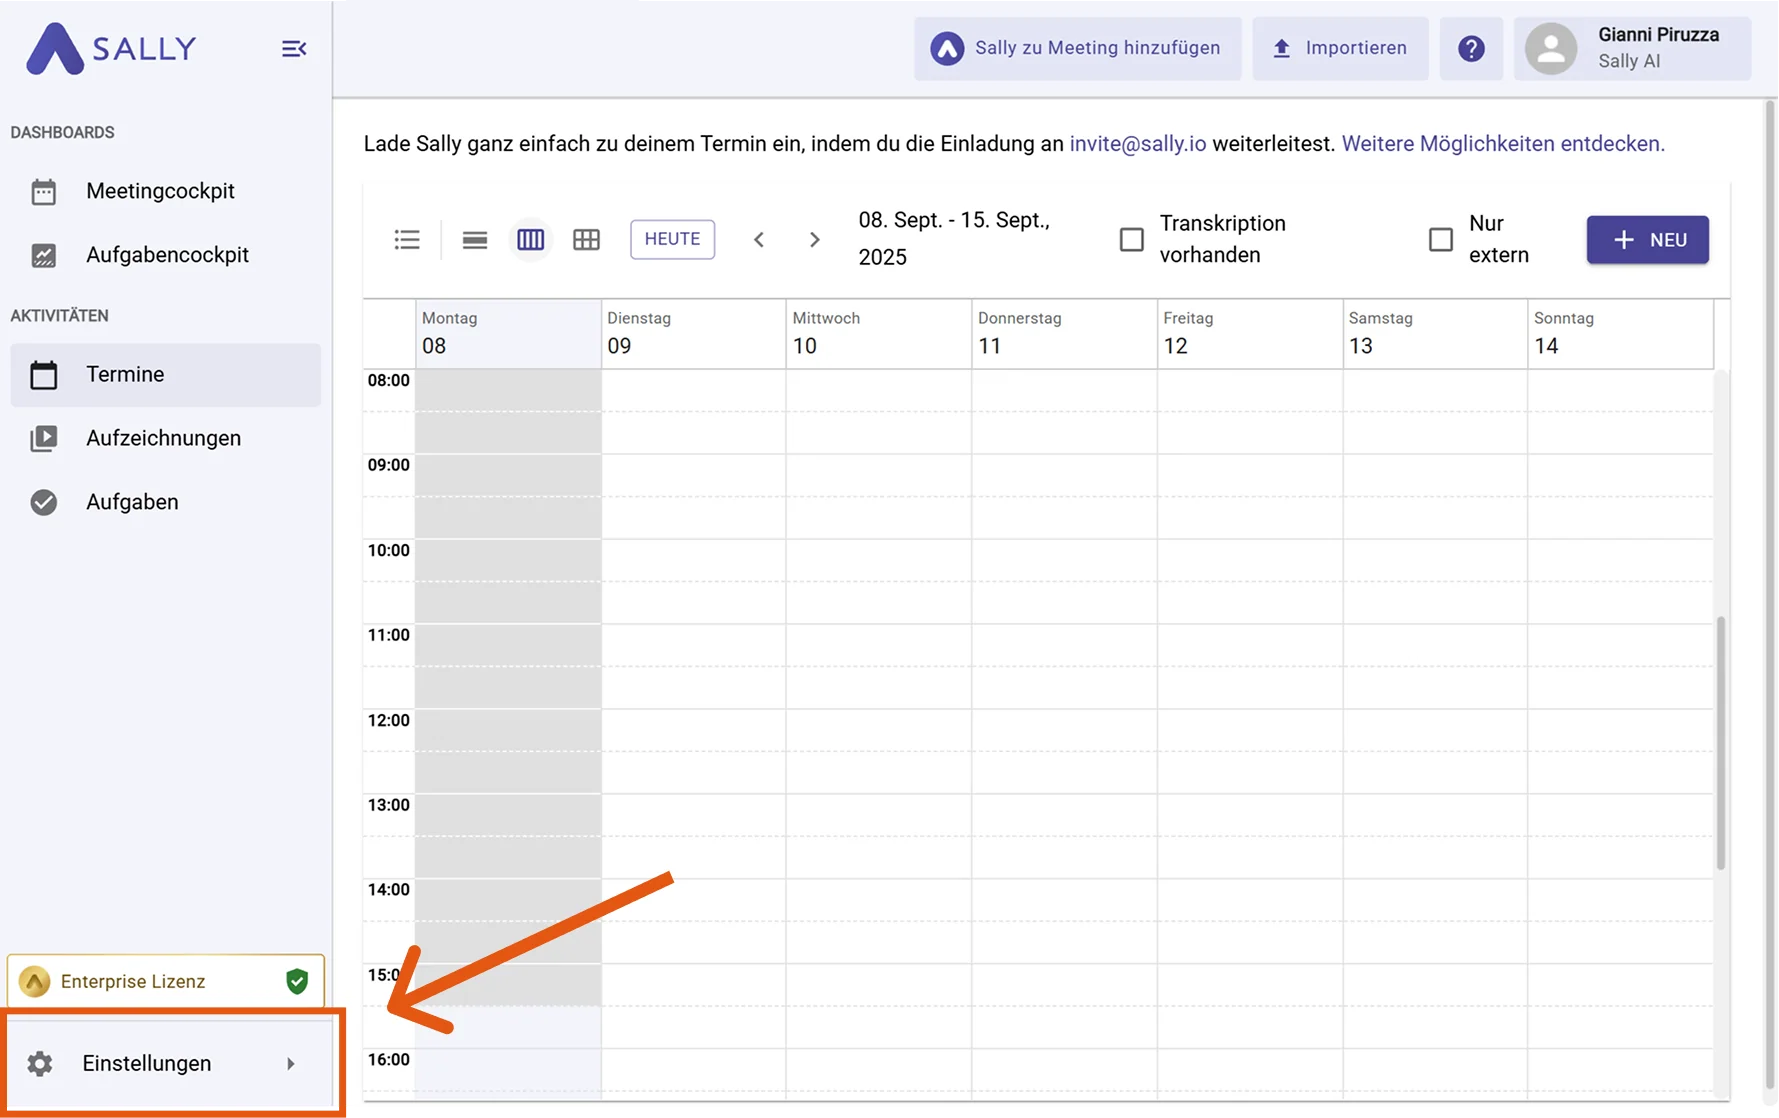
- Log in to Sally at app.sally.io.
- Open Settings in the bottom-left of the sidebar.
- In Settings, choose "Integrations". Under "Your personal integrations", click "+ Add integration".
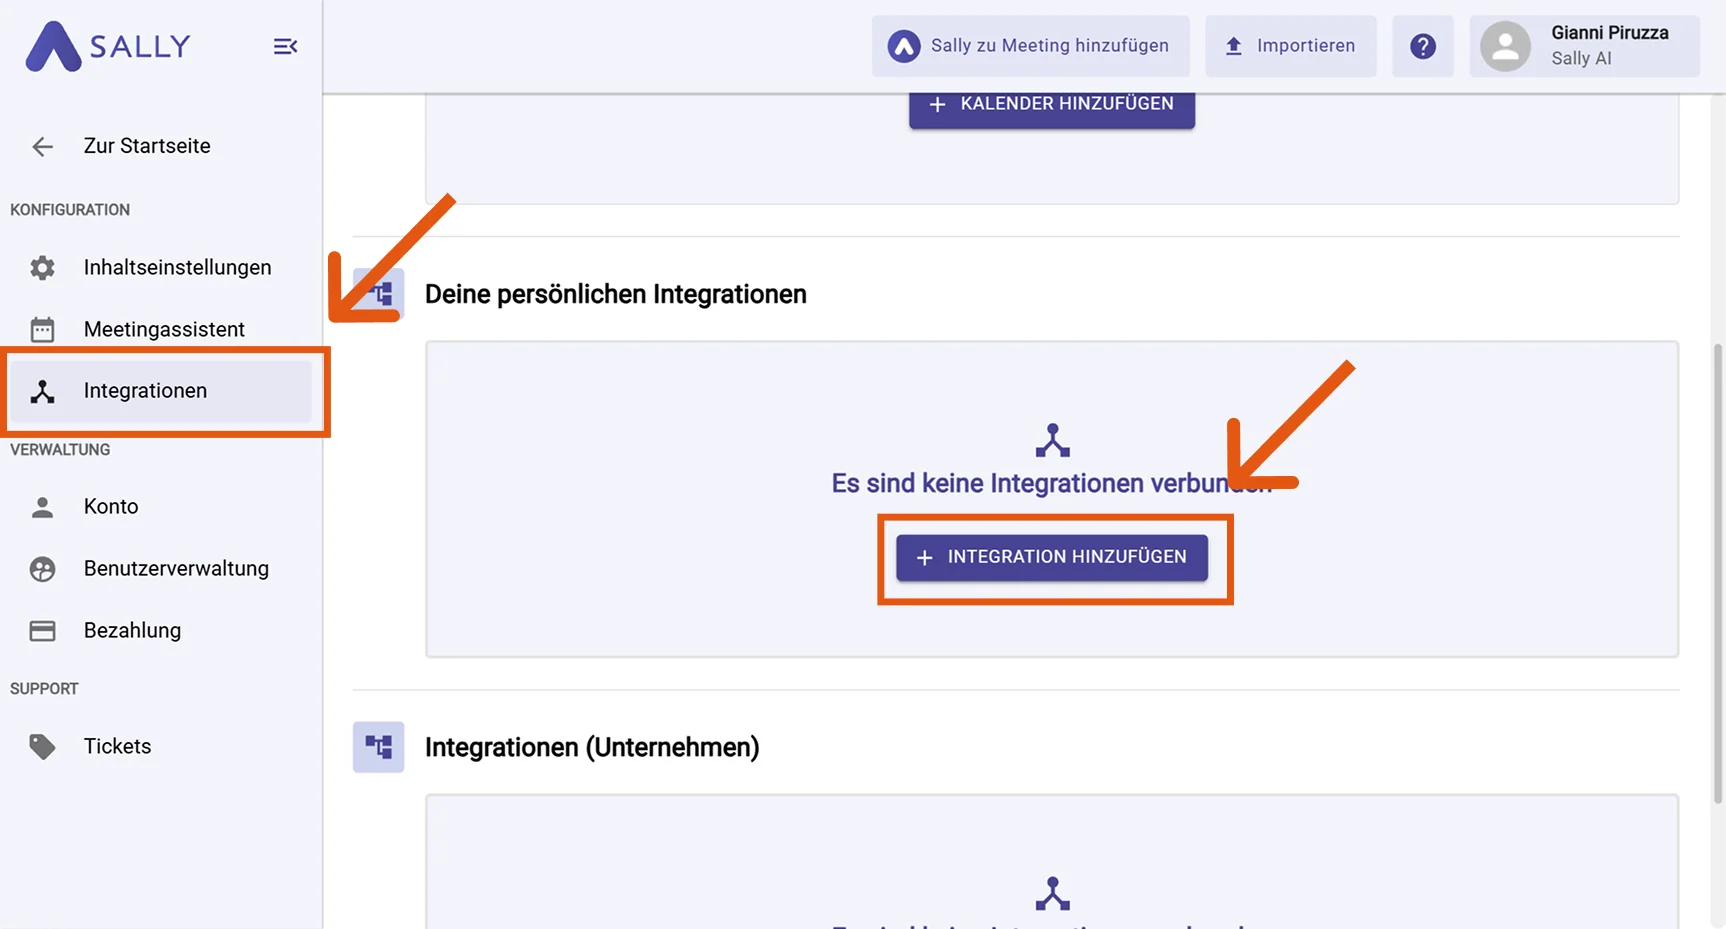
- In the integration drawer, find "Sally MCP" and click "Create Token".

-
Fill out the "Create new Sally MCP Token" dialog:
- Name: a label that helps you recognize the token later (e.g. "Cursor").
- Expires: choose a lifetime: 30 days, 90 days, 1 year, 2 years, or Never.
Then click "Create Token".

- Sally displays the full token exactly once. Copy it immediately and store it in a password manager or secure secret store. Once you close the dialog, the clear-text value is gone: you cannot view it again, only regenerate it.
The token grants read access to every appointment, recording, and summary your Sally user sees in this company account. Do not paste it into Slack, email, or tickets. Store it in a password manager.
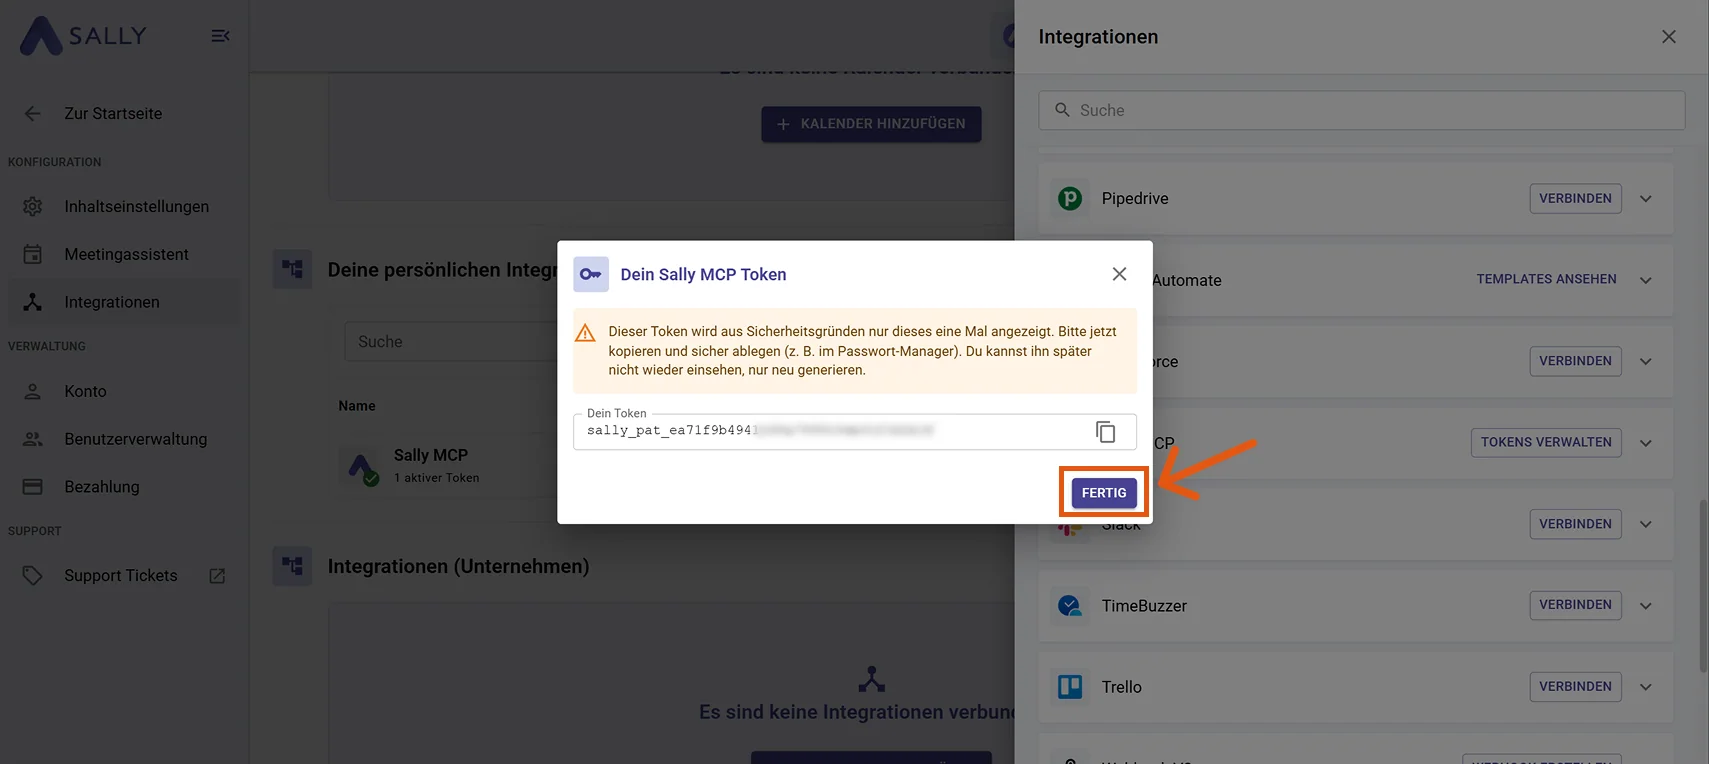
- Click "Done".
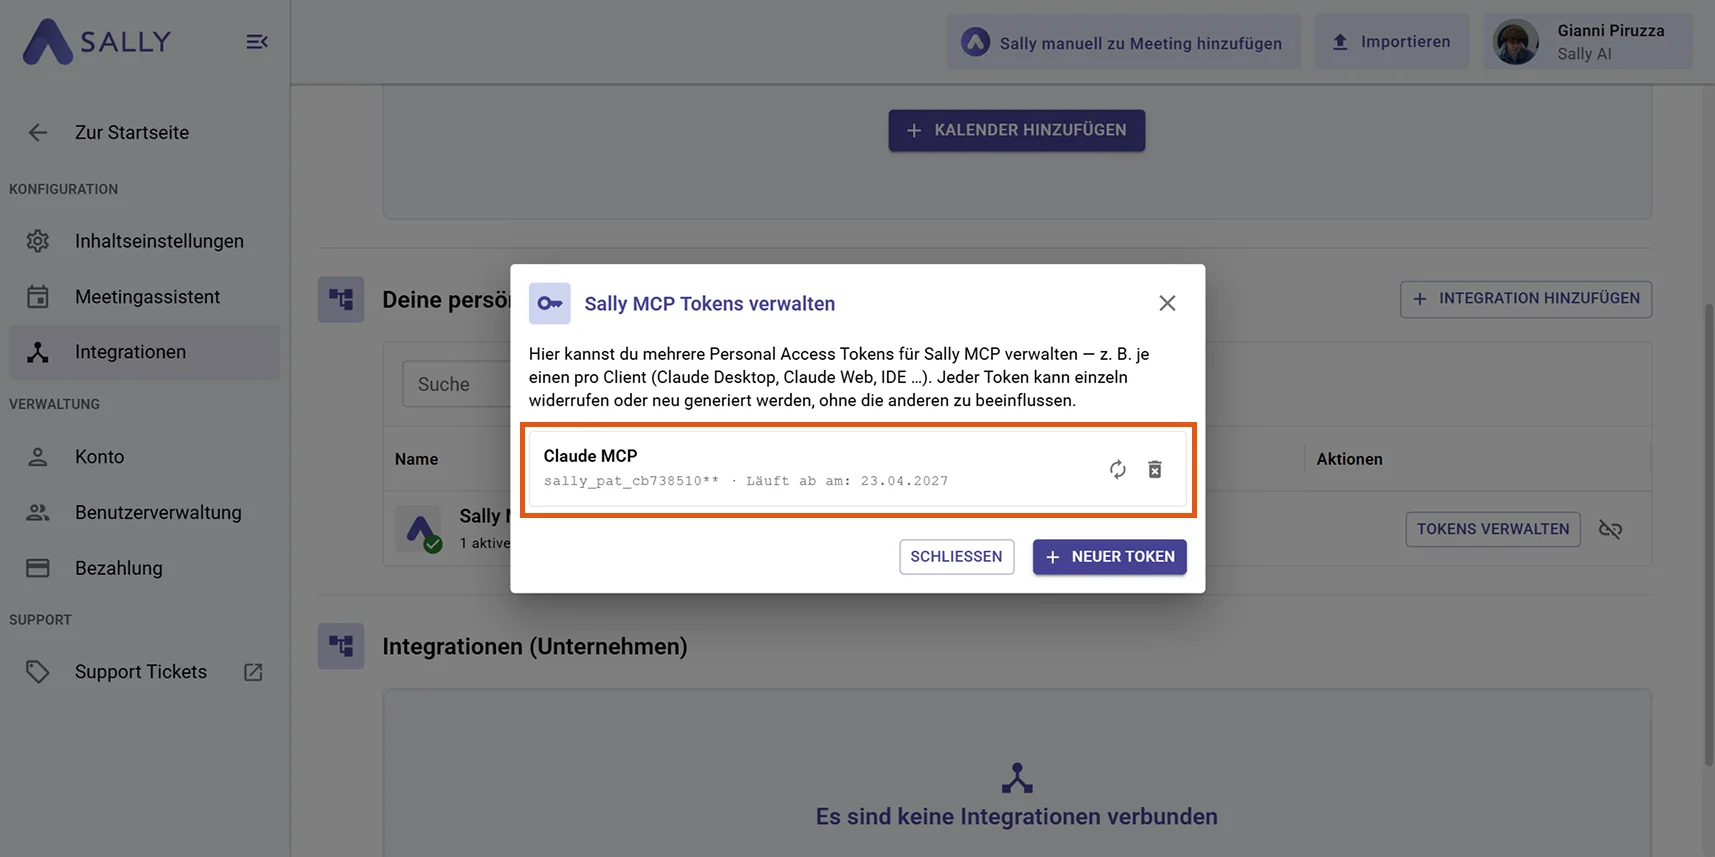
You can return to Settings → Integrations → Sally MCP → "Manage Tokens" at any time to regenerate, revoke, or create additional tokens. Regenerating invalidates the old token immediately, so update it in any client that still uses it.
2. Set Up the MCP Connection in Cursor
Option A: Via the Cursor settings UI
- Open Cursor.
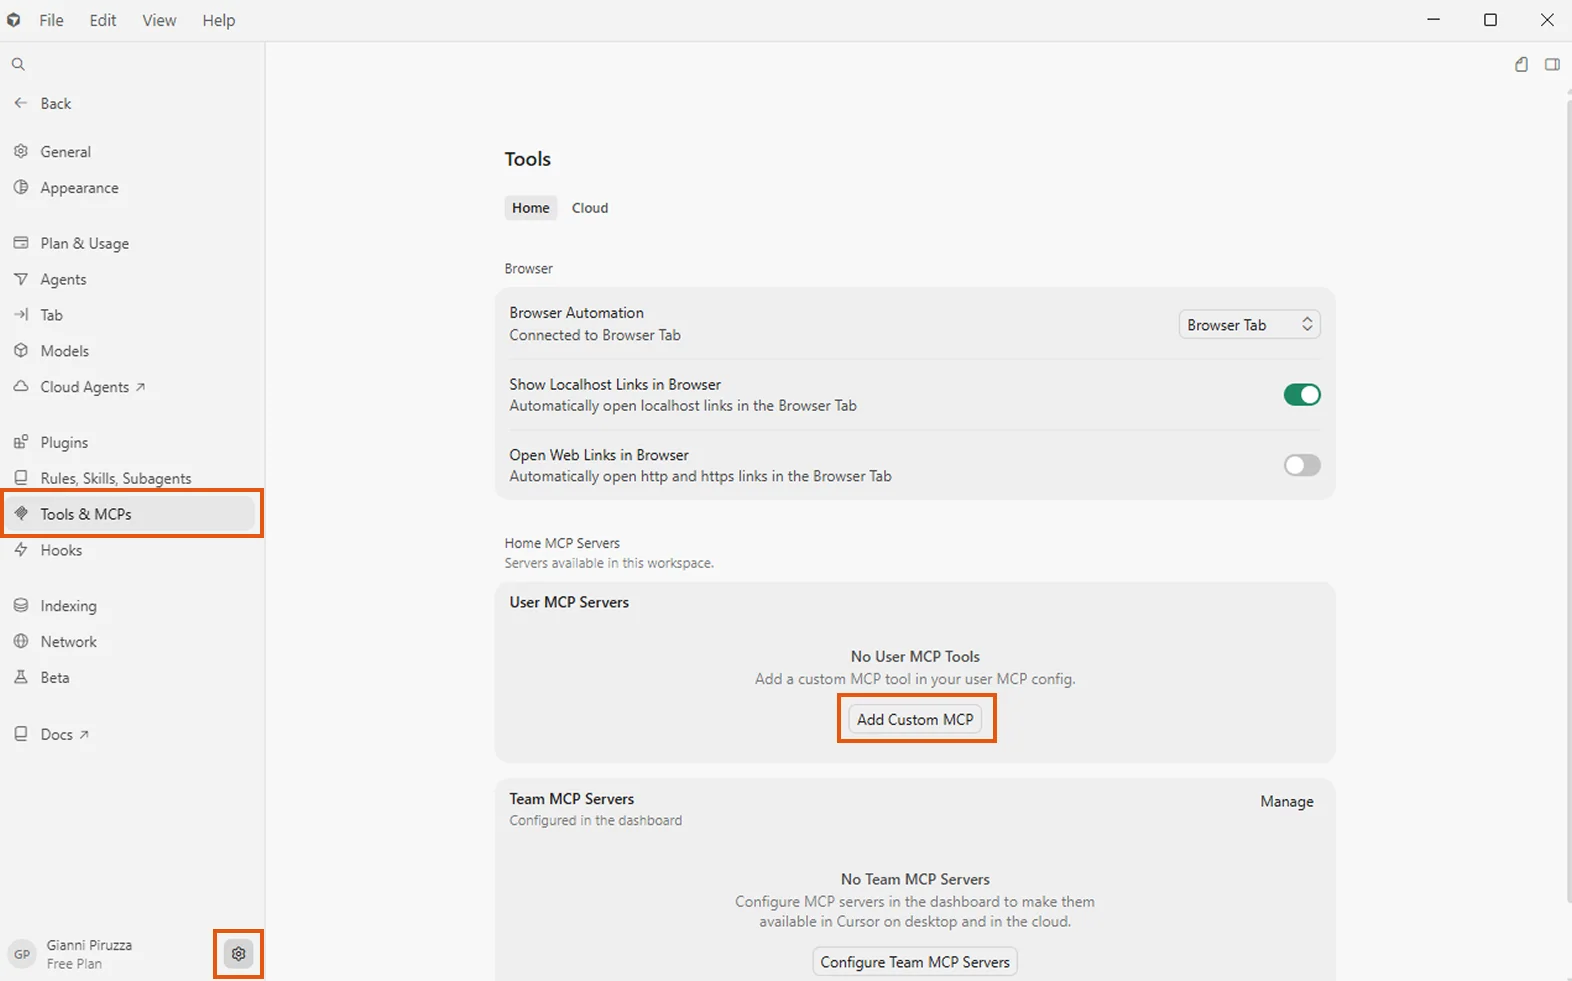
- Click the gear icon in the bottom-left corner to open Settings.
- Navigate to "Tools & MCPs" in the left sidebar.
- Under "User MCP Servers", click "Add Custom MCP".
-
Enter the following details:
- Name:
sally - Type:
http(or "Streamable HTTP" if listed) - URL:
https://app.sally.io/api/v1/McpExternal - Headers:
Authorization: Bearer sally_pat_PASTE_YOUR_TOKEN_HERE
- Name:
-
Save. The Sally MCP server now appears under "User MCP Servers" with its tools enabled.
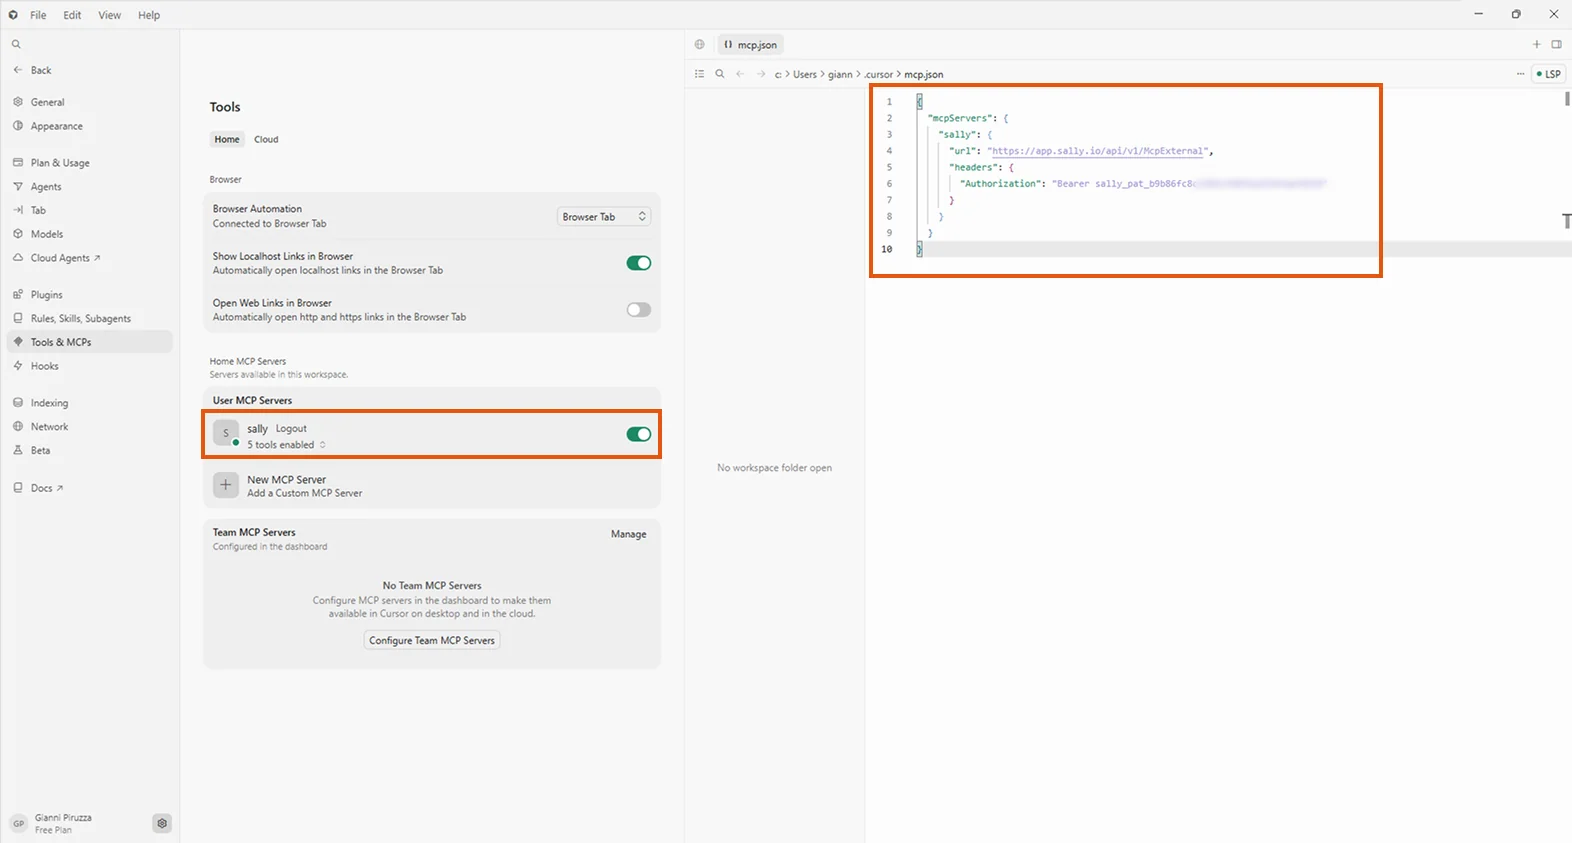
Option B: Via the project config file
Create or edit the file .cursor/mcp.json in your project root:
{
  "mcpServers": {
    "sally": {
      "type": "http",
      "url": "https://app.sally.io/api/v1/McpExternal",
      "headers": {
        "Authorization": "Bearer sally_pat_PASTE_YOUR_TOKEN_HERE"
      }
    }
  }
}
Replace PASTE_YOUR_TOKEN_HERE with the token from Step 1. Save the file.
The settings UI configures Sally globally (available in all projects). The .cursor/mcp.json file scopes the server to a single project. Choose whichever fits your workflow. If both are present, the project config takes precedence.
Once configured, verify the connection:
- Open a new agent panel in Cursor.
- Click the "+" button and open "MCP Servers". Verify that "sally" is listed and toggled on.
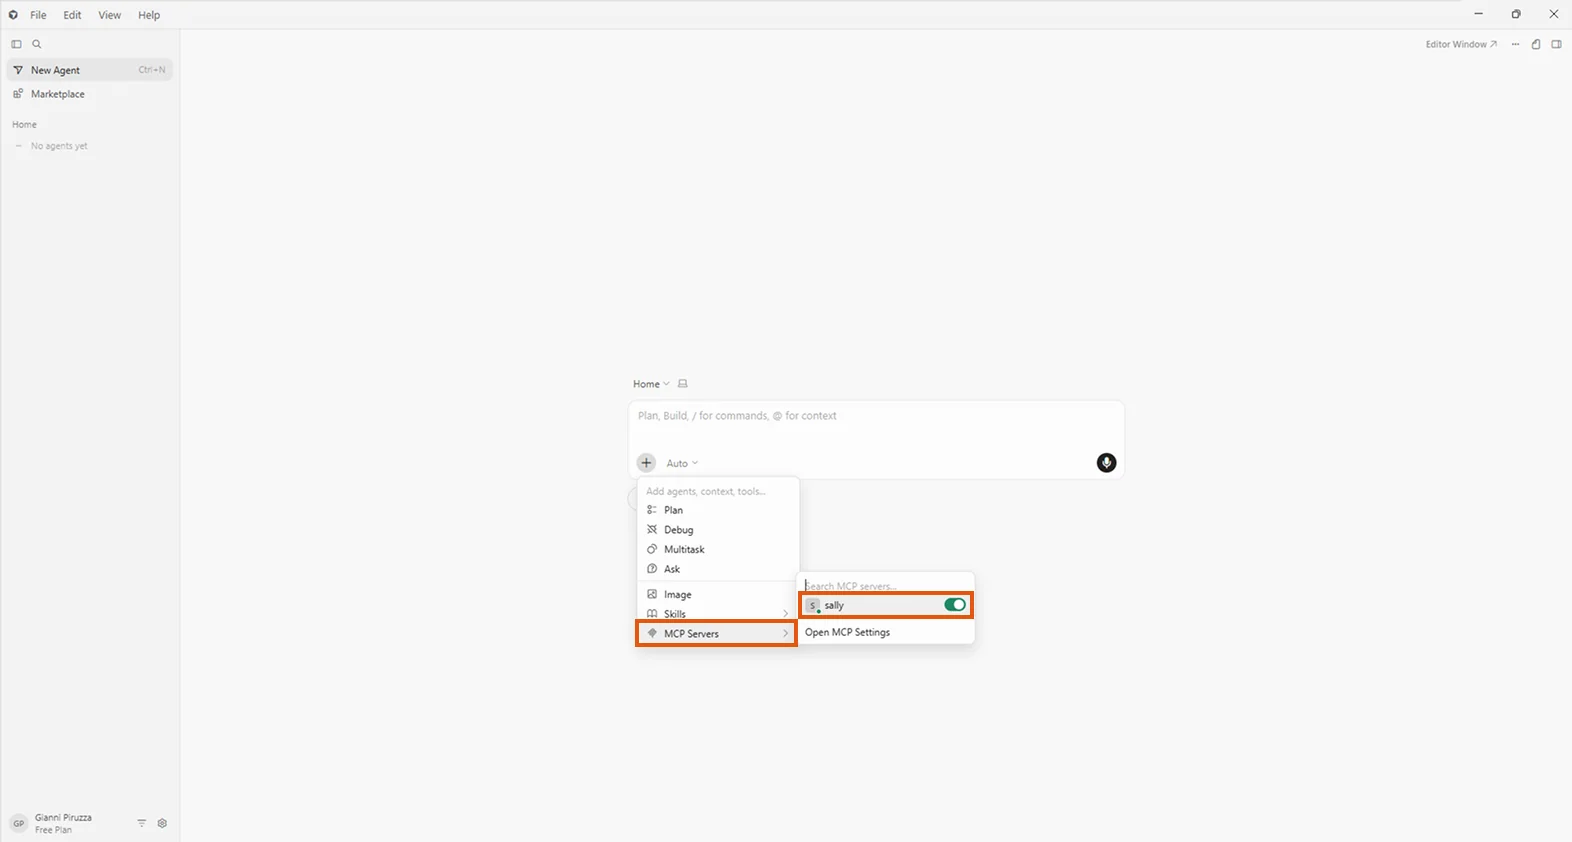
- Ask:
"Which Sally tools are available?"
Cursor should list the five Sally tools. Try a real query:
"Search my Sally meetings from the last 7 days that mention the Q3 planning."
3. Access Scope
The Sally MCP connector only returns meetings tied to your own Sally user or explicitly shared with you. The table below sums up what is and isn't reachable through your token:
| Source | Accessible via MCP? |
|---|---|
| Your own meetings (you are the owner / technical owner) | Yes |
| Meetings shared with you via a recording folder (directly or through one of your teams) | Yes |
| Meetings of users for whom you have been set as deputy ("Vertretung") | No |
Even if you have been granted deputy ("Vertretung") rights for another user inside Sally, those meetings are not exposed through MCP. The connector currently only surfaces your own recordings and recordings explicitly shared with you via folders. If you need a deputy's meetings in your AI tool, ask the owner to share them through a recording folder.
4. Troubleshooting
| Issue | Fix |
|---|---|
| Sally tools don't appear | Restart Cursor after adding the config. Check that .cursor/mcp.json is valid JSON. |
| "Unauthorized" or "Invalid token" | Verify the full token with the sally_pat_ prefix. Regenerate in Sally if needed. |
| MCP section not found in settings | Update Cursor to the latest version. MCP support was added in early 2025. |
| Results are empty | Make sure the Sally user behind the token has accessible meetings. Check access rules. |
For more troubleshooting tips, see the General Setup Guide → Troubleshooting.