How to integrate ClickUp with Sally AI
Connect Sally AI with ClickUp to turn what came out of a meeting into real work, right in the matching workspace, space and list. With the Sally ClickUp integration you send action items, decisions and follow-ups to ClickUp in one click, so nothing gets typed twice and your team's system of record stays current.
Quick navigation
1. How do I connect ClickUp with Sally AI?
Follow these steps to enable the Sally ClickUp integration.
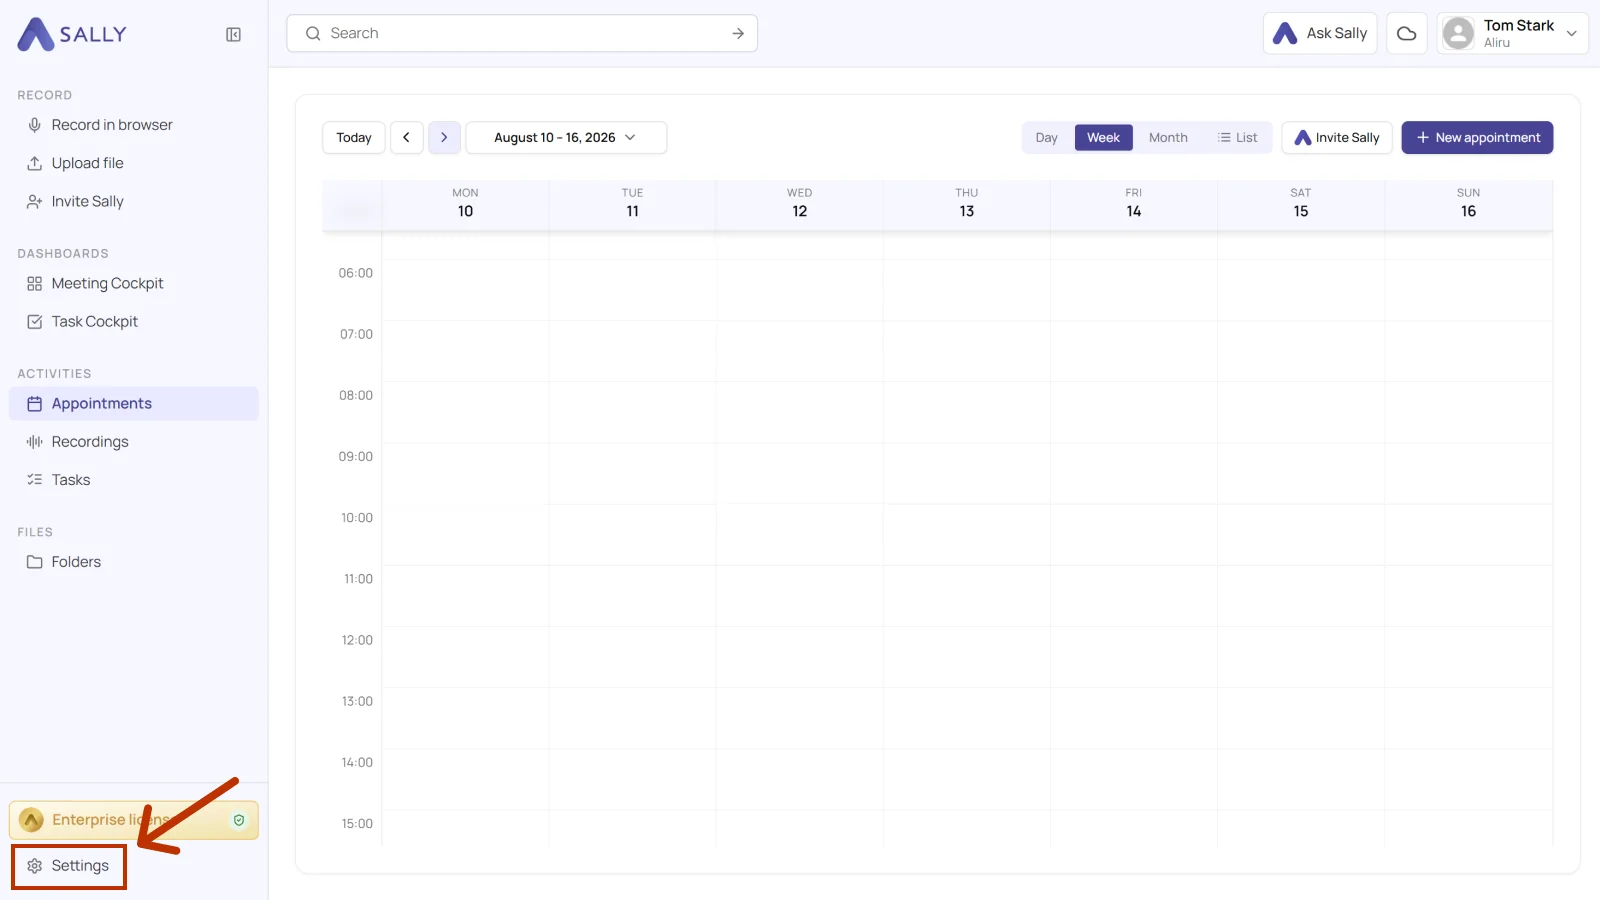
- Open Settings from the bottom-left corner of the sidebar.
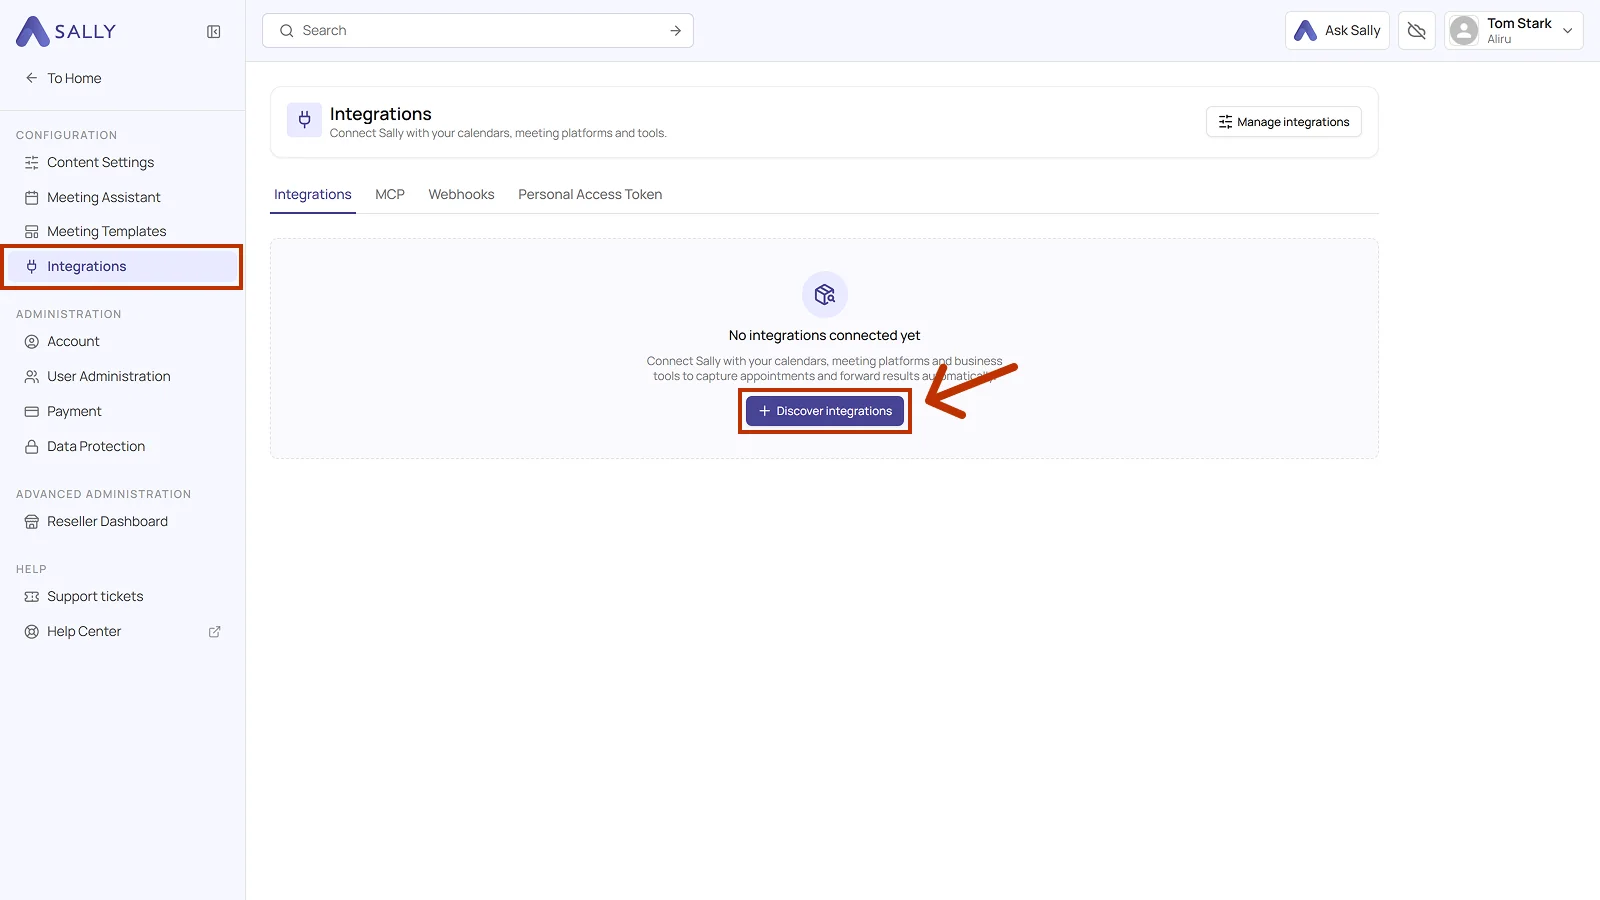
- Under Configuration, select Integrations. If no integration is connected yet, click Discover integrations, otherwise click Add integration in the top right corner.
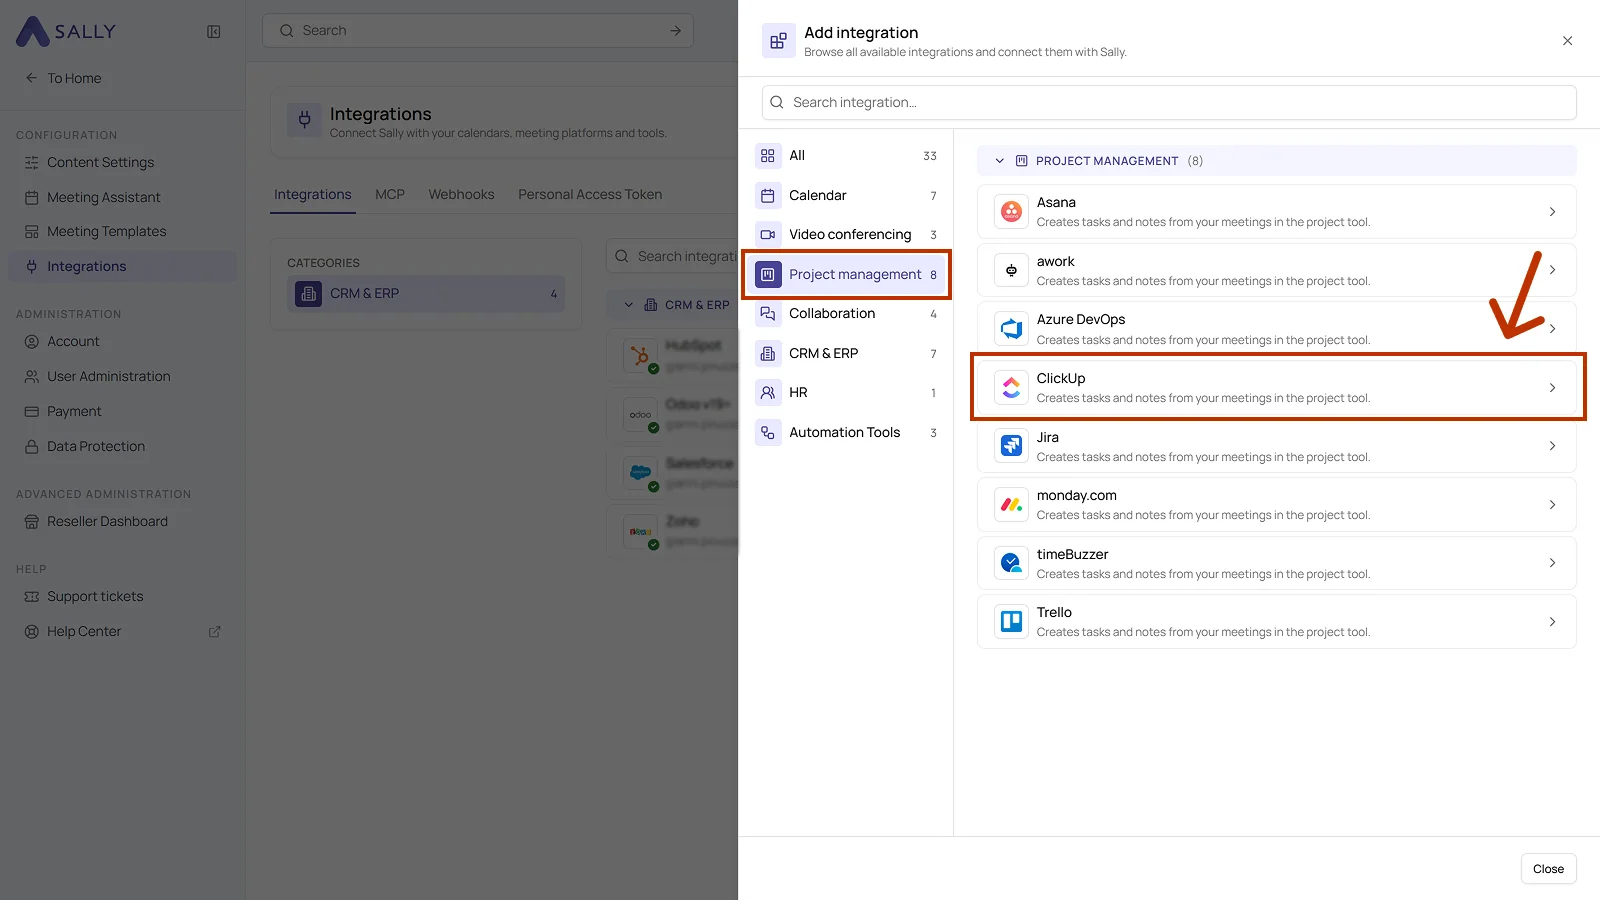
- In the Add integration panel, pick the Project management category on the left and then ClickUp. Complete the login on the ClickUp side.
- After the login, ClickUp appears in the list under the Project management category. Disconnect in the top right corner ends the connection whenever you need to.
1.1. Which actions may Sally use?
A connected integration has two tabs, Overview and Actions. The Actions tab defines what Sally offers through this integration, in the Sally chat and after the meeting.
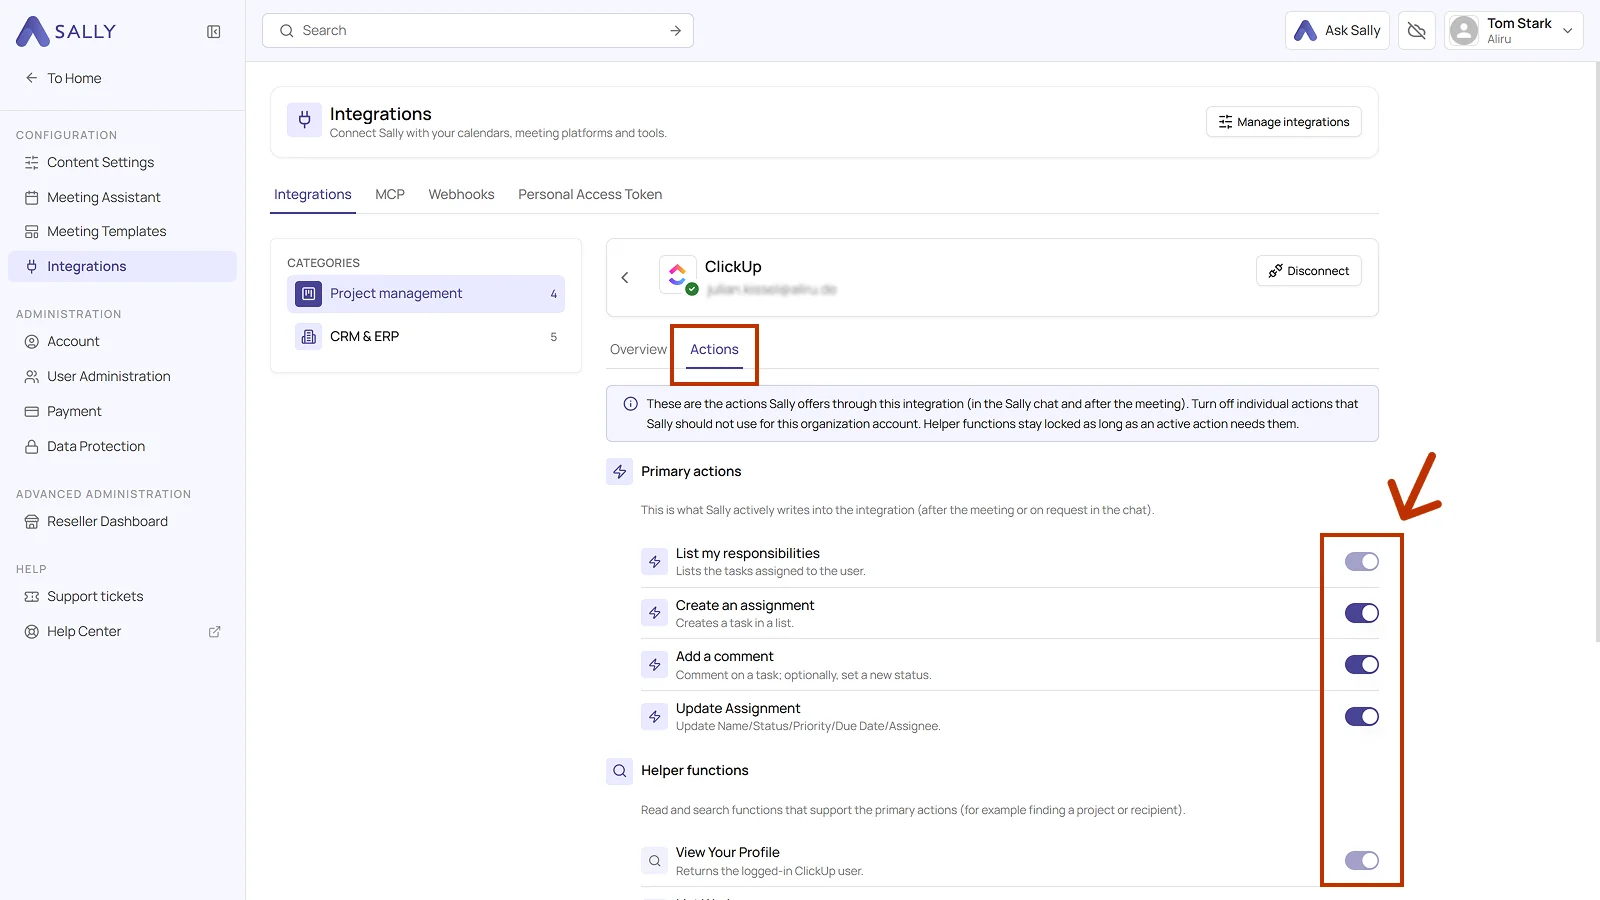
Primary actions are what Sally actively writes into ClickUp, meaning listing, creating, updating, and commenting on tasks. Each action explains what it does in the line below it.
Use the toggle on the right to take out a single action that Sally should not use for this organization account.
Not every action shows up in the selection at the meeting. Sally uses some of them itself, in the chat or as part of another action. Leave them switched on so the integration works in full, and switch off only what Sally really should not do in this organization account.
Below that sit the helper functions, the read and search functions that support the primary actions, for ClickUp that is View Your Profile. They stay locked as long as an active action needs them.
2. How do I send meeting insights to ClickUp?
Once ClickUp is connected, you can send meeting insights from Sally to ClickUp with a single click, into the right workspace, space, and list.
You can:
- Create task in ClickUp for a new task with a responsible person, status, and due date.
- Add comment to ClickUp task for extra context on an existing task, without changing owners or dates.
2.1. Create a task in ClickUp
Turn a Sally insight into a new task in ClickUp.
- Open the meeting in Sally.
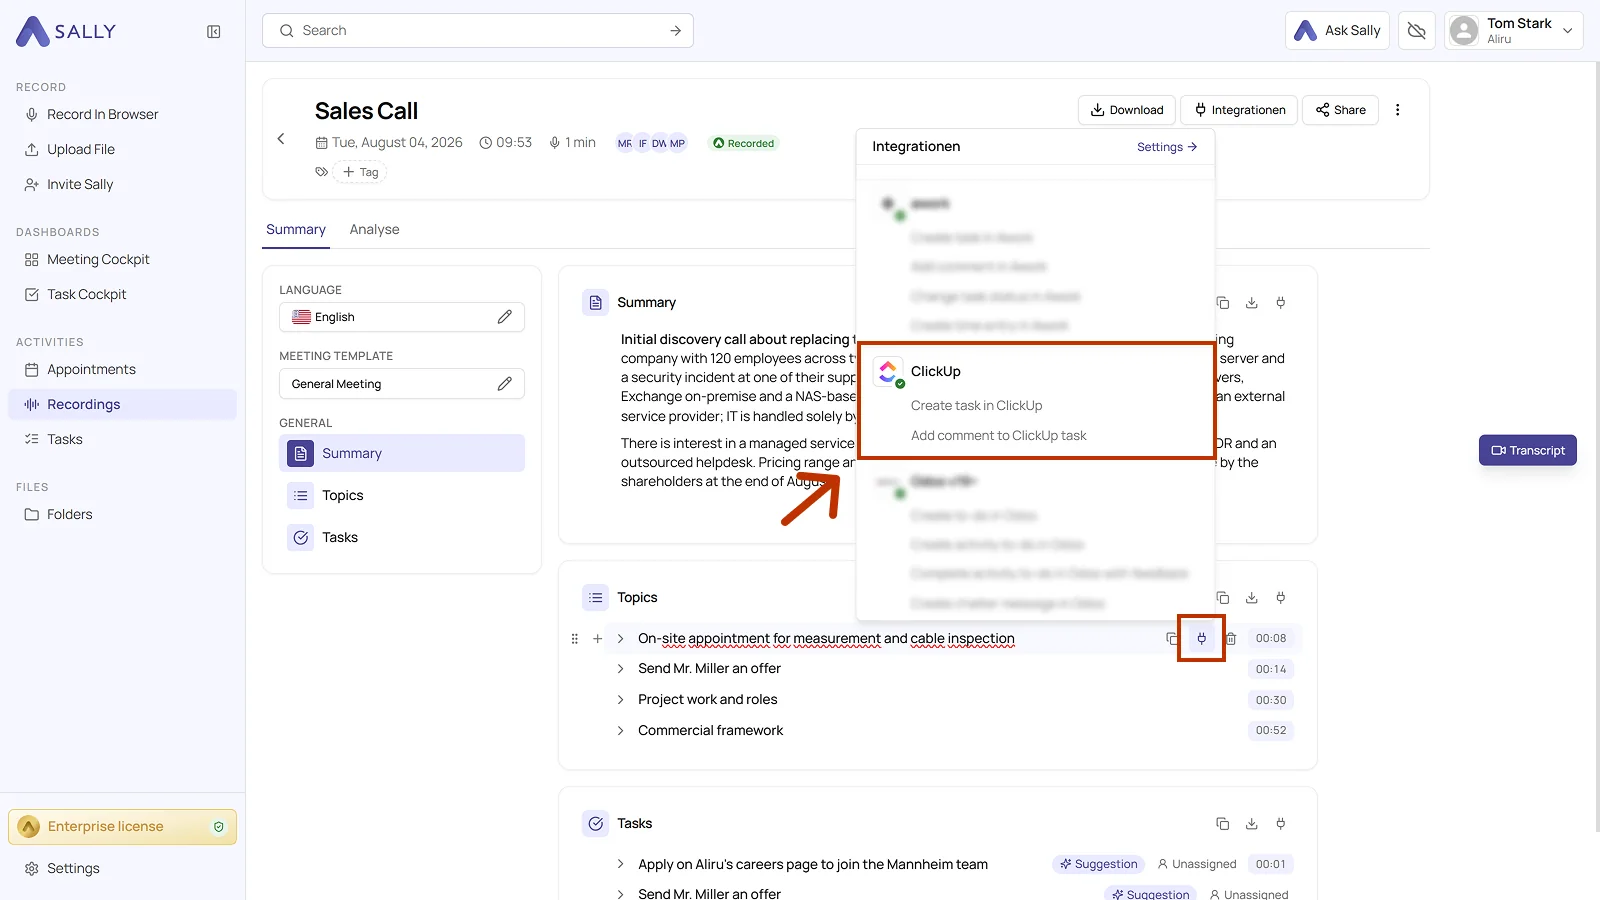
- In the summary, hover over a block or over a single entry and click the plug icon. In the list, choose Create task in ClickUp under ClickUp.
- Fill in the dialog. Workspace, Space, List, and Name are required, and the name already comes prefilled from Sally. Responsible, Status, Priority, and Due date are optional. Use the description field to add further details.
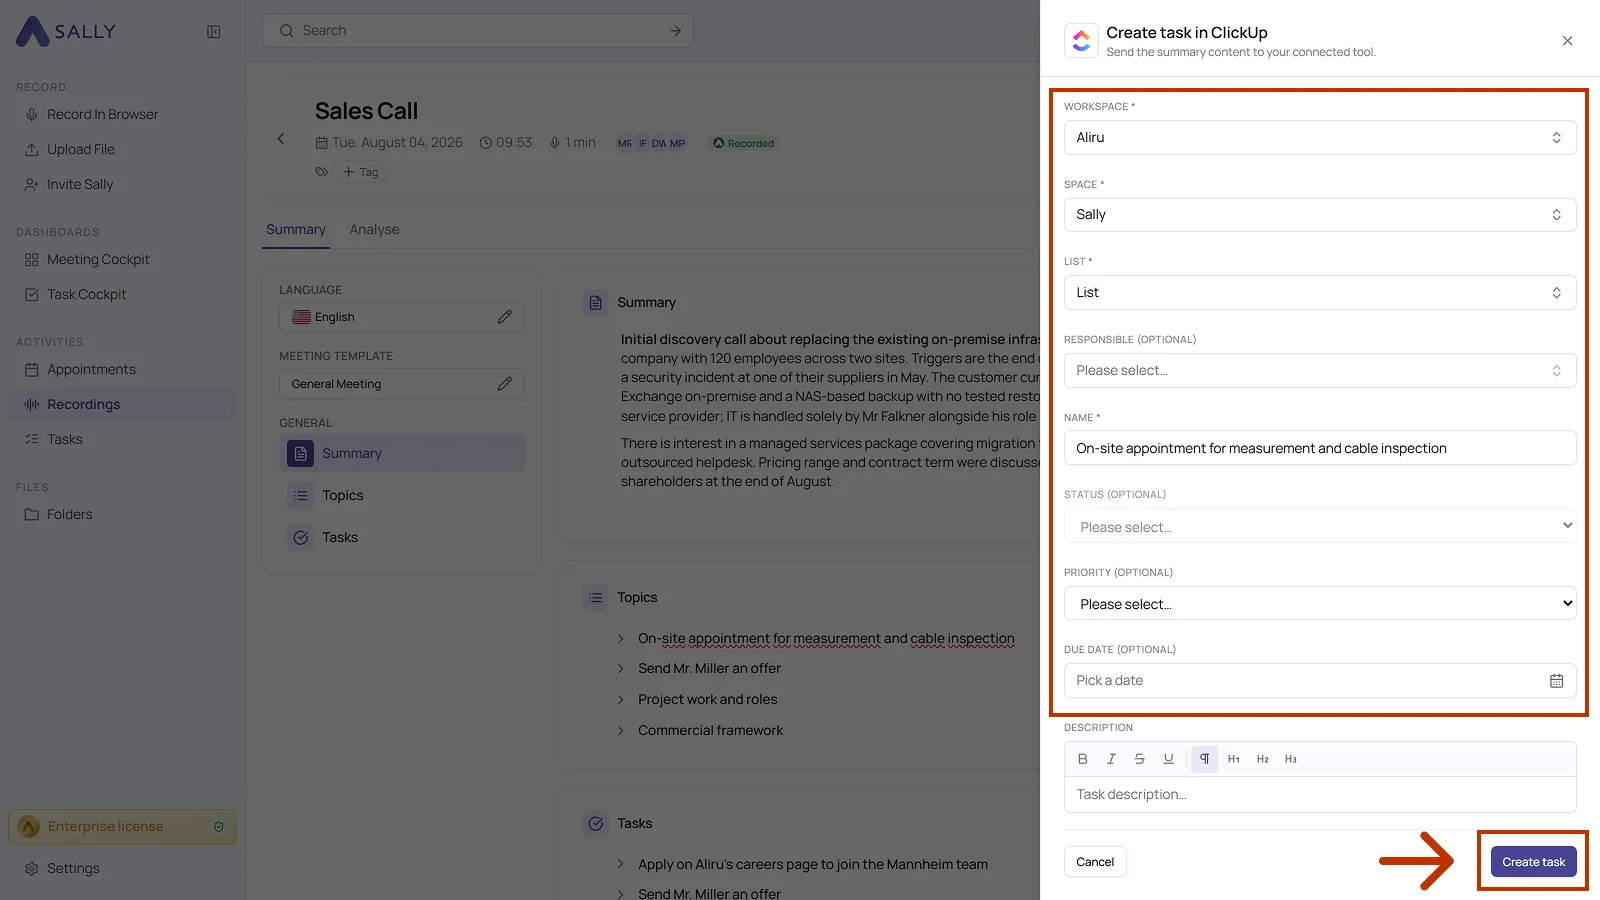
- Click Create task to send it to ClickUp.
Add as much detail as you can: list, responsible person, status, due date, and priority. The more complete the task, the fewer follow-up questions come back and the better it can be tracked in ClickUp.
2.2. Add a comment to a ClickUp task
Add meeting context to an existing task, which is ideal for updates, decisions, or extra notes.
- Open the meeting in Sally.
- Click the plug icon on the block or on the entry and choose Add comment to ClickUp task under ClickUp.
- In the dialog, pick the workspace, space, list, and the task the comment belongs to. All four fields are required.
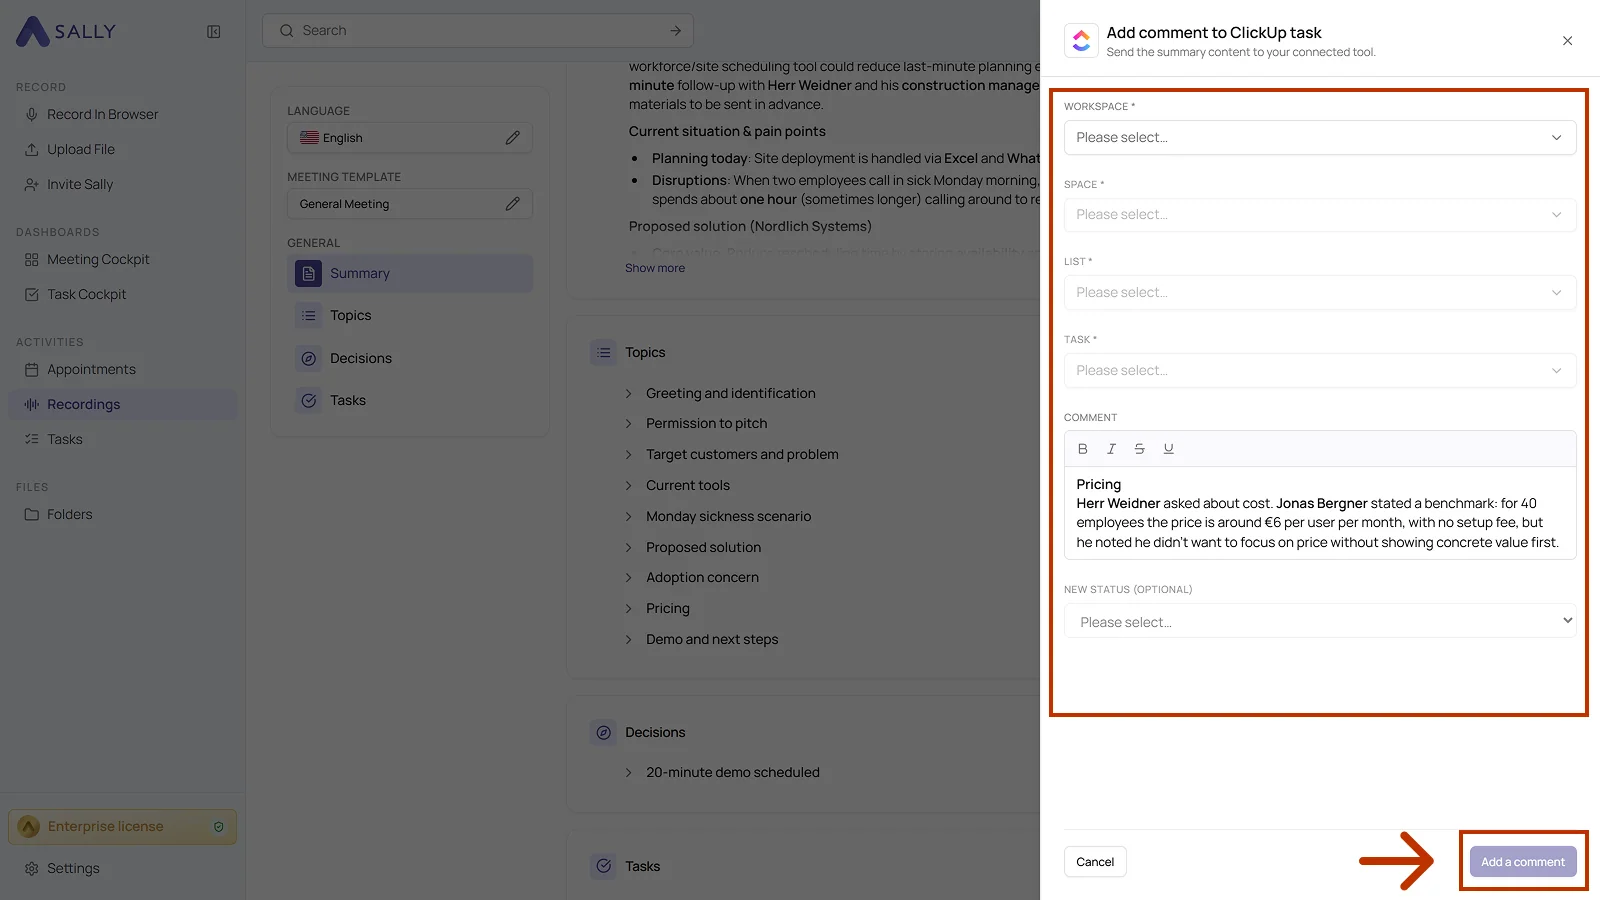
- The comment field holds the text from the summary, which you can edit in the editor. New status additionally moves the task to another status, which is optional.
- Click Add a comment to send the comment to ClickUp.