How to Verify Your Domain for Auto-Join in Sally AI
Verifying your company domain in Sally lets you control which accounts belong to your organization. Once a domain is verified, you can enable Auto-Join so that anyone who creates a Sally account with an email address on that domain (for example jane.doe@yourcompany.com) is automatically added to your existing organization account, instead of creating a separate one.
This avoids fragmented organizations, makes onboarding effortless, and keeps all team members on the same plan, settings, and license pool from day one.
Quick Navigation
- What is domain validation and why use it?
- How do I add and verify a domain?
- How do I enable Auto-Join for new users?
1. What is domain validation and why use it?
Domain validation proves that your organization actually owns a given email domain (e.g. yourcompany.com). You confirm ownership by adding a single TXT record to your DNS provider that Sally generates for you.
Once a domain is verified, you unlock Auto-Join:
- Any new account created with an email on that domain is automatically routed into your existing organization.
- No separate organization is created, no manual invitation needed.
- Your team members get the correct workspace immediately.
This is especially useful for larger teams where employees might sign up on their own and would otherwise end up in isolated mini-organizations.
2. How do I add and verify a domain?
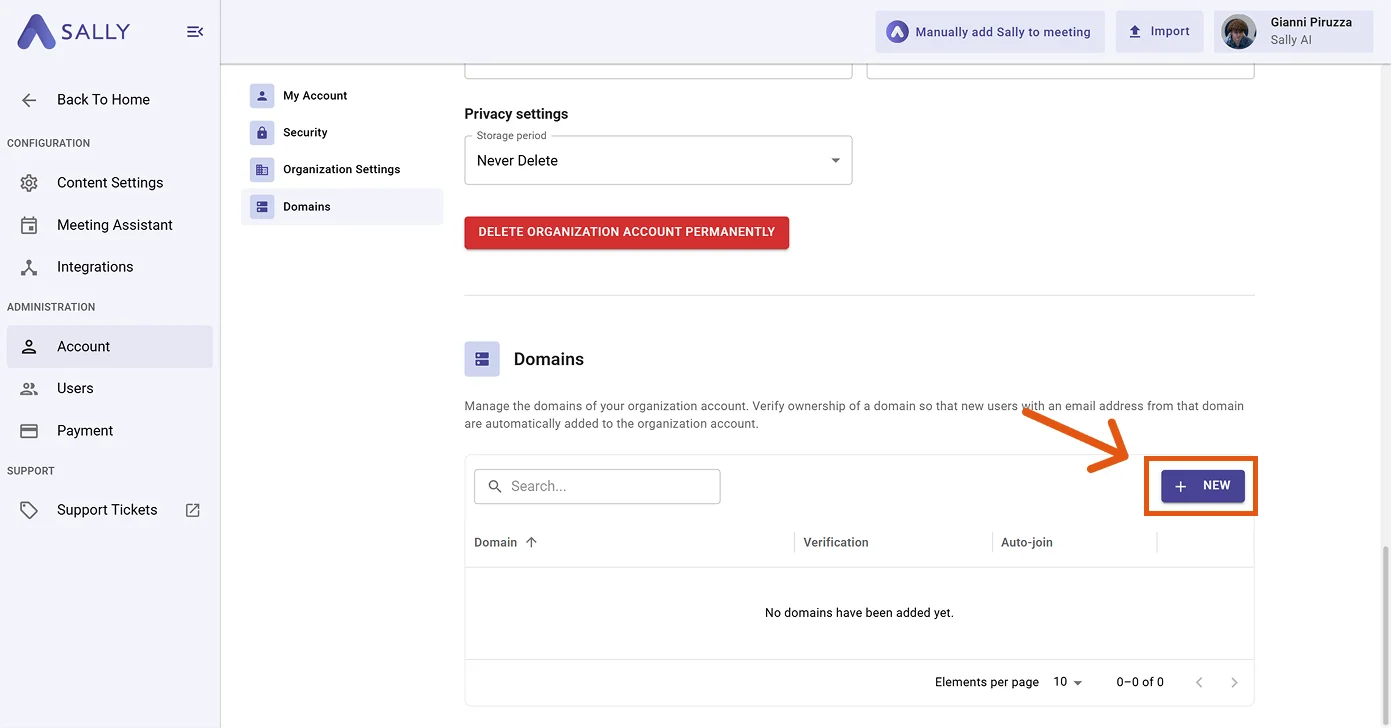
- Open Settings in the left sidebar.
- Go to Account and select the Domains tab. Click + New to add a new domain.
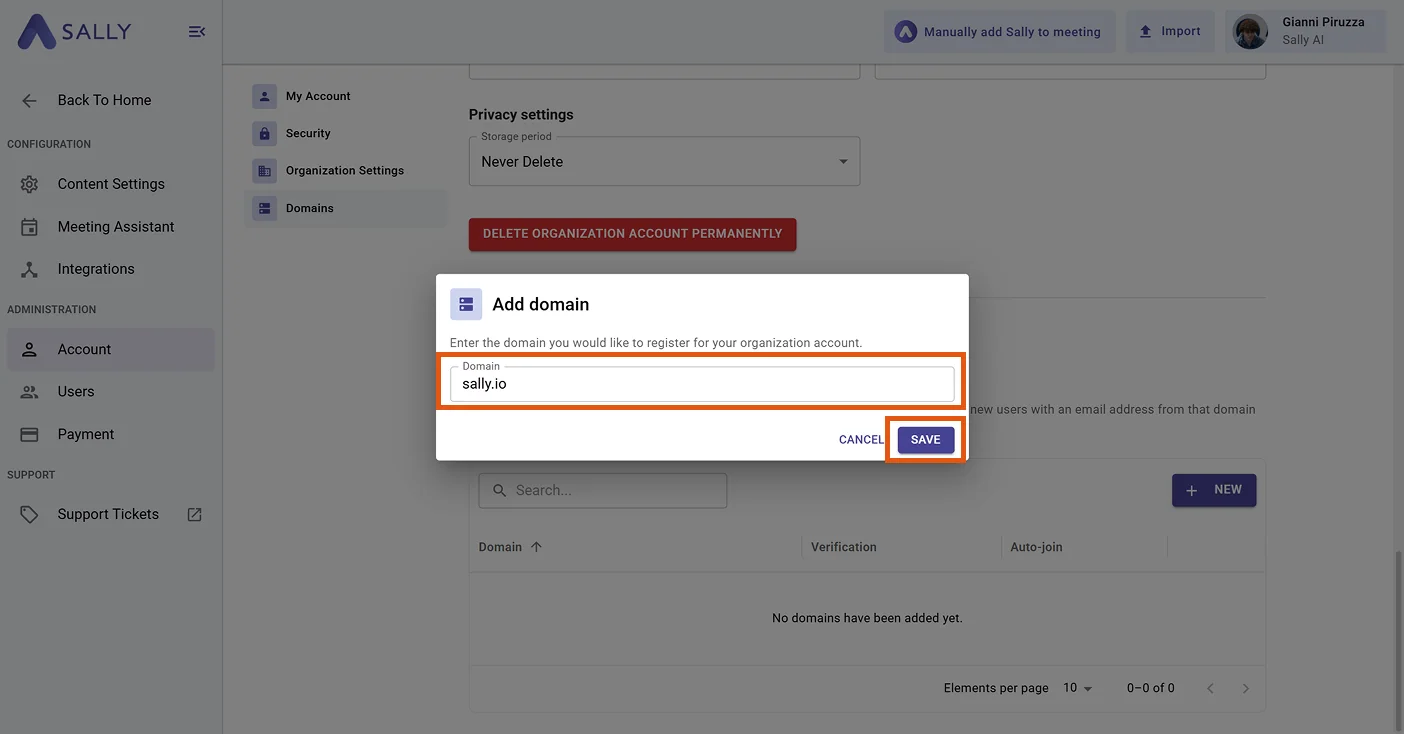
- Enter the domain you want to register (for example yourcompany.com) and click Save.
- Sally now displays a TXT DNS record that you have to add at your DNS provider. The dialog shows you the Type, the Host / Name (your domain) and the Value (a unique verification token).
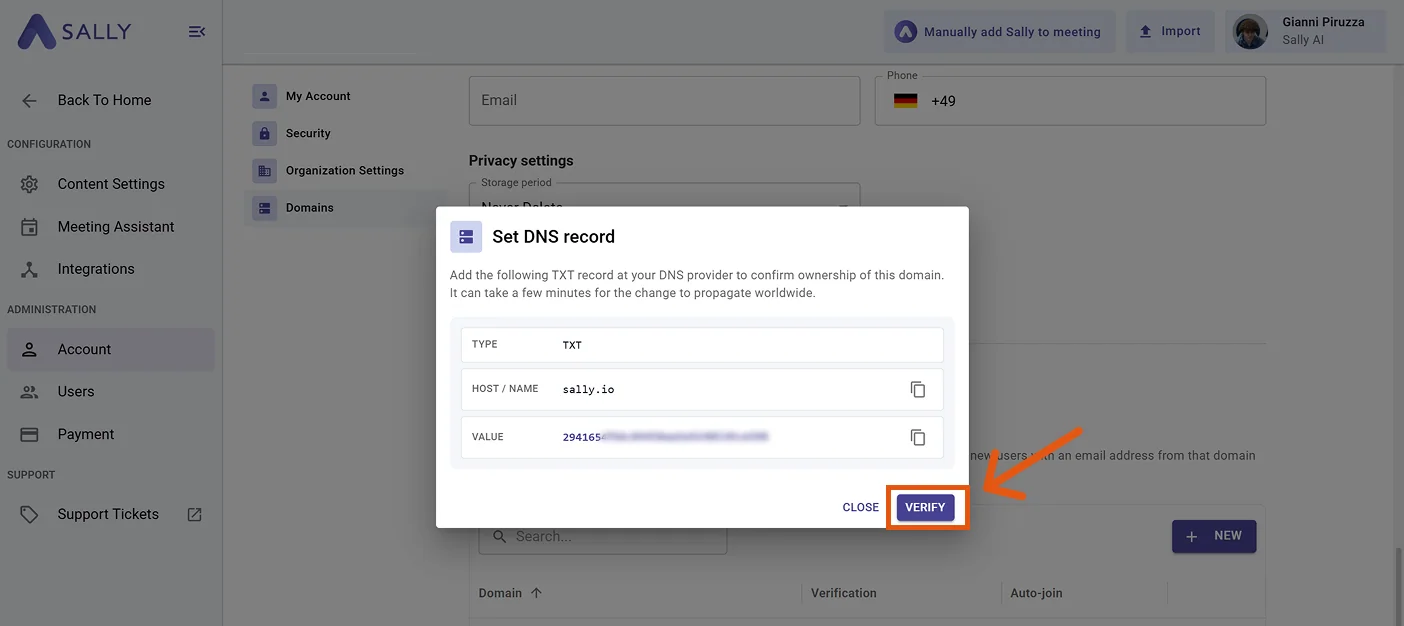
Log in to your DNS provider (e.g. Strato, IONOS, GoDaddy, Cloudflare, Route 53) and create a new TXT record for the domain shown. Copy the Value from Sally exactly as displayed. The empty prefix means the record applies to the root domain.
- Now enter the data at your domain provider (Strato in our example, but it works the same way with any other provider).

- After you have created the TXT record at your DNS provider, return to Sally and click Verify in the dialog.
DNS changes can take a few minutes to propagate worldwide. If verification does not succeed immediately, wait a moment and try again.
- As soon as Sally finds the TXT record, the domain status switches to Verified.
3. How do I enable Auto-Join for new users?
Once a domain is verified, you can decide whether new accounts on that domain should be added to your organization automatically.
- In the Domains list, locate the verified domain.
- Activate the Auto-Join toggle in the corresponding row.
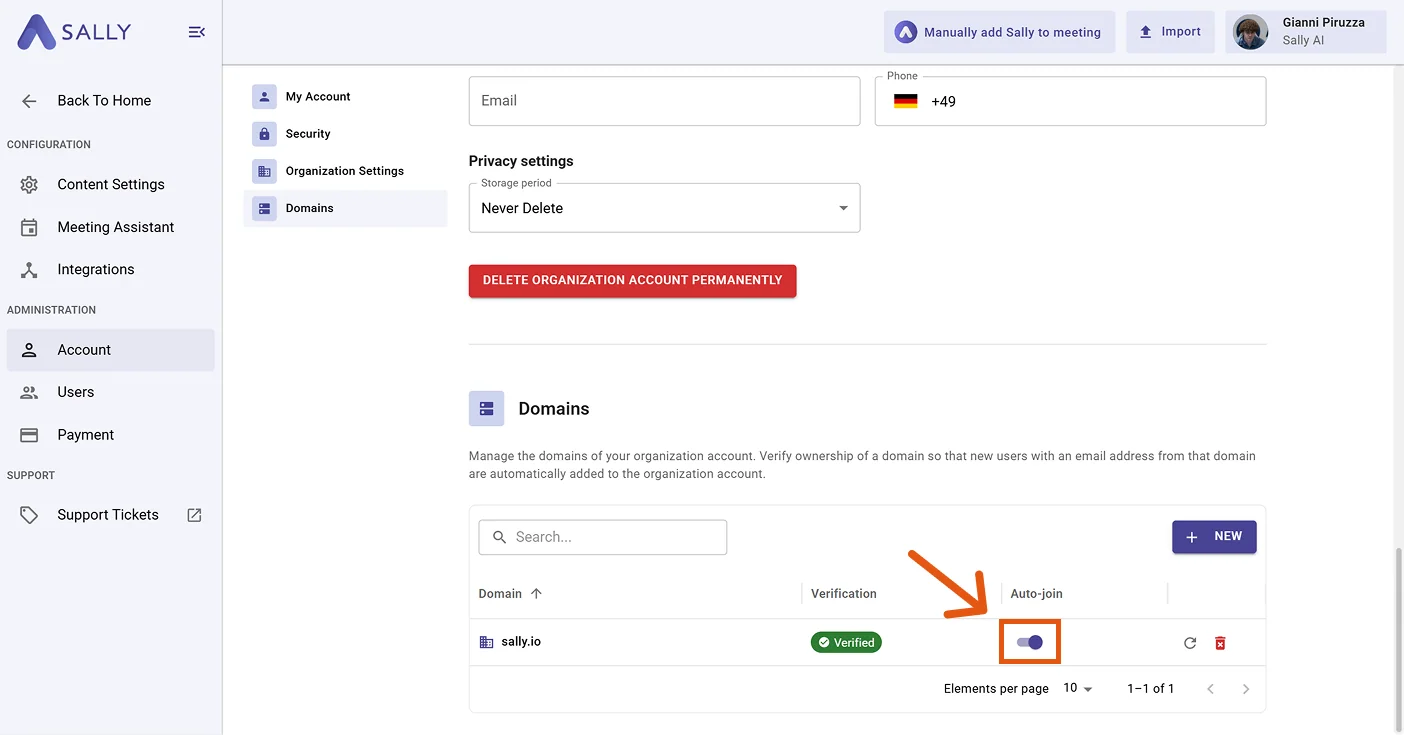
From this point on, every new Sally account created with an email on that domain is automatically added to your organization account, instead of starting a new, separate organization.
Existing accounts that were created before Auto-Join was enabled are not affected. Auto-Join only applies to new sign-ups.