How to customize document settings in Sally AI
Before you download a transcript or summary as a document, you can adjust the document settings to control its design and layout.
These settings let you define how your meeting reports look, from colors and logos to footers and download restrictions, so your exported files always match your company's style.
Quick navigation
- What does a Sally AI document look like?
- How do I access document settings?
- What document settings can I configure?
1. What does a Sally AI document look like?
A document is how you store, share or send a meeting summary or transcript, in a clean, professional layout.
They include key meeting information such as the title, date, attendees, location, and summary.
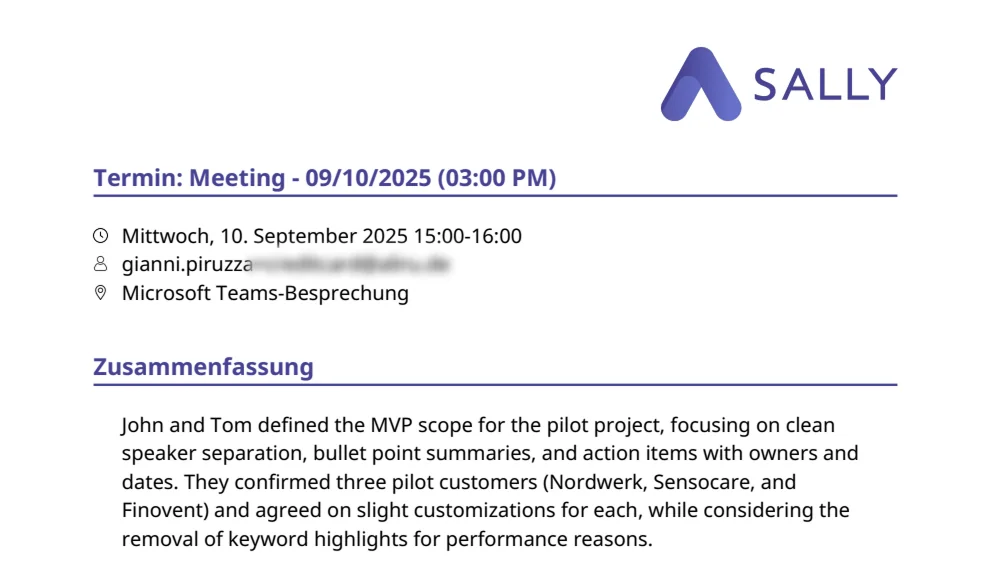
By adjusting your document settings, you can:
- Add your company logo for consistent branding
- Use your own colors for headings and body text
- Include a footer with company details or disclaimers
- Restrict certain downloads to maintain privacy and compliance
Together they make every report look tidy and consistent with your company's style.
2. How do I access document settings?
To open the document settings:
- Open Settings from the bottom-left corner of the sidebar.
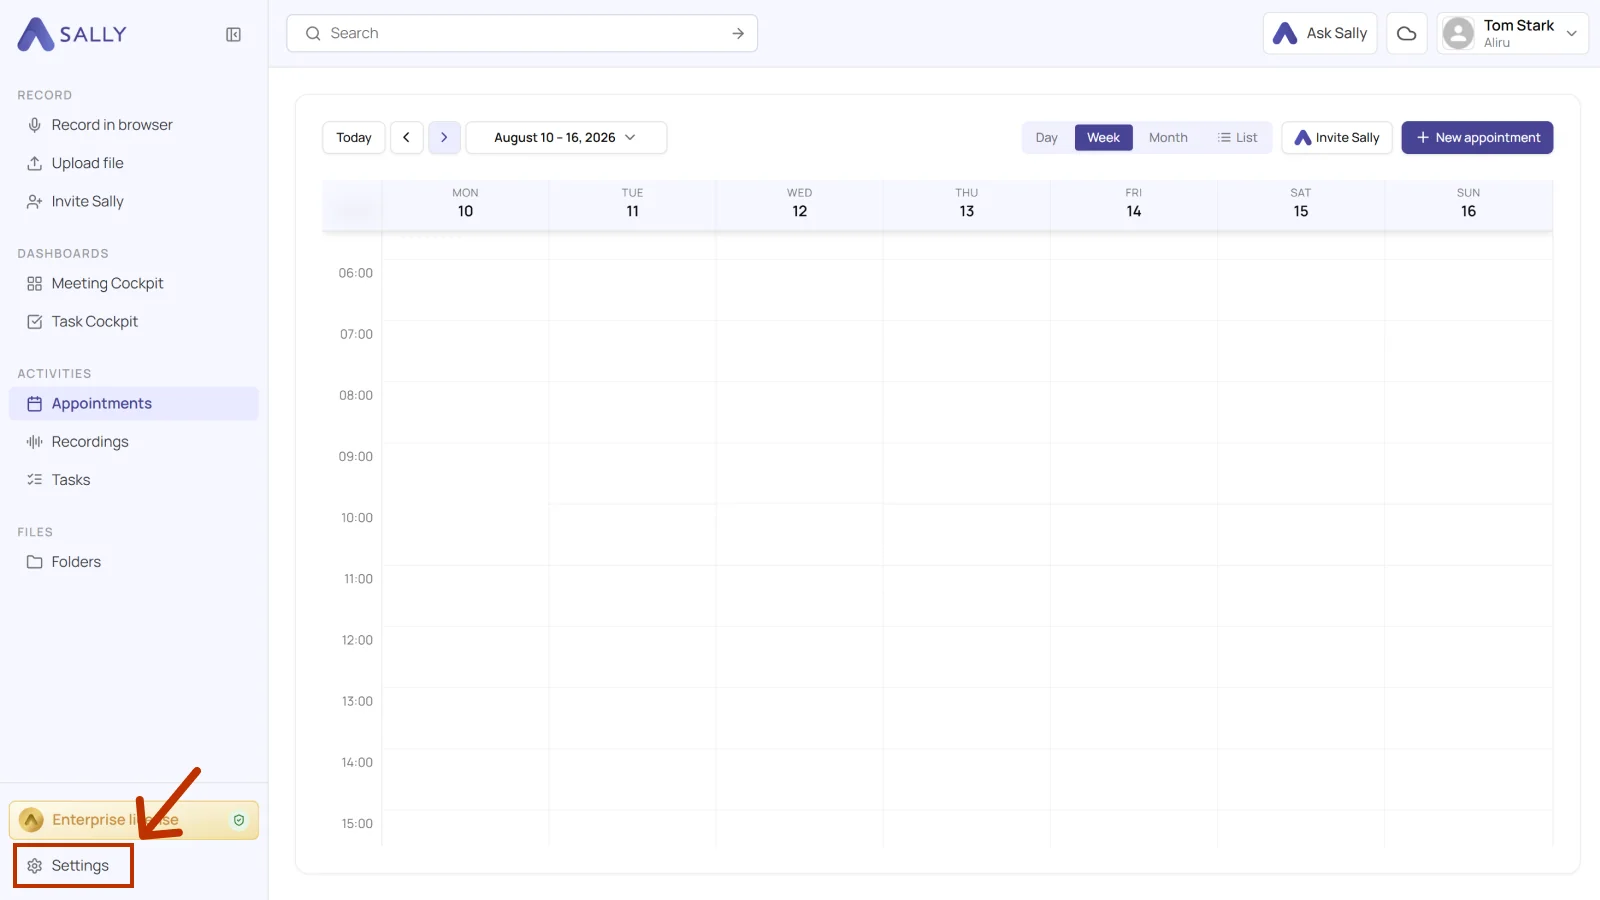
- Under Configuration, select Meeting Assistant and then the Documents tab.
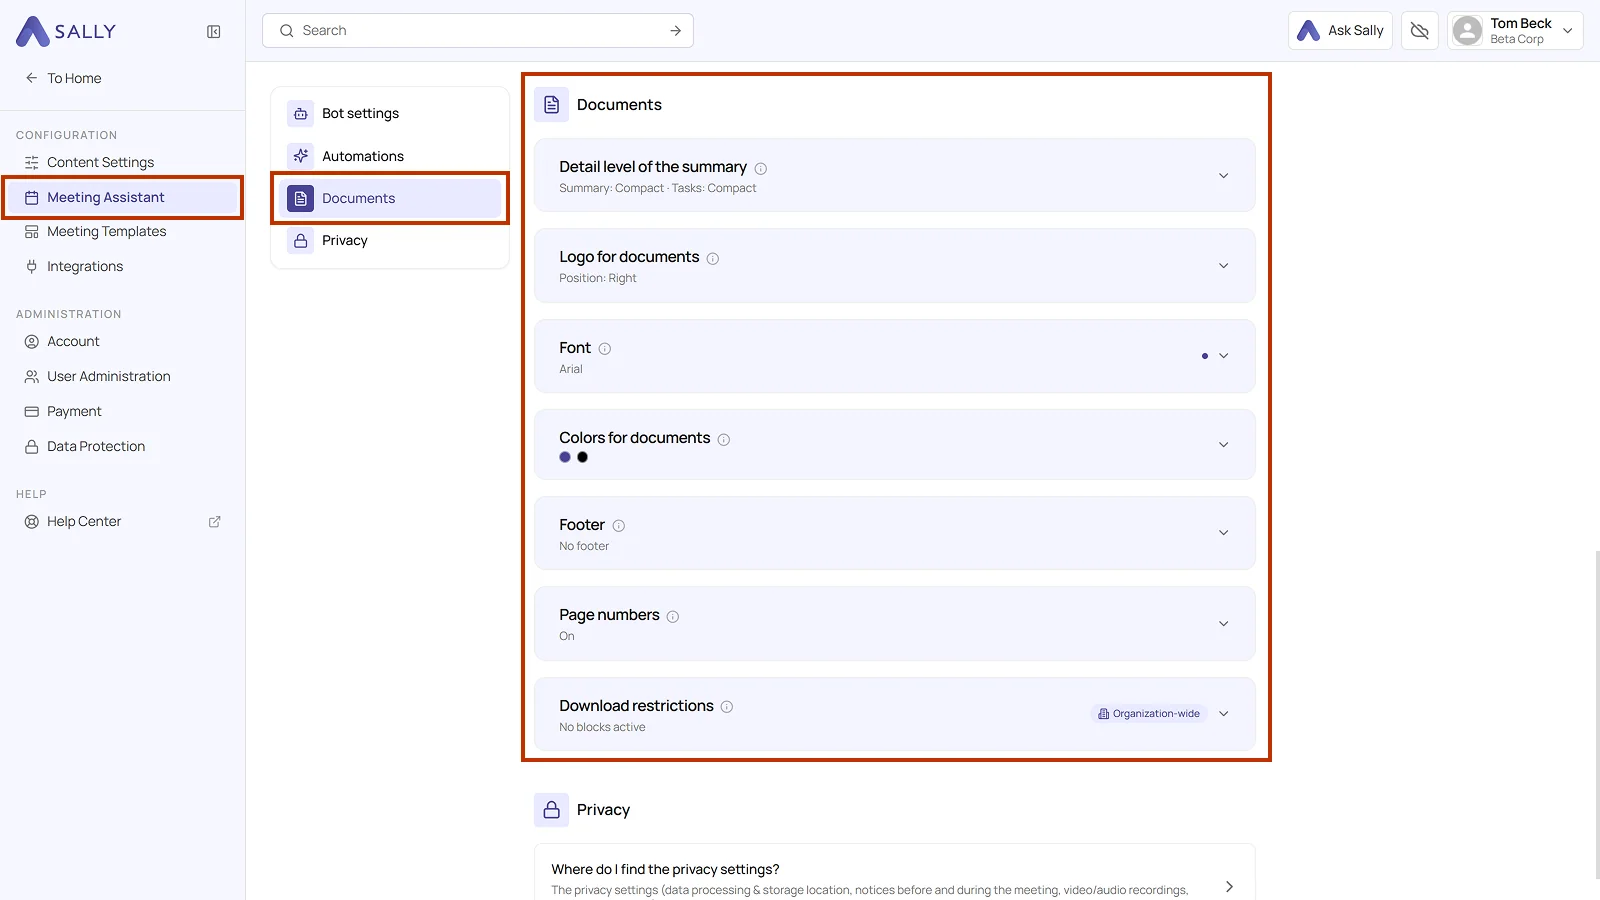
The section lists the seven settings one below the other. Under each title you see the current state: the font you picked, the position of the logo, or the number of footer sections. To change a setting, expand the corresponding row.
Every setting has its own Save button. As long as you have changed something without saving it, Unsaved changes appears next to that button.
With the Defined organization-wide toggle, a setting applies to the entire organization. Only those two roles have that toggle, members do not. The row then carries the Organization-wide label in the top right corner, and every user receives their documents by the same rule.
The sections below go through every document setting, so you can decide what makes sense for your team.
3. What document settings can I configure?
3.1. Level of detail in the summary
Sally allows you to determine the level of detail in your downloaded summaries.
This setting decides how much detail topics and tasks carry in an exported report. The line under the title shows which level of detail currently applies to the summary and to the tasks.
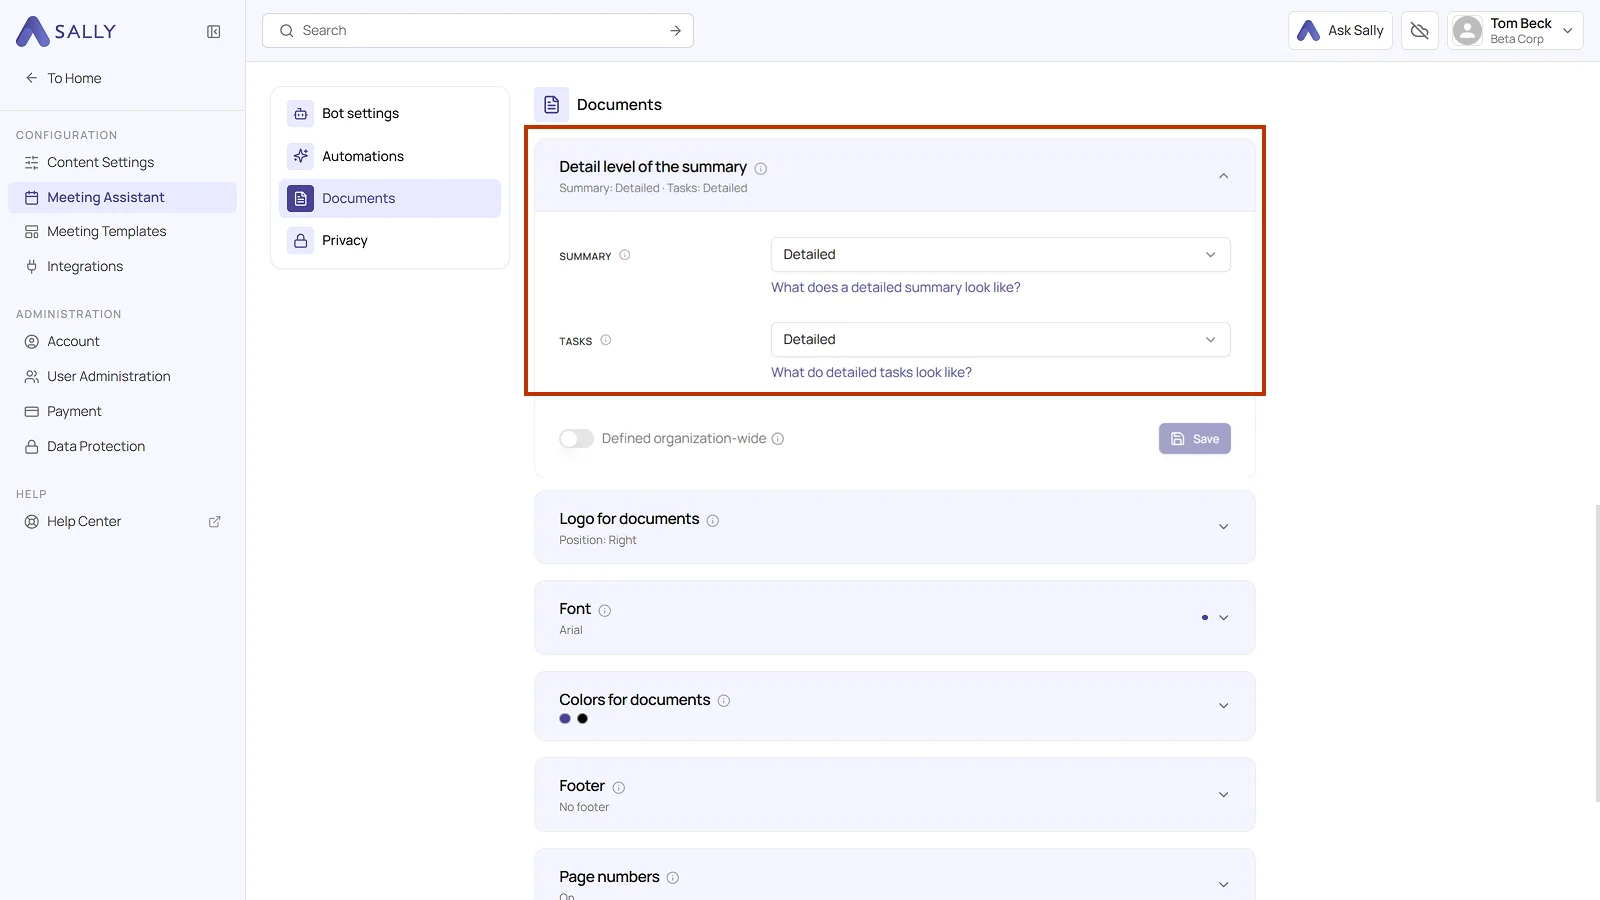
You set both individually, through two dropdowns with the levels Compact and Detailed. Below each dropdown, a link opens an example of the level you currently have selected.
Summary
The Summary dropdown decides whether topics and sections of the summary include additional descriptions.
-
Compact: without subpoints Sally only displays the main sections of your summary, clear, short, and easy to scan.
-
Detailed: with subpoints Each section of the summary is expanded with short descriptions. This is ideal if you want more context without reading the full transcript.
Tasks
The Tasks dropdown defines how detailed tasks appear in exported reports.
-
Compact: without assignee and due date Tasks are displayed only as a short list.
-
Detailed: with assignee and due date Tasks additionally include information about the responsible person and the due date.
This format is especially useful for structured meeting notes or project discussions, where tasks should be clearly assigned.
3.2. Logo for documents
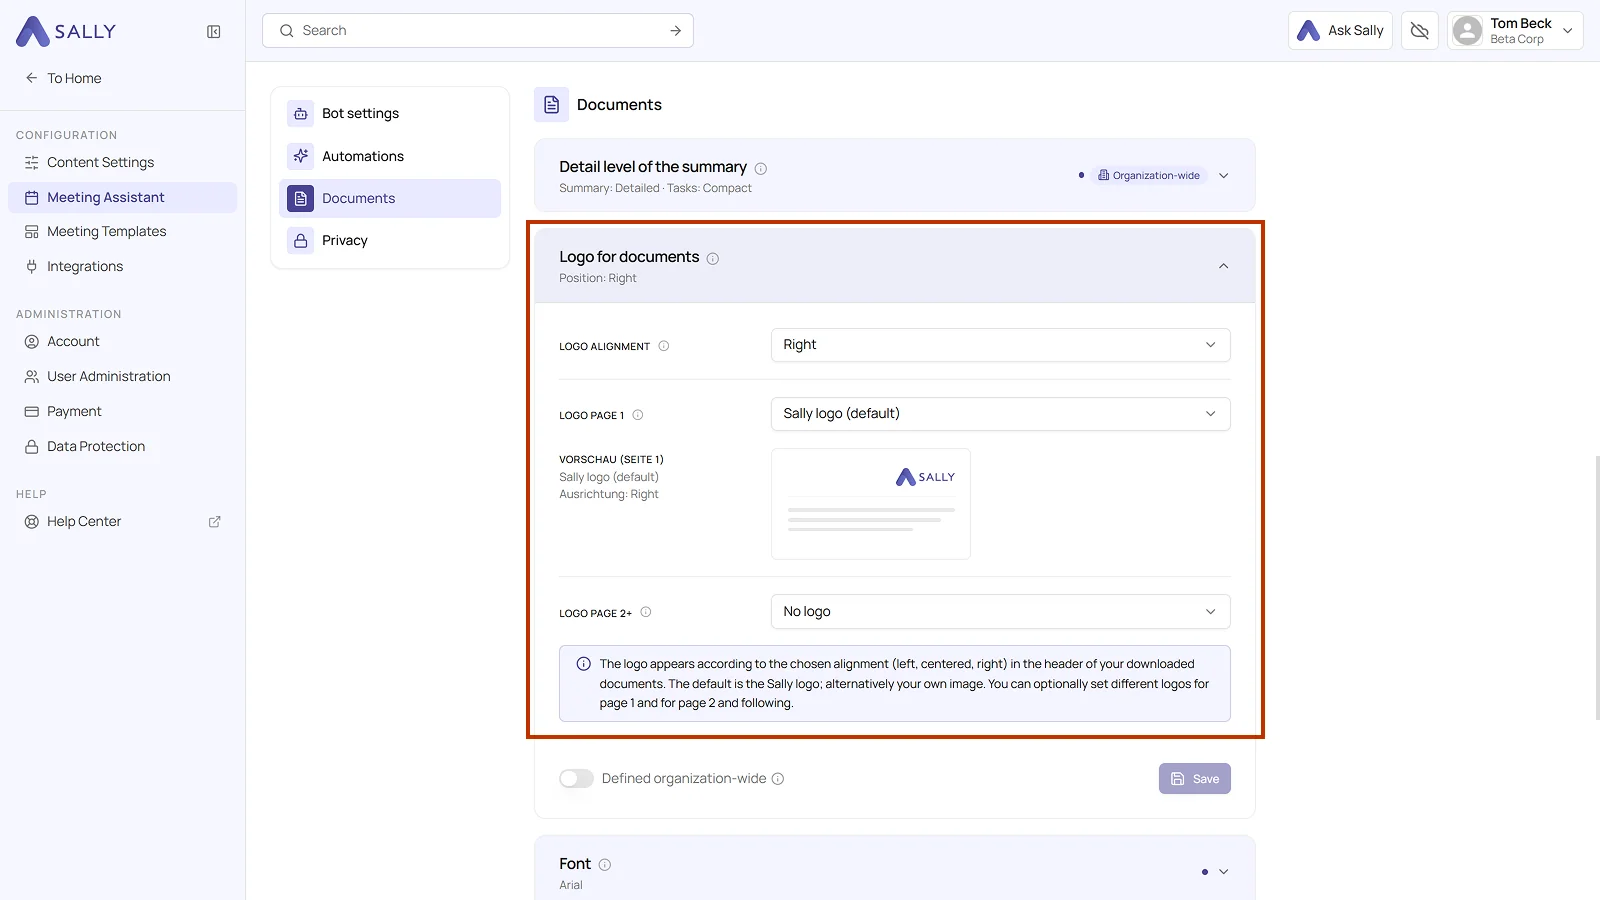
You can choose which logo is displayed in your exported reports and where it sits.
Logo alignment
The logo appears in the header of your downloaded documents, either left, centered, or right.
Logo page 1
- Sally logo (default): the standard Sally logo on the first page.
- No logo: the document shows no logo on the first page.
- Alternatively, upload your own image, for example your organization's logo.
Right below, a preview shows what the header of the first page looks like.
Logo page 2+
For all following pages, you can also define which logo should appear:
- Sally logo (default): the Sally logo appears on all remaining pages.
- No logo: no logo is displayed on the following pages.
- Here too, you can use your own image.
Useful when you want a bold title on the first page and a discreet logo on the ones after it.
If this logo setting should apply to everyone in your organization, turn on Defined organization-wide and click Save.
3.3. Font
You can set the font of your exported reports to match your company's branding or your own taste.
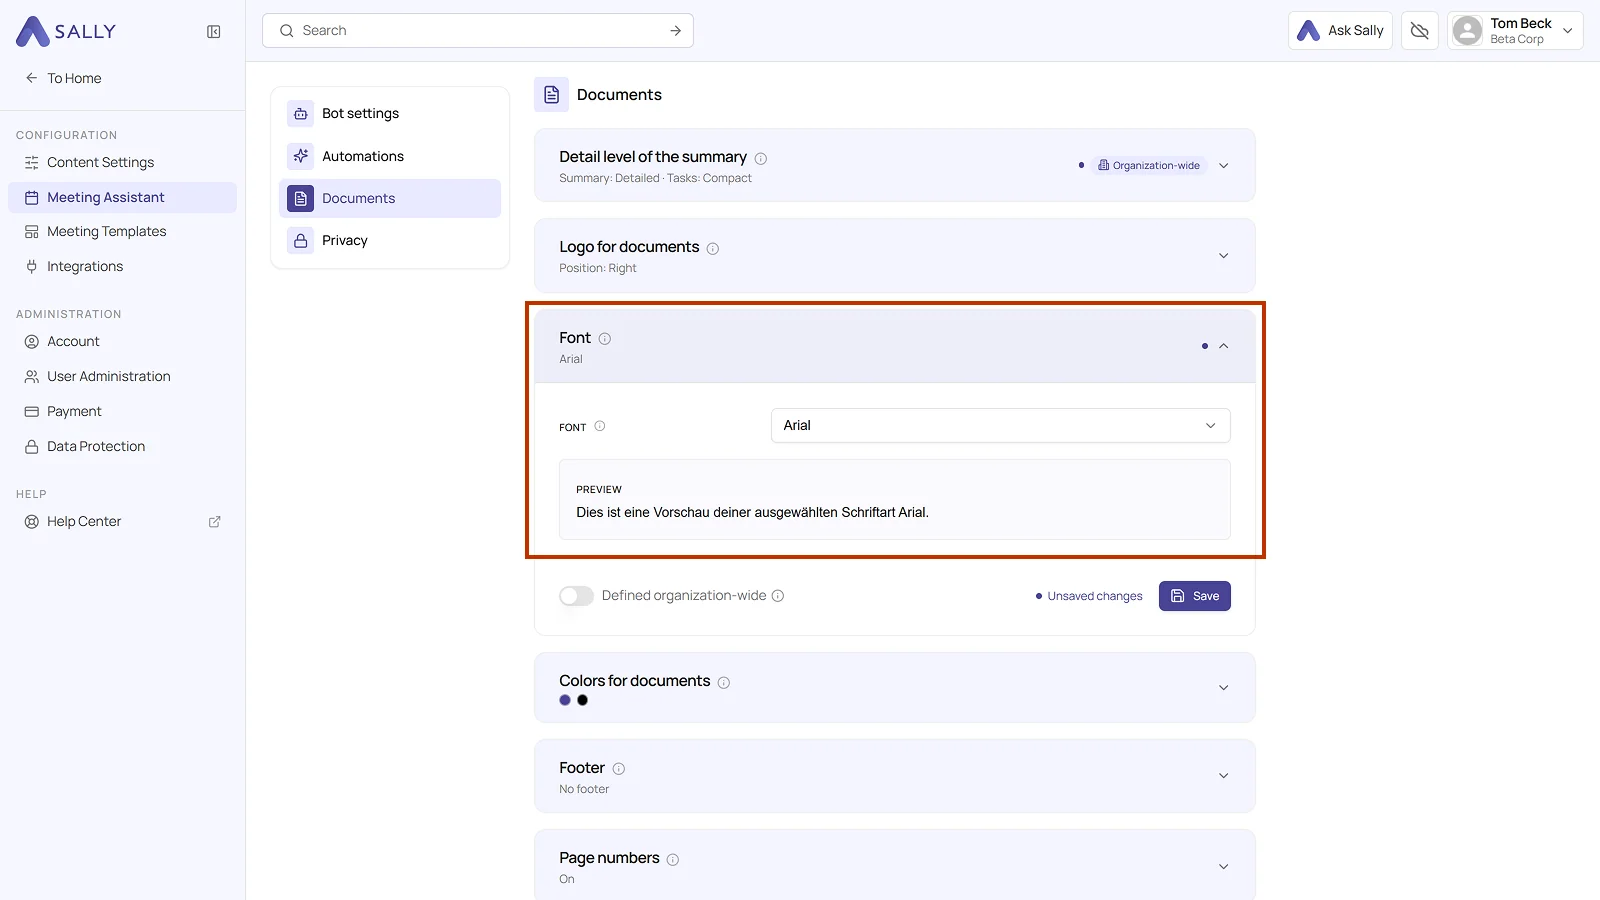
Pick a font from the list. The preview below shows straight away how the text looks in your documents.
This setting affects, among other things:
- Headings
- Body text
- Summaries and lists
- Other text content in the exported document
You can currently choose from the following fonts in Sally:
- Arial
- Calibri
- Courier New
- Georgia
- Helvetica
- Noto Sans
- Segoe UI
- Tahoma
- Times New Roman
- Trebuchet MS
- Verdana
If this font should apply to everyone in your organization, turn on Defined organization-wide and click Save.
3.4. Colors for documents
Here you set two colors: the heading color for titles and highlights, and the text color for body text. You enter both as a hex value, for example #484494.
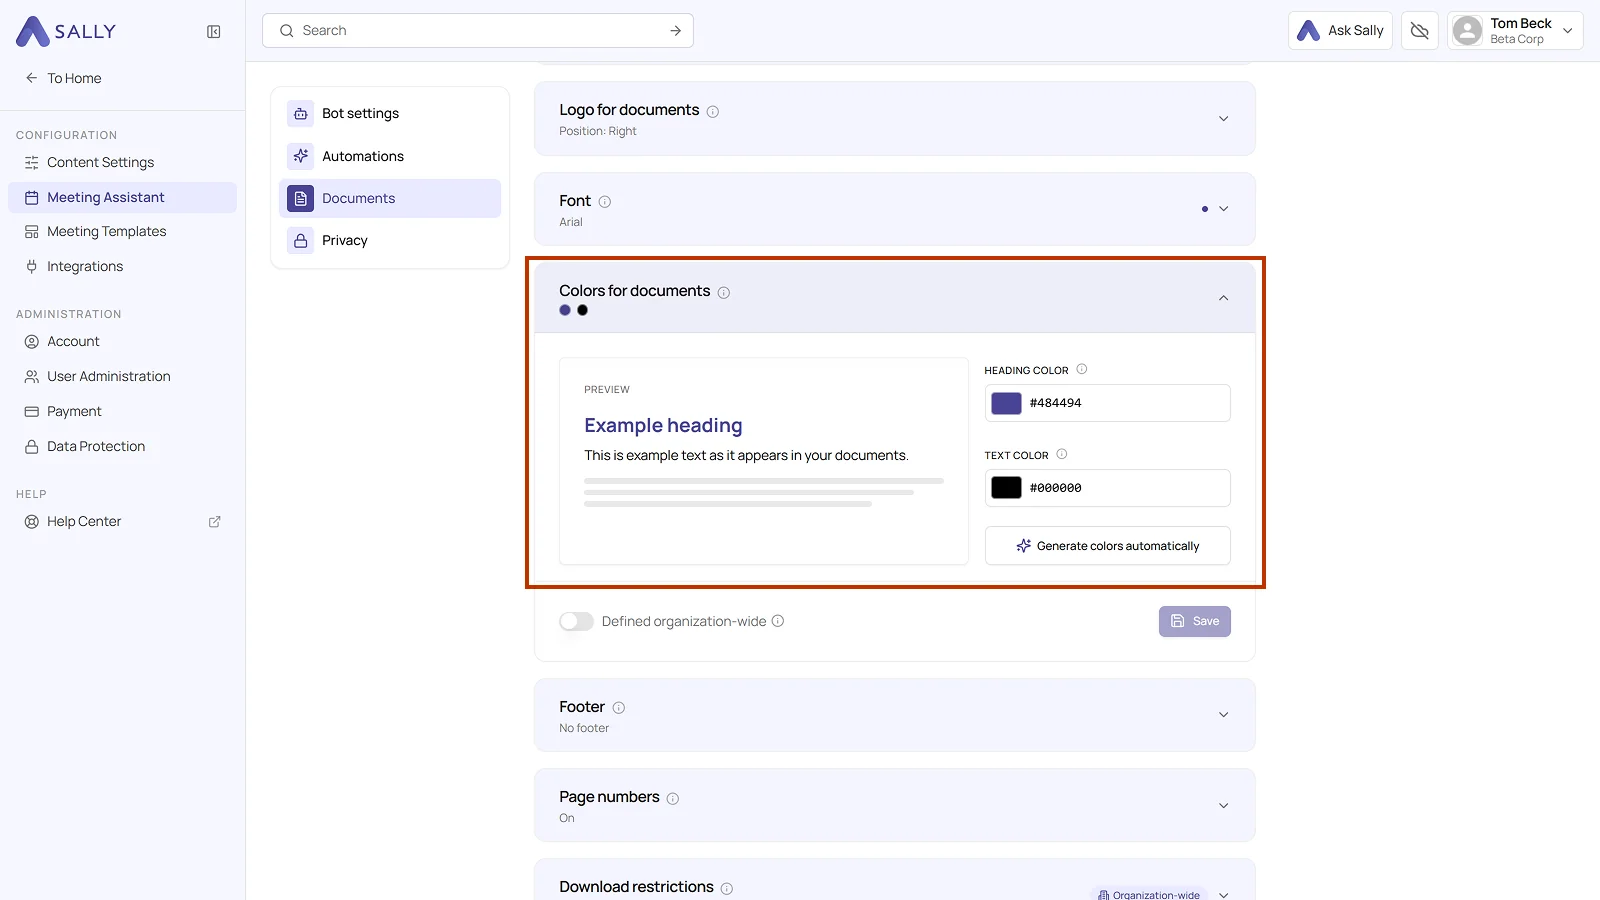
The preview on the left instantly shows how headings and body text look with the colors you picked. Generate colors automatically lets Sally suggest a matching pair.
- Match your company's brand color
- Use neutral tones for formal client-facing reports
If these colors should apply to everyone in your organization, turn on Defined organization-wide and click Save.
3.5. Footer
Add one, two, or three footers at the bottom of your reports.
Each field can contain any text, such as contact information, company name, or legal disclaimers.
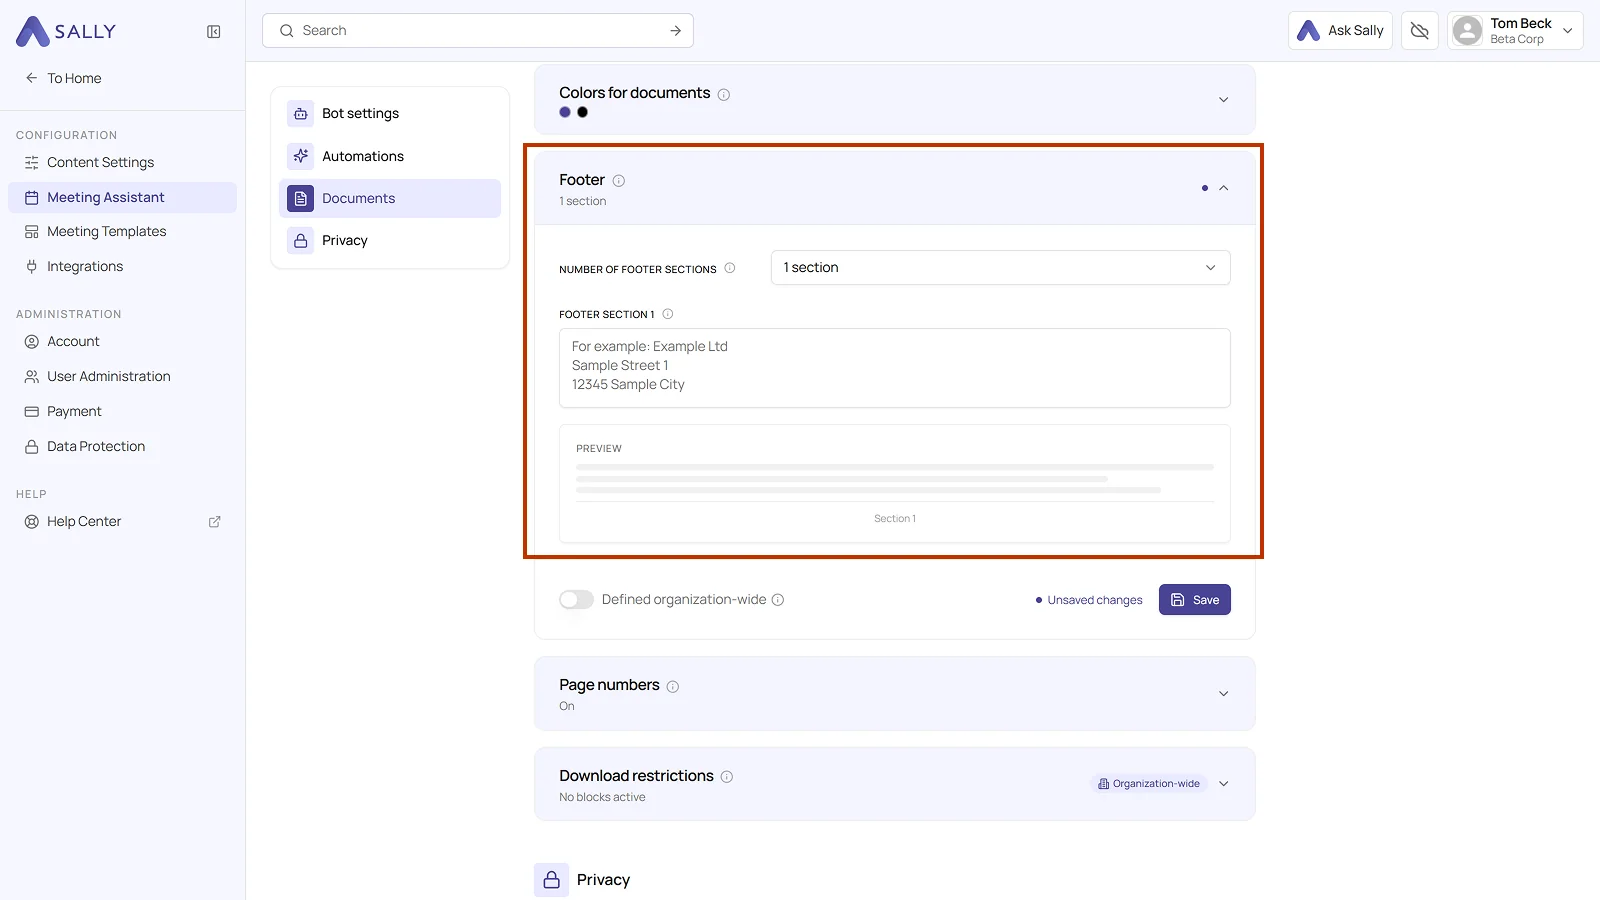
Number of footer sections defines how many footers the document gets:
- 1 section: a single line at the bottom
- 2 sections: a left and a right footer
- 3 sections: more room for detailed information
If you pick no section at all, the bottom of the page stays empty. Each section gets its own text field, which also takes multi-line text. The placeholders show what usually goes there, such as the company name and address on the left and the registration details on the right. The preview below shows where the sections end up in the document.
If this footer setting should apply to everyone in your organization, turn on Defined organization-wide and click Save.
3.6. Page numbers
You can decide whether your exported meeting reports should include page numbers or not. There is a single toggle for it, Page numbers in documents.
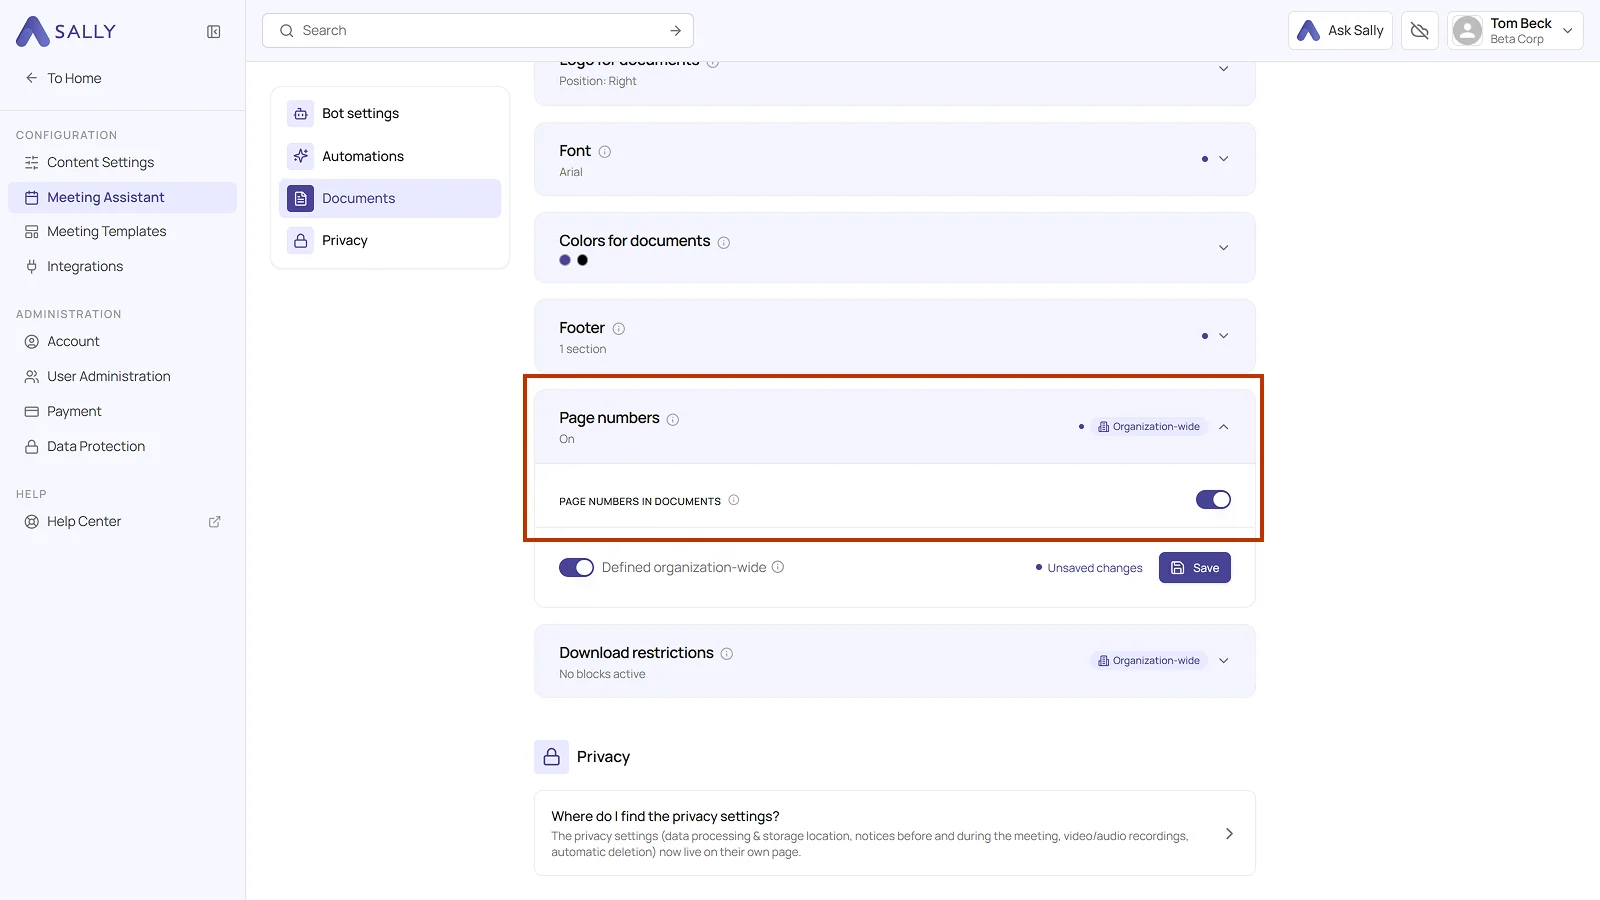
- On: each page of the document receives a page number. This is especially useful for longer meeting notes or reports.
- Off: the document is exported without page numbers.
Page numbers make it easier to structure, reference, or print documents, especially when they contain multiple pages.
If this setting should apply to everyone in your organization, turn on Defined organization-wide and click Save.
3.7. Download restrictions
Owners and admins can restrict which file types users are allowed to download, helping protect sensitive information. The line under the title counts how many of the four blocks are active.
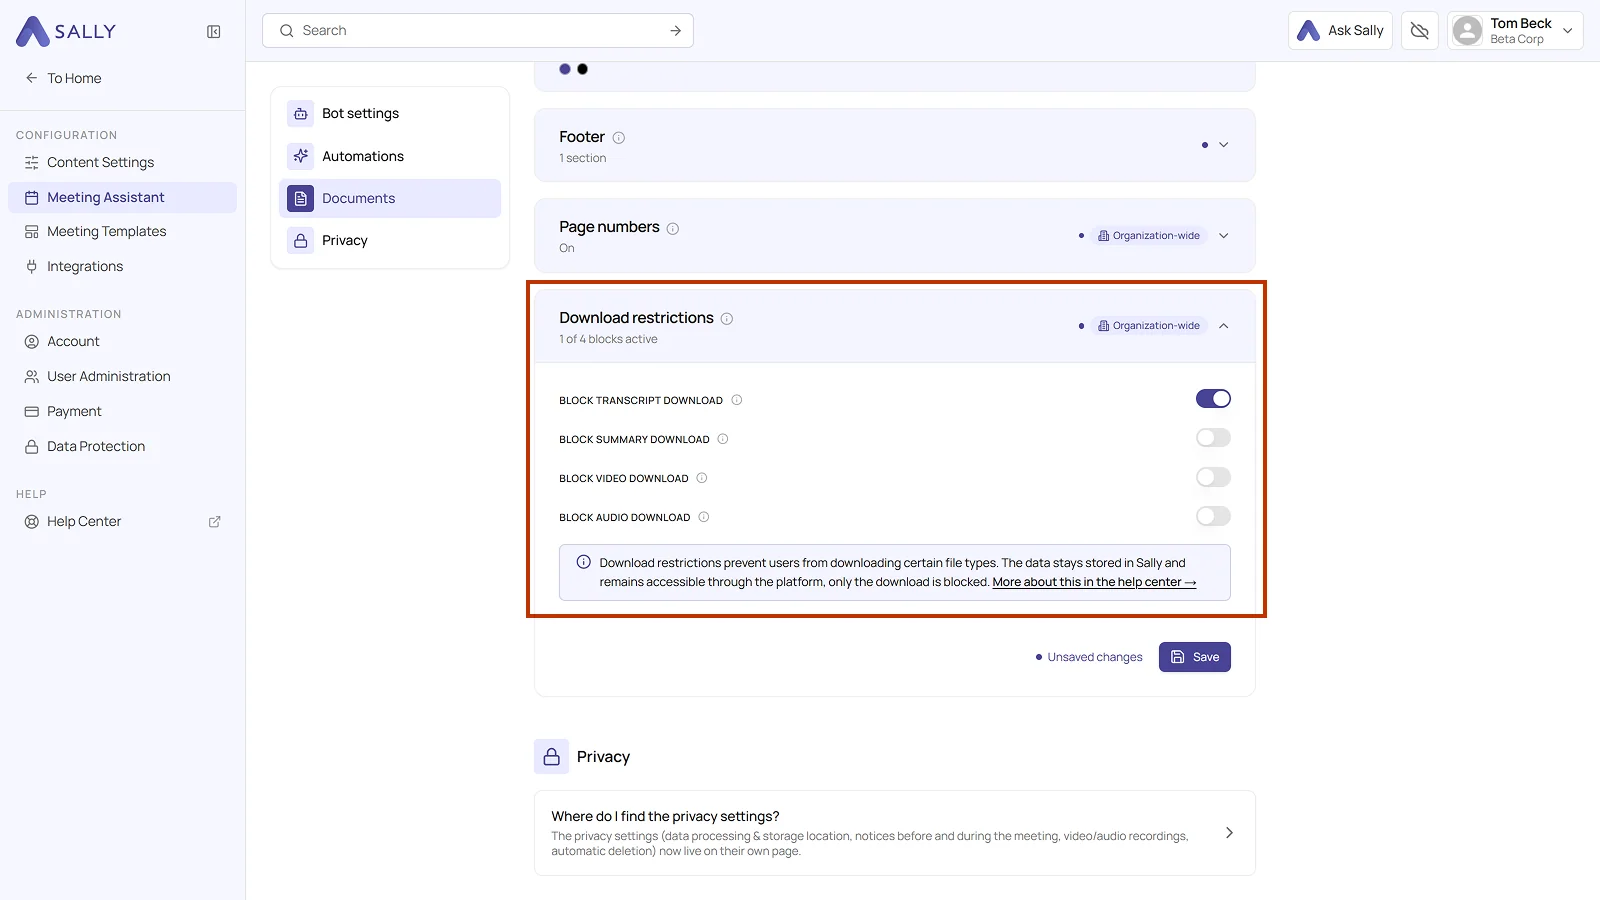
Available blocks:
-
Block transcript download
Users won't be able to export or save written transcripts of meetings as files. This is useful when internal discussions should stay within Sally. -
Block summary download
Blocks users from downloading Sally's automatically generated summaries. This ensures that sensitive insights remain in the system and aren't shared externally. -
Block video download
Disables the option to download meeting video recordings. Videos can still be viewed within Sally but not exported to local storage. -
Block audio download
Stops users from saving the raw audio recordings of meetings. This helps reduce data exposure and comply with stricter privacy rules.
A block does not take anyone's access away: the data stays stored in Sally and remains accessible through the platform, only the download is blocked. These restrictions are defined organization-wide, meaning all users follow the same rules.