How to add or remove users in Sally AI
User Administration is where you invite colleagues to your organization account, hand out roles and licenses, and remove access again. Everyone then has exactly the access they need, and you keep track of who is working in the account.
You set the role and the license while inviting. You can also invite someone without a license and assign one later.
Only owners and admins can invite, edit, and remove users.
Members do not see User Administration.
Quick navigation
1. Invite a user
- Open Settings at the bottom of the left sidebar.
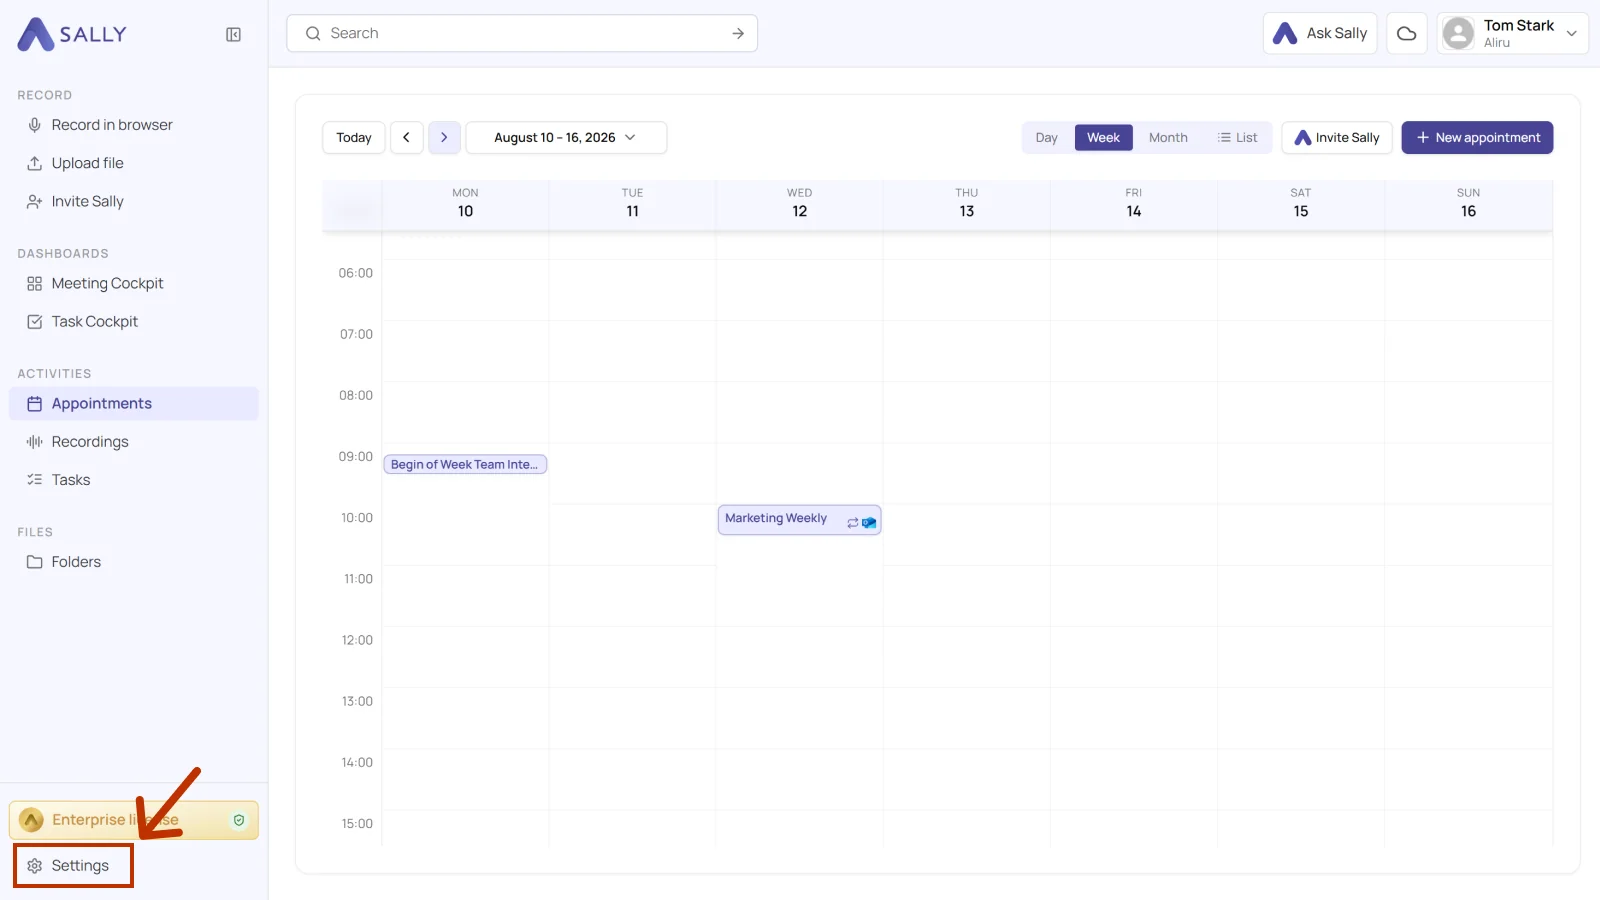
- Under Administration, open User Administration.
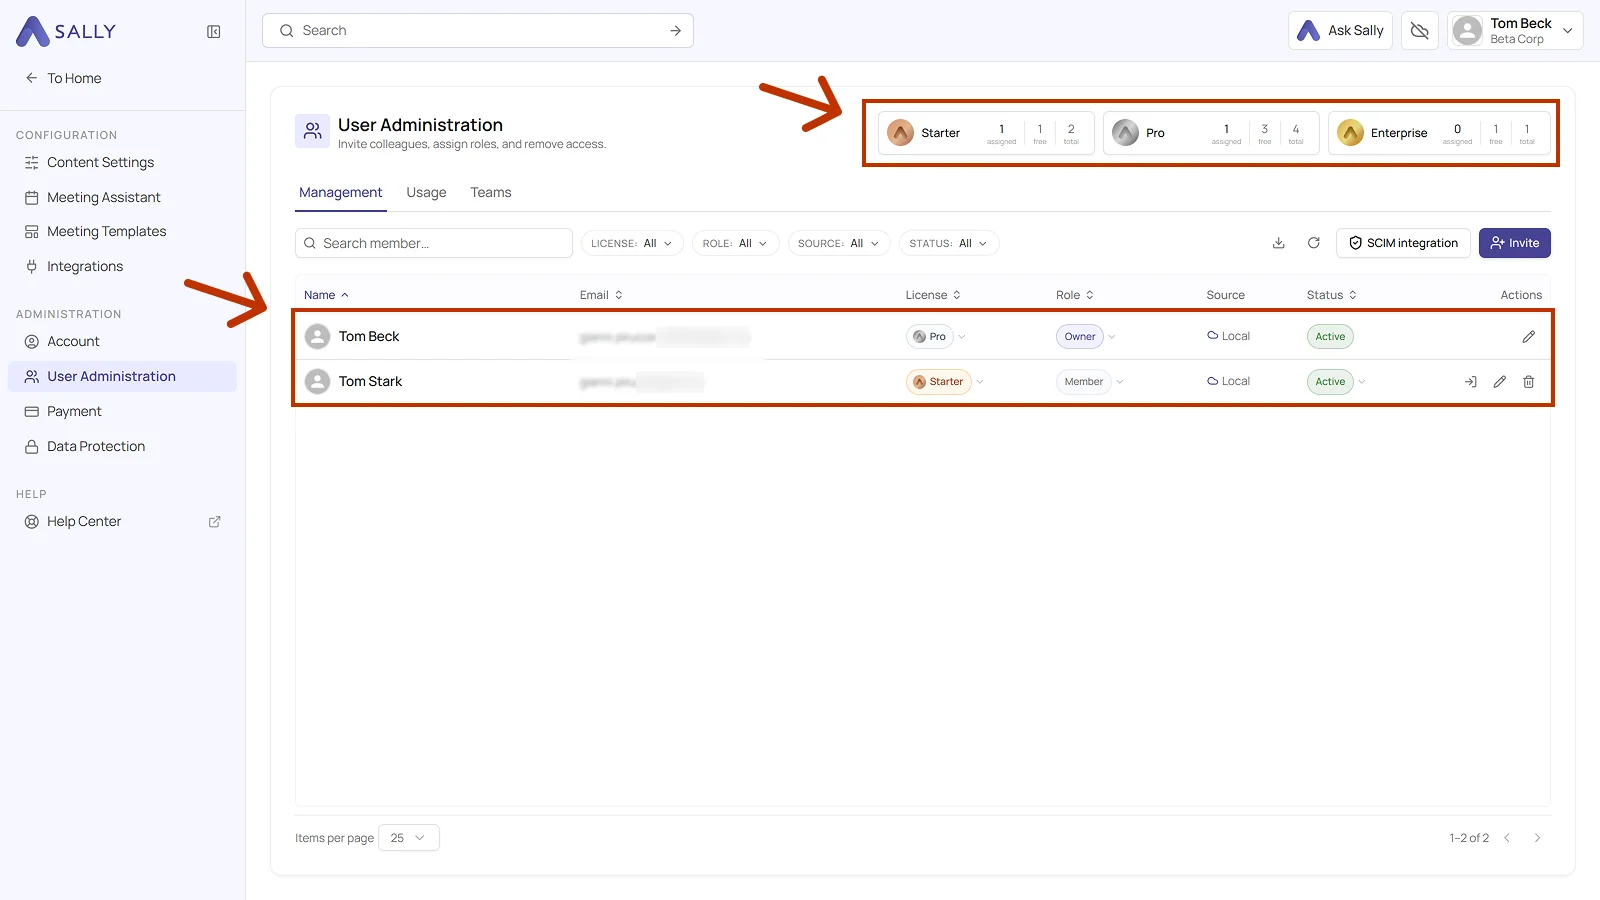
The licenses sit in the top right corner, each type with assigned, free, and total. That tells you at a glance whether a license is still free for the new person.
The Management tab lists the members in these columns:
- Name and Email of the person
- License and Role
- Source, where the account comes from, Local for invited people
- Status of the account, Active once they have finished signing up
- Actions for editing, impersonating, and removing
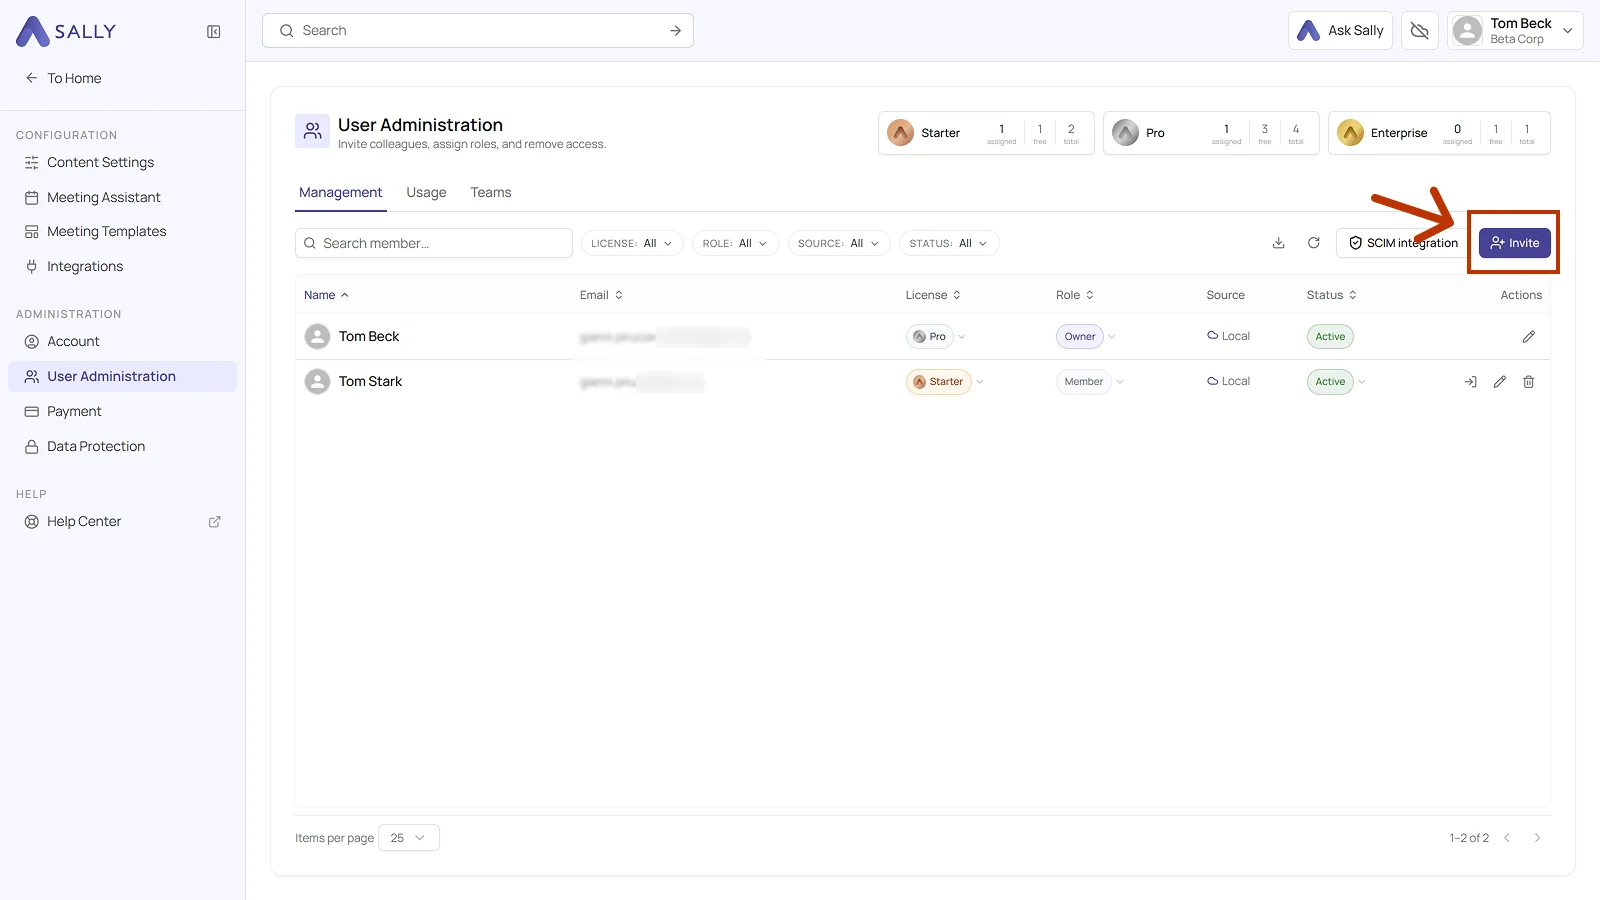
- Click Invite in the top right corner.
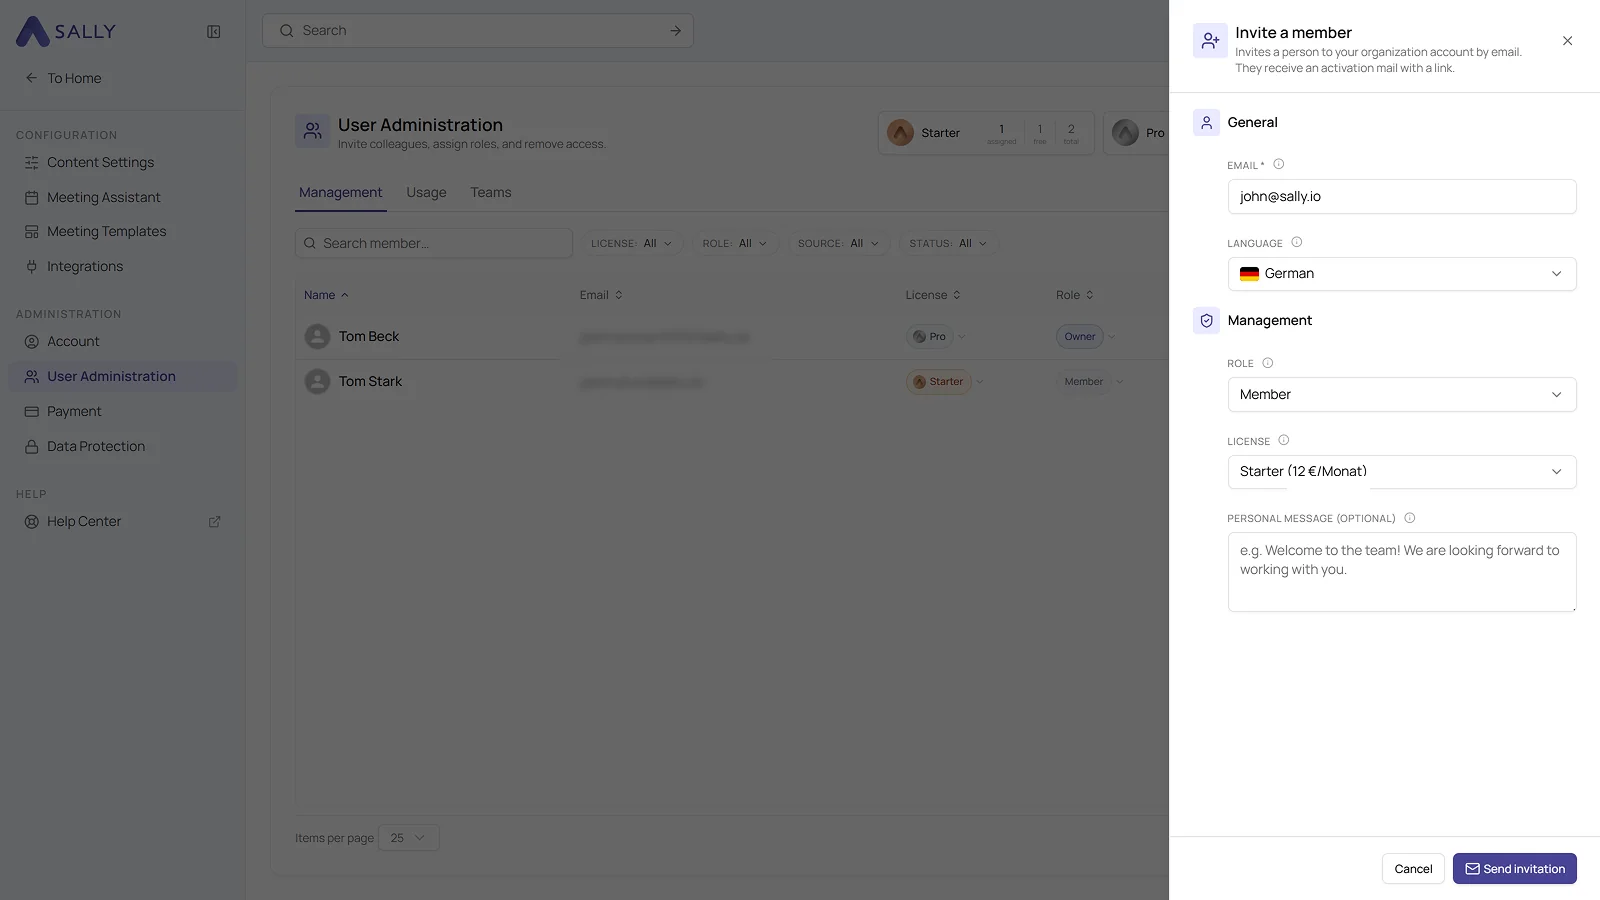
- The Invite a member panel opens on the right. Under General, enter the email, the only mandatory field, and pick the language of the invitation.
- Under Management, set the role and the license. Only licenses you have already bought can be picked.
- Optionally add a personal message that goes out with the invitation.
- Click Send invitation, or Cancel if you change your mind.
Which role fits?
| Role | What it allows |
|---|---|
| Member | Works with Sally: meetings, transcripts, summaries, their own integrations, and their own settings. Payment, user administration, and organization-wide settings stay closed. |
| Admin | Everything a member can do, plus user administration, payment, and the organization-wide settings. An admin cannot change or remove an owner. |
| Owner | Everything an admin can do, plus handing out the owner role and deleting the organization account. |
Who holds which permission in detail is listed under user role management.
The invited person gets an activation email with a link and appears in the list right away, at first with their invitation status. Once they accept and finish signing up, the status changes and they can use Sally with the rights of their license.
Search member and the License, Role, Source, and Status filters find a person even in long lists. The download icon exports the list, and SCIM integration sets up automated user management.
2. Remove a user
- Open Settings and, under Administration, open User Administration.
- Find the person's row in the Management tab.
- Click the bin icon in the Actions column and confirm in the dialog.
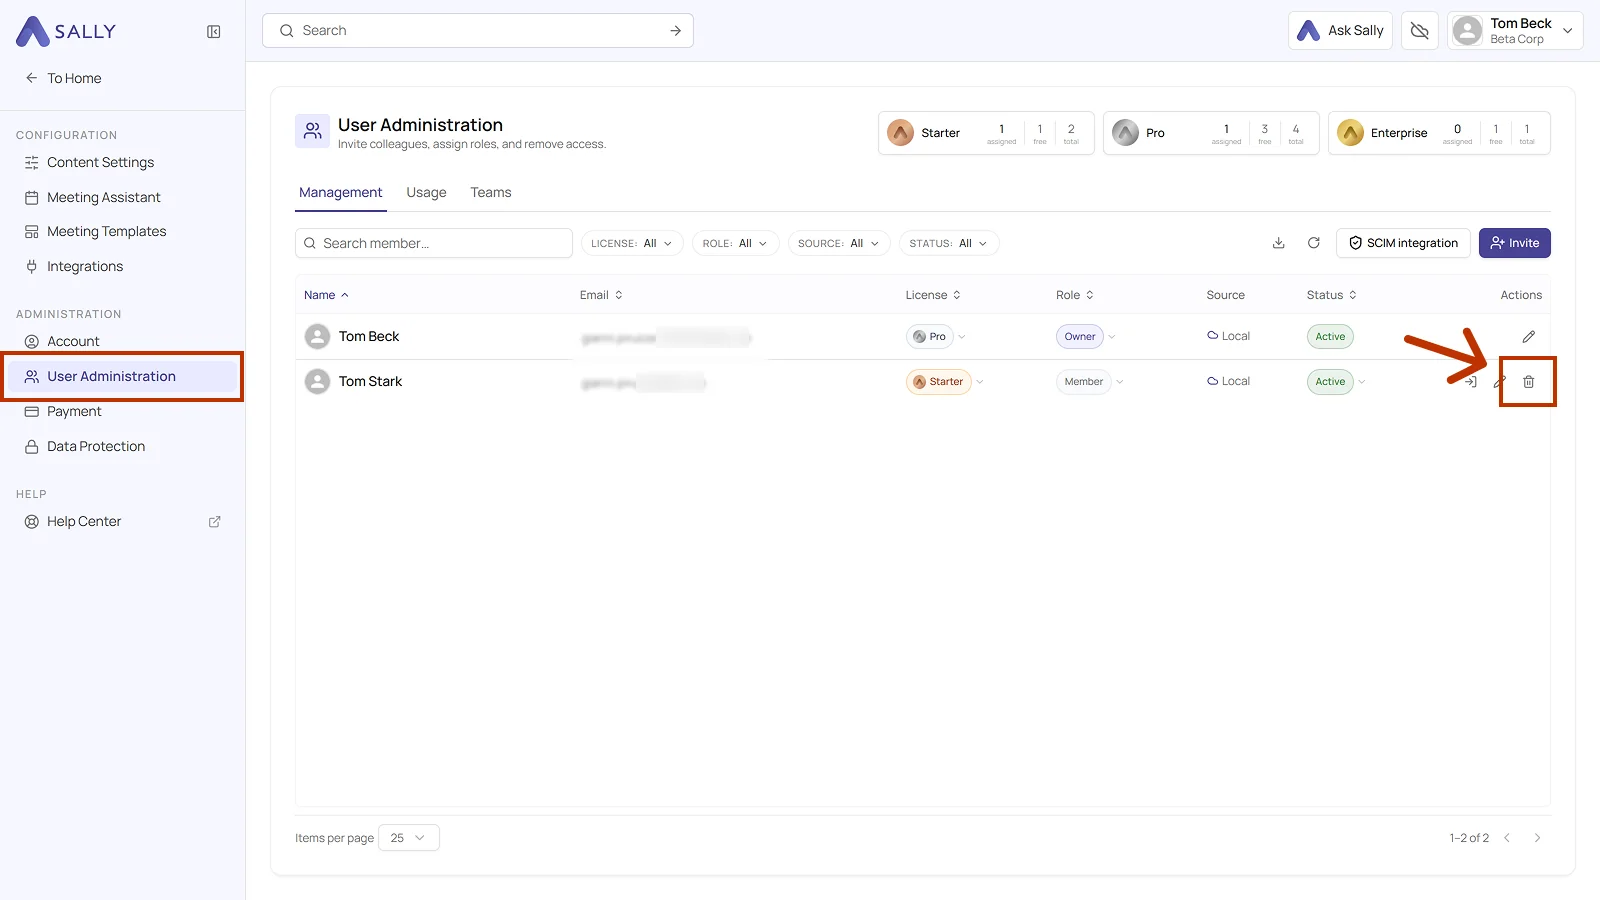
The same column holds two more icons: the pencil for editing and the mask icon for impersonating. The owner row has no bin, that role cannot be removed here.
Whoever is removed cannot reach your organization account any more, from that moment on. There is no undo, so getting back in takes a fresh invitation.
The license of the removed person becomes free again and can be assigned to someone else.