How to connect Salesforce with Sally AI
Connect Sally AI with Salesforce to turn what came out of a meeting into CRM updates, right on the matching lead, account, contact, opportunity or case. With the Sally Salesforce integration you send notes, tasks and events to Salesforce in one click, so nothing gets typed twice and your system of record stays current.
Quick navigation
1. How to connect Salesforce with Sally AI
Here is how to set up the Sally Salesforce integration.
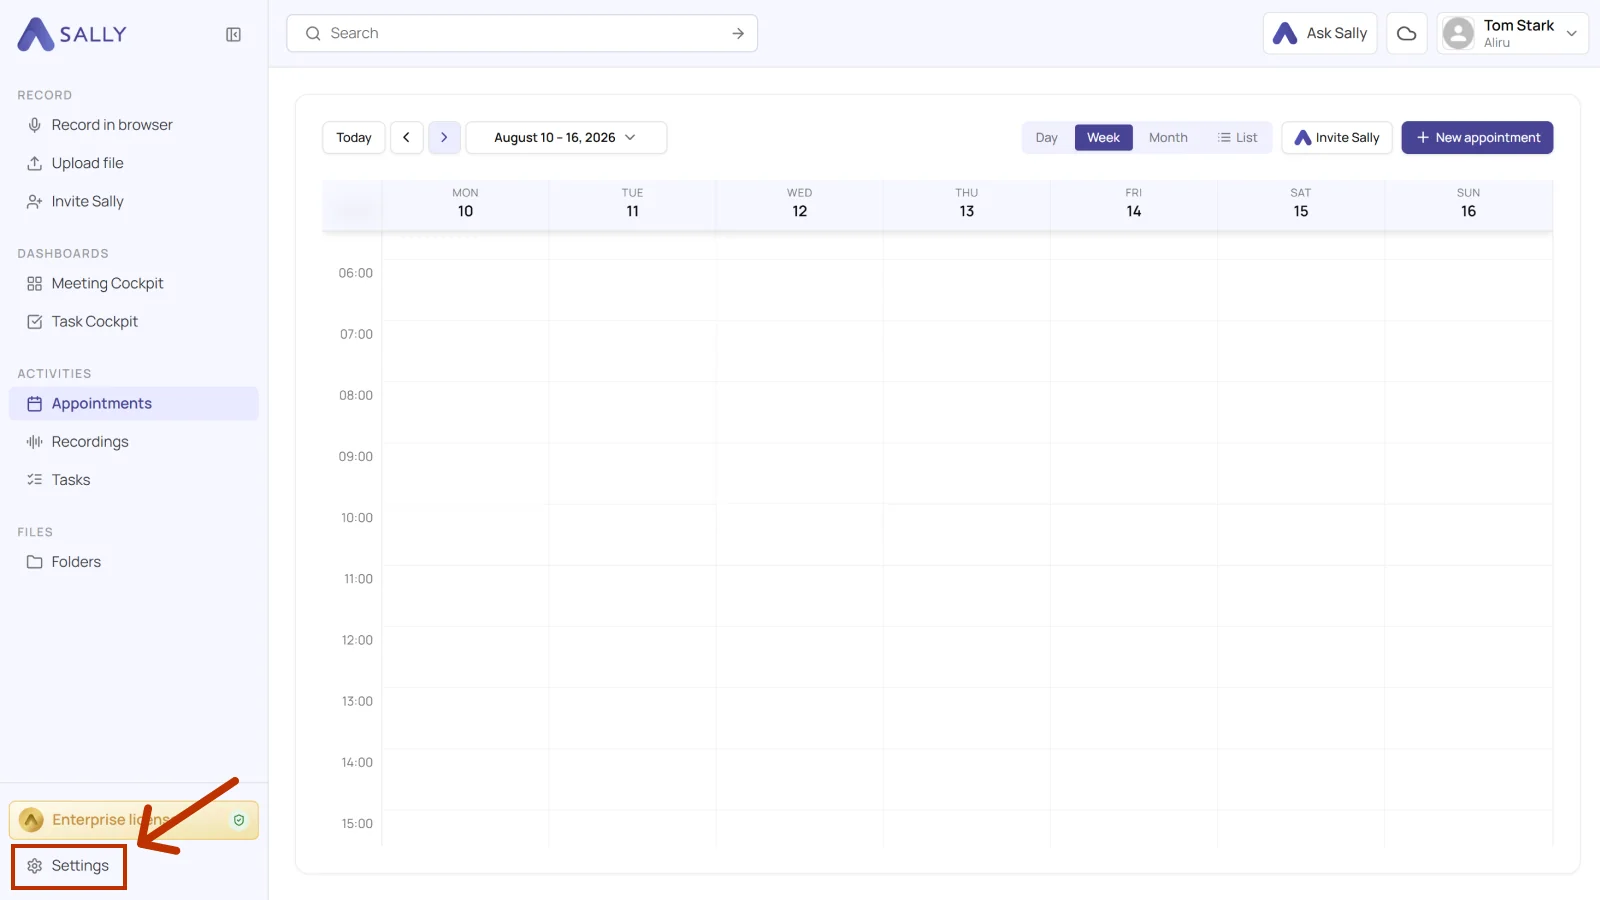
- Open Settings at the bottom of the left sidebar.
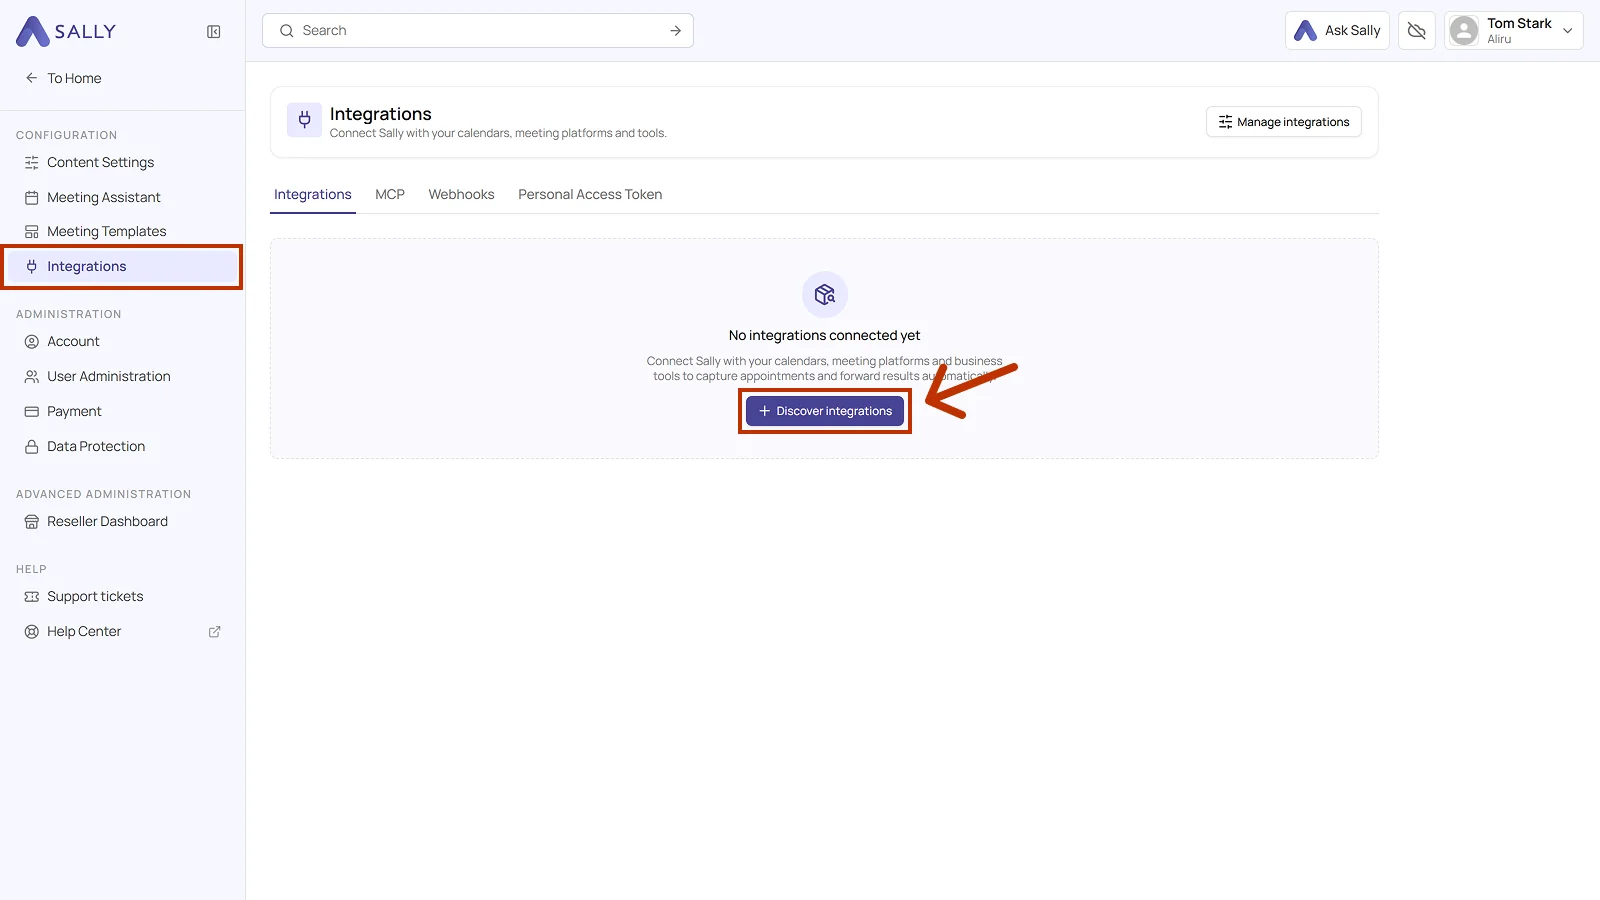
- Under Configuration, select Integrations and click Discover integrations.
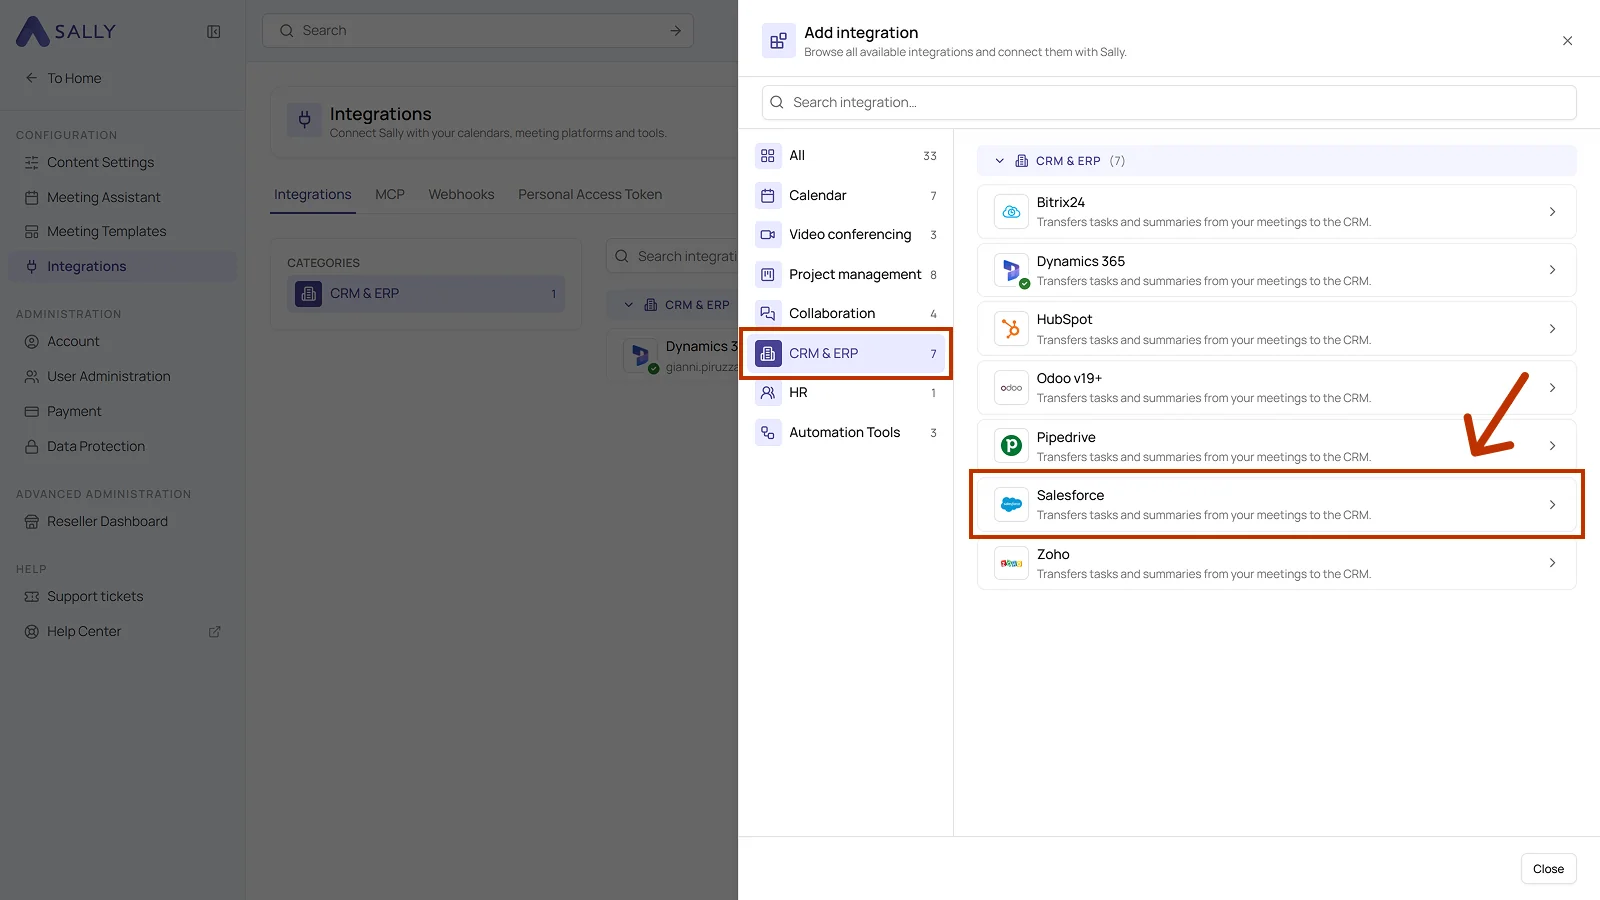
- Open the CRM & ERP category on the left and select Salesforce. You can also just type the name into the search bar at the top.
-
The panel on the right explains what the integration does. Click Connect at the bottom right.
-
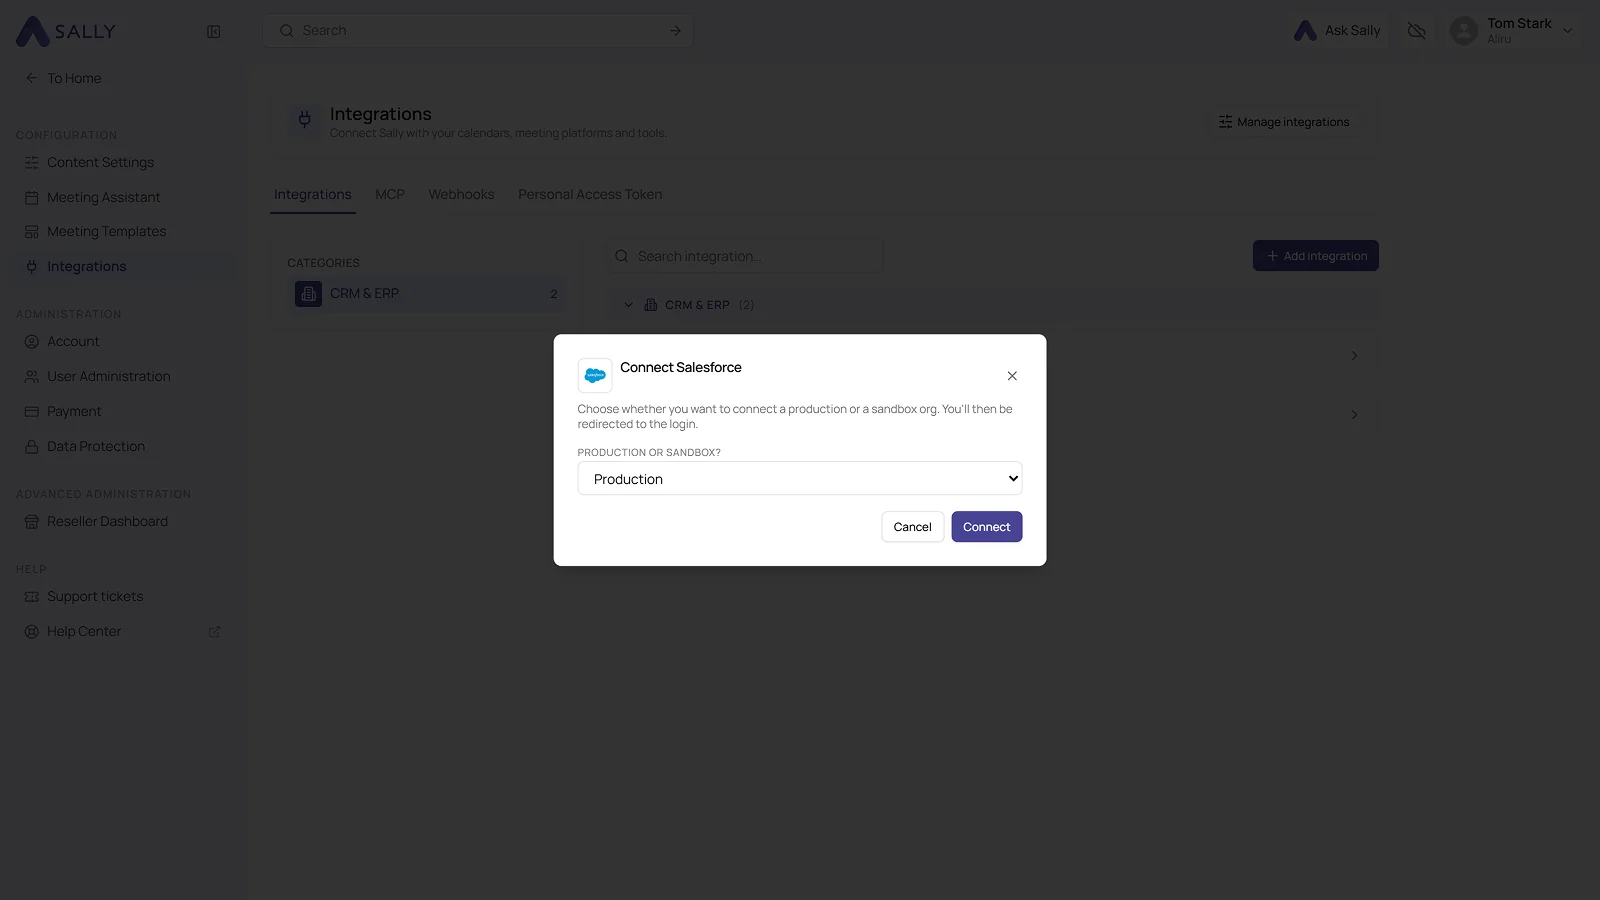
In the Connect Salesforce dialog, choose whether you want to connect a production or a sandbox org, then click Connect. Sally sends you on to the Salesforce login.
- Once you have signed in, Salesforce is connected. The Actions tab lists everything Sally can do through this integration, and you can switch off whatever it should not use for your company account. Helper functions stay locked while an active action still needs them, which is why some toggles will not move. Disconnect in the top right corner removes the integration again.
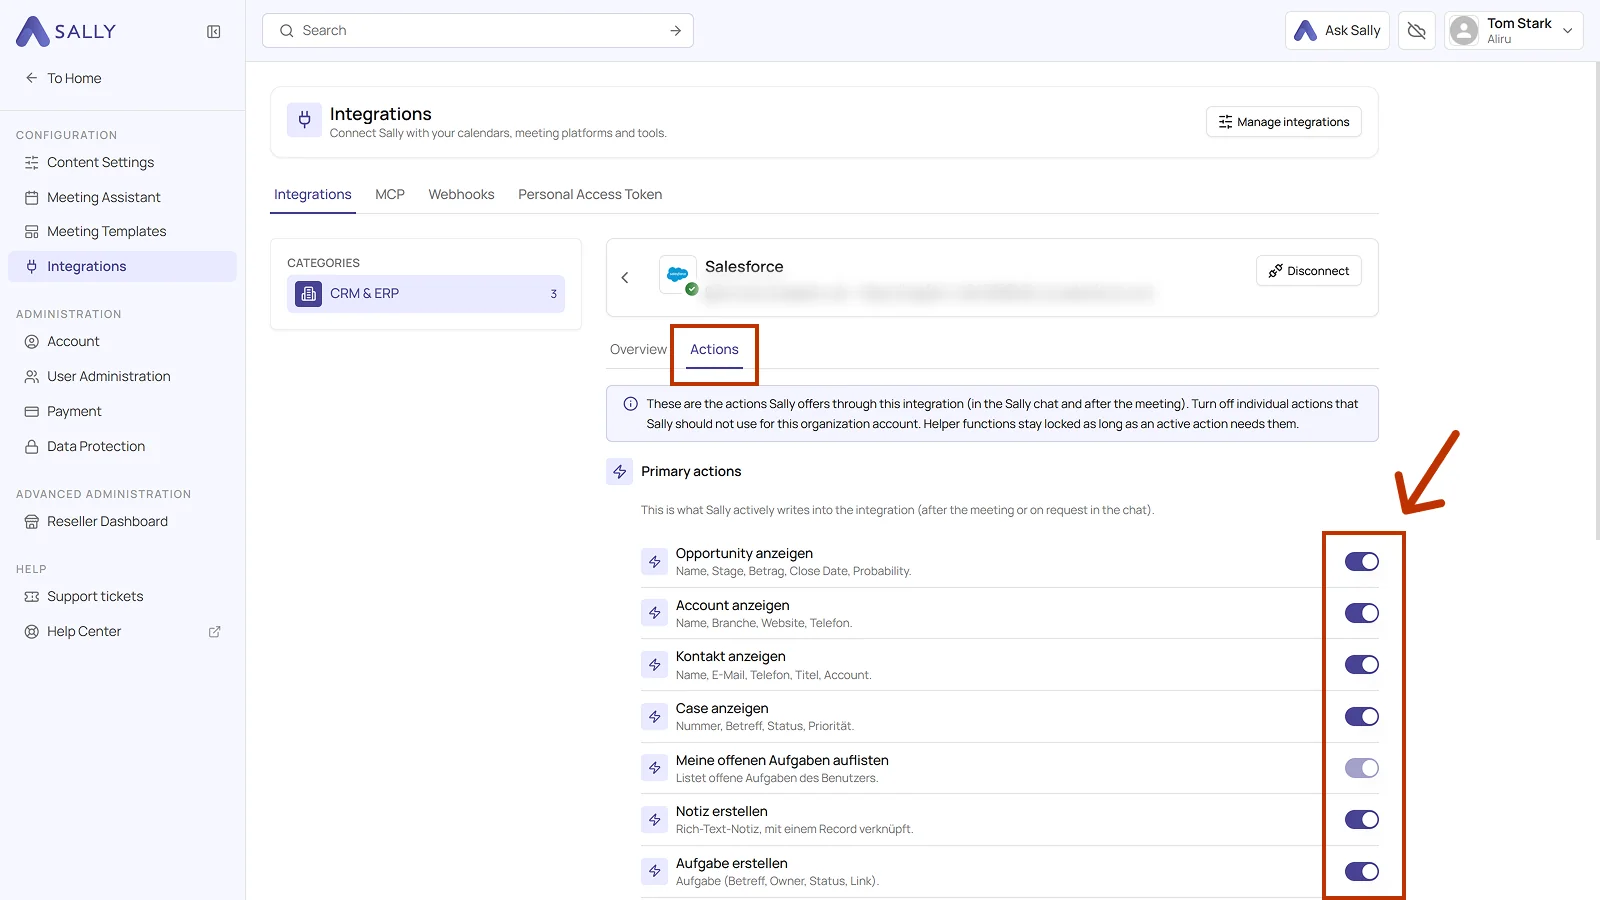
Whether an integration may be connected at all is up to owners and admins, see managing integrations for your users.
2. How to send insights to Salesforce
With Salesforce connected, content from a recording lands on the right record in a few clicks.
It works the same way every time: open a recording and click the Integrations icon. It sits at the top of every section and on every single line. The three Salesforce actions show up underneath.
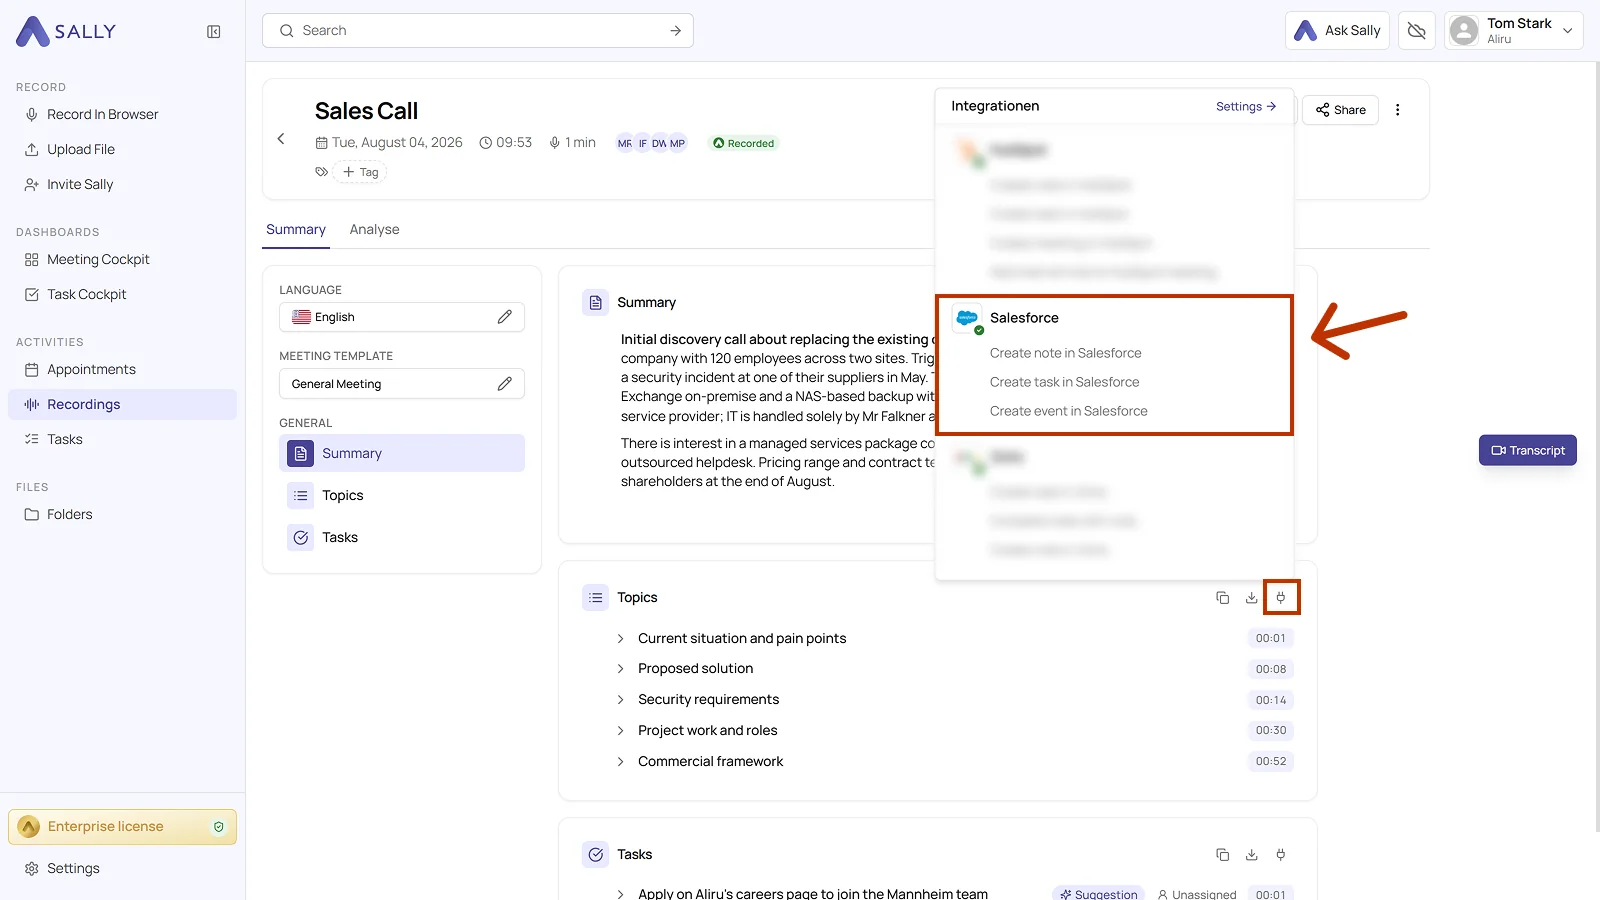
You can:
For each of these actions, the content comes prefilled from the summary and can be edited. Further down the form you pick the record it should hang on in Salesforce: a lead, account, contact, opportunity, or case.
2.1. Create a note in Salesforce
Keep what was discussed on the matching Salesforce record, as a note.
- On the section you want to save as a note, click the Integrations icon and pick Create note in Salesforce.
- Read over the content of the note, which comes prefilled from the summary.
- Link the note to a record and create it.
- In Salesforce it shows up on the record under Notes & Attachments.
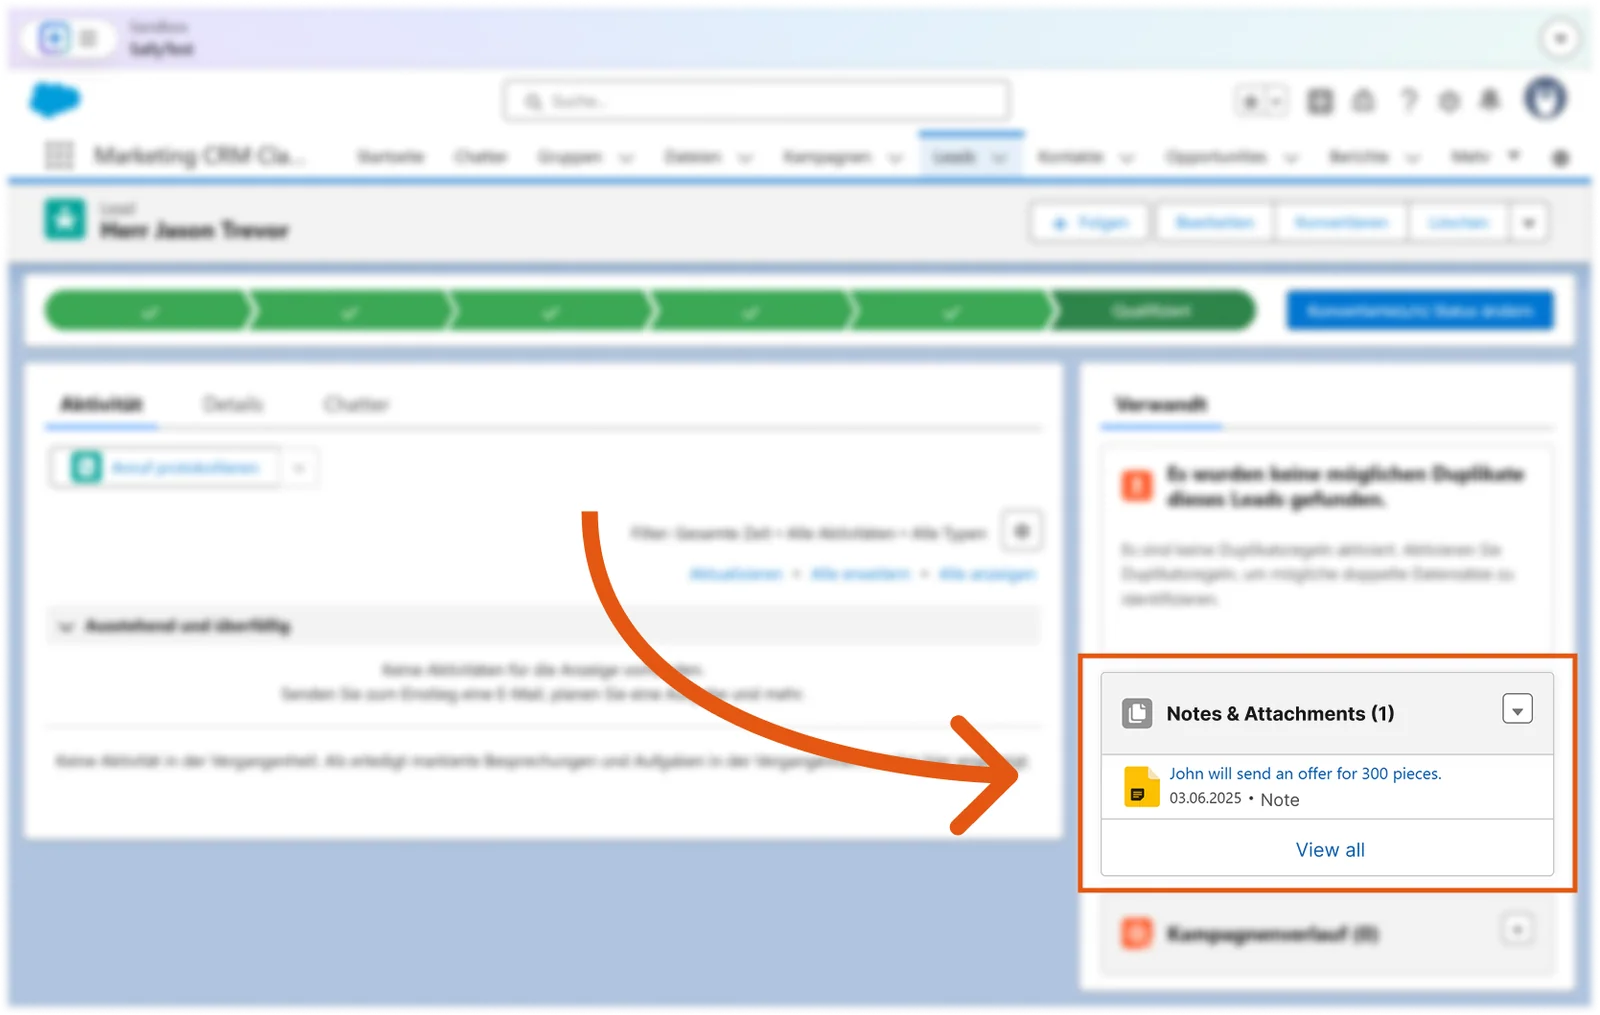
Pick the record where the work actually continues, so the active opportunity rather than the general account. That keeps the history where your team looks for it.
2.2. Create a task in Salesforce
Turn a point from the summary into a Salesforce task.
- On the line you want to create as a task, click the Integrations icon and pick Create task in Salesforce.
- Pick who owns it under Responsible and set the status. Both are required, and the status starts out as Not started.
- Priority starts at Normal and the due date is empty. Both are optional.
- Link the task to a record and click Create task.
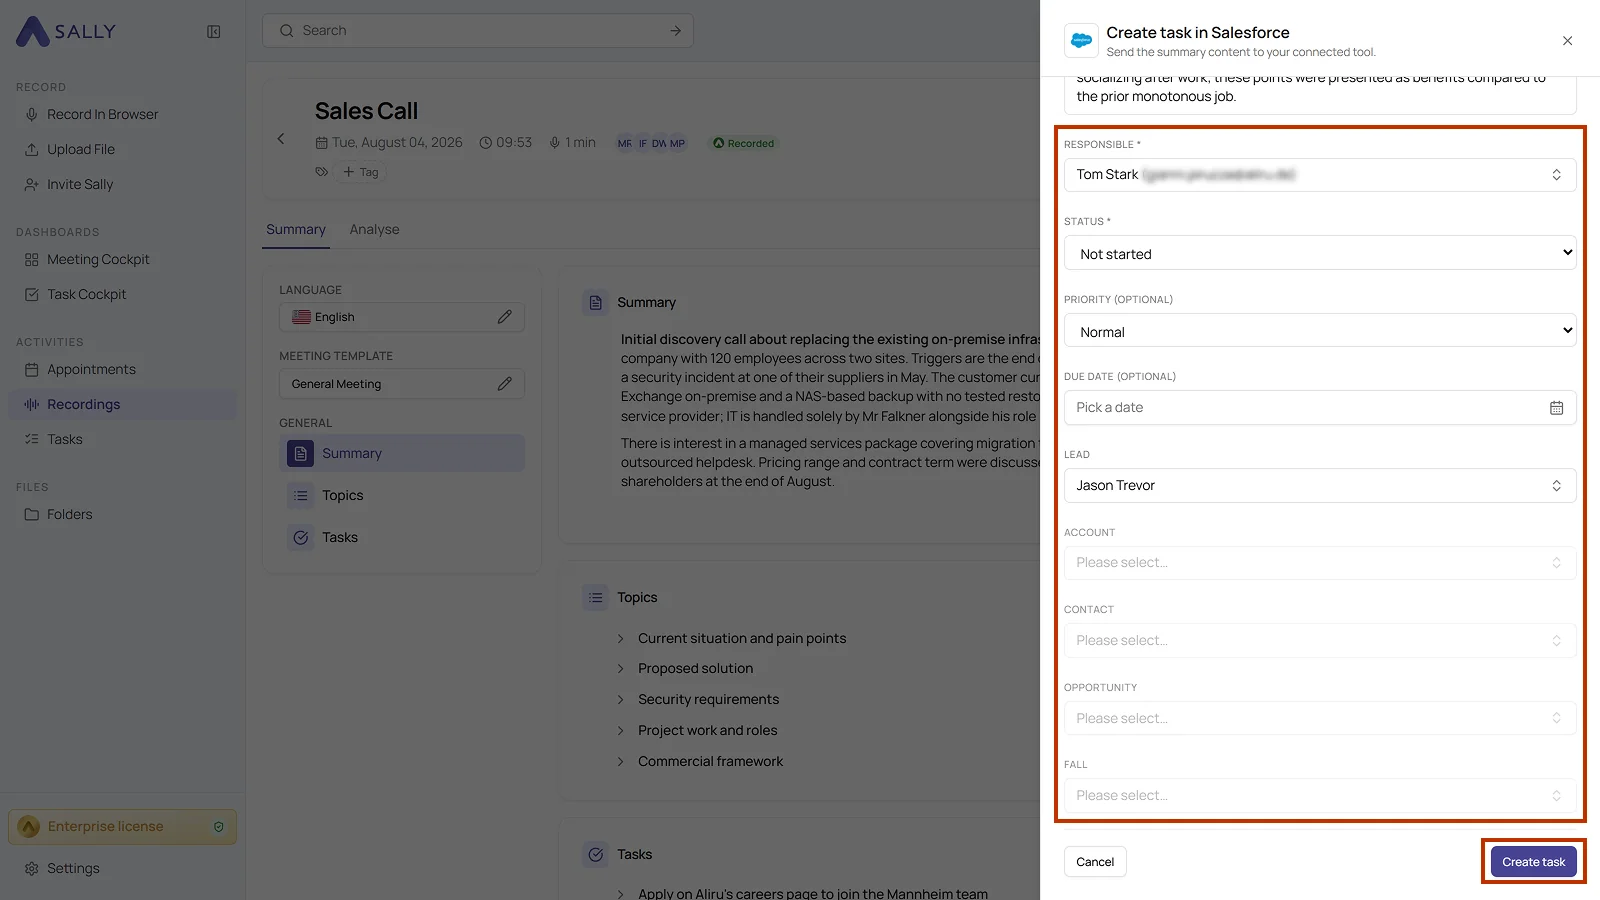
Link the task to exactly one record. That way it turns up in Salesforce where it belongs and does not get lost among the activities.
2.3. Create an event in Salesforce
Log a fixed appointment as an event in Salesforce, either the meeting itself or a follow-up you agreed on.
- On the line you want, click the Integrations icon and pick Create event in Salesforce.
- Check start and end. Both are required and prefilled with the time frame of the meeting. Location is optional.
- Link the event to a record and click Create event.
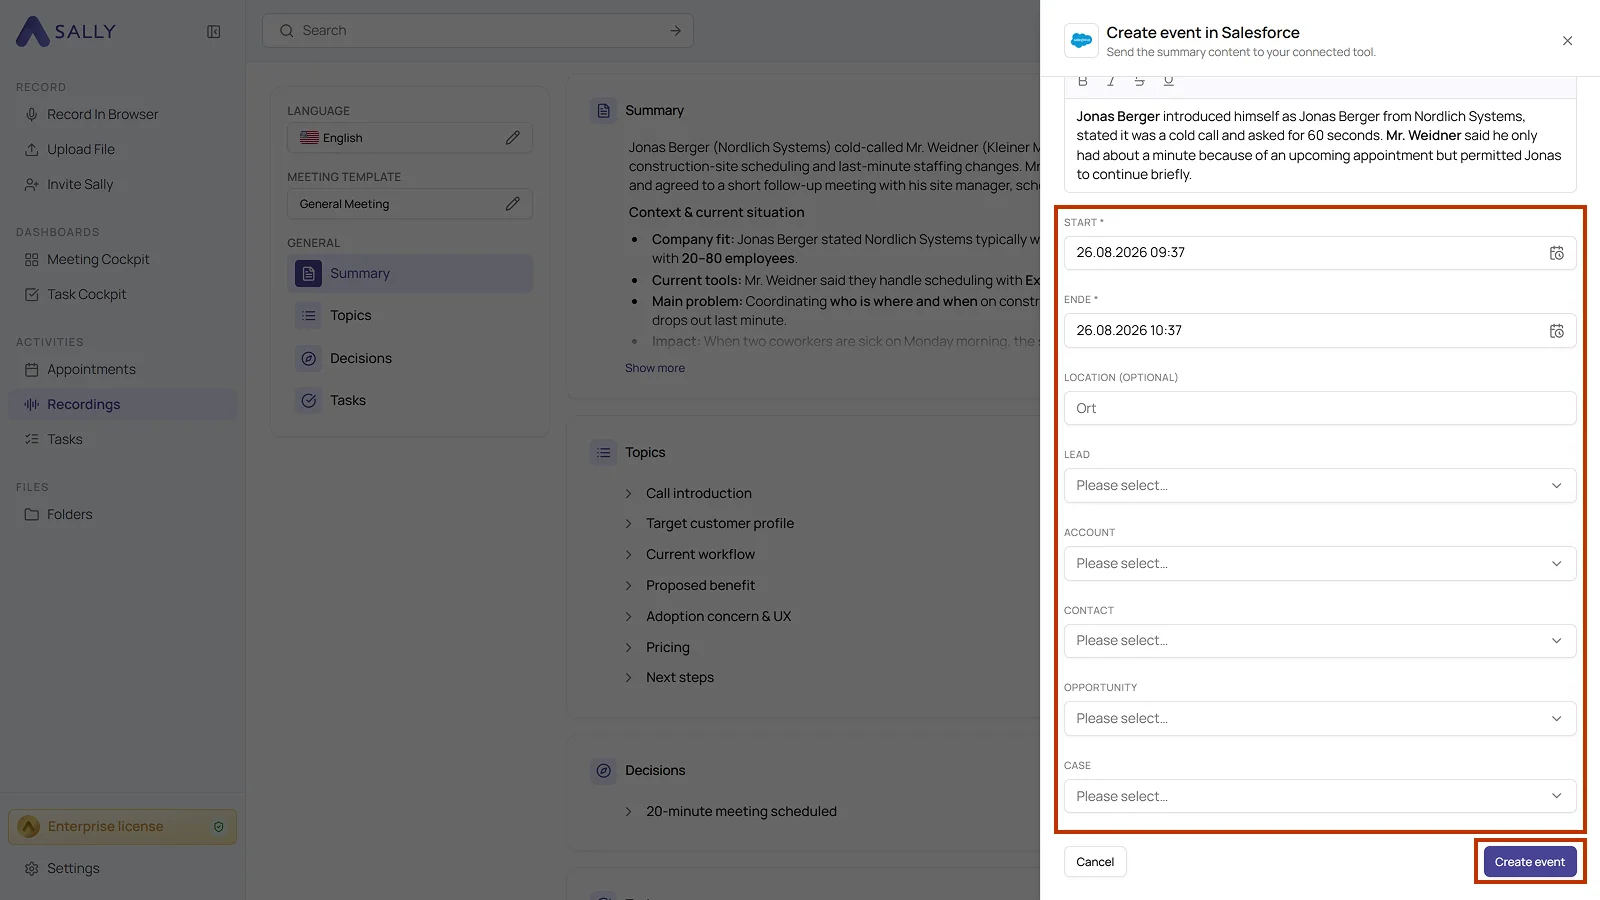
Use an event for anything with a fixed time, a demo or a call back, and a task for work without a set slot.
3. Required OAuth scopes
For the integration with Salesforce, Sally uses OAuth 2.0 for authorization. The following scopes define which areas Sally can access on behalf of the authenticated user.
-
Sally accesses this information solely to technically establish and maintain the connection to the user account.
-
Sally does not make any autonomous changes. Actions are performed exclusively upon the explicit initiative of the user.
-
API endpoints are only called within the scope of an active action initiated by the user within the platform.
Technical overview of required scopes
| Scope | What Salesforce technically allows with this scope | How Sally uses this scope |
|---|---|---|
id | Access to the unique user ID | Sally reads the user ID to properly authenticate the connected account. |
profile | Access to basic profile information | Sally reads basic profile data to identify the connected account. No profile data is modified. |
email | Access to the user's email address | Sally reads the email address to uniquely identify the connected account. |
address | Access to stored address information | Part of Salesforce's identity model. Sally does not modify address data. |
phone | Access to stored phone numbers | Part of identity-related information. Sally does not modify phone numbers. |
api | General API access according to user permissions | Technically required for integrations via the Salesforce API. Sally uses this access strictly within the defined integration functions. |
full | Full API access according to user permissions | Part of Salesforce's OAuth integration model. Sally does not perform independent CRM actions outside explicitly user-initiated functions. |
refresh_token | Token renewal capability | Allows the connection to be maintained without requiring repeated login. |
offline_access | Issuance of long-lived access tokens | Ensures a stable, ongoing connection. No Salesforce data is modified. |
openid | OpenID Connect authentication | Secure authentication via Salesforce Identity services. |