How to connect Odoo with Sally AI
Connect Sally AI with Odoo to keep what came out of your meetings in your Odoo system, as to-dos, activities, or chatter messages.
With the Sally Odoo integration you move results from a meeting into Odoo in a few clicks, hand them to the right person, and keep your ERP or CRM current, without typing anything twice.
Quick navigation
1. Connect Odoo with Sally
Here is how to set up the Sally Odoo integration.
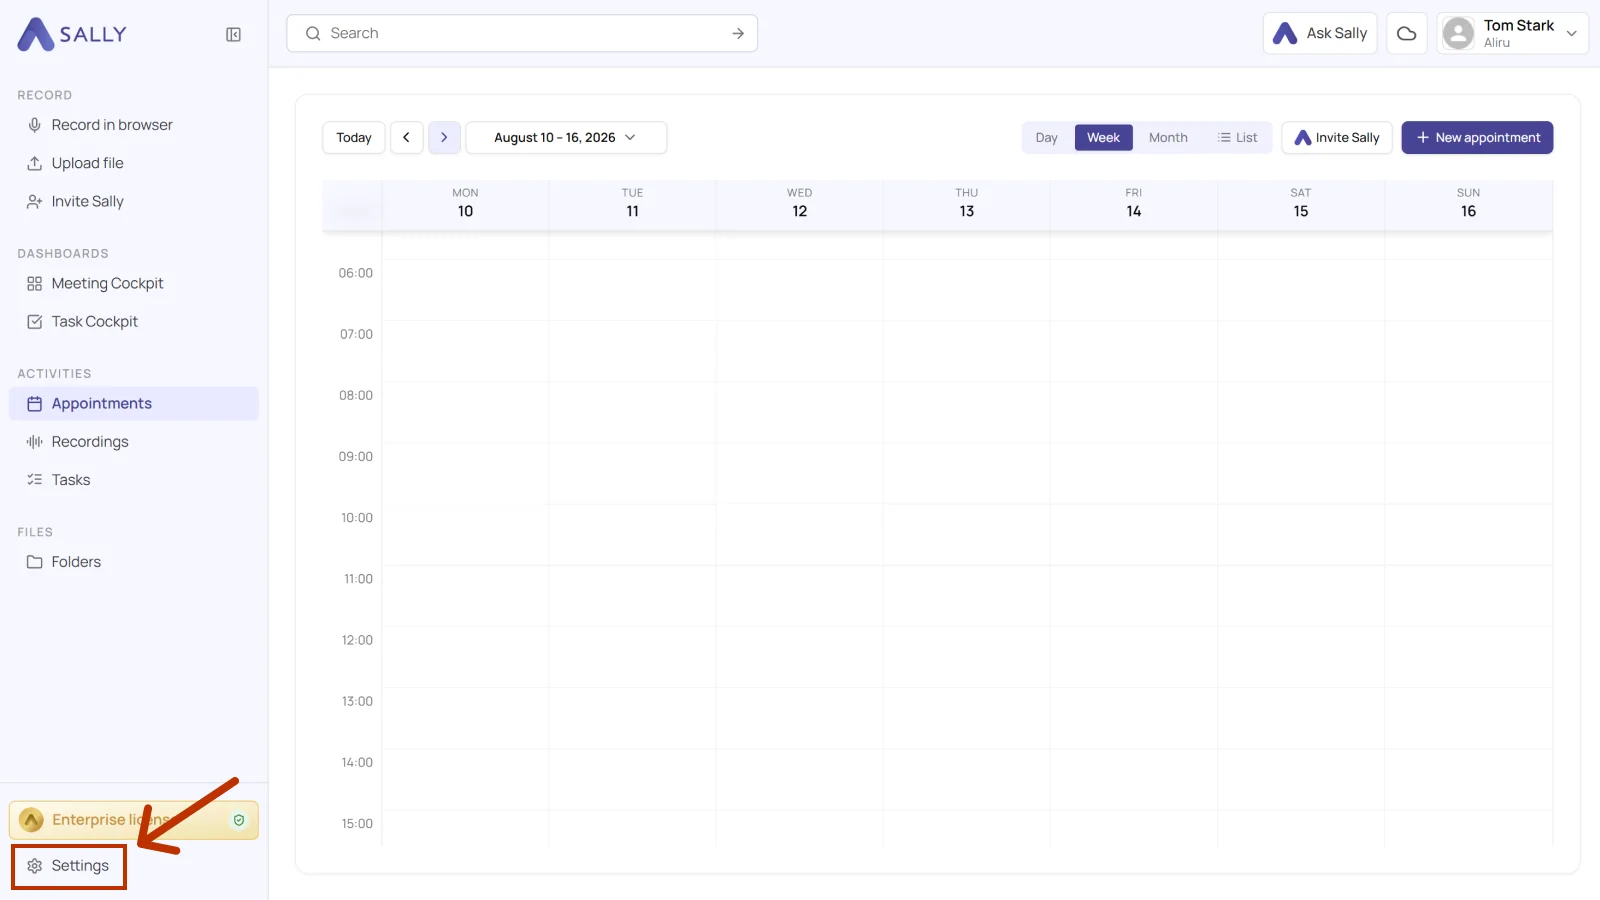
- Open Settings at the bottom of the left sidebar.
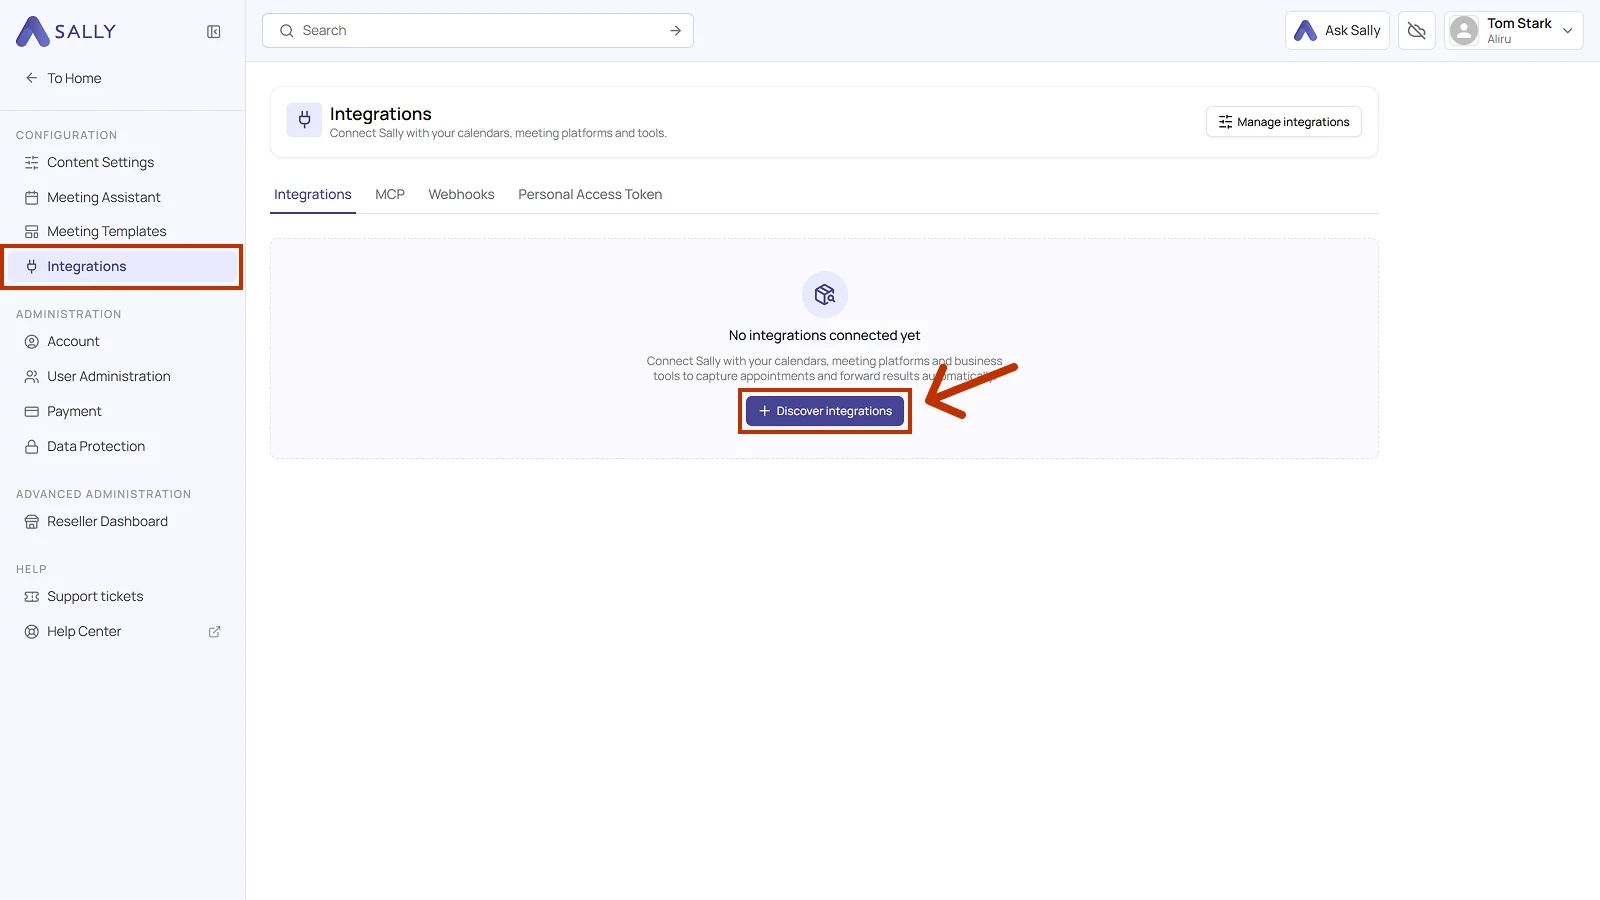
- Under Configuration, select Integrations and click Discover integrations.
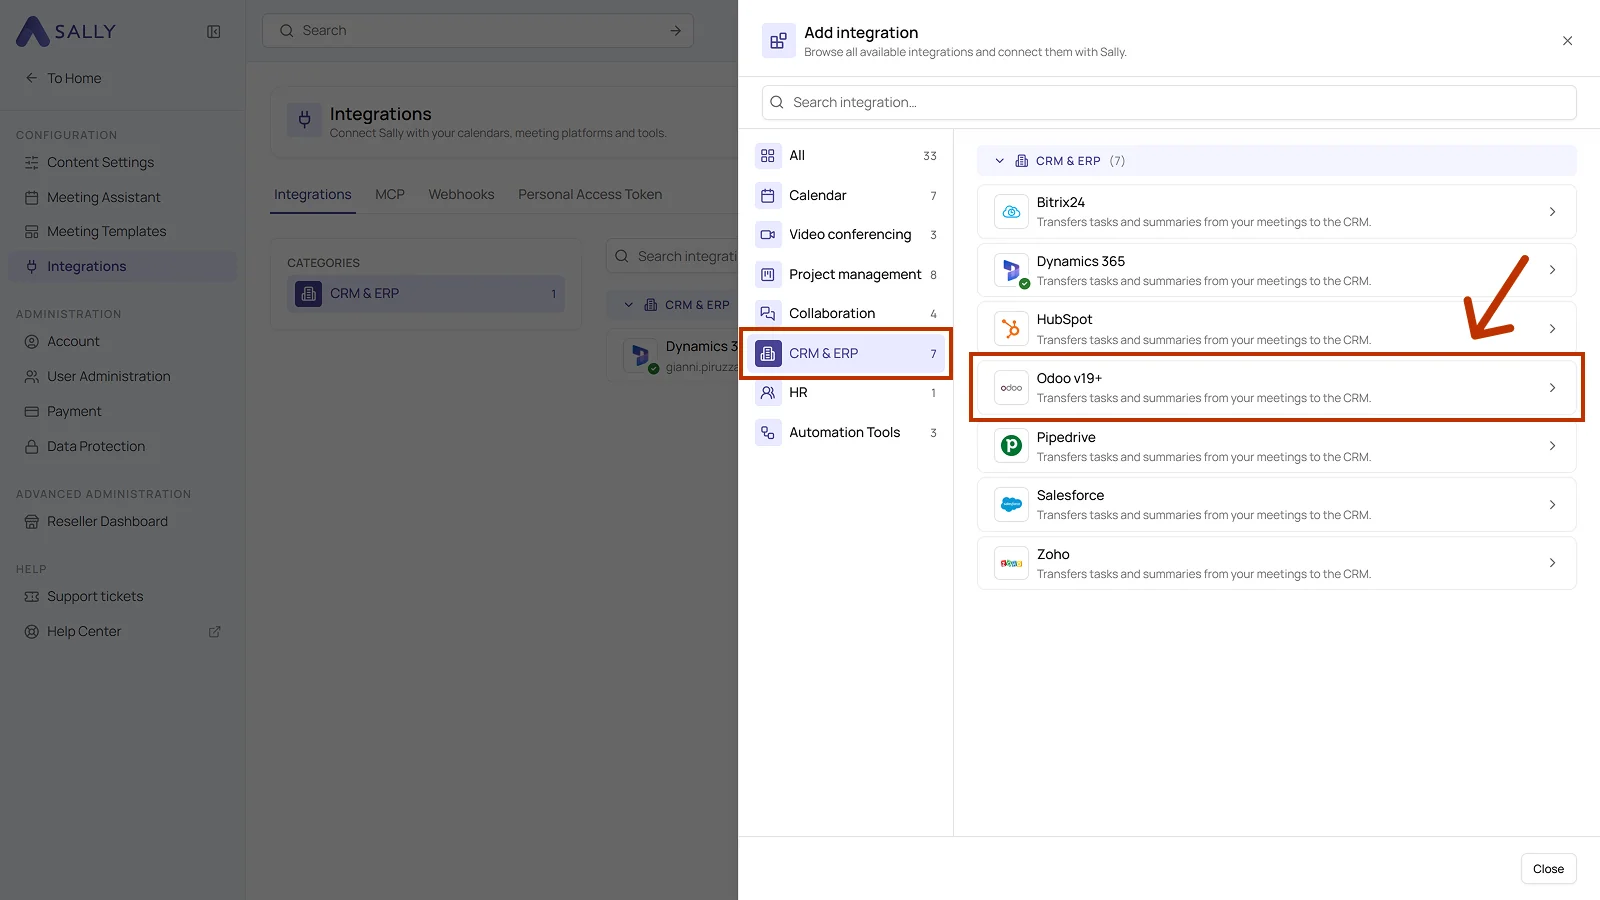
- Open the CRM & ERP category on the left and select Odoo v19+. You can also just type the name into the search bar at the top.
-
The panel on the right explains what the integration does. Click Connect at the bottom right.
-
In the Connect Odoo v19+ dialog, enter your host and your API key. The database field is optional. Click Connect and Sally checks the access with Odoo straight away. Further down you will find how to create an API key in Odoo.
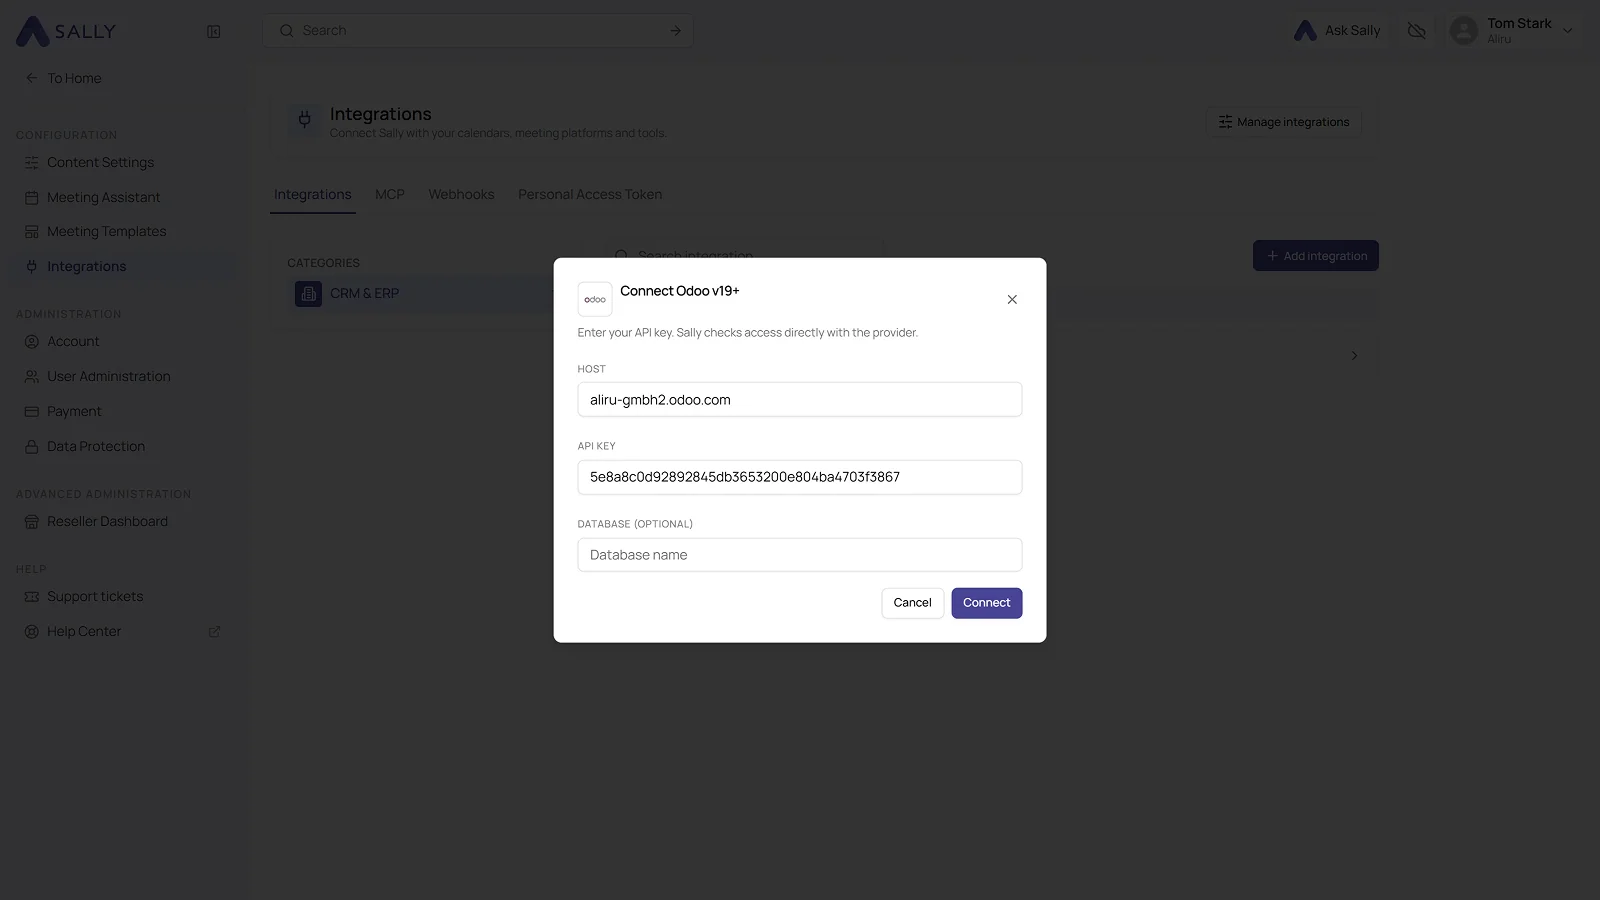
The Odoo host must be entered as a plain hostname (domain).
✅ Correct:
mycompany.odoo.com
❌ Wrong:
https://mycompany.odoo.com/odoo/crm
mycompany.odoo.com/odoo/crm
Enter only the domain, without https:// and without any additional paths.
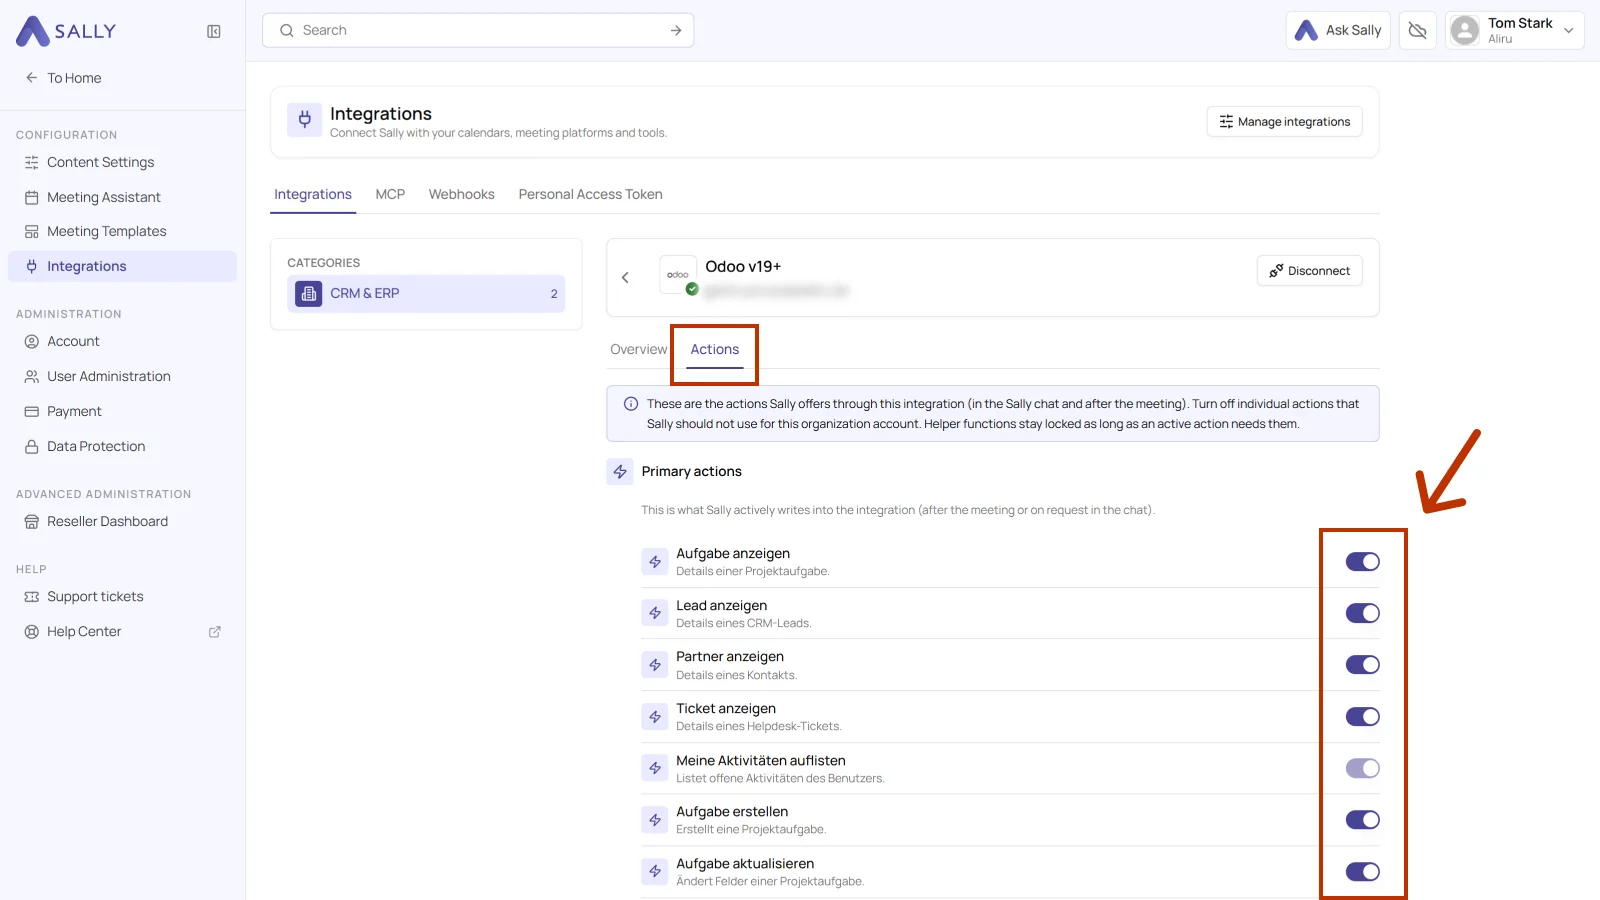
- Once the check goes through, Odoo is connected. The Actions tab lists everything Sally can do through this integration, and you can switch off whatever it should not use for your company account. Helper functions stay locked while an active action still needs them, which is why some toggles will not move. Disconnect in the top right corner removes the integration again.
API key in Odoo
To set up the connection, Sally needs an API key from your Odoo account.
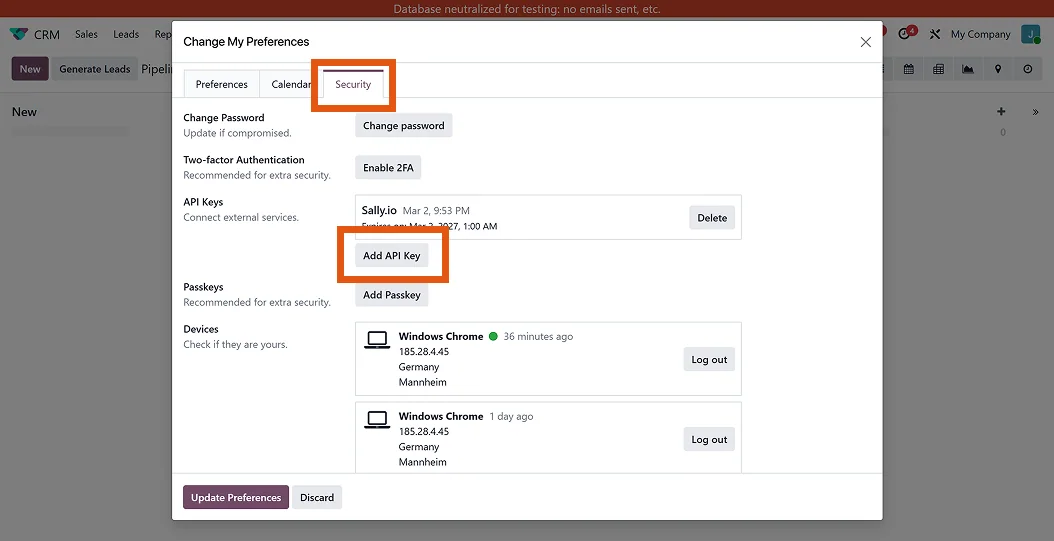
- In Odoo, open your user profile and go to Change My Preferences.
- Switch to the Security tab.
- Scroll to the API Keys section and click Add API Key.
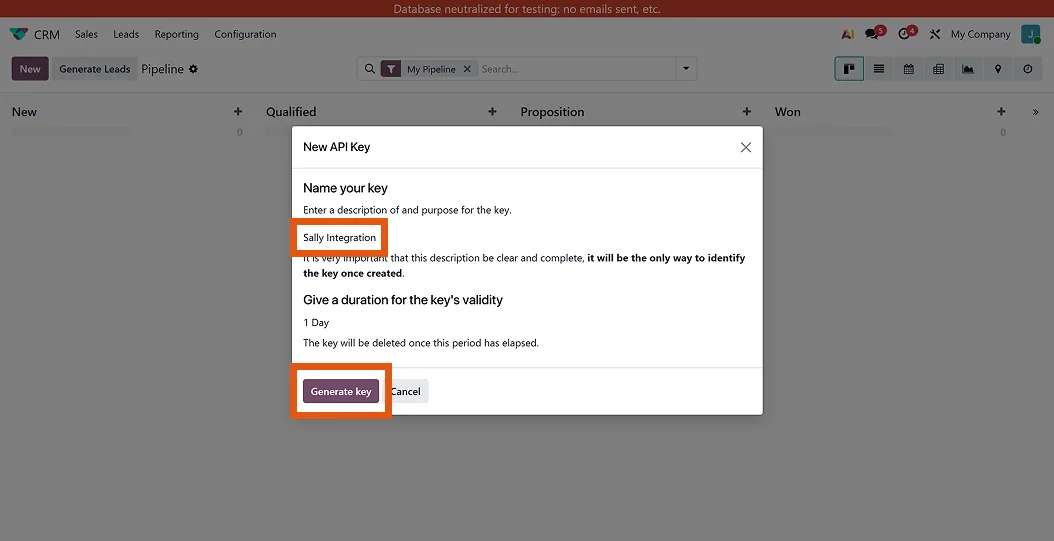
- Give the key a name, for example Sally Integration, pick how long it stays valid, and click Generate key.
- Copy the API key and paste it into Sally.
The API key is shown in full only once. Store it somewhere safe, or paste it straight into the Sally integration.
Whether an integration may be connected at all is up to owners and admins, see managing integrations for your users.
2. Send insights to Odoo
With Odoo connected, content from a recording reaches Odoo in a few clicks.
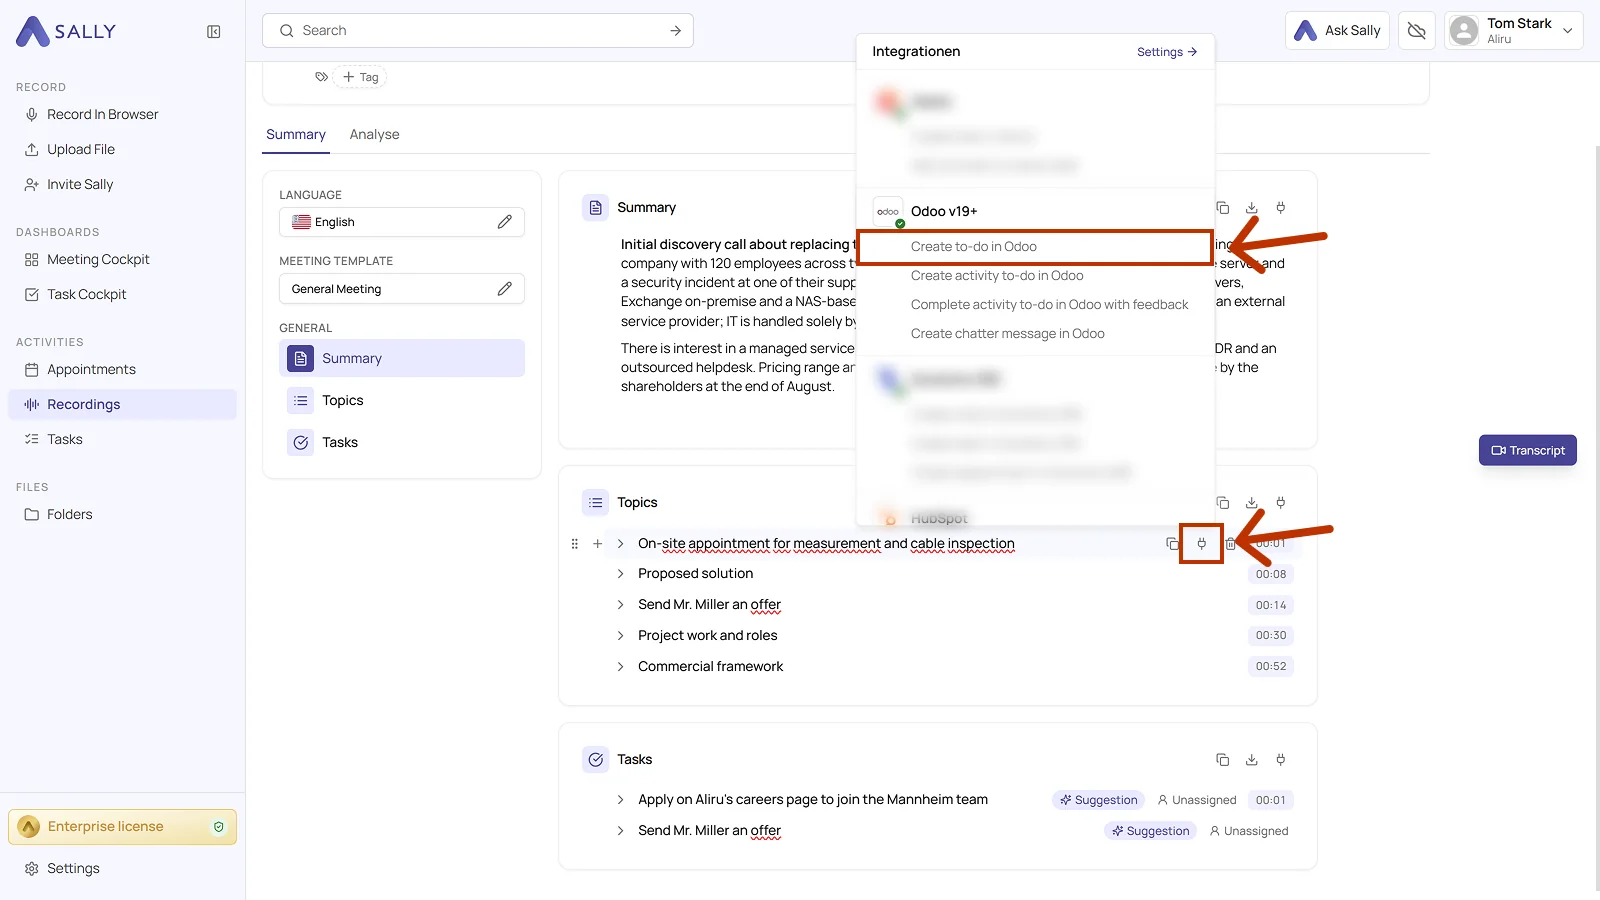
It works the same way every time: open a recording and click the Integrations icon. It sits at the top of every section and on every single line. The four Odoo actions show up underneath.
You can:
- Create a to-do in Odoo
- Create an activity to-do in Odoo
- Complete an activity to-do in Odoo with feedback
- Create a chatter message in Odoo
For each of these actions, the content comes prefilled from the summary and can be edited.
2.1. Create a to-do in Odoo
Turn a point from the summary into a personal Odoo to-do or into a to-do inside a project.
- On the line you want to create as a to-do, click the Integrations icon and pick Create to-do in Odoo.
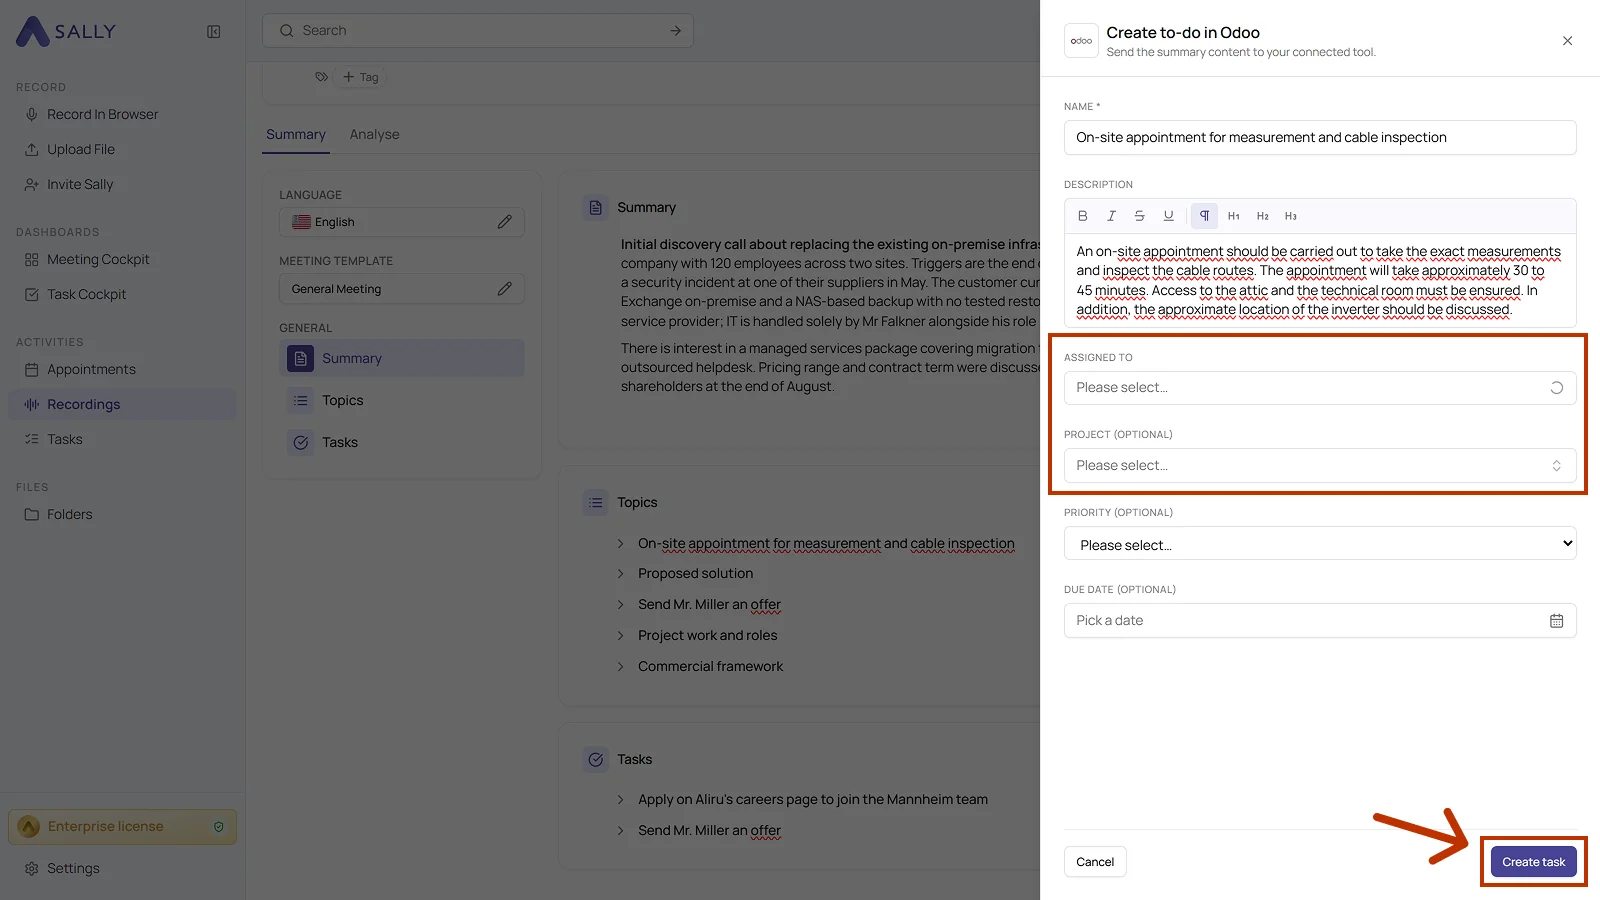
- Check the name and the description. The name is the only required field.
- Pick who owns it under Assigned to. Project, priority, and due date are optional. Leave project empty and you get a personal to-do.
- Click Create task.
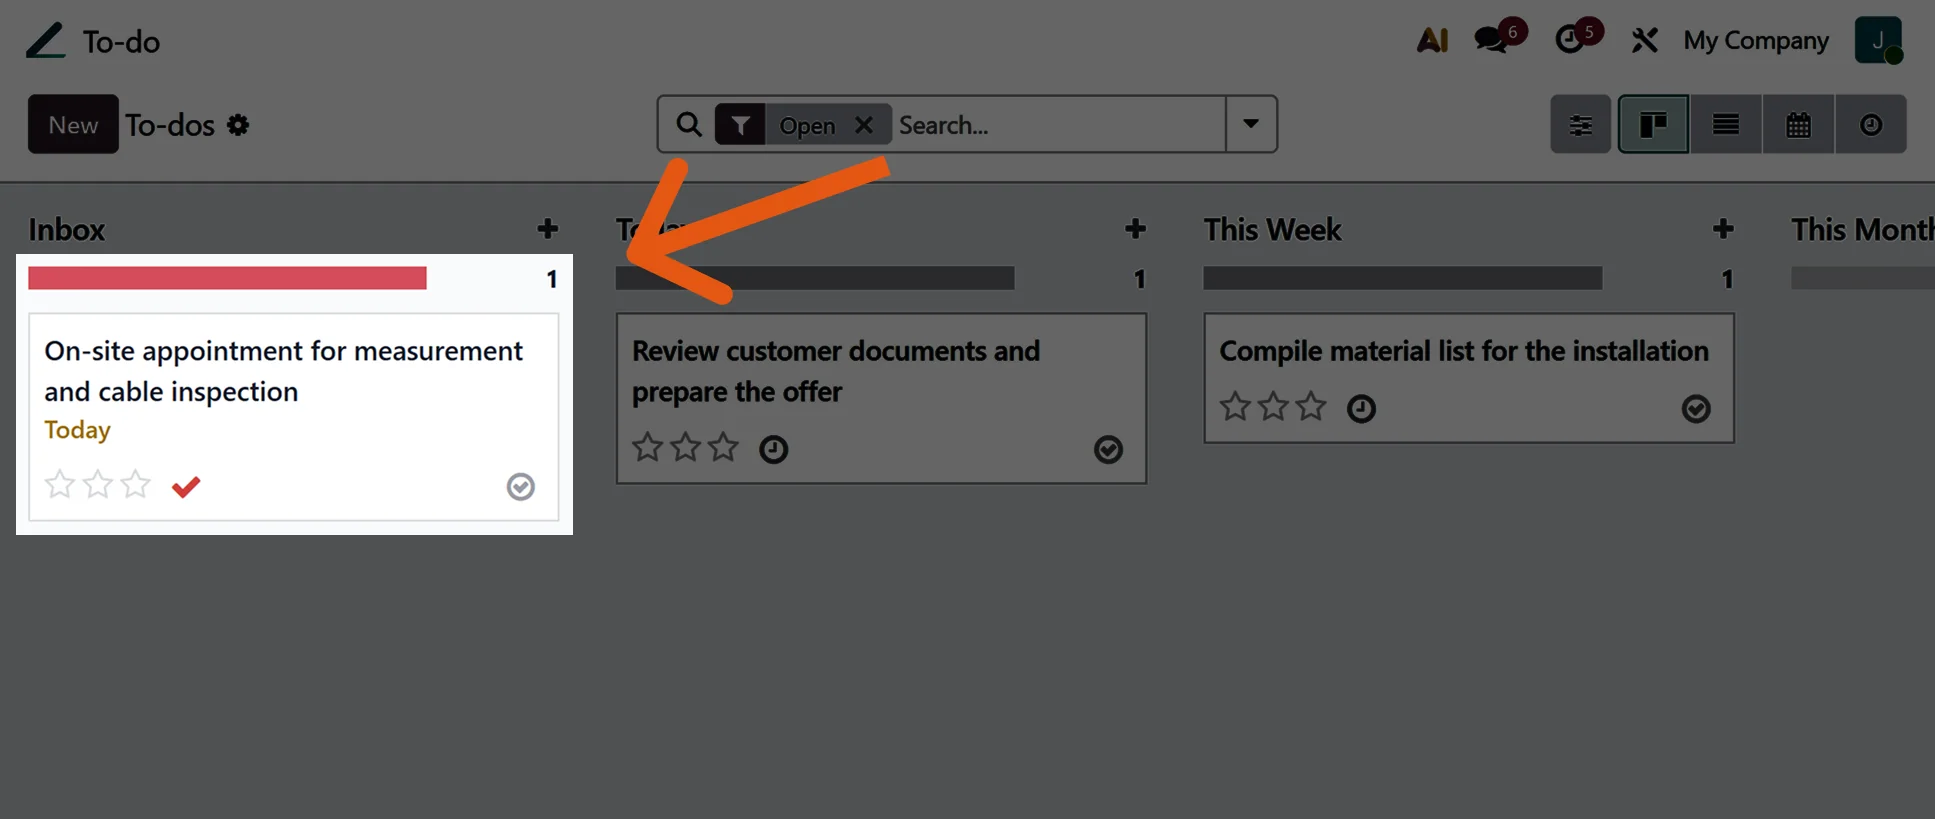
- The to-do lands in the inbox of your personal or project to-do list in Odoo.
2.2. Create an activity to-do in Odoo
An activity to-do hangs on a record, for example on a lead, an opportunity, or a contact.
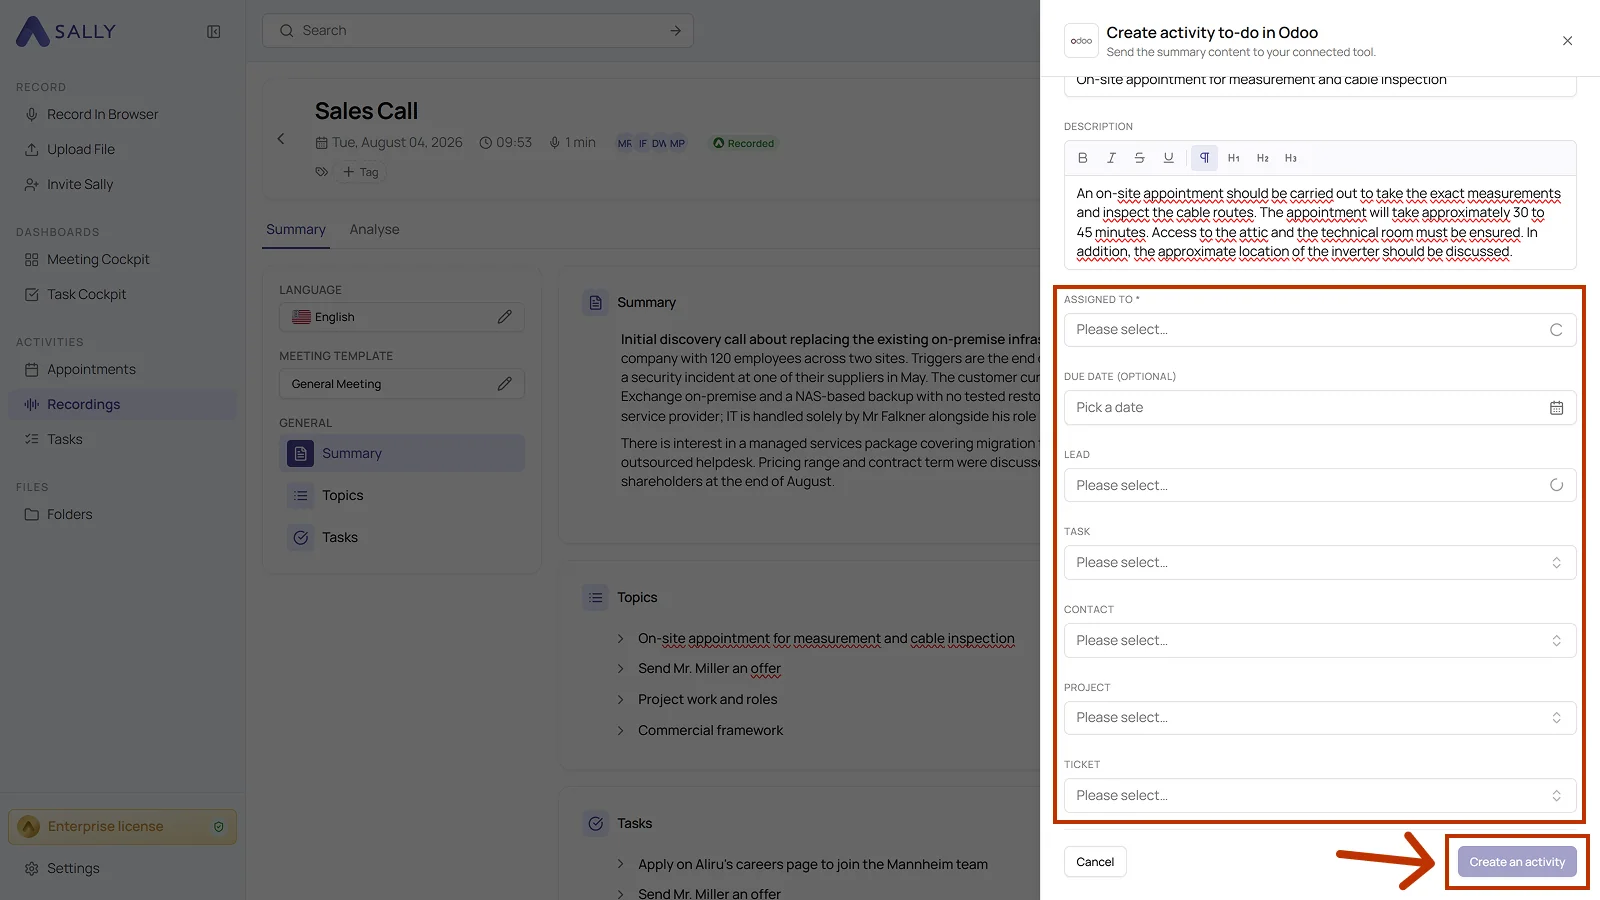
- On the line you want, click the Integrations icon and pick Create activity to-do in Odoo.
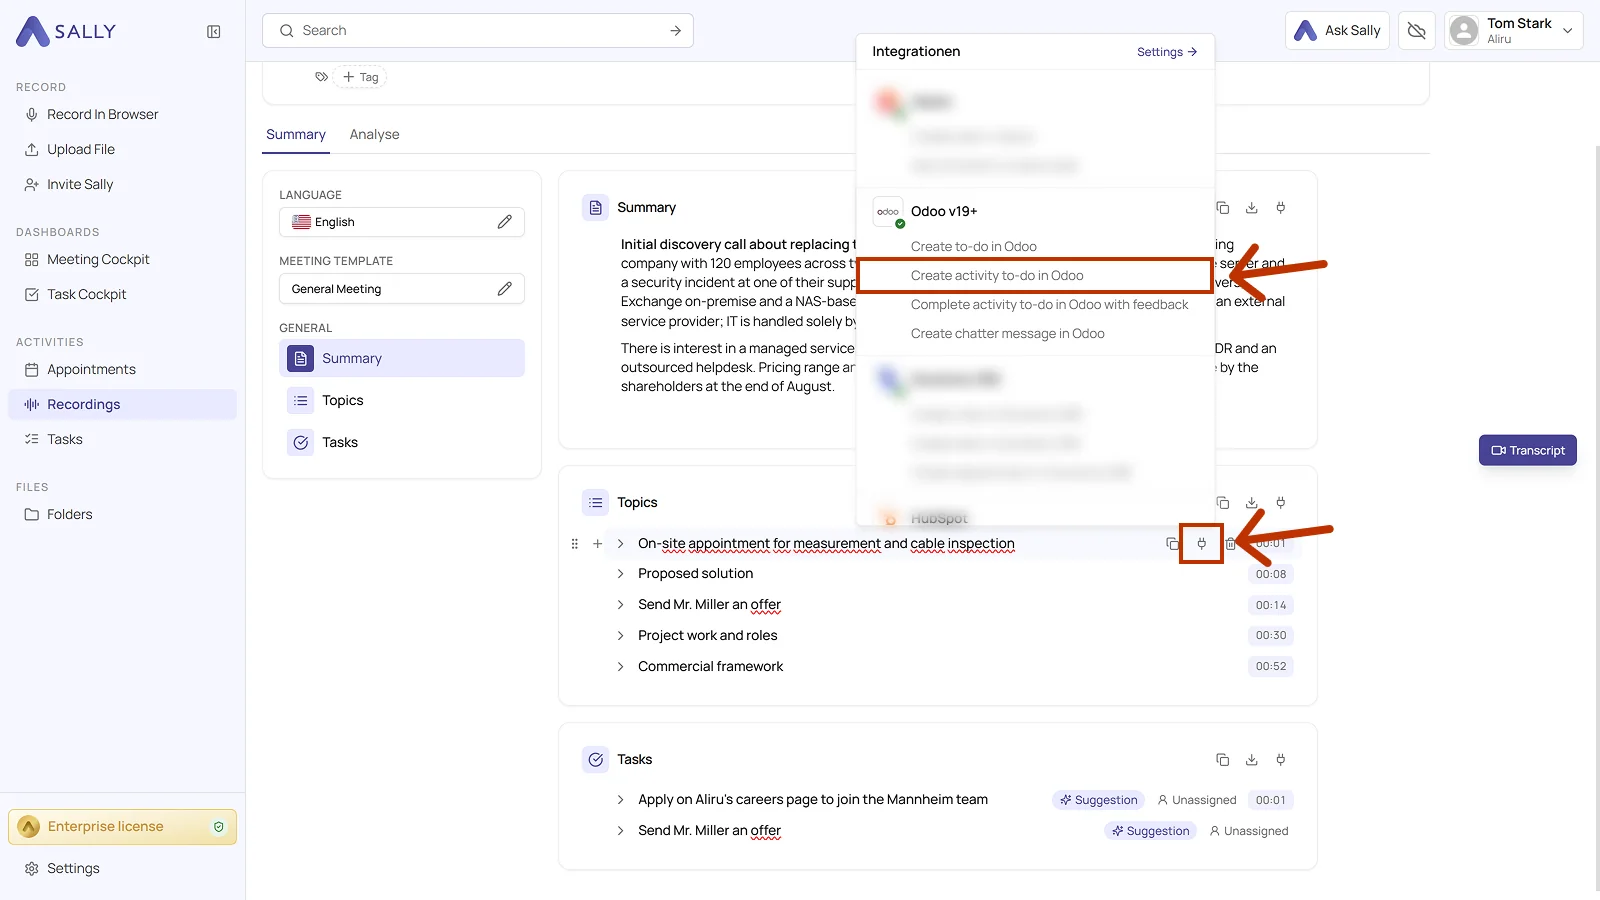
- Read over the description and pick who owns it under Assigned to. That field is required, the due date is optional.
- Link the activity to a record: lead, task, contact, project, or ticket.
- Click Create an activity.
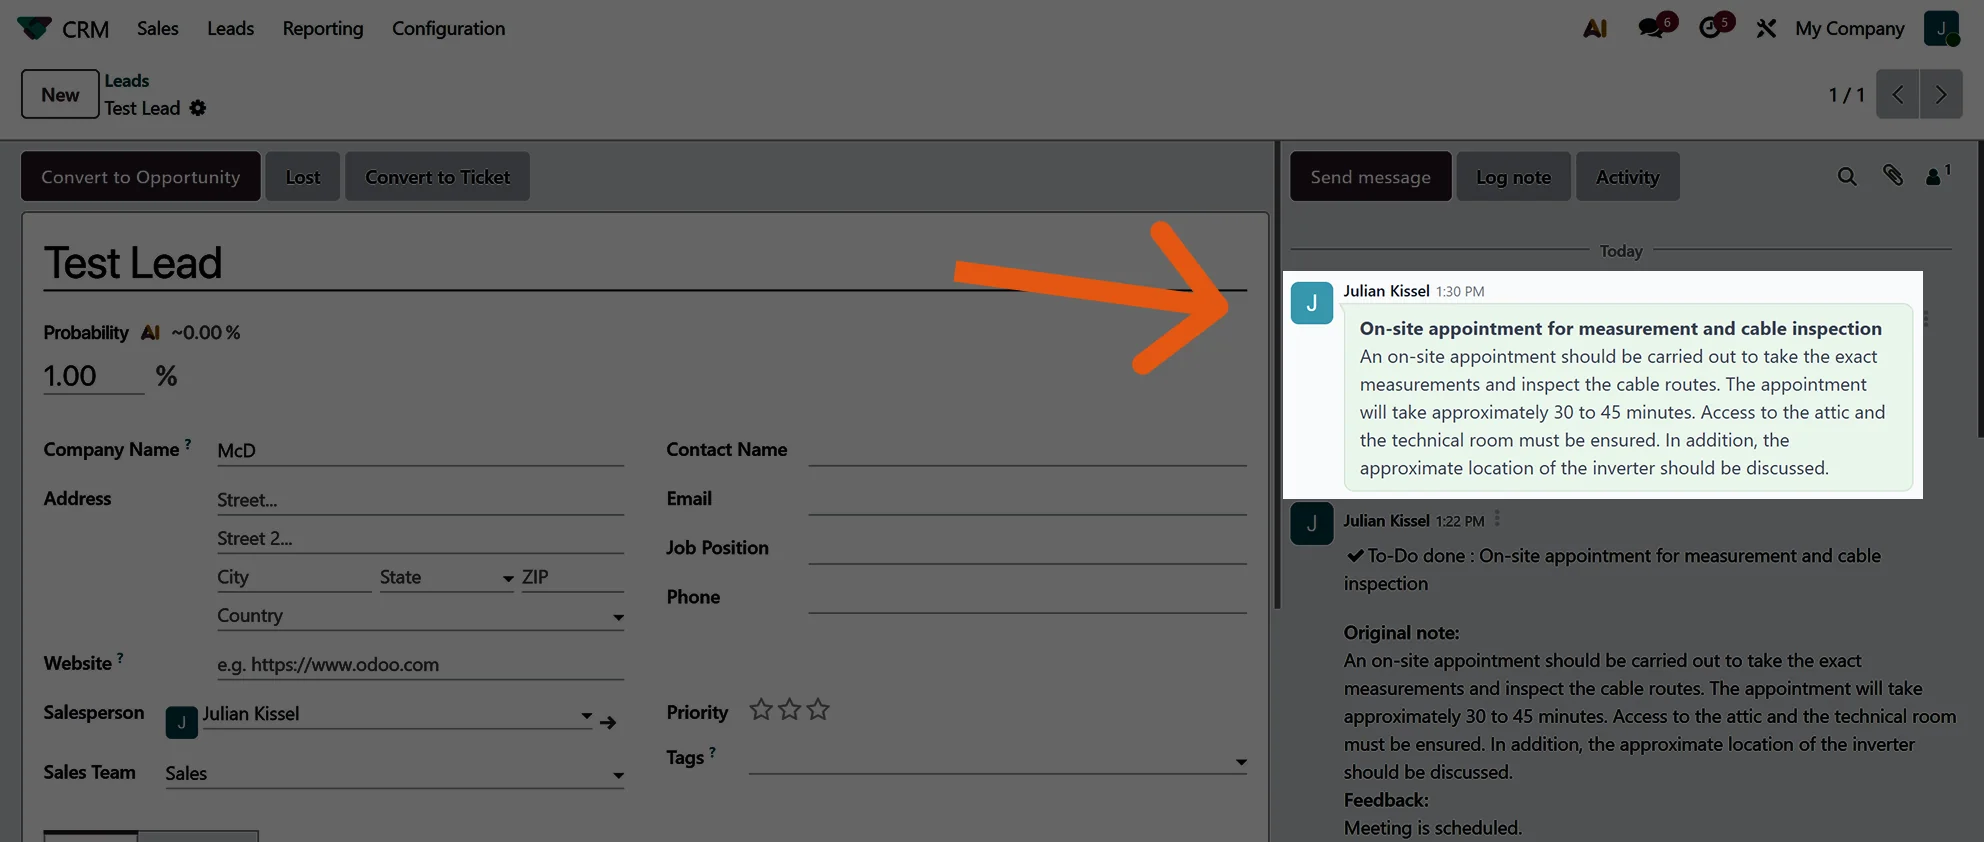
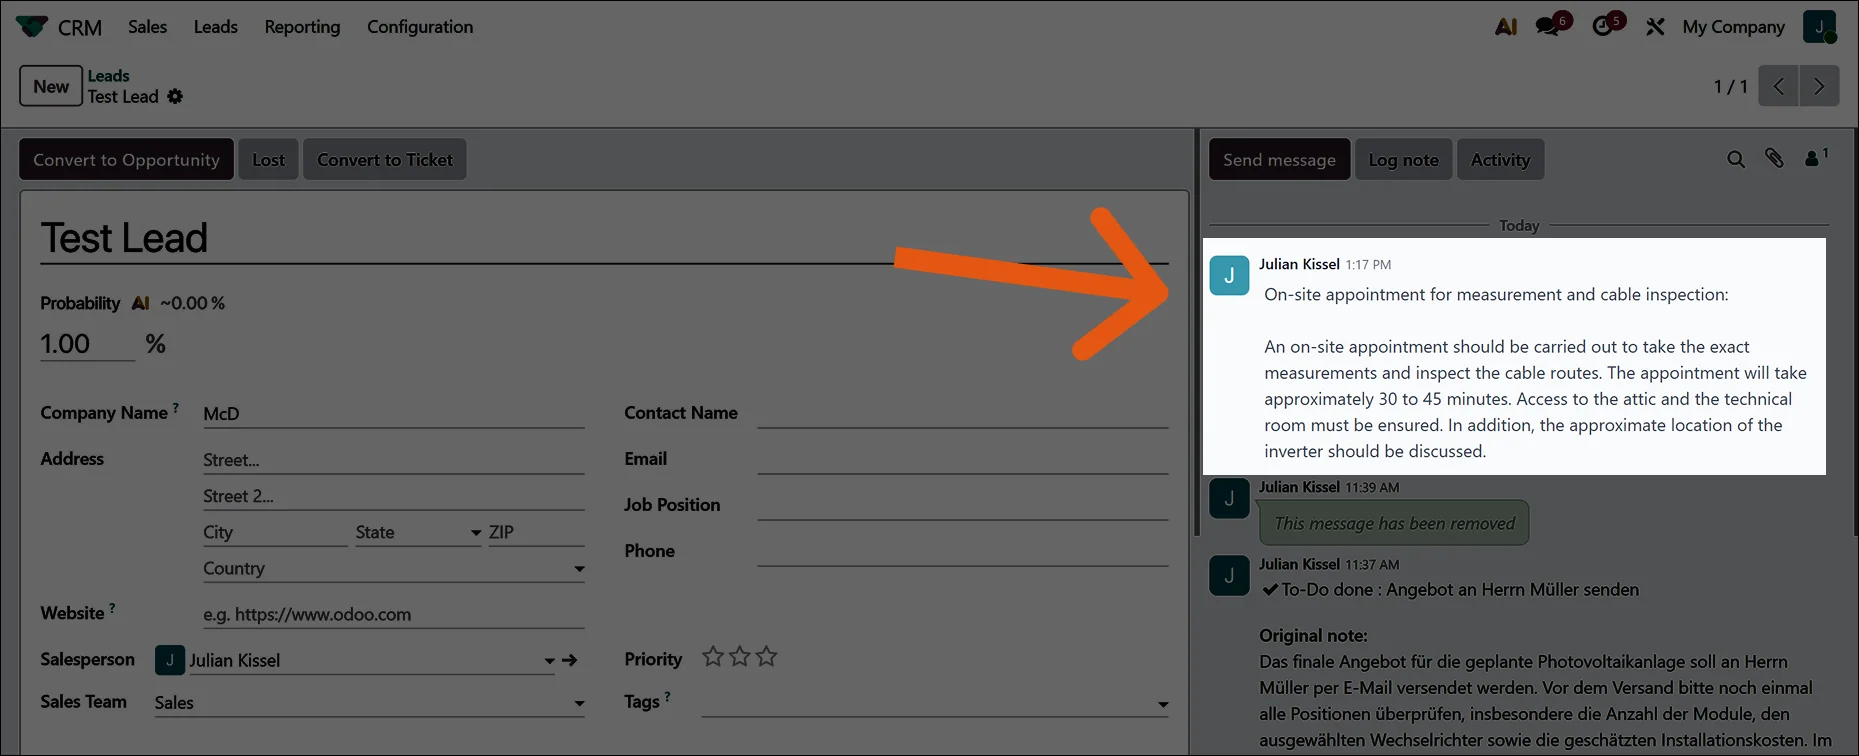
- The activity shows up on the record you picked, a lead in this example.
2.3. Complete an activity to-do in Odoo with feedback
You can close an existing activity to-do from inside Sally and record what came of it.
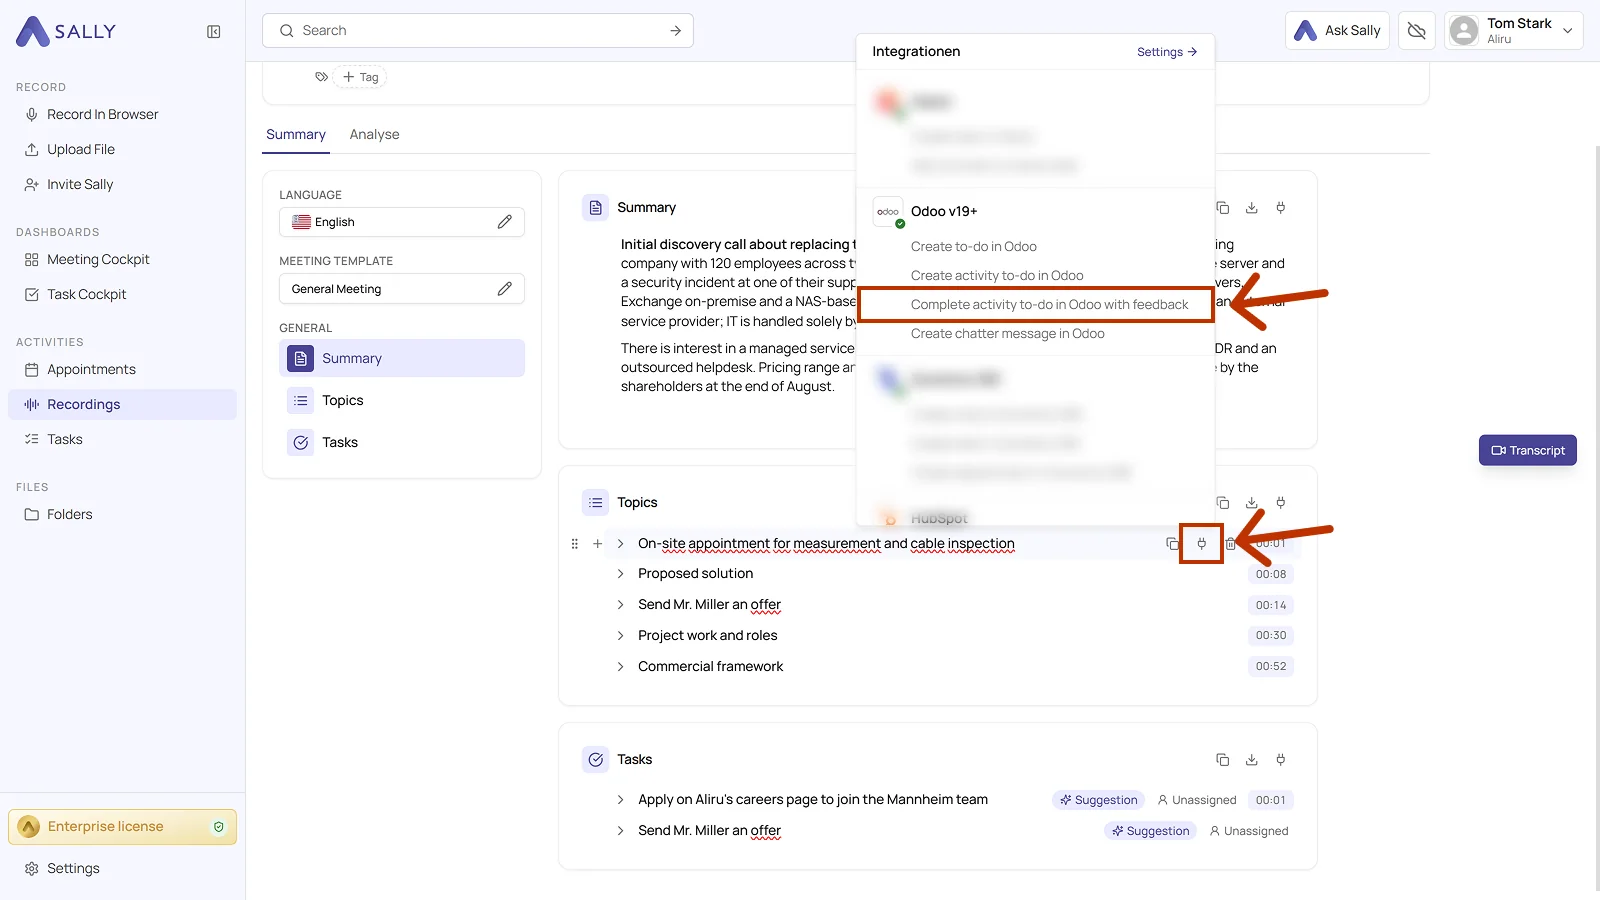
- On the line you want, click the Integrations icon and pick Complete activity to-do in Odoo with feedback.
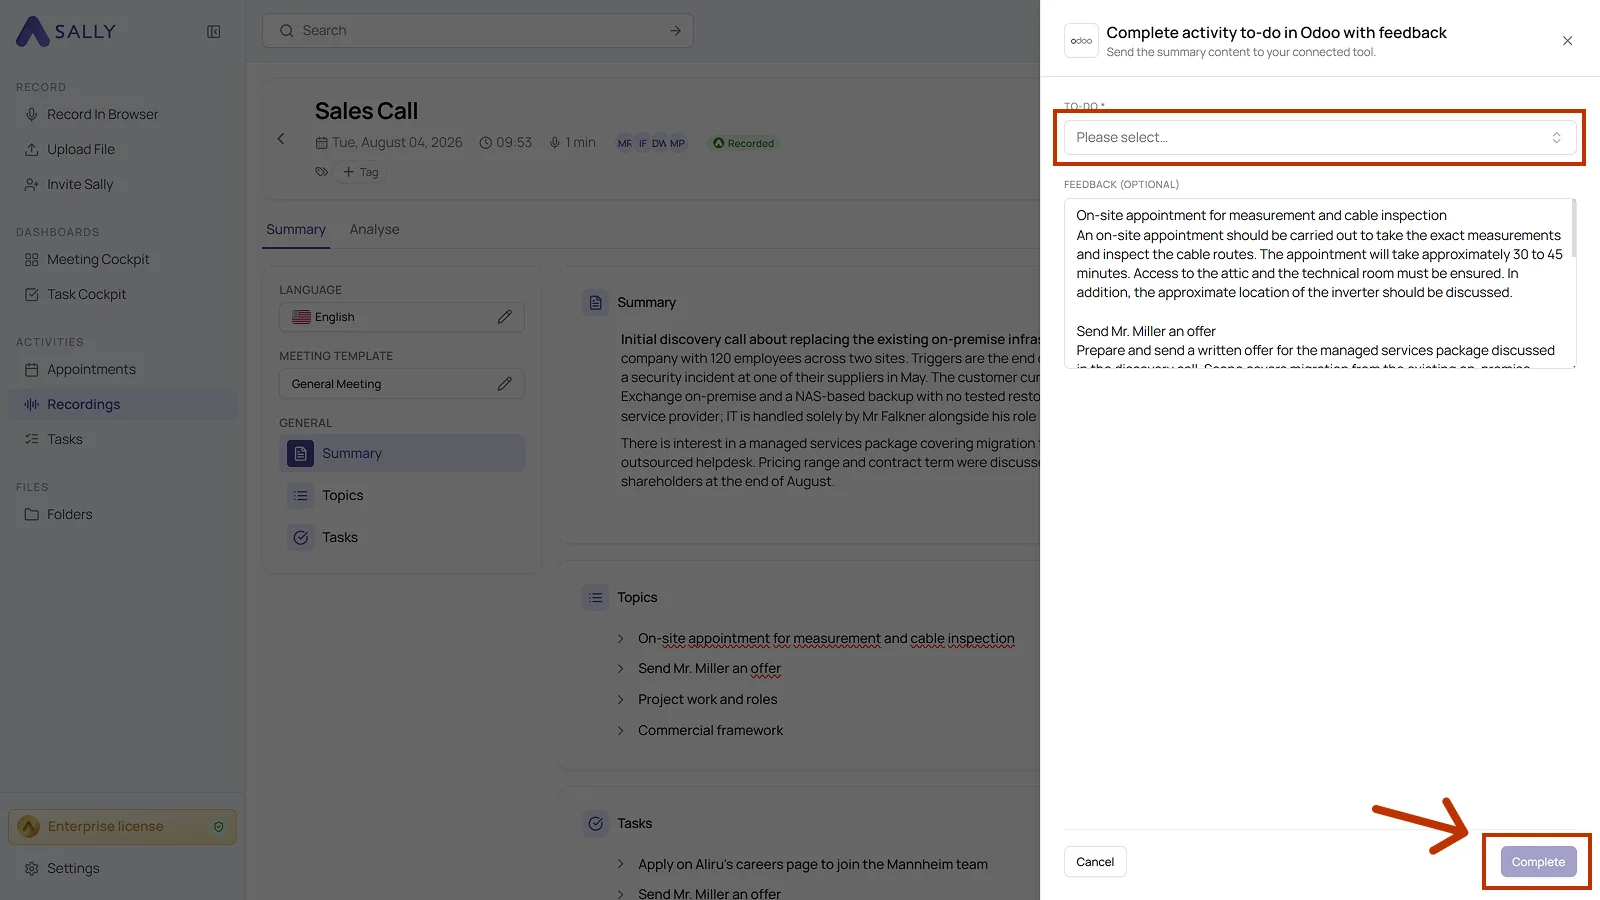
- Under To-do, pick the activity to-do you want to close. This field is required.
- Add what came of it in the feedback field if you like. The text comes prefilled from the summary.
- Click Complete.
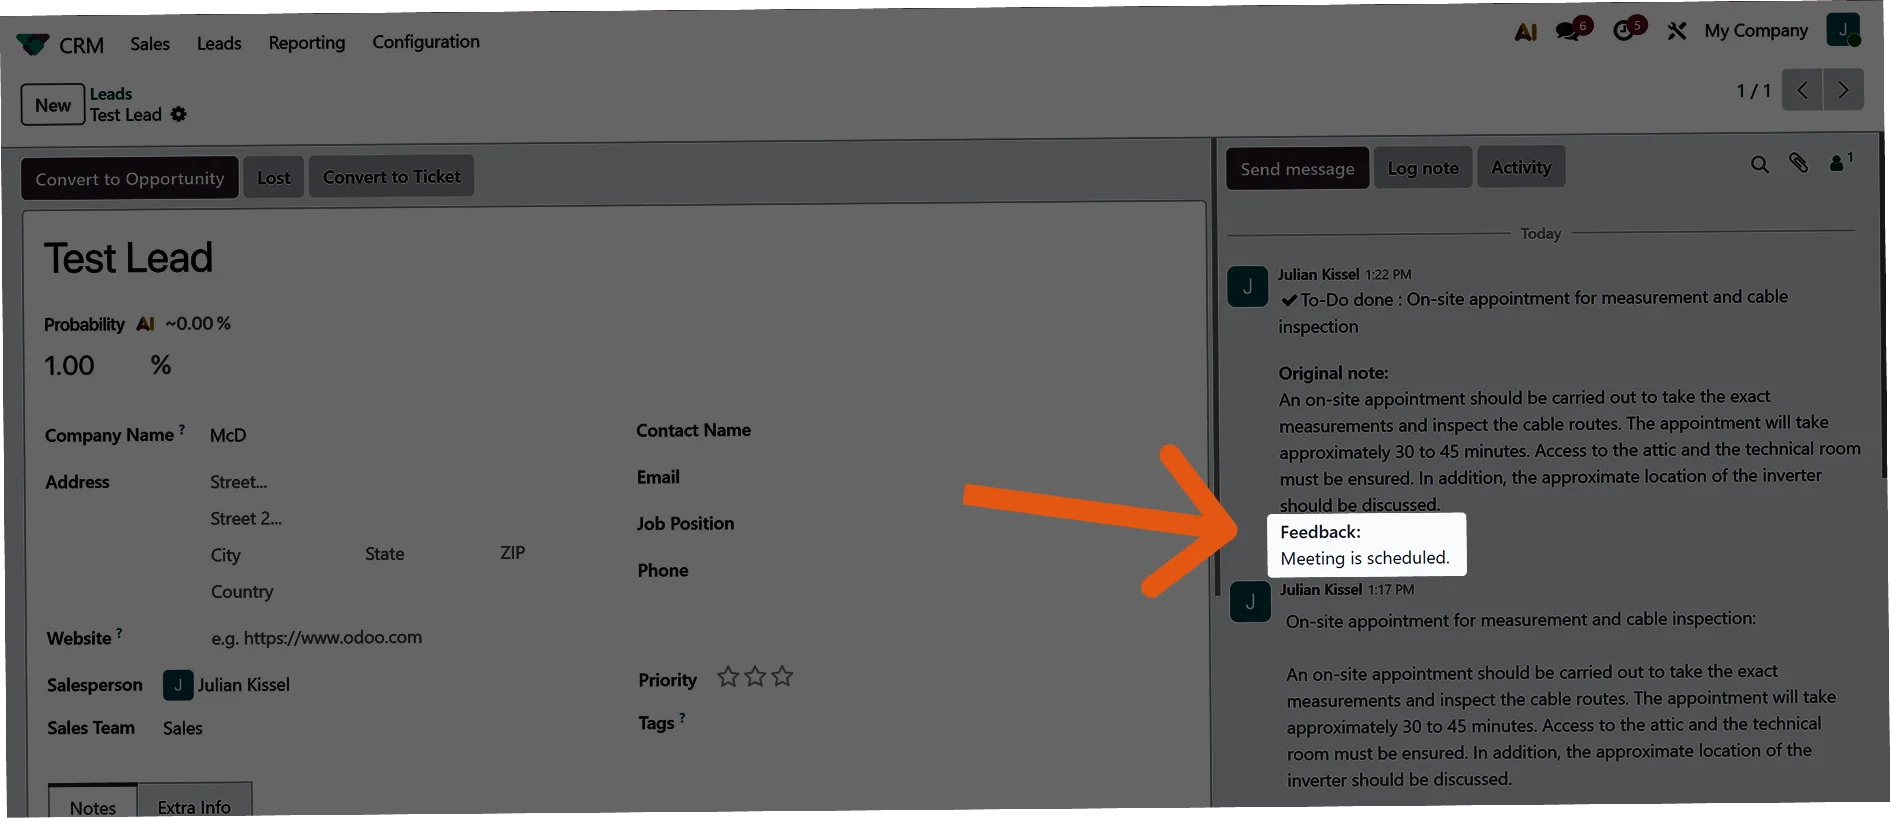
- The activity to-do is closed in Odoo, and the feedback sits in the chatter of the record.
2.4. Create a chatter message in Odoo
A chatter message keeps what was discussed on the record itself, without turning it into a task.
- On the line you want, click the Integrations icon and pick Create chatter message in Odoo.
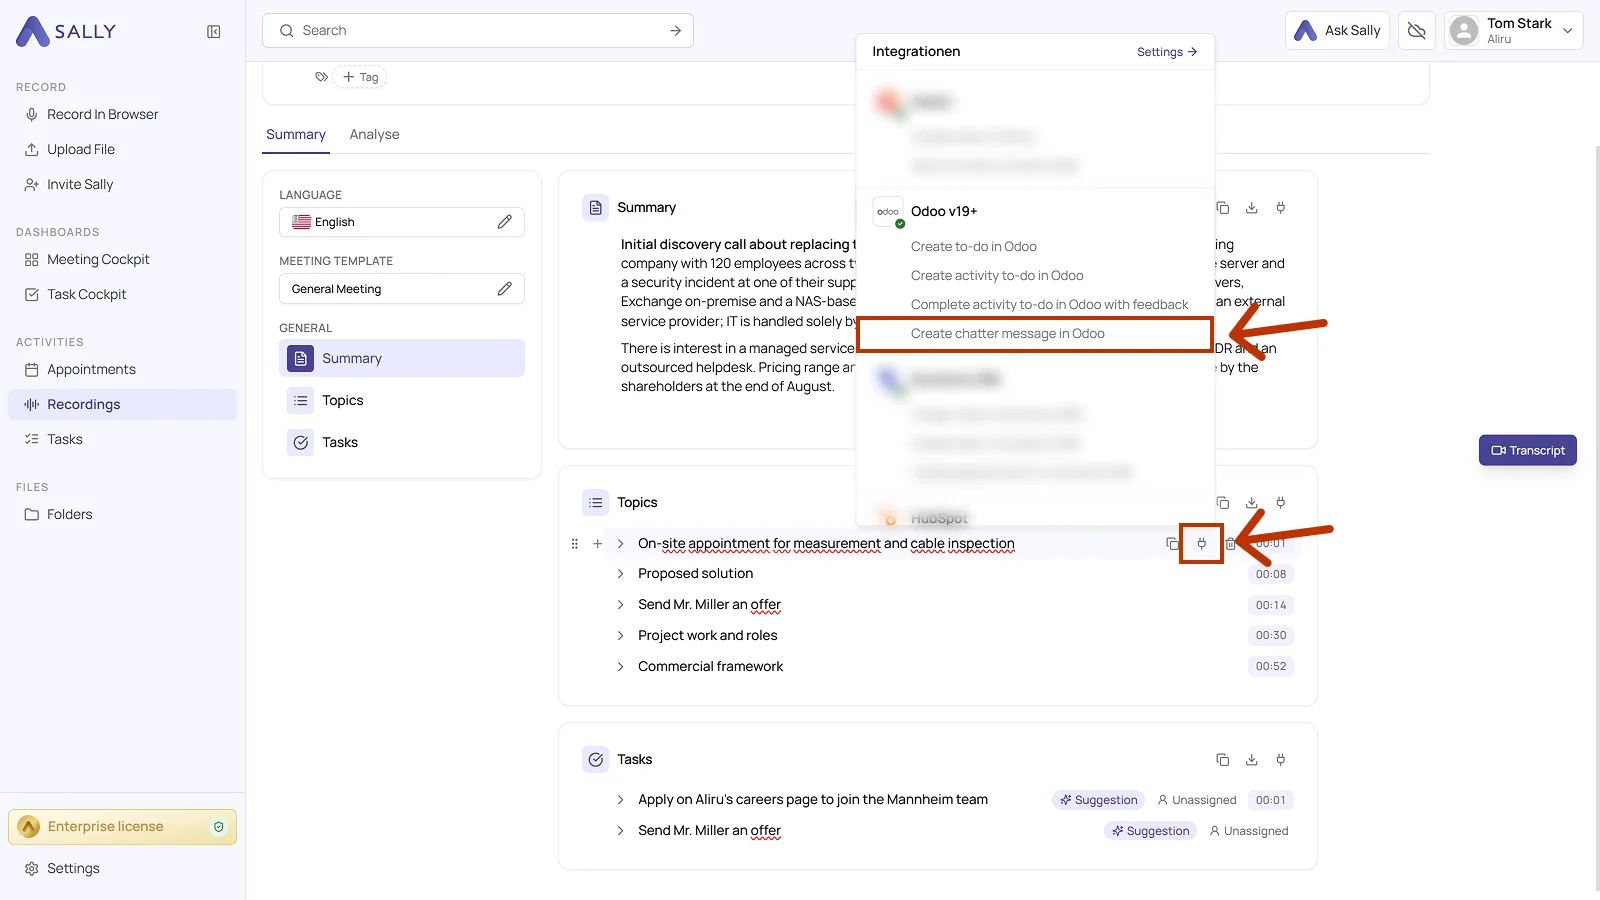
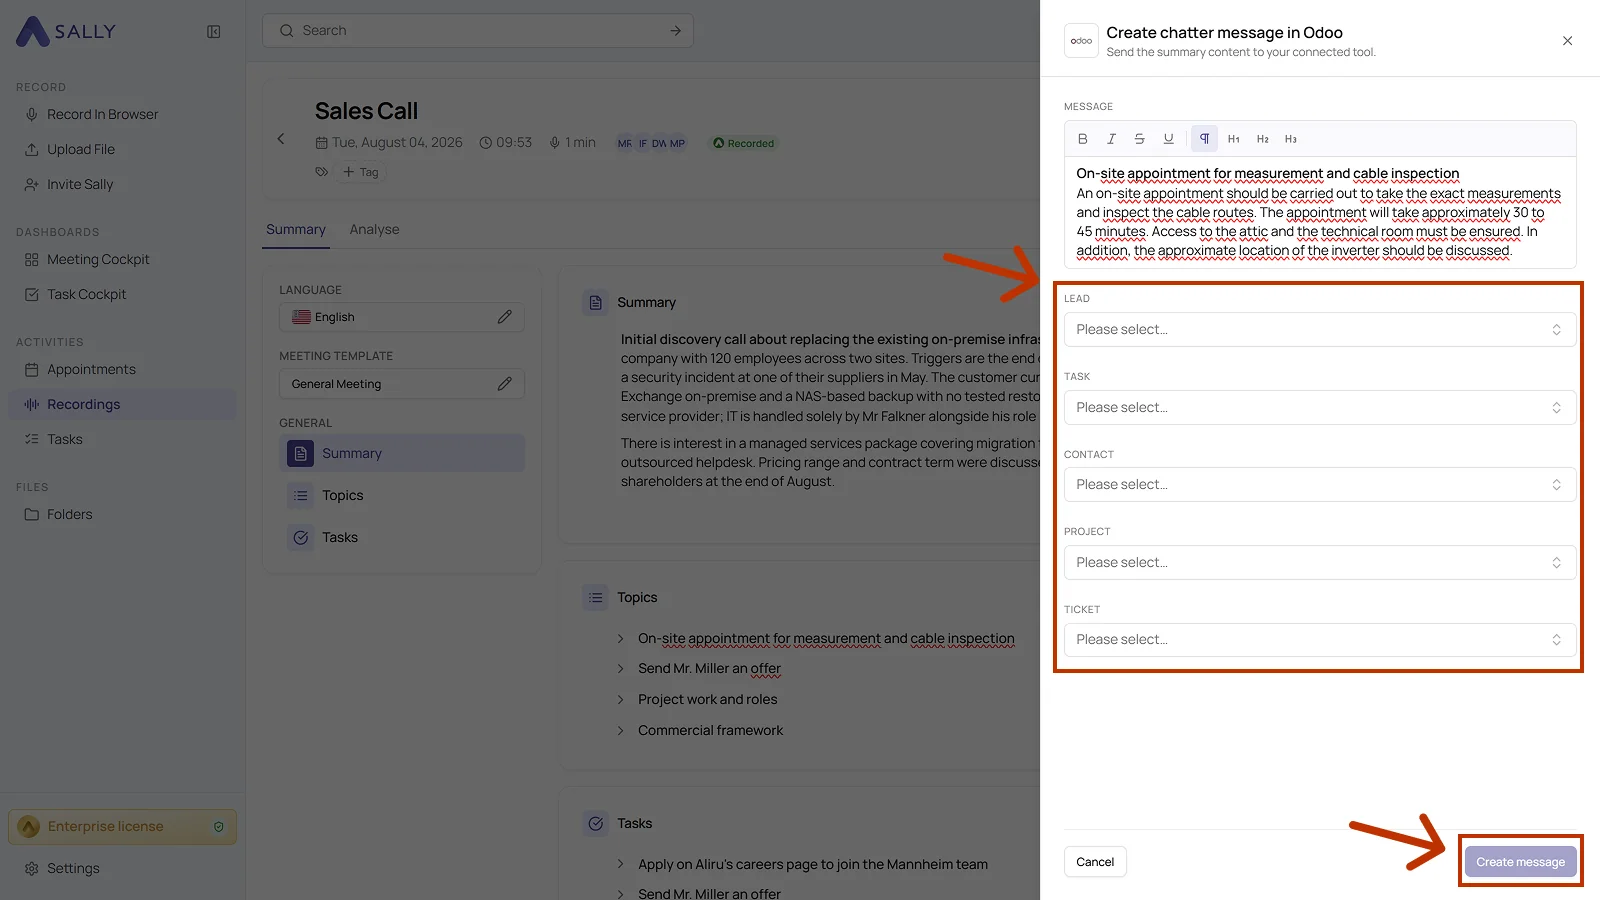
- Read over the message. It comes prefilled from the summary and you can format it in the editor.
- Link the message to a record: lead, task, contact, project, or ticket.
- Click Create message.
- The message appears in the chatter of the record you picked.