How to upload and transcribe video or audio files in Sally AI
In addition to transcription via the meeting bot, you can manually upload a video or audio file to Sally. Sally then processes the file and creates a transcript and a summary that you can read and download from your account.
Quick navigation
1. How to upload and transcribe a video or audio file
Here's how:
- In the sidebar under Record, click Upload file.
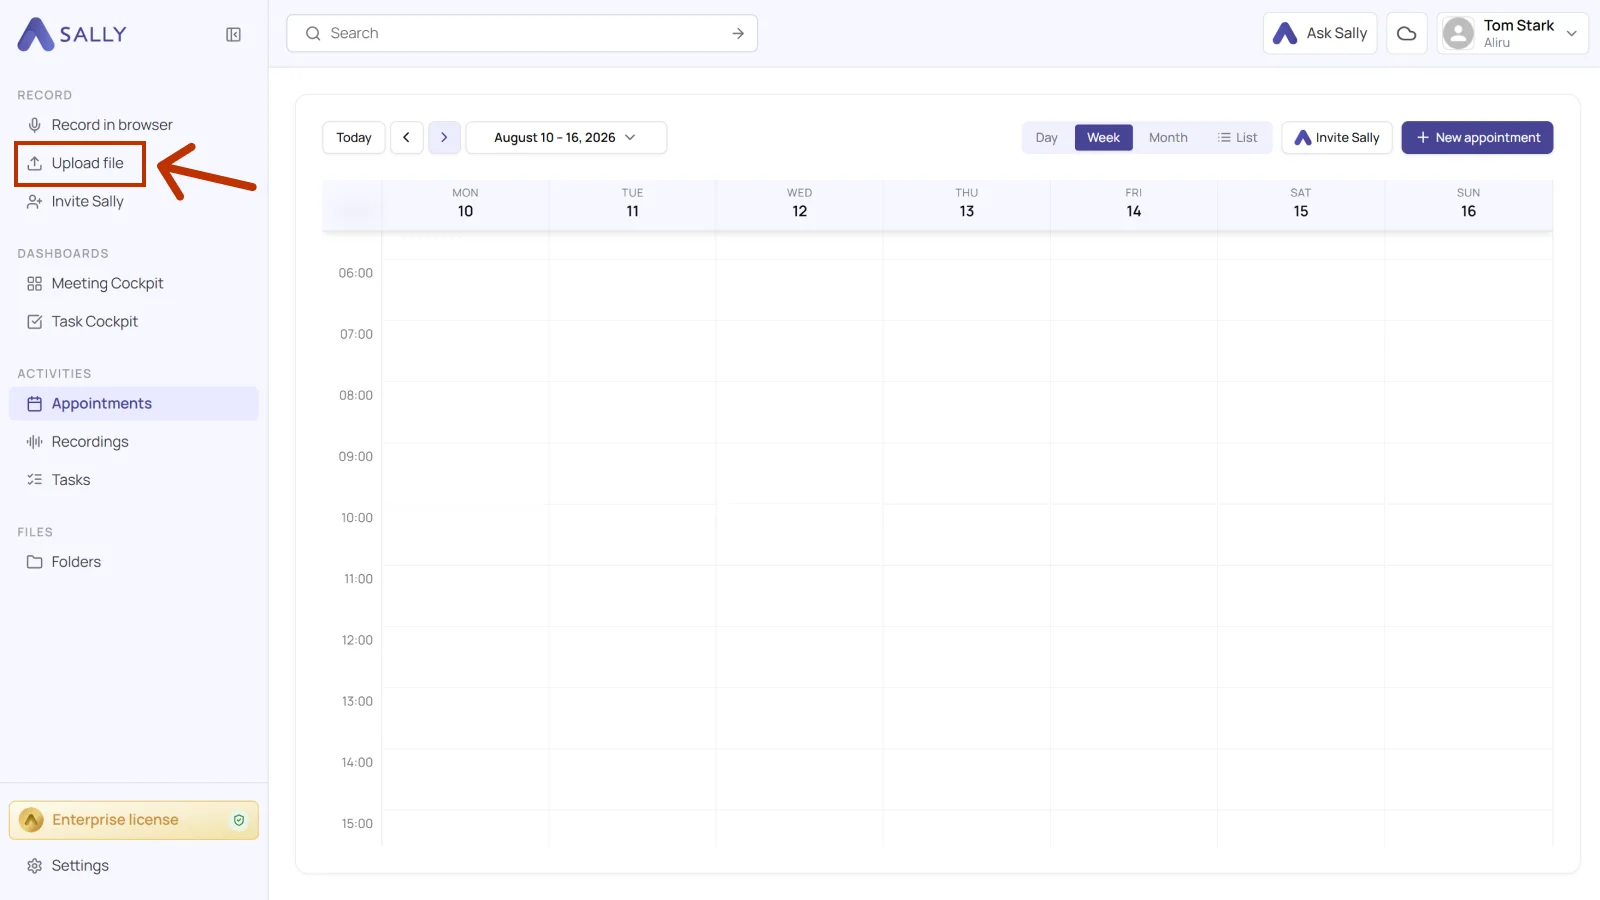
- In the "Upload recording" panel, drag and drop your video or audio file into the drop area or select it manually.
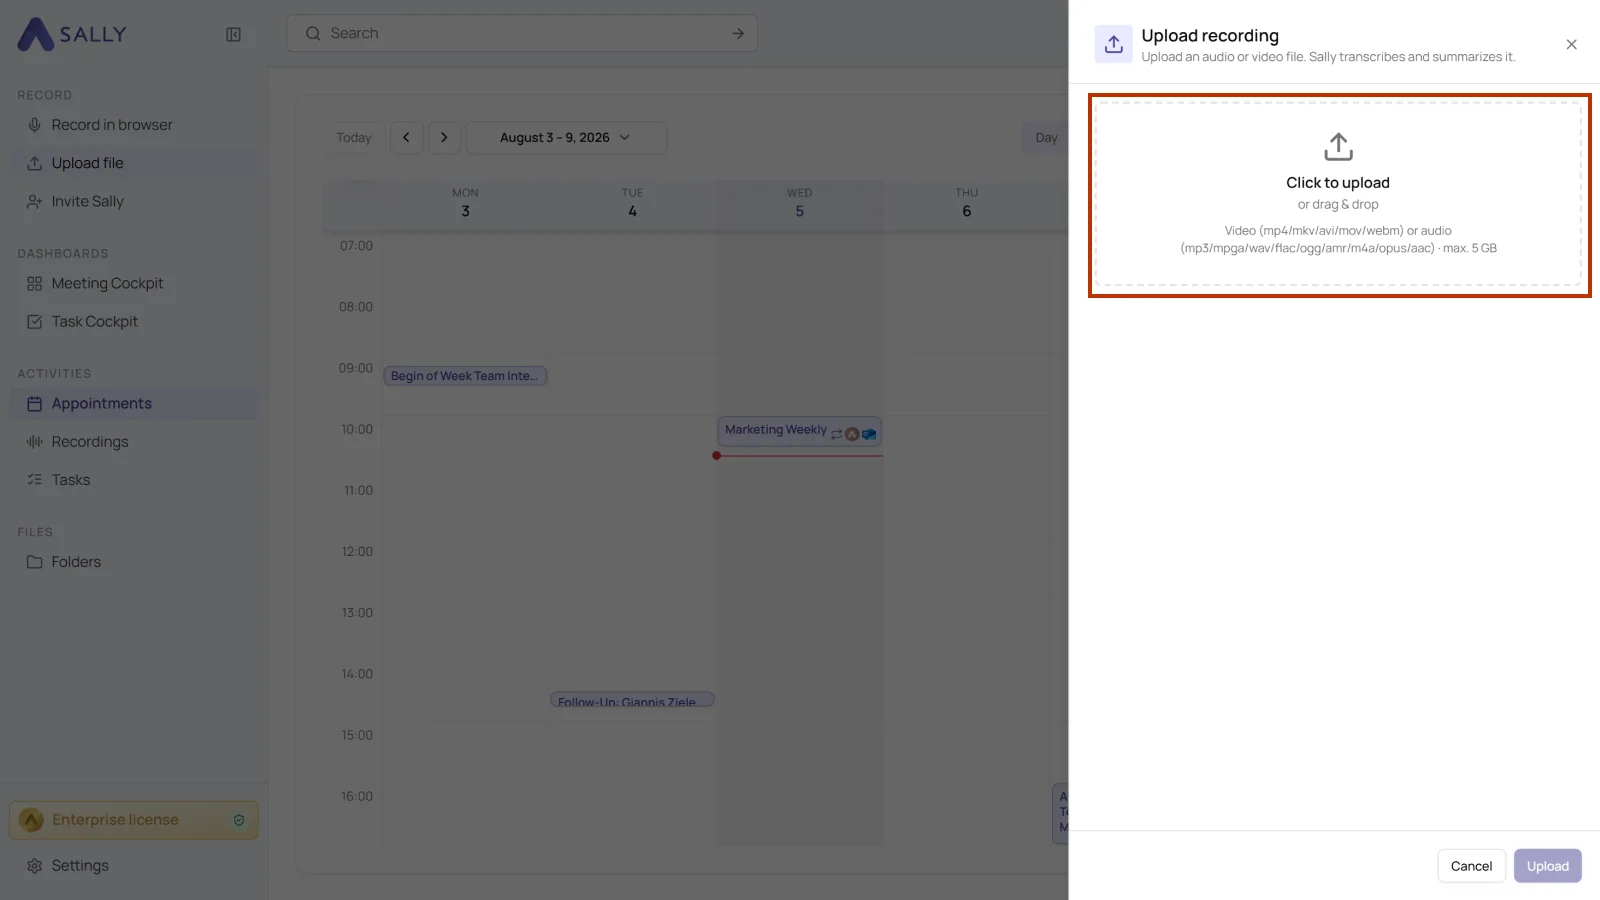
In the Starter plan, you can upload files up to 1 GB in size.
In the Pro and Enterprise plans, the upload limit increases to 5 GB.
Supported formats:
- Video: mp4, mkv, avi, mov, webm
- Audio: mp3, mpga, wav, flac, ogg, amr, m4a, opus, aac
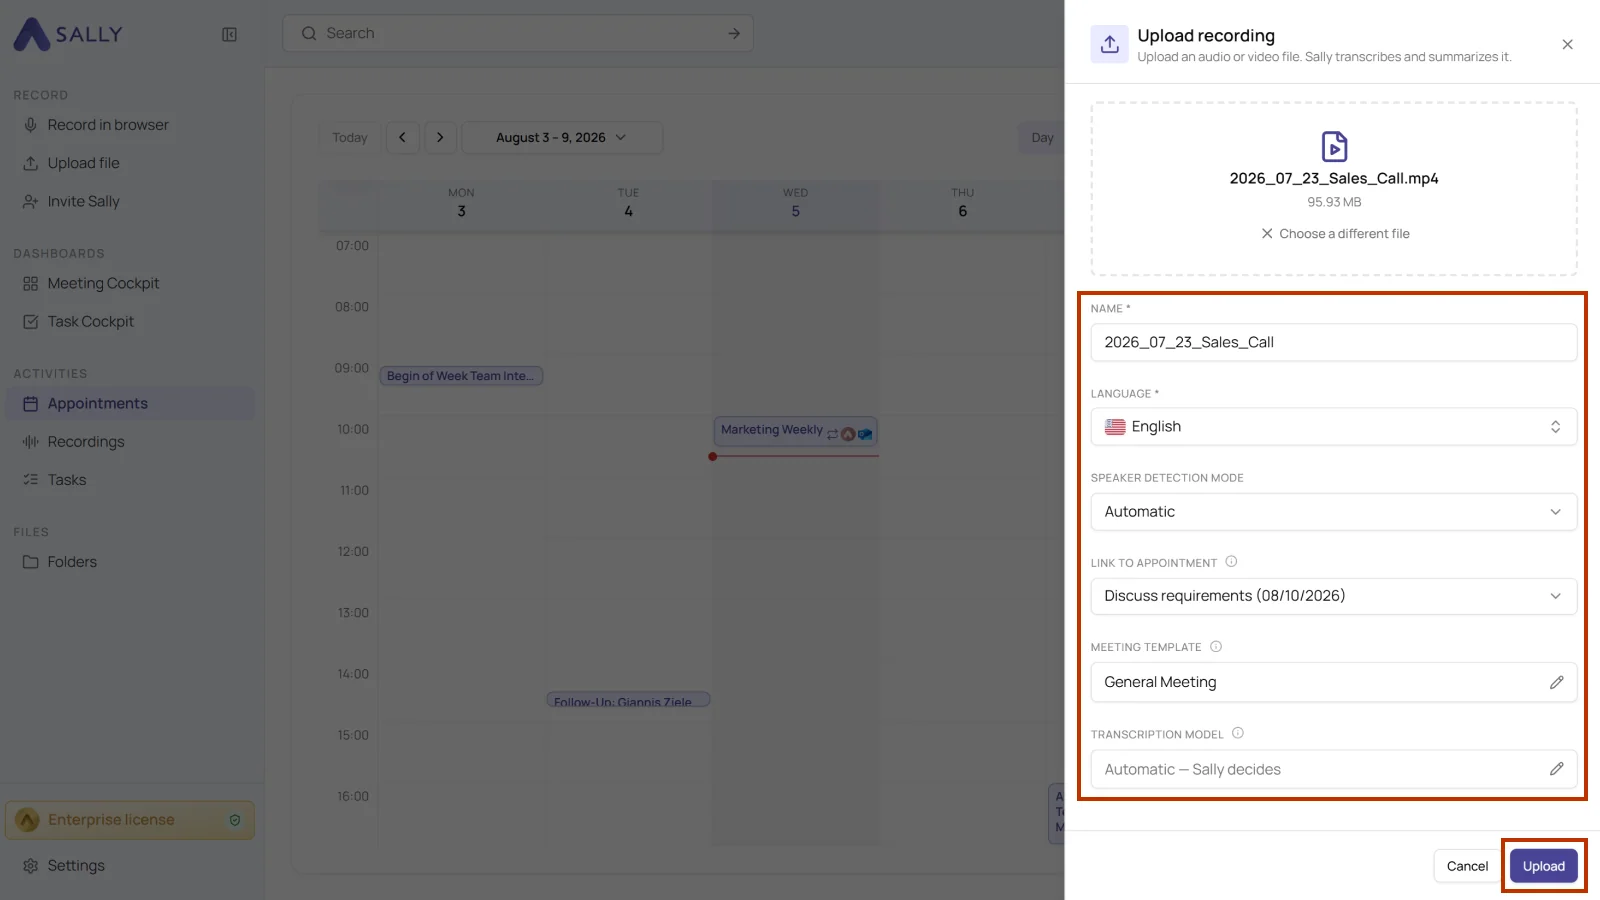
- Before the upload starts, you can set the following in this window:
- Give the recording a name. The file name is filled in by default.
- Pick the language manually instead of letting Sally detect it.
- Let Sally detect the number of speakers automatically or set it manually. If you pick “Manual” speaker detection, an extra field appears for the exact number.
Only use this when there are many speakers or the voices sound very similar. Automatic detection is usually the more reliable choice.
-
Link the file to a calendar event so the transcript shows up there too.
-
Choose the meeting template.
-
Set the transcription model or leave it on "Automatic, Sally decides".
-
Click "Upload".
-
Sally takes you to the "Recordings" section and starts on the transcript. That takes a few moments.
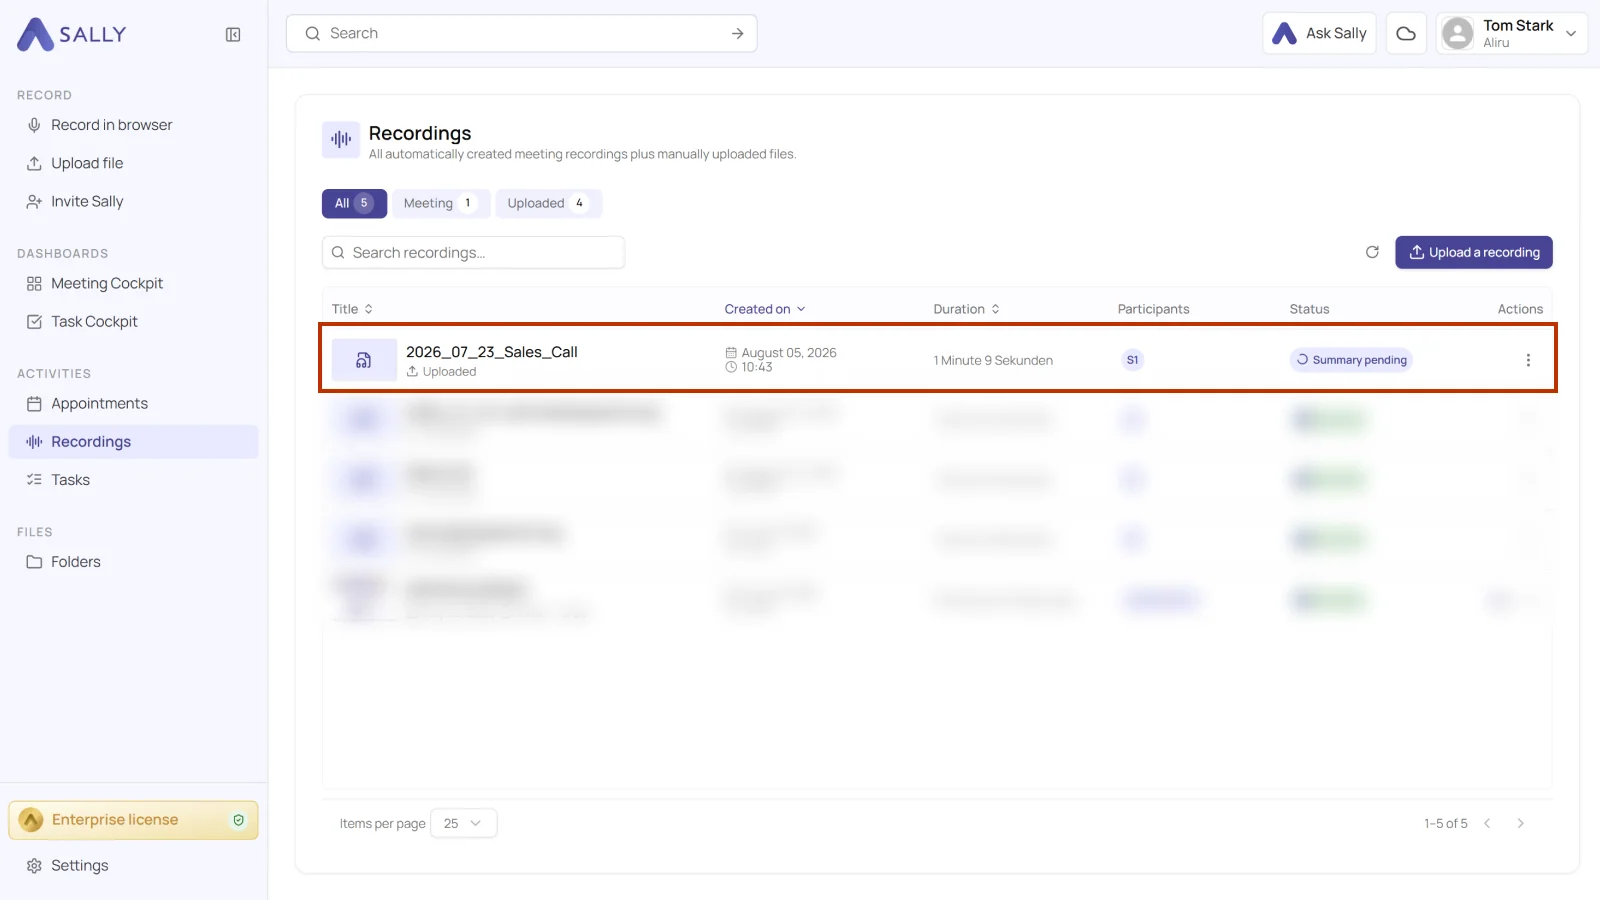
- If you linked the video to an appointment, the transcript appears there as well. You can also open and download it from the Recordings tab.
For tips on improving the accuracy and formatting of your transcripts, see our guide on Optimizing Transcription.
2. How to link a recording to a meeting afterwards
If you didn't link a meeting when uploading your file, you can easily do it later.
That way the transcript sits in the right place, right under the meeting it belongs to.
Here's how:
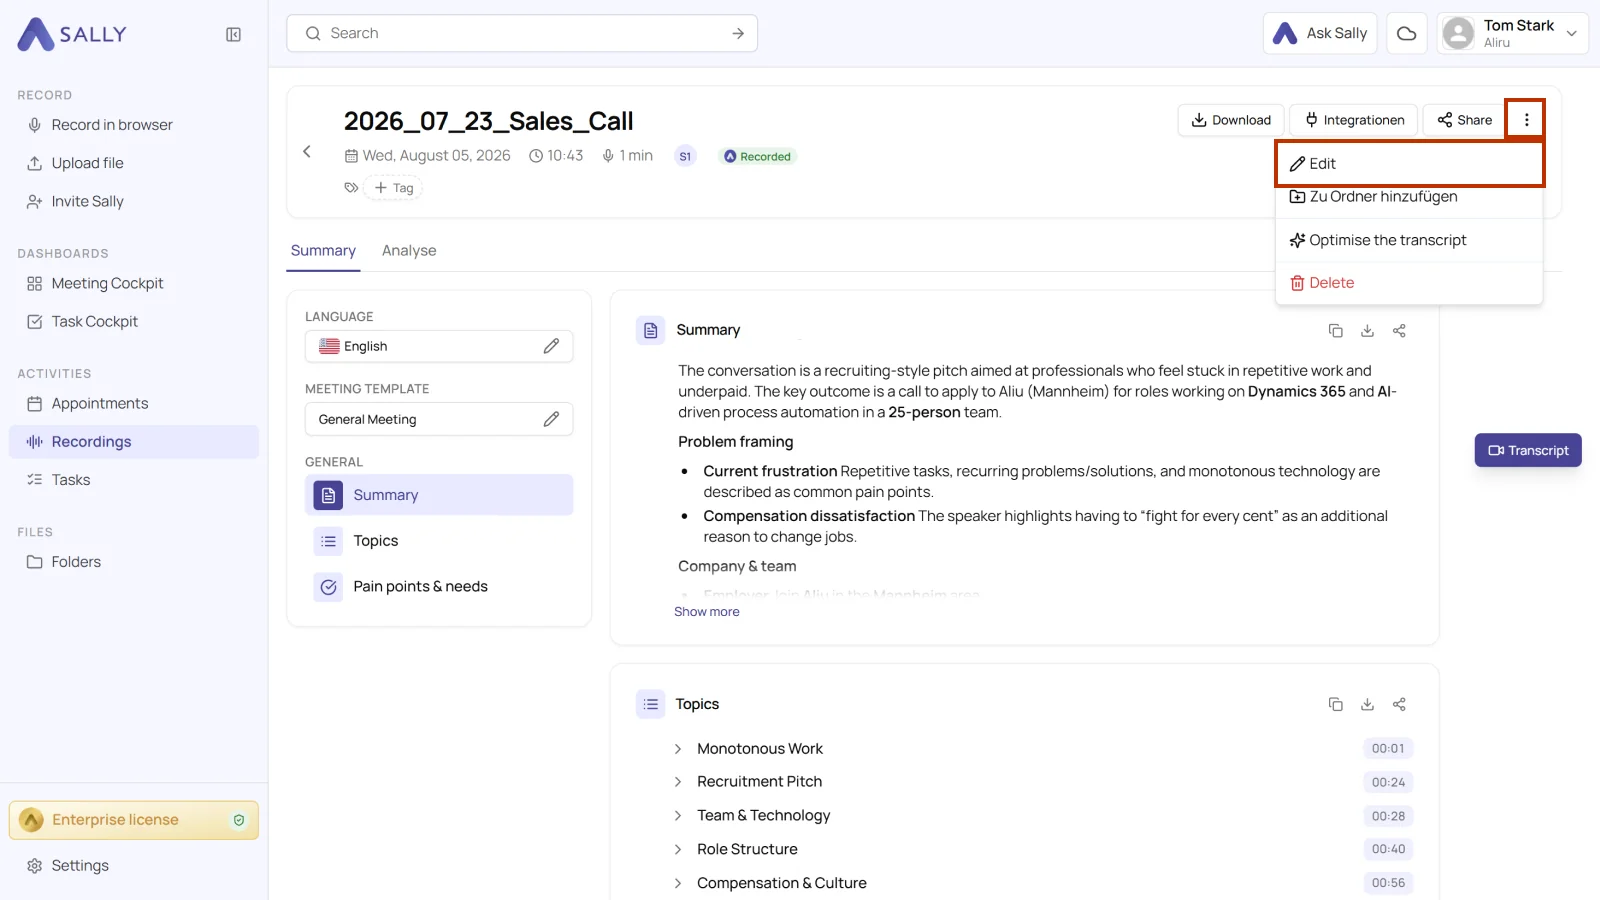
- Select the recording, click the three-dot menu in the top right corner and then Edit.
- In the "Edit the recording" window, search for the appointment under "Link an appointment". Enter at least two characters.
- Then click Save.
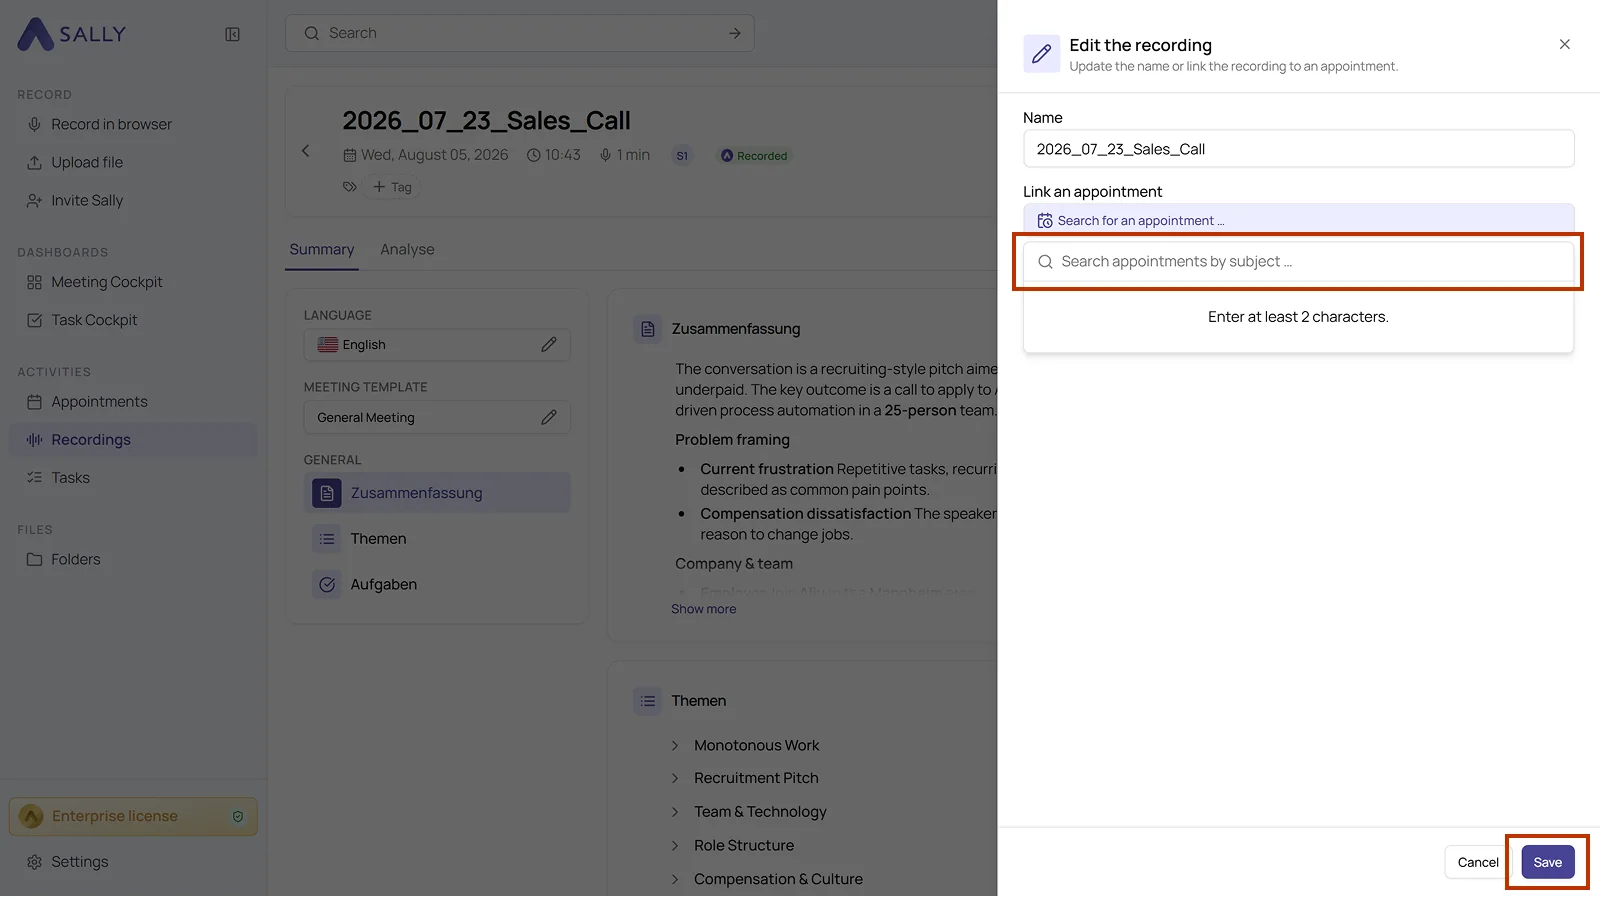
Once saved, the recording appears under the linked meeting.
Your transcripts stay in order, even for files you upload later on.