How to record meetings on your computer with the Meeting Recorder
The Meeting Recorder is the Sally app for Windows. It runs in the background, notices by itself when there is a conversation going on your computer, and asks whether Sally should take notes. The recording then goes to Sally on its own, ready to be transcribed and summarized. Sally does not join the meeting as a bot for this, the recording happens right on your computer.
Next to recording in the browser, this saves you two things: no tab to keep open, and no browser permission to confirm every time you record. That makes it a good fit if you often talk at your computer, whether that is an online meeting or a phone call.
Quick navigation
- Get the app and sign in
- Recording
- Upload the recording
- An interrupted recording
- Account and settings
- Common questions
1. Get the app and sign in
You download the app from inside Sally:
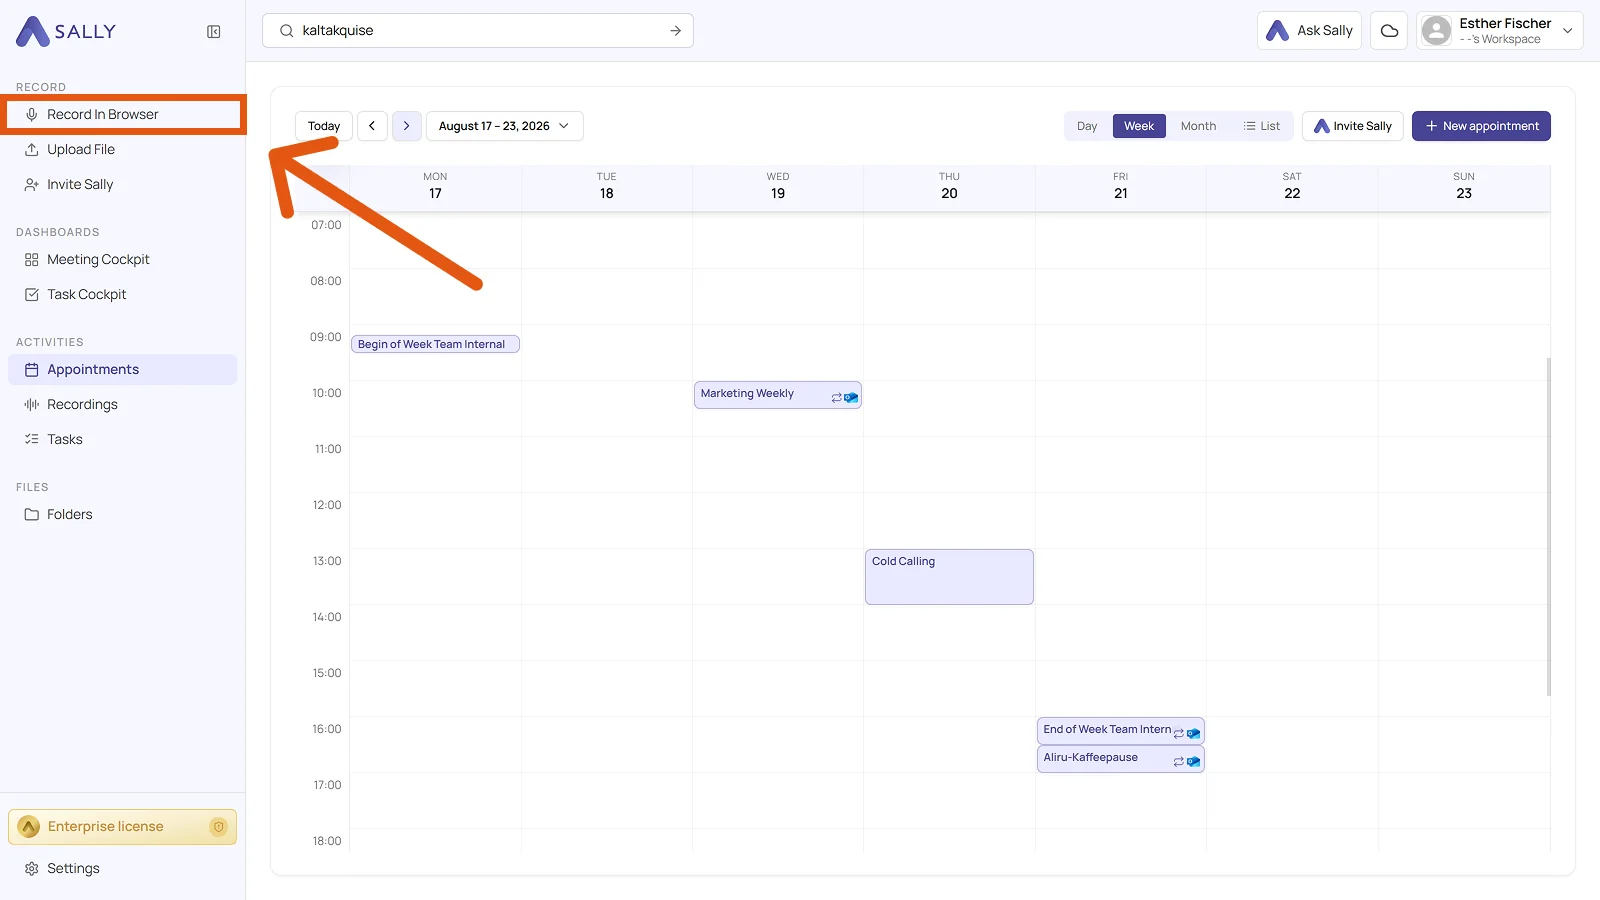
- In the sidebar under Record, open Record In Browser.
- Scroll down to Do you have meetings on your computer often? and click Download for Windows.
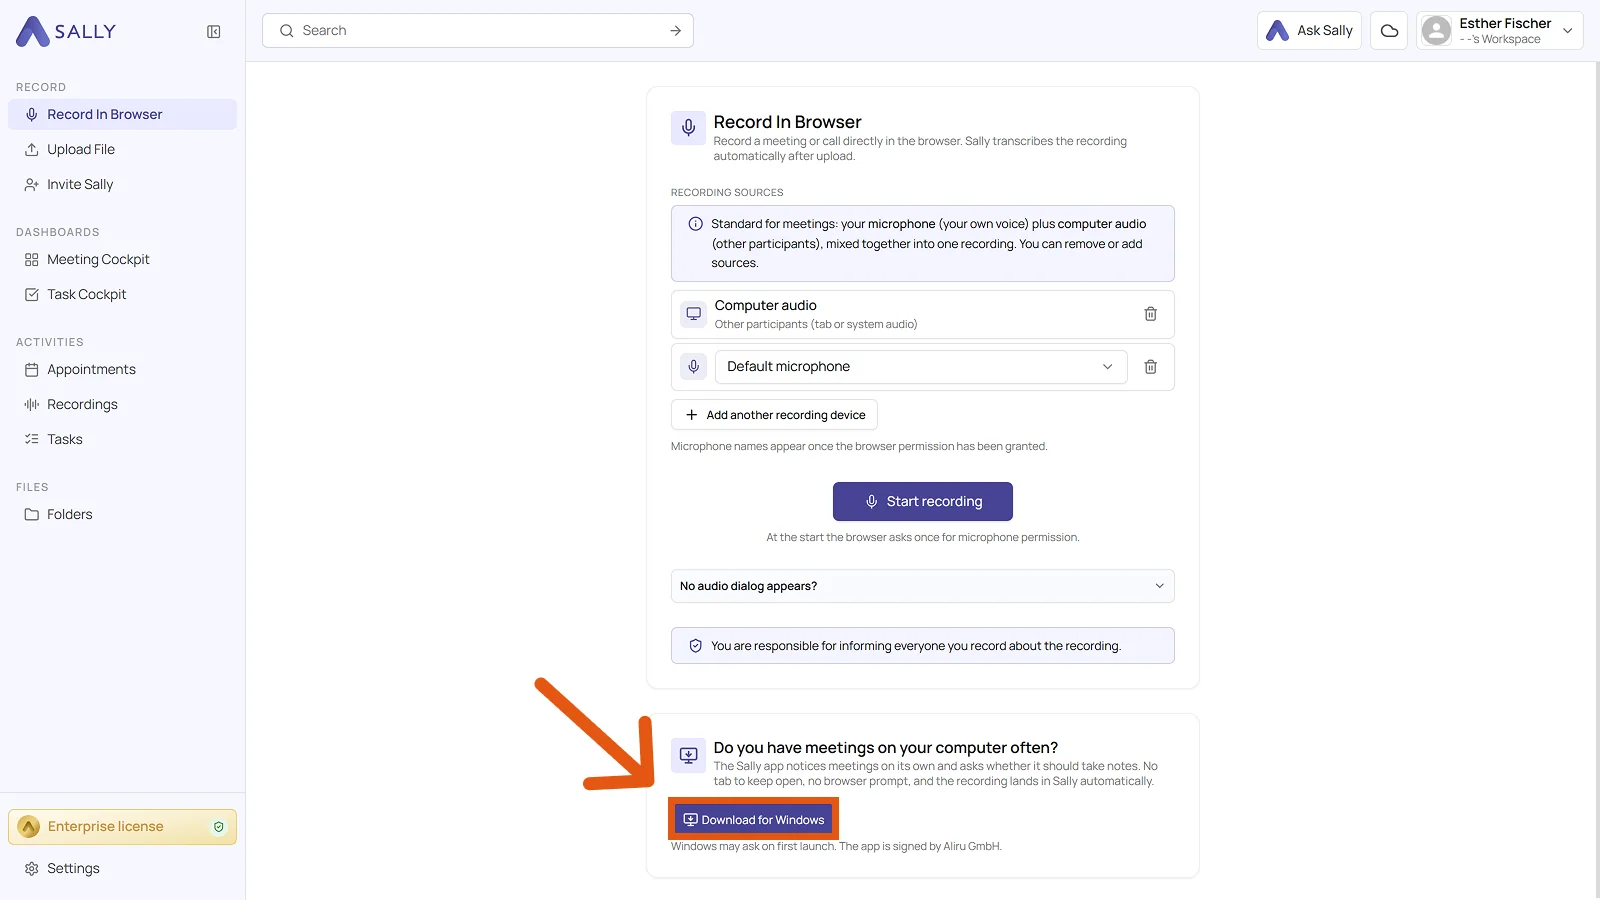
Windows may ask you to confirm the first time you run the app. It is signed by Aliru GmbH, so you can confirm the installation.
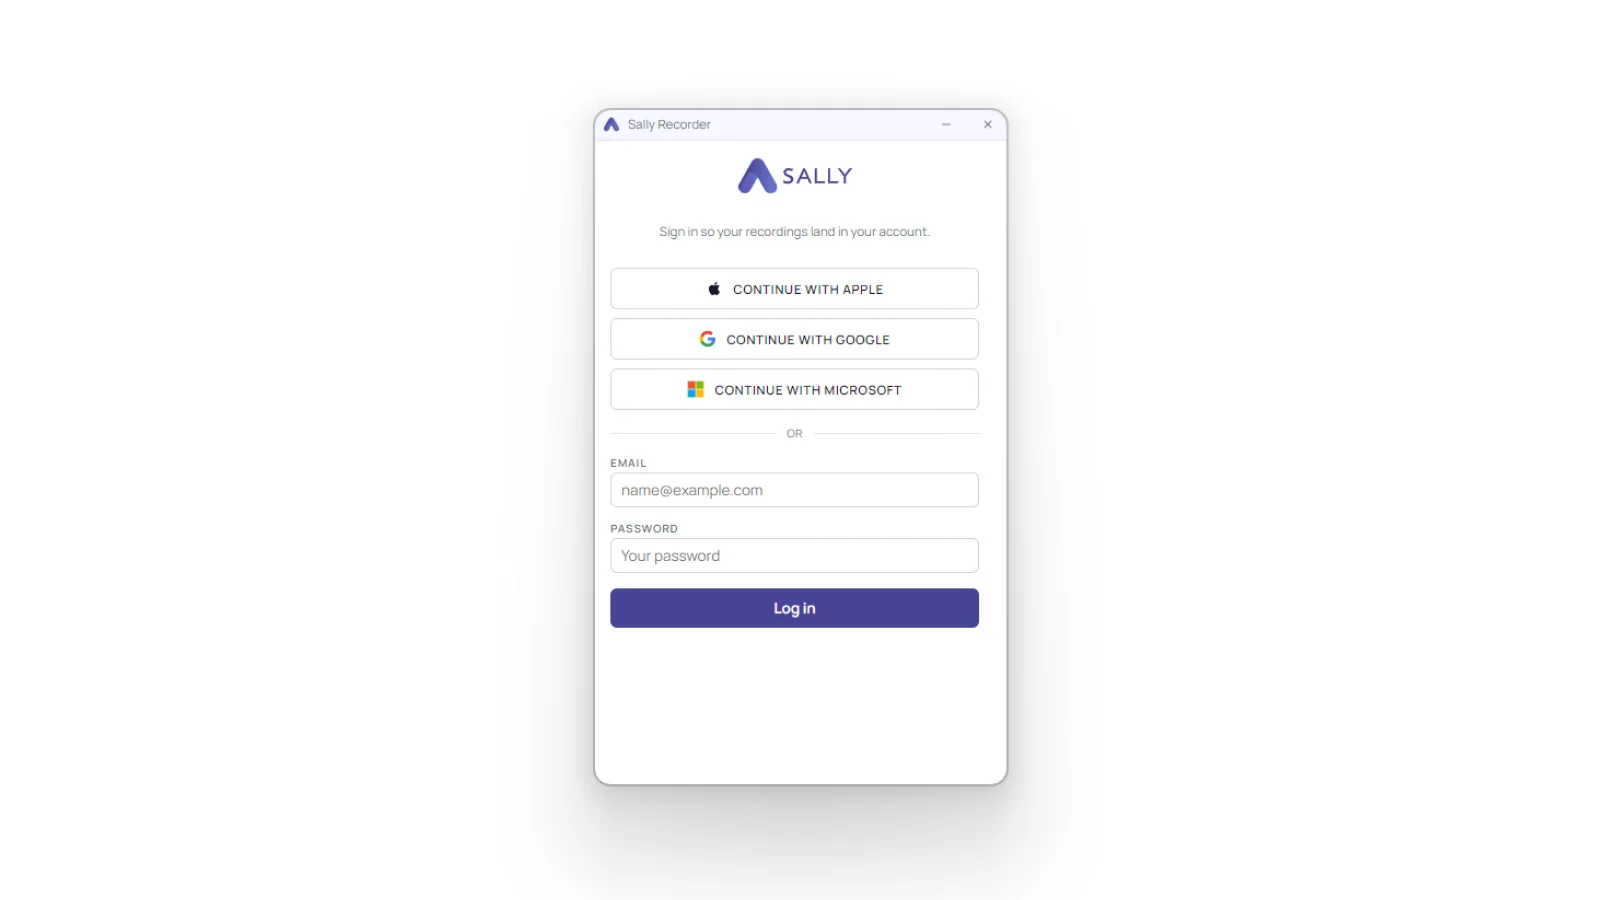
- Start the app and sign in with your Sally account, either through Apple, Google or Microsoft, or with your email address and password.
2. Recording
You can record in one of two ways: you start the recording yourself, or Sally asks as soon as she notices a conversation.
2.1. Start a recording yourself
Open the app and click Start recording. Above the button, Recording sources shows you what is about to be picked up: your microphone for your own voice, and Computer audio for the other side. A source marked ready can be recorded.
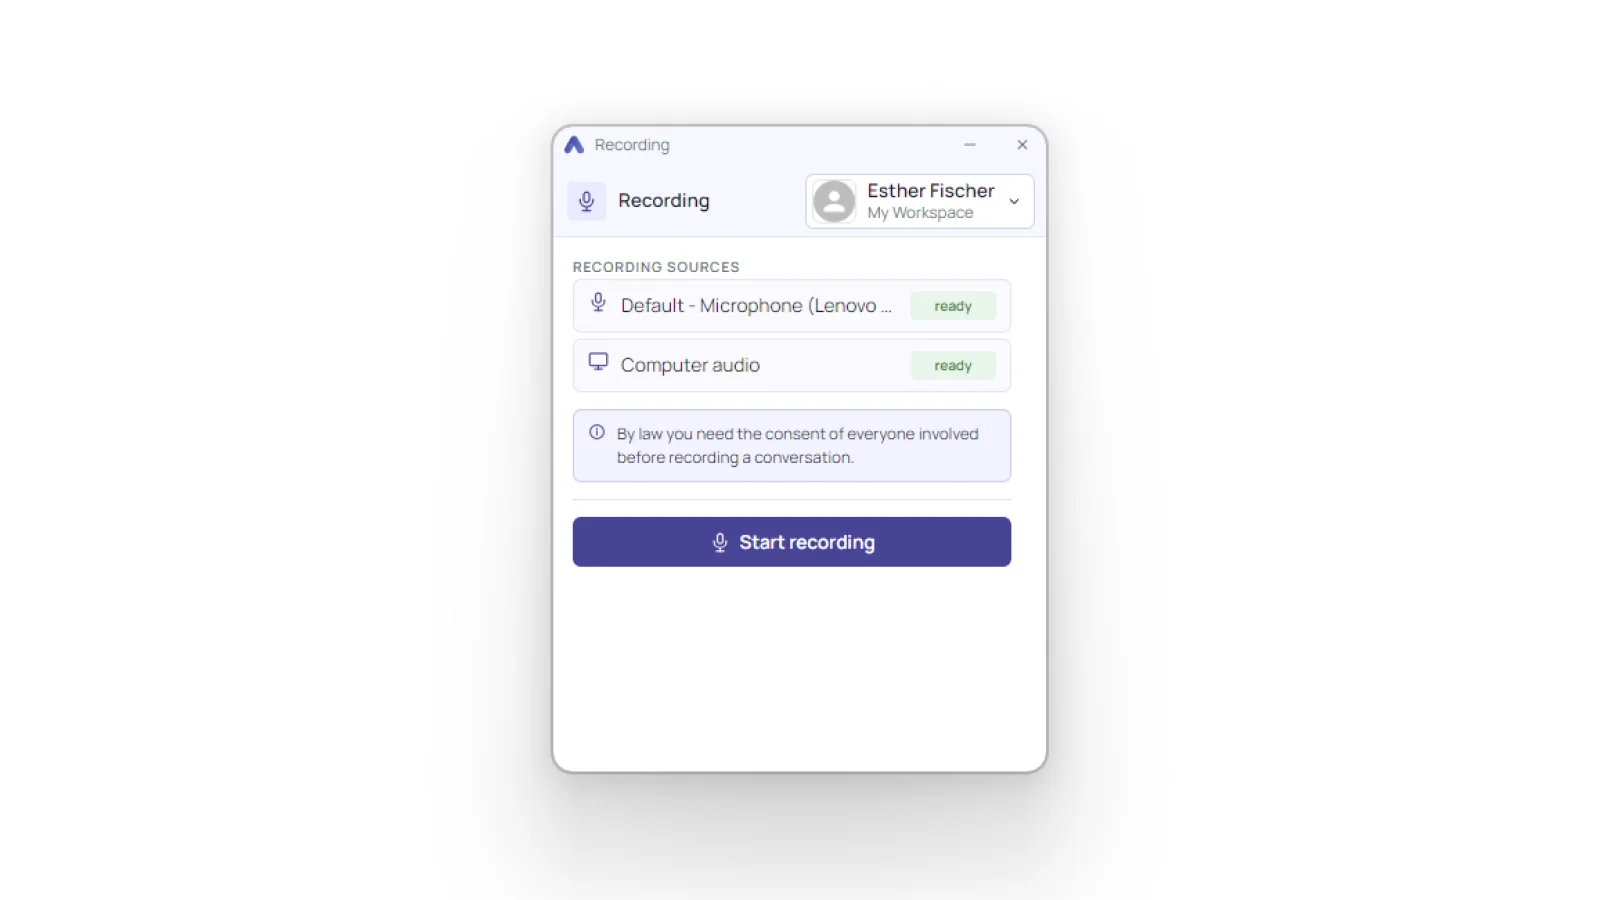
The app says so itself: by law you need the consent of everyone involved before you record a conversation. Tell people up front that Sally is taking notes.
2.2. Sally asks on her own
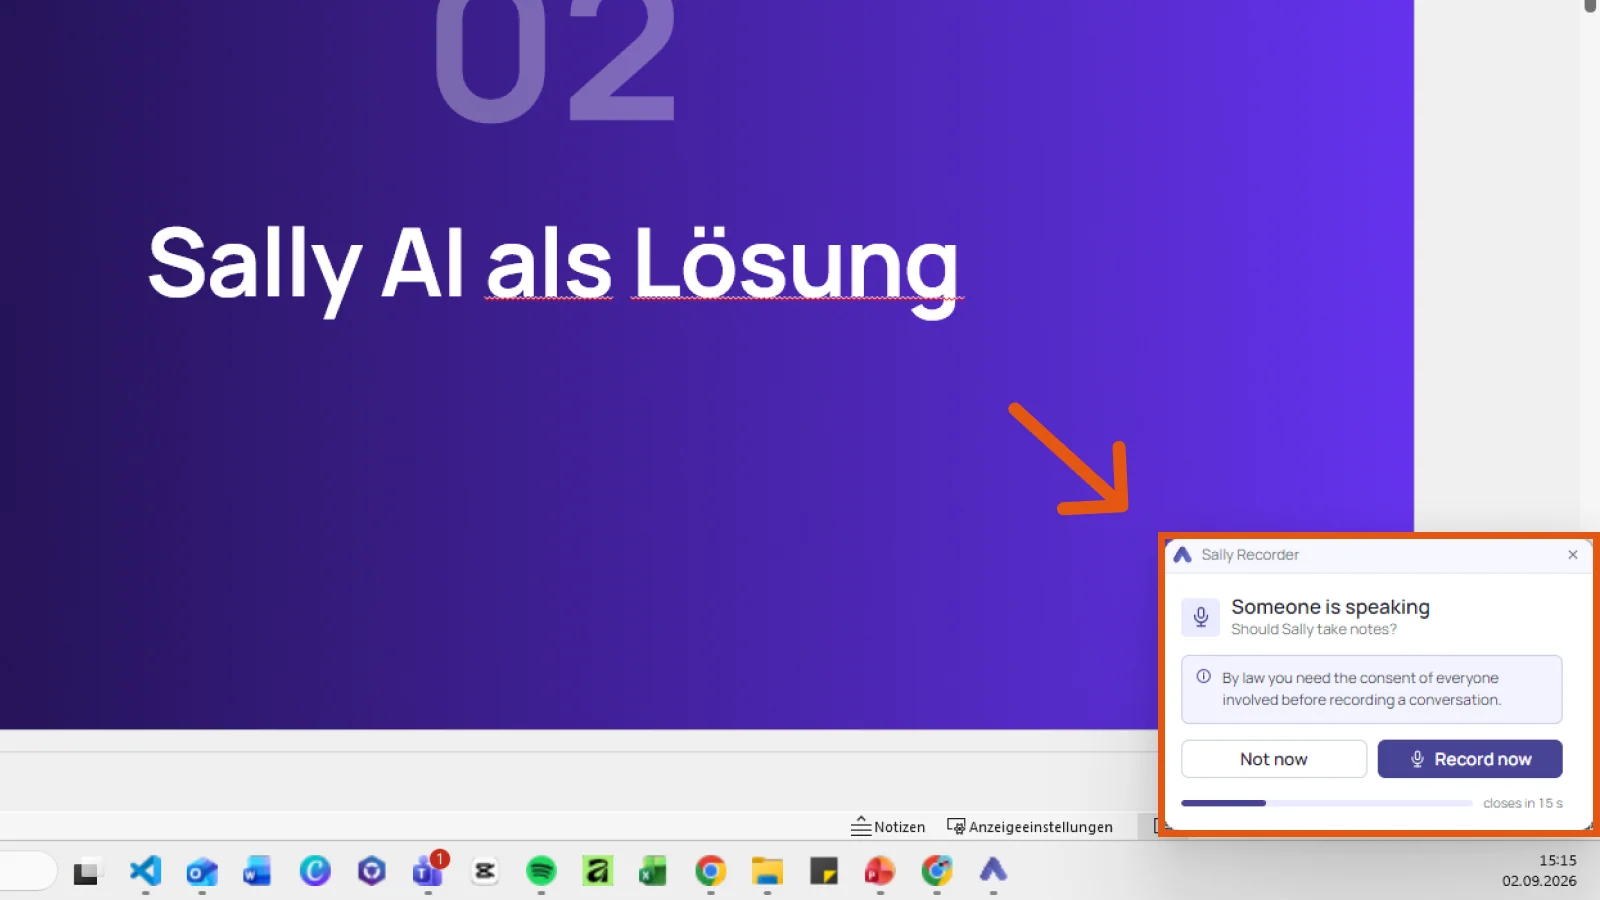
With the app running in the background, it lets you know as soon as it hears a conversation on your computer. Someone is speaking appears in the bottom-right corner and asks whether Sally should take notes. Record now starts recording, Not now dismisses it. If you do nothing, it closes again after a few seconds.
2.3. While recording
Once you are recording, the window shows Recording, the elapsed time, and a level meter for the audio. The two buttons pause the recording or stop it.
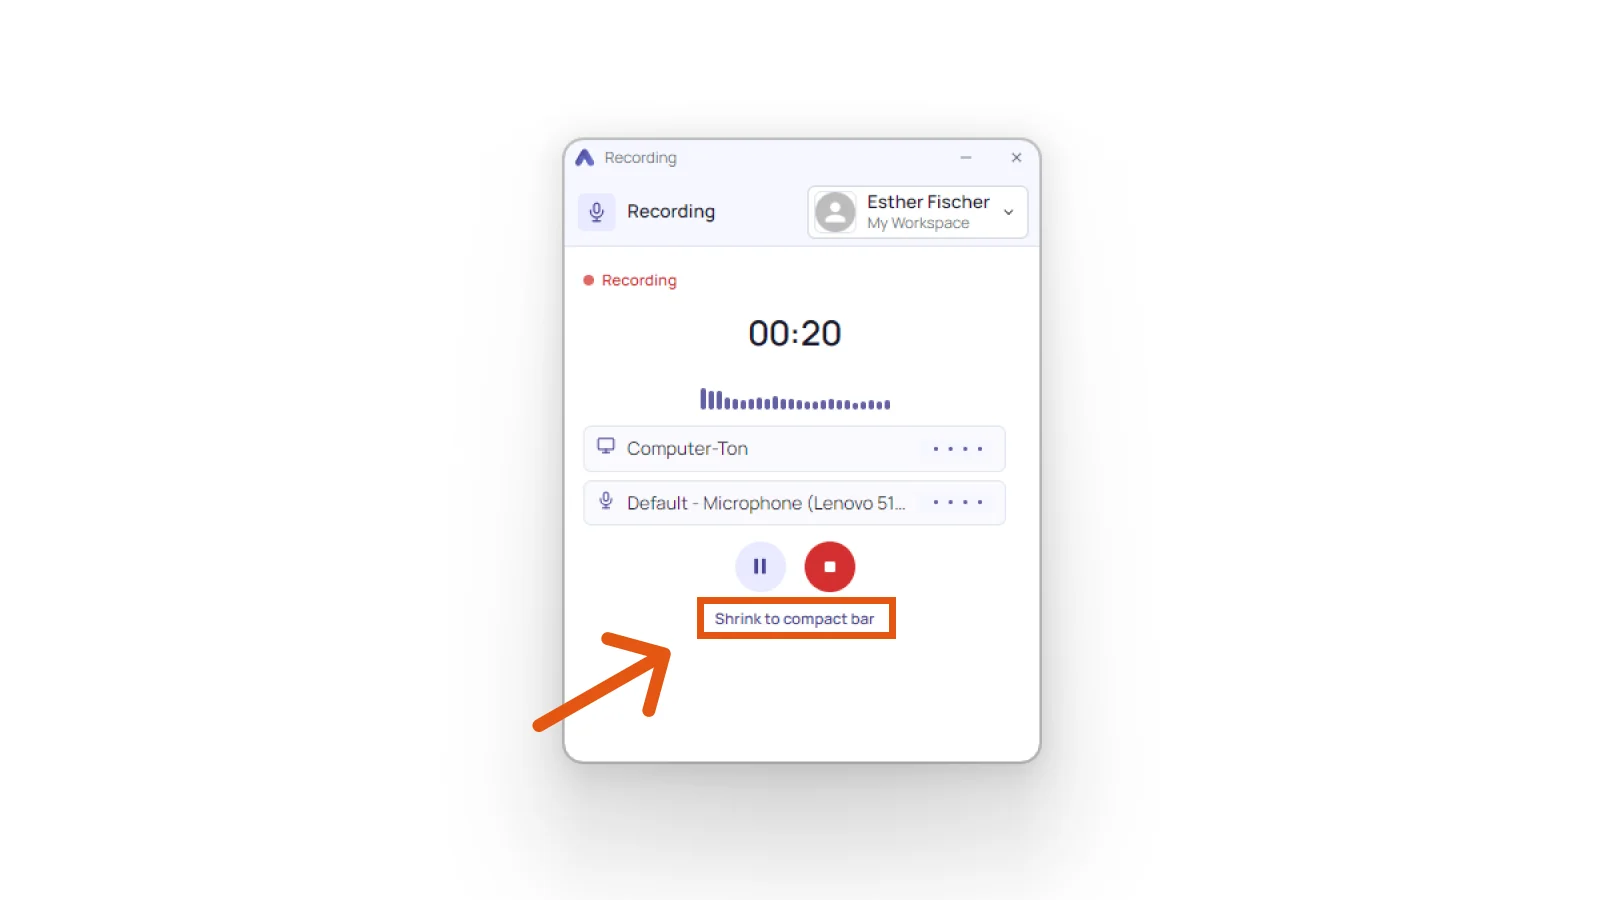
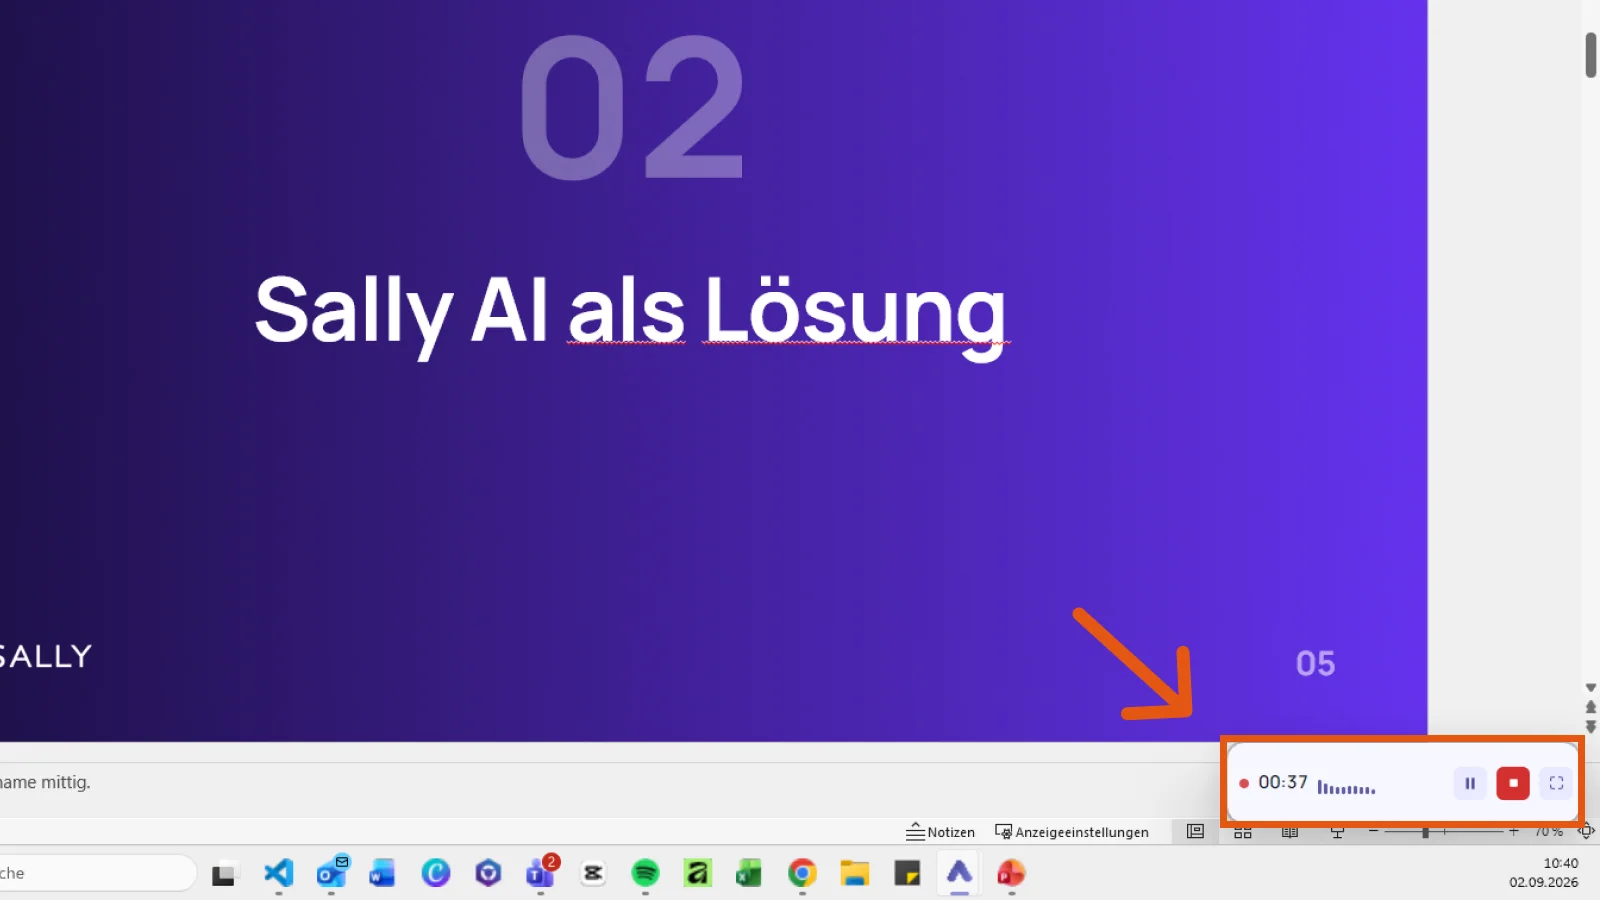
To get the window out of your way, click Shrink to compact bar. You are left with a thin strip in the bottom right corner showing the time and the level, plus pause and stop. The button on the far right makes the window big again.
2.4. End of the meeting
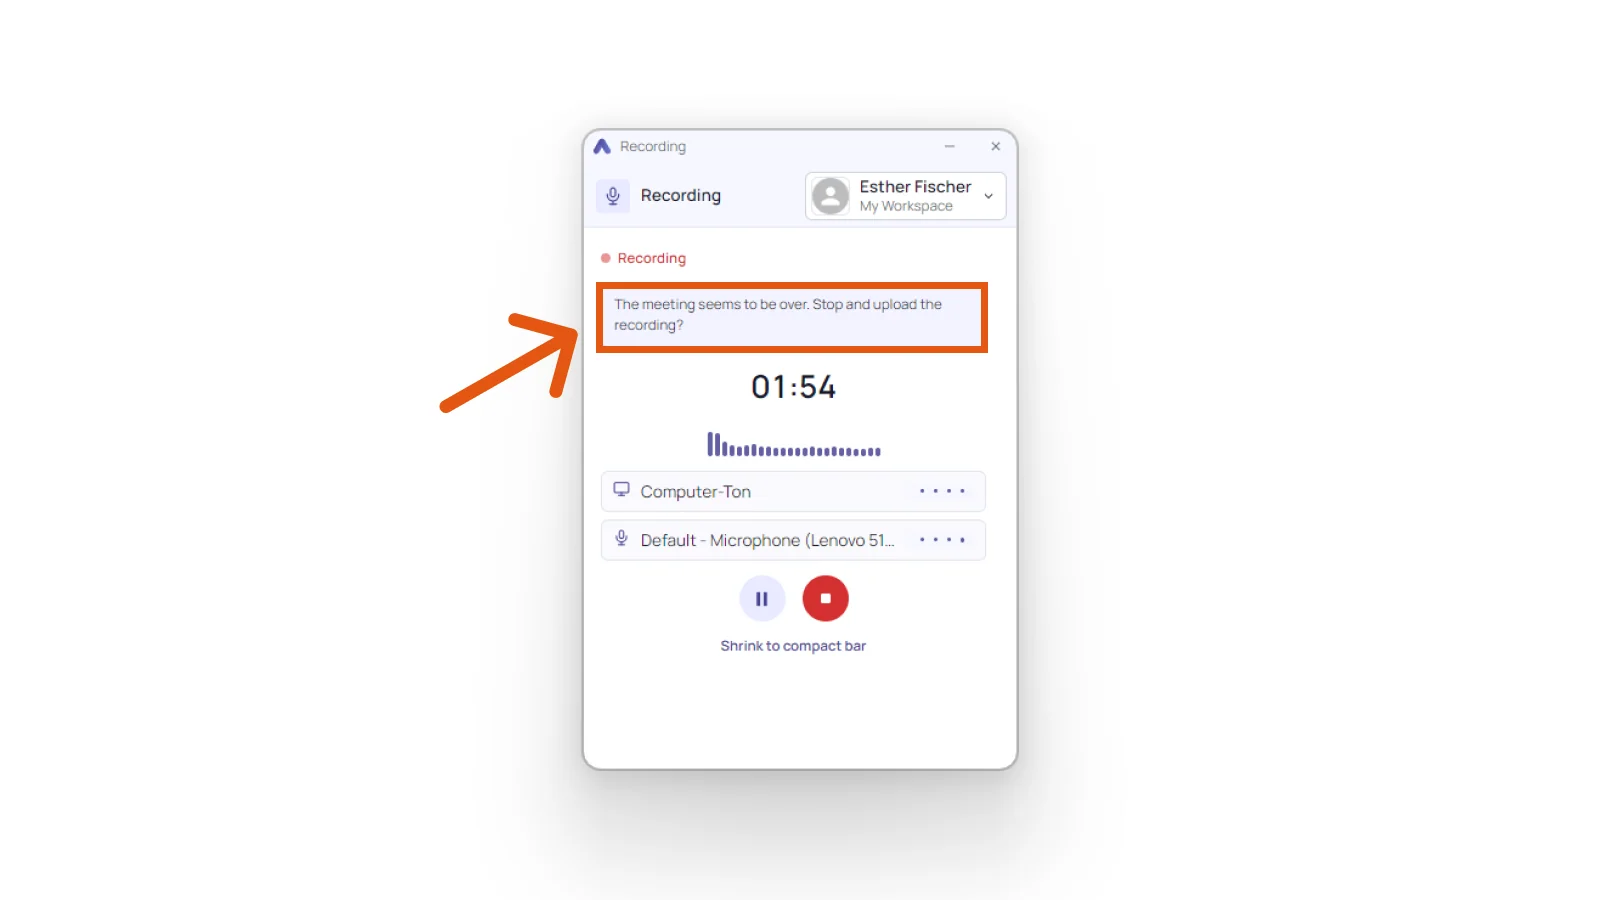
If it goes quiet for a while, the app asks you: The meeting seems to be over. Stop and upload the recording? That way a recording cannot run for hours unnoticed.
3. Upload the recording
The moment you stop recording, the app asks for the few details Sally needs.
3.1. Details of the recording
At the top you get the length and the file size. Below that you can give the recording a name and link it to an appointment, either by searching or by picking one of today's. Both are optional, so the recording goes up without an appointment as well. Advanced settings adds four dropdowns:
- Language of the recording, set to Detect automatically by default
- Speaker detection mode, either Automatic or Manual. With Manual you enter how many people spoke, a number from 1 to 20
- Meeting template, which shapes the summary
- Transcription model
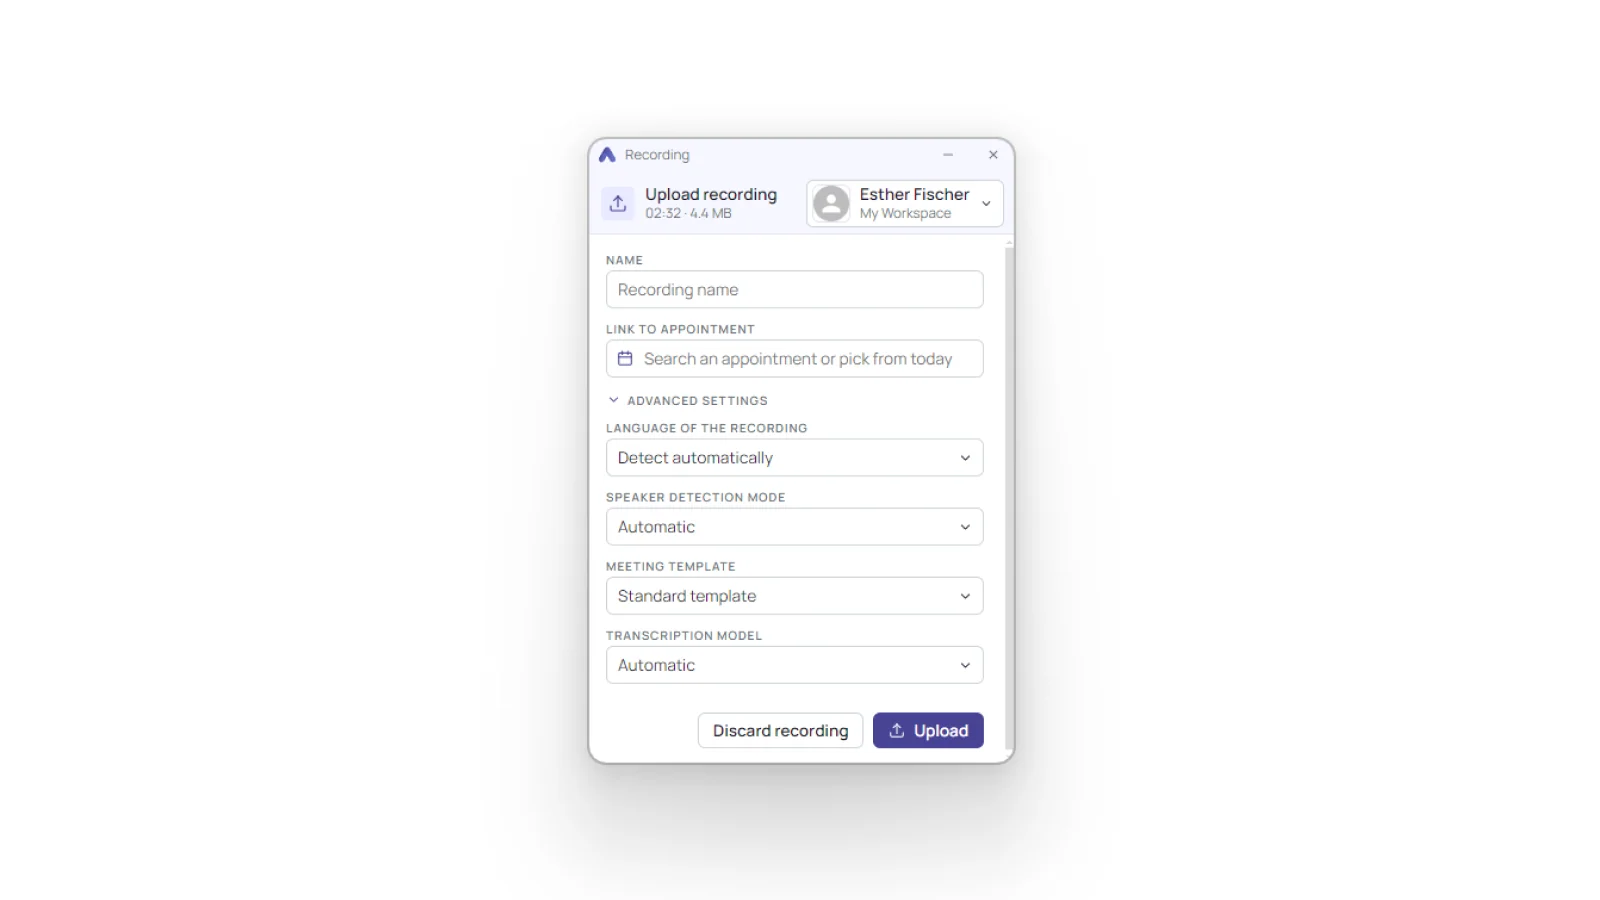
The meeting template you pick is what decides how the summary is put together.
3.2. Uploading
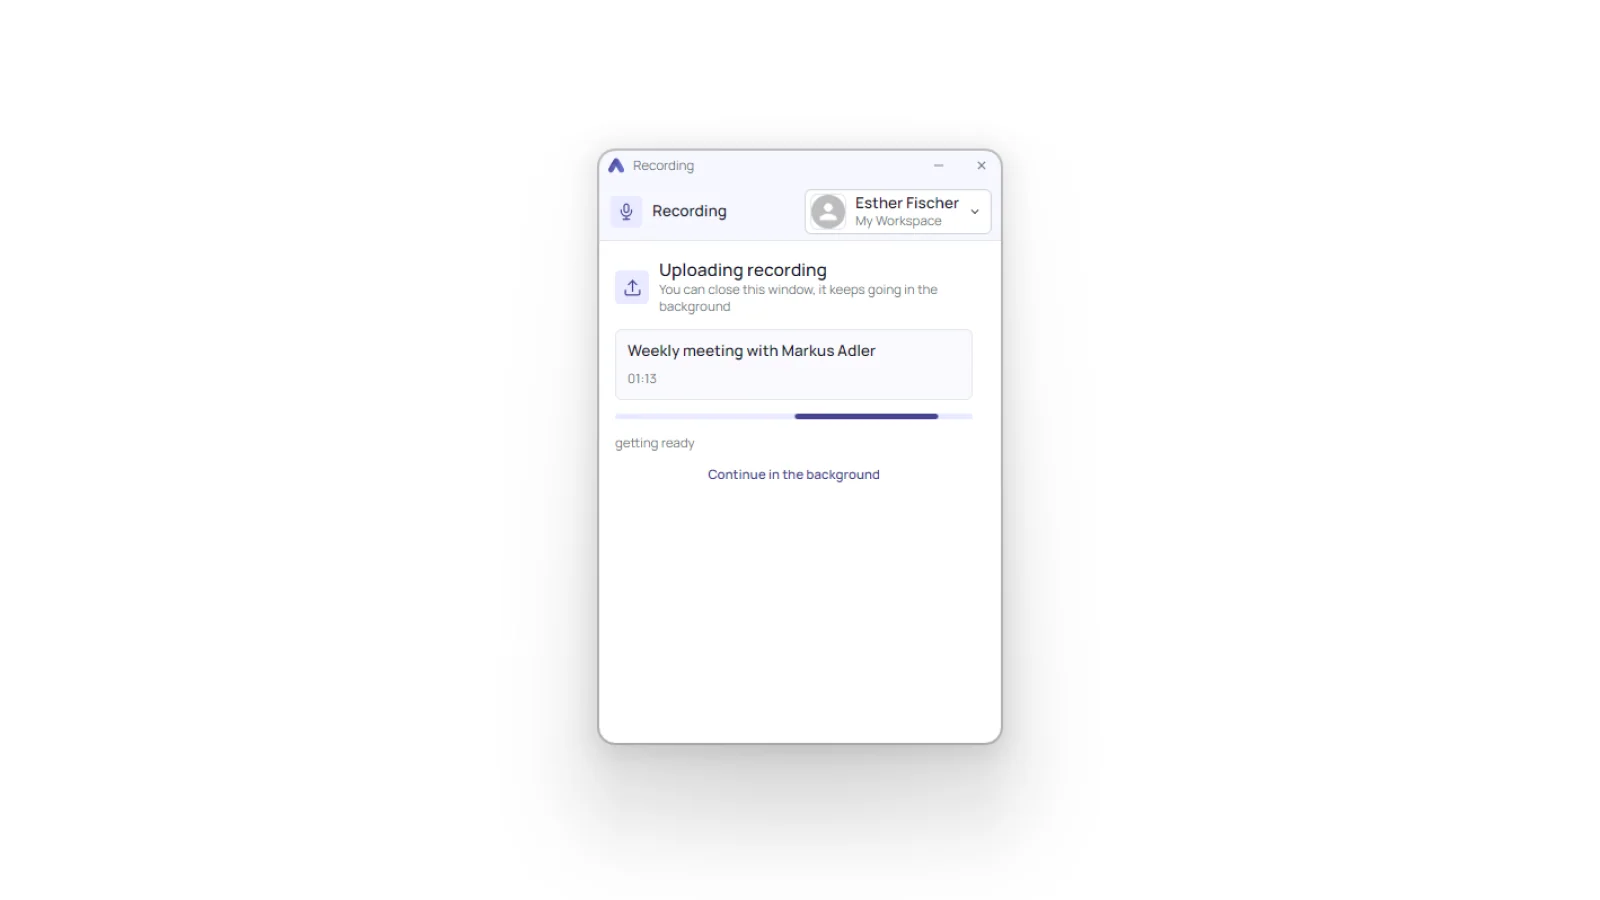
Upload sends the recording off to your account. You do not have to wait for it: Continue in the background keeps the upload running while you get on with something else.
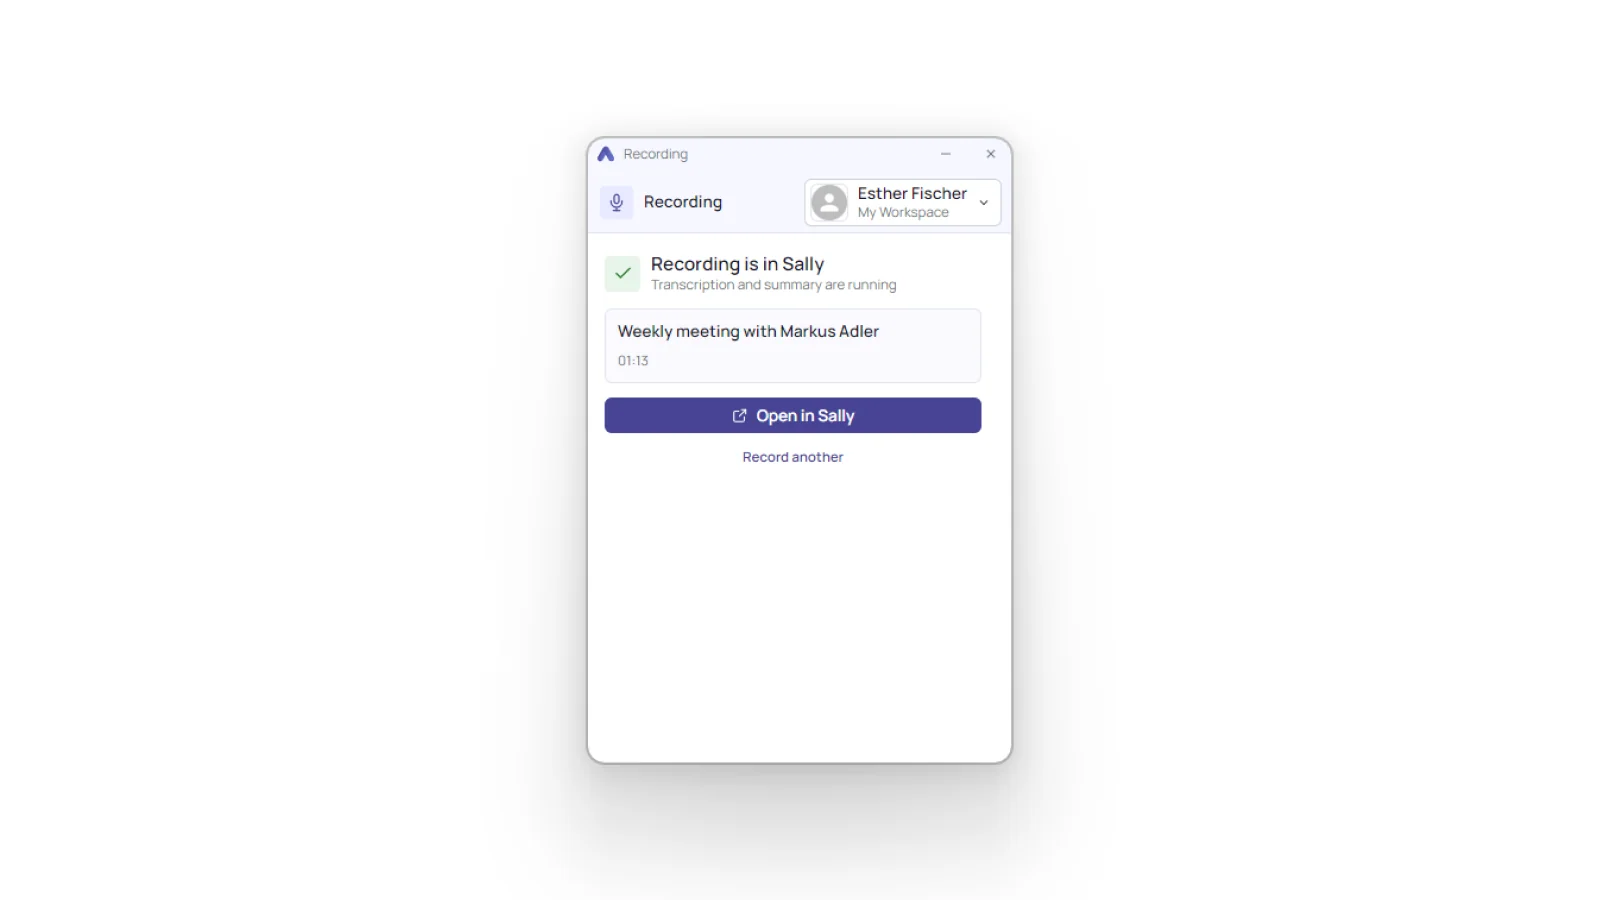
Once it arrives, the app tells you Recording is in Sally, and the transcription and summary run from there. Open in Sally takes you straight to the recording, Record another starts the next one.
3.3. Discard a recording
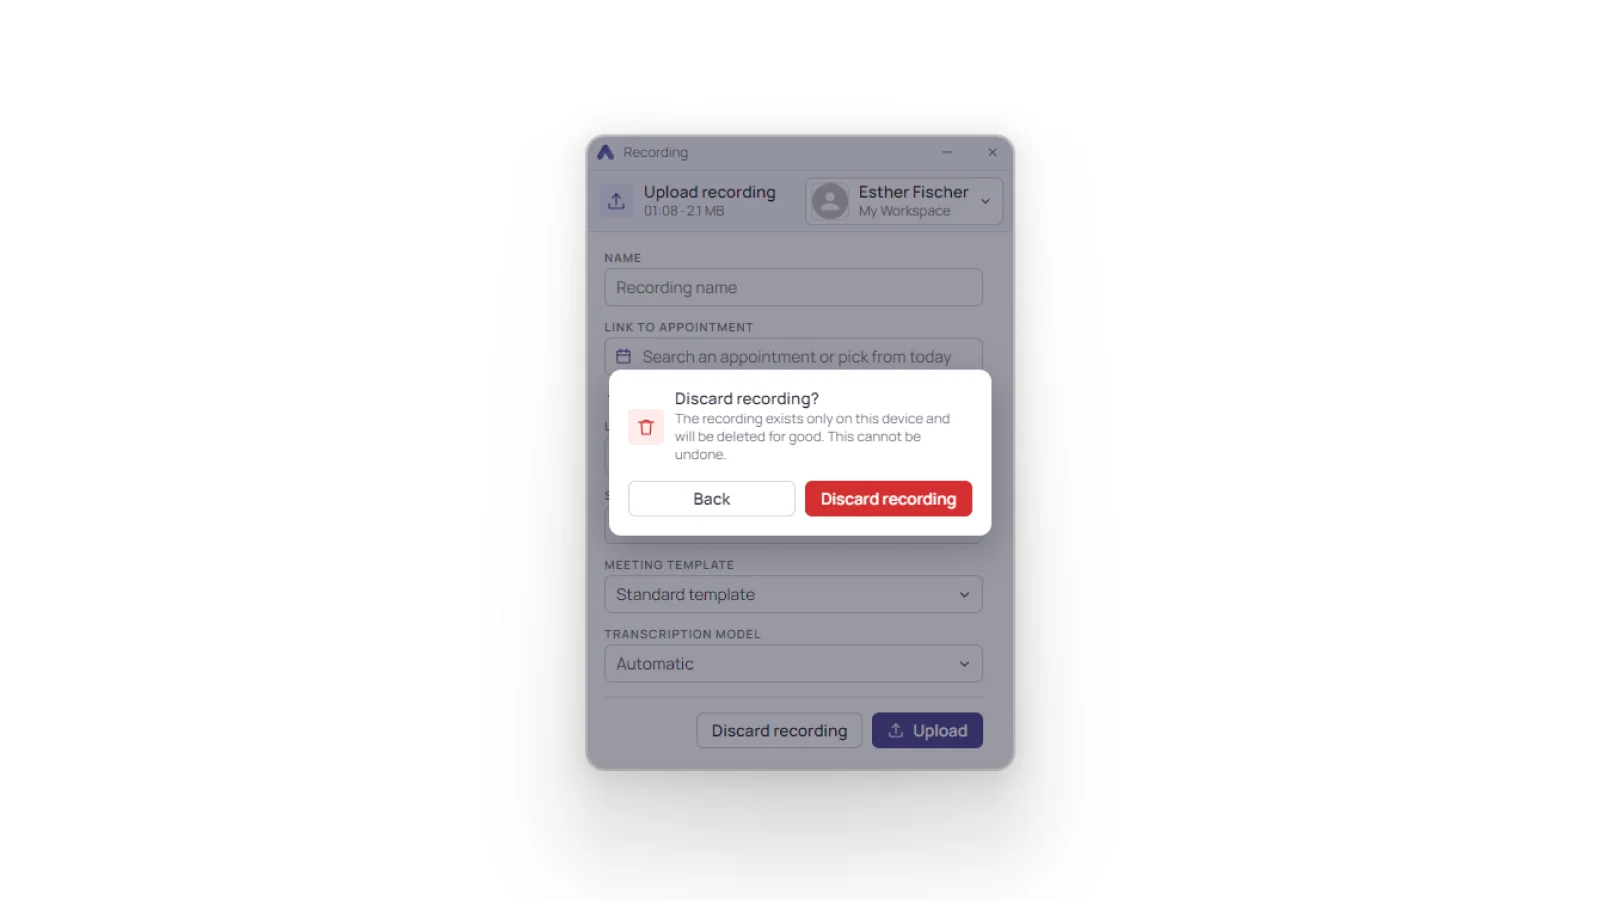
If you do not want to keep a recording, click Discard recording. The app asks for confirmation first, because the file only exists on this device and is irrevocably deleted, with no way to get it back.
4. An interrupted recording
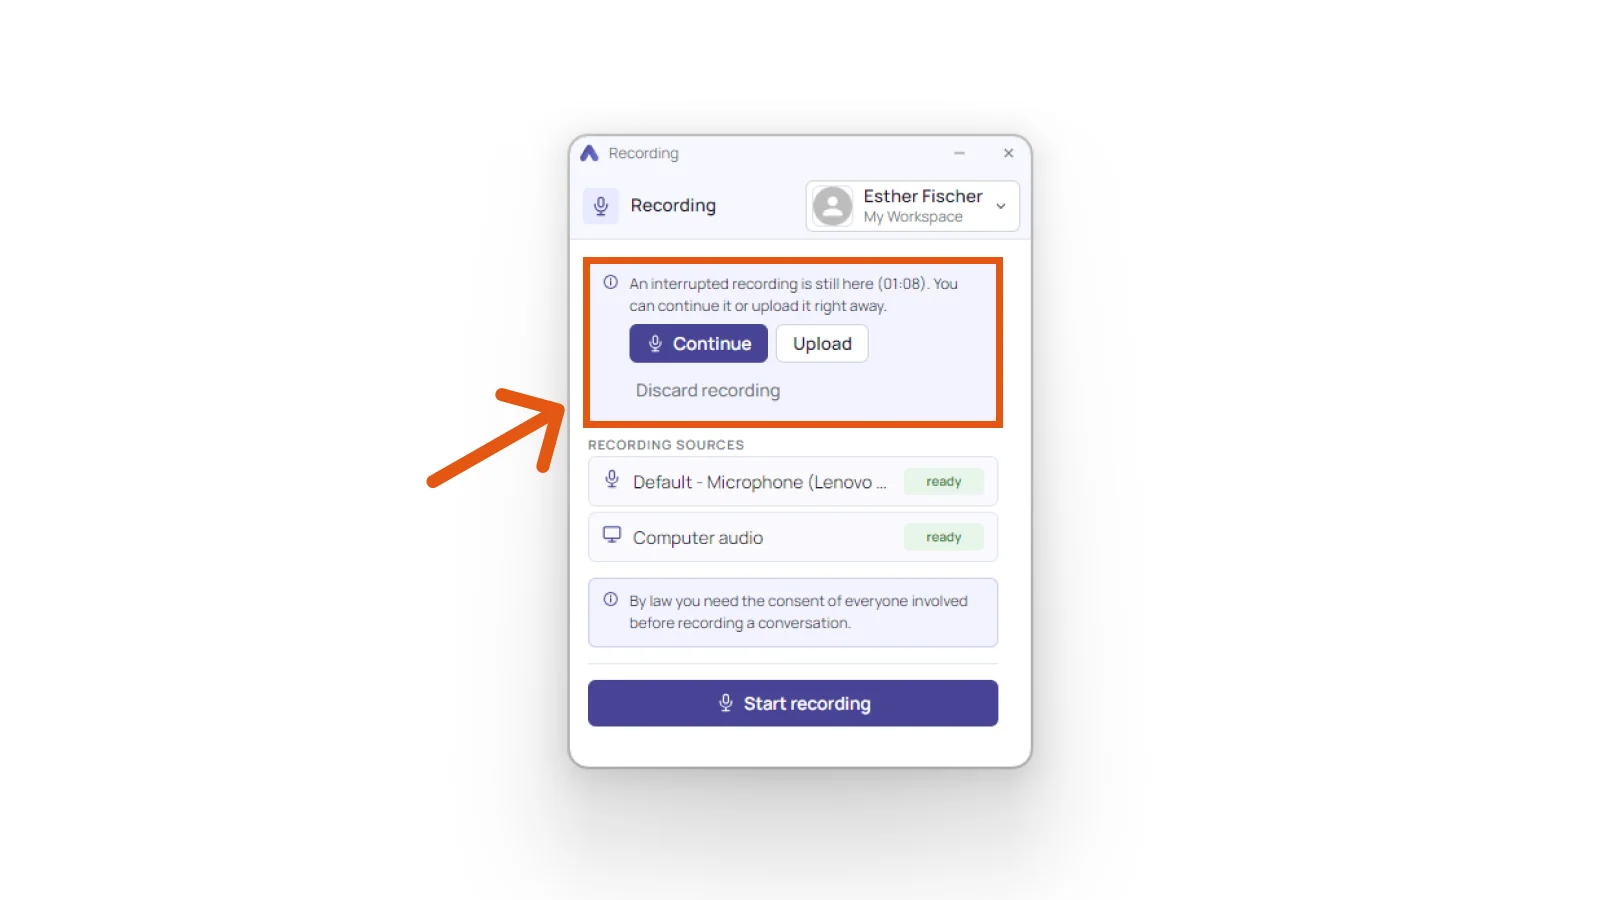
If a recording is cut short because the computer shuts down or the app closes, you have not lost it. Next time you open the app, a panel at the top of the window shows the interrupted recording with its length. You have three choices: Continue picks up where you left off, Upload sends what you already have to Sally, and Discard recording deletes it.
5. Account and settings
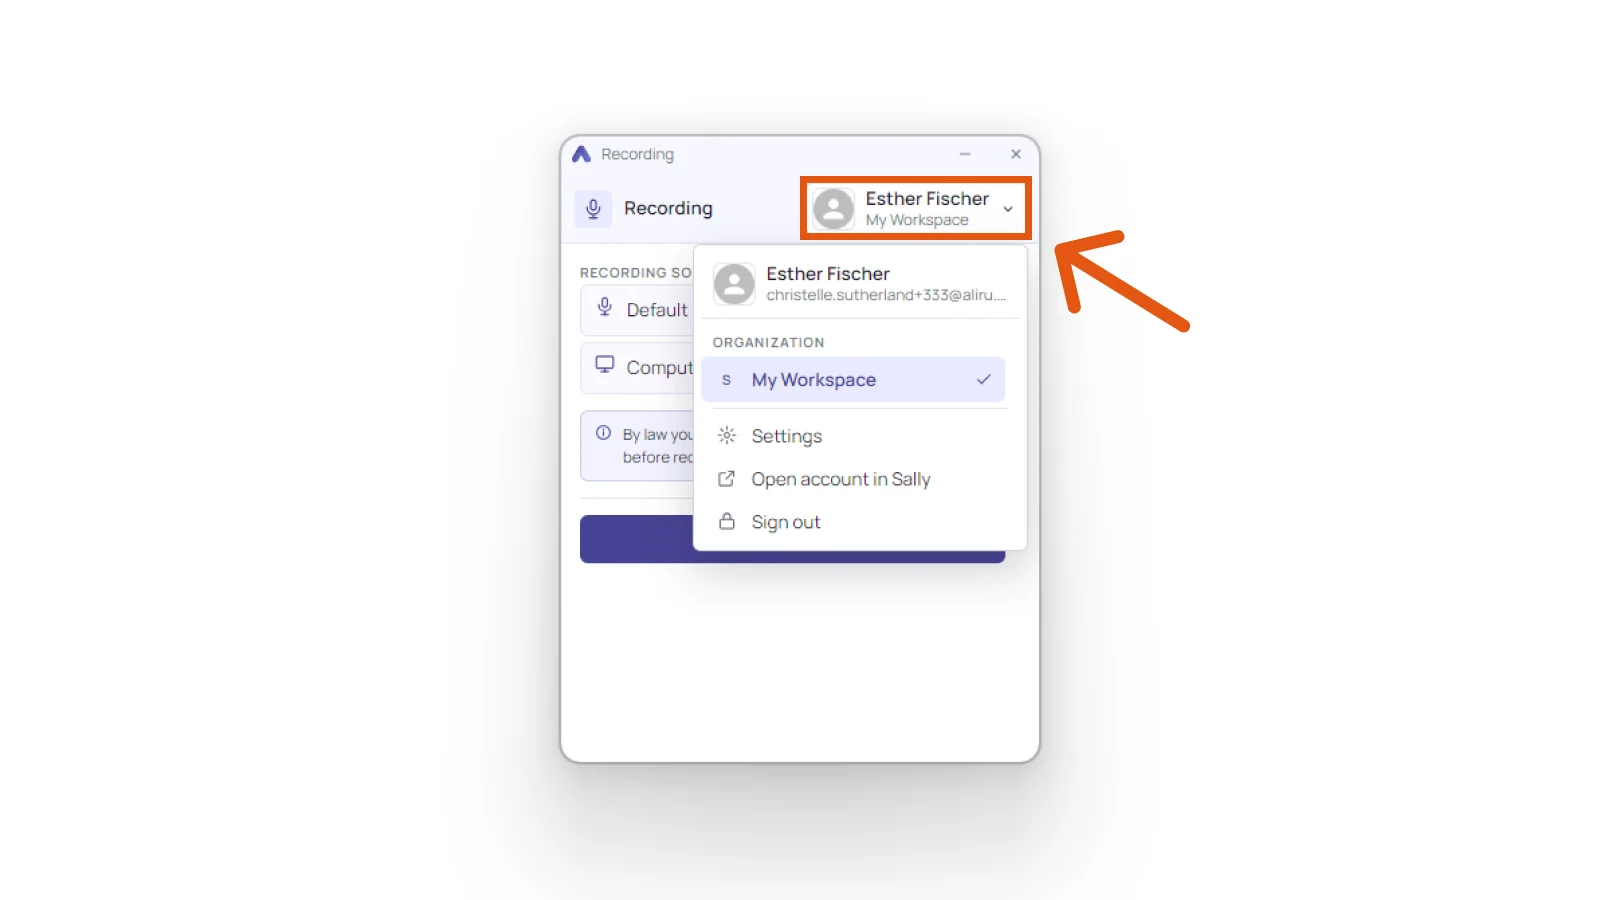
The top-right corner tells you which account and which organization you are working in. Click it and you get Settings, Open account in Sally, and Sign out. If you work across several organizations, this is where you switch.
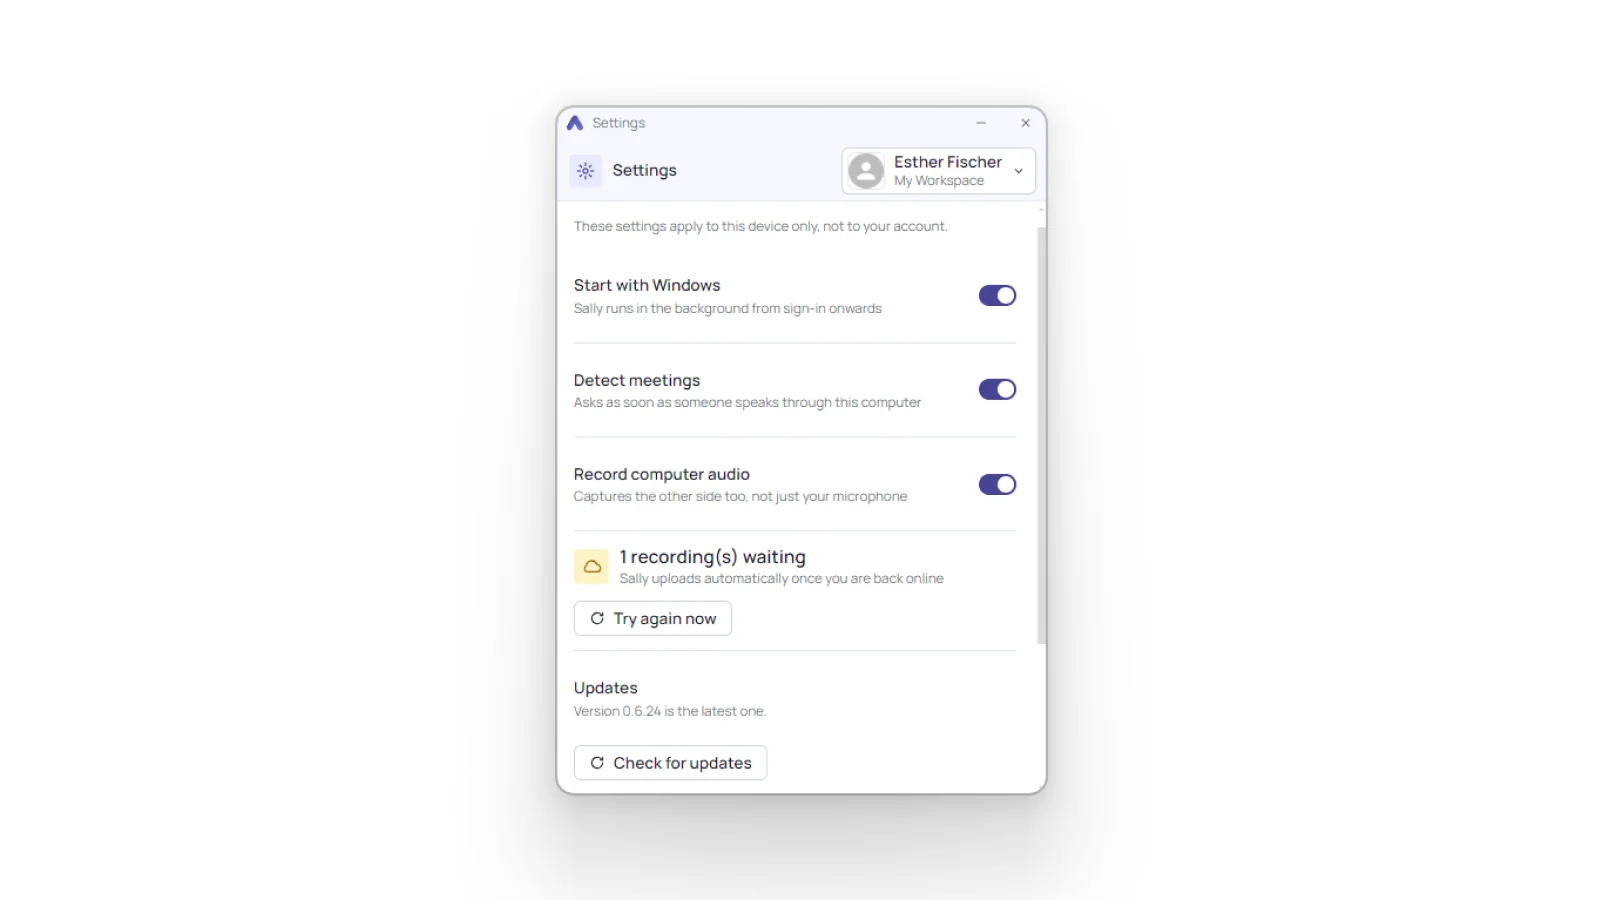
Click Settings and the app opens its own settings. They apply to this device only, not to your account. Three toggles and two more sections:
- Start with Windows: Sally is running in the background from the moment you sign in.
- Detect meetings: the app asks whenever it hears a conversation on this computer. With the switch off, Sally no longer asks on her own whether she should record.
- Record computer audio: the other side gets recorded too, not just your microphone.
- Waiting recordings: if you were offline when you finished, Sally uploads on her own as soon as you are back. Try again now starts the upload immediately.
- Updates: shows which version you have, and Check for updates looks for a newer one.
6. Common questions
- 6.1. Compared with recording in the browser
- 6.2. Recording without a connection
- 6.3. Where the recording ends up
- 6.4. Method blocked by the administrator
6.1. Compared with recording in the browser
Both routes give you the same result, a recording in Sally. What the app saves you is the tab you would otherwise keep open and the browser permission you would otherwise confirm. In return it only runs on Windows. For the occasional conversation, recording in the browser is enough.
6.2. Recording without a connection
The recording stays on your device at first. If you are offline when you finish, it waits there and Sally uploads it as soon as you are back online. The settings show how many recordings are still waiting.
6.3. Where the recording ends up
In whichever account and organization the top-right corner of the app is showing. Once uploaded, you will find it under Recordings, alongside anything you recorded in the browser or brought in as a file upload.
6.4. Method blocked by the administrator
Owners and admins can switch off individual recording methods for a whole organization, including the Meeting Recorder app. With the method blocked, the app will not record for that account. You can see which methods are open under recording sources.