How to record a meeting directly in the browser
Some conversations never appear as a calendar appointment that Sally could be invited to. A call over Teams, a web session at a customer's site, a quick alignment nobody sent an invite for. For those you record straight in the browser, and Sally never shows up as a participant in the meeting.
Sally captures two audio sources at once: your microphone for your own voice, and the computer audio for everyone else. Both end up in a single recording. Once it is uploaded, Sally transcribes it and writes the summary just like for any other meeting.
Sally says so in the panel itself: "You are responsible for informing everyone you record about the recording." Unlike the bot, which sits visibly in the meeting, nobody can see that you are recording.
Quick navigation
- What this method is for
- Open recording in the browser
- The recording sources
- Start the recording
- When no audio dialog appears
- Common questions
1. What this method is for
Recording in the browser fits whenever there is no appointment Sally could be invited to. That covers phone calls, spontaneous conversations, and any platform where a bot should not or may not follow along.
What sets it apart from the other methods is visibility. With manual attendance Sally joins as a participant and everyone sees her in the list. In the browser the recording runs on your side, with no extra participant. In return, telling the others rests entirely with you.
2. Open recording in the browser
To get there:
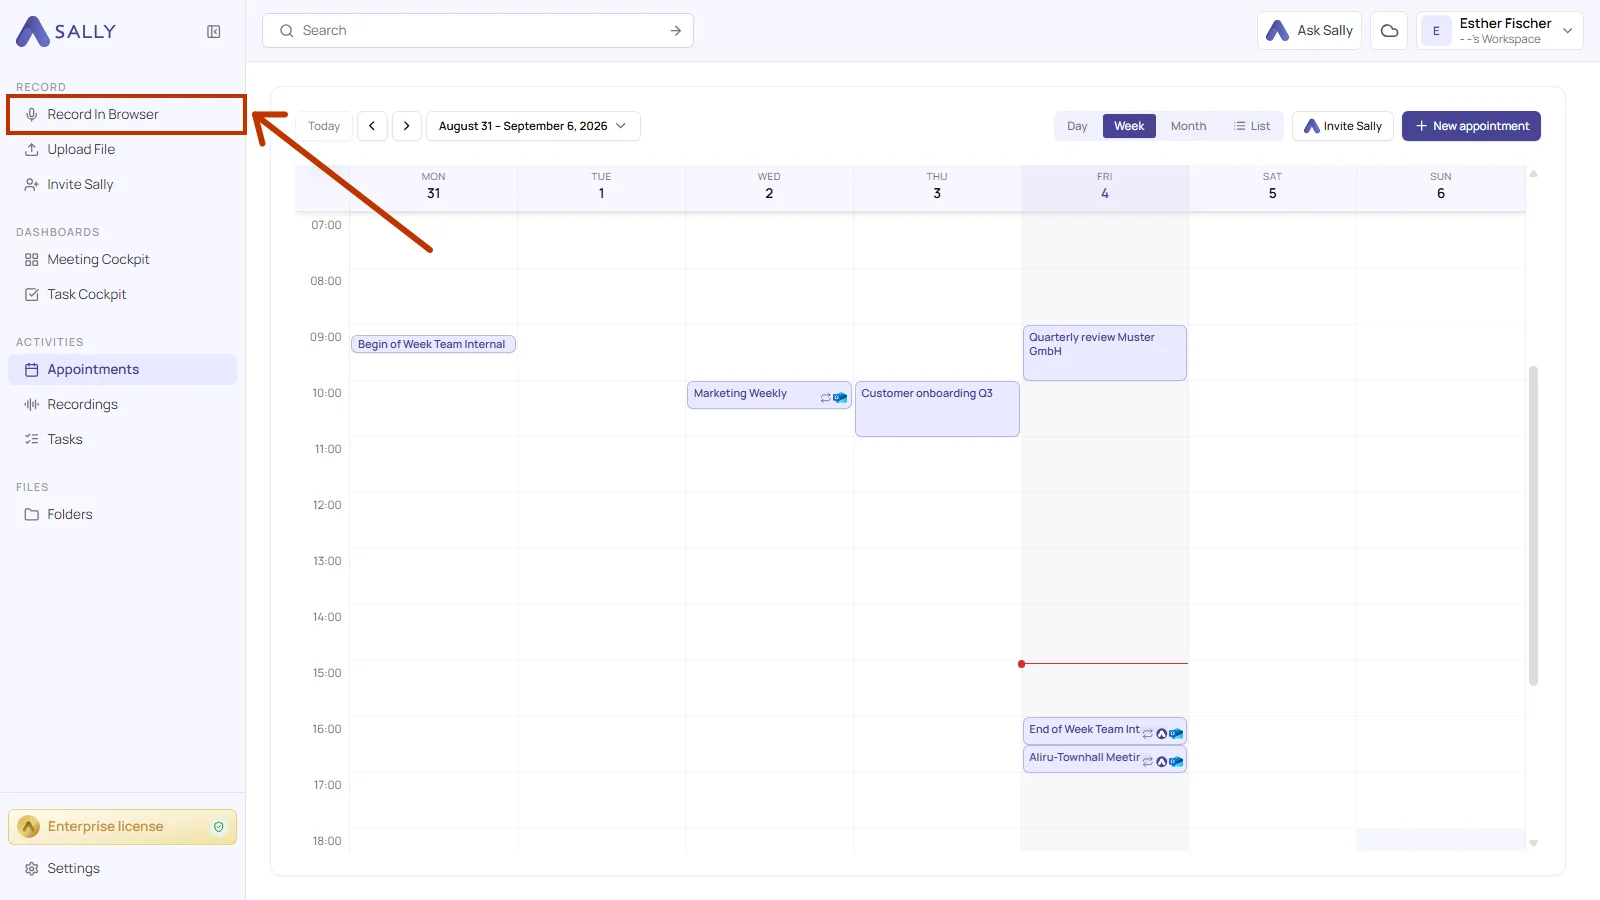
- In the sidebar under Record, pick Record In Browser.
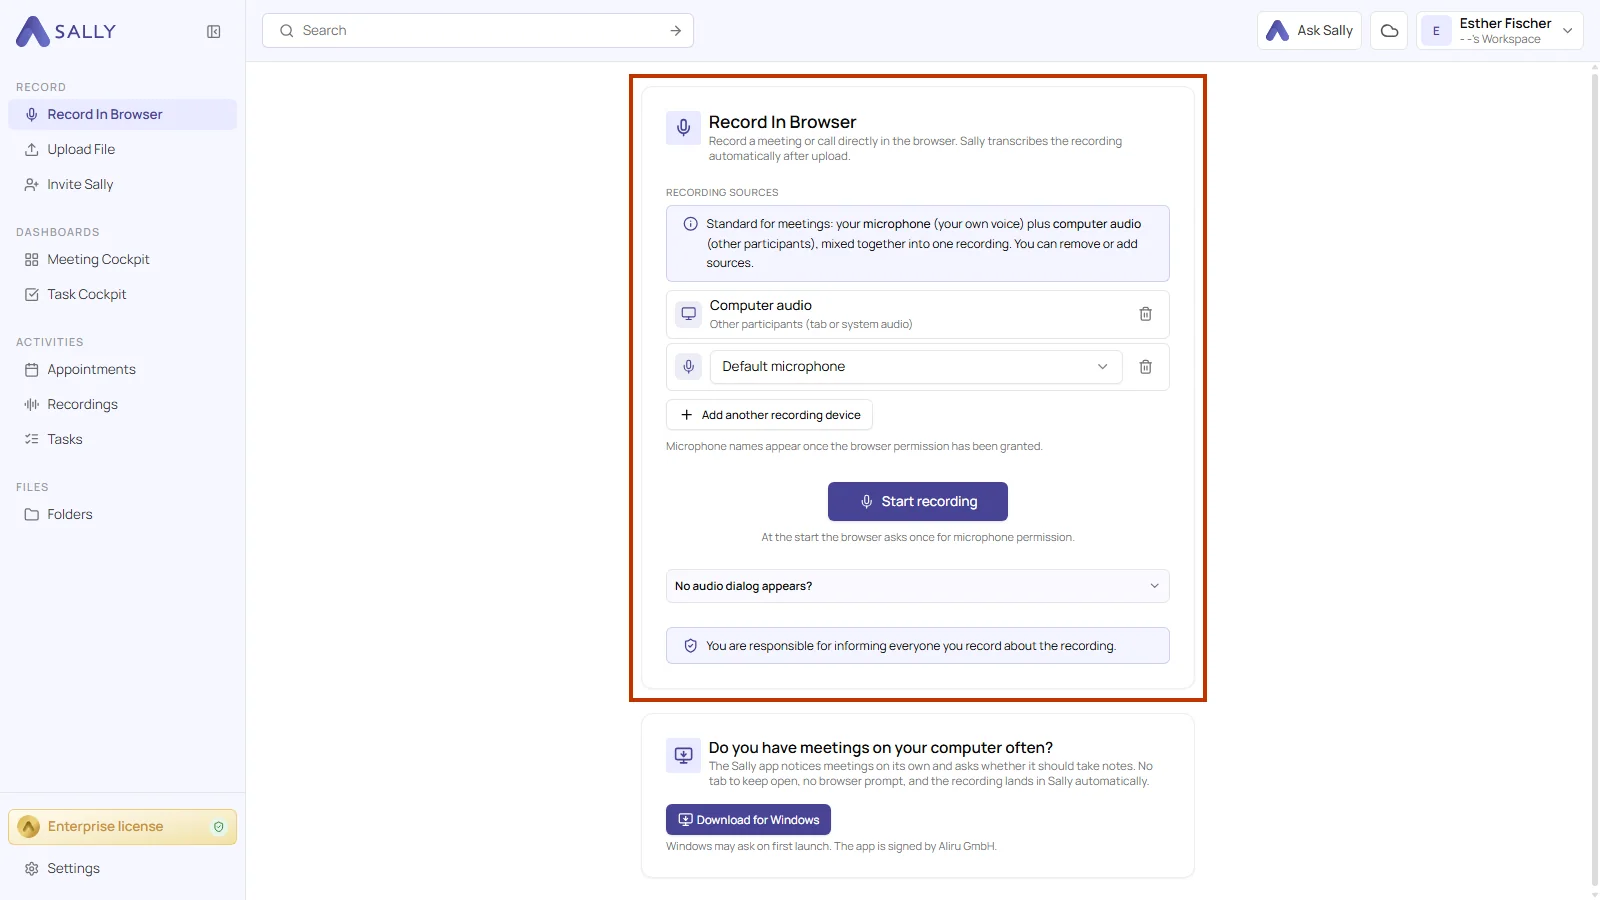
The panel explains itself in one sentence: "Record a meeting or call directly in the browser. Sally transcribes the recording automatically after upload."
3. The recording sources
Recording sources is where you see what will be captured. Sally starts from a default that suits most meetings, and describes it right above: "Standard for meetings: your microphone (your own voice) plus computer audio (other participants), mixed together into one recording. You can remove or add sources."
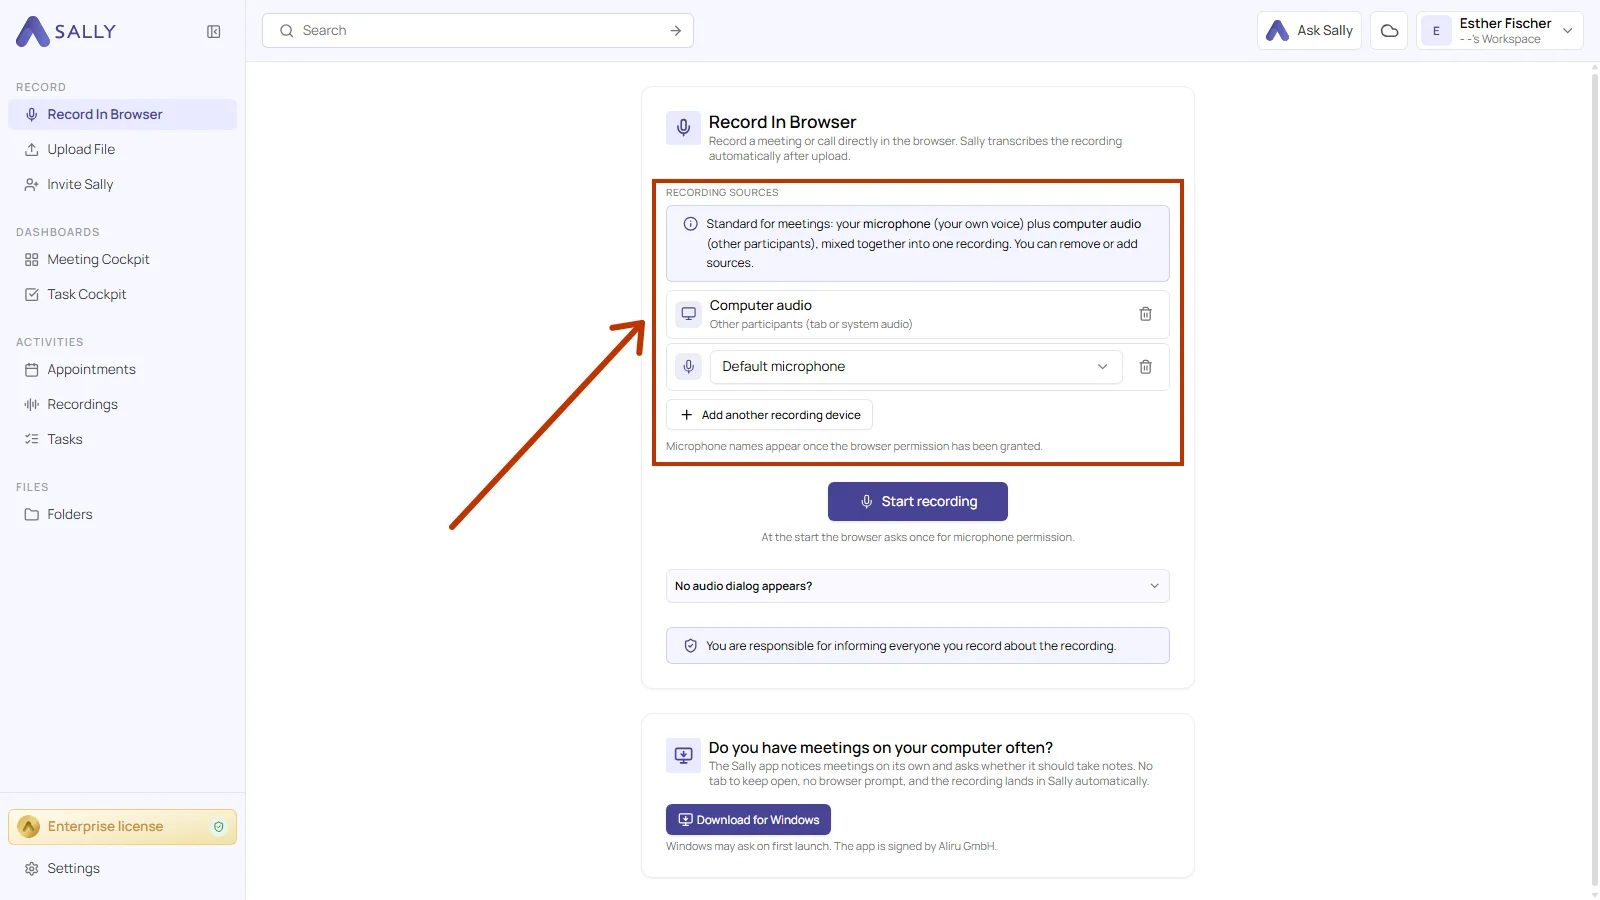
The bin icon on the right removes a source. The only time you can do without the computer audio is when nothing comes out of your machine at all, a conversation in the room for instance, which your microphone picks up on its own. Sally asks once more before removing a source and points out that without the computer audio the other participants are not recorded.
3.1. Computer audio
This is the sound coming out of your machine, which means the voices of the other participants. Sally describes the source as "Other participants (tab or system audio)". Without it, the recording will only contain you.
3.2. Microphone
This is your own voice. The dropdown picks the device, and Default microphone is preselected. As long as the browser has no permission yet, the device names stay empty, and Sally says why: "Microphone names appear once the browser permission has been granted."
3.3. Further devices
Add another recording device brings in a third source. That pays off when there is a second microphone in the room, a conference microphone next to your headset for instance.
4. Start the recording
- Once your audio sources are set up, click Start recording.
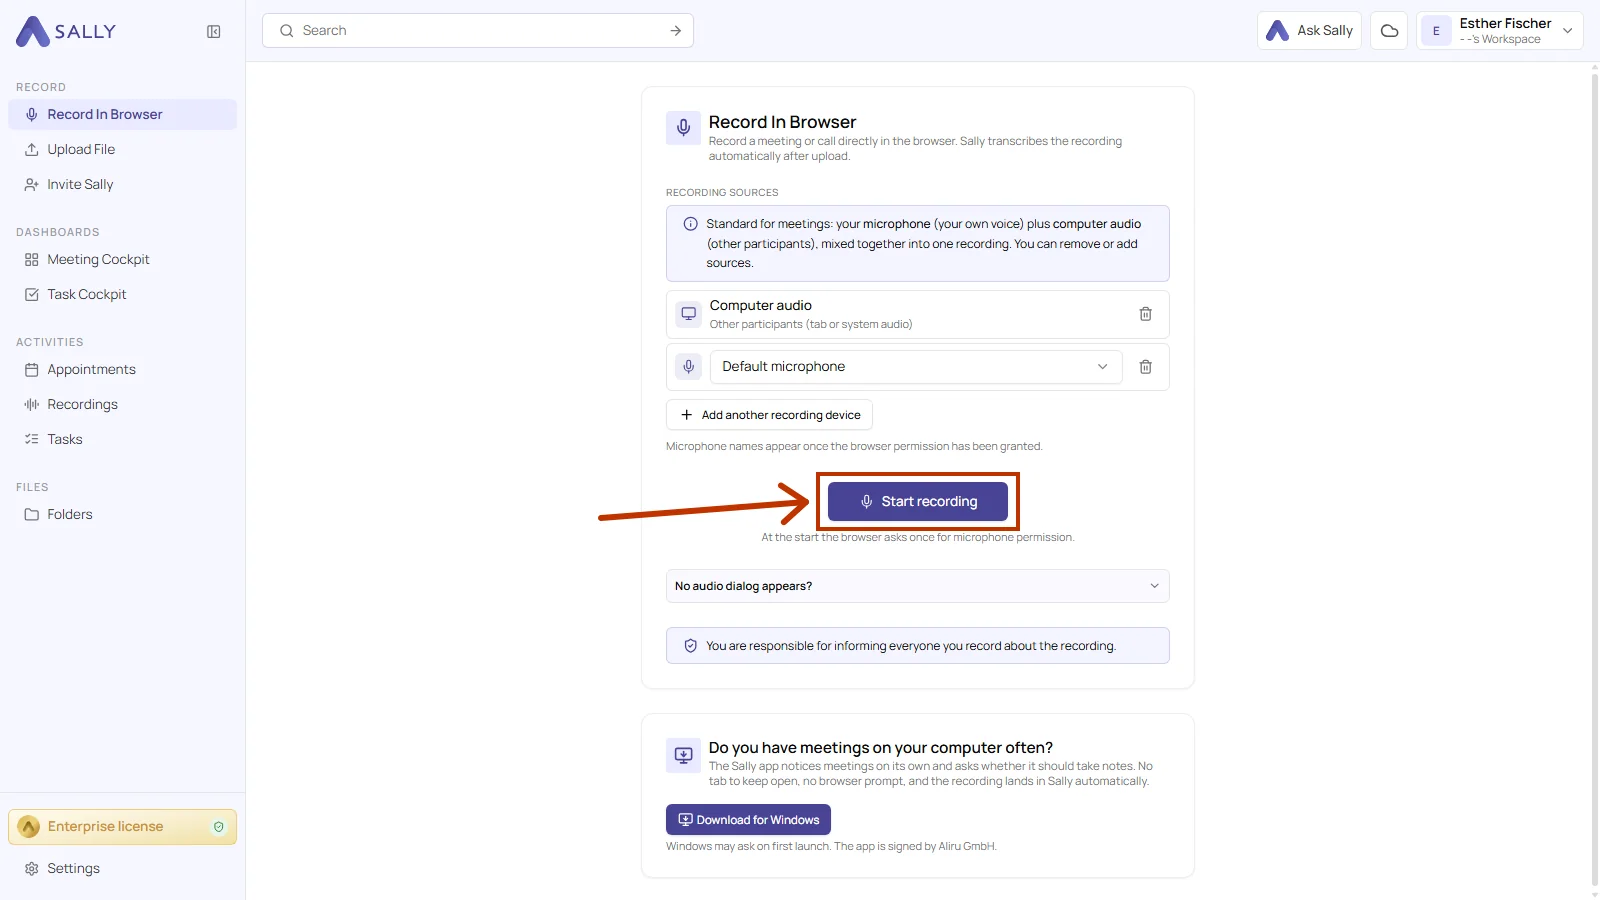
- The browser now asks what to share: a single tab, a window, or the entire screen. The exact labels depend on the browser. The screenshot shows Chrome.
This is the most important thing in this dialog. Without sharing the system audio, the sound from your computer is not recorded at all. In Chrome the switch is called Share system audio. If you do not switch it on, Sally only records your microphone, the other side is missing entirely, and you notice it only when the transcript contains nothing but your own sentences.
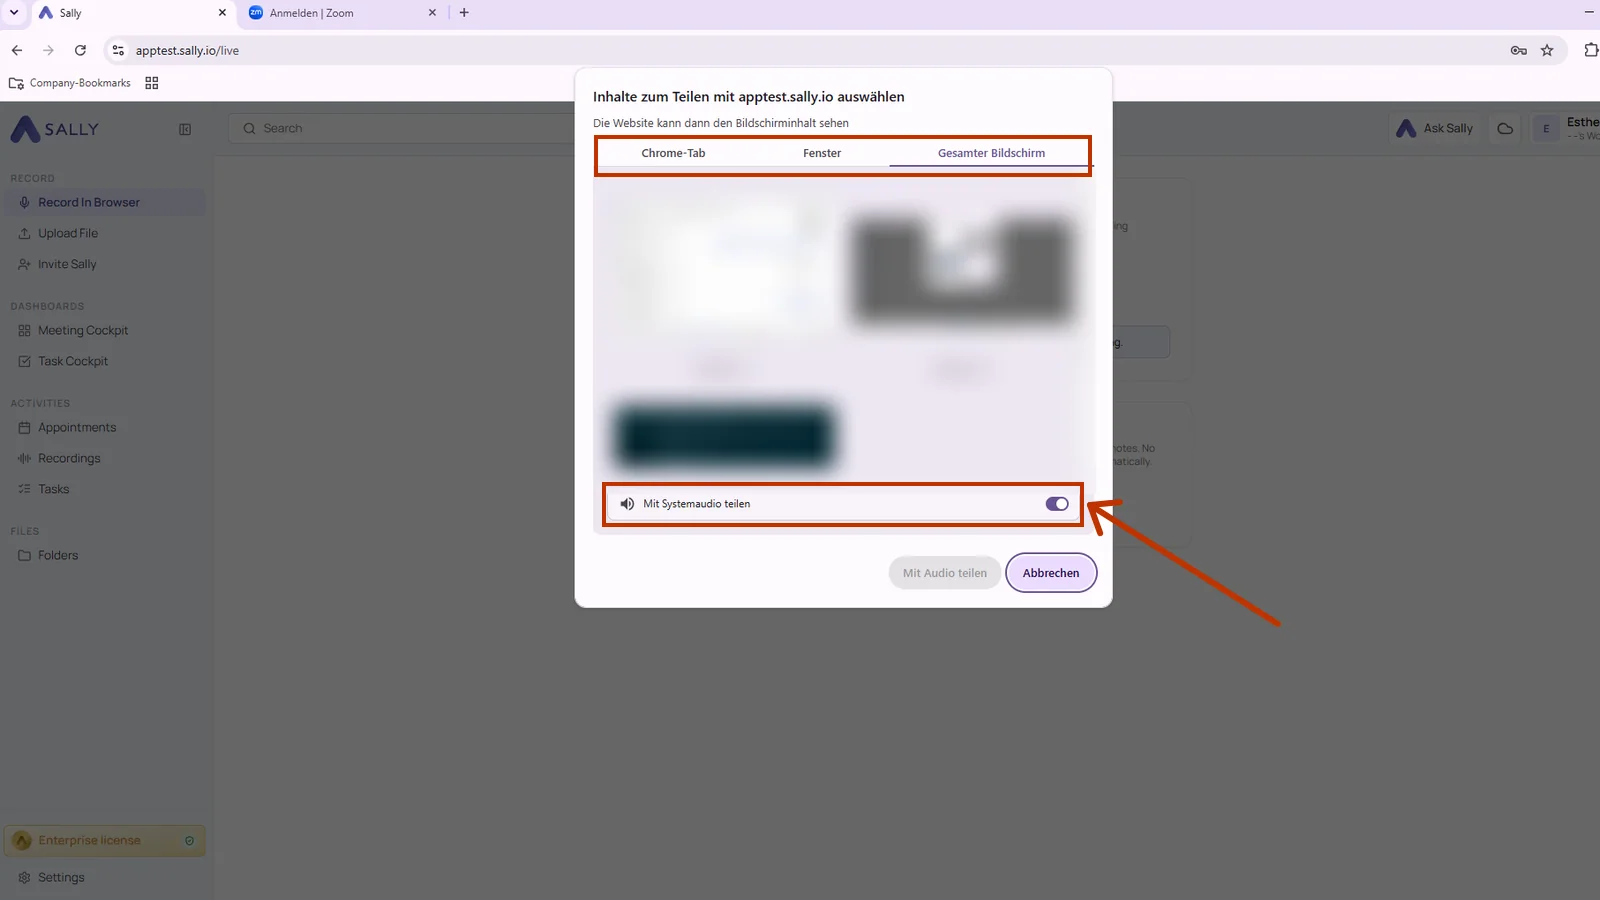
We recommend sharing the entire screen. With a single tab or window, only the audio of that one source comes through. If the conversation runs in another application, or if you pick the wrong source by mistake, the audio is missing from the recording.
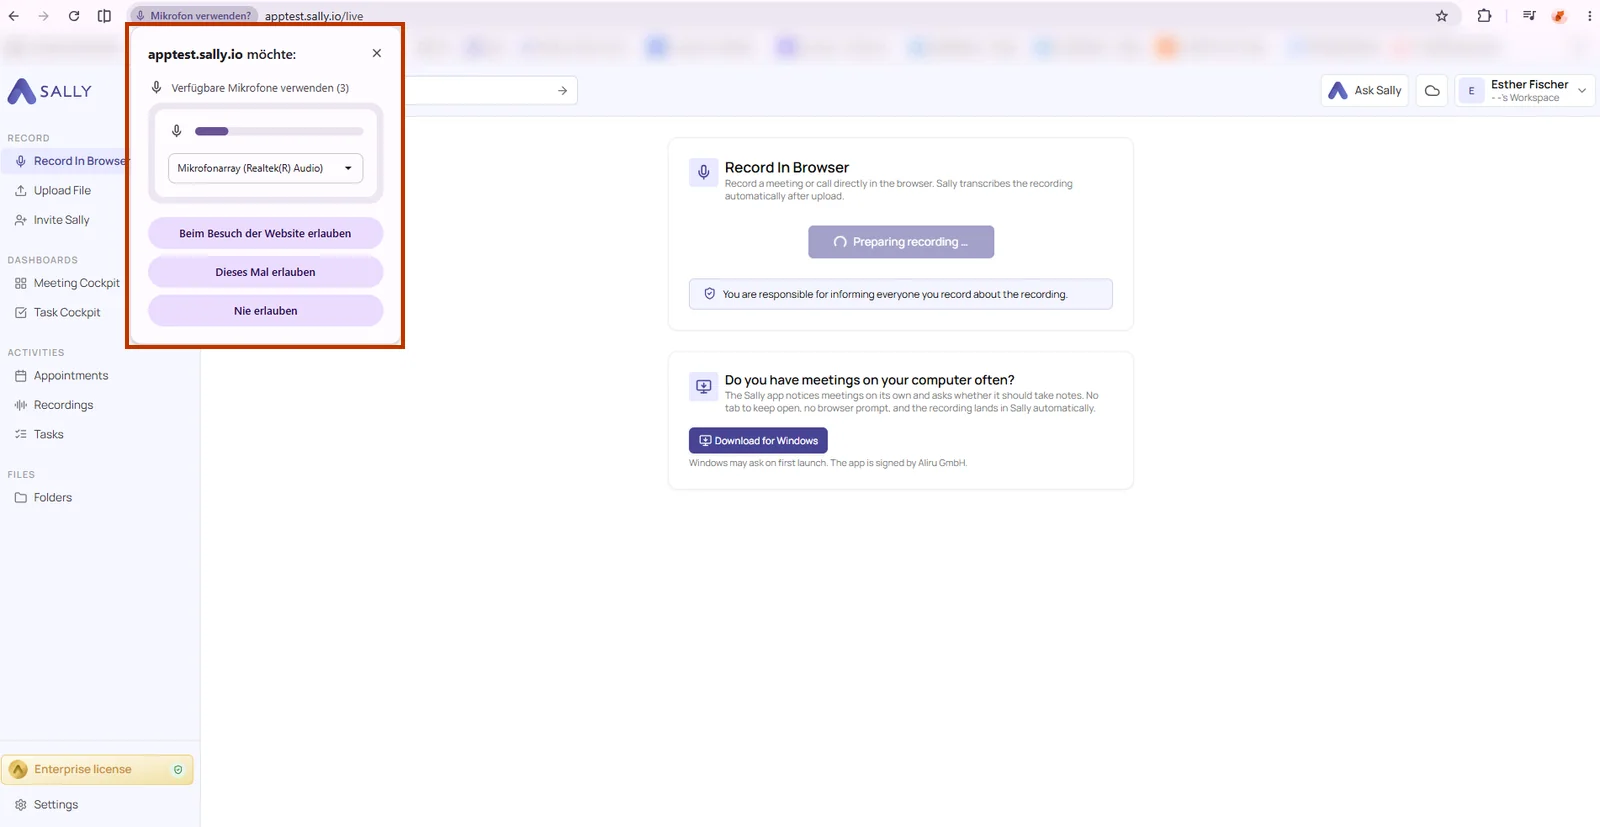
- The first time round, the browser also asks for microphone permission. Sally announces it: "At the start the browser asks once for microphone permission." Pick your microphone in the prompt and allow the access. Behind the prompt, Sally is already getting ready and the panel shows Preparing recording ….
4.1. While the recording runs
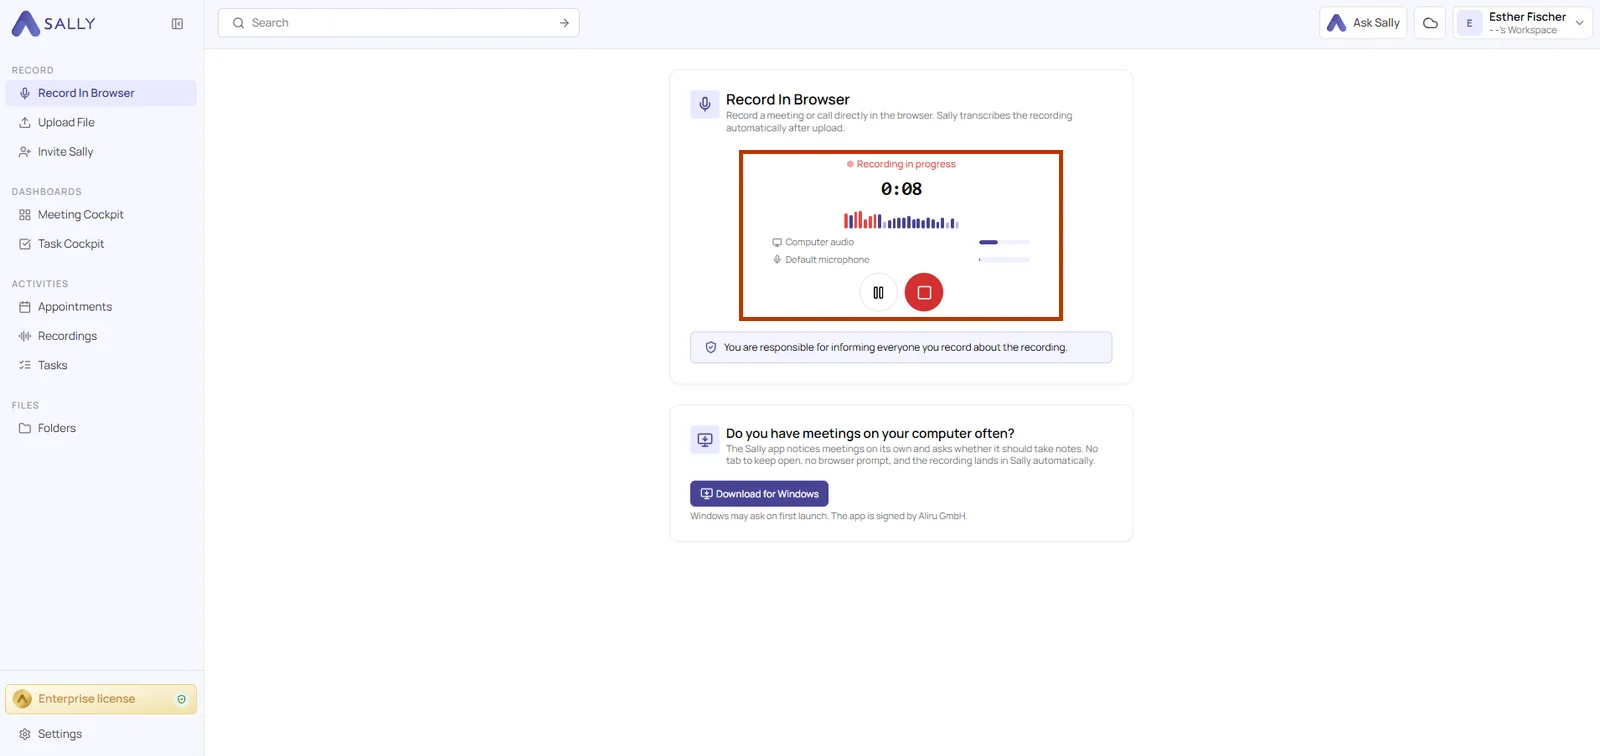
As soon as every source is ready, the panel switches to Recording in progress and counts the time. The level meter below shows both sources in different colors, purple for your microphone and red for the computer audio. Underneath, each source appears again with a level of its own.
That tells you right at the start whether both sides are actually coming through. If the level for the computer audio stays flat while the others are talking, the system audio was not shared. It is worth restarting the recording straight away rather than ending up with half a transcript.
The pause button holds the recording, the red button ends it.
4.2. Stop the recording
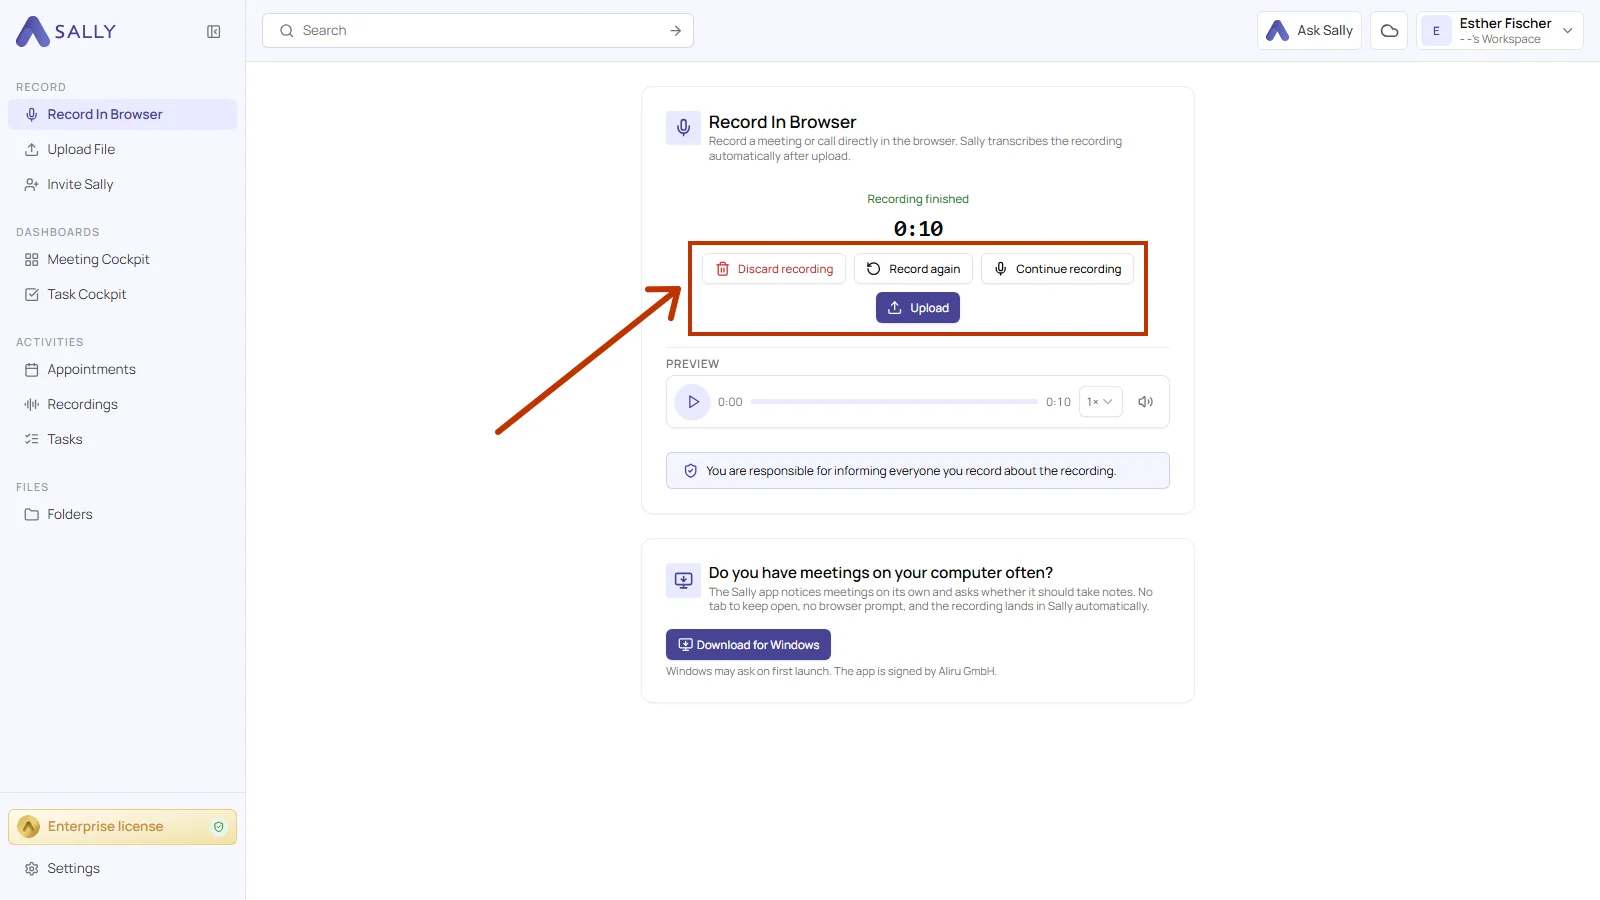
Once you stop, the panel reads Recording finished and shows the total length. Under Preview you can listen to the recording right there, before it goes anywhere.
Only Upload sends the recording to Sally, where it gets transcribed and receives its summary. Continue recording picks the same recording back up if the conversation carries on after all. Record again starts over. Discard recording deletes it, and Sally asks once more before it does.
You will find the uploaded recording under Recordings afterwards, like any other recording.
4.3. When the sharing permission is missing
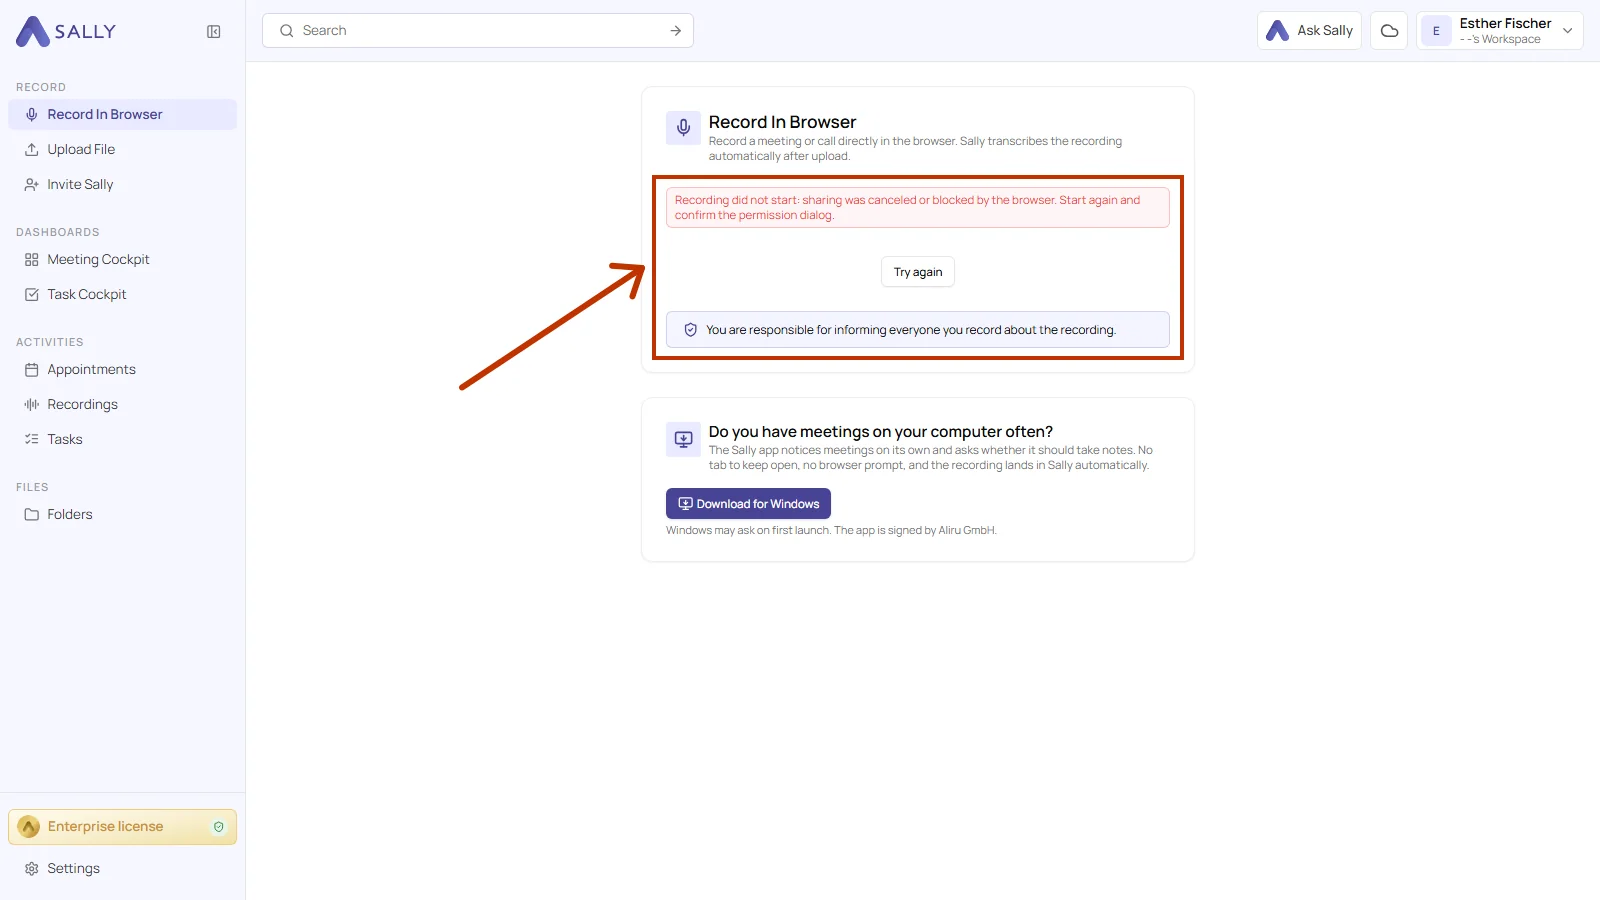
If the sharing is canceled or blocked by the browser, Sally shows a note that the recording could not be started. Try again gives you a second attempt.
For everyday use on a computer there is the Meeting Recorder, the Sally app for Windows. It notices conversations on its own and asks whether it should take notes. That removes both the tab you keep open and the browser prompt before every recording.
5. When no audio dialog appears
Not every browser can pass on the system sound. If yours does not ask about audio at the start, a virtual audio device helps by offering the system sound as a microphone input. Sally names the tools for it under No audio dialog appears?.
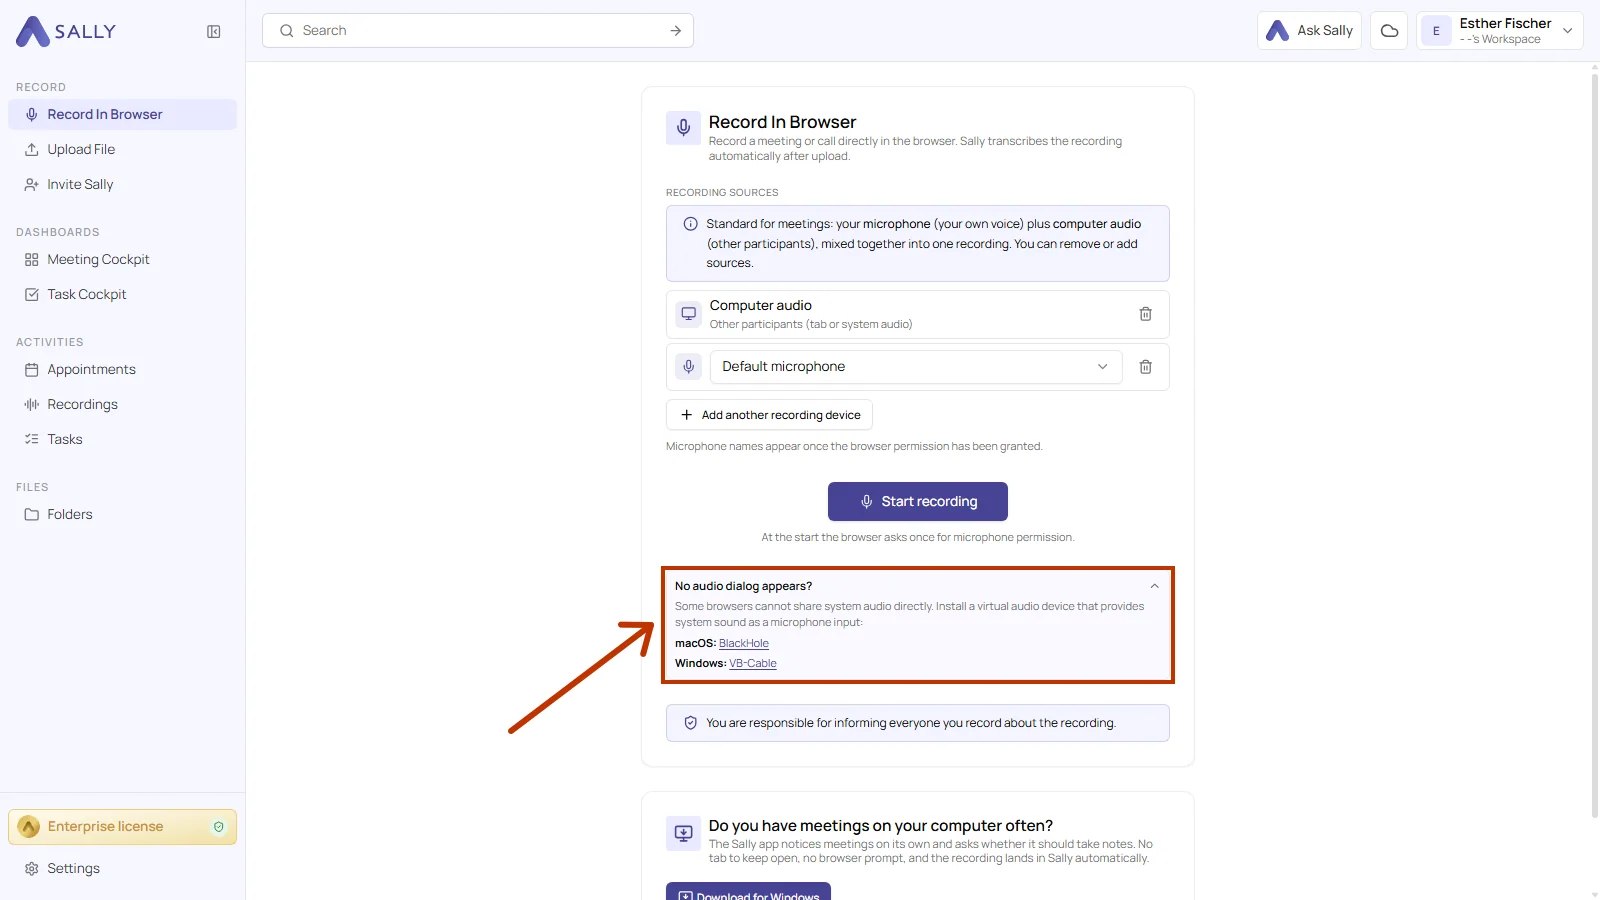
For macOS that is BlackHole, for Windows it is VB-Cable. Once installed, the virtual device appears like a normal microphone in the list under microphone.
6. Common questions
- 6.1. Can anyone see that I am recording
- 6.2. The entry is greyed out
- 6.3. Difference to the Meeting Recorder
- 6.4. Where the recording ends up
6.1. Can anyone see that I am recording
No. No bot joins, and nothing changes in the participant list of the meeting. That is exactly why informing the others rests with you, and why Sally points it out in the panel.
6.2. The entry is greyed out
Then an owner or admin has switched this method off for the organization. Hover over the entry and you get the note Disabled by the administrator. Which methods are open is controlled under recording sources.
6.3. Difference to the Meeting Recorder
Both capture the microphone along with the computer audio. In the browser you need no installation, but you do need a tab to keep open and a browser permission before every recording. The Meeting Recorder runs as an app in the background, notices conversations on its own, and only runs on Windows.
6.4. Where the recording ends up
Under Recordings, together with all your other recordings. The transcript and the summary are created automatically as soon as the recording is uploaded.