How to create a support ticket in Sally AI
Support runs inside Sally, so you reach our team without leaving the app. You open a ticket right where you work, and everything that follows stays under one ticket number: your description, the files you attach and every reply from us.
Two things happen the moment you ask. While you type the subject, Sally searches the Help Center and offers the articles that match. And once the ticket is in, Sally answers it herself straight away, so you often have a solution before a colleague of ours has read a word.
If you cannot get into the app at all, because the login fails for example, write to support@sally.io and we will pick it up from there. Our support hours, response times and contact channels are listed at the end of this article.
Quick navigation
- Where to find your tickets
- Create a ticket
- The first answer arrives at once
- Replies and history
- Close a ticket
- Your tickets at a glance
- Support hours and contact channels
1. Where to find your tickets
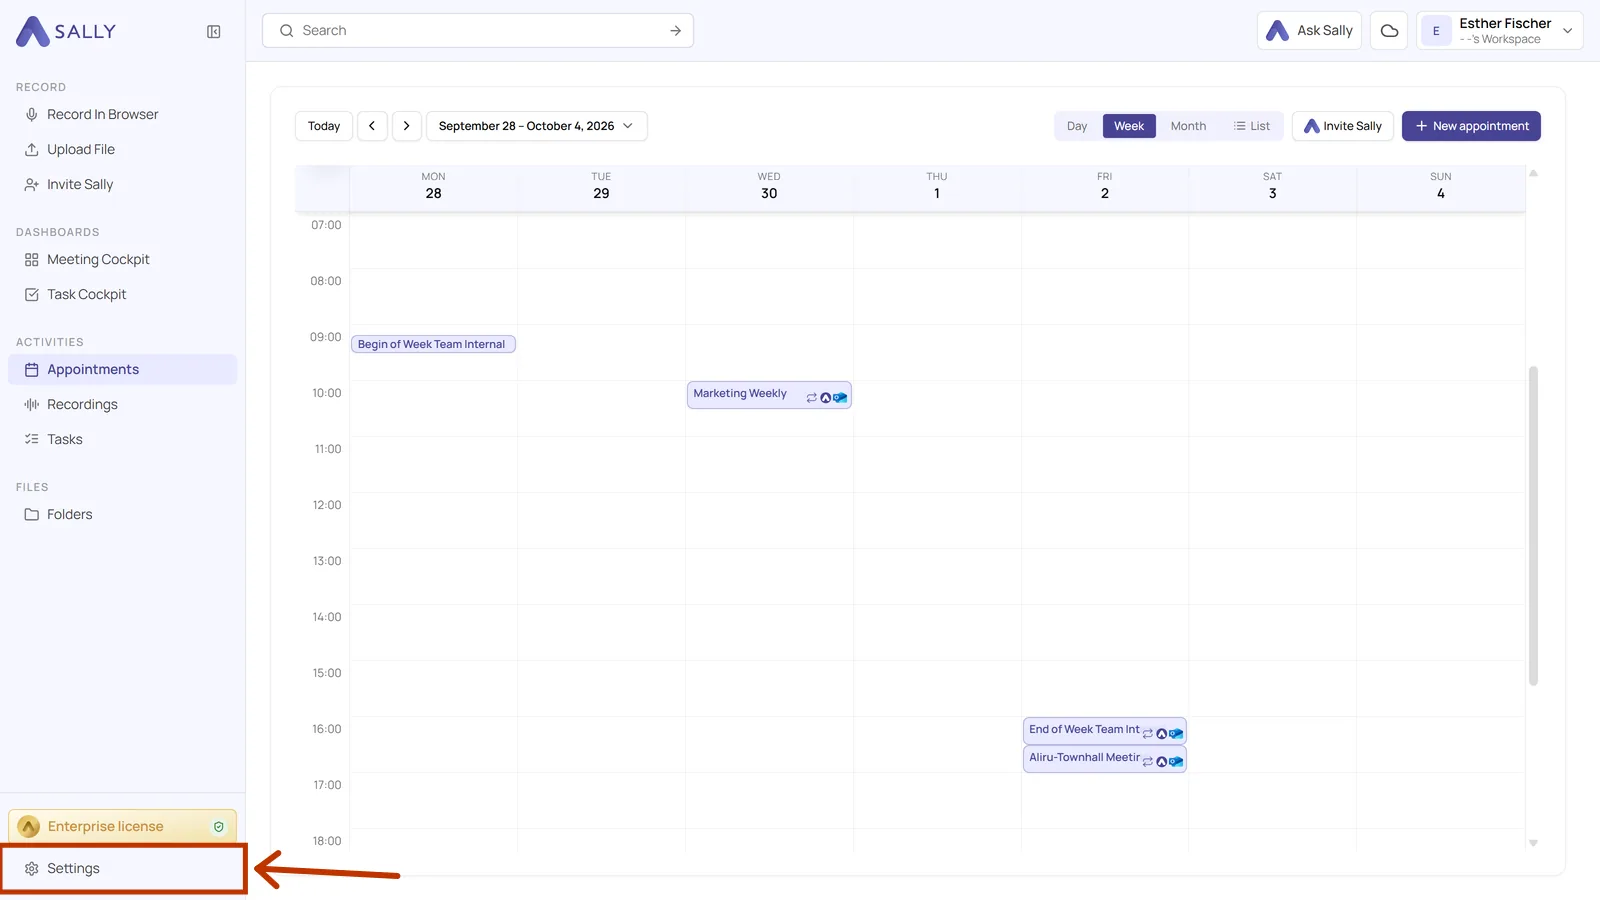
- Open Settings at the bottom of the left sidebar.
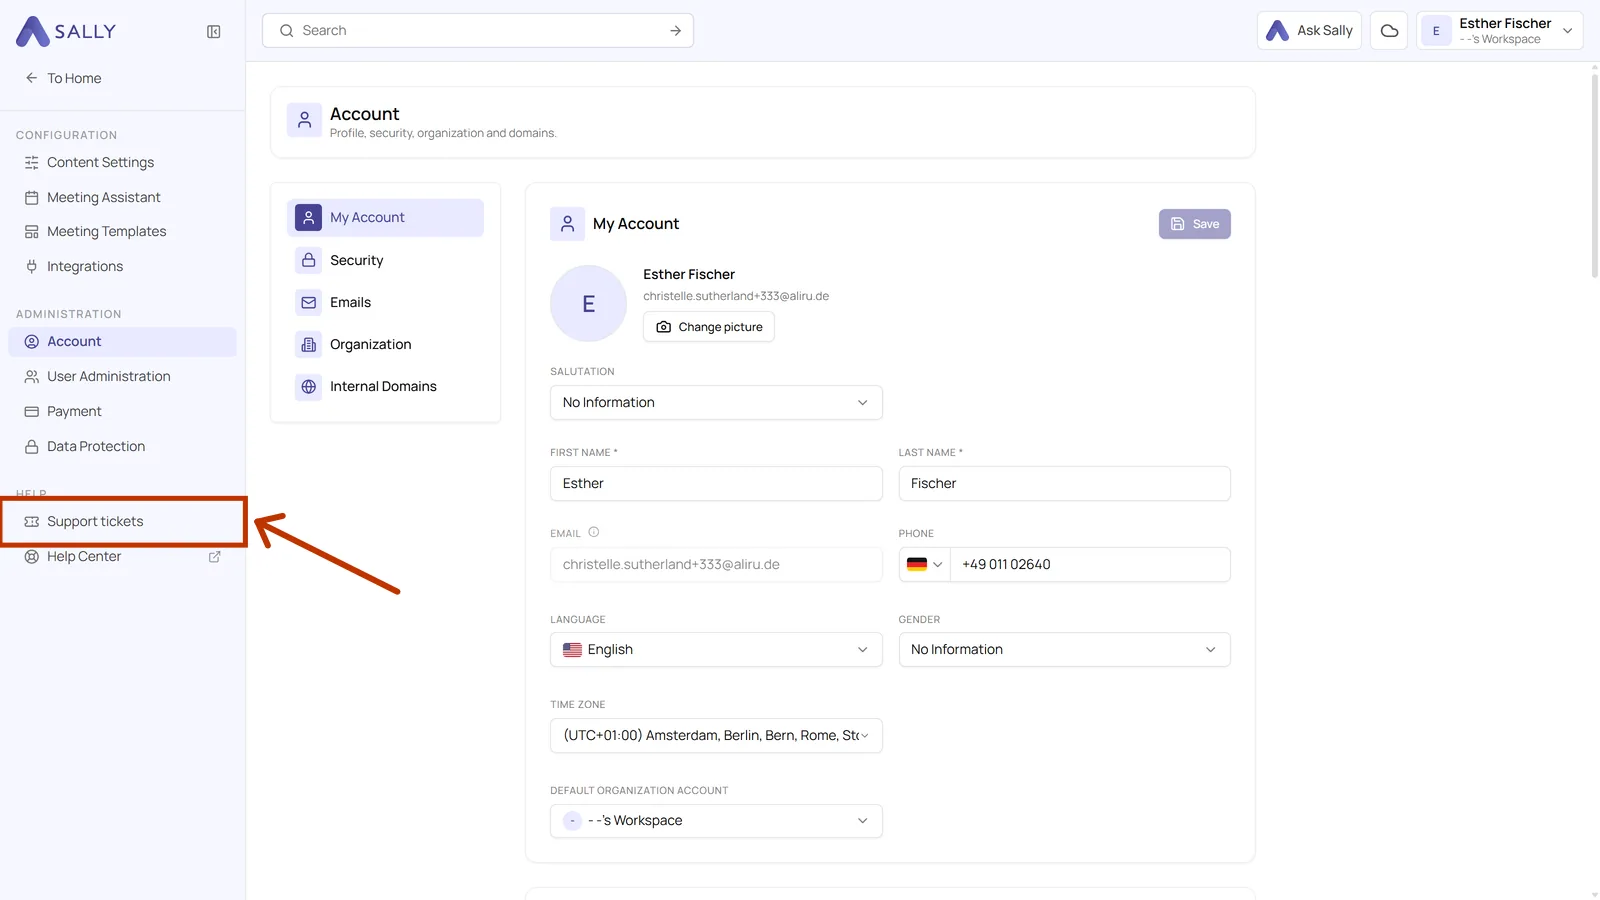
- Under Help, select Support tickets.
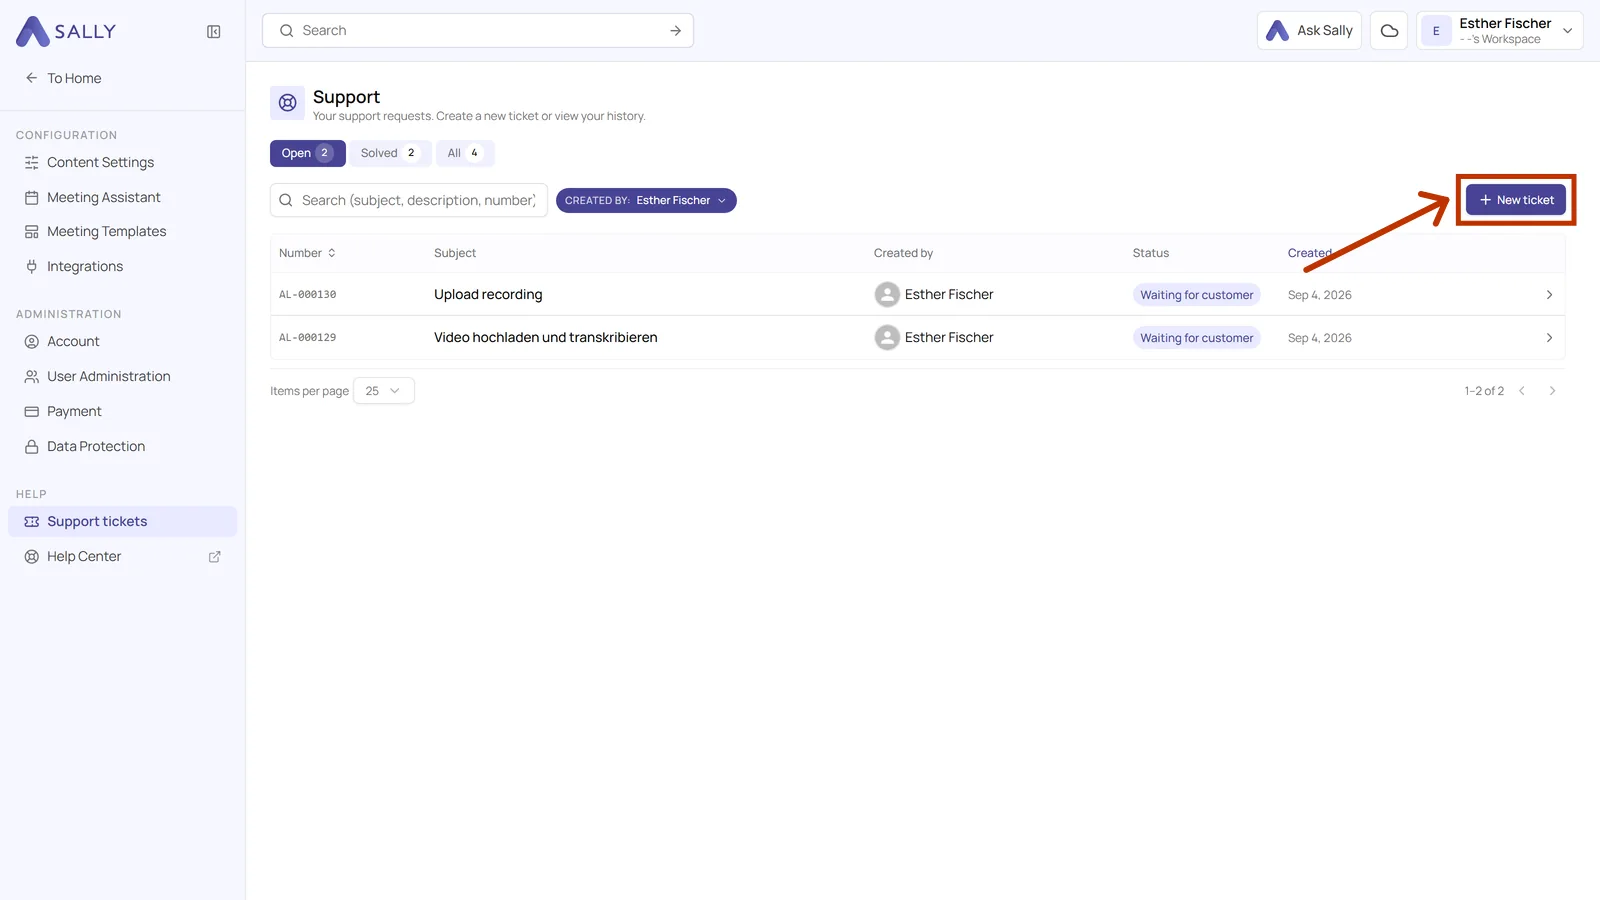
The page keeps every request you have ever sent, open and solved alike. New ticket in the top right corner is where a new one begins.
2. Create a ticket
The form comes in two steps. The first one is a single field, because an article may answer your question faster than we can.
2.1. Subject and article suggestions
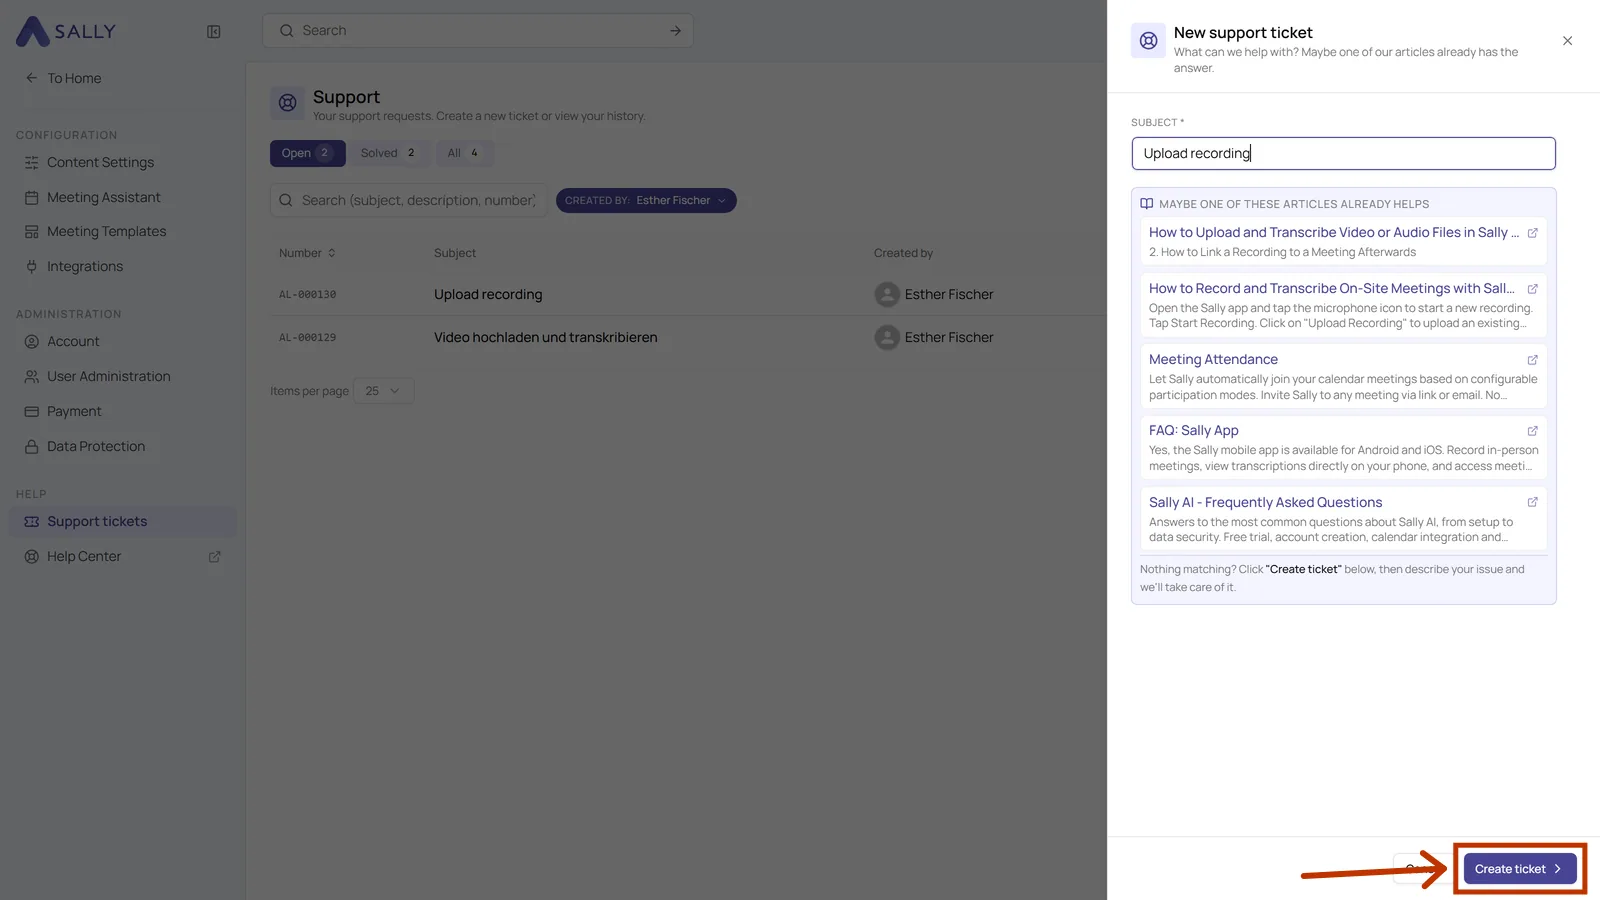
Write your issue into the Subject field, the only one that is required. As you type, matching Help Center articles appear underneath. Open one and you may be finished already.
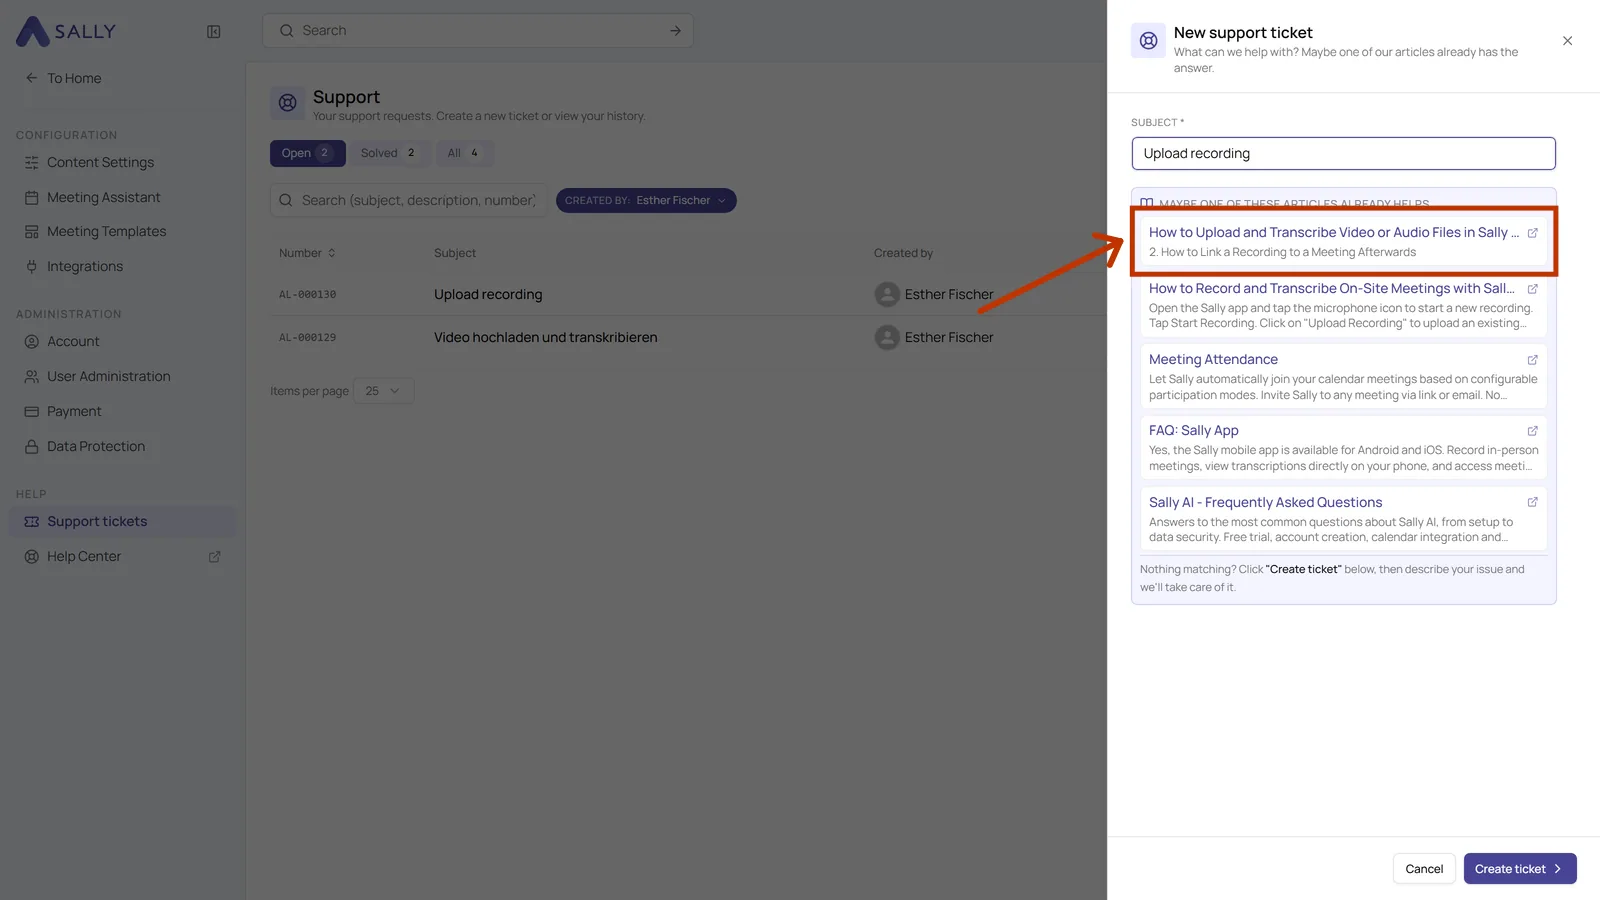
The search matches the words you use. Upload recording leads to the article about uploading. With nothing arrived you only get articles that miss the point. So put the feature or the screen into the subject and describe the symptom in the next step.
If nothing fits, Create ticket takes you to the second step.
2.2. Describe your issue
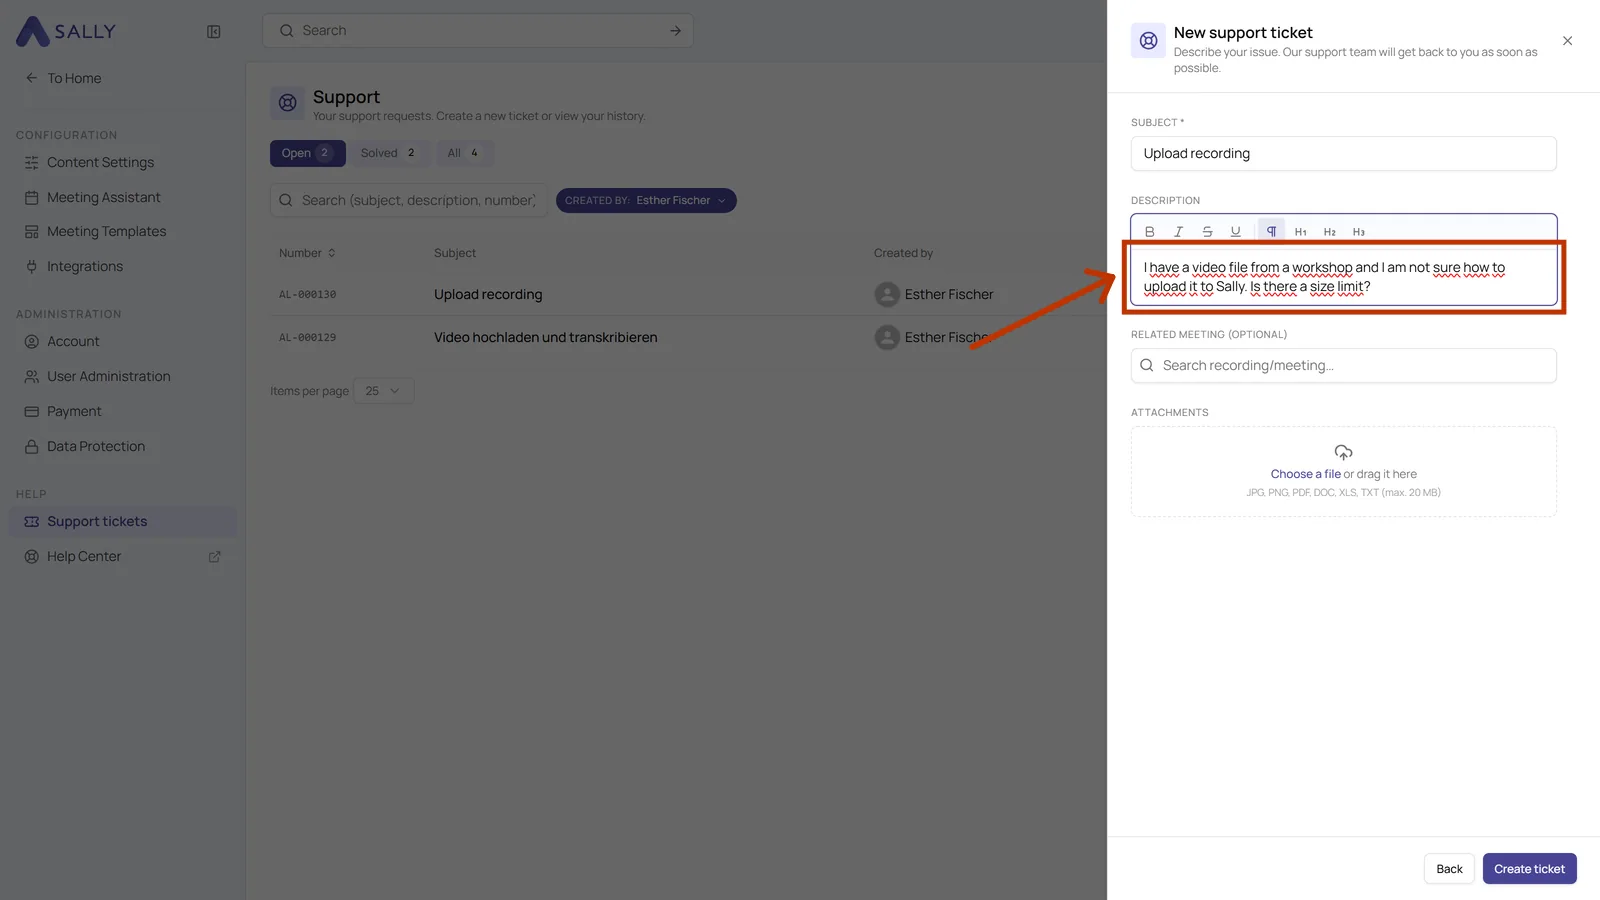
Here you tell us what happened. The subject carries over from the first step.
- Description: what happened, and what you expected instead. The editor handles bold, italic and headings, so a longer report stays readable
- Related meeting (optional): pick the meeting the issue belongs to and we do not have to ask for it
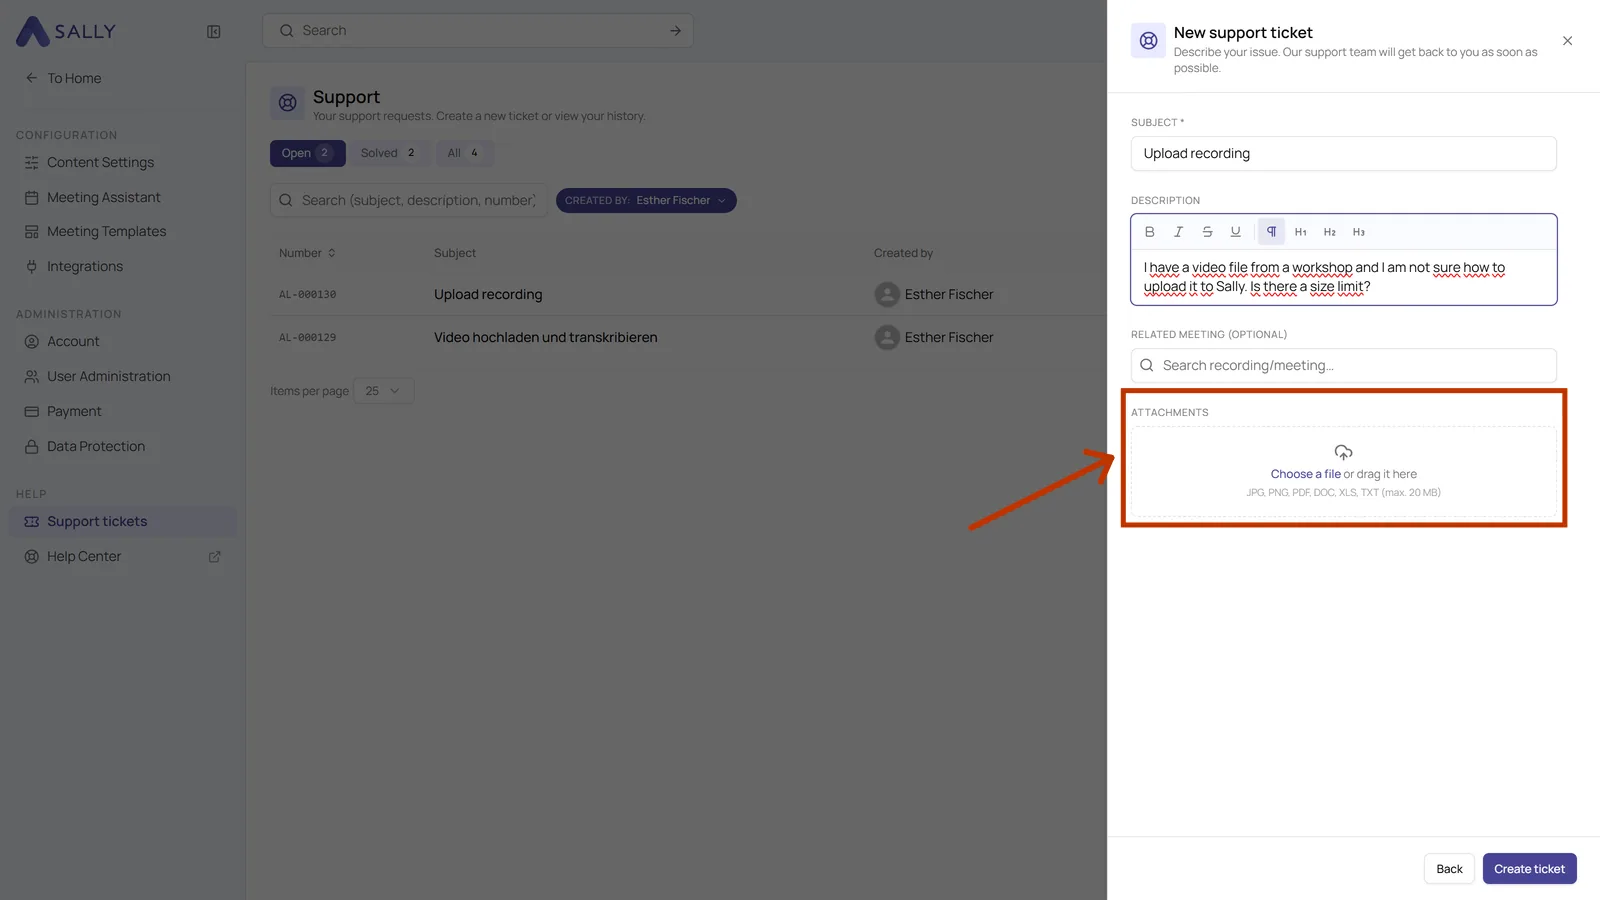
- Attachments: a screenshot often says more than the description. Choose a file or drag it here accepts JPG, PNG, PDF, DOC, XLS and TXT, up to 20 MB
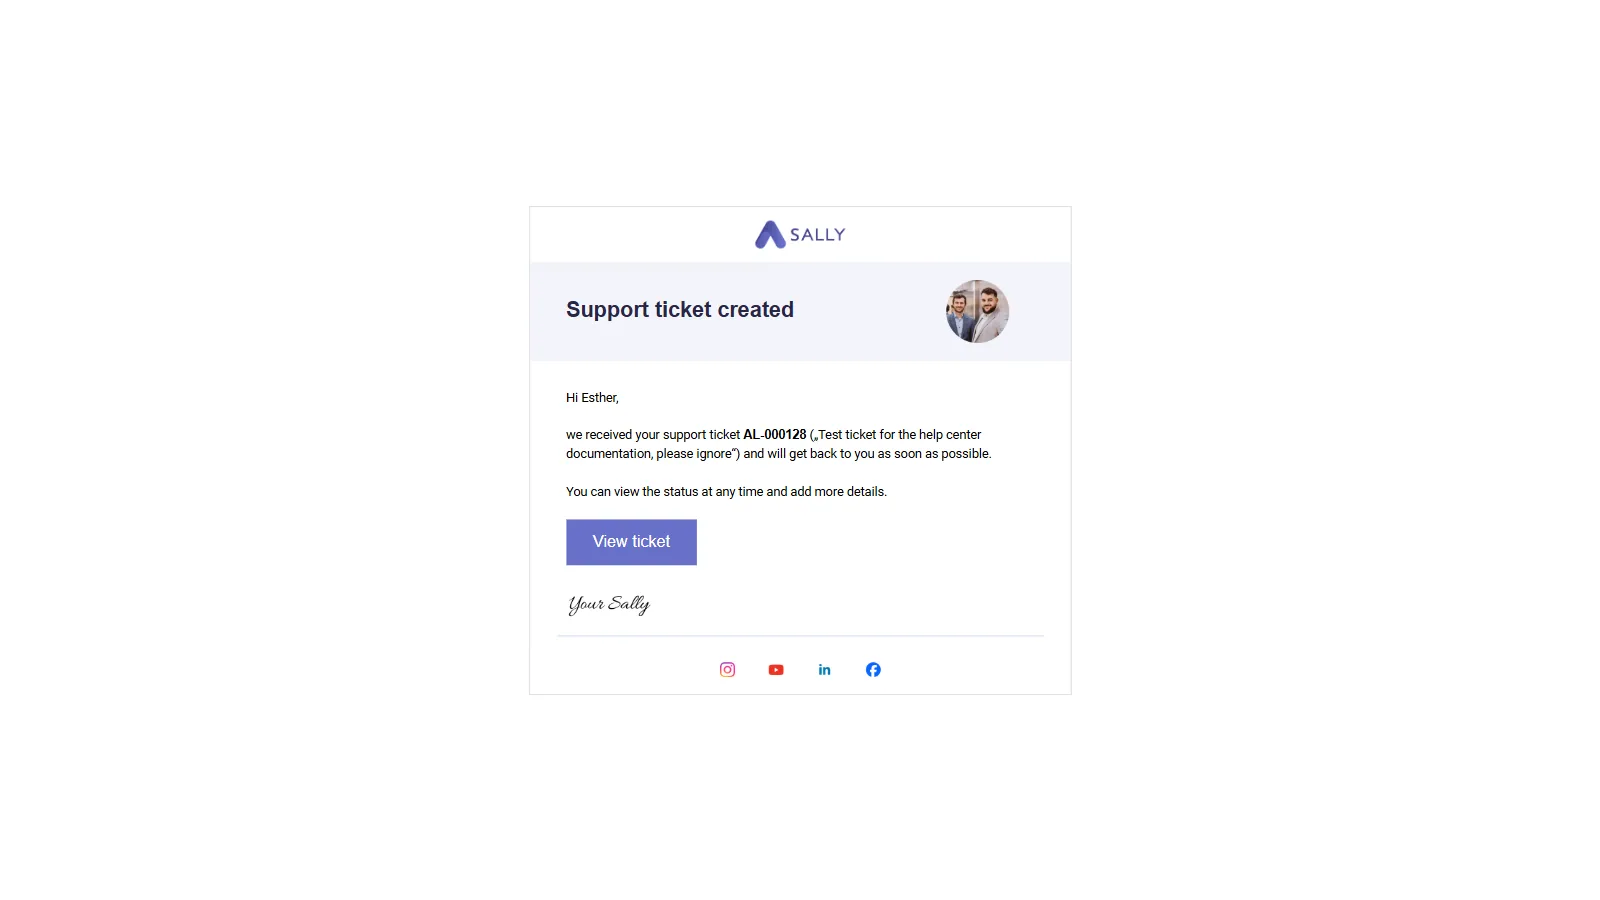
When you are done, click Create ticket in the bottom right corner. Sally gives the ticket its own number and opens it right away. An email confirms that your request has arrived.
3. The first answer arrives at once
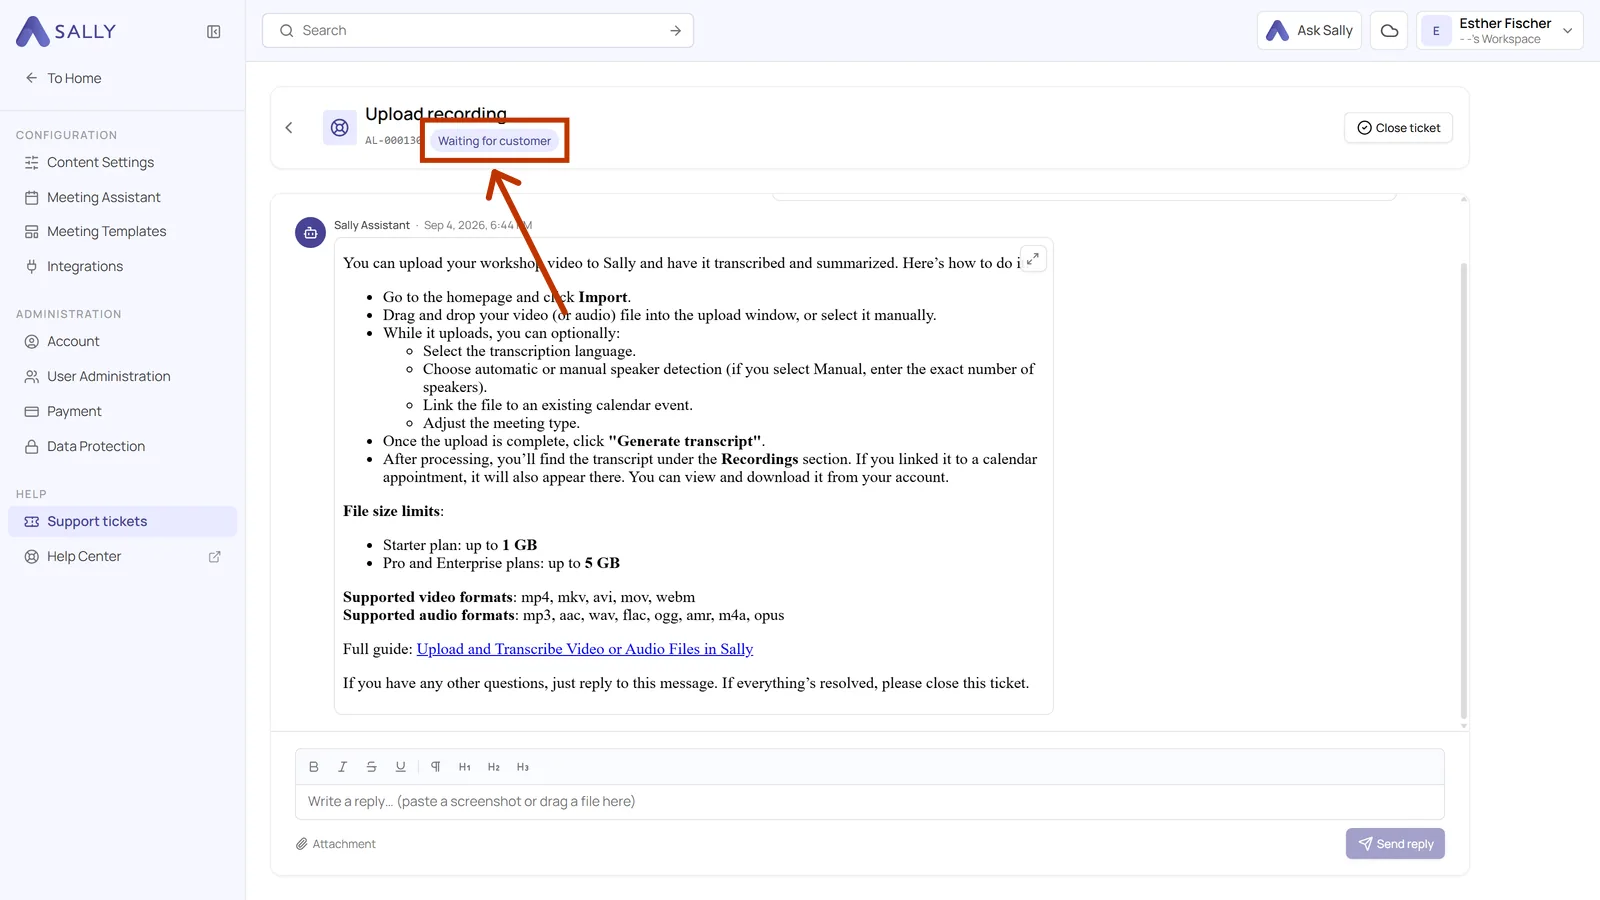
Sally Assistant replies to a new ticket immediately, out of the Help Center. In our example that answer walks through the upload step by step, names the size limit for each plan, lists the supported formats and links the full article.
The ticket then reads Waiting for customer, which means the ball is with you: reply if the answer missed the point, or close the ticket if it did the job.
4. Replies and history
A ticket is a conversation, and every message in it shows its author and the time it was posted, ours as well as yours.
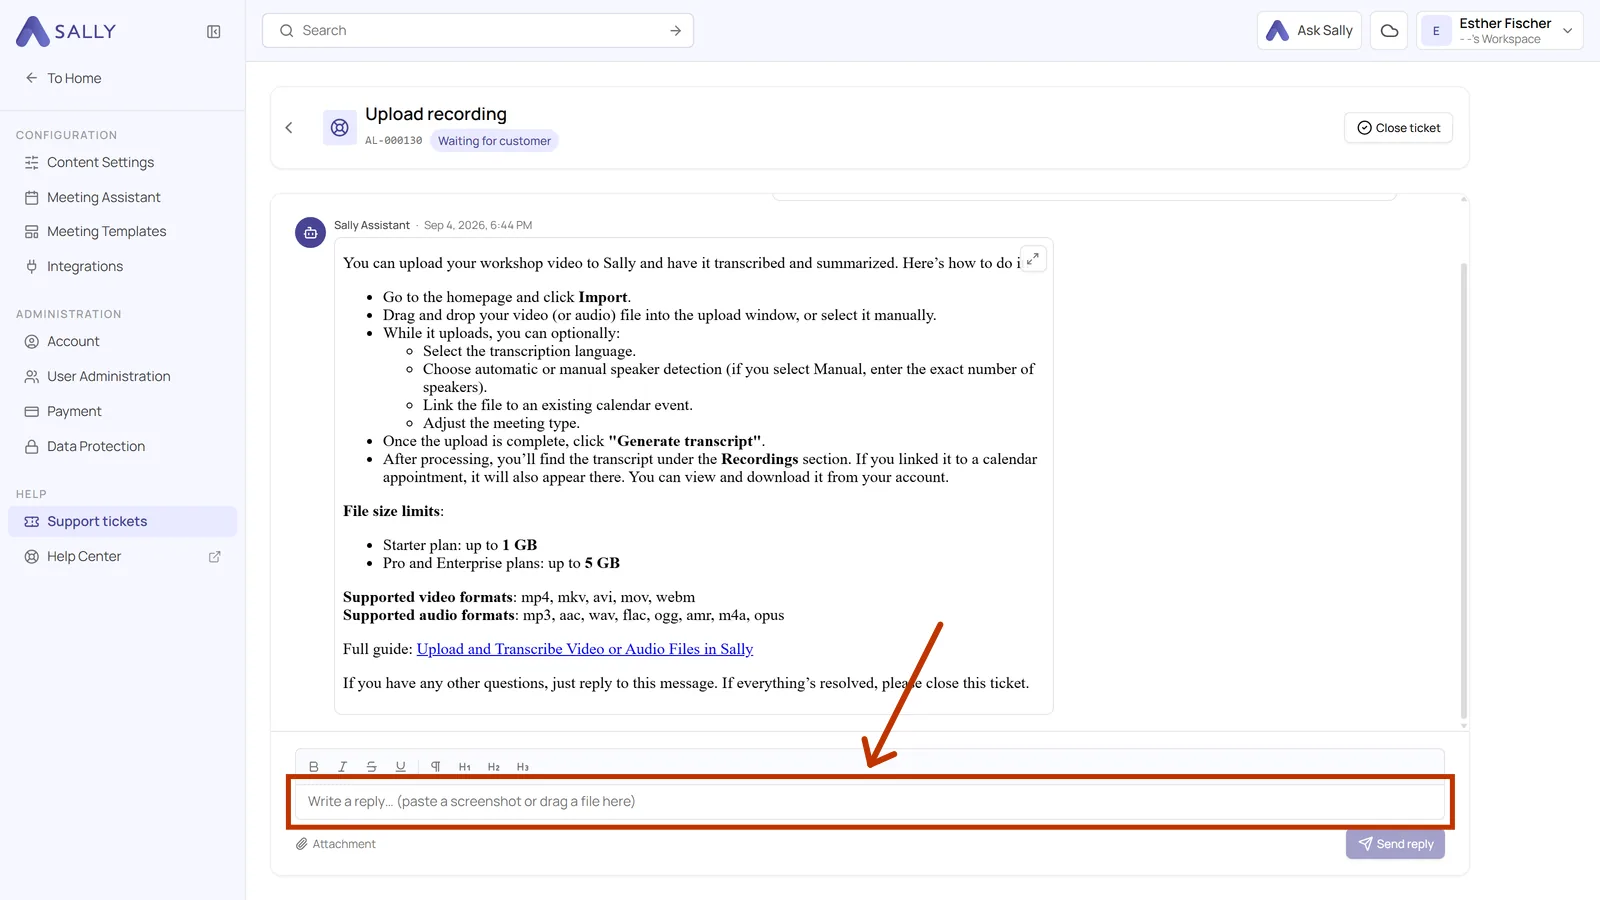
You write your reply in the field at the bottom, and it accepts formatting. A screenshot goes in by pasting it straight into the field or dropping it there. Attachment adds a file, Send reply posts the message. Someone from our team then takes care of your request.
5. Close a ticket
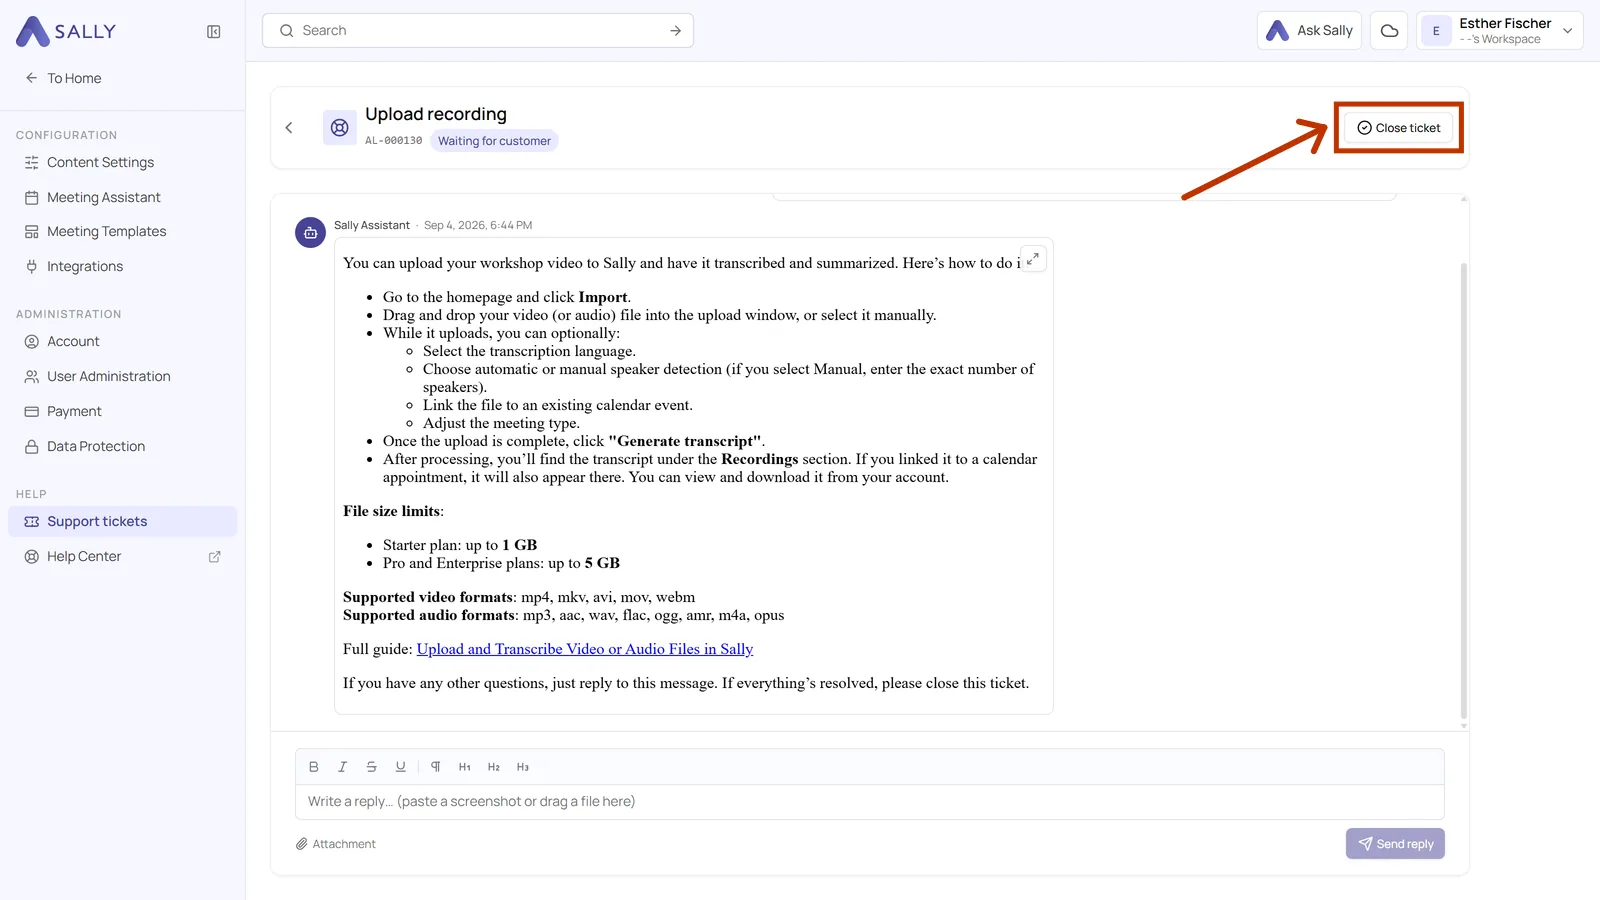
Once your issue is settled, Close ticket in the top right corner ends it.
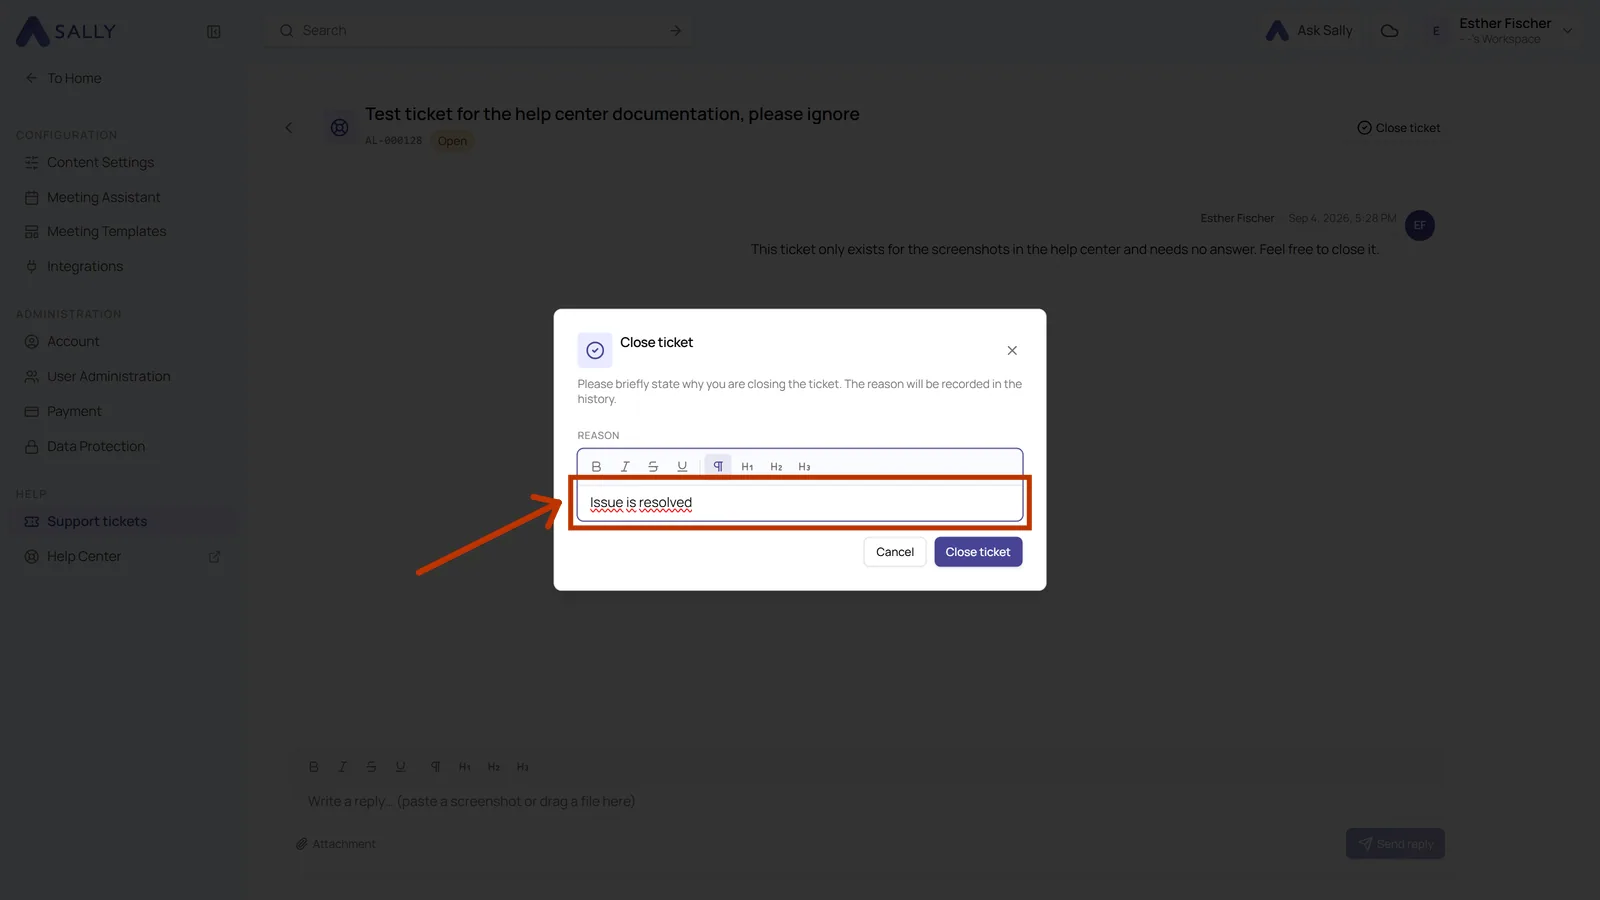
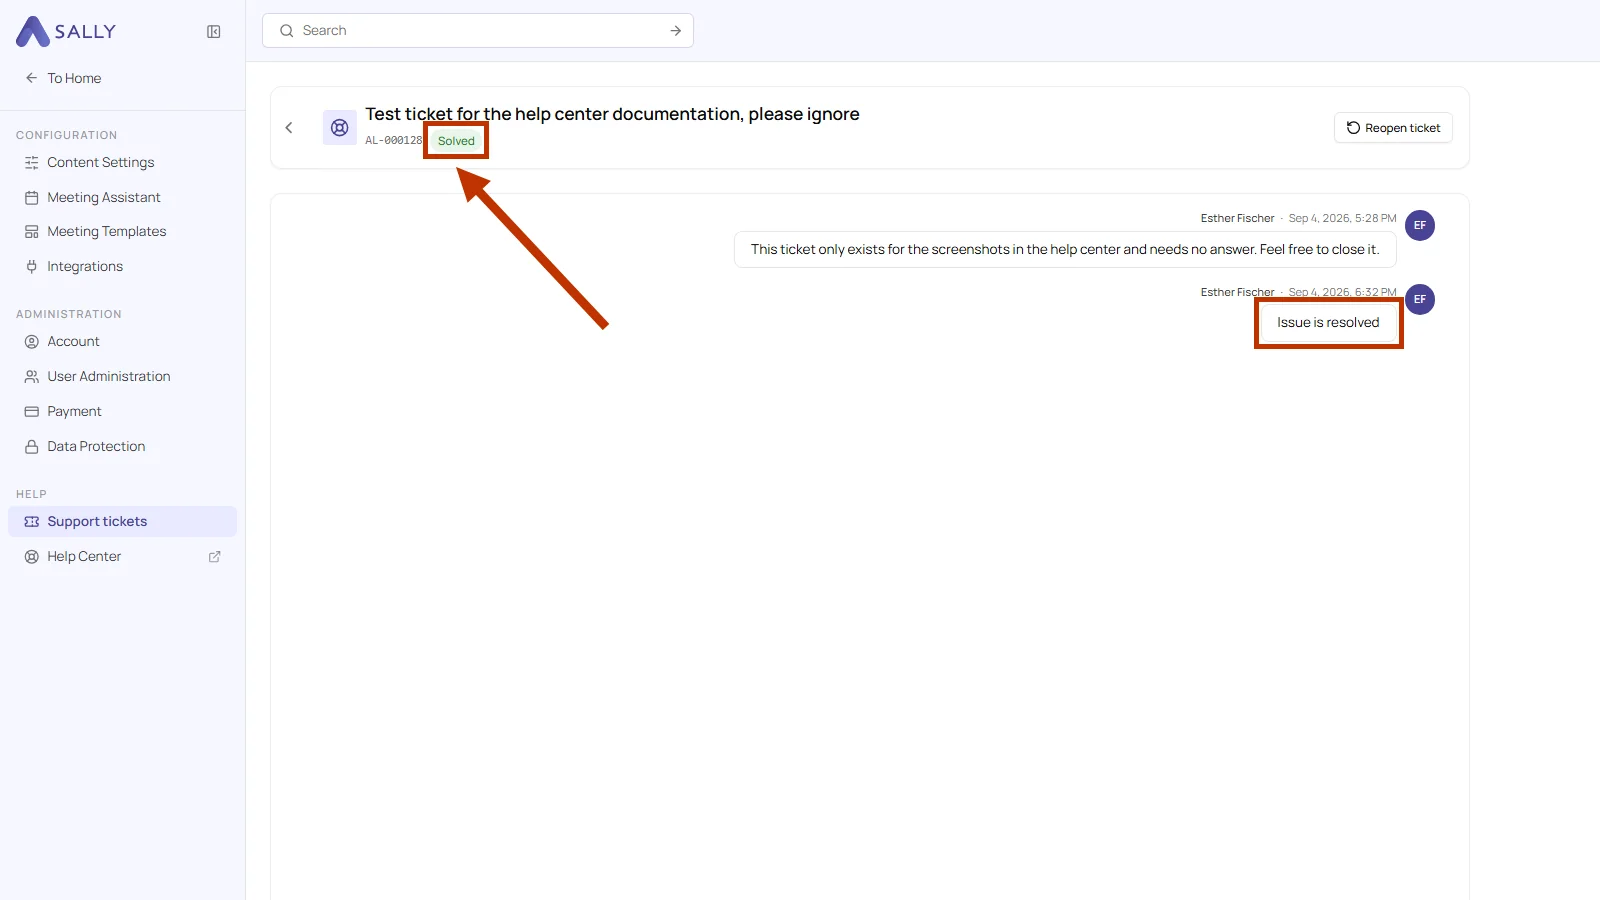
Sally asks for a short reason first, and that reason goes into the history, so anyone reading the ticket later knows how it ended. Close ticket in the dialog sets the status to Solved, and the ticket stays in your list with everything that was said.
Once you confirm, the status pill switches to Solved and the reason sits in the history as the last entry. Reopen ticket puts the ticket back on open if the matter comes up again.
6. Your tickets at a glance
The list keeps all your requests together. You only see the tickets you opened yourself.
- Open, Solved and All split it by status, each with a counter
- The search field covers subject, description and number
- A click on Number or Created sorts the list
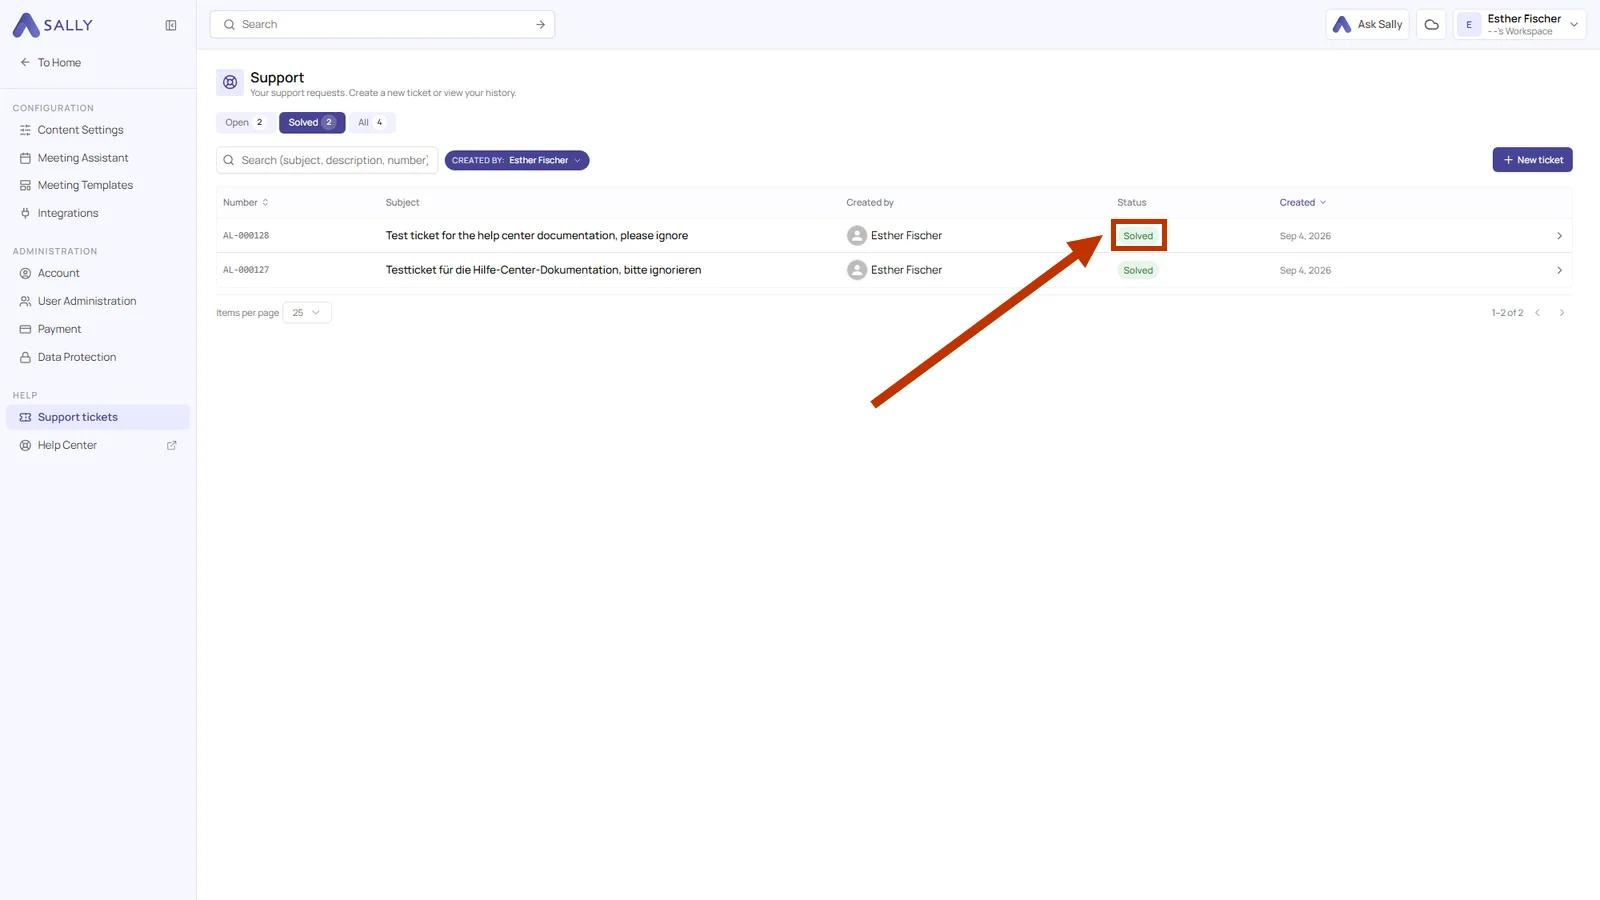
Every ticket carries a number of its own, such as AL-000129. Mention it when you reach us somewhere else about the same thing and we have the whole thread in front of us.
7. Support hours and contact channels
You can open a ticket around the clock, and Sally answers it right away. A reply from our team can also reach you outside the hours below, while the phone line keeps to them.
- Support hours: Monday to Friday, 9:00 to 16:00 (CET/CEST), except on public holidays
- Phone: +49 621 49088670, within the support hours
- First response: Sally replies to every new ticket immediately, and someone from our team gets back to you within 24 hours on business days
Here is how to reach us:
- Support case: New ticket in Sally, under Settings → Support tickets
- Email: support@sally.io, the right address if you cannot get into the app at all
- Knowledge base: the Sally AI Help Center with guides, FAQs and release notes
- Data protection: privacy@sally.io for questions about your data, contracts and data subject rights