How to edit and adjust your transcript in Sally AI
Editing a transcript is about more than typos. You can restructure the content, put statements with the right speaker, correct timestamps and add or remove whole text blocks. That way the transcript matches the conversation and reads well.
Quick navigation
1. Open transcript
Here's how to access the transcript you want to edit:
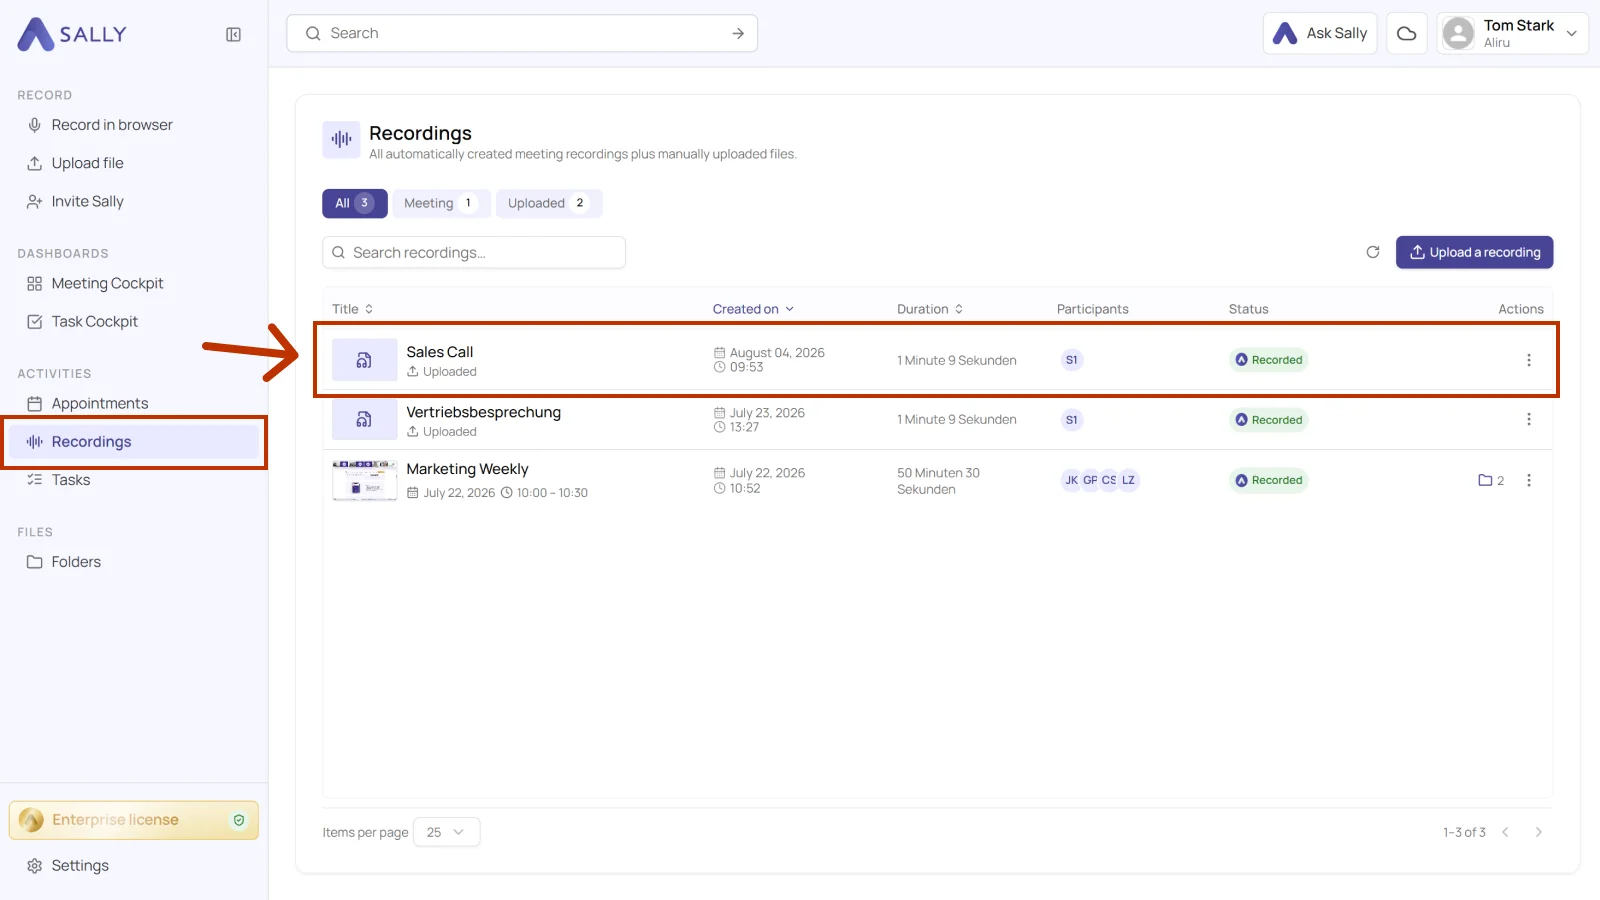
- Open Recordings in the sidebar and click the recording you want to edit.
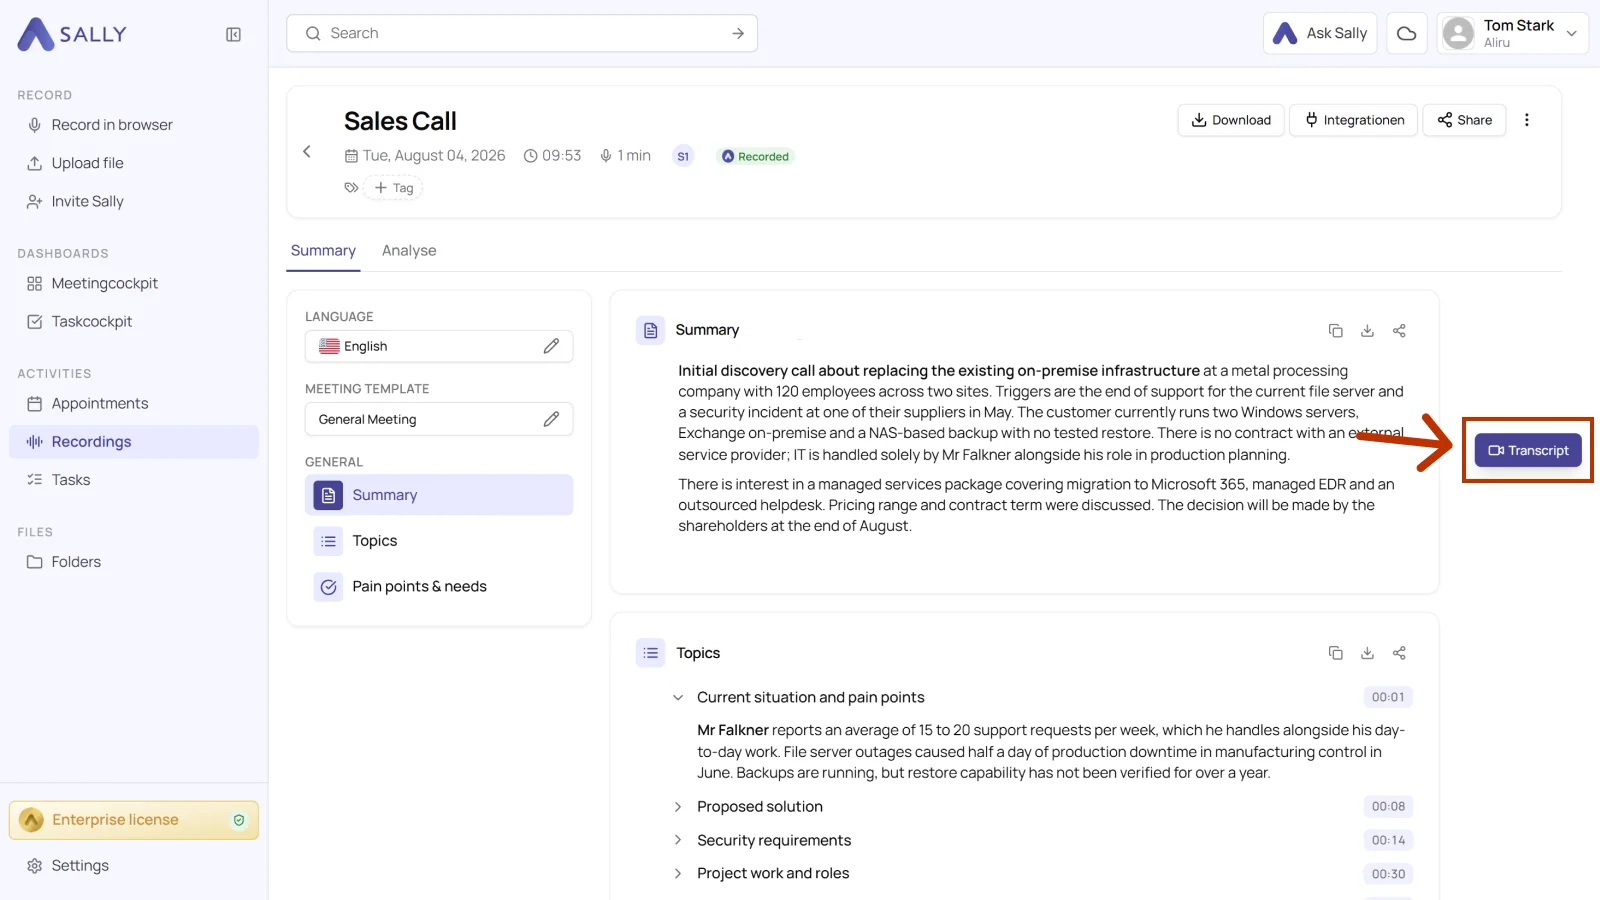
- Click the Transcript button next to the summary. The complete transcript opens in the right-hand sidebar.
Recordings holds both your meeting recordings and the files you uploaded yourself. For a meeting, you can also start from Appointments.
2. Edit transcript
The transcript offers several ways to change content, structure and speaker assignments. All changes are saved automatically as soon as you leave the text field or click elsewhere.
2.1 Edit text directly
Use this to correct or rephrase a text block yourself, for example when a word came out wrong or a sentence reads oddly.
How to edit text directly:
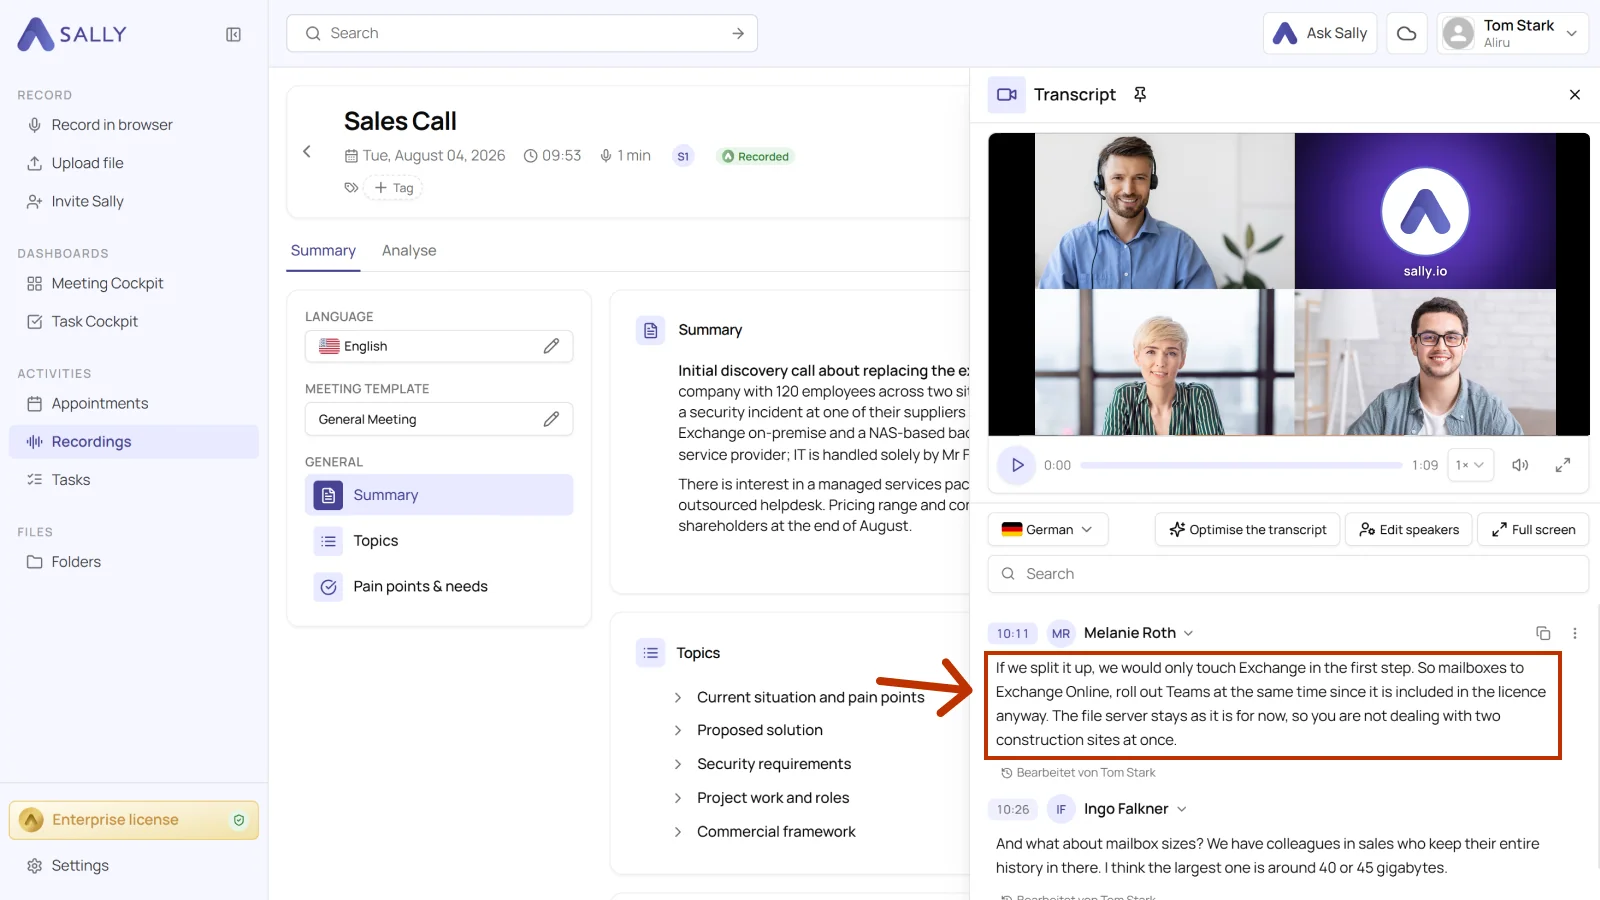
- Select the text you want to edit.
- Modify the text directly in the field.
2.2 Add or delete text blocks
You can add or remove text blocks to better structure the transcript or to add missing content.
How to add or delete text blocks:
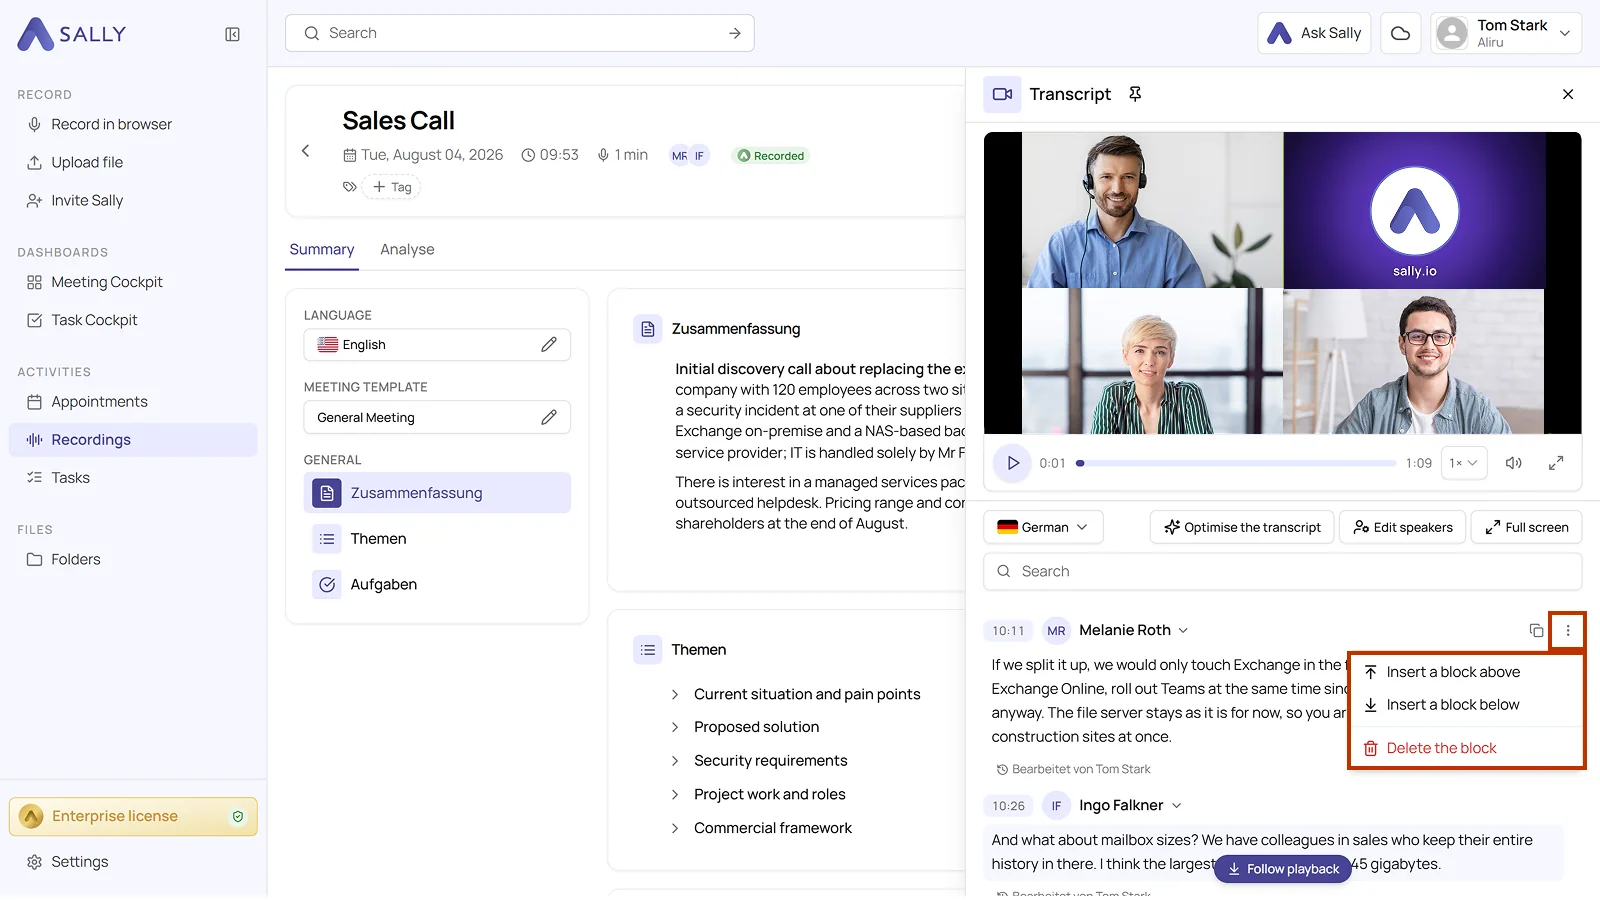
- Click the three-dot menu in the relevant text block.
- Choose one of the following options:
- Insert a block above
- Insert a block below
- Delete the block
The new block appears above or below the one you picked. You can edit it and assign a speaker.
“Delete the block” removes it completely.
2.3 Split text blocks
You can split long or dense statements into several text blocks. That reads better and helps when single sentences belong to different speakers.
How to split a text block:
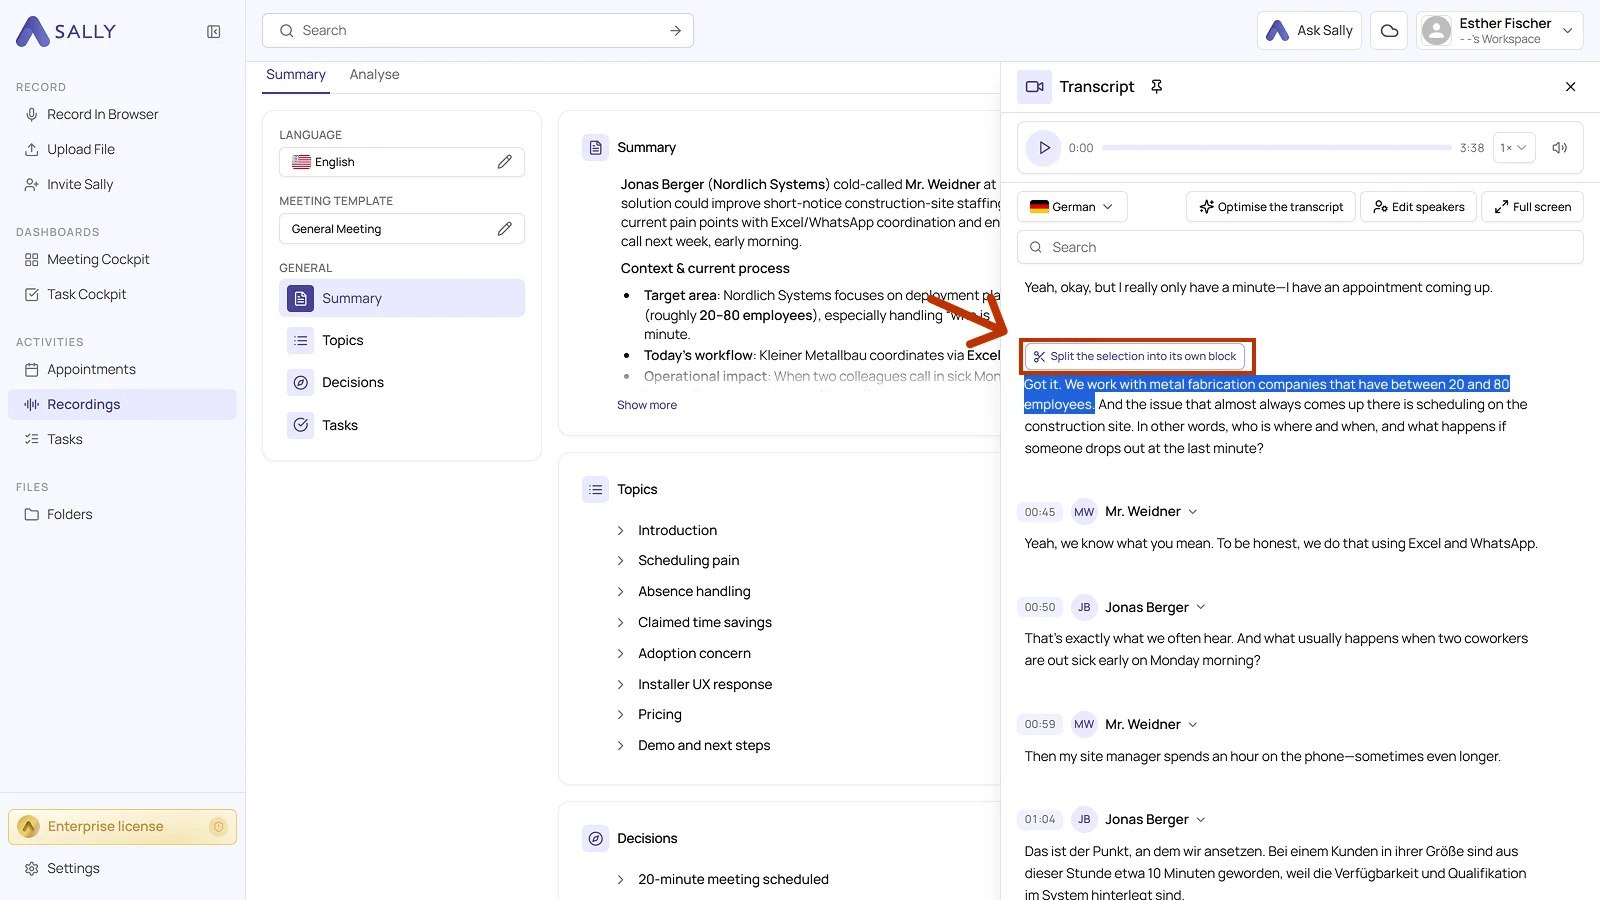
- Select the text that should become its own block.
- Click “Split the selection into its own block”, which appears right above your selection.
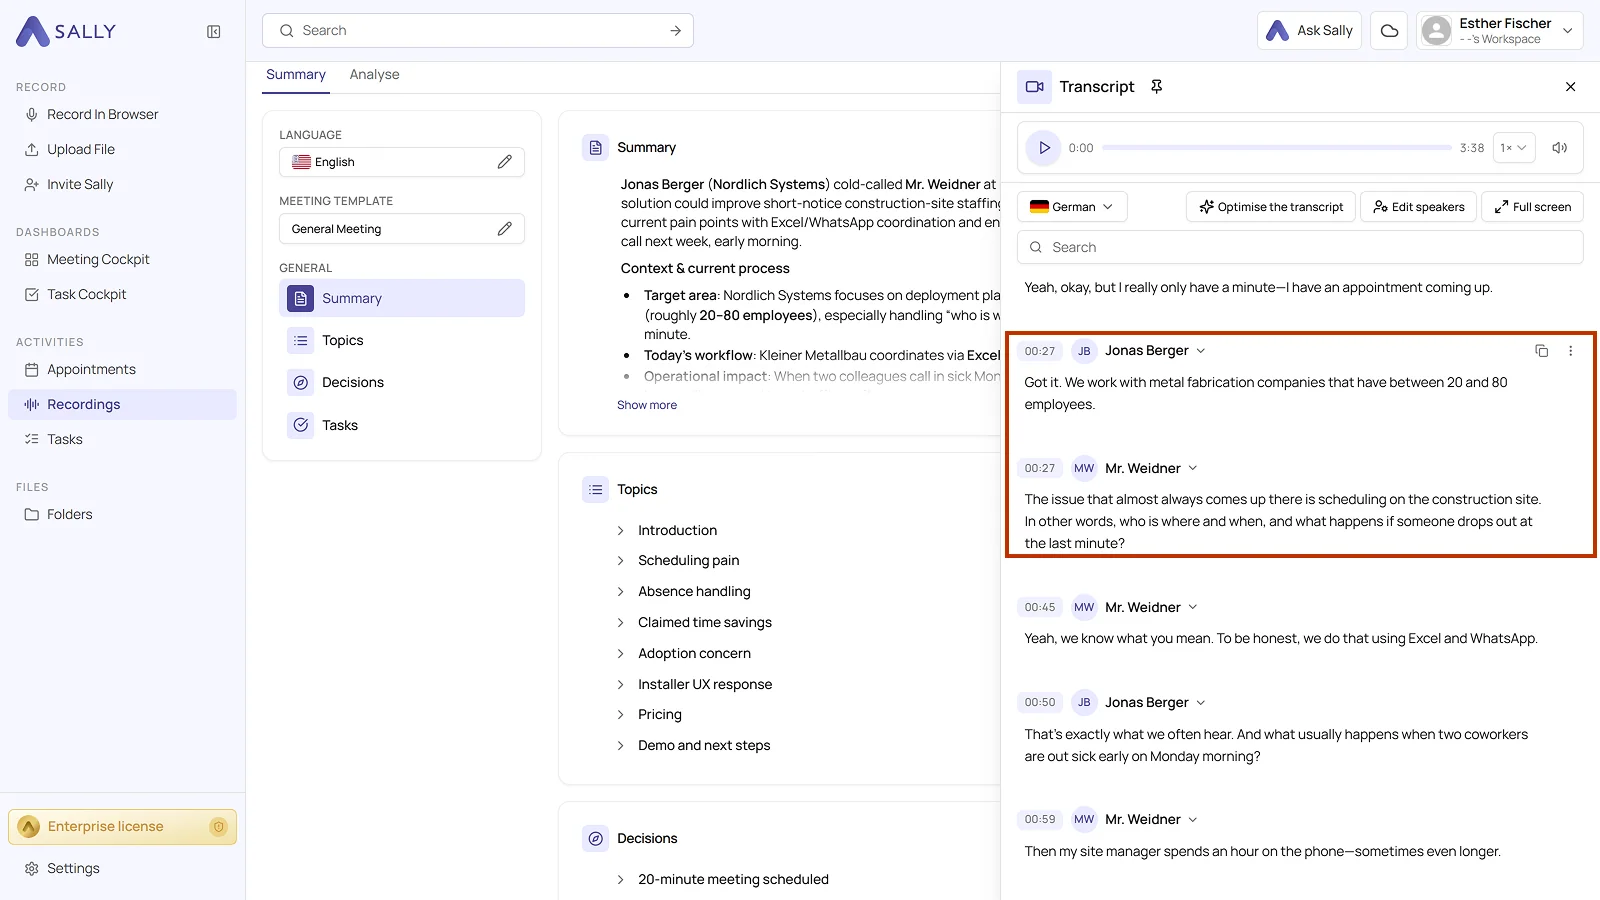
- The selected text moves into its own block below the original one.
2.4 Edit timestamps
Every text block carries a timestamp. Adjust it when the timing is off or needs to be more exact.
How to edit a timestamp:
- Click the text block whose timestamp you want to edit.
- Click the timestamp of the selected text block.
- Adjust the timestamp manually.
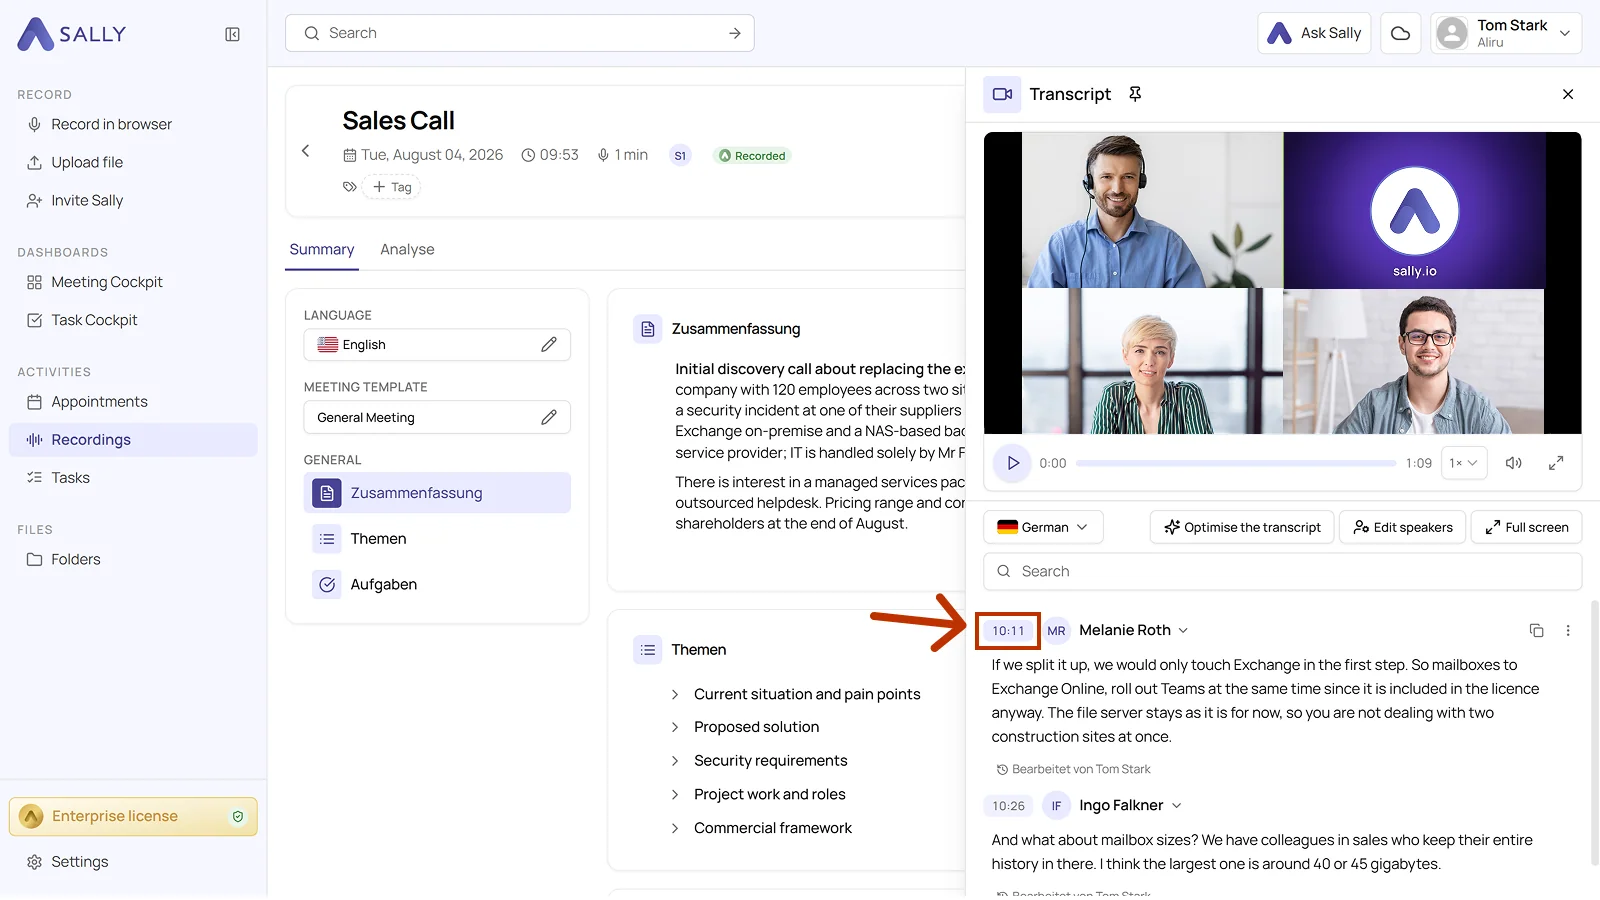
Click the adjusted timestamp and the recording jumps straight to that spot.
You have to select the text block first, otherwise the timestamp stays locked.
2.5 Reassign speakers (assign participants)
Speakers are the voices Sally detects in the transcript, so the participants of your meeting. If a block ended up with the wrong speaker, for example because two people talked over each other, you can correct it yourself. If the same person was detected twice, you merge the two speakers into one.
To reassign a speaker:
-
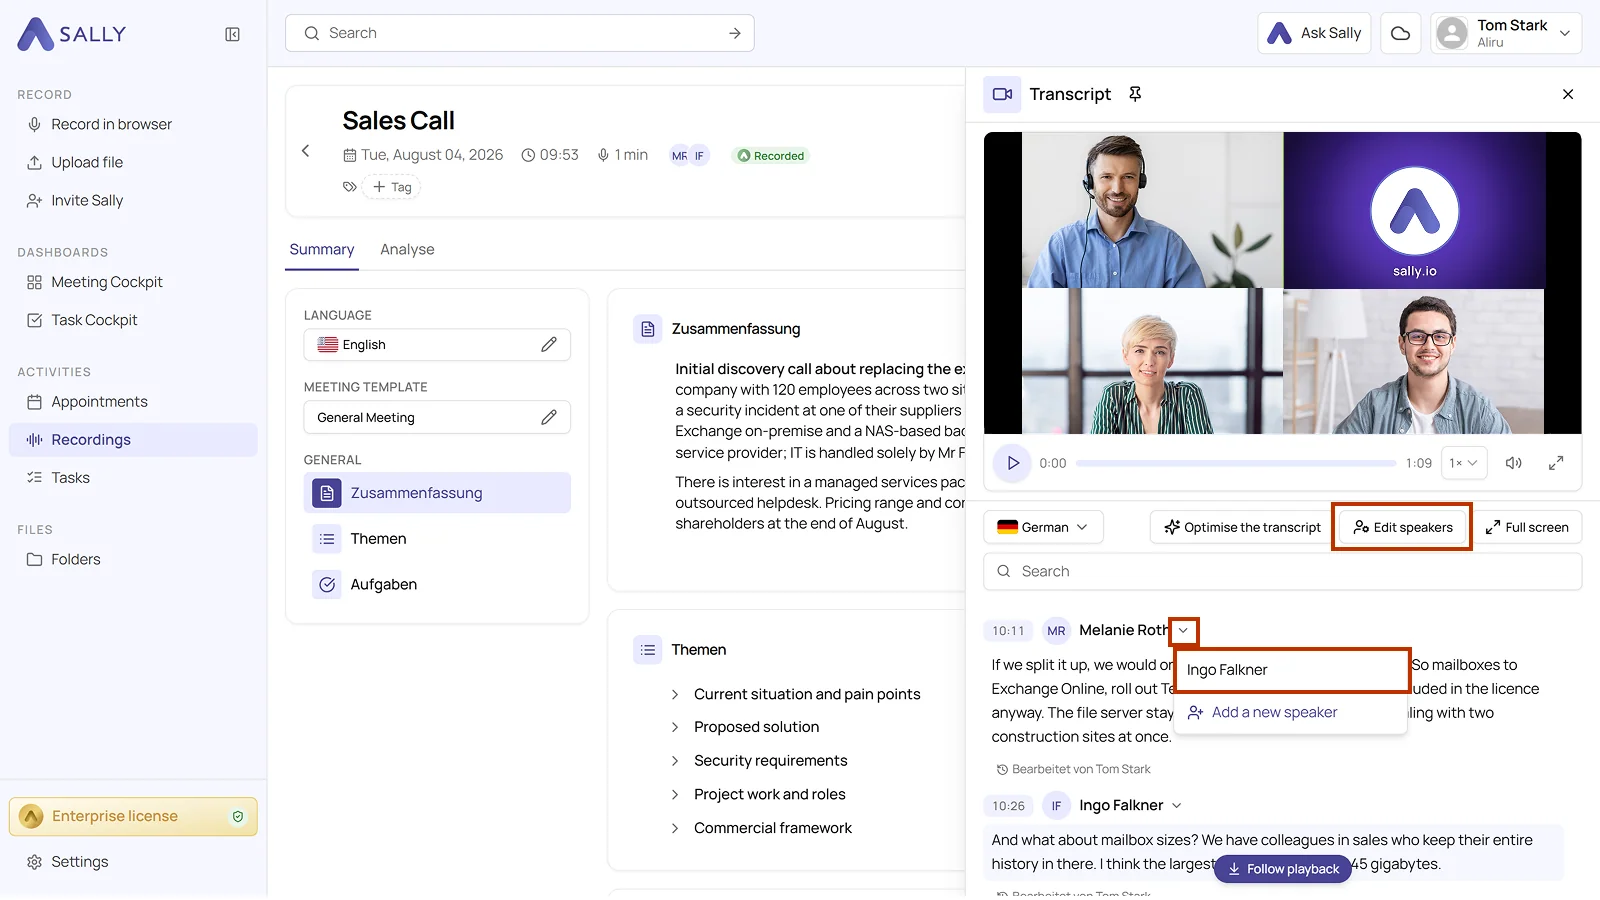
Click the dropdown next to the speaker's name within the text block.
Alternatively, Edit speakers in the transcript bar opens a dialog where you can rename every speaker of the recording, merge two speakers, or add new ones.
-
Select the correct name from the list.
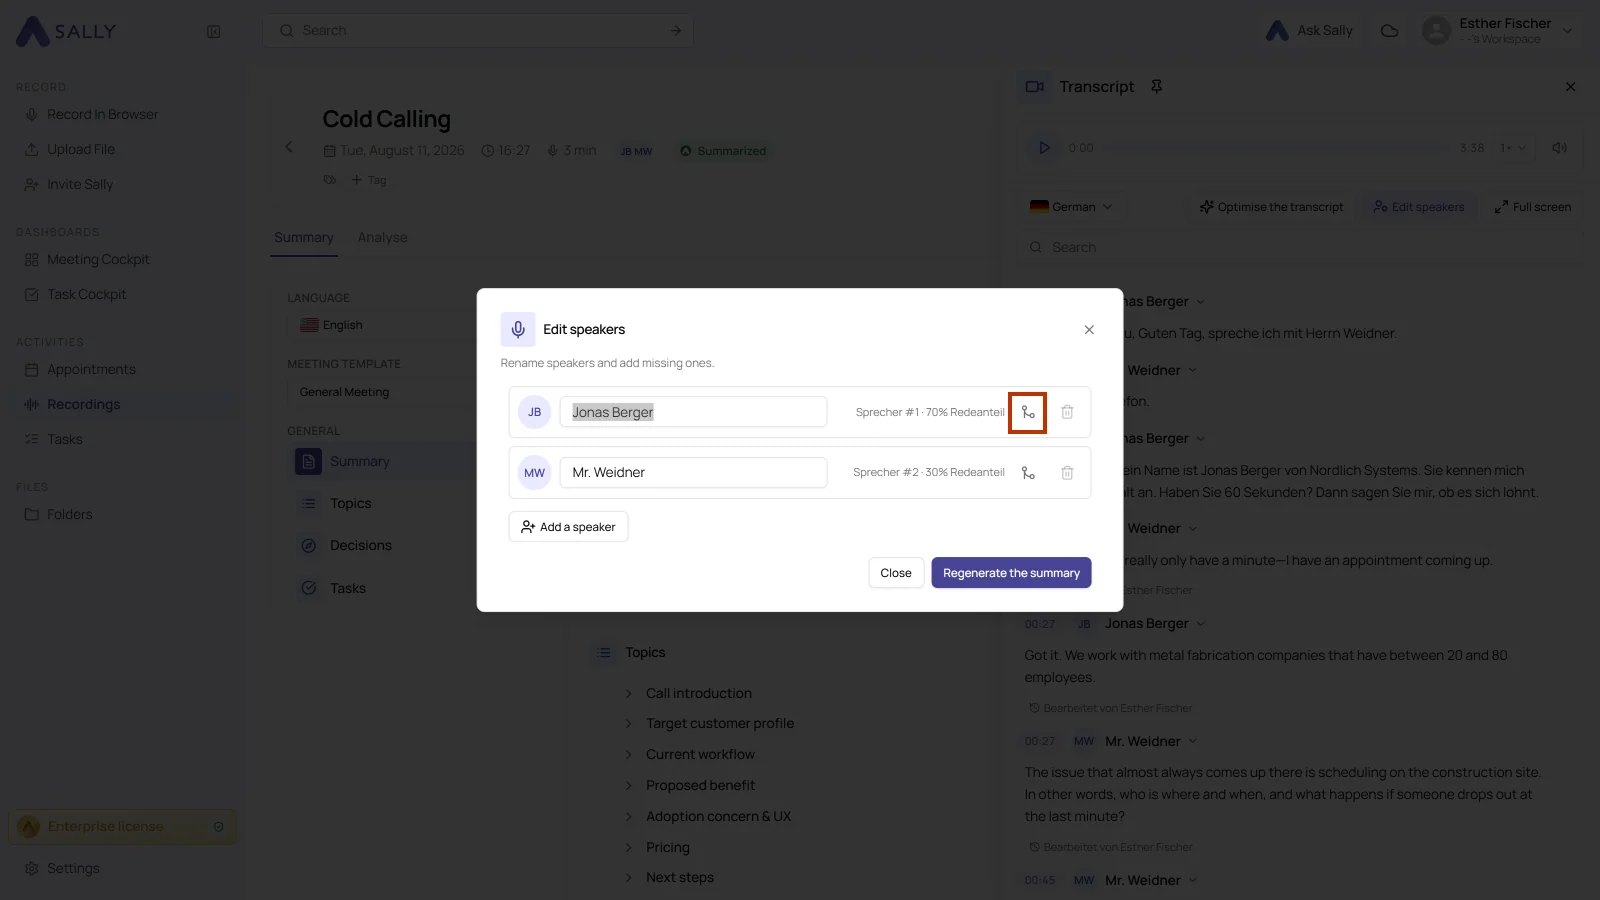
2.1. If one person was accidentally detected as two speakers, click the merge icon to the right of the name in the “Edit speakers” dialog.
2.2. Under “Merge with …”, choose the speaker the entry should be merged into. The two entries become one speaker, and their text blocks then run under the remaining name.
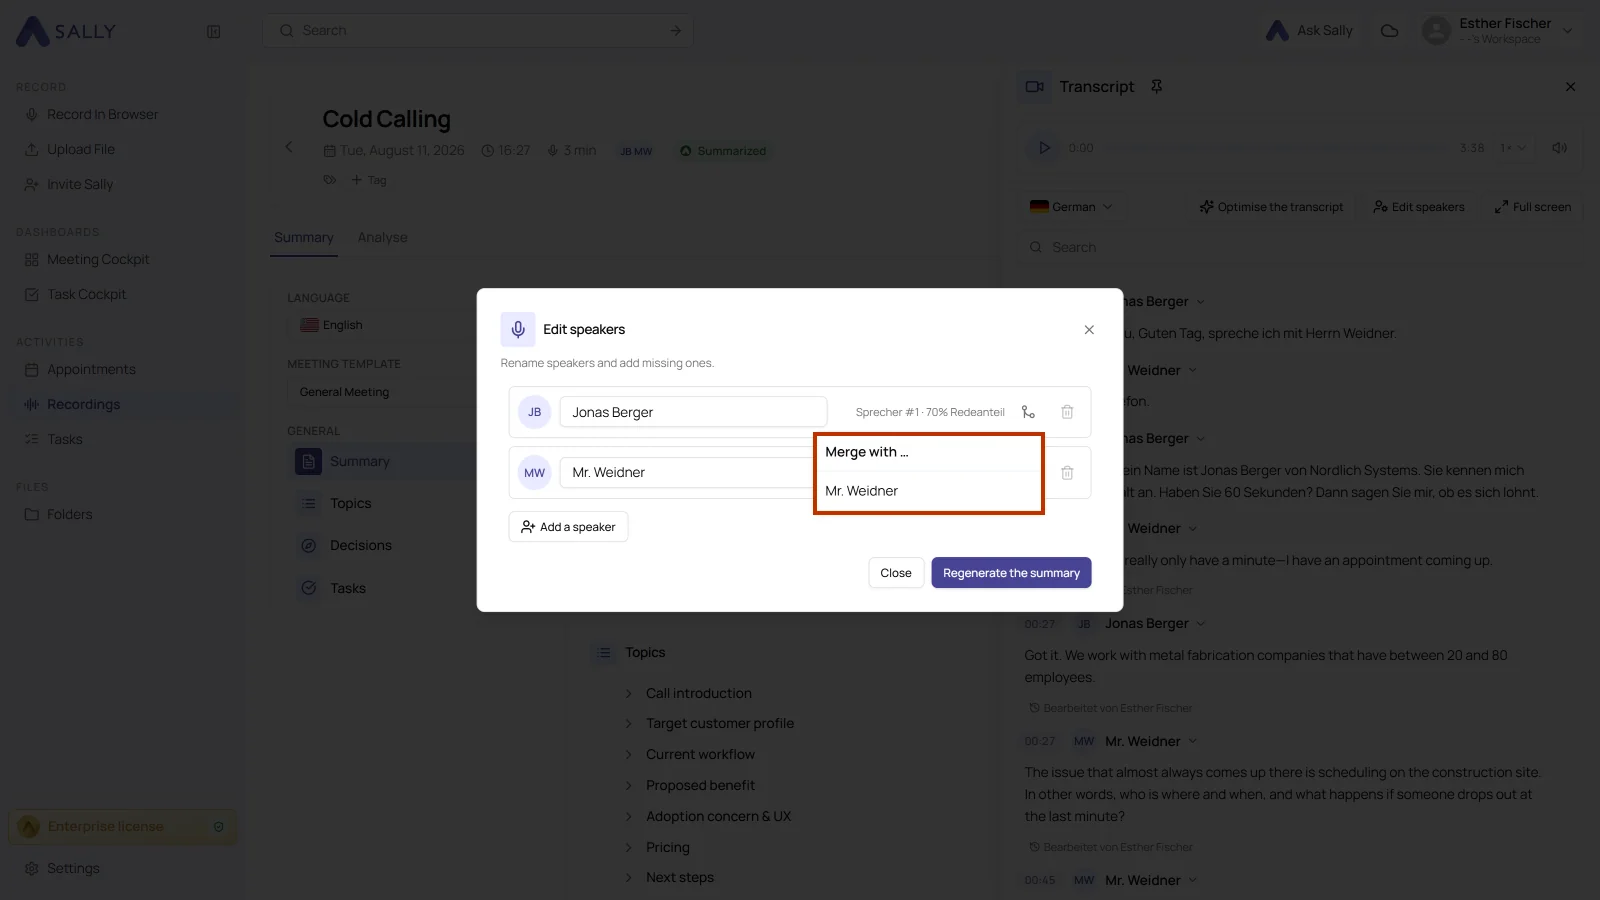
Merging takes effect immediately and cannot be undone. Only merge two speakers once you are sure they are the same person.
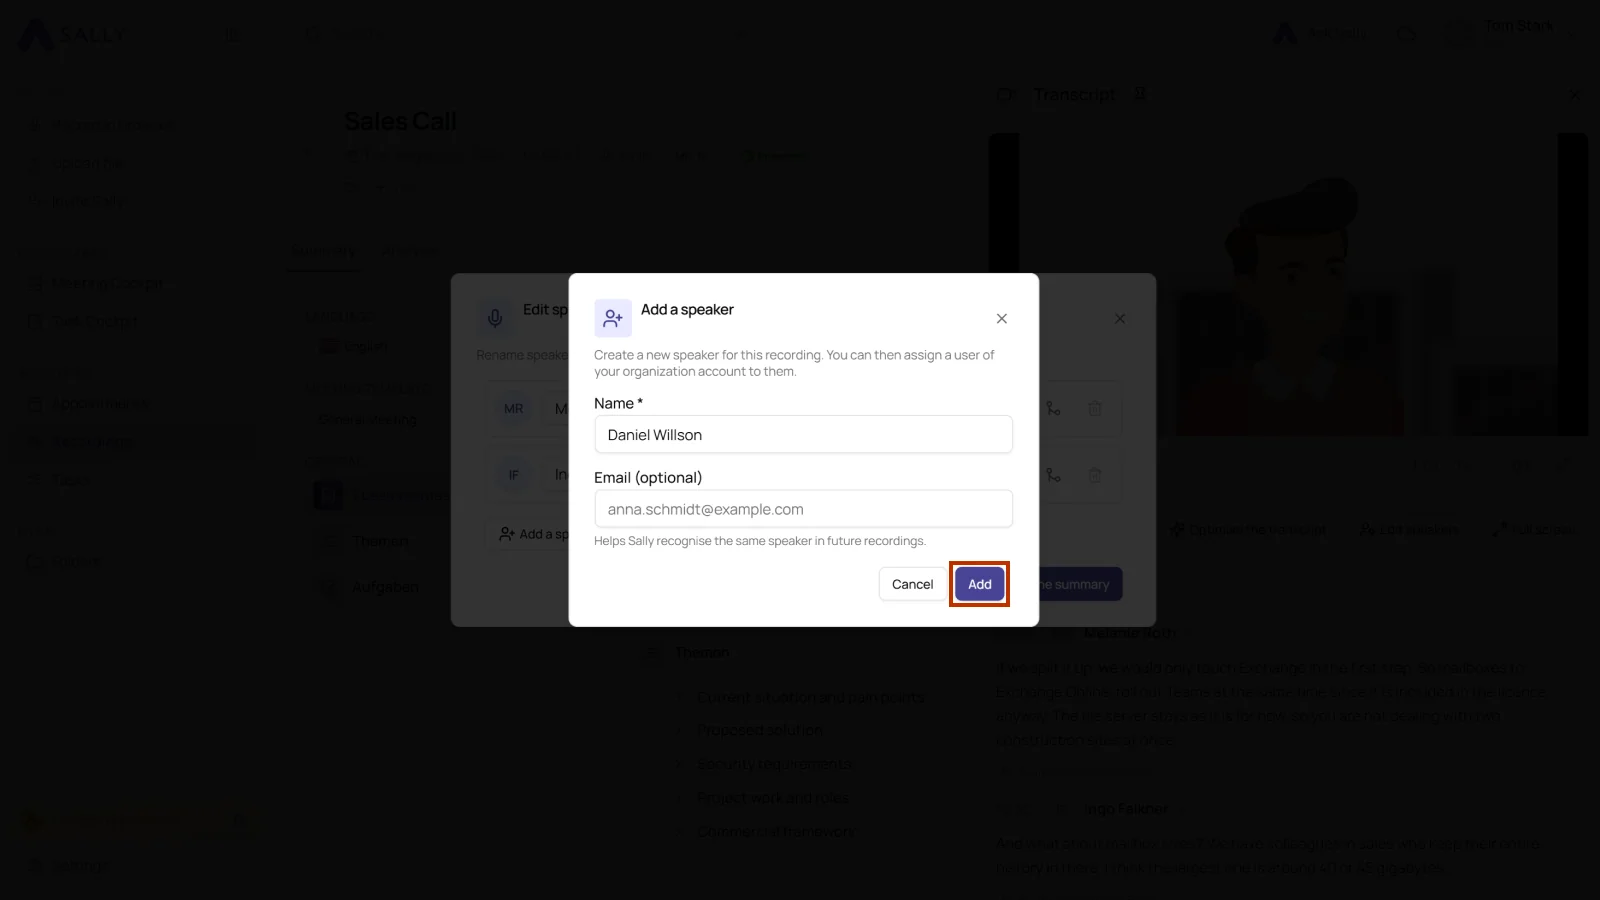
2.3. If the correct speaker does not appear in the list, you can add them by selecting "Add new speaker".
2.4. In the “Add a speaker” dialog, enter the name, optionally an email, and click “Add”.
- As soon as you change the speaker or add a new one, the “Change speaker” dialog appears. Choose one of the following options:
- This block only: This option changes the speaker name only for the currently selected text block.
All other text blocks remain unchanged, even if they use the same speaker name.
In a meeting, a single sentence was incorrectly assigned to Anna, even though it was spoken by Tom.
If you select “This block only”, only this one sentence will be changed to Tom.
All other parts where Anna is speaking correctly remain unchanged.
- All blocks: This option changes the speaker name globally for all text blocks that are currently assigned to this speaker.
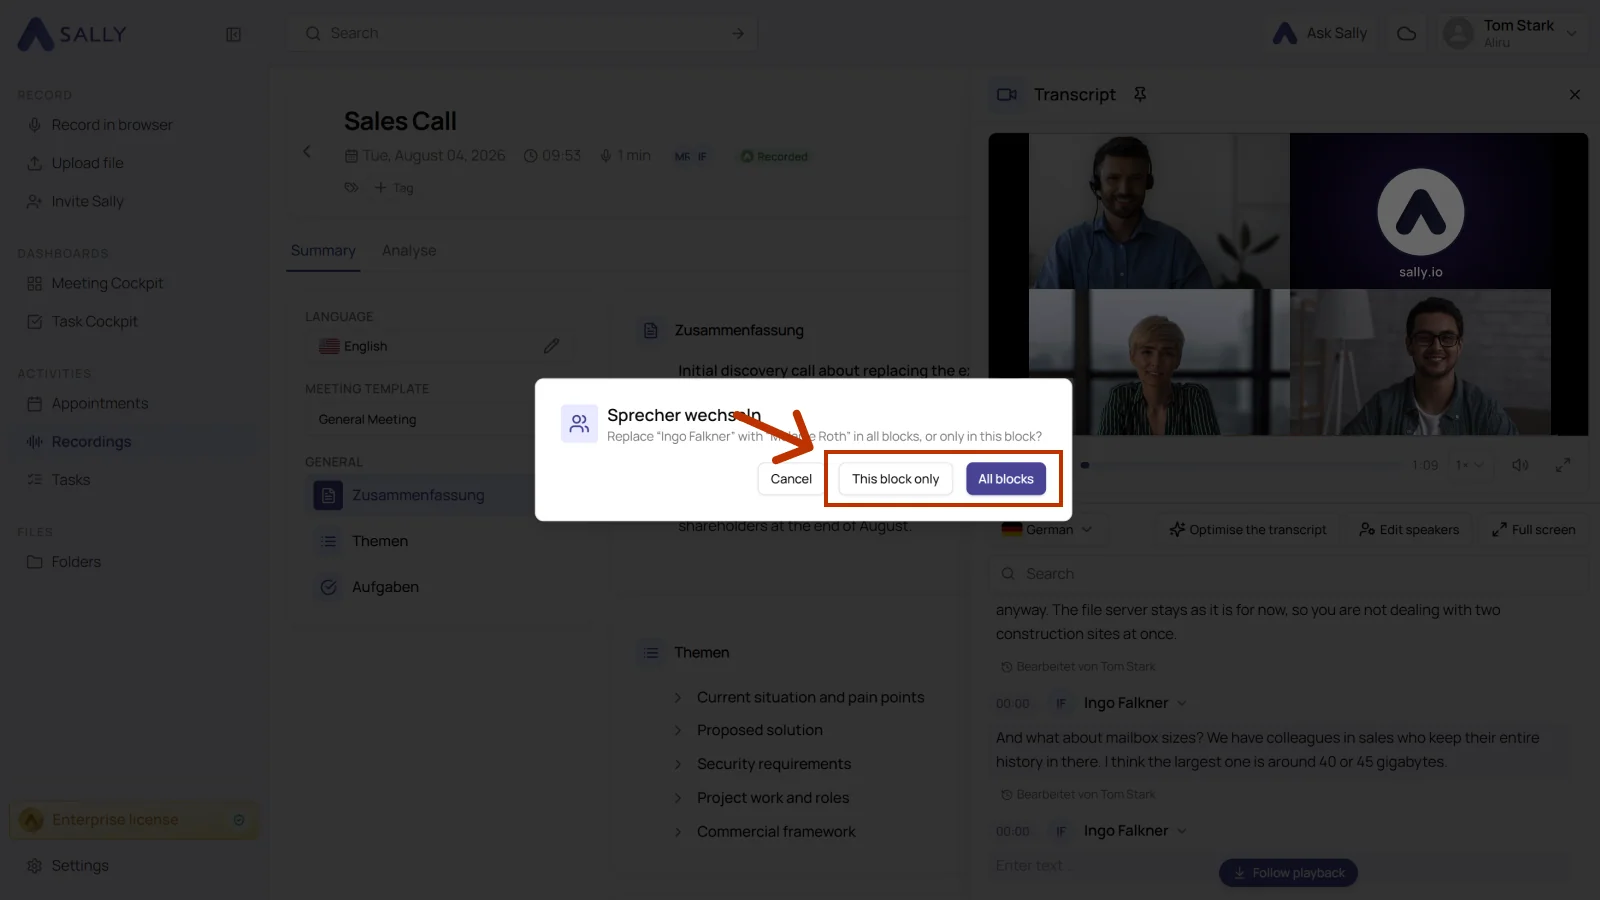
The speaker was recognized as Speaker 1 throughout the transcript, but their actual name is Max.
If you select “All blocks”, all text blocks assigned to Speaker 1 will automatically be renamed to Max.
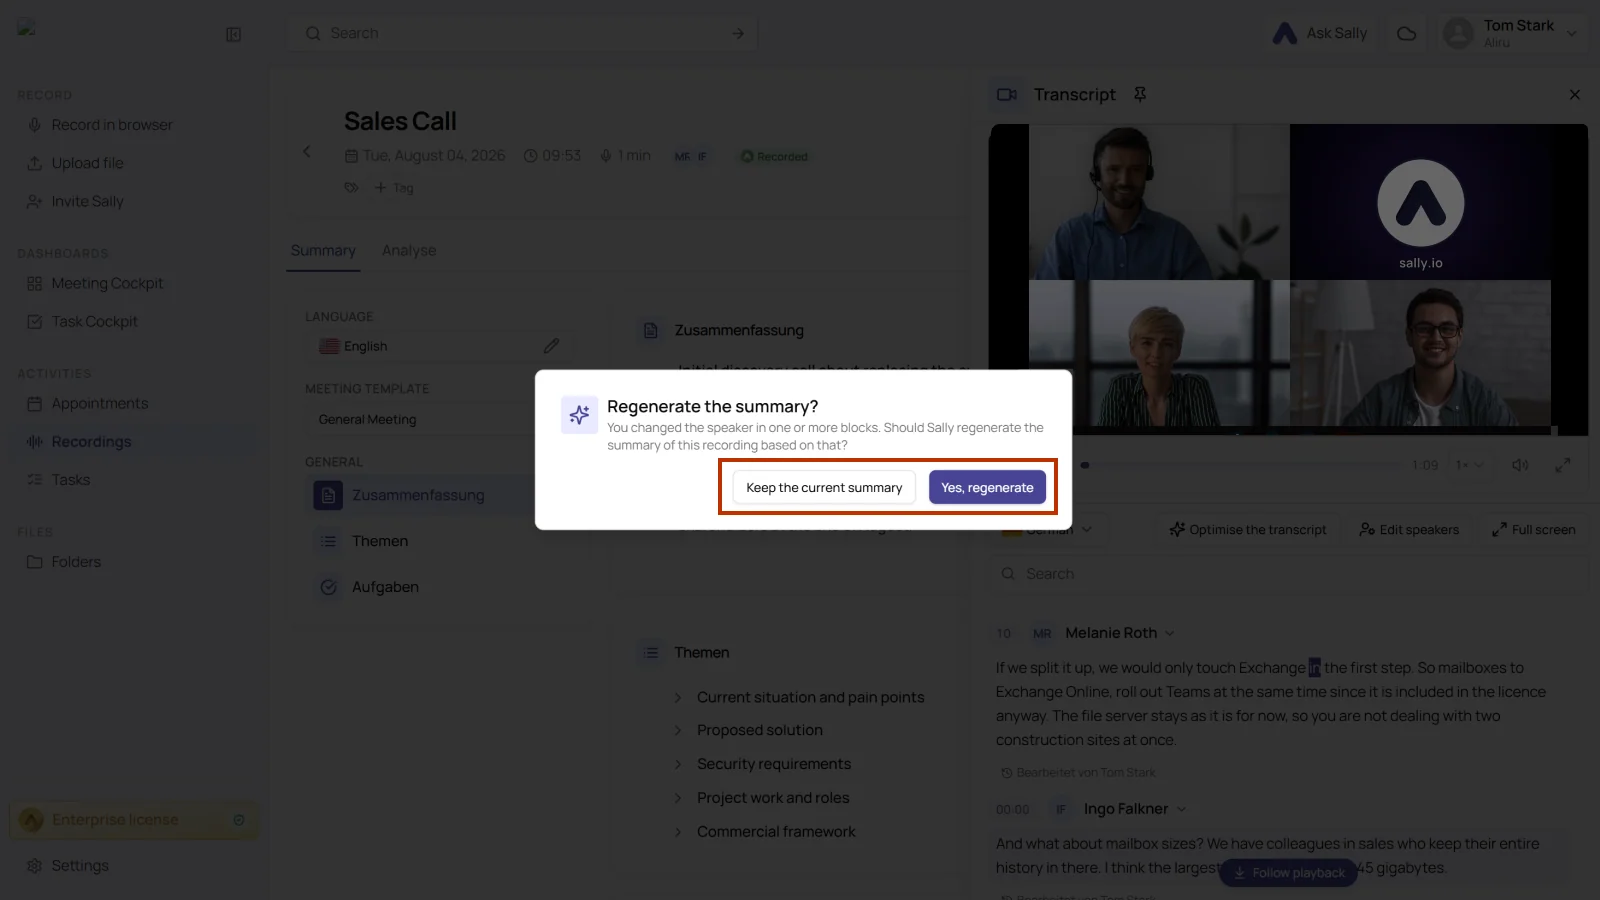
- After your choice, the “Regenerate the summary?” dialog appears. Decide there between “Yes, regenerate” and “Keep the current summary”.
2.6 Change transcript language
You can also change the transcript language yourself, for example when the automatic detection got it wrong.
How to change the transcript language:
- Click the language selector in the transcript bar, to the left of “Optimise the transcript”.
- Pick the language you want.
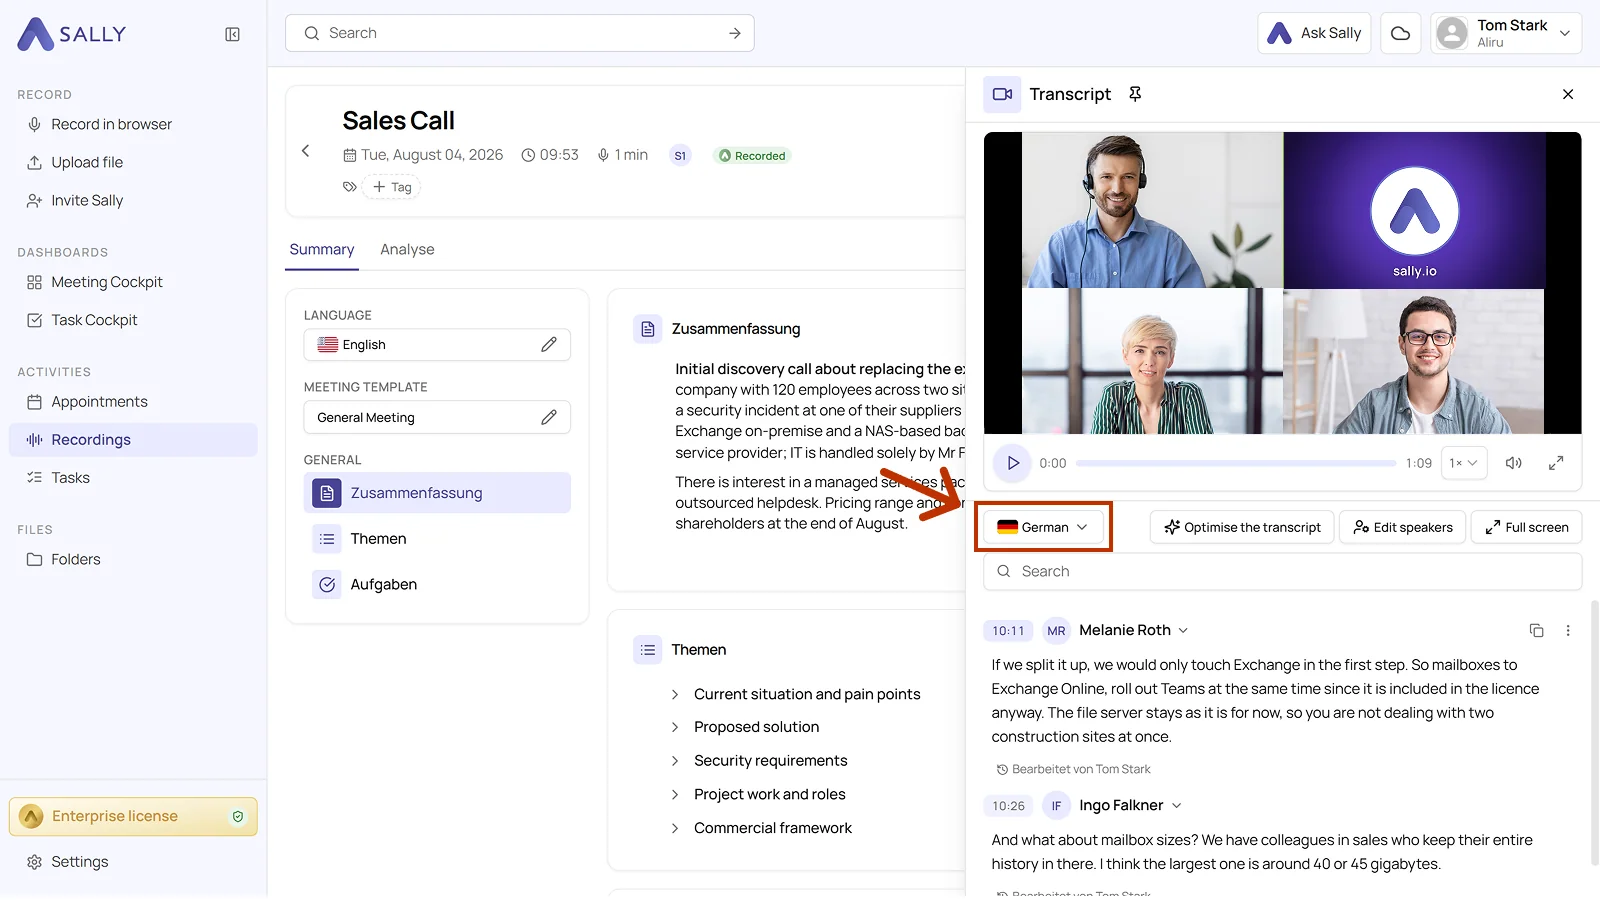
When you change the language, the transcript is only translated and displayed in the selected language. The underlying transcription itself remains unchanged.
If you want to use a different language for the actual transcription, you need to reprocess the transcript via Optimize transcript.
3. Review and finalize
Before you finish, read the whole transcript once more and check that it is complete and correct.
Best practices:
- Read the full text to catch any remaining errors.
- Check that speaker names are consistent throughout.
- Make sure the timestamps are correct.
- Check that the important points, decisions and to-dos are all in there.
- Verify that the summary still matches the updated transcript.
Once everything looks right, you can download the transcript to share, archive or work with it elsewhere.