How to change invoice recipients in Sally AI
You can update your invoice details at any time, so invoices reach the right email address and carry the correct billing information.
These are two separate things: you change the email address in Sally itself, and the billing information, meaning the name, billing address, and tax ID, in the Stripe customer portal.
Quick navigation
1. How do I change the invoice email recipient?
The email recipient is the address invoices are sent to.
- Open Settings at the bottom of the left sidebar.
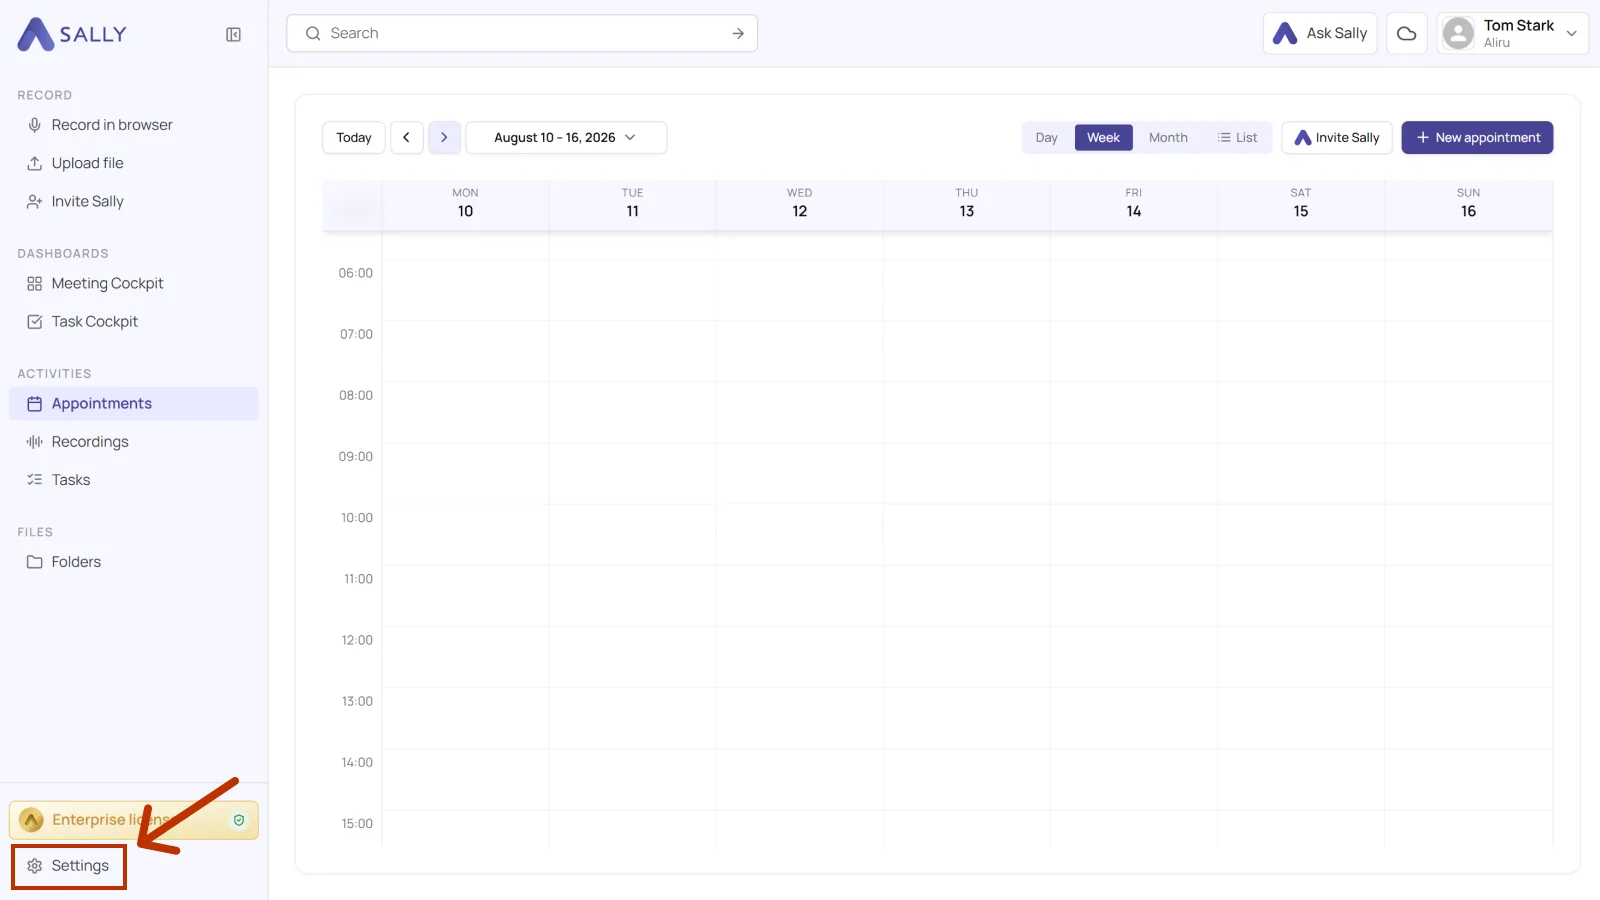
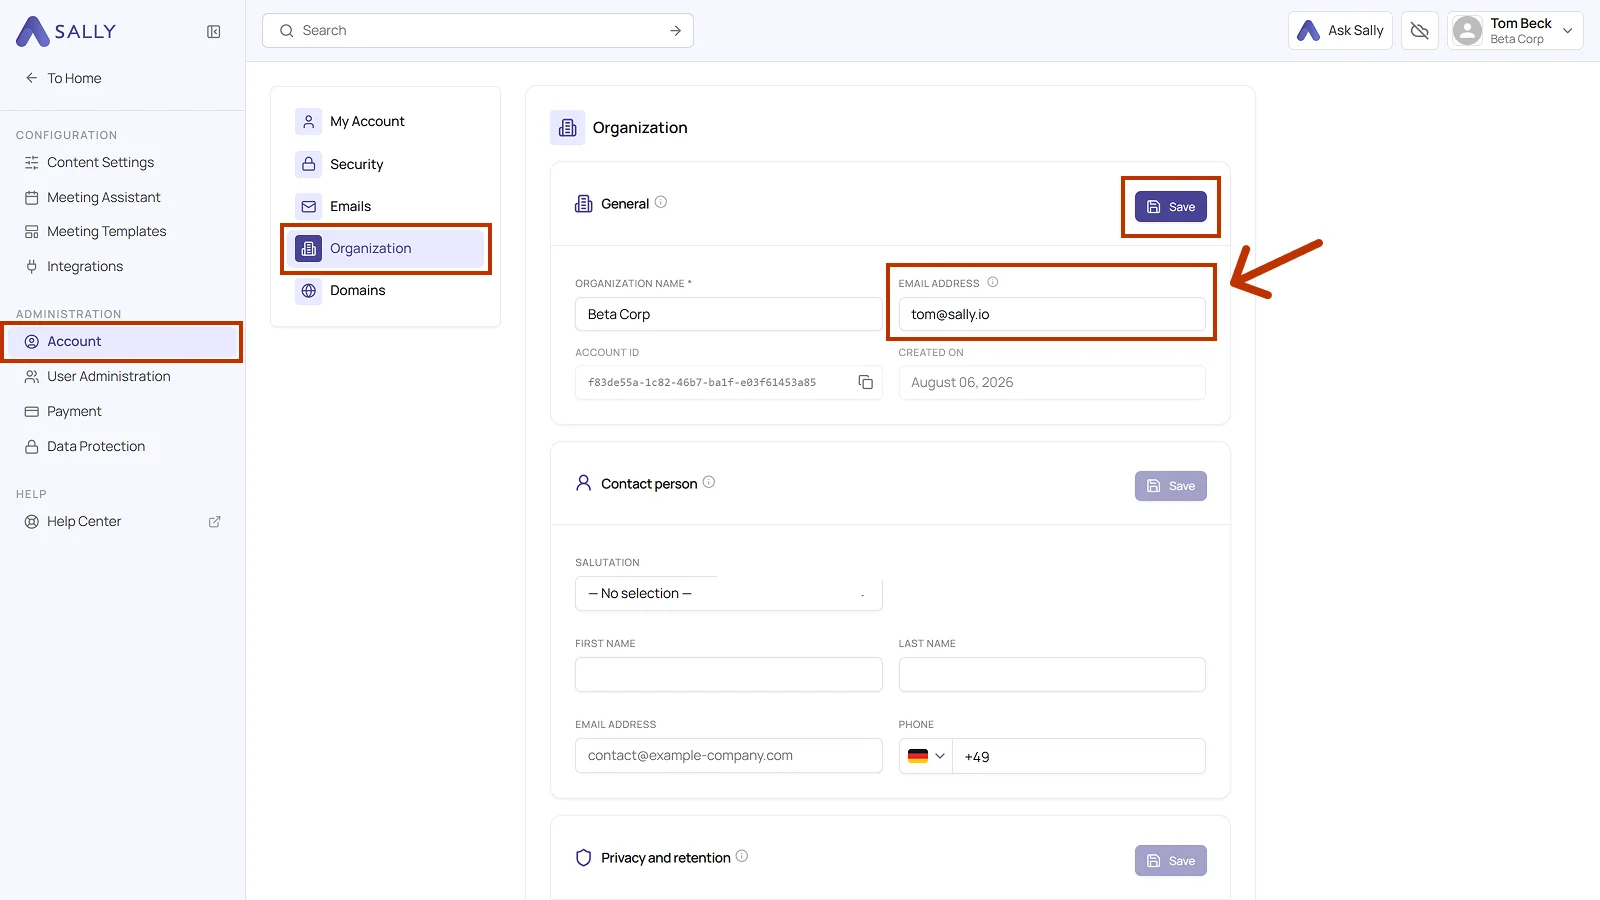
- Under Administration, open Account and pick Organization on the left. The Change email link in the Payment area leads there as well and opens the page in a new tab.
- In the General card, enter the new address under Email address and click Save at the top right of the card.
Info
From now on, all invoice emails go to the new address. Earlier invoices are not affected, and you can download them from the platform at any time.
2. How do I change the billing recipient information?
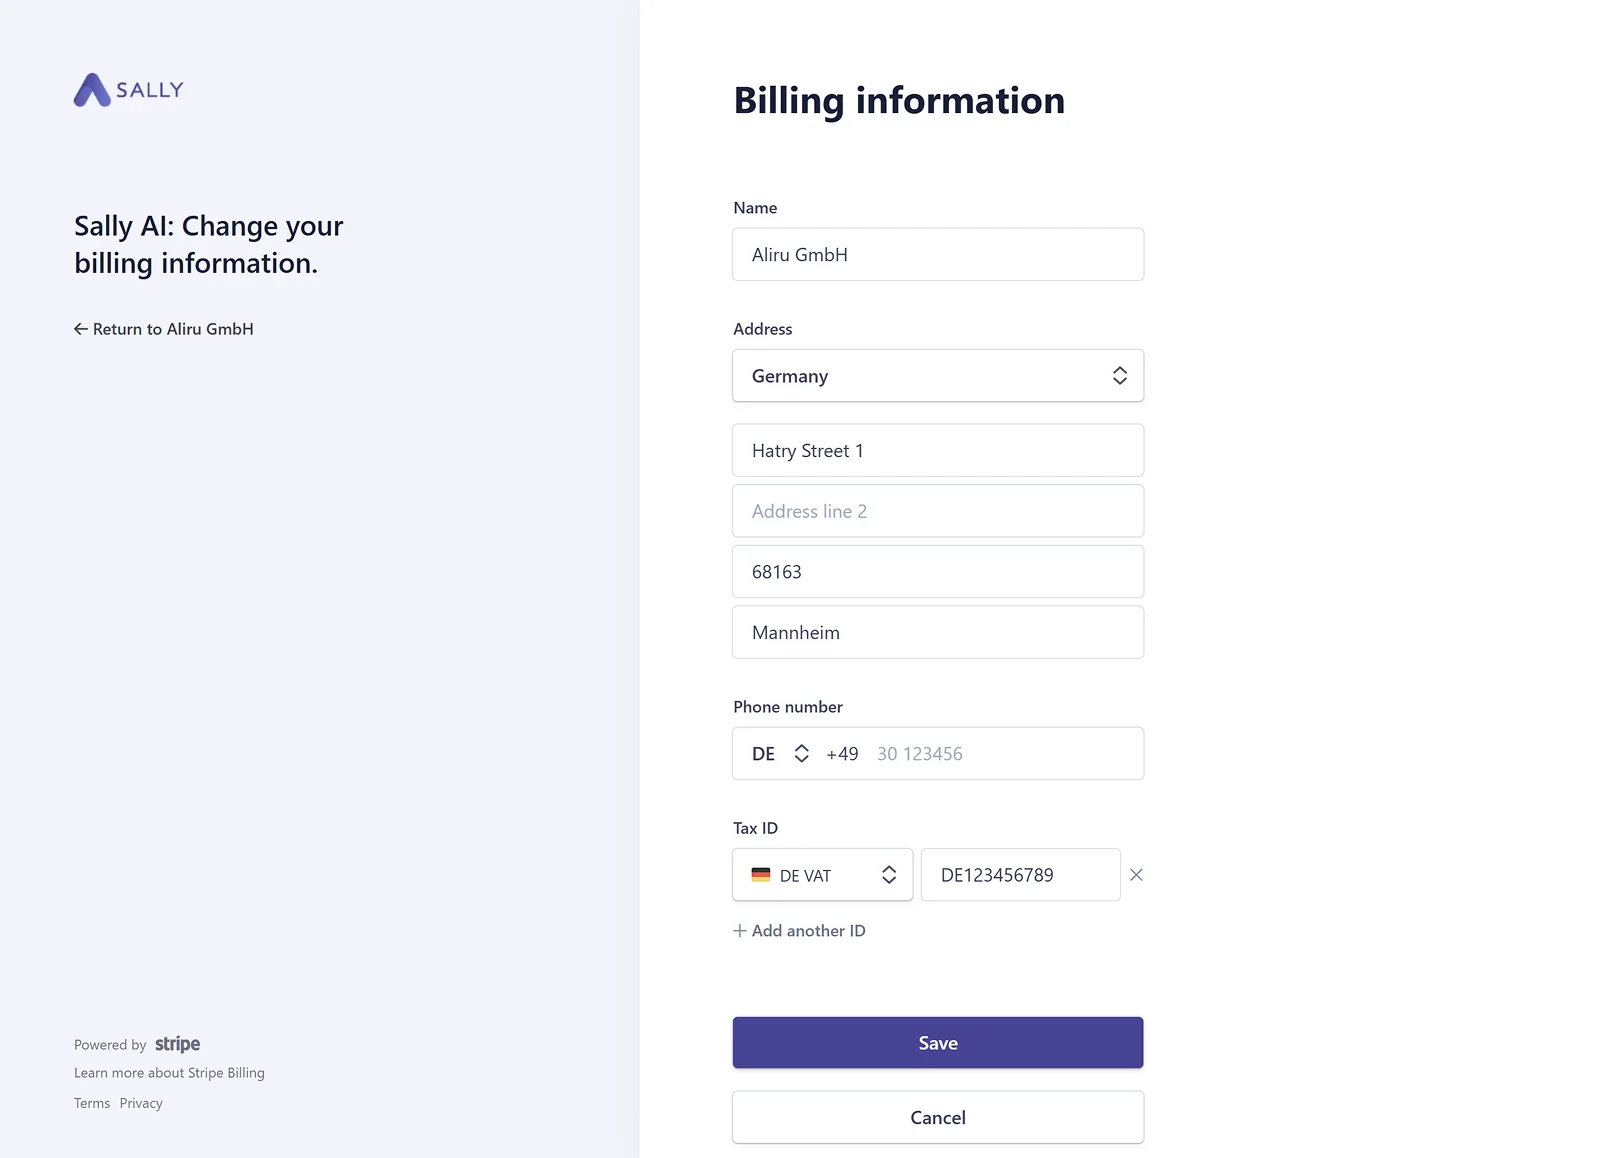
The billing recipient information defines what appears on the invoices, that is the name, billing address, and tax ID.
To update your billing information:
- Open Settings at the bottom of the left sidebar.
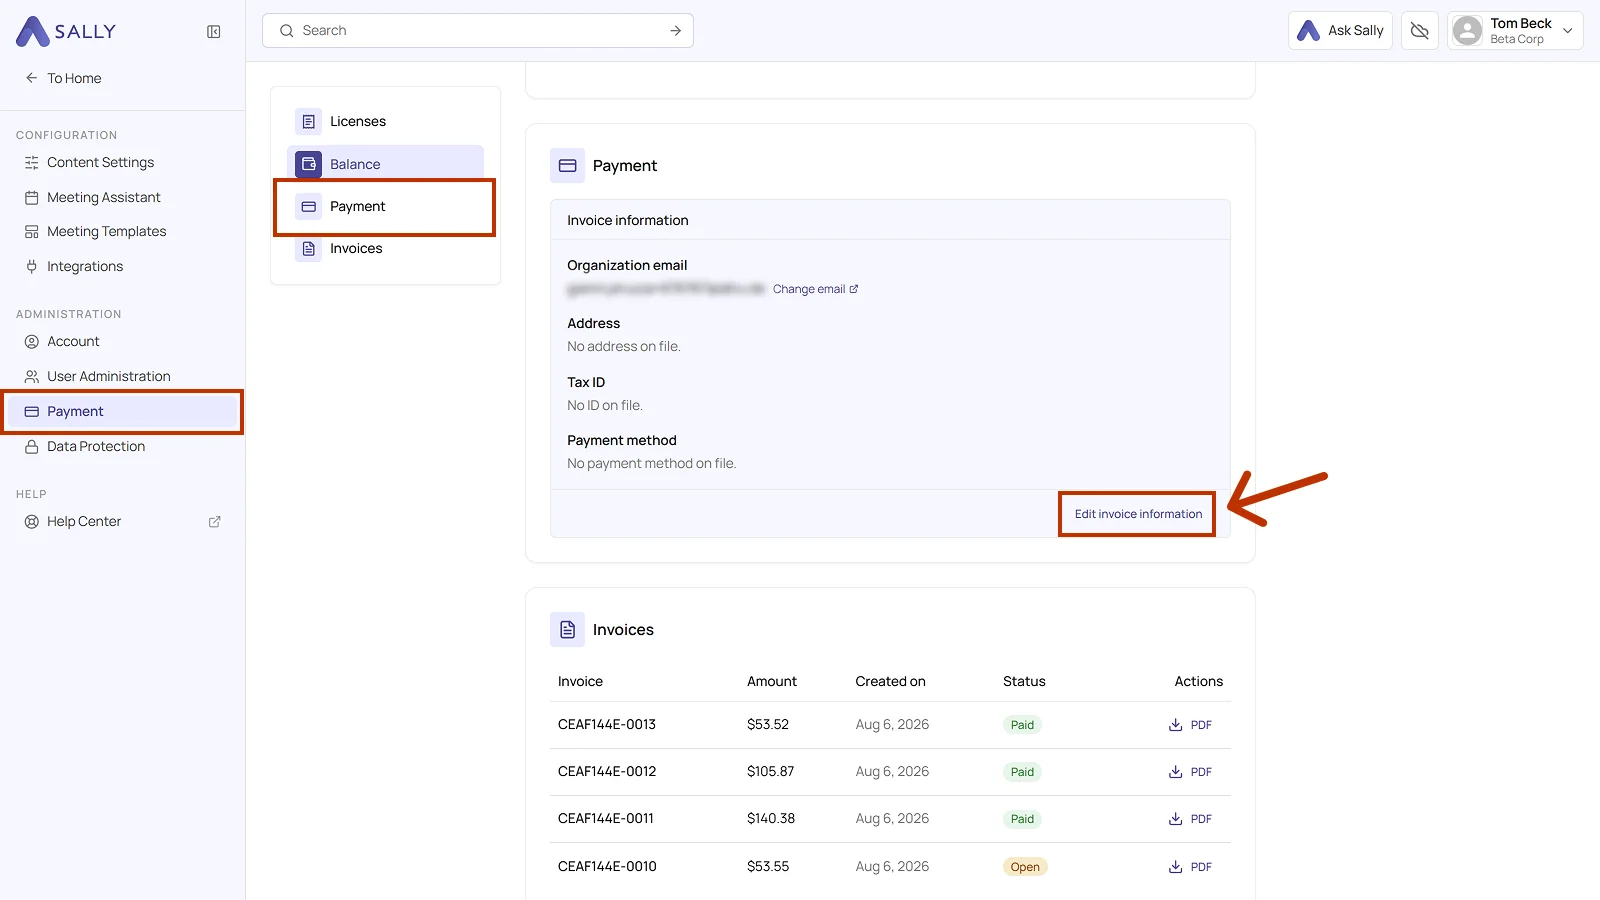
- Under Administration, open Payment and go to the Payment section.
- Click Edit invoice information. This takes you to the Stripe customer portal.
- Under Billing information, click Update information.
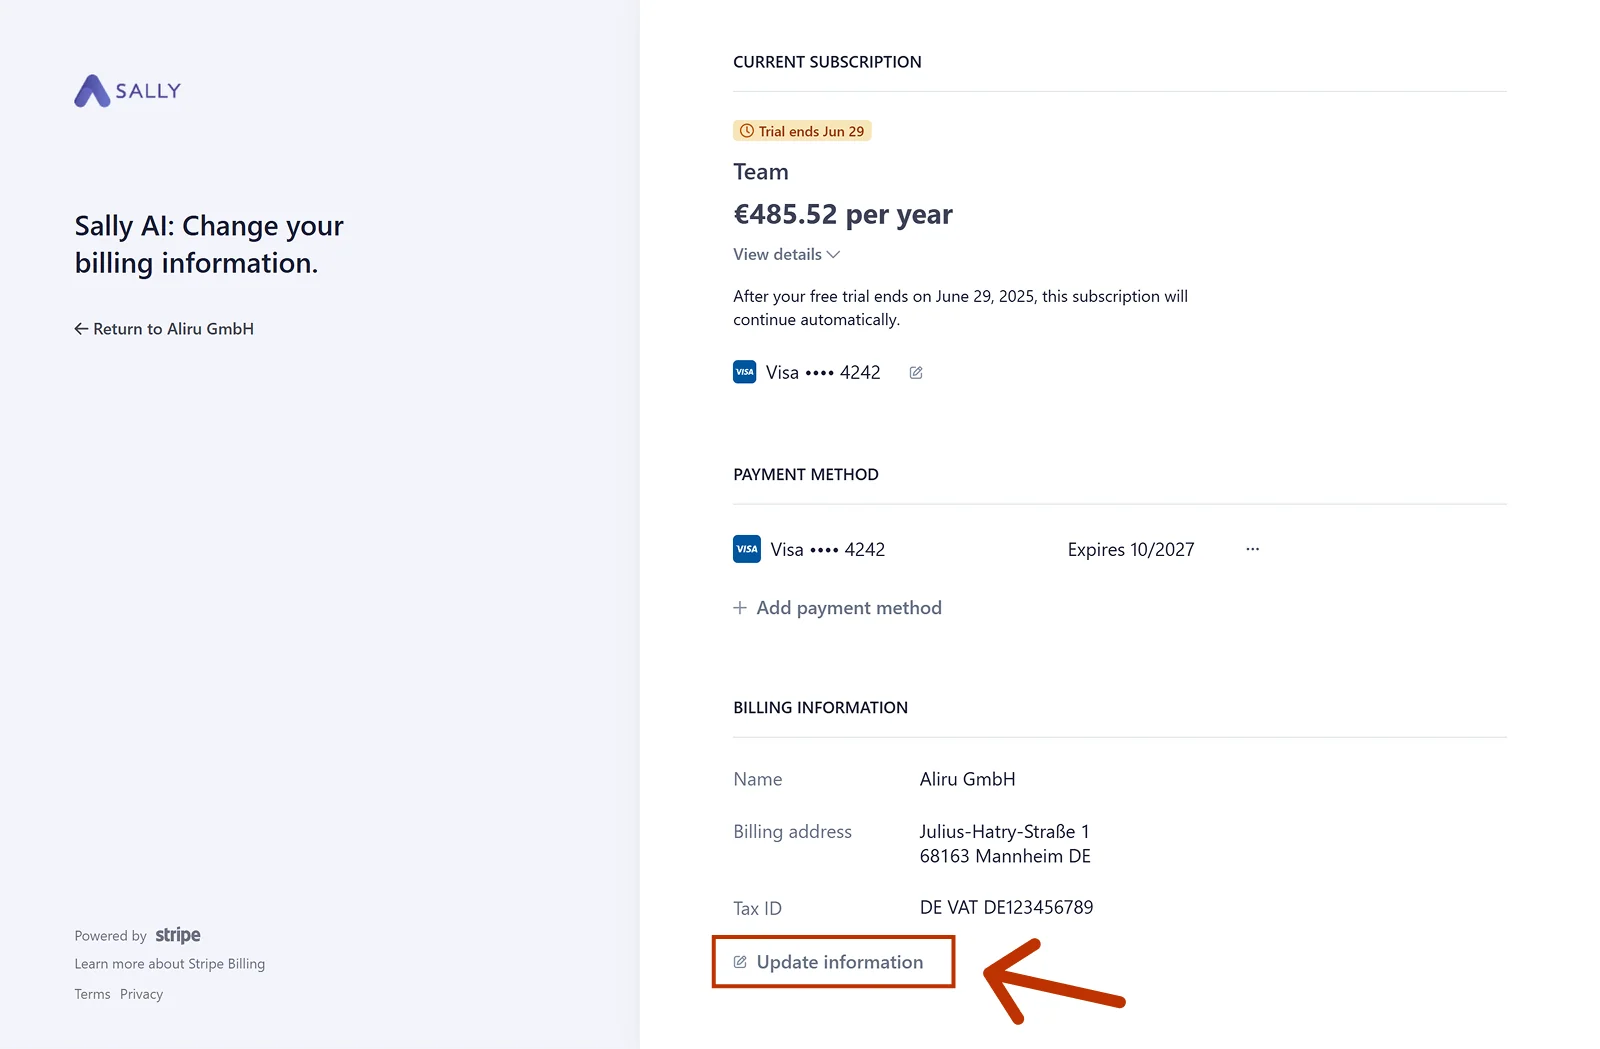
- Fill in the name, billing address, and phone number. Under Tax ID, pick the type on the left, DE VAT for instance, and enter the number next to it. If you need more than one, + Add another ID below the first one stores a second tax ID.
- Click Save.
Info
- After your update, the entered billing information will appear on all future invoices.
- Important: Updates are not applied retroactively. Your billing information will only be included in invoices issued after the change.