How to connect a CalDAV calendar with Sally AI
With the CalDAV integration you connect Sally to any calendar that supports the open CalDAV standard, for example Fastmail, Nextcloud, mailbox.org, Posteo or a Synology NAS. Sally then reads your meetings (with the right permissions), joins them without a separate invitation and shows all your scheduled events right in Sally.
- the CalDAV server URL of your provider
- your username, usually your email address
- your password, many providers require a separate app password for third-party apps
Step 1: Create an app password (example: Fastmail)
Most providers do not let external apps sign in with your regular password. Instead, you create a separate app password that only grants access to your calendars and that you can revoke at any time.
This guide uses Fastmail as an example. The steps in Sally are exactly the same for every CalDAV-capable calendar, only the server URL and the place where you create the password differ from provider to provider.
Look for app passwords, app-specific passwords or CalDAV in the security settings of your provider. You will usually find the matching server URL in the provider's help pages, for Fastmail it is https://caldav.fastmail.com.
In Fastmail it works like this:
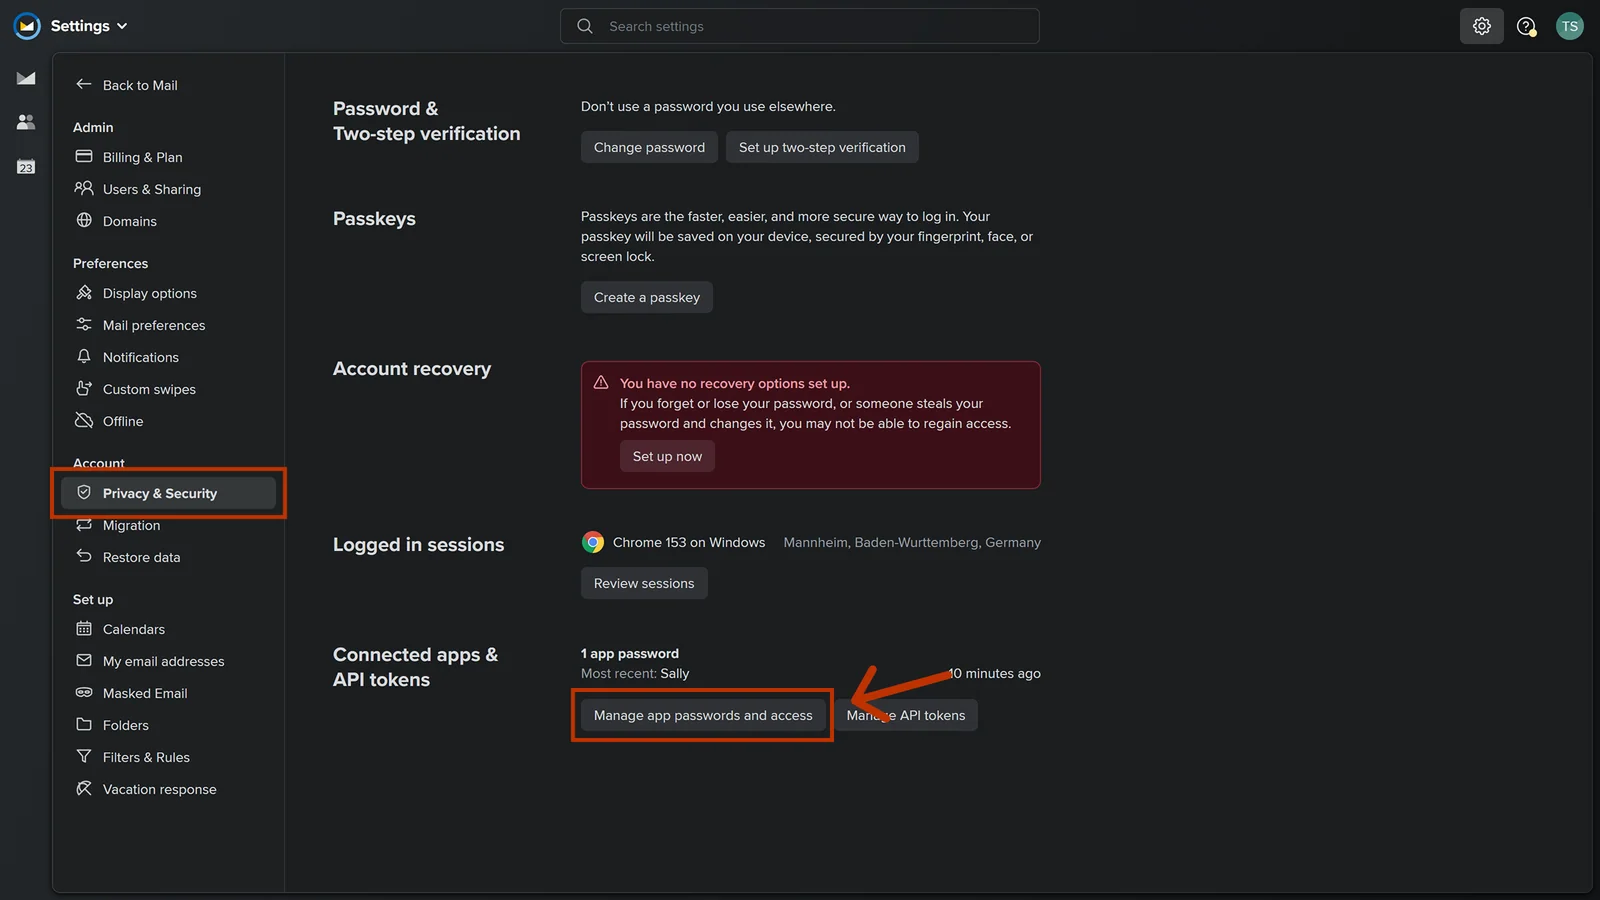
- In Fastmail, open Settings, go to Privacy & Security and click Manage app passwords and access under Connected apps & API tokens.
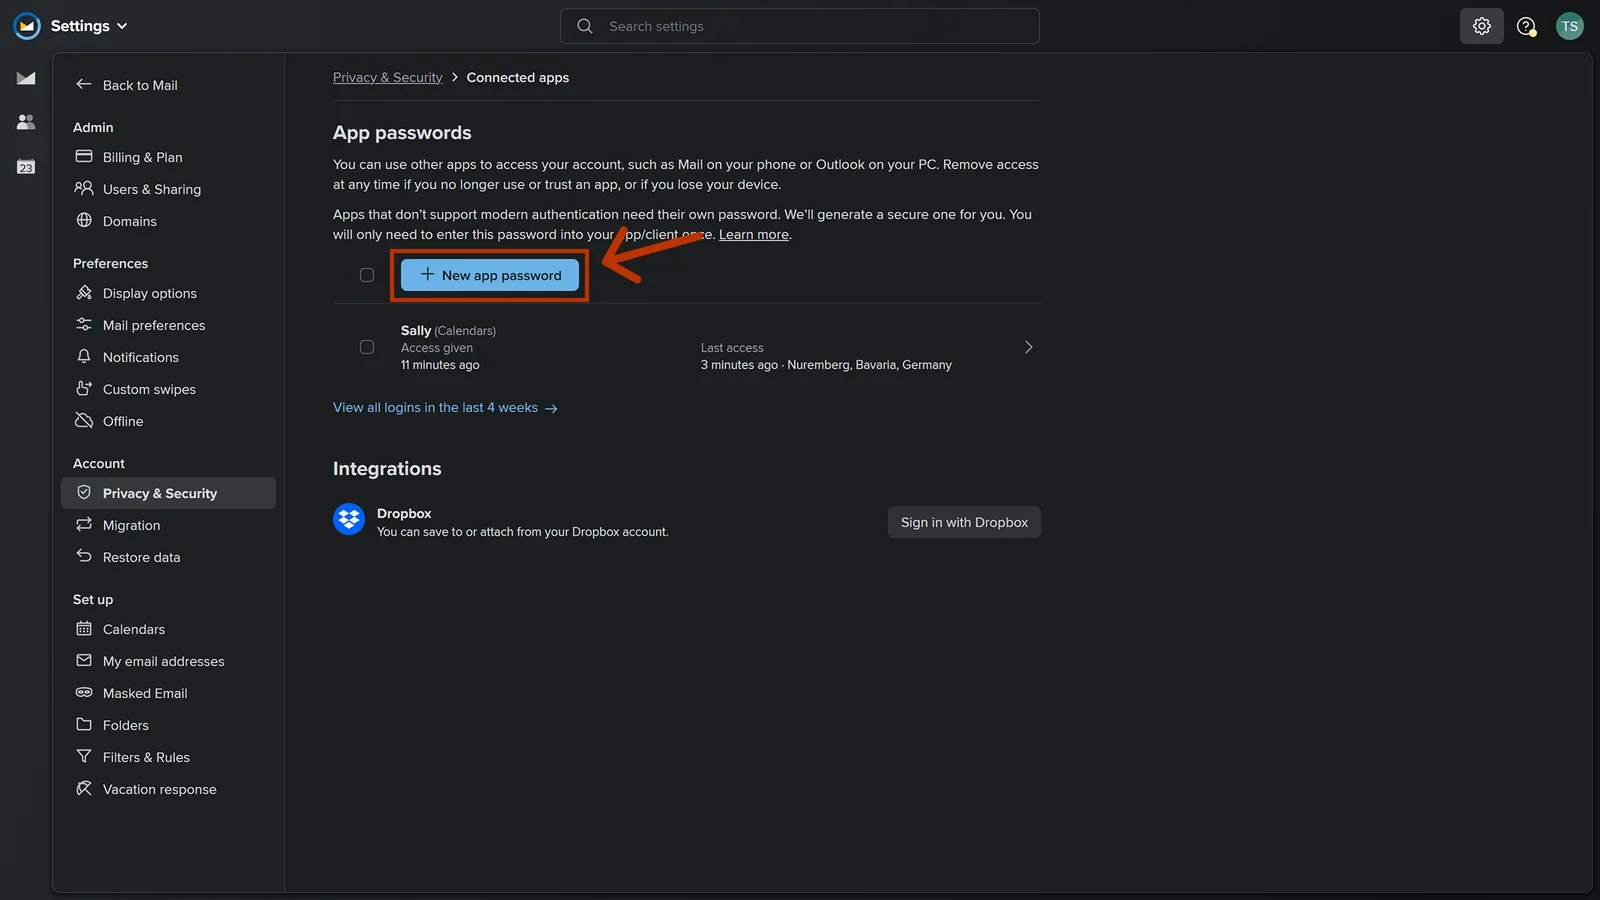
- Click New app password.
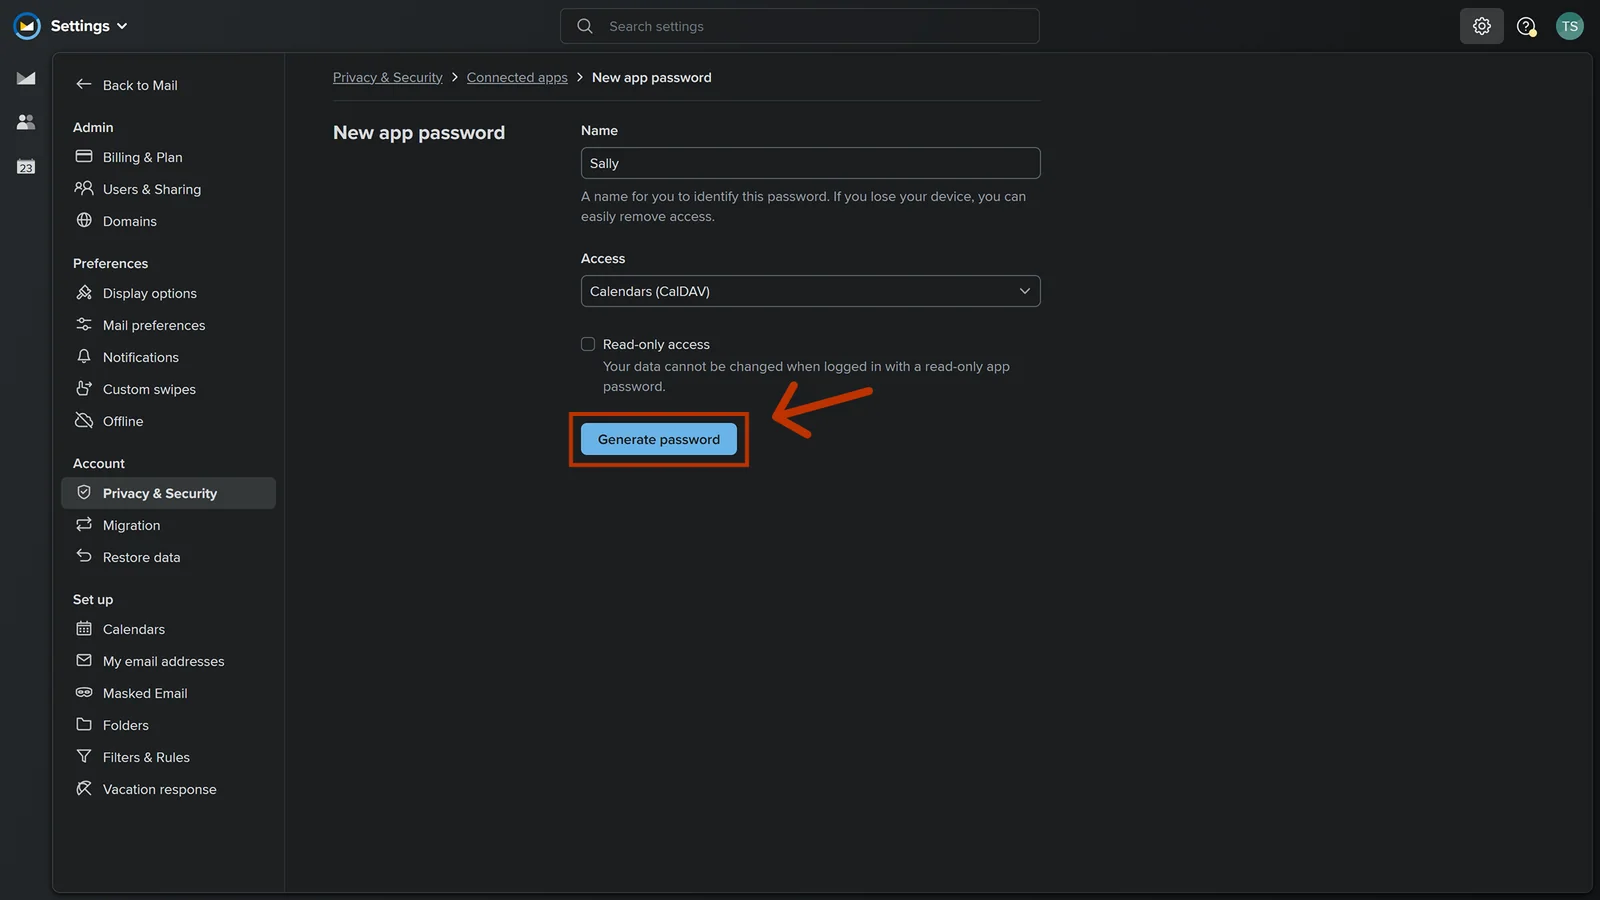
- Enter a name, for example "Sally", select Calendars (CalDAV) under Access and click Generate password. Copy the password that is displayed, you will need it in Sally in a moment.
Copy the password right away and keep it somewhere safe, for example in your password manager. Fastmail shows it only once. If you lose it, you have to create a new app password.
Step 2: Connect CalDAV in Sally
Now you enter the app password you just created in Sally, together with the server URL and your username. Sally uses these credentials to connect to your calendar and sync your appointments.
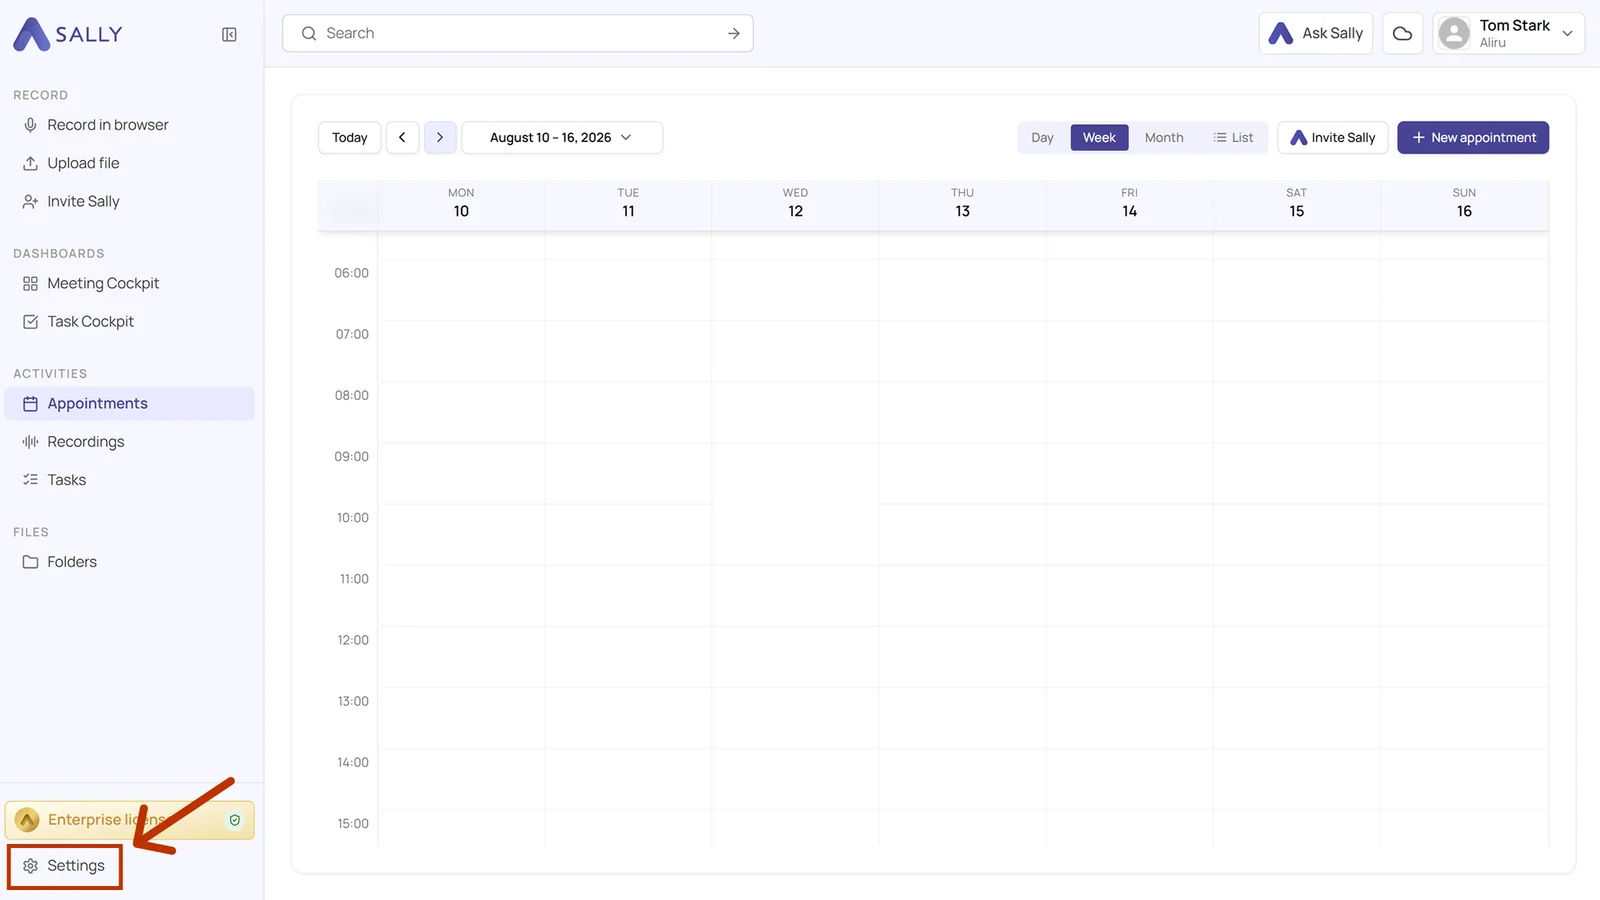
- Open Settings at the bottom of the left sidebar.
- Under Configuration, select Integrations and click Discover integrations.
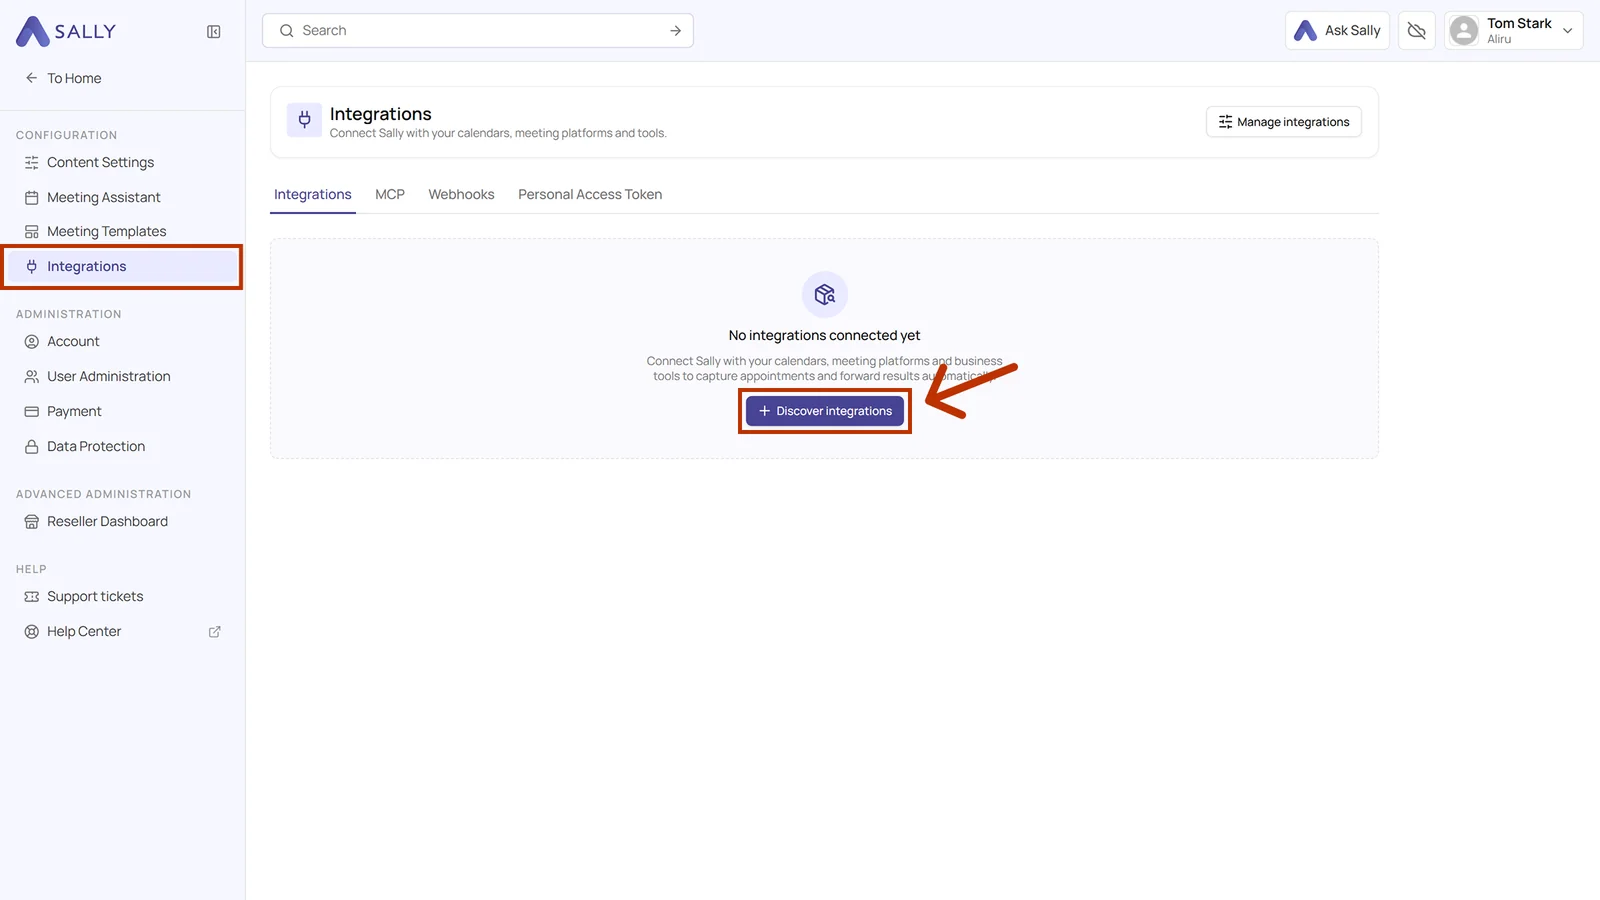
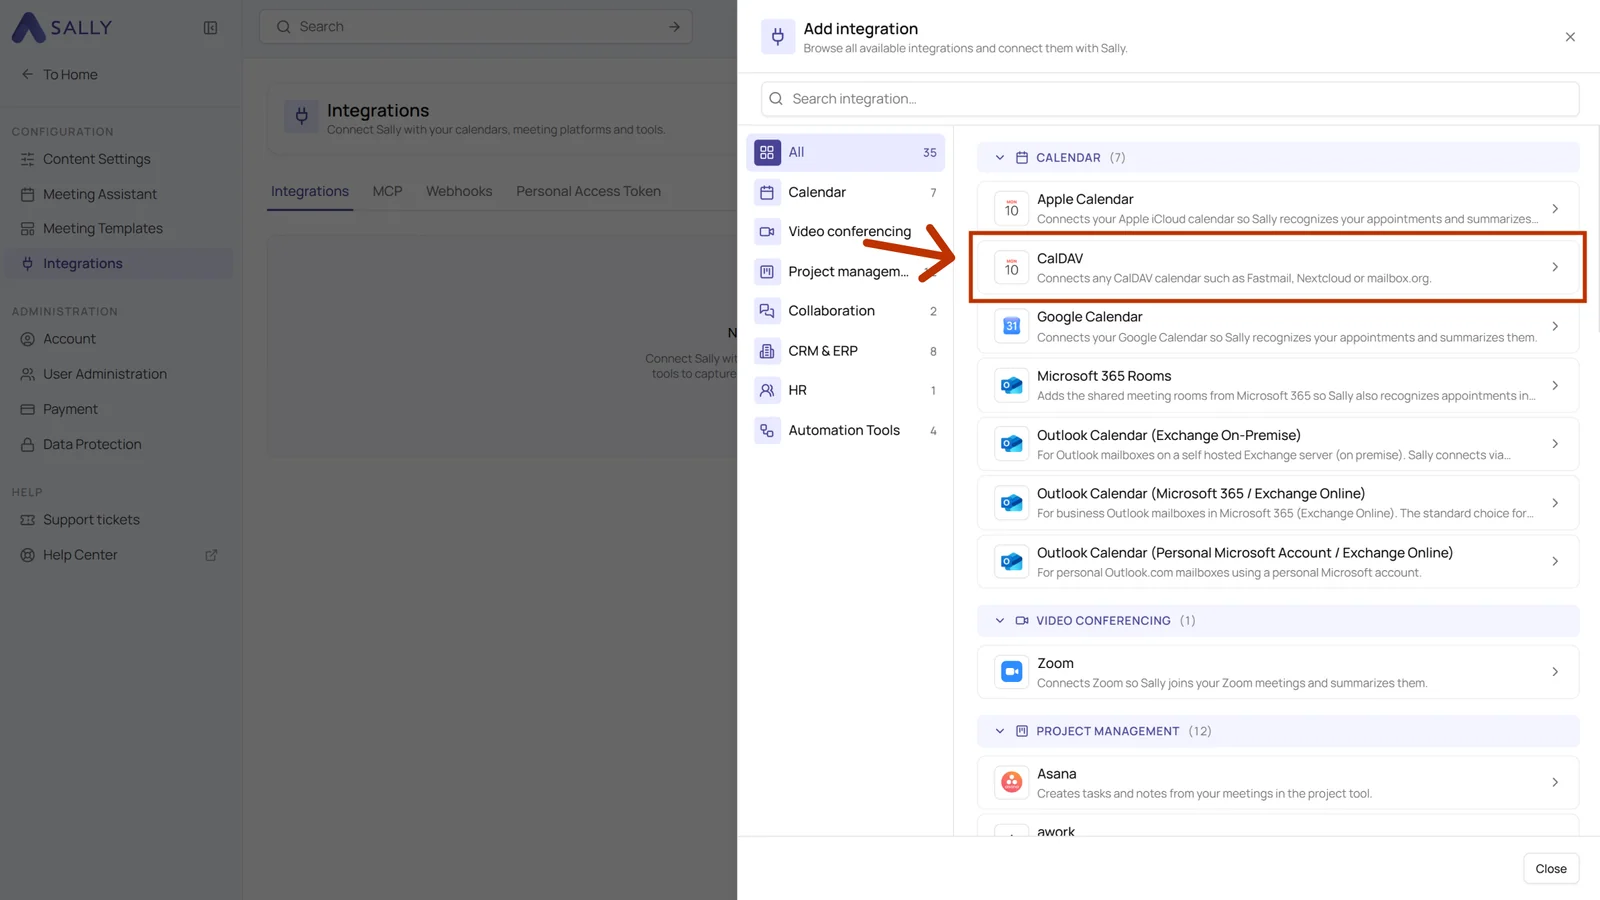
- Pick CalDAV from the Calendar section of the list. You can also find the integration directly through the search field at the top.
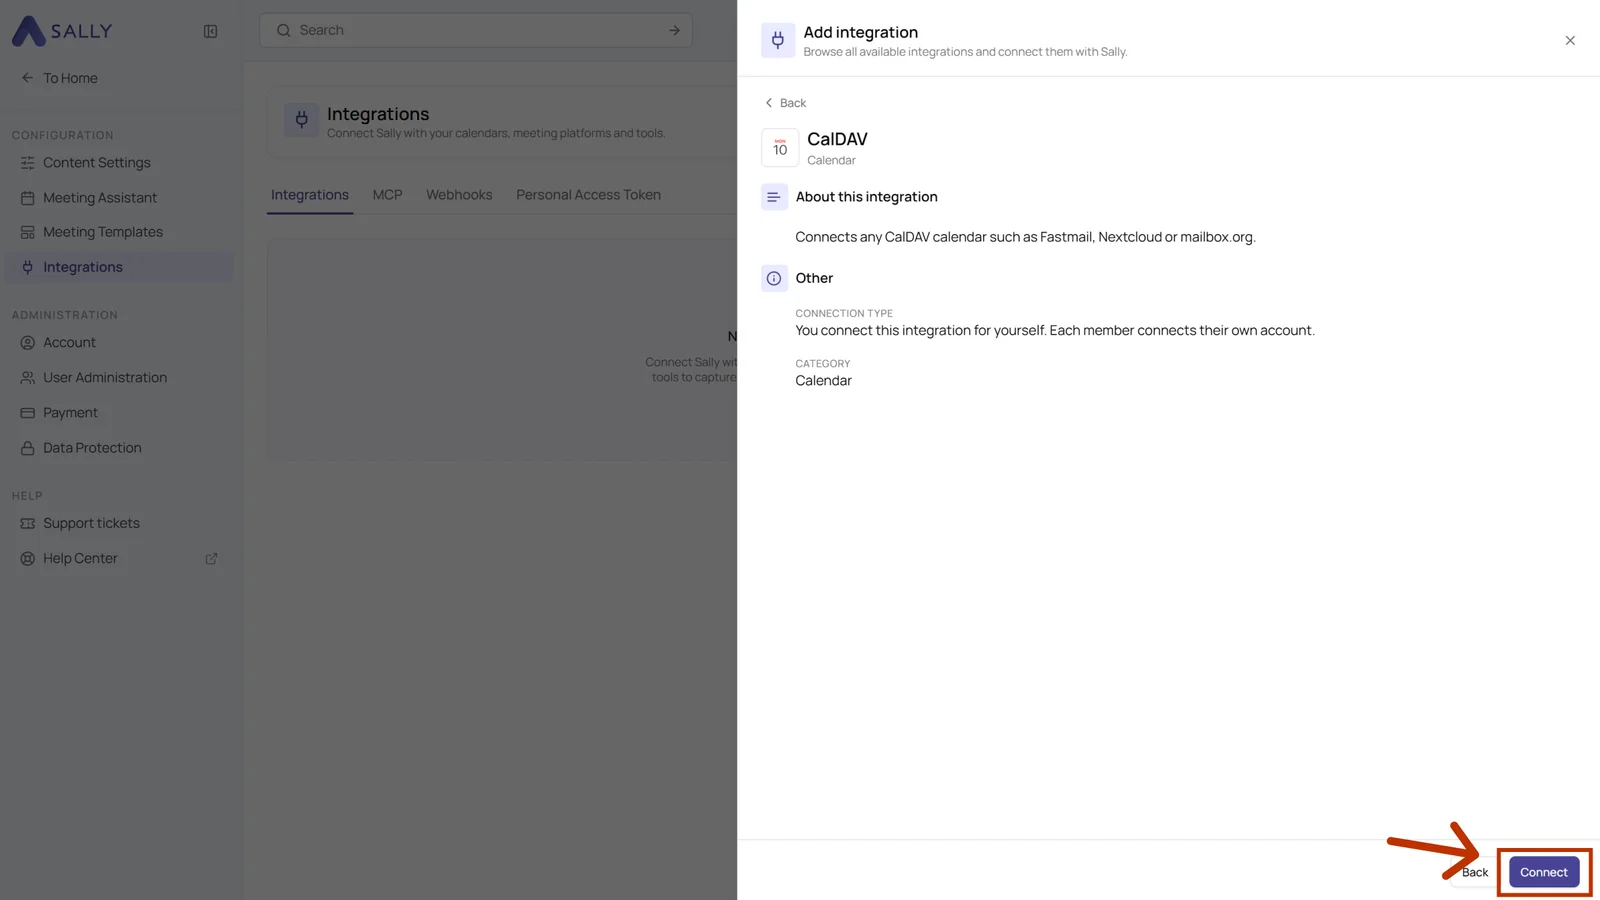
- The panel describes the integration and notes that every member connects their own account. Click Connect in the bottom right corner.
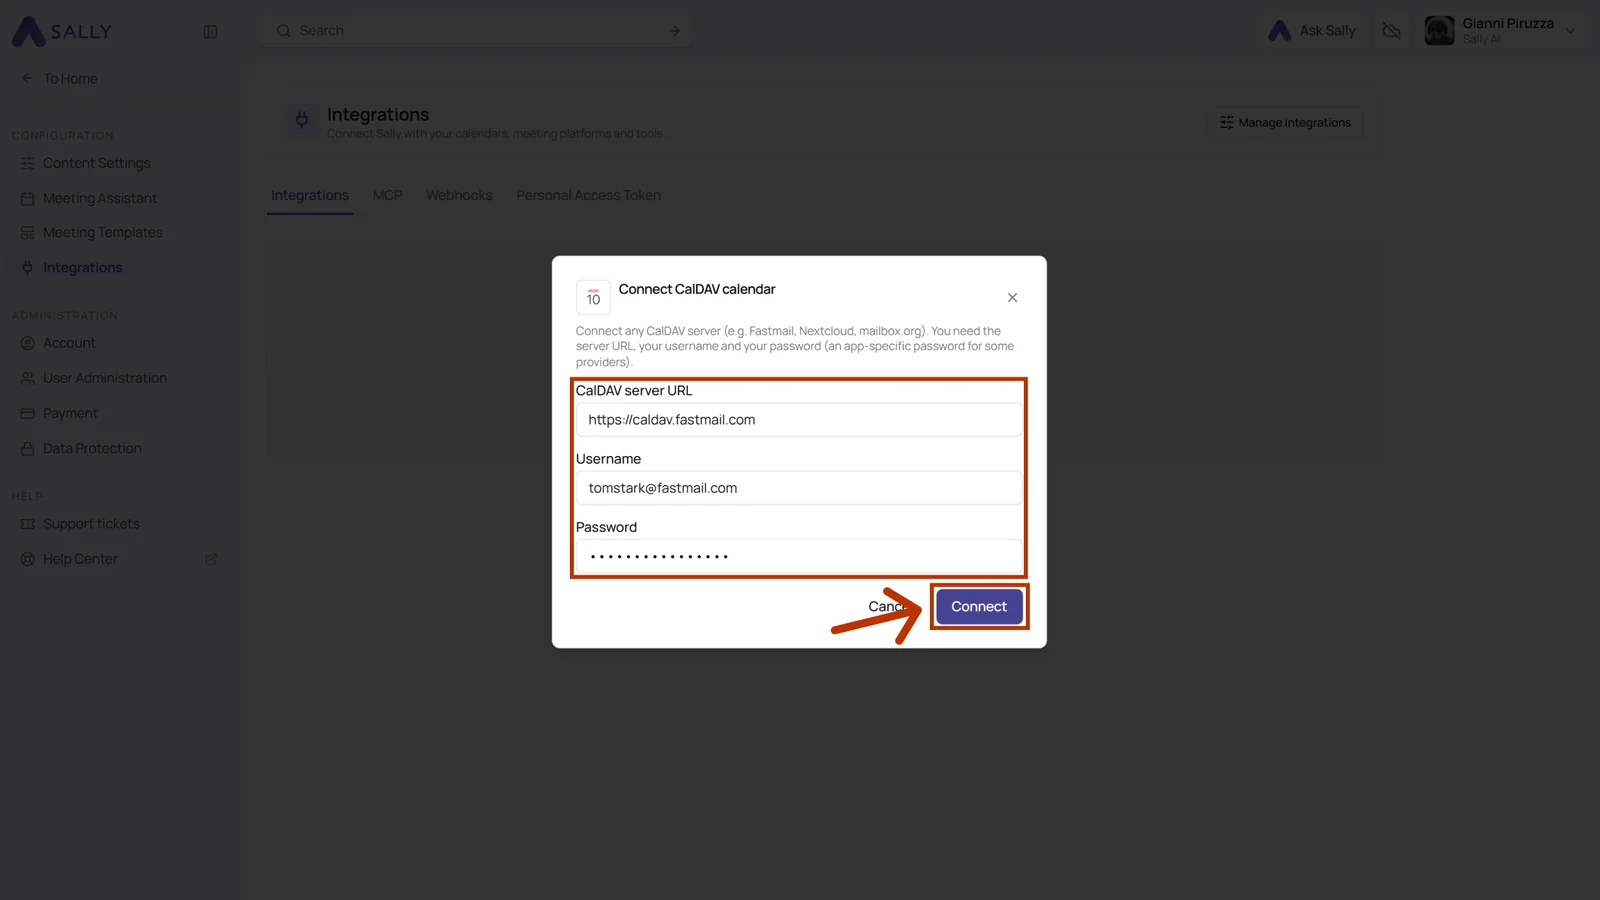
- In the Connect CalDAV calendar dialog, fill in the three fields and click Connect:
- CalDAV server URL: the address of your provider, for Fastmail
https://caldav.fastmail.com - Username: your login, for Fastmail your full email address
- Password: the app password you created in step 1
- CalDAV server URL: the address of your provider, for Fastmail
- The connected calendar now appears under Calendar in your integrations, together with your username. Your events show up in Sally under Appointments.
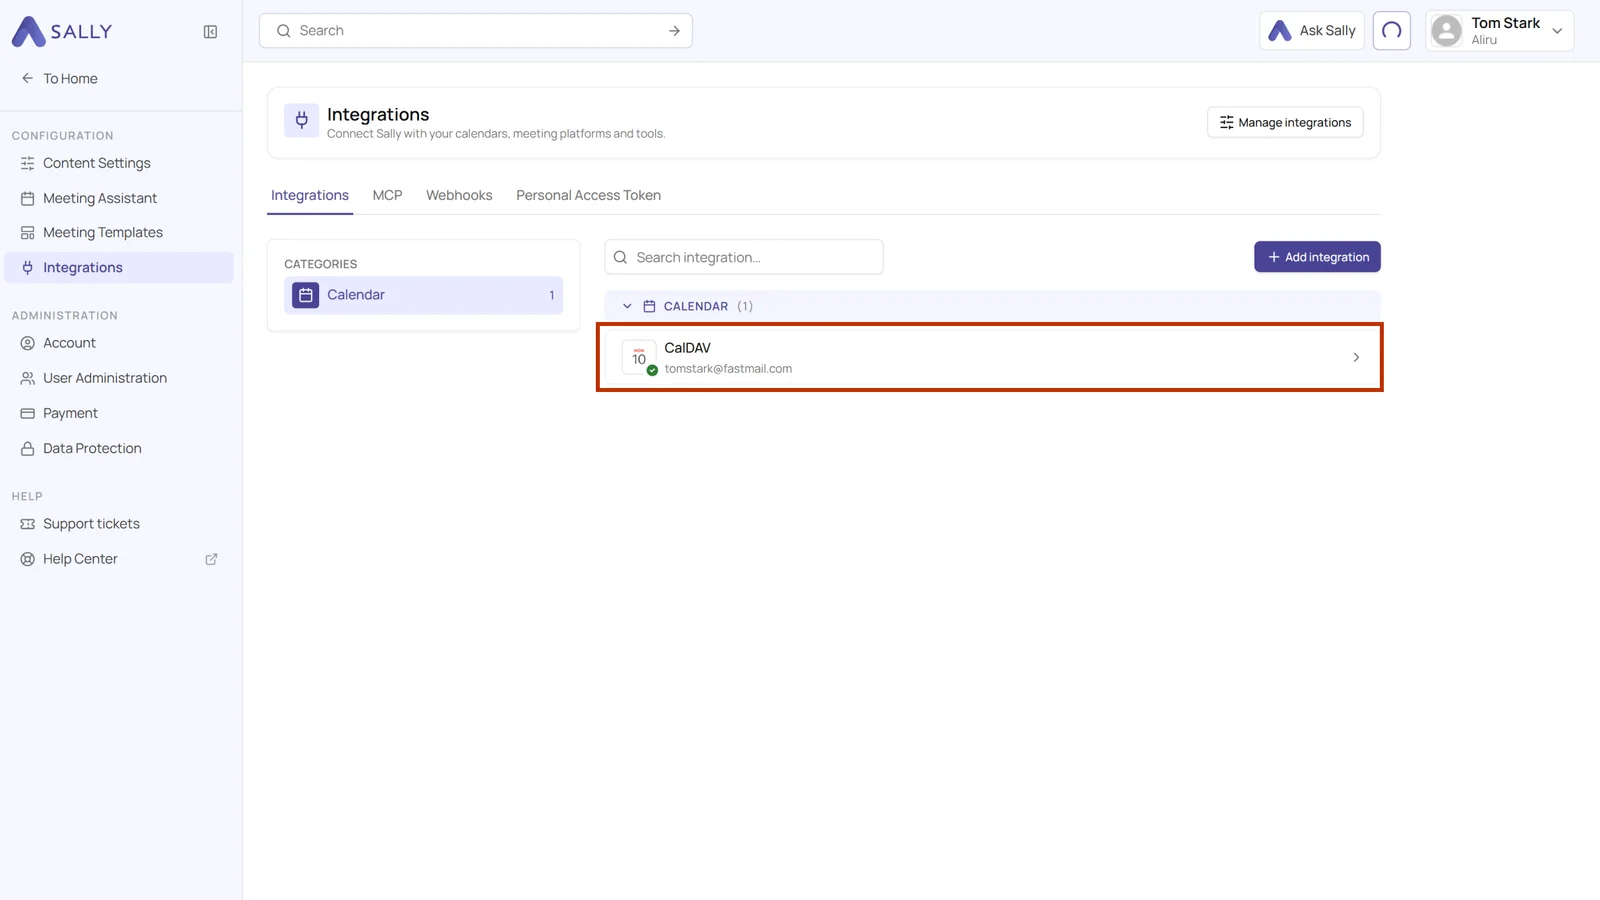
Synchronization may take a few moments. Restart Sally if necessary.
Once the connection is in place, you can set whether and when Sally should automatically join your meetings.
Whether a calendar may be connected at all is up to owners and admins, see managing calendars for your users.