How to highlight appointments in the calendar
You often remember a meeting by when it took place, not by its title: "that was Tuesday afternoon". The calendar under Appointments helps with exactly that. A filter highlights every appointment that has a recording or carries a certain tag. Everything else turns grey but stays in place, so you still see your week as it was and find the right meeting at a glance.
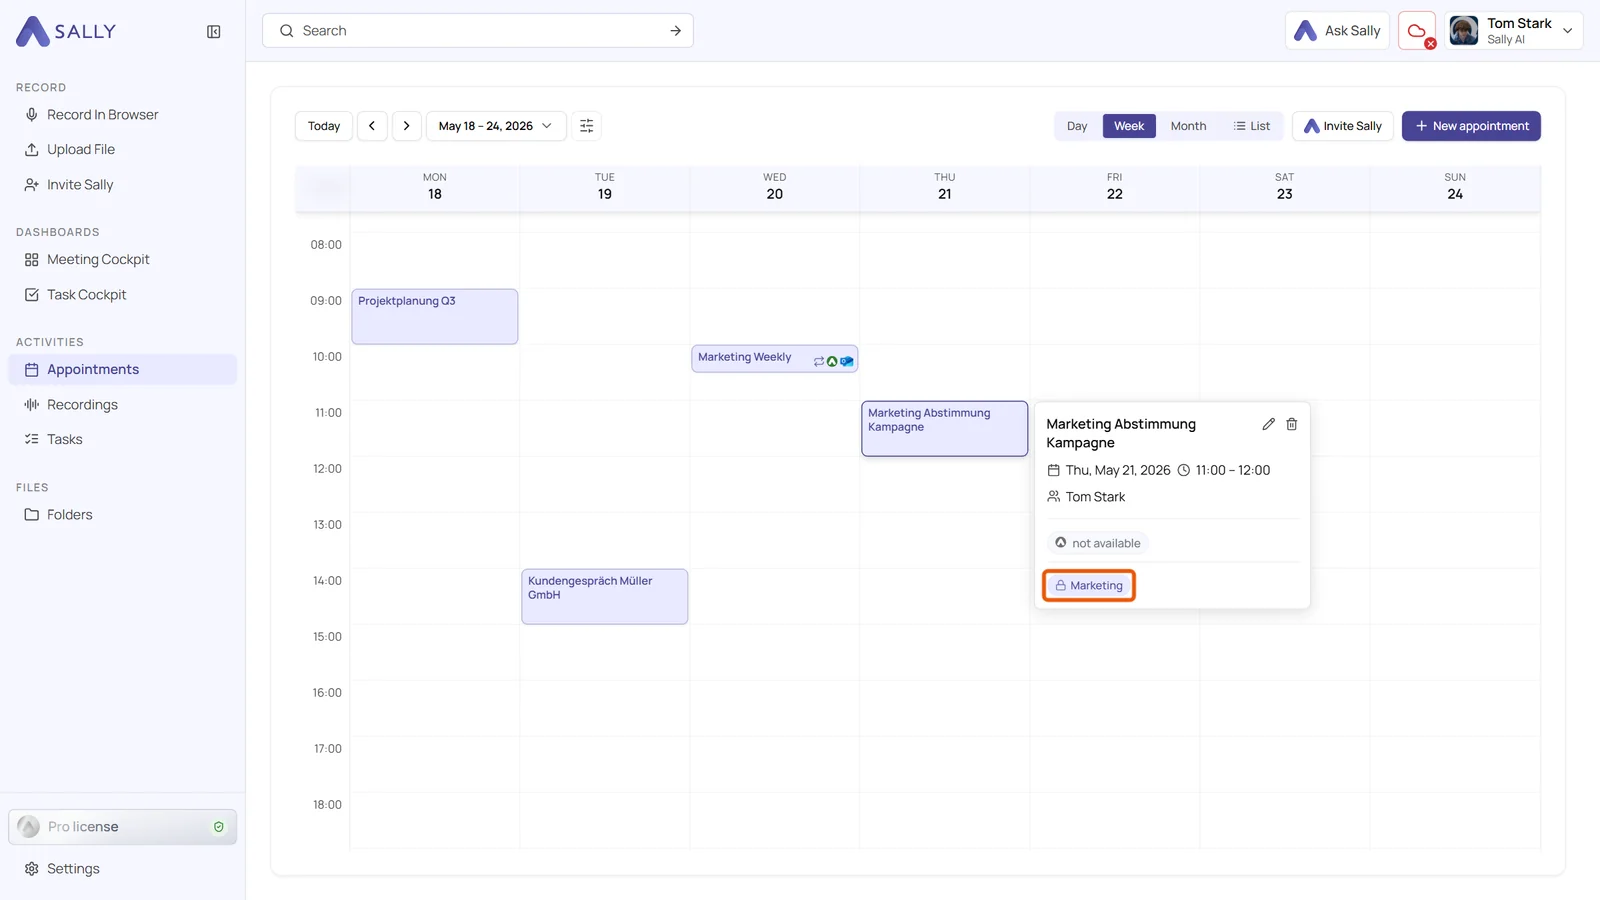
When you move the mouse over an appointment, a preview opens. For meetings with a finished summary it now shows the first sentences of that summary, so you know what the meeting was about without opening it. Tags that Sally set automatically carry a padlock there, which helps you spot a wrong assignment quickly.
Quick navigation
- Open the filter
- Highlight appointments with a recording
- Highlight appointments with a tag
- Appointment preview with summary and padlock
- Filter in the list and on your phone
1. Open the filter
-
Click Appointments in the left sidebar and choose the Day, Week or Month view at the top right.
-
Click the filter icon directly next to the date. A small window opens with two fields: Recording and Tags.
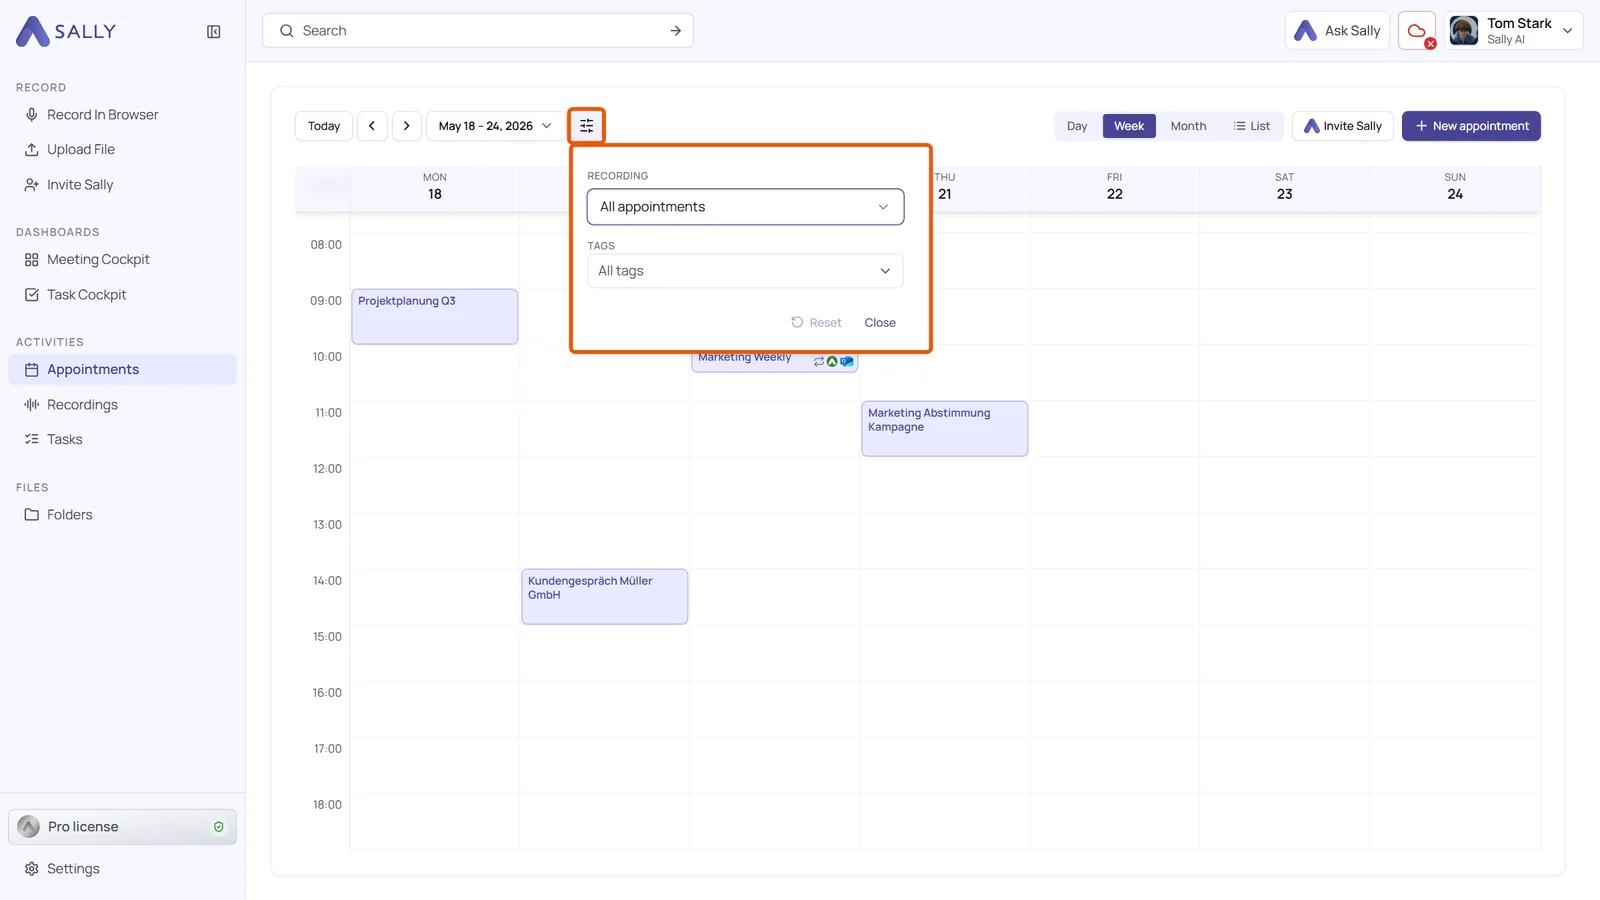
Your choice takes effect immediately, there is nothing to confirm. Reset clears both fields at once, Close hides the window and keeps the filter.
2. Highlight appointments with a recording
-
Open the field Recording in the filter window.
-
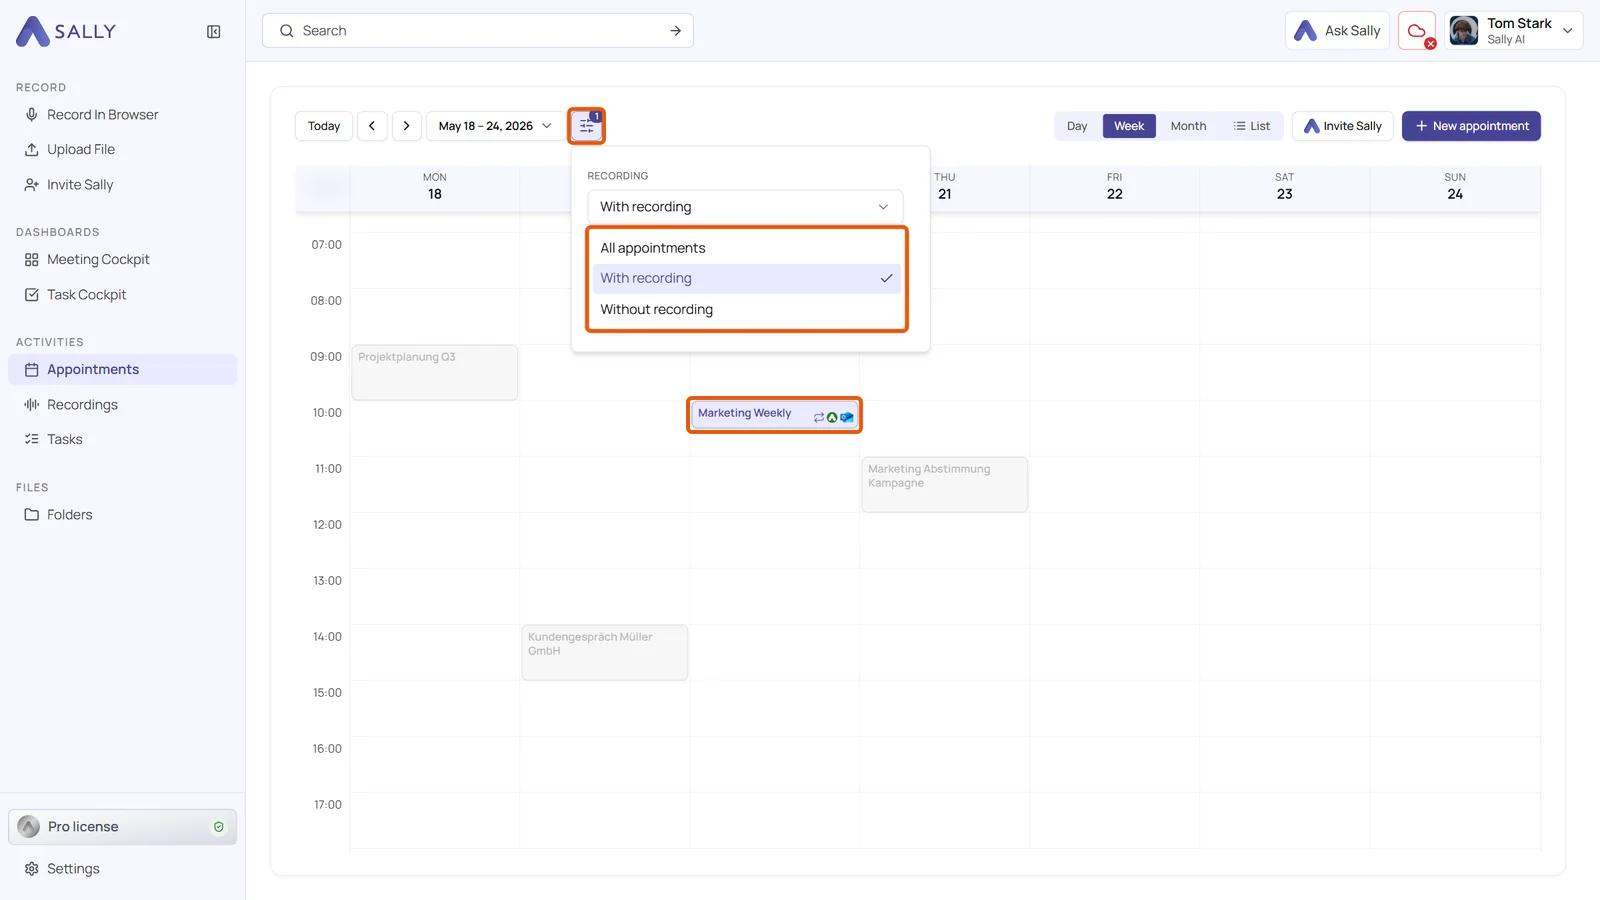
Choose With recording to highlight every meeting that Sally recorded. Without recording does the opposite and shows you, for example, which meetings Sally did not attend. All appointments switches this part of the filter off again.
Appointments that do not match turn grey. They are not hidden: you can still click them and open their preview. As soon as a filter is active, the filter icon shows how many filters are set.
3. Highlight appointments with a tag
-
Open the field Tags in the filter window. The list shows all tags of your organization account in alphabetical order. Type a few letters into the search field to find a tag quickly.
-
Select one or more tags. An appointment stays in colour if it carries at least one of them, including tags it inherits from its recurring series.
While a tag filter is active, the cards in the calendar also show their tags. In the week view each card shows one tag, in the day view up to three plus a "+n" for the rest. To keep the title readable, this only happens on appointments that last at least 45 minutes.
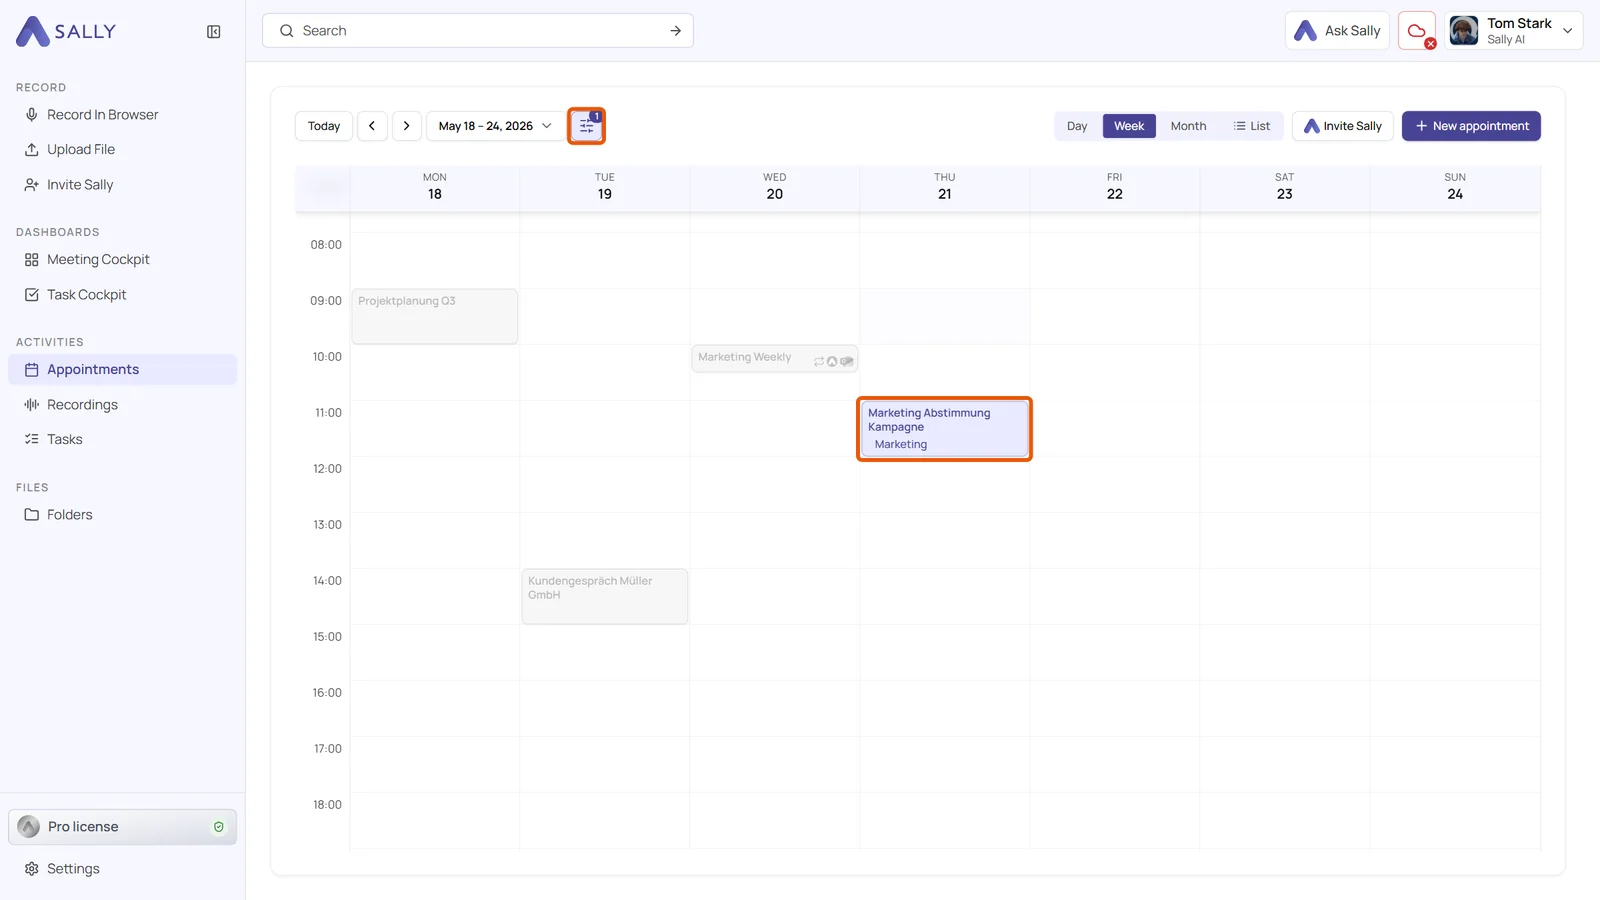
You can use Recording and Tags together. An appointment then has to match both, for example every customer meeting with a recording. How to create and assign tags is explained in Tags.
In the month view the matching appointments move to the top of each day. That way they do not end up behind "+N more" while the day shows three grey appointments.
The filter is part of the address in your browser. A reload or a link you send to a colleague keeps it. The next time you open the calendar from the sidebar, it starts without a filter.
4. Appointment preview with summary and padlock
Move the mouse over an appointment to open its preview. If the meeting has a recording and a finished summary, one or two sentences from that summary appear directly below the date and time. They come from the most recent summary, so you see right away whether this is the meeting you are looking for.
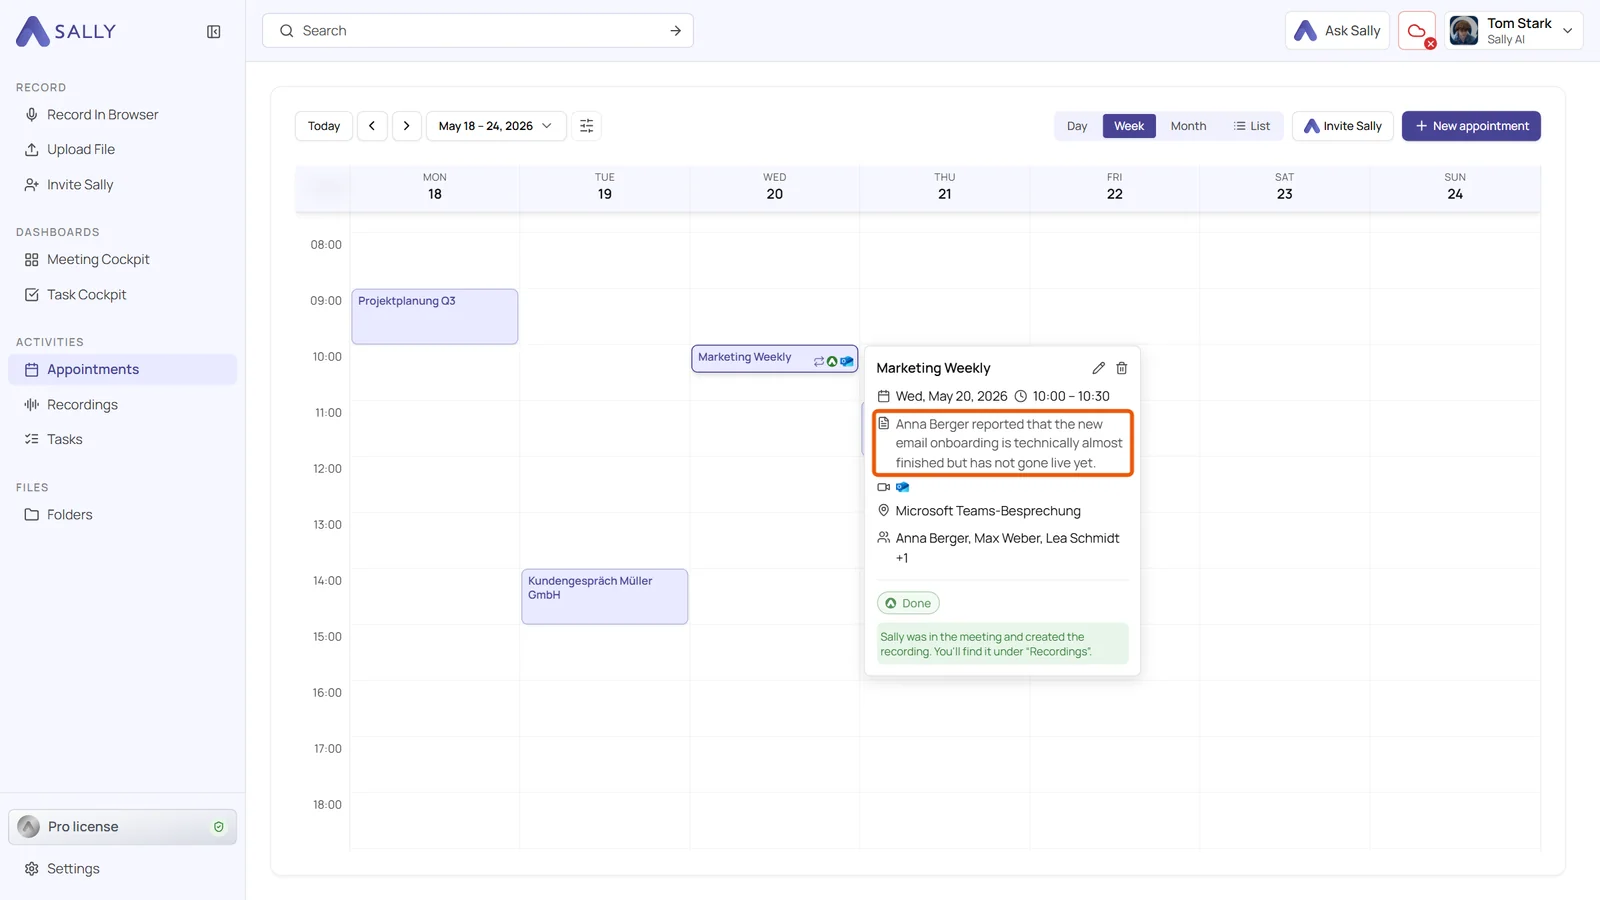
Appointments without a summary show the preview as before, without these lines.
Further down, the preview lists the tags of the appointment. A tag that Sally set automatically because a word in the title matches its keyword carries a small padlock. If you see a padlock on a meeting where the tag does not belong, the keyword is too broad. You can adjust it in the tag settings, see Automatic assignment from the title.
5. Filter in the list and on your phone
The List view works a little differently. Above the table you find three filters: Time range, Recording and Tags. Here, appointments that do not match are hidden instead of greyed out, because a list has no time grid that you would need to keep. The page numbers below the table count only the matching appointments.
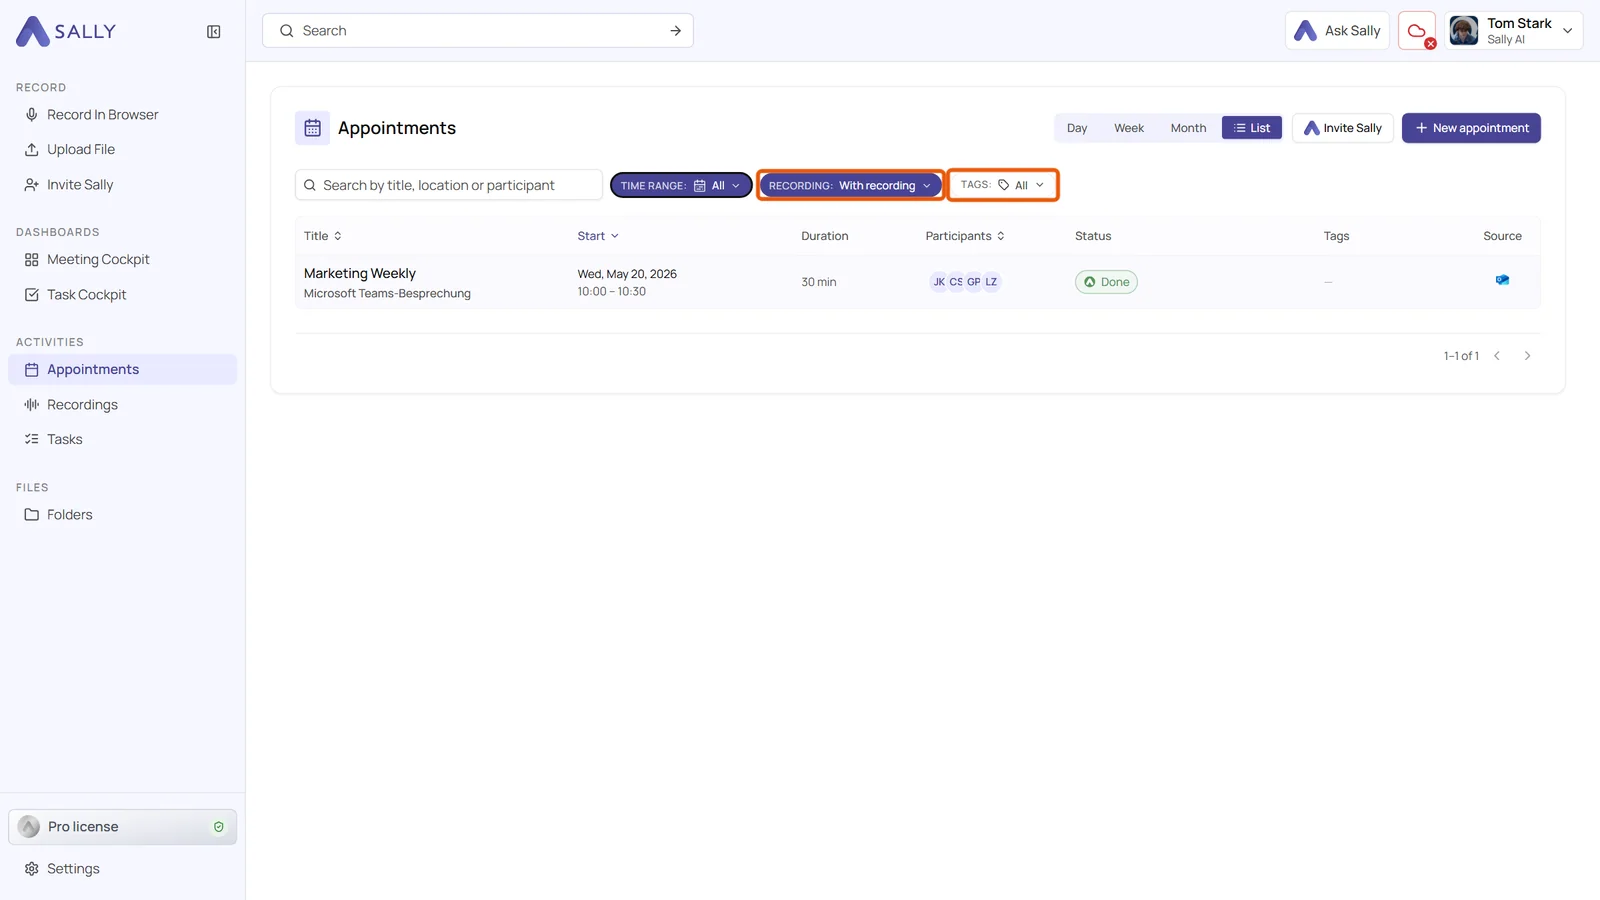
If no appointment matches, the list says "No appointments match the filter." Change or reset the filters to see your appointments again.
On a phone, a tablet or in a narrow browser window, the filter sits behind a single filter icon. The number on it tells you how many filters are active, and a tap opens both fields. In the agenda on your phone, appointments that do not match turn grey as well.