Accept tasks in bulk and organize them by category
After a meeting, Sally goes through what was said and lists the to-dos she finds in the summary as task suggestions. This guide shows you how to turn them into a well-organized task list in three steps: you accept all suggestions from a summary at once, give each task a category, and then group and filter your list so the right work is always in front of you.
New to this? Just work through the page from top to bottom. If you only want to create a single task, turn one suggestion into a task or sync tasks to your other tools, see How to create and sync tasks for the basics.
Quick navigation
- Accept all suggestions at once
- How categories work
- Group and filter your task list
- Manage your categories
1. Accept all suggestions at once
- Open Recordings in the sidebar and click the recording you want.
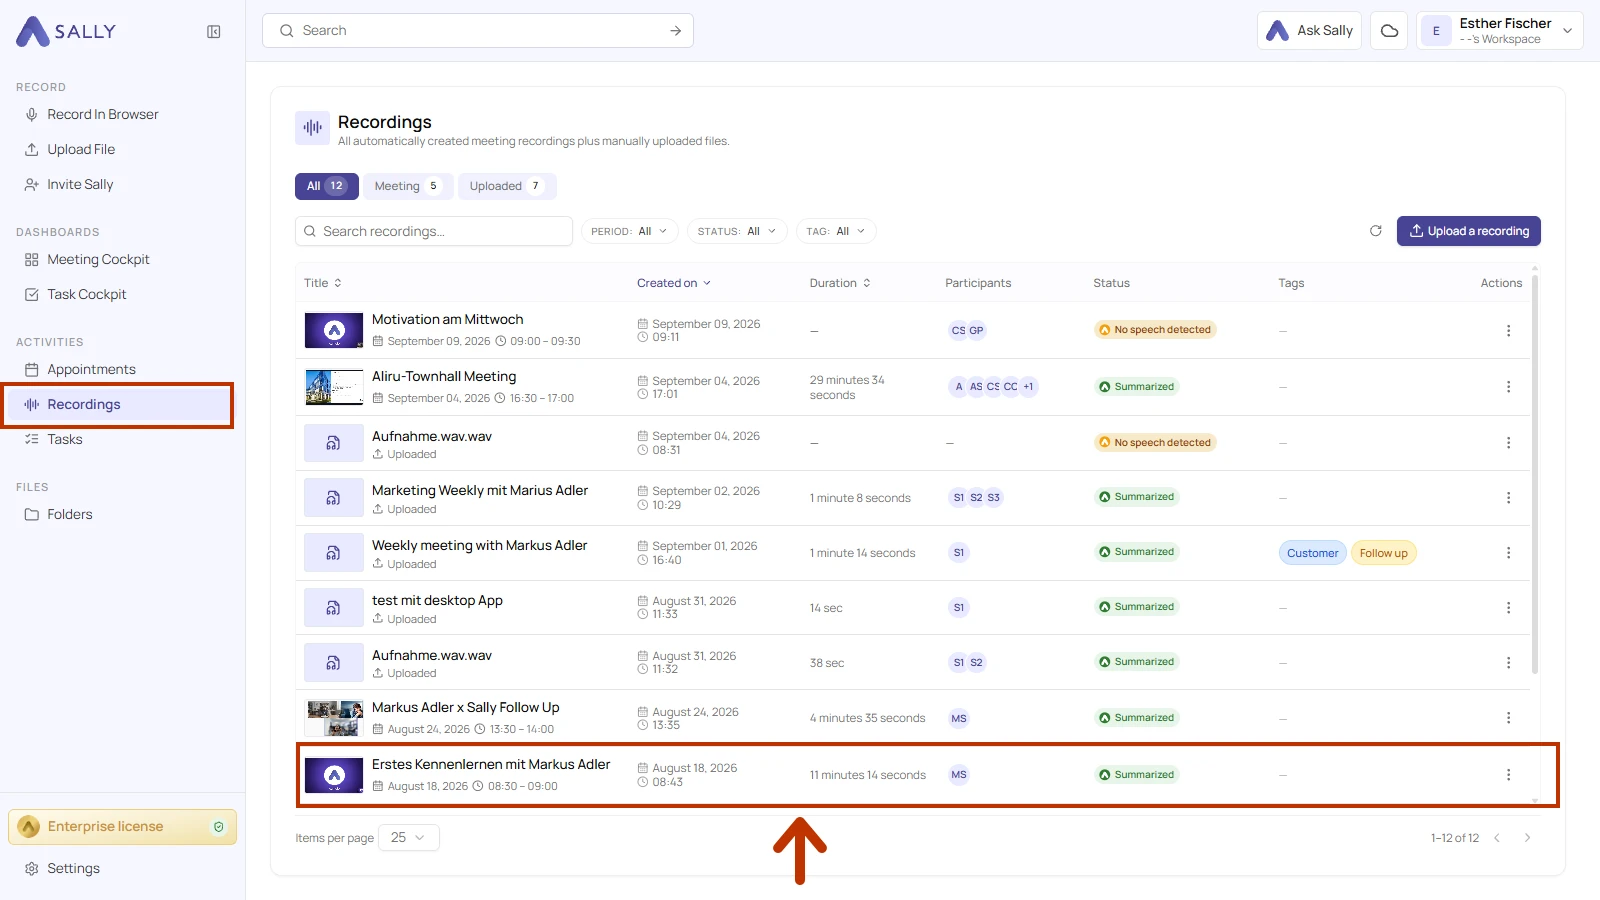
- In the report, open the Tasks section from the menu on the left. If there are open suggestions, you'll see an Accept tasks button showing how many there are, for example Accept tasks (4). The button disappears once there are no suggestions left.
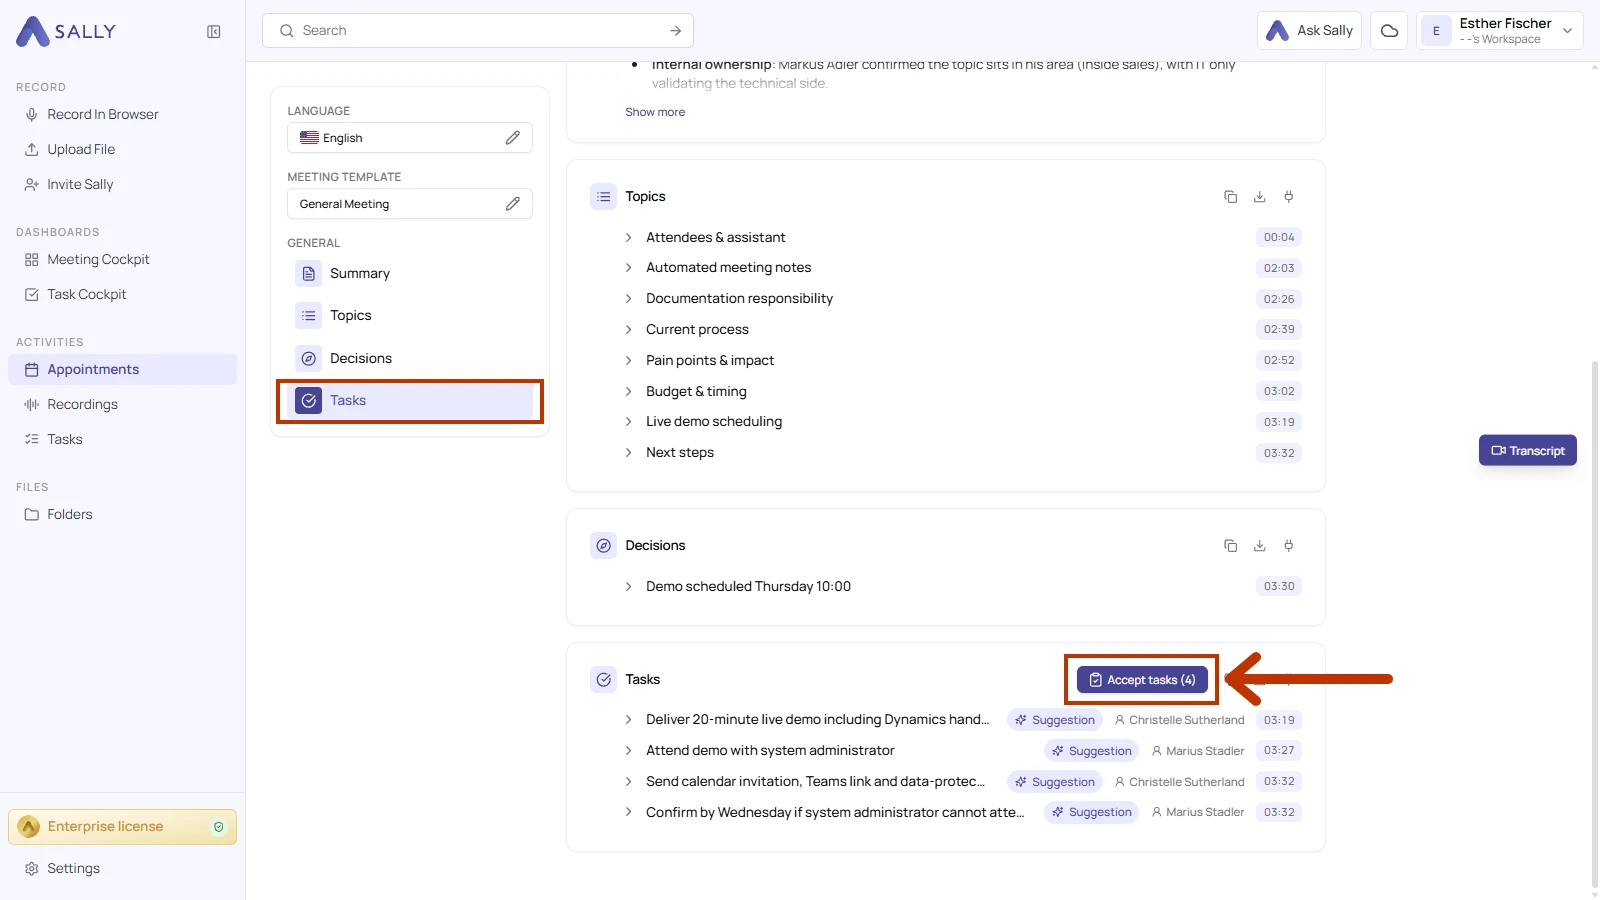
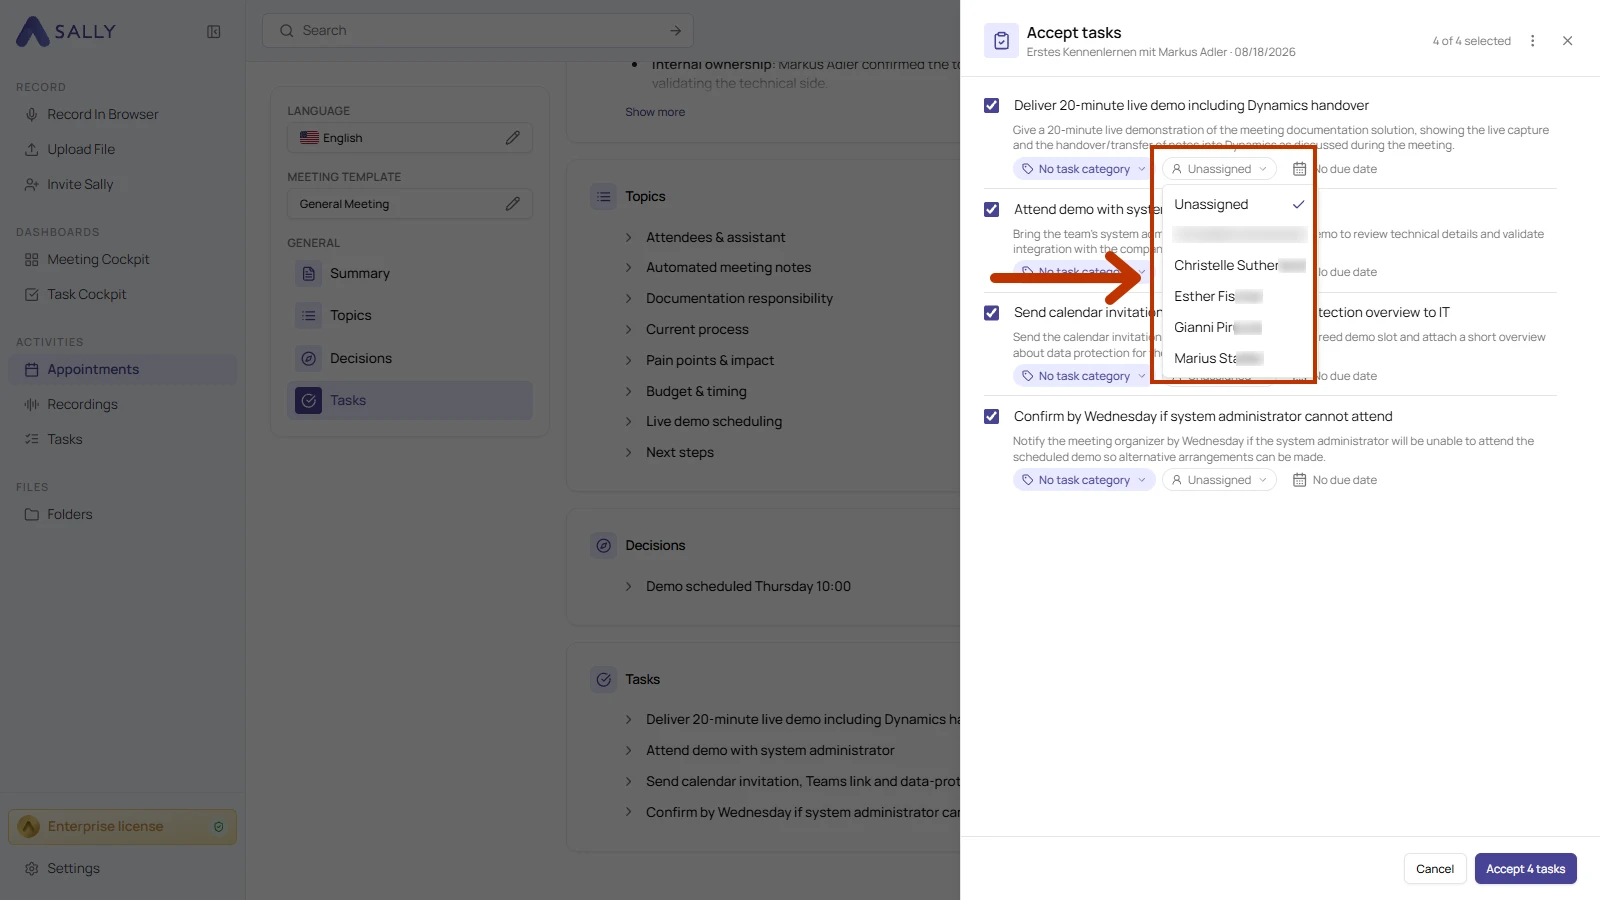
- Click Accept tasks. A drawer opens with all suggestions from the summary, each one already selected. The counter in the top right shows how many are selected, for example 4 of 4 selected. Uncheck any you don't need. The menu (⋮) next to the counter offers Select all, Clear selection and Only ready to accept. The last option limits the list to suggestions Sally can create right away.
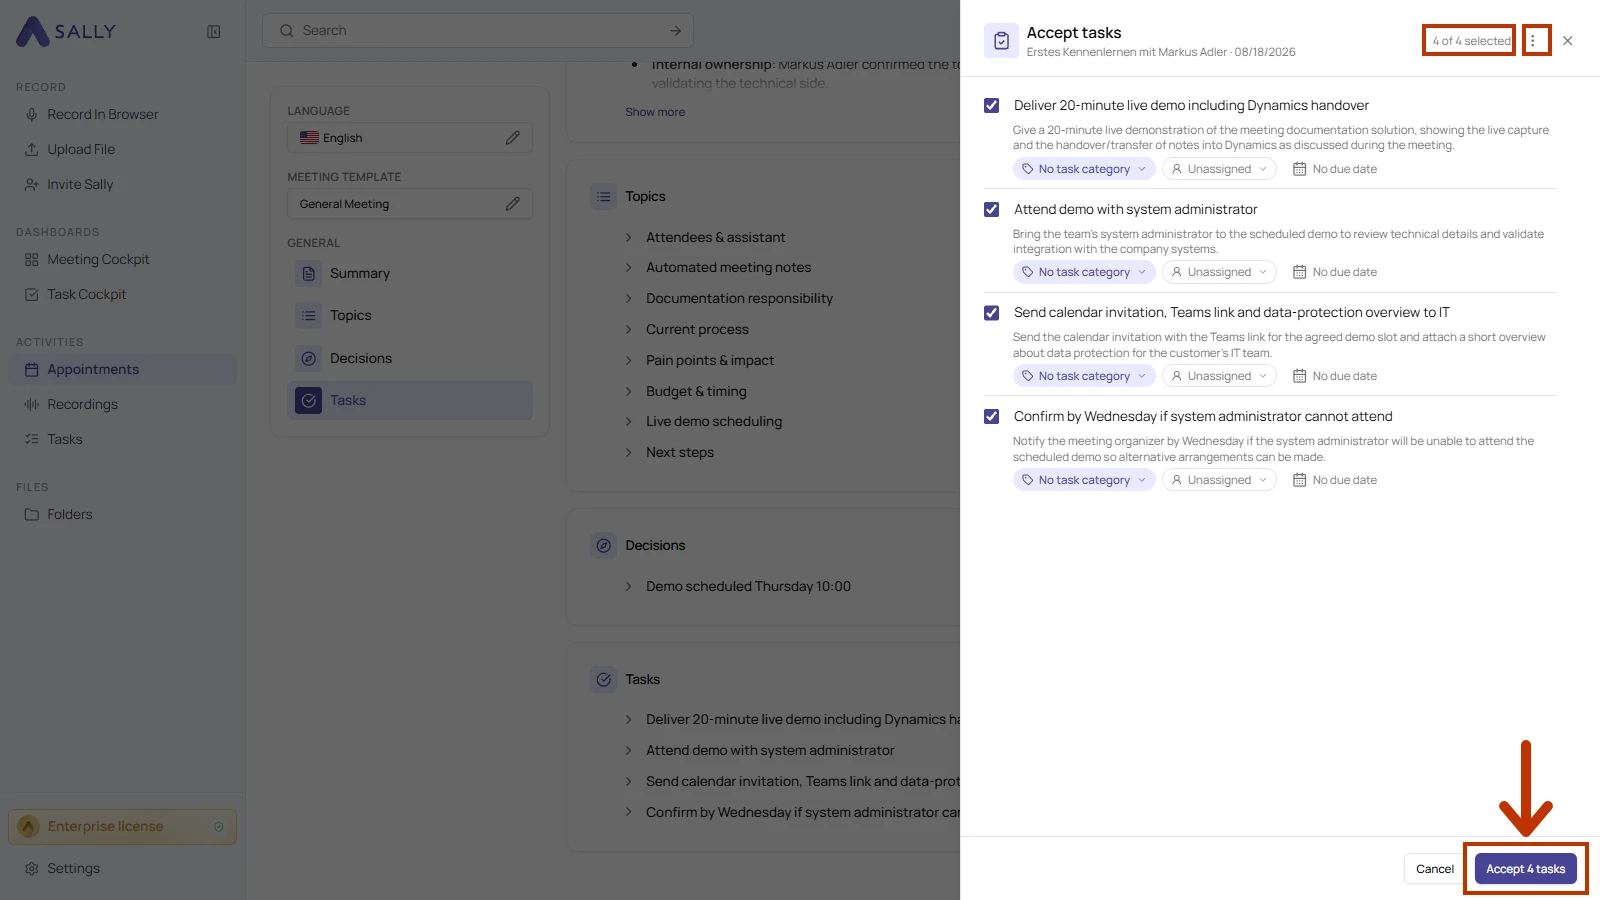
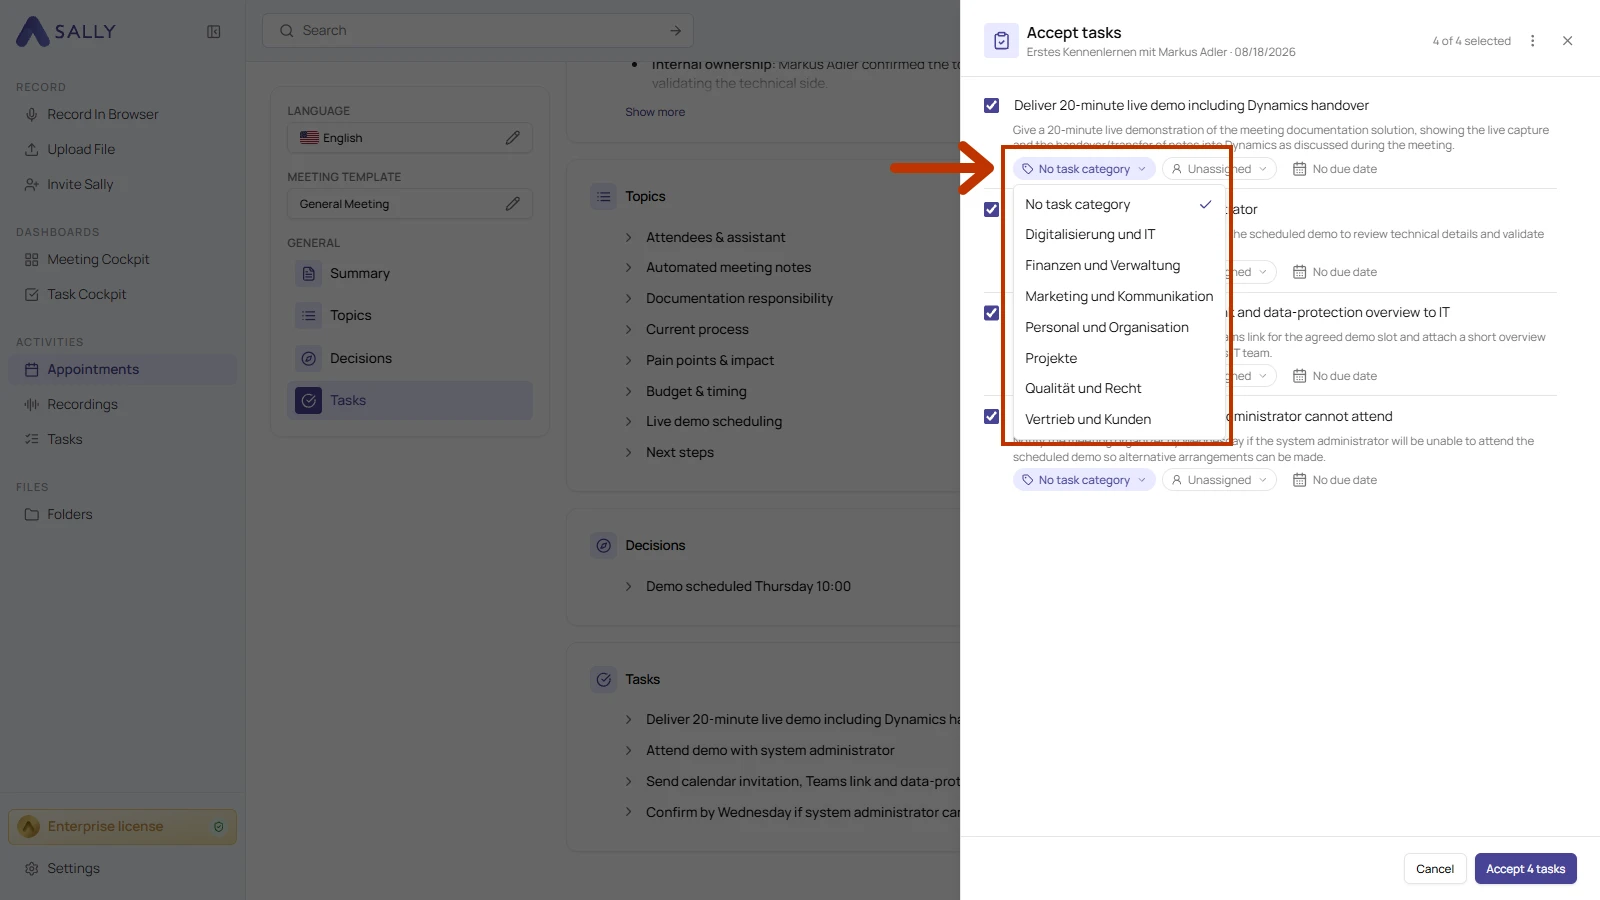
- Review each row and make any changes you need. The subject, category and due date can all be edited. Where possible, Sally suggests a category. You can set or change it from the dropdown.
- Under responsible, pick who should handle the task. The list shows the members of your company account.
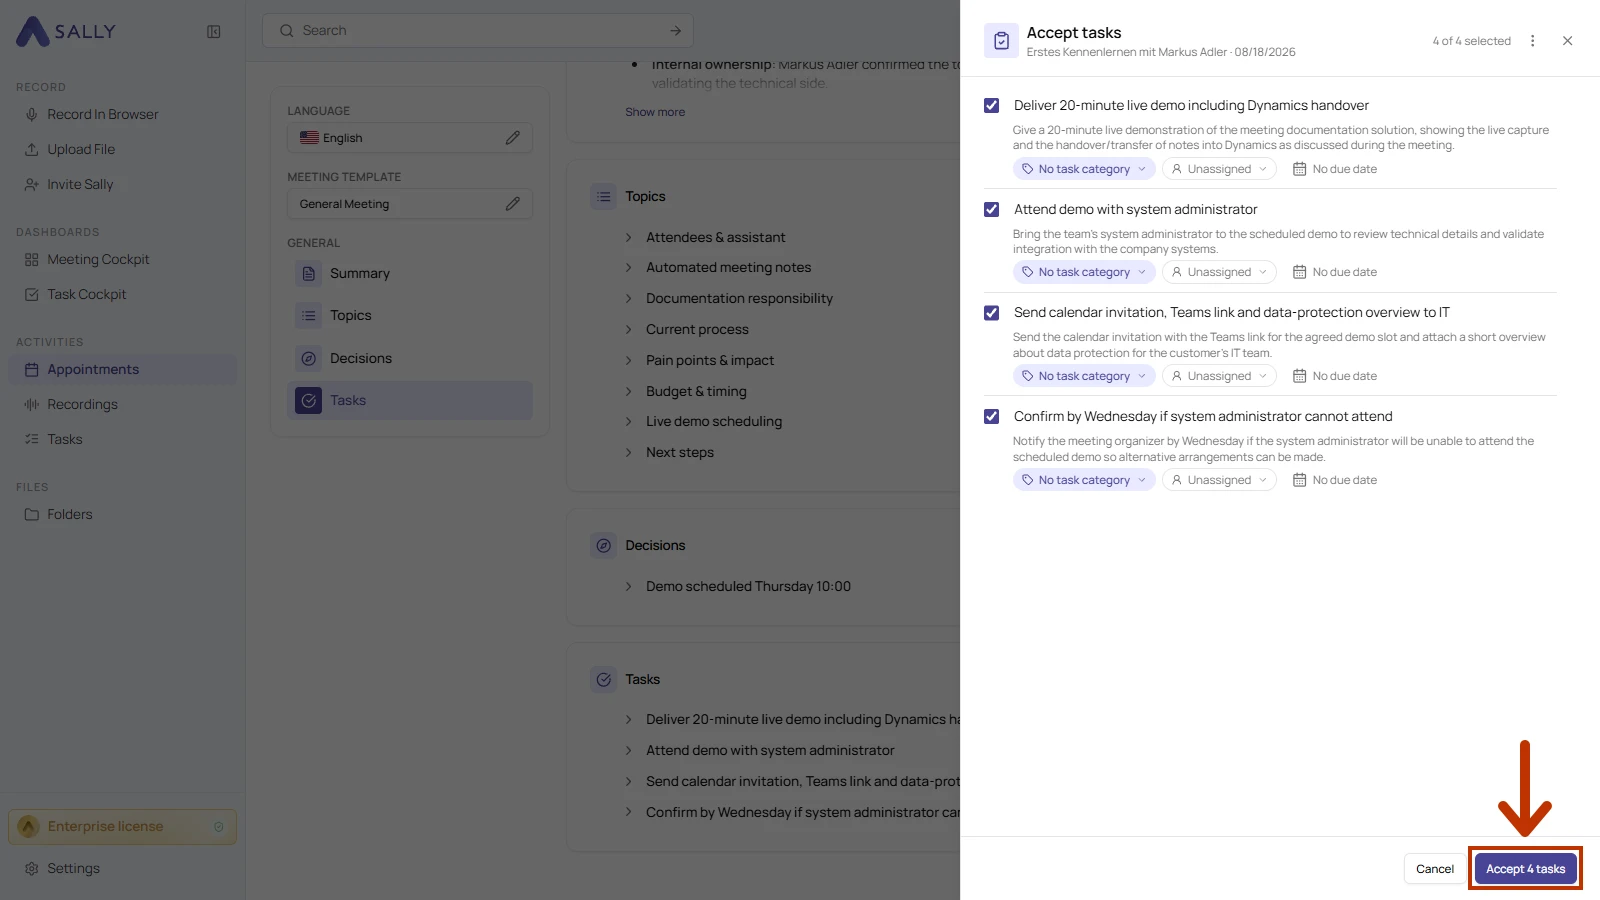
- Click Accept tasks at the bottom to create all selected tasks in one go. They then appear in your task list, which you can open from Tasks in the sidebar. Any suggestions you didn't select stay in the summary, so you can come back to them later.
You can assign a task to any user in your company account. They don't need a license. People who have been invited but haven't accepted yet don't appear in the list, and neither do blocked accounts.
2. How categories work
A category groups related work, so your task list stays organized without any manual sorting. Where possible, Sally suggests a category. You can change it at any time, either in the drawer while you're accepting tasks or later in your task list. To change it later:
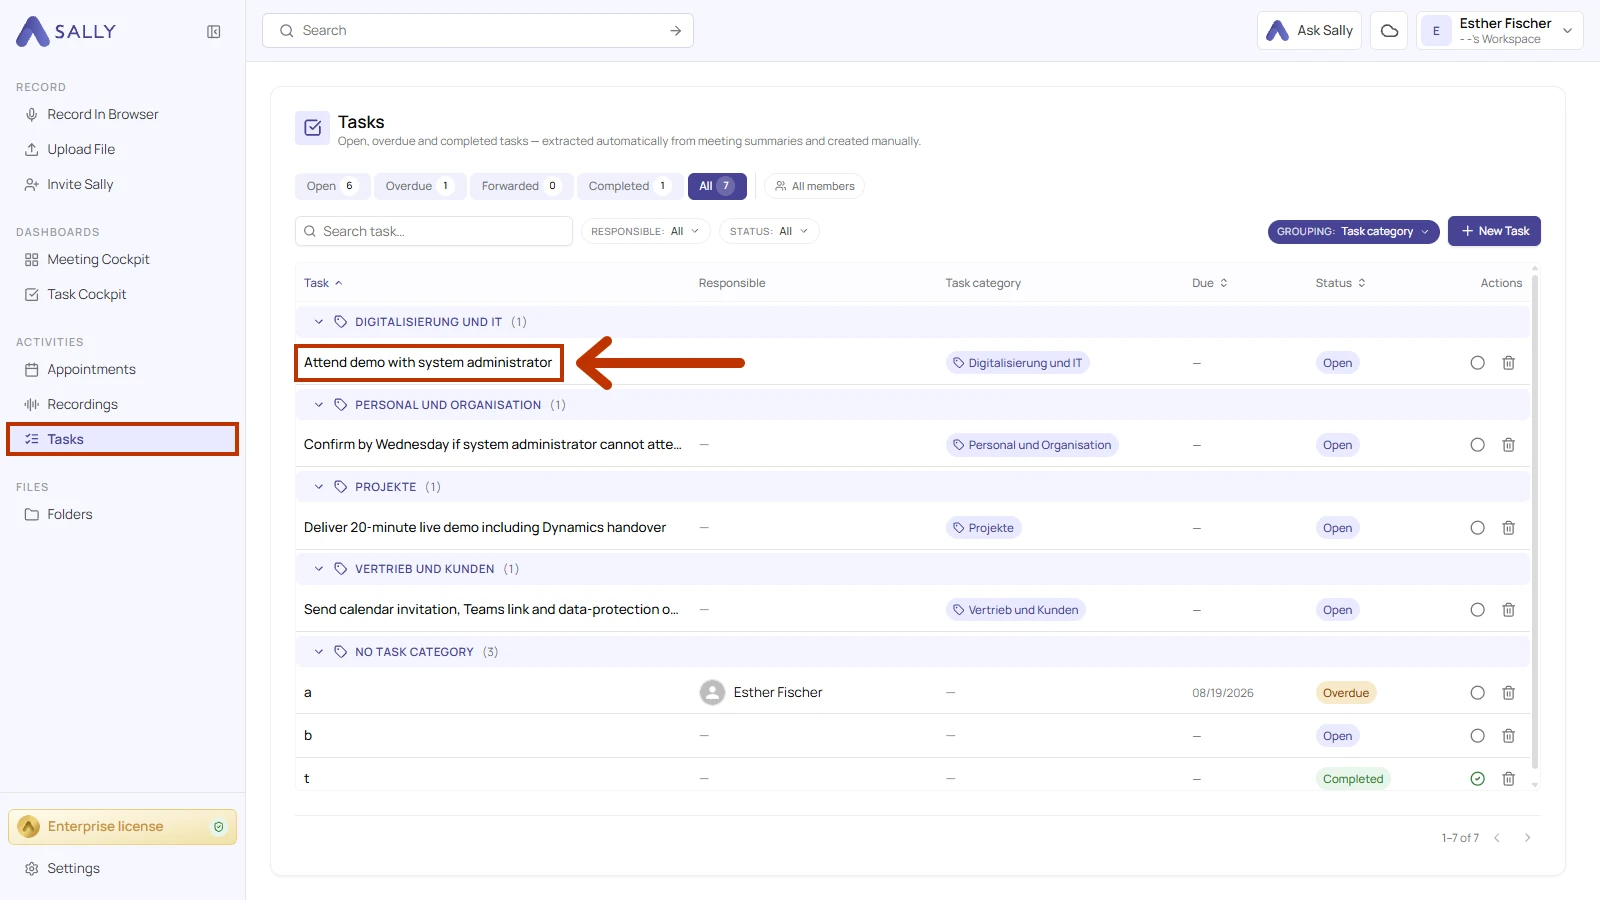
- Open Tasks in the sidebar and click the task you want to change.
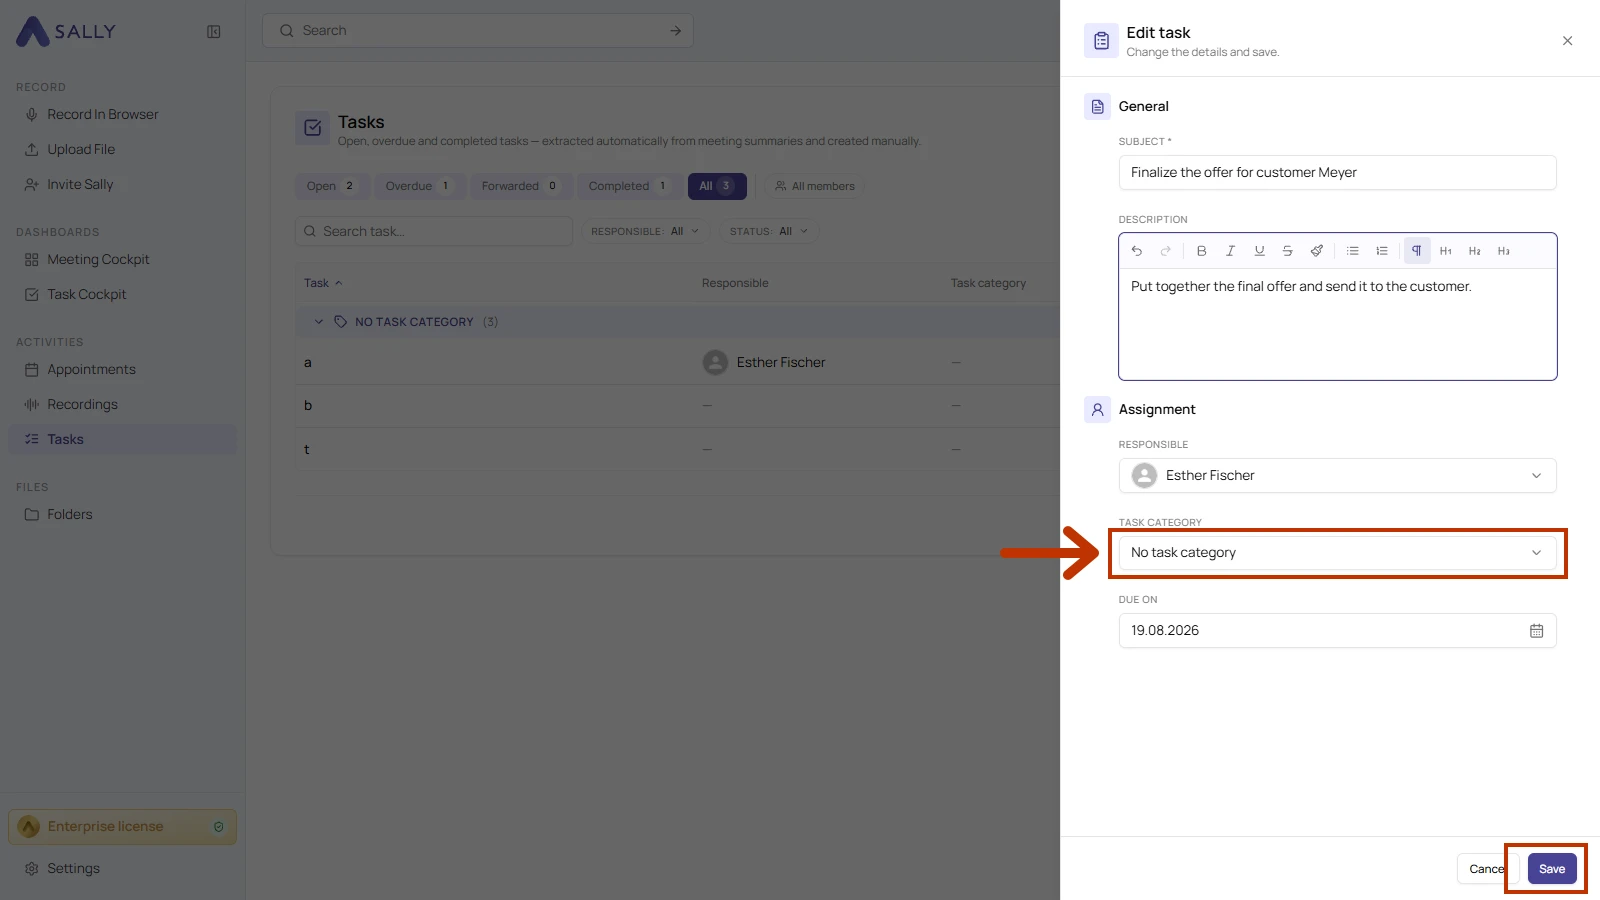
- The Edit task panel opens. Choose a Task category and click Save.
New accounts don't come with any categories, so they need to be created first. In a company account, an owner or admin takes care of this, which means the categories you see are the ones your team has set up. A good set covers the main areas of your work. For example:
| Category | What it covers |
|---|---|
| IT and digital | Systems, interfaces, access, rollouts, and technical coordination |
| Finance and admin | Budgets, invoices, contracts, purchasing, and billing |
| Marketing and communications | Public image, events, press, and the website |
| HR and organization | Hiring, schedules, time off, responsibilities, and internal processes |
| Projects | Tasks that belong to an ongoing project with a defined start and end |
| Quality and legal | Requirements, audits, data protection, documentation, and compliance |
| Sales and customers | Quotes, pricing, negotiations, and anything related to customers or prospects |
Tasks without a category are collected in a separate group, so nothing slips through the cracks.
3. Group and filter your task list
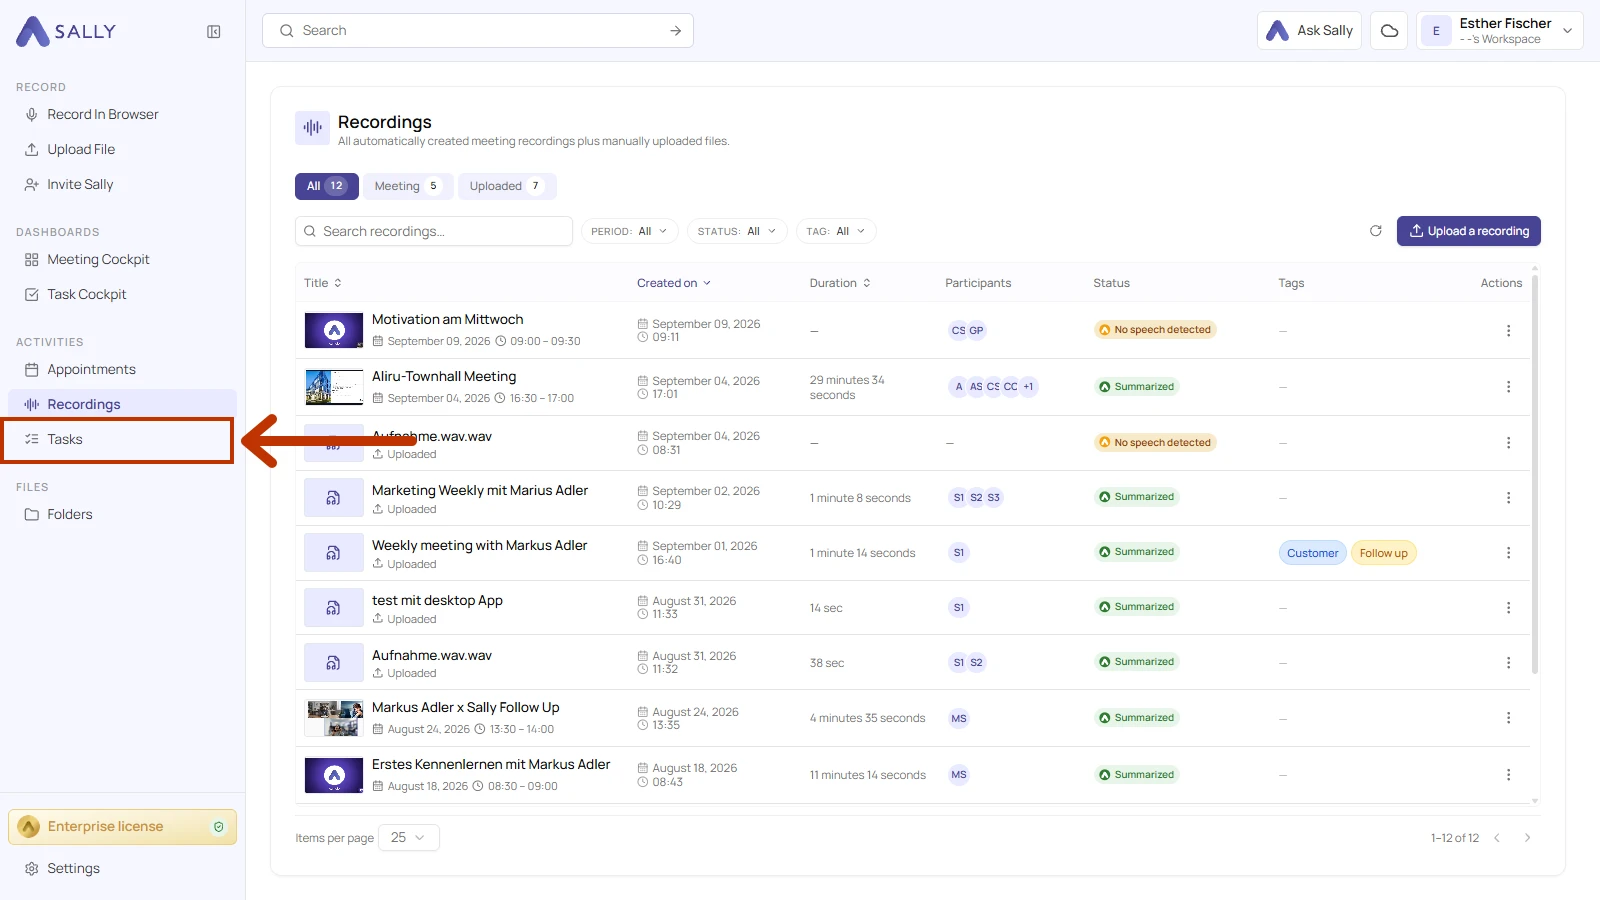
- Open Tasks in the sidebar to see all your work in one place.
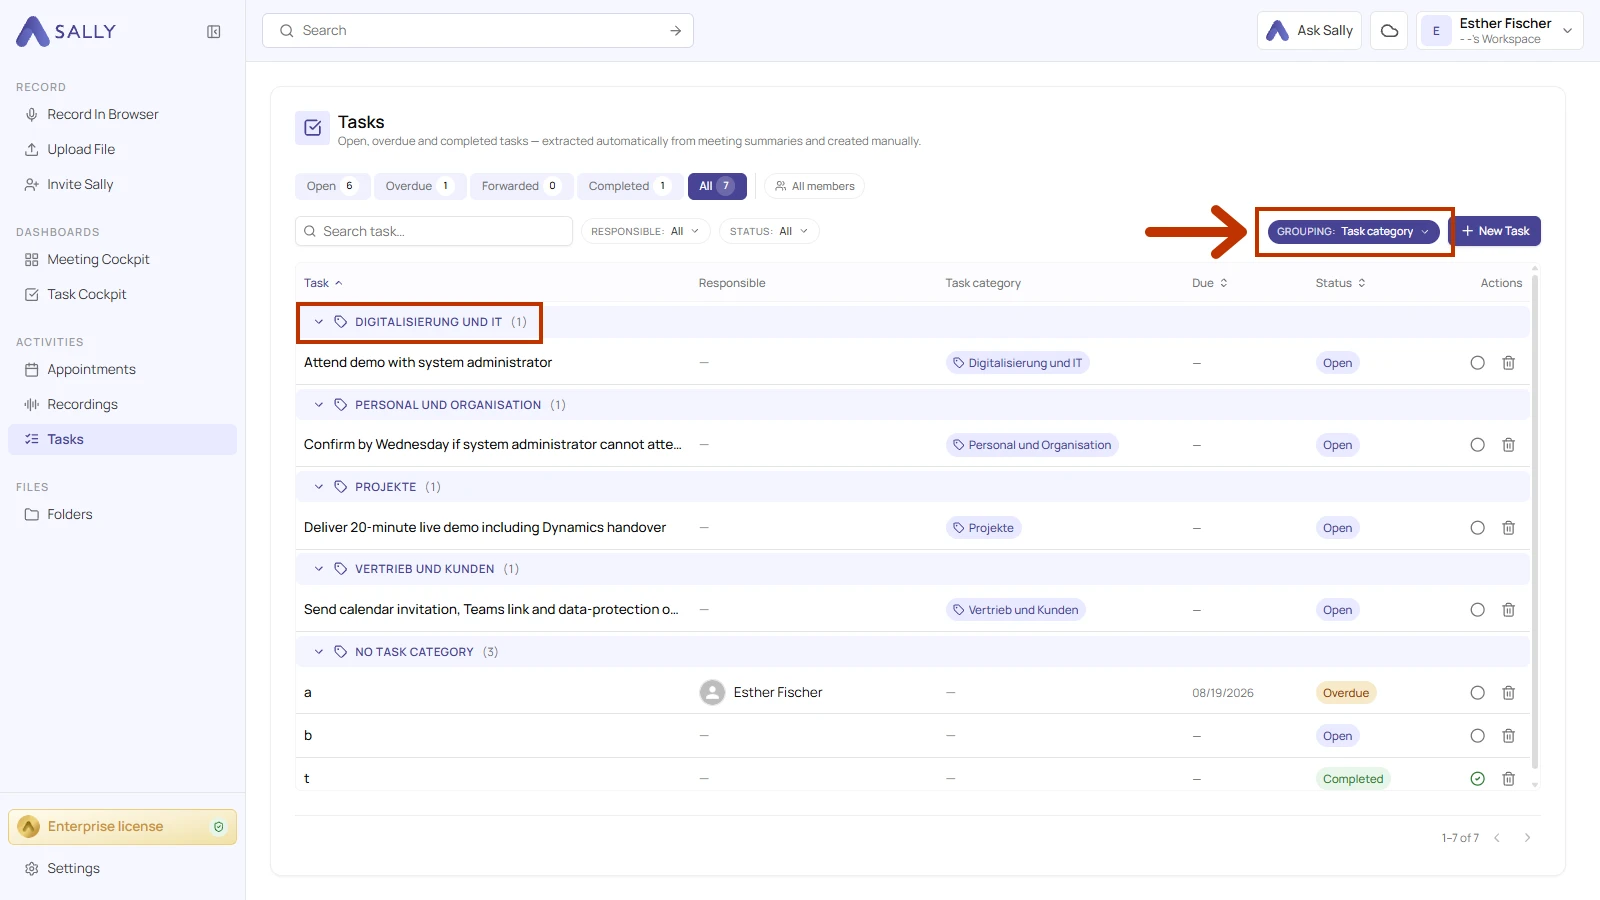
- Set Grouping to Task category. Your tasks are then grouped by category, and each group has a header row with the category name and the number of tasks in it. Collapse or expand a group to focus on one area. The Task category column also shows each task's category as a label.
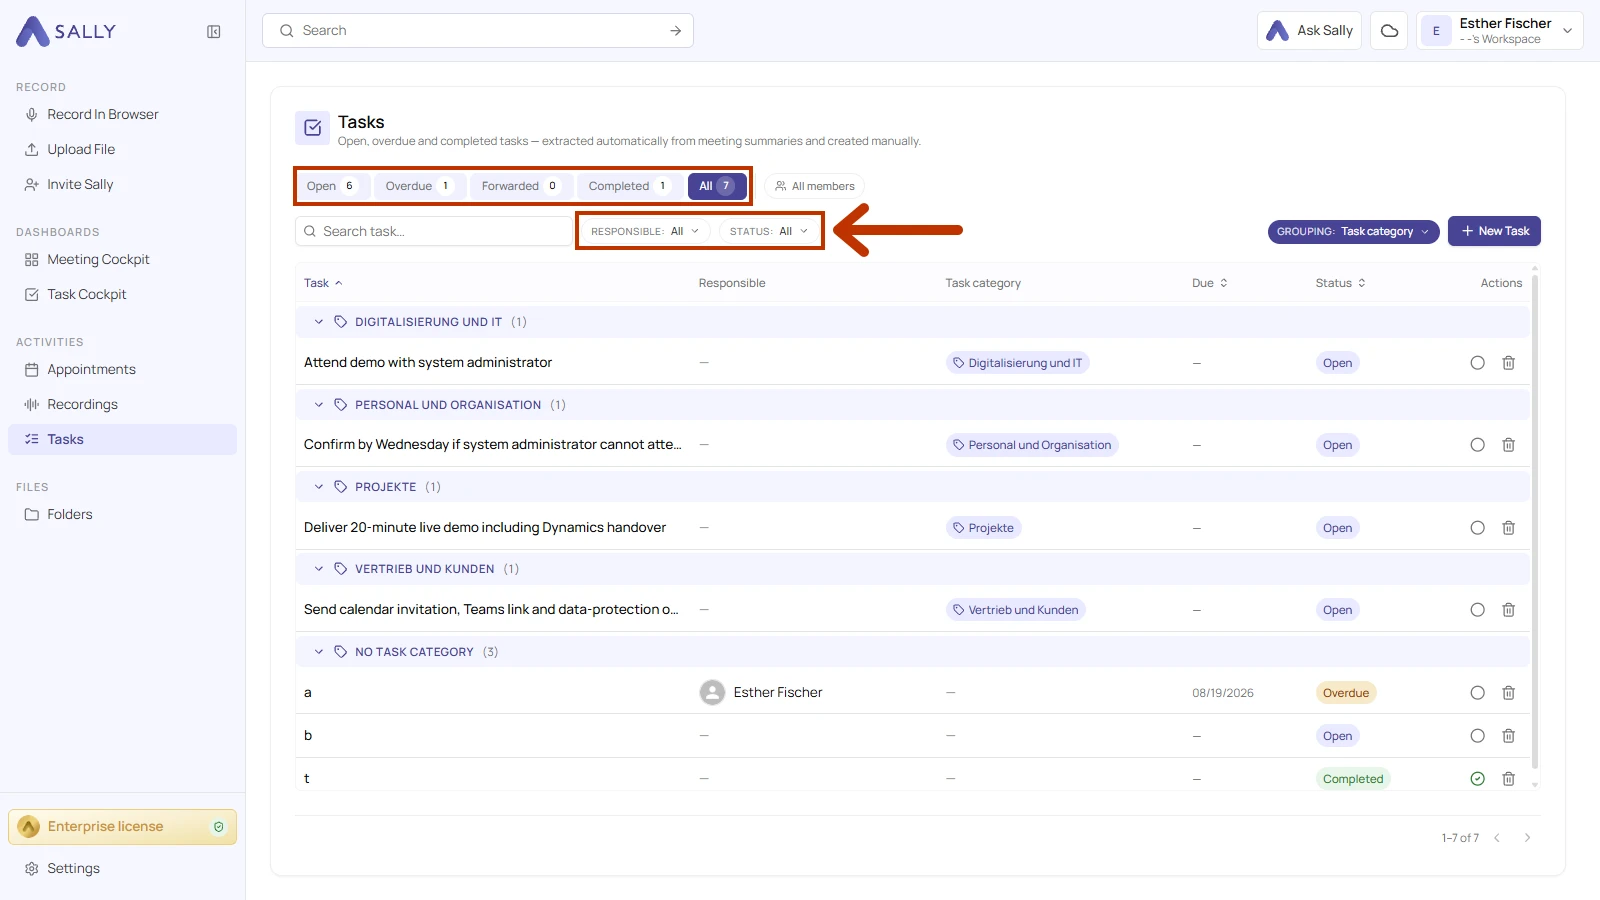
- Use the Status filter to show only Open, Overdue or Completed tasks, or All of them. The Responsible filter shows the tasks assigned to one person. The tabs at the top (Open, Overdue, Forwarded, Completed and All) each show a count. Tasks without a due date never count as overdue.
4. Manage your categories
Everyone in your company account can see the categories and assign them to tasks. Only owners and admins can create, rename or delete them, just like the vocabulary.
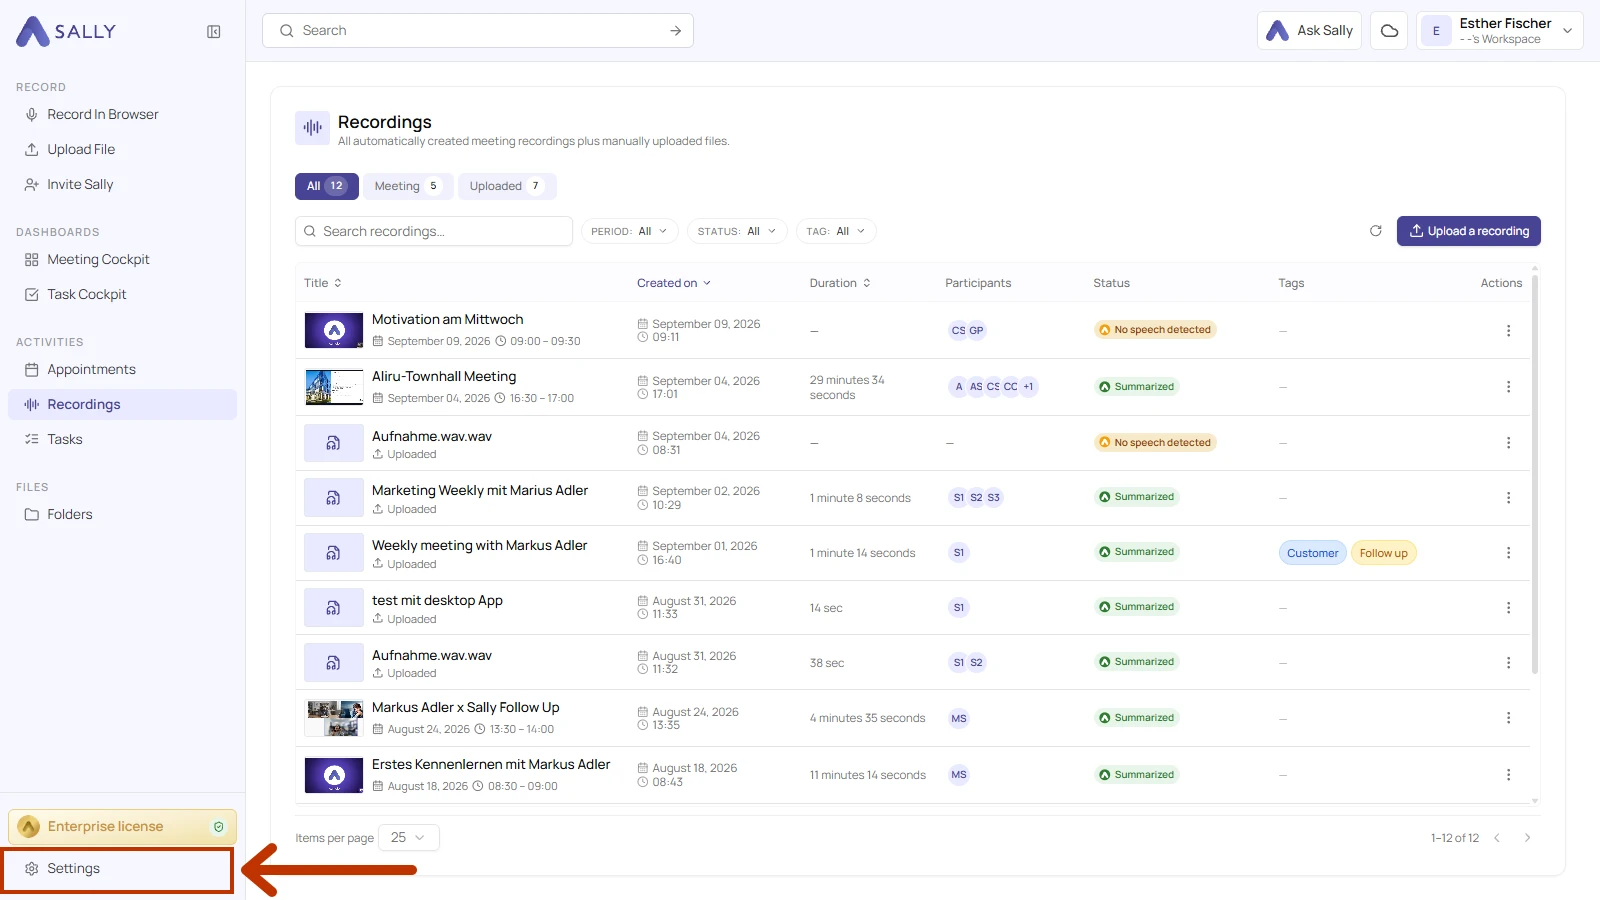
- Open Settings at the bottom of the sidebar.
- Go to Content Settings and open the Task Categories section.
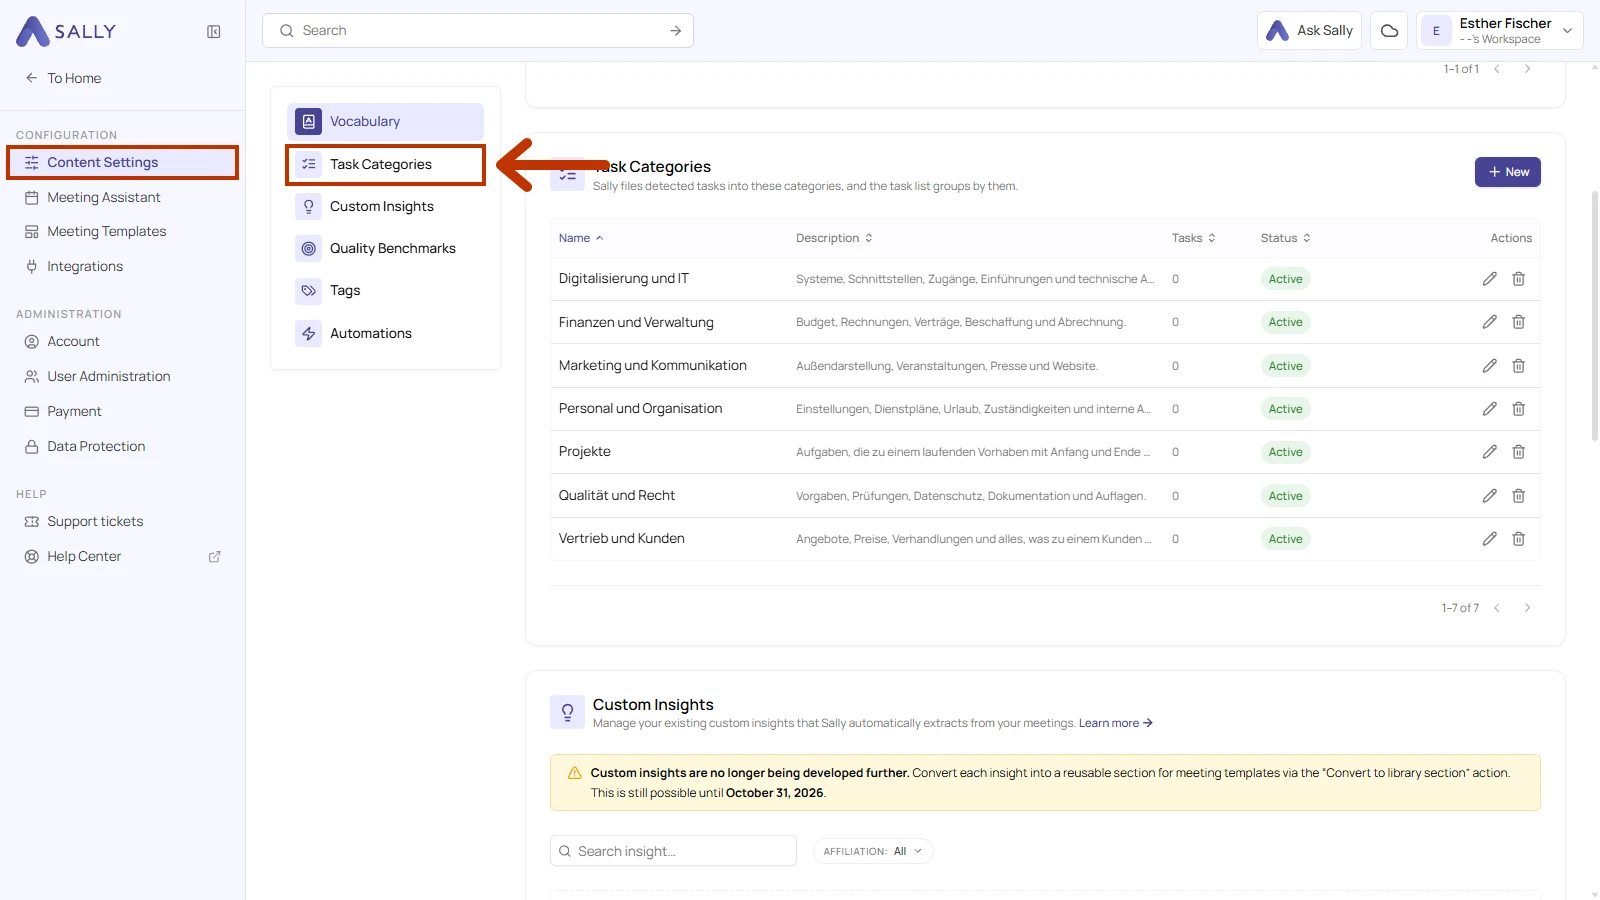
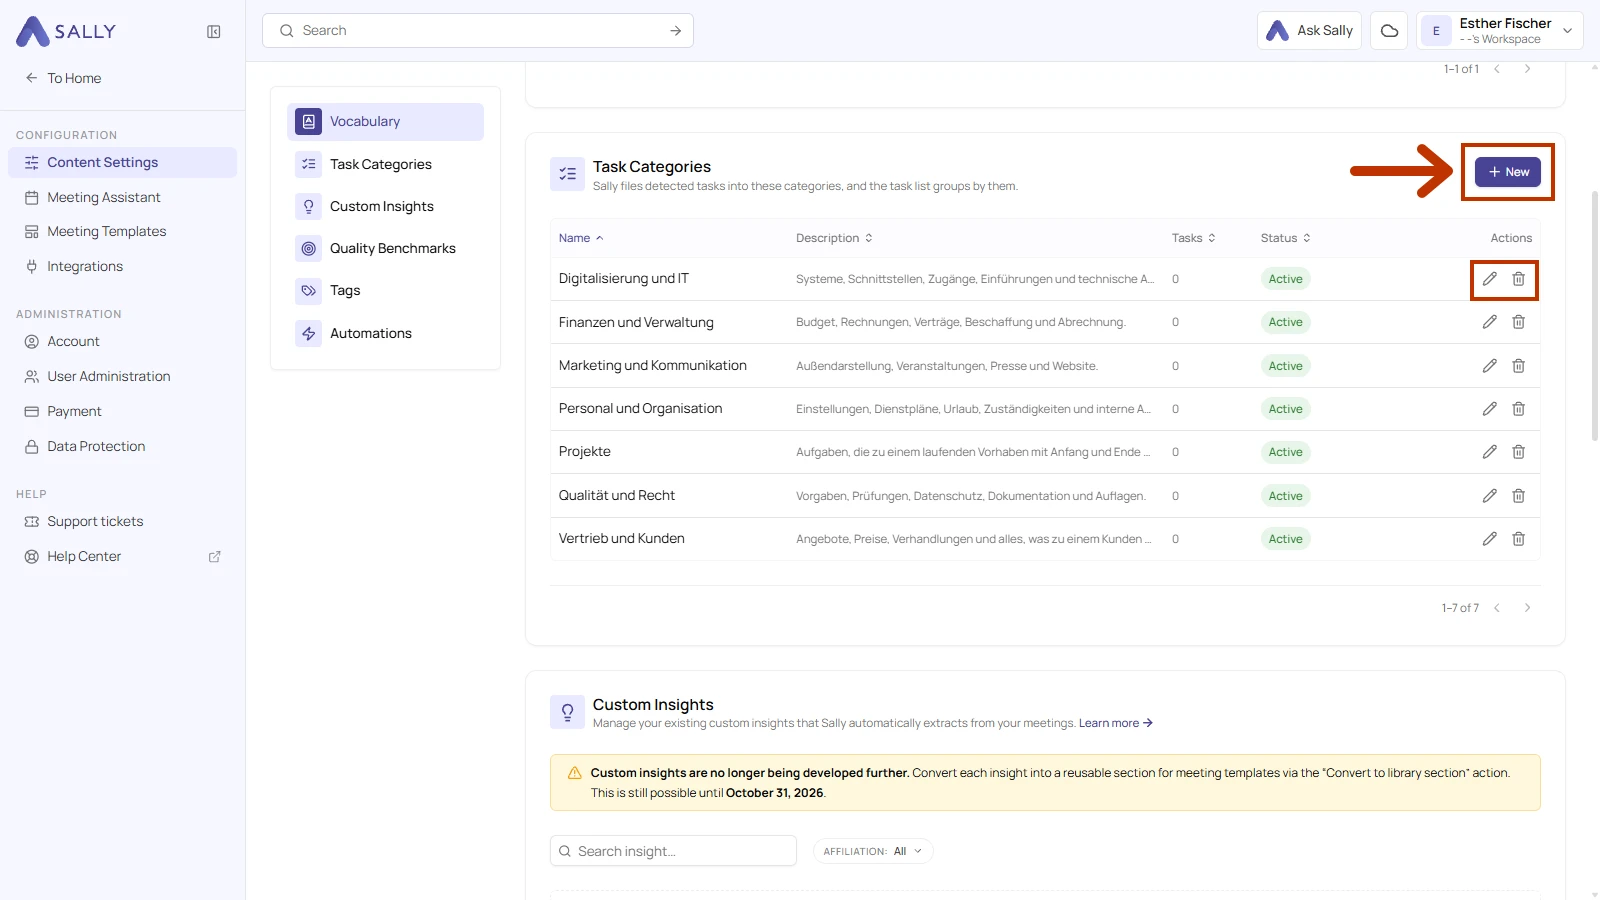
- Click New to create a category.
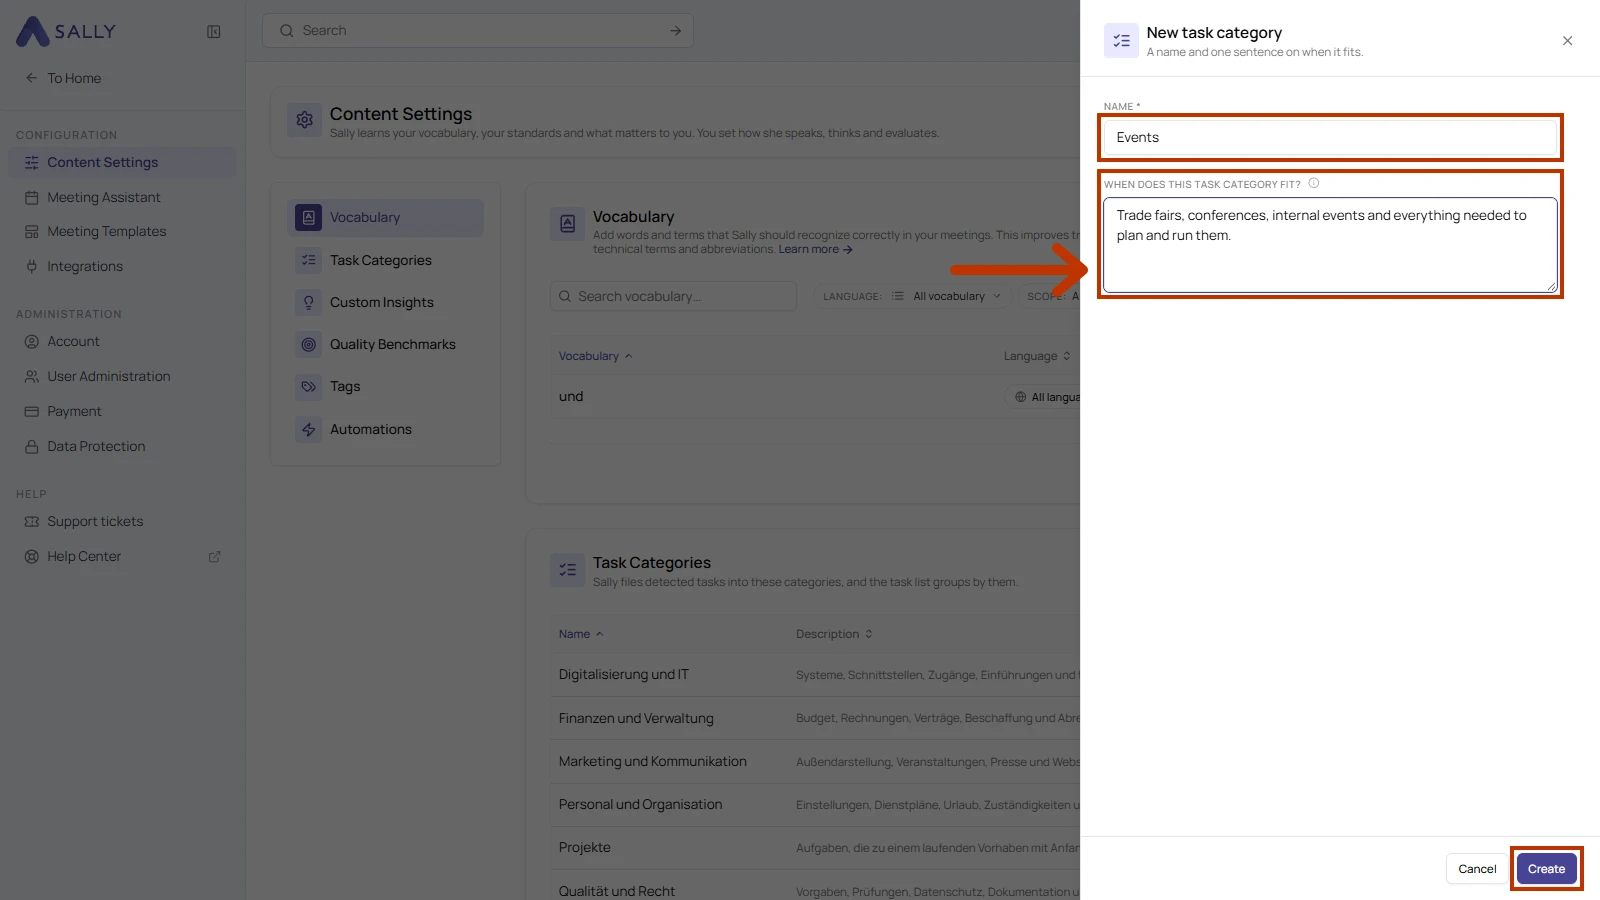
- Enter a Name and add a description in the When does this task category fit? field. The description is important because Sally uses it to decide for herself whether a task belongs in the category. Describe the kind of work that fits in one clear sentence. Without a description, she can only go by the name. Then click Create.
To make changes to a category, click the pencil icon and edit its Name and Description. To delete a category, click the trash icon.
Give each category a short, clear name. Everyone in your company account sees the same names, so names that everyone recognizes make the grouped task list easier for the whole team to read.